Search the Community
Showing results for tags 'roon'.
-
Why are there debates if "bits are bits"? Can you hear a difference in streaming audio software? Bits are Bits! Foobar2000 was lighter on its feet, more accurate tone/timbre, quieter, and had better timing of decays. There are a delicacy and precision about its sound. JRiver had a “fatter” sound with more bleeding edges and smeared textures. It sounded flatter (by a good margin) and more veiled in a thicker, unnatural warmth.
-
 View full article
 -
The Definitive Guide To Roon Optimized Core Kit (ROCK)
The Computer Audiophile posted an article in CA Academy
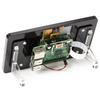
 Who: Roon Labs, developers of Roon software. What: Roon Optimized Core Kit (ROCK), a custom linux operating system that runs Roon core and works like an appliance. When: Available now. Where: Directly as a free software download from Roon. Why: It's the best way to run Roon (my opinion). How: This guide will attempt to show you how to setup ROCK. The guide will be updated as needed. Note: Before continuing, I must applaud Roon Labs for its detailed documentation found here (LINK). When I first installed ROCK I relied on this documentation in addition to the Roon community. The CA ROCK guide is meant to add value to what is already available from Roon, condense some of the most important information, and to clear up many of the questions I ran into while setting up my first few ROCKs. Let me dig a little deeper into the what and why. Until now, Roon needed to be installed on Windows, macOS, or a NAS (unless one was a geek capable of setting up a Linux machine etc...). Windows and macOS require a full blown computer, keyboard, monitor, mouse, OS updates, OS issues, hardware issues, optimization questions, etc... Installing Roon directly on a NAS seemed like the best of all worlds when it first came out, but some of us ran into issues due to NAS hardware limitations. Plus, the cost of NAS units jumps very quickly into the thousands of dollars, without any hard drives, when the NASes feature fast processors and a good amount of RAM . In my system, I've run Roon on all supported platforms. I built a custom Windows 10 computer with a Xeon processor, an NVMe SSD, a mountain of RAM, a RAID card, and several terabytes of storage. This was to be my Roon core computer that sat in my utility room away from my audio system. It just served music over the network. Not too long after I built the PC, I started having issues that I've yet to solve. The PC must be restarted daily for Roon, JRiver, or web browsers to work. I've also installed Roon on a number of NAS units, and been disappointed by the slow speed when browsing and searching my library (300,000+ tracks). The point of my story is to point out that problems will arise with a general purpose computer and a better solution is desirable. Roon Optimized Core Kit (ROCK) is Roon Lab's attempt to solve these issues. Roon Labs has pre-certified several hardware options from which users can chose and has created a custom version of Linux optimized especially for this hardware and to run Roon only. Not only this, Roon Labs has created an extremely simple installation wizard for non-geek users. I've been running ROCK and found it truly works like an appliance. All updates are done through the Roon interface, even updates to the custom operating system. The user doesn't have to know anything other than to click the "update" button. Note: ROCK isn't for those looking to filter or resample audio by routing it through HQPlayer. Only the Roon OS can be installed on a ROCK, not the required HQPlayer app. Fortunately, Roon now features many DSP options natively and these will run on the core i7 NUC. Architecture To understand where the ROCK fits into a system, we must first look at the Roon architecture. Roon requires three components. 1. Core / Server 2. Remote 3. End Point All three components can be on a single computer, two computers, or even split into thee computers or audio devices. The Core is Roon's brain. This is the piece that runs on ROCK. Roon remote can be run on a computer, iOS, or Android device. The end point can be a USB DAC directly connected to any device running Roon software, or a network connected device running Roon software. Roon architecture with ROCK in the system can also be configured a number of ways, from simple to complex. Here are a few examples. A. ROCK running as the core with all music stored on the ROCK's internal 2.5 inch hard drive (a USB drive connected for backup), Roon Remote running on an iPad, and audio sent to a RoonReady DAC over Ethernet. B. ROCK running as the core with all music stored on the ROCK's internal 2.5 inch hard drive (a USB drive connected for backup), Roon Remote running on an iPad, and audio sent to a directly attached USB or HDMI audio device. C. ROCK running as the core, music stored on a NAS, Roon Remote running an iPad, and audio sent to RoonReady network devices. This is how I use ROCK and believe it's the best way, given my storage requirements. I will continue to use my situation as an example system. There are many other ways to do things given peoples' different needs and requirements. I have 300,000+ tracks consuming 11 terabytes of disk space on a Synology DS1812 NAS. This NAS has a 2.13 GHz Intel Atom processor, 1 GB of RAM, and 8 spinning 2 terabyte hard drives. It's an old NAS using slow hardware. However, running Roon core on ROCK has made this hardware a moot point. All the work is done by the ROCK while the NAS just serves up files. I use iOS and Android remote devices, as well as my 27" 5K iMac as a remote while I'm working at my desk. The Roon core / database files are backed up to the NAS, and the entire NAS is backed up to the Amazon cloud. Amazon offers unlimited cloud storage for $59 per year in the US. I have a 1 Gbps up/down internet connection over which my data is automatically synchronized. Hardware Note: For those who don't want anything to do with this aspect of ROCK, Roon Labs offers a product called Nucleus. It's identical to the systems below, but is sold by a dealer and comes ready to use. The price will be around $2,000 for the i7 model. Roon Labs has pre-selected two Intel NUC based systems on which people should install ROCK. 1. The i3 based NUC7i3BNH NUC, with 4 GB of RAM and a 64 GB M.2 SSD. This system is recommended for small to medium libraries (under 12,000 albums). The price of this system should be around $400. 2. The i7 based NUC7i7BNH NUC with 8 GB of RAM and a 64 GB M.2 SSD. This system is recommend for large libraries and those using DSP features. The price of this system should be just over $600 I selected the i7 based NUC7i7BNH NUC because I want the freedom to use Roon and all its features in any way I can. I selected an 8 GB module of single rank RAM, over the 2x4 GB modules suggested by Roon because I want to leave the second memory slot available, should I want to repurpose this hardware in the future. Roon Labs says it will not use more than 8 GB of RAM and all additional RAM will be a waste. I selected a Samsung SSD 960 EVO NVMe M.2 250GB disk because I've had great luck with these drives. The 250 GB is larger than I need, but it's the smallest size in this model. Samsung also offers a Pro model for an additional $200, but I don't believe the slightly improved sequential read / write speed of the Pro model will have an effect on ROCK. If a users wants to store music on an internal drive, s/he will need to purchase a 2.5 inch SSD or HDD. The M.2 drive is only for the OS and Roon, while the 2.5" drive is for music. A USB drive is also possible for music storage. Note: This NUC supports Intel Optane memory. However, ROCK doesn't support this yet and it's doubtful it ever will. Don't purchase an Optane module for ROCK, it's a waste of money. Here are links to what I purchased. The total price was $660. Intel NUC7i7BNH NUC - LINK Crucial CT8G4SFS8213 8 GB RAM - LINK Samsung MZ-V6E250BW SSD 960 EVO NVMe M.2 250GB SSD - LINK Installation Intel NUC computers ship without disk or RAM, and require a keyboard, monitor, and mouse for installation of ROCK. In the image below you can see the Samsung SSD and Crucial RAM installed in the NUC. The installation requires a screw driver and common sense. No technical skills required. Once the hardware is assembled, connect the peripherals and power it up to make sure it's working. There's no operating system on the disk, so it won't boot to a usable screen, but the hardware should boot. Here is an ultrashort time-lapse of me installing the hardware. It's really this simple. BIOS According to Roon Labs, the both the i3 and i7 NUCs must be at BIOS level 46 or higher. My NUCs shipped with version 0042. Updating the BIOS is fairly easy. Here are instructions. Go to Intel's Drivers & Software download site for the purchase NUC and select the latest BIOS to download. Assuming a purchase of the NUC7i7BNH NUC, here is a link to the download page - LINK. If you want a quick download of BIOS version 0046, here's a direct download link from CA's server - LINK. I compared the BIOS versions for both the i3 and i7 and the files match perfectly. I haven't tried this download on the i3, so use at your own risk. Place the BN0046.bio file on a USB stick and place the stick into the NUC. When booting the NUC hit the F7 key. This will load the BIOS update screen. You will likely see a couple other files on the USB stick, but those are of no concern. Using the keyboard, select the BN0046.bio file and hit Enter when asked if you wish to update the BIOS. Here are some screenshots of the process. After updating the BIOS, there are a couple Roon Labs recommended settings to change. When booting your NUC, hit F2 to enter the BIOS setup. Once the BIOS configuration page loads, hit F9 to load the defaults. Then, click the Advanced tab, followed by the Boot tab. Uncheck UEFI Boot. Also set the M.2 SSD to first in the boot priority. Select the Boot Configuration tab and adjust the following options, enable Boot USB Devices First, enable Suppress Alert Messages At Boot, disable network/ LAN / pixie boot. ROCK Note: The video near the bottom of the page shows the next few steps in detail. Once the BIOS is updated to at least version 0046, it's time to install ROCK. Go to the Roon Labs ROCK Install Guide page, scroll to the download section and find the link to the factory reset disk image. If Roon Labs doesn't change the address, this link will download the image directly - LINK Users on a Mac will be able to uncompress this downloaded file, producing the image file named roonbox-linuxx64-nuc3-usb-factoryreset.img. Make sure the file extension is IMG. Users on a PC will not be able to uncompress this file and will need to download a tool such as 7-zip. Here is a link - LINK. Once installed, 7-Zip will uncompress the file, revealing the IMG image. With the image file ready, you need to write this file to a USB stick. Copying the file to the USB stick will not work, it must be written using a image flashing tool. The tool I've been using for a while is called Etcher. It can be downloaded for Mac and Windows here - LINK. Using Etcher, select the IMG file, select the USB stick, then select Flash. Once this is complete, you are ready to install ROCK on the NUC. Place the newly flashed USB stick in the NUC and boot it up. If it doesn't boot from the USB stick, restart it and hit the F10 key. This will enable you to manually select the USB stick from which to boot. Once the ROCK install screen appears, the rest is simple. Follow the wizard that asks if you'd like to install ROCK, to select an install disk, and to confirm this is what you want to do. Several seconds later, ROCK installation will complete. Remove the USB stick and reboot the NUC. Once it boots, you will see a Roon screen displaying the IP address of the ROCK. This IP address should be entered in a web browser to complete ROCK setup. Note: One can also go into the Roon app and click the button to Configure Roon OS devices, then select the ROCK. The end result is the same. The web interface is brought up. Here is an ultrashort video of me updating the BIOS and installing ROCK. It's really this simple. (Don't mind the dirty, messy, and dusty utility room. You should see the rest of it!). Configuration Note: The video near the bottom of the page shows the next few steps in detail. After ROCK is installed and you go to the NUC's IP address in a web browser, you will see big red letters saying "Missing Codecs." This is normal due to patented codecs. Roon Labs would have to pass on a licensing fee to the customer for these to be installed with ROCK. Instead, these can be downloaded by the end user at no charge. Roon Labs recommends users download the codec file from this website - LINK. However, I've already downloaded it, extracted the only needed file, and made it available directly from the CA server. If you want to download the appropriate file from the original website recommended by Roon Labs, you will need to install a program such as The Unarchiver (LINK) on macOS or 7-Zip on Windows, in order to unzip the file. Either way, you need the file and it makes no difference to me where you get it from. Here are links. Complete package that needs to be uncompressed with one of the apps above - LINK or The only file you need (it's a zip file that can be uncompressed by any computer) - LINK Assuming you downloaded the file from the CA server and uncompressed the zip file, you're left with a single file named ffmpeg. This file needs to be copied to the ROCK's Codecs folder. Connect to ROCK the same way you would connect to any other folder on your network (not with a web browser). On a Mac, ROCK appears in Finder under the Shared section. If asked for a username and password, connect as guest without a password. Copy ffmpeg to the Codecs folder. Once the ffmpeg file is copied to ROCK, reboot the ROCK computer by going to its webpage, clicking the little red power icon in the upper right corner, and selecting Reboot. If all goes well, when it comes back up, it will say OK under Roon Server Software. All other configuration / setup is done via the Roon app. Users who have previous installation of Roon and want to transfer playlists, edits, play history, tags, settings, etc... may want to migrate their existing databases to the new ROCK. This is done by backing up the current Roon database and restoring it to the ROCK from the backup. Roon has an entire page on this process, located here - LINK. Note: When moving to the ROCK you may be asked to unauthorize one Roon server. Just click the unauthorized button next to your existing Roon server, so the ROCK can use your license. After switching to the ROCK, you may have a strange issue where a Roon remote (iOS or Android for example) is still connected to the old database, even though it has been unauthorized. It will play music and cause the audio end points to drop off the ROCK version of Roon. To stop this issue from happening, I uninstalled Roon from the computer that was running the database prior to using ROCK, then reinstalled Roon. Upon reinstallation I elected to use ROCK as the core, thus not creating the database on the local computer. You can also manually remove the core database folders, but uninstalling and reinstalling is easiest. Note when uninstalling on Windows, select the box to remove the database and settings. When uninstalling on Mac, navigate to /Library and remove the Roon folder. Because I didn't have much custom data in the database and all my playlists are on Tidal, I elected to start with a fresh database on ROCK. Launching Roon on my iMac desktop, Roon asked me to select a core. I selected the ROCK, and completed the setup by adding a music file location and signing into Tidal. Once this was done, Roon scanned music folder of 300,000+ tracks and analyzed the music files. the initial scan completed overnight while the analysis took much longer. it really doesn't matter because music can be played while wither processing is going on. I created a little video of me going through the ROCK file downloads and initial setup through the web and Roon interfaces. Nothing special, just a fairly quick run through of what the process looks like. Wrap Up Roon Optimized Core Kit (ROCK) is my preferred way to run Roon on my network. It may not be for everyone, but I believe it's for many people. ROCK runs like an appliance. It doesn't require technical knowledge beyond the basic ability to click an update button. The installation requires a bit more knowledge, but someone capable of following instructions will have no problem setting it up. On the other hand, those uninterested in setting up a ROCK themselves can purchase the Roon Nucleus. The Nucleus contains the exact same internal hardware and software as that mentioned above, but comes in a nice looking chassis. The Nucleus will be sold at dealers for around $1,000+ more than purchasing the hardware and installing the software yourself. If you have any questions about how to best run Roon or what hardware to purchase for a Roon installation, it's a no brainer that a ROCK (or Nucleus) can and will get the job done as good or better than any other option.
 -
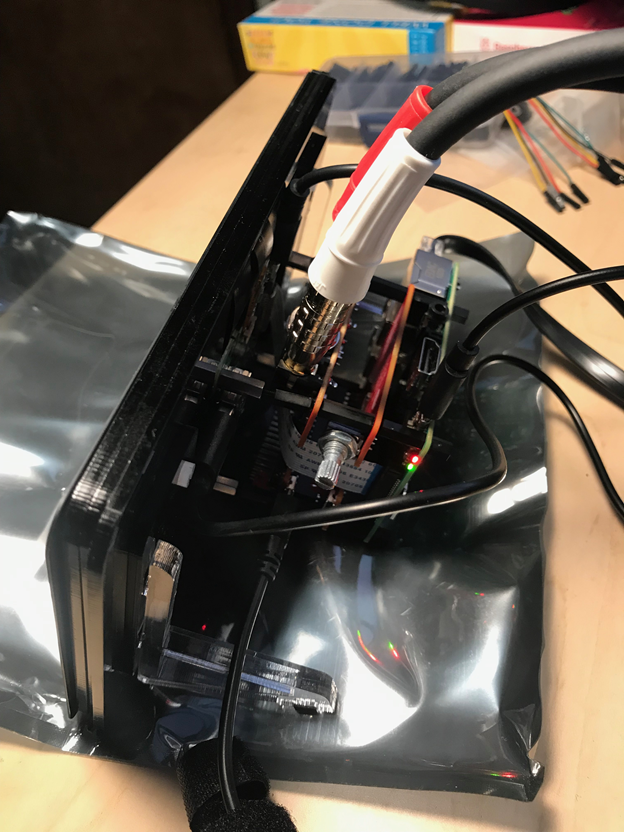
So are you afraid of ESD? Does the thought of Arctic Silver Heatsink Paste make you go cold? Are you fearful of Phillips screwdrivers? Do you still want to play with the NUC? I have found the Goldilocks computer for you. Semi-Custom Fan-less NUC using the Dawson Canyon boards, we have come to love! Orderable with Optane SSD and much more. The system is fully warranted and you can extend the warranty. You can order it with our without an OS installed. (At least get Ubuntu installed for backup and order a USB stick from them) Simply NUC has a custom build that is perfect: https://simplynuc.com. At the top of the page see the custom NUC button. Click that and scroll down to the Fanless case section and pick the i7 model. The options I have selected above are "perfect" for a NUC to run Roon Server, etc. Get Ubuntu installed so the machine has something to run when you start up. The PORCOOLPINE comes with a power supply so you can get going right away. I purchased my Dawson Canyon board from them so I am only a happy customer. I was going to have a model of these custom built for resale, but there was not enough interest and my budget would not allow speculation. You can get an upgraded power supply at some point. You can order any of the options you would like. I just did an Euphony OS setup post that you can follow or you can setup Audio Linux from my NUC build post: HAVE FUN Bob Here is an interesting review of the PORCOOLPINE from another site: https://techsterweb.com/2019/01/27/porcoolpine/

-
Anyone? Installing Roon as part of a whole-house system, which will be controlled/automated with Crestron. We have two applications: 1. Listening Room: dCS DAC will serve as Roon endpoint and feed preamp>power>FS speakers. 2. Distributed Audio: Several Roon endpoints will serve as sources on whole-house system which uses Crestron SWAMP amplification to drive kitchen, outdoors, etc. Integration seems pretty limited. I found this: https://kb.roonlabs.com/Crestron Disappointing that Crestron module is available on Nucleus, but not other core platforms. Anyway, does anyone have any experience using these two systems together? Thanks in advance. Bart
-
 I am trying to build a hifi Headphone station for Roon streaming. This is an evolution of an earlier thread I started.... I was seeking too much in an all-in-one box and have decided to get a stand-alone tube headphone amp. I am looking for a Roon-Ready streamer/DAC to feed it. My IDEAL box would do precisely that, do it really well, and do nothing else. My research has turned up many Roon-Ready DACs, but almost all are bloated with many features I do not need (pre-amps, proprietary control software, etc). I don’t mind spending <=$2k, but I’d rather that go into a better DAC than into features I do not need. Suggestions?
 -
Since the latest Roon update my single PC setup running AO / Roon / Tidal / HQP is not working anymore on Windows Server 2016. Roon did not provide a solution so far. The above mentioned combination does still work on Windows 10. As a result I' ve to decide to step back to Windows 10 or stay on W2016S and remove HQP from the set up and upsample via Roon instead. Would like to hear your opinion which option would resultaten in the best sound quality. Thanks in advance, Benno
-
I'm doing a clean install on my music-dedicated mini and would like to know what is the latest and greatest of the optimizations I can do. Machine: - mac mini 2012, i7 quad, 16GB RAM, 120GB SSD (Mercury 6G) - External HD over FW - Bridged networking: Thunderbolt/ethernet adapter bridged to internal ethernet - network switch to thurnderbolt, internal ethernet to dCS Rossini - LPS (Uptone JS-2) with internal mini MMK board - Run headless with one of those dongles in the HDMI port keep graphics alive (screen sharing very slow otherwise) OS: macOSX 10.14.4 (downloaded the 10.14.4 installer so this is my scratch starting point) Players: Roon (over network to dCS Rossini) Audirvana (not used much at the moment) I run installation last night and did all of the standard things like turn wifi, bluetooth off, disable spotlight, etc. I did NOT disable SIP so I cannot disable Notification services, etc. View on disabling SIP? Any recommendations? Thx.
-
Dear all, I'm running HQPlayer in combination with Roon and Tidal on Windows Server 2016. (Total set-up: ASUS ROG I7 / WS2016 / FP / AO / Roon Server / Tidal / HQP / Singxer SU-1 / Gustard X-20 Pro). Since the latest Roon update (1.6 build 401) playback stops after the first track. The status bar in Roon is not moving at all and stays on the start position. With previous releases I've never had this issue. From several tests I learned that the set-up does work properly when HQP is installed on Windows 10 but not when it is installed on Windows Server 2016. Are other users running these programs on Windows Server 2016 experiencing the same problems? Looking forward to your reponses, Benno
-
 This is a pictorial comparison of Windows audio players, including screen views, unique features, and support environment. It is by no means complete but should give you a general idea of what the different audio players look like, some unique features, and a snap of their support forums. The audio players include HQPlayer (mainly the Client), Roon, Audirvana Plus for Windows, and JRiver Media Center. (It is a pdf document.) https://www.dropbox.com/s/kmuo24gztr2v0j7/Comparison.pdf?dl=0
 -
Greetings, Looking for a new headphone amp for a specific situation: drive a stand-alone headphone system in a home study. No loudspeakers. Roon-Ready streaming Tidal/Qobuz/NAS will be only source. Ideally, I could find a high-end, class A tube amp with balanced phone outs,...with DAC and streamer built-in. BUT, I prefer to not compromise amp or DAC quality in order to jam all functions into a single box. 2 components would be fine. Suggestions?
-
and leaving the Apple world. One of the many considerations for me is how I use my computer when I listen to music. Right now I use ROON and Audirvana 3.5. Audirvana would need to go, which is a shame because it is a great sounding player. IMO it is the best for a Mac that is directly connected to a DAC. ROON is, IMO, meant to be used over a network and that's not how I am using it at the moment. Anyway, I know there is no full ROON system for linux yet, but there is a ROON Server. Would I be able to run that, and control it via either my phone or a web interface at the computer I am sitting at? Thanks. Someone is finally making a good looking desktop PC that's not an Apple. https://system76.com/desktops
-
I run Roon Core on a Mac mini (2012 model, i7 quad, 16GB RAM, 120GB SSD, 3TB FW800 HD). Playing to a dCS Rossini over the network. Rossini is connected directly to the mini's ethernet port, the switch is connected to the mini via an Thunderbolt/Ethernet adapter, and the two ethernet ports are bridged together (so I can see the Rossini from anywhere in the network). Questions: 1- Are there sound quality difference from switching to, say, a Roon Nucleus+ or other servers - assuming I always play over the network? 2- Are there any network configurations and/or hardware that are better? 3- Any other advice? Thx.
-
 Looking for advice on how to proceed with Audio Server setup. Here is the current status: 1. My house is wired with CAT6 going to a 16-port Gigabit Switch. I also have the house fully wired with RG-6 for video (and possibly audio, see below) 2. I have just acquired a Synology DS218+ NAS which is to be used as storage and back-up. 3. I have an almost new Denon AVR-X1500H Receiver and do not intend to replace it. This what I know about it: The receiver has a Digital Audio (Coax) input The receiver has an Ethernet port. Can receive audio (in my case FLAC files) streaming from a DNLA compliant server. 4. I also happen to have an Intel NUC7i3BNH with 64GB SSD, 8GB Ram and a built -in 500GB HDD. I could use that and also keep my music (about 25,000 FLAC files) on it. I have been thinking of using Roon ROCK on the NUC but I’m not sure yet due to the fact the software license is almost $500. I understand there are other Media Player software out there that could serve me well and cost less? Q1. I assume if I use the NUC setup that I can stream my music directly to the receiver via Ethernet and using any compatible device such as my Android tablet to select music and view music information? Q2. I’m also contemplating getting a Raspberry Pi3 Model 3 and connect with an ALLO DigiOne Signature so that I could connect to my receiver’s digital coax input via my CAT6 coax cable. Cost is very reasonable for this hardware at $239! Is this a better idea? Q3. Or could I perhaps use the NAS (installing the music files there)? If so which Media Server software will work well on my NAS and does not cost a fortune. Q4. Which of the above approaches would you recommend? Q5. Which is most future proof or flexible (I do not wish to make a lot of equipment changes later)? Q6. Which one is most flexible in regard to selecting and providing information on the music played to a portable device and/or perhaps also showing it directly on my TV screen (a brand new LG OLED)? Thankful for any advice/ Bjorn
 -
Ever since abandoning the Apple iTunes/iPod world for a FiiO X5 and Roon life has been a heckuva lot better. I use a MacMini as a media server with Plex and Roon. The only hole is this nirvana is managing the files that I'd like to copy to my FiiO when I travel. In short... is there a Mac OS app that will catalog my music directories or (even better) read my Roon database and allow me to do iTunes-ish things when copying music to my FiiO? How do I come close to the iPod/iTunes experience with Roon (or a directory of FLAC, WAV, DSF files) and my FiiO? Thanks, Adam
-
We are trying a new wiki-esque method of showing the settings in AudioLinux. October 2019 Things evolve. Over time I have found that Euphony OS is simpler to install and run and it sounds better to me. I had been running a two box solution with a sever and a couple of different endpoints. My configuration changed over the summer when a new version of Euphony was released that runs the OS in RAM. I have migrated to a single box solution that uses my Xeon Server (see my Xeon thread on that) directly connected to my Kii Three Speaker system. See my profile for the system design. The NUC described here is a Wonderfull endpoint or server if needed. Get the best power supply you can afford and this thing sings! Notes as of 6/25/19 The Dawson Canyon NUC also know as the DNHE / DNKE / DNBE / DNFE system is classified as a commercial grade NUC with a 3yr life cycle. The dnh"E" stands for Extended Life. Most Intel NUC(s) have a refresh cycle of about 18 months to two years. However, anytime Intel releases a commercial grade system to the market, the life cycle is a minimum of 3yrs. According to the roadmap, the Dawson Canyon will continue to be on the market all of 2019 and 2020. Currently, we are dealing with an Intel shortage that should come to rest by the end of July. The NUC(s) impacted are mostly i7 and i3 Dawsons (in all formats H/K/B/F. At the root of the following thread you will find the beginning: If this construction system is too much for you to do, or you want to buy rather than build. Here is one option: I have started a thread on building a music server. See below: There has been a HUGE flurry of activity on the “Massive SQ” thread onAudiophileStyle. The discovery of putting a specific Intel NUC computer into the stereo system as the network endpoint running Audiolinux (AL) in RAM with no other disks has dramatically improved the audio quality for many of us. Here is a link to where the NUC part of this thread “started:” https://audiophilestyle.com/forums/topic/30376-a-novel-way-to-massively-improve-the-sq-of-computer-audio-streaming/?page=359&tab=comments#comment-860030 Two primary NUC models are in use. The single board computers are typically put into a fan-less case, hooked up to a high-quality power supply, booted off of a USB stick into RAM. What I hope to accomplish here is to have a “recipe” for success. Just like baking a cake you need to have your tools and ingredients ready before you start. Remember this is first and foremost a DIY project and t is also a “Work In Progress”. For me, it is also a rousing success. From 0 to NUC/AL/RAM in 2 hours *Not including Prep* To bake our NUC cake, we need the following components and tools. Setup Tools USB Keyboard and Mouse HDMI Monitor and HDMI cable Power supply for the NUC. **** discussion on this later *** Small Phillips screwdriver Anti-static work strap. A well-lit place to work A Windows PC or Mac to download AL and set up the USB stick Internet connection Just the right amount of coffee What needs to be in your Stereo system Ethernet connection A USB cable to the DAC Power supply for the NUC/AL Roon system (my choice, there are others) What you need to buy Two NUC models have been popular in this project. From all reports, they both sound great. According to some the i7 model sounds better and costs more! Take the time to read the relevant parts of the “massive” thread. I chose to get the Core i7 model. Note that the prices are estimates for the USA and do not include tax, shipping, etc. The Celeron Model comes from Intel as a complete system in a box. You need to extract the computer from the box and mount it in the fan-less case. Intel NUC7i7DBNE single board computer. $575 Akasa NUC Plato X7D case $170 OR Intel NUC7CJYH. $130 Akasa Newton JC Fan-less. $100. https://amzn.to/2Wvd7fg Here is the rest of what you need to order: RAM Ballistix Sport LT 8GB Single DDR4 2400. $60. https://amzn.to/2WsAPZr USB Stick. SanDisk Ultra Flair 32GB USB 3. $10 Audio-Linux headless. $49. (license and one year support) Once you order up the parts and get everything in place, let us get Audiolinux setup installed on the USB stick. You can do this from Windows PC or a Mac. I have done both following the instructions on the audio-linux.com website and if you have a PC do it there for speed. The Mac method took 75min to build the same USB stick. *** Etcher does run on MacOS. You should be able to build the USB stick there. *** In your favorite Windows PC web browser download your Linux image and a copy of Etcher. http://audio-linux.com https://www.balena.io/etcher/ Put the USB stick in your machine. Install and run Etcher. Etcher prompts you for the location of the image file you want to flash to your USB stick. Etcher should show the target as your USB drive! MAKE Sure because it ERASES the target! It takes 10-15 minutes to complete flashing the USB stick. While the USB stick is flashing, we can build the NUC board into the case. For the rest of this setup, you need a nice clean workspace and your anti-static strap. Oh and go slow on the Coffee! First, unbox the case remove the top cover to inspect the inside and inventory all of the materials. The top case cover has four small Phillips head screws to remove. Here are three views inside the case. The above views are the inside front with the board holding the power switch, the LEDs and the two USB 3 ports. The small board is the two front USB 2 ports. Below is the inside rearview where the computer board is mounted and the shielded cutouts for the ports. Flip the case over and put the feet on so that to protect the bottom from scratches. There are four feet with screws to attach. Be sure to put them in the correct screw holes. You can now carefully set aside the case as we have to do a “fan-ectomy” on the NUC Board. You are dealing a bare computer motherboard; please observe standard anti-static protection procedures. An anti-static wrist strap and the anti-static bag that the board comes in are your friends. Here are pictures of both sides of the board. On the top side, you have the RAM and M.2 slots and some of the other connections for drives. The second picture shows the included fan and heatsink that we have to remove. First, you need to unplug the fan power cable. The connector is small so be careful pulling it off. Remove two small screws holding the fan down to the heatsink. The heatsink is attached to the motherboard with three screws. In the above picture, you can see them on the silver bar and in the recessed hole in the black part of the heatsink. Carefully remove the screws, and you can pull the heatsink away from the board. Note that the heatsink “grease” sticks them together a bit. Below you can see the separated heatsink and the board with the compound on the CPU (black part). Now you need to clean up the old heatsink compound from the CPU. Use cotton swabs and some alcohol to clean it off. The picture below shows the CPU module after cleanup. Next put the new heatsink grease on the CPU and the heatsink pad on the smaller black rectangle. The pad is a bit fussy to get stuck down. There are some pictures in the install page from Akasa that may help. In my case, they have an addendum showing how they now include the heatsink grease. From the picture below I used too much thermal paste! Thanks, @Dutch for pointing that out. A couple of dots would have been enough Here is a video of better ways. https://www.youtube.com/watch?v=JYwHB2P6GmM It is time to install the board in the case. Carefully set the motherboard on the static bag aside and bring the case back to your workplace. Put the rear of the case closest to you and move the cables out of the way. Observe the part of the case where the CPU seats on the upraised heatsink and the four standoffs for mounting the board. There are four screws and fiber washers to hold the case in place. Carefully set the board CPU side down onto the case aligning it to the standoffs. Being careful not to strip the screws install them all but do not tighten. Once all four screws are in carefully tighten them down. I do them: upper left, lower right, lower left, upper right. Just my method! Next, it is time to connect the cables. The two USB 2 connectors are on the upper left, and the black thin flat ribbon cables plug into them. The two big USB 3 cables plug into the USB connectors on the top. Finally, the multi-color cable plugs into the header. The connector is keyed and goes on the leftmost pins. There is a hole blocked on the connector and a clipped pin on the board. With the connections completed installing the RAM in the bottom slot is next. The bottom slot is slot #2, but folks think it is the right place. The little RAM board goes in at an angle into the connector and is then pressed down to hook into the spring latches on the side. Dress the cables so that you can screw the top plate back on to the case! The “hardware” part complete. Now for the “smoke test.” You need to connect the keyboard, display, mouse, network. Finally, plug in the power cable and press the power switch to turn on the computer. ** do not plug the USB stick in yet ** Making the initial changes to the BIOS If the NUC passed the smoke test, the computer boots up to the BIOS where you have to make some settings changes. Note that on the first screen the UFEI Boot selection is ticked on. Note the temperatures of the CPU. Keep an eye on them as we go forward to make sure you did a good job on the heatsink grease! Mine here is under 30C which is GREAT. Set the BIOS clock on this screen if it is not right. Select the “Advanced” menu selection shown on the above screen to go to the next settings pages. Select the SATA tab and turn off SATA and the activity light. On the Boot Configuration page, I have mine set to boot USB first, Network last and the USB, and Optical are checked on. (may be able to uncheck the Optical). I may be doing a network boot, so I left it alone. On the Secure Boot tab, uncheck the Secure Boot item to disable it. Audioliniux does not use Secure Boot. On the performance tab under Processor, uncheck Hyper-Threading and Turbo Boost. The only other change I have made is to set the Primary Power setting to Balanced Enabled. I think others have set to Low Power. ** Note that this is all still a bit of an experiment and these settings may change. ** Insert your Audiolinux USB stick into one of the USB 3 connectors. You can now use the F10 key to save and exit the BIOS. Audiolinux Setup We are now on the final leg of the setup. With great thanks to Piero Olmeda, the author of Audiolinux distribution this part this part is pretty simple! When the machine boots up, some text goes by and if all is well the computer displays the Audiolinux menu screen. You may see a few differences in this screen depending upon what version of the system menu you have installed. Piero updates the different parts of the OS on a regular basis. Before we start with the configuration, you should update the system. This menu is driven merely by the cursor keys, and the enter key. So cursor down to the update menu and press enter. Since you are not getting ahead of me yet, you are booting and running off of the USB stick, so no RAM mode issues need to be addressed. Note that I am running this NUC as a Roon endpoint so I have not explored other audio packages. During the install steps, you need the default passwords for Audiolinux. I assume that they might change so, please refer to the Audio-Linux.com website to find them. (scroll down and look or search on the page for the correct passwords. Cursor down and select the update menu item. You need to run the first four updates if you are following along with me. I did them in order. (I do not know if that order is “correct”). You will need your passwords during this. After you have completed the last update of the Audiolinux menu go back to the first page and select option 8 Console Mode. That takes you to the command line. DON’T PANIC! Just type in the command: menuand press enter. You have restarted the Audiolinux menu, so the new version runs. You are now going to configure the system to be a Roon endpoint, run in RAM and extreme mode. From the first screen select the configuration menu item. The above screen appears. Select the Roonbridge men item to set-up endpoint. After that completes set number 14 (scroll down) Set real-time priority to “extreme." Finally, select 15 enable ramroot. Select Cancel to return to the main menu screen and select Reboot. The computer reboots and automatically loads the OS into RAM. As the machine boots up and pauses for a few seconds displaying this screen. It will automatically start-up in RAM after that delay. After the boot to RAM is complete, the Audiolinux menu appears. From the Audiolinux menu check the CPU temperature found on the “Status” page. Also check the Audio Status from the “Configuration” Page. HURRAY! Pat yourself on the back. Toast yourself! Your Audiolinux Roon endpoint should be fully operational. Grab a USB cable and DAC and hook them up. Fire up the Roon application to add the new device to your audio system. There are some more steps to perform, but for testing purposes, you can run the system right now to see how it works. I mentioned at the start of this article that a good power supply is beneficial for NUC to produce the best sound. The NUC runs from 12v to 19v DC. There are reports that running at 19V may sound better. Some of the users have the UpTone Audio LPS 1.2 running their Celeron NUCs. Others are using Paul Haynes supplies, and I am sure there are many others. I have an UpTone Audio JS-2 in my system, and it runs my NUC and my ISORegen. Before you put the NUC into production, there are some other settings that you need to do. I am a huge fan of having the clocks running correctly in my computers and setting up Audiolinux to use network time server to keep the clocks on the beat is essential. Some other items can be adjusted as needed. @austinpop has an excellent post describing how to do some of them. https://audiophilestyle.com/forums/topic/54933-audiolinux-and-nuc-troubleshooting-and-tuning/?tab=comments#comment-901393 This little bit of cleanup work requires you to edit a couple of files and run a few commands on the command line in Linux. Now is also the time where you can do some of the fine-tuning and changes that may influence audio quality. I am not going to show the final tweaks of Audiolinux in this article. I want you to play, listen, and read some more. There is another thread on tuning and troubleshooting. https://audiophilestyle.com/forums/topic/54933-audiolinux-and-nuc-troubleshooting-and-tuning/?tab=comments#comment-901393 **** IF you are going to have more than one AudioLinux device running Roon on your network you will most likely run into a problem where Roon gets confused about devices. You will have to apply the fix in this post: https://audiophilestyle.com/forums/topic/54933-audiolinux-and-nuc-troubleshooting-and-tuning/?page=31&tab=comments#comment-918823 I am planning to post a summary of my settings over the next couple of weeks, and I have the time/date setup and fine-tuning in that. *** I am close on this one please stand by**** This article is a summary of my NUC build and a record for my own memory. I hope that others find value in it. There is so much work that has been done by others I cannot thank them all. I have to shout out to the following folks for all their work. @austinpop @lmitche @romaz @greenleo @hifi25nl @rickca I know that there are so many others I cannot remember them All! Thanks Bob Fairbairn ---------------------------------------------------------------- Adding WiFi to the build I have been thinking about adding a WiFi card to the build so I dug around and found the card and antennas on Amazon. So here is ONE WAY to add WiFi to the NUC Parts needed M.2 card for your NUC. In my case the Intel AC-8265. https://amzn.to/2Wt9mH2 Antennas and cables for the card. https://amzn.to/2Bcm5Vx Tools needed Phillips screwdrivers as before Needle nose pliers. 5/16 in socket wrench Small round file You might want to skip the coffee before you do this. Do not forget your anti-static protection ! This is the point where I have to play the robot on "Lost in Space". DANGER WILL ROBINSON The connectors on this card are tiny, fragile, and fussy. In my build, the Akasa case is anodized black and I could not insert the SMA connectors into the case without filing the holes out a bit. NOTE metal filings are conductive and can short out the CPU board. I HIGHLY INSIST that you remove the board and then file the case. HIGHLY INSIST! Here we go This is where the board will go and you can see the rubber grommet for one of the antenna leads. Note that the M.2 board mounting screw has a post below it that has to be removed to put the lower board in. Remove the screw and the post. Here is a view of the socket and the post with the board not installed. The second picture shows the board installed. I had to remove the board to install the antennas leads. *** DO NOT INSTALL THE BOARD BEFORE CONNECTING THE ANTENNA LEADS AND PUTTING THE SMA CONNECTORS ON THE CASE *** Here is the board with the antenna leads connected. It is really close quarters in there. Those connectors are fussy. This shows one of the antenna SMA connectors mounted in the case. I used a 5/16in nut driver to snug up the SMA to the case. The antenna is threaded on and you do not want a loose connector/cable. Finally, the case buttoned up antennas installed. I set up on the bench with keyboard, mouse, and monitor. I can then attach my Chord Mojo for quick test final test and initial audio quality review. Software and BIOS Setup for WiFi There is one BIOS change needed to enable the M.2 card in the machine. Look at the PCI page in Advanced Settings. The WiFi setup is now in the Audio Linux menu! And of course in operation. Foot notes after a few weeks in operation. 1. I have now re-connected the WiFi card as my new home network allows me to create multiple networks. I created a 5GHZ only network SSID for the endpoint. I have that running. I will report further. 2. I am having a very hard time determining if I can hear the difference of the USB stick in or out. I have made some other changes in the network since then and I will go back and re-test.
- 167 replies
-
- 40
-

-

-

-
- nuc
- audiolinux
- (and 5 more)
-
Hello all, I have a Linn Klimax DS, connected by ethernet to my Internet provider box, as well as a qnap 109. These were Linn's recommandations when I purchased my first DS streamer. Reading the forum, I feel it may not be the best set up. I would like to try Roon and not have too many boxes and cables. What would you advise me to do? Get a nuc for Roon + a Switch, another nas with ssd cache, or going the innuos or sonictransporter route ? I'm a bit lost as many threads seem open to debate in the long run and tend to favor USB related solutions. Thanks a lot!
-
 Rebuilding the perfect beast. How I evaluated an heir-apparent for my Squeezebox Touch and had a little fun in the process. This not meant to be a measurements-laden post as there are plenty of those out there already. My objective was to figure out how to set up a Raspberry Pi (RPi) microcomputer as music streamer and DAC. It’s more a a chronicle of my successes and mistakes - followed by listening impressions. I'm not that keen on DIY devices, but the RPi has intrigued me from the start, and this seemed like an ideal opportunity to jump in and create a Roon endpoint for my secondary office system. Roon is my music library player of choice, so this informed my initial goals. I suspect that most people here already know about Roon, so I won’t spend too much time on it aside from the setup screens. If you’ve never heard about Roon as a music front-end for your system, you’re in for a treat! I had 4 basic questions out of this exercise: 1) Would this be a suitable replacement for my aging Squeezebox Touch? 2) Can a regular guy assemble this easily? How long will it take? 3) Can this device compete with devices at significantly higher price points? 4) Will I be constantly dealing with unstable hardware and software? If it ain’t broke – fix it! Did I really need a new DAC in my office? No, not really. My Logitech Squeezebox Touch (SBT) had been working well as a Roon Endpoint connected to a set of powered AudioEngine 5+ “Classic” speakers. It’s a great way to discover new music while working, and it’s plug and play simple. The SBT is a fully contained Endpoint and DAC that outputs via RCA to my powered speakers - simple. Here is what that looks like. I know the pictures are not great, but please bear with me: The legendary Squeezebox Touch (SBT) was released around 2010 and was so far ahead of its time, that Logitech in their infinite wisdom cancelled it after just a few years of production. It attracted many fans who continue to happily use this device to this day and still runs $125+ on the used market (new MSRP was ~$300). SBT prices spiked a few years back, but I suspect the Google Chromecast Audio took a bite its market - before it too was cancelled! Roon has a simple setting that emulates the old Logitech Media Server protocols and can stream beautiful music to the SBT with minimal fuss as seen in the below Roon device setup screen: I was looking for an excuse to get on the Raspberry Pi bandwagon and was initially curious about how it would compete as a network streamer/DAC combo with the SBT I knew so well. When the new Raspberry Pi 3 Model B+ was recently released, I figured I’d give it a go. If it was not what I wanted, I could repurpose the Raspberry Pi for any number of fun alternate projects. Here’s an inventory of the what I got to get started, it comes to about $300: · Raspberry Pi 3 Model B+: $35 · Orchard Audio ApplePi HAT DAC: $139.99 · Orchard Audio ApplePi Volume-Clocker: $84.99 · Samsung 32GB MicroSD EVO Select Memory Card (MB-ME32GA/AM): $7.99 (way larger capacity than needed, borrowed from my dashcam) · Mackertop 5.25V 3A Micro USB Wall Charger AC Adapter for Raspberry Pi 3, HP HSTNN-LA43 PA-1150-22HA: $12.99 (buy 2 if you plan to add a Touchscreen) · HVAZI 320pcs M2.5 Nylon Hex Spacer Standoffs Screws Nuts Assortment Kit: $12.99 (way more freaking parts than needed – I should have gotten copper/metal ones) Note: most of the non-Orchard Audio parts came off Amazon.com so I used the exact product descriptions above to help with the search. A Feast of Options How did I settle on the ApplePi, especially given that there are many HAT DACS for the Raspberry Pi to choose from! They range in price from $25 to $350 so there is something for everybody. At the top of the range the competition from ready-built systems starts kicking in hard, and I am especially thinking of the BlueSound Node 2i at $500. I chose the Orchard Audio ApplePi DAC because I missed out on the Kickstarter campaign about a year ago, and I had been curious about this DAC ever since. I had read up on similar offerings from Allo, HiFiBerry, Pimoroni, JustBoom, etc. It was a toss-up between the Allo Katana and the Orchard Apple Pi. The Orchard ApplePi seemed less complicated, given that the Katana had so darn many options; multiple output stages, power supplies, etc. Frankly it was a bit too daunting to make that many decisions up-front. Next up was to decide on the OS for the RPi, which I needed to be a Roon endpoint, so I chose RoPieee as my primary OS over Volumio, DietPi, MoodeAudio, etc. RoPieee is a really straightforward OS that self-updates and requires minimal configuration to allow the RPi + DAC to act as a Roon endpoint (over Ethernet or Wifi). Nothing else. The great news is that I can swap out my MicroSD card at any time with any of these other OS configurations, but first things first. Get the darn thing working. I downloaded the excellent Balena Etcher software to write the RoPieee OS 1 GB image file to my MicroSD card. Within minutes I had my RoPieee MicroSD cart ready to be inserted into my RPi! I got the RPi first, so I connected an HDMI monitor, plugged in an Ethernet cable and the 5.25V 3A power adaptor (Note: getting the power right power supply will prevent undervoltage warnings and reboots). On my monitor the setup scripts whizzed by, and I let the setup/reboot process run its course until the green LED on the RPi was blinking about once a second. Once RoPieee setup is complete, there is no more output to the HDMI screen, so further configuration happens via web interface: http://ropieee.local/. This interface also accounts for multiple RoPieee devices so they can all be configured and named from here. Sweet! Oh, and any later screens you see me show do not show up via HDMI connection, only via the optional touch screen. The elegant RoPiee interface allows for the configuration of any USB connected DACs and/or a DAC hat. My DAC was still a few days out, so I connected an old LH Labs Geek Out 1000 to the USB port and selected the “Audio USB” setting in the web UI. Without a DAC, Roon doesn’t “see” the Raspberry Pi, so once the Geek Out was connected directly into the USB Port I checked Roon and it had been recognized. I enabled it and was ready. Whoah, that was easier than expected! I plugged in headphones to the Geek Out and started playing music via my Sony MDR-Z7 headphones hooked up via the 47 Ohm output. The audio quality was ok, but not as good as I memory served me while connected to my OPPO 205 or via balanced connection to my Pono DAP, nor my impressions from having the GeekOut connected to my laptop, but that was not what I was looking to do. The RPi USB is apparently pretty poor, so perhaps I was getting a taste of this. I decided not to take this side mission. Either way, it was working! A few days later a neat package arrived from Orchard Audio containing the ApplePi DAC and Volume controller boards, and the stacking header connectors. I pulled out my maximum overkill box of 320 spacers and screws and fished out the following items (these are all the M2.5 thread): · 4 x Feet · 4 x 12mm Standoff · 4 x 14mm Standoff · 4 x Screws (In retrospect I would have preferred getting the brass ones). A nice video on the Orchard Audio website explains it all, and I had watched in anticipation. It helps to measure the standoffs beforehand so you aren’t eyeballing the difference between a 12mm and a 14mm standoff when you have 5 different sizes to choose from. Pro-tip y’all! The stack came together quickly ONCE I had the right sizes! I wasted no time moving the RCA cables from my Squeezebox Touch to the miniature stack of circuit boards I had just assembled. In the RoPieee OS web screen I selected the Audio HAT to be the Orchard Audio ApplePi DAC, hit save, and had RoPieee reboot the DAC via the Web UI. Upon completion I enabled the newly discovered DAC in Roon: I love it when stuff just works… I know very well how the SBT and AudioEngine 5+ powered speakers sound, but even as I was being somewhat distracted by enabling this new RPi endpoint in Roon, my focus was immediately drawn to the music when I started up Jean Michel Jarre’s latest “Equinoxe Infinity” (via Tidal). It’s a new reference recording, and I immediately noticed a significant sound quality improvement. Granted the SBT is probably a better streamer than DAC, but holy cow! The stereo imaging on Flying Totems (Movement 2) was outstanding, and the bass much, much tighter. Everything was just better. The Roon screen below shows the ApplePi as an EndPoint alongside other devices on my network. At louder volumes (90-100 dB) the ApplePi DAC exhibited its prodigious talents in a way that impressed the hell out of me. I did a series of sighted back and forth plugging between the ApplePi and the SBT on the same material and noticed that the immediate differences I had noted were undeniable. At louder volumes (I was using a SPL meter) the SBT had me reaching to turn down the volume because it sounded too bright, but I never got this urge with the ApplePi while listening to Mozart Violin Concertos (MQA Remix 2016) on Tidal. Honestly, I thought the AudioEngine 5+ speakers were decent but not spectacular, so I had that upgrade itch. That urge has since disappeared. The bass is huge and the imaging is precise. Way better than I thought possible. I even forgot about wanting to add a subwoofer. My wife even commented on how great it sounded and wants me to now set up something at her office. What just happened?!? Once I had the above configuration up and running for a few days, I decided to go deeper down the rabbithole and add the optional RPi 7” touchscreen and stand. You can operate the device without the touch screen, but I wanted the screen because it’s one of the things that made the Squeezebox Touch so versatile. This added another $91 to my total cost, so it was pushing $400 now. · Raspberry Pi 7" Touchscreen Display $80 1 · Pibow Touchscreen Frame Noir $11 Once the screen arrived, I was followed the instructions and connected the screen to RPi using the supplied flat ribbon cable. The ribbon cable receptors on the Raspberry Pi and Monitor card require you to pull up the black tab so it unlocks the receptor. Once inserted, pushing down the tab will clamp the cable. Initially I tried jamming the ribbon into the slot, which was stupid. Just use the tabs ok? The touchscreen frame assembly was elegant and simple. Mounting the Pi with HATs onto the back of the touchscreen took some fiddling and picking the right spacers and wishing the ribbon cable was 1cm longer so it would not be such a tight stretch (figured out later I could have reoriented the device). The touchscreen needs power as well, and the manual proposes two ways: one which used two of the supplied jumper cables, but that way didn’t work because the HAT was already using the terminals. The other option was to use a USB to Mini USB cable from the screen’s board (screwed to the back of the touch screen) to the Raspberry Pi – this worked fine, but I later decided to order a dual head female to male Mini-USB power splitter extension, the $7 Electop Micro USB Female to 2 Micro USB Male Splitter Cable. This would also free up the side USB port (totally optional though). The DAC needed power too, so to avoid the dreaded underpower yellow lightning bolt I grabbed the second Mackertop 5V power supply which I received with the ApplePi but left in the box. It happened to be identical to the one I had ordered beforehand. I plugged this second power supply into the ApplePi Volume Clocker so it would power the DAC section. I have an iFi iPower 5v power adaptor (currently in use in my main system) and could have used it too. Below is an image of the back of the touchscreen with everything hooked up. Note how tight the ribbon cable fits, but I will eventually reverse the spacers and rotate it so the RPi is closest to the screen rather than farthest away as shown. The only advantage here is that it’s a little easier to access the MicroSD card. Back to Business I was playing around with the headless configuration of RoPieee but it did not automatically see the newly added Touchscreen. I reflashed my SD card with RoPieee and restarted the setup process and this time it automatically set up the Touchscreen. At this point the Touchscreen had upside-down text about not finding Roon. I went into the Roon Settings / Display screen on my PC and saw the newly discovered Roon Extension called Ropieee Remote control - which I expertly enabled (getting drunk with success!). Tip: Whenever you reflash the OS you will need to go into the Roon Audio settings and re-enable the Raspberry Pi (don’t forget the DAC, WiFi, and timezone settings in RoPieee). For these reflashing operations, make sure the Network cable is plugged in so you can see what is happening in the http://ropieee.local/ setup screen on your PC after the setup is complete (once the RPi green light blinks once a second) or when you see Welcome to Ropieee on the touchscreen. Don’t mess with anything while RoPieee is configuring itself. It takes 10 minutes at most and may reboot a few times. Patience... Inside the RoPieee web control screen you will find a snazzy new Display Tab that allows the display to be configured in case it shows up upside down. Make sure you use the exact Roon Control Zone name you gave the DAC in Roon, in my case I called it Orchard Apple Pi DAC. Hit commit and let the RPi reboot and it will be ready to go afterwards. Note: Make sure you Commit and Save Changes in each individual RoPieee screen when you are customizing the setup. Below are some of my settings in RoPieee: Below is a view from the top with the RoPieee screen running. I had this on a small desk top space next to my laptop which I was using to flash the images and control the settings on the webpage. The way the ApplePi DAC is oriented puts the RCA cables and the power supply cables pointing upwards. I might have preferred that they faced away from the screen (90 degrees to the back), but for now, this worked and above all, was sounding great. Final Thoughts This exercise was to check out what it takes to assemble a Roon endpoint from a Raspberry Pi and that proved to be easy and fun. I blew my $300 budget by adding the touchscreen, but it made total sense especially because it “hid” the RPi + DAC behind the handsome bevel and I had an awesome pause button to hit when incoming calls happened and a cool digital clock when nothing was playing. The case is another matter, due to the height of the RPi plus the HATS I measured that a case would need to be at least 2.5” tall. I was unable to find a suitable case but read somewhere that people had success with the HifiBerry case, but it’s not tall enough to accommodate the two HATs nor does it have the right holes to accommodate the volume knob or the XLR/RCA outputs. Don’t bother. There is an “open” case available from Pi Plates that uses large standoffs around the 4 corners that I might be able to use, so I ordered one to see how it would work. I also realized that instead of stacking the HATs on top of the RPi, I could get an extension 40-pin ribbon cable and separate the DAC from the Pi. This would allow me to use the Pi Plates container to contain the DAC and Volume control separately from the RPi and provide more flexibility. I also wonder how a LPS would impact the sound of this rig, but I wanted to repurpose my existing iFi iPower switching PS first. No rush. Remembering the Initial questions: Q: Would be a suitable replacement for the aging Squeezebox Touch? A: Yes, and more – there are various different programs including a SBT emulator that would give me far greater choices. With the screen and vastly superior DAC it’s no contest. You can even emulate the SBT on the RPi! Q: Can a regular guy assemble this easily? How long will it take? A: Yes, but the assembly time depends on choices you make. A barebones setup can be done in 10 minutes and adding the initial RoPieee configuration you could be up and running in 20 minutes. I initially made a few easily reversible mistakes which took me ~45 minutes. Q: Will this be able to hang with Roon Endpoint devices at significantly higher pricepoints? A: What else under $500 or even $1000 has a 7” touch screen and such a great DAC that is not Raspberry Pi-based? A $499 Bluesound Node 2i is compelling, and it comes with the highly acclaimed BlueOS. I don’t have one to compare against, so I cannot comment on sound quality differences, but if anybody has compared it against the SBT I would welcome the datapoint. Q: Will I be constantly fumbling with unstable hardware and software? A: The hardware and software proved to be robust enough to put up with mt clumsy manhandling. After playing with RoPieee, Volumio and DietPi I got the hang of it and even brushed up on some SSH skills to tweak DietPi. It must be said - RoPieee is superb – it sounds great (if not the best) and is dead simple to use. Most of these tools can auto update, so that’s a bonus to always have the latest. PROS 1. Great sound – it must be said, the DAC’s sound quality is immediately obvious. 2. Highly flexible platform, easy and (mostly) fun to assemble. 3. Upgradeable; touchscreen, higher quality linear and switching linear power supplies, choice of multiple operating systems and features, etc. 4. Outside of the Allo Katana, nothing under $500 or even $1000 appears to be in the same league according to published measurements. This is a serious DAC, regardless of platform, that’s the eye opener. CONS 1. No case, so aside from lacking RF or EMI shielding, the circuits are exposed and A/B testing by plugging/unplugging RCA cables requires care. 2. Raspberry Pi boards pass “dirty” power up through the ground and this is not isolated from the DAC. I suspect there is a tweak for this, but for now I cannot hear it. 3. Most RPi “starter kits” lack the required standoff screws so the 2.5M screws and MicroSD card must be ordered separately to get started. Just order the pieces individually. 4. A Touchscreen adds another $80 but requires an extra power supply and is best with a $10 frame + stand. The mainstream audio press has not given these Raspberry Pi devices much attention, but it’s clear to me that high-end digital audio vendors should be taking note. It’s imminent that better electrical isolation, professional cases, and more fully pre-assembled RPi-based turnkey systems will proliferate and massively disrupt the price performance expectations of the entire audio industry. It won’t just be limited to intrepid hobbyists. ApplePi Specifications · Signal to Noise Ratio (SNR): 128dB (2,510,000 to 1) · Total Harmonic Distortion + Noise (THD+N): <0.0005% (-106dB) · Balanced Output Voltage: 5 Vrms (0dBFS) · Balanced Output Impedance: 200 ohm · Single Ended Output Voltage: 2.5 Vrms (0dBFS) · Single Ended Output Impedance: 100 ohm · Dual TI Burr Brown DAC (PCM1794A) in Monaural Mode · Ultra Low Noise Linear Regulation · Low Jitter PLL Clock Generation · Supported Sample Rates: 44.1, 48, 88.2, 96, 176.4 and 192kHz · Supported Bit Rates: 16-Bit and 24-Bit · Outputs: Mini XLR or RCA · Power: Powered from Raspberry Pi or Power Directly (Optional) · Optional Power: 5V with Micro USB connector · Power Consumption: 4.5W (5V @ 0.9A) · Supported SBCs: Raspberry Pi, Tinker Board, Sparky SBC Part 2 – PecanPi, Ready to serve! Fast forward a week and as I was wrapping up my findings on the ApplePi, Orchard Audio announced the PecanPi; the next generation of the device and it read like a wish-list come true; custom aluminum case with a volume knob, volume board, headphone amp, and DAC combined onto one board. It’s almost as if they were listening to me! What’s new is the option of getting the PecanPi DAC completely pre-built and pre-configured. It struck me that the ApplePi I had just written about suddenly made the jump to become a turnkey device and I could either scratch everything I had written or just provide my impression of the new device. The PecanPi will be available as a kit (between June/August), but the case is mighty compelling because there no great cases options available (Allo has better options here). Knowing what I know now, I would opt for the PecanPi DAC and aluminum case because I would want to add a screen and my own choice of 9V power supply and also because I already have a RPi. You could say that I have been emboldened by my positive experiences with the ApplePi, and I am excited by the opportunities for customization. However, the prebuilt/configured system makes far more sense for those who aren’t ready to take the plunge and want to plug and play. The beauty is that you can now have it either way! More info: https://orchardaudio.com/shop?olsPage=products%2Fpcnp-strmr As a bonus, the technical performance has also improved with the PecanPi, SNR is 2dB better, THD+N is 3dB better, and jitter performance is also improved. Honestly, after listening to an early production model for a week, I can’t hear an immediate difference when I am doing casual A/B switching, but it may impress the measurements crowd. The ability for the PecanPi to function as a headphone amplifier is worth noting in that it sounds huge and powerful. Better than I am used to with my 5-year-old portable DAP and comparable to the OPPO 205. I’m not a fervent headphone listener, and the need to use an optional Y connector to convert the RCA outputs to a headphone output means you’d have to remove the Y connector and replace the RCA cables when you want to switch back to regular RCA output. I took a few pictures of the PecanPi DAC to show the robustness of the board design, gone are the mini-XLR connectors for full sized ones, and the aluminum case is robust, with enough porousness to not interfere with Wi-Fi. See below. Well that wraps up my journey so far! I have a lot more to learn, but boy am I having fun!
- 17 replies
-
- 2
-
-
- raspberrypi
- orchard audio
- (and 5 more)
-
 Hi all! I'm new to the forum, but have been reading around and been really enjoying the community, support, and ideas shared. I recently picked up some KEF Q150 bookshelf speakers, receiver, and a Pro-Ject Debut Carbon Esprit SB (DC) turntable (w/ Schiit Mani preamp)—just getting started in the world of hi-fi audio, and have much to learn (but having a lot of fun). However, despite the incredible sound coming from my vinyl collection with my new setup, I've been scheming a way to integrate digital music into my setup. After about a solid month of research and learning, I have a parts list for my planned digital audio PC / music server build. I wanted to share and hear all thoughts / suggestions / concerns before I pull the trigger—it's not the cheapest build (approx. $2650). The main goal is to run either Ubuntu or Windows 10 for a Roon server / Tidal playback on the DAC I'm about to buy—Pro-Ject Pre Box S2 Digital. The other goal of the build was to allow for 4K HDR playback (so 3840x2160 @ 60Hz) as an HTPC. Also, trying to limit the TDP as much as possible and go completely fanless/silent/no moving parts. The PC will live "headless" in my living room next to the stereo equipment. Here it is! CATEGORY COMPONENT MODEL NO. NOTES Case Streacom FC9 Alpha Fanless Chassis, Non-Optical, Silver ST-FC9S-ALPHA Fanless, passive heatsink case, supports PCIe cards up to 155mm in length (with drive tray attached) IR Receiver Streacom Flirc SE IR Receiver FLIRC-SE IR control (for use with Logitech Harmony Hub / Echo Dot / Alexa) CPU Heatsink Riser Streacom HT4 Thermal Riser STHT4 For compatibility with MSI Z370M Gaming Pro AC Motherboard MSI Z370M Gaming Pro AC, Intel Z370 Intel Z370 Chipset CPU Intel i5-8400 8th Gen, 6-Core 2.8GHz BX80684I58400 65W TDP GPU MSI GeForce GT 1030 2GH LP OC, 2GB GDDR5 • 35W TDP • 153mm length w/ passive heatsink, to fit in FC9 case • HDMI 2.0b: 4K 60Hz (HDCP 2.2), takes up 1.5 slots, so connecting to lower x16 PCIe slot (blocking unused lower x1 PCIe slot) RAM HyperX Predator DDR4-4000 Black, 16GB (2x8GB) HX440C19PB3/8 (On MBO supported RAM list) Boot Drive Samsung 970 EVO SSD, NVMe M.2, 500GB MZ-V7E500BW NVMe M.2, 3400 MB/s read, 2300 MB/s write Storage Drive Crucial MX500 SSD, SATA 3 2.5", 2TB CT2000MX500SSD1 SATA 3, 2.5" NVMe M.2 Heatsink EKWB EK-M.2 NVMe Heatsink, Black 3830046991737 For NVMe SSD cooling PSU HDPLEX 400W HiFi DC-ATX Linear Power Supply HDPLEX 200W Linear Power Supply, Silver • 19V 7.4x5.0mm > HDPLEX PSU • 9V 5.5x2.1mm > SOtM tX-USBexp • 5V 5.5x2.1mm > Micro USB DC adapter > DAC USB Audio Card SOtM tX-USBexp USB 3.0 Audio Card tX-USBexp External power via LPS, connecting to upper x1 PCIe slot Power Filter Card Elfidelity Rainbow Sugar 2 Hi-Fi Audio Power Filter Card AXF-104 Internal power filtering, connecting to upper x16 PCIe slot USB Cable AudioQuest Carbon USB Cable, 0.75m/2.5ft 65-089-12 For connection to DAC USB Filter AudioQuest JitterBug USB Filter JITTERBUG SOtM tX-USBexp > AQ JitterBug > AQ Carbon > DAC DC Adapter Adafruit MicroUSB to 5.5x2.1mm DC Barrel Jack Adapter 2789 Convert 5.5x2.1mm DC jack (from HDPLEX LPS XLR to 5.5x2.1mm DC cable) to Micro USB, for DAC DAC Pro-Ject Pre Box S2 Digital, Silver 5V Micro USB power Thank y'all very much in advance! Cheers, Z
 -
 Hi all, for a long time I was very happy with my SPDIF source Raspberry Pi with Allo DigiOne and moOde, but the UI of moOde has some limits. So I decide to switch to Roon. Another point was, I see some limits of a synchronus protocol like SPDIF, a "bit perfect signal" seams to be easier reachable with an asynchronous protocol like USB, which allows an error correction (copyping files via USB is in practice typically bit perfect). So I was searching for a "high quality USB-source", which brings me to e.g. "Allo USBridge Sig" for 300 bucks ... without the Roon Server. My favourite Roon Server is a Roon Nucleus, which costs here in Switzerland 1800.- Swiss Francs (approx = Euros) ... OUPS. So .. now I come to the point 😉 In case of you have a good DAC with galvanic isolation (I think most the people in this forum have something like that), the quality of USB-output I think "is not so important". Because of the asynchronous USB-protocol, the DAC must anyway do a re-clocking of the signal by its own, so e.g. Jitter is the problem of the DAC, not the problem of the USB-output. The USB-output must "be only good enough" to deliver a bit perfect USB-signal. I have a Chord Qutest, which have like most of Chord DACs an USB galvanic isolation and because of Rob Watts technology jitter is not an issue. So, which is USB-outpout should I choose? I'm big fan of the Roon Nucleus, which can be also "work as a USB-output", not as an "Audiophile USB-output" (it's a PC), but with a Chord Qutest this seems to be not a problem. The bigger problem is the price of a Roon Nucleus, 1800 bucks is too much for a "fanless Intel NUC" (the Nucleus is nothing else). So I decided to build my "own Nucleus": Intel NUC Baby Canyon NUC7i3BNH (PC hardware of the Nucleus for 300 bucks, same price as a Allo USBridge Sig!) some additional parts are needed to: 8 GB RAM and a SSD for Roon Operating System (together 100.-) Akasa Newton S7: matching aluminium fanless case for the Intel NUC above (another 100.-) the best: Roon Nucleus OS = Roon ROCK can be downloaded for free, see Roon ROCK - get started clear ... Roon license you have to pay, like a original Roon Nucleus So, for 500 bucks I can get a "perfect fanless Roon Server in an aluminium case", which can direct deliver an USB-output for my Chord Qutest ... PERFECT, that's what I need! So, that's what I did 👍 ... and maybe I can inspire some of you to think about "where should my money go" ... into "Audiophile USB-outputs" or into "more useful stuff" (my opinion).
-
I have been using my system now for two and a half years: Meridian 818v3 reference Bowers 800D (3) Classe mono amps Roon (recently upgraded to 1.7) Tidal stream through Roon Sarum T cables MAC Laptop as Roon core (OS: Yosemite 10.10.5) Everything has been working fine until a couple of weeks ago. I have noticed a considerable drop in sound quality, and I am struggling to understand where on my system I am getting the issue. To date I have: 1 - Tried playing through one amp and one speaker. It seems to be the same on both which rules out an Amp/Speaker issue 2 - I streamed directly from Tidal on my laptop through USB to the 818v3 and still get the same issue 3 - I have rolled back the Roon software to 1.6 and 1.5 and go the same issue. This leads me to the 818v3 being the problem? I have reset to factory settings just incase there are some rogue filters, but its still the same problem. Anybody got any advice? Matt
-
AURALiC Polaris Wireless Streaming Amplifier ($3799) “POLARIS defines the AURALiC brand: innovative technology, great sound, superb user experience, and excellent value. It is a wireless streamer, a music server, a DAC, a pre-amplifier and a stereo power amplifier – the ultimate solution for music lovers seeking high quality streaming from a single, compact audio component” The POLARIS offers seventeen inputs channels comprising streaming, digital and analog sources. The internal DAC, incorporating AURALiC Flexible Filters and Femto Master Clock, supports Quad-Rate DSDand PCM up to 32Bit/384K. The powerful internal stereo amplifier module can deliver 120 watts per channel into 8 ohms, 180 watts per channel into 4 ohms continuous power with exceptionally low distortion- sufficient for the most demanding loudspeakers. The internal DAC, incorporating AURALiC Flexible Filters and Femto Master Clock, supports Quad-Rate DSD and PCM up to 32Bit/384K. The powerful internal stereo amplifier module can deliver 120 watts per channel into 8 ohms, 180 watts per channel into 4 ohms continues power with exceptionally low distortion- sufficient for the most demanding loudspeakers. POLARIS utilizes AURALiC’s award-winning Lightning Streaming Platform. Launched in 2014, Lightning Streaming is industry’s first streaming solution that supports Quad-Rate DSD, PCM up to 32Bit/384K through Wi-Fi network. Lightning Streaming offers several innovative and unique features such as Gapless Playback, On-Device Playlist, Memory Cache and Bit-Perfect Multi-Room functions. This on-going platform is maintained, and continually developed by AURALiC’s in-house software R&D team to ensure customers are regularly updated with new features through the product’s automatic software update system. The products streaming function is operated by AURALiC’s Lightning DS control App which is at the heart of all the companies streaming products and available on iOS platforms, with Mac and Windows versions in development. It is also compatible with other third-party OpenHome or UPnP control software for playback and also works as a RoonReady endpoint to use with Roon software, bringing you an alternative way in which to discover and listen to music. AURALiC is introducing another innovative technology: Hybrid Volume Control for POLARIS. The Hybrid Volume Control uses both analog and digital volume control together for optimum audio performance and the best possible sound quality. The analog attenuators reduce the signal level in 12dB steps whilst the DAC's internal digital volume control handles small amounts of volume change within each step. By using this technology, the DAC chip always operates in the best performance range, bringing much lower distortion, better dynamic range and high sound quality at low volume levels. POLARIS is equipped with two pairs of multi-function RCA connectors - these two stereo pairs of analog channels can be configured as a phono stage input, a line stage input or pre-amplifier output through the product settings menu. Digital inputs include AES/EBU, Coaxial, Toslink and a USB connection to a computer working as a standalone USB DAC. When purchasing POLARIS, you can specify a 1TB SSD for internal music storage as an option at extra cost, turning POLARIS into a fully functioning Music Server. To purchase, arrange for a home trial or for more info click here
-
 This is my first topic I am initiating, and I didn't see it already covered, though it may be somewhere so excuse any redundancies please. I've been a JRiver user for a few years now, and have wanted to get into multi-room (whole house) audio. I tried using various DLNA renderers as separate zones, which works, but the sync is awful, can't easily grab online streaming services and send to different zones, etc. So after researching SONOS (which I'm thinking is probably a bad word around here), and DTS Play-Fi, I ended up going the Play-Fi route getting a Paradigm PW Link. I wired it directly to my router via CAT5e, which drives a decent Parasound AMP, which drives a decent pair of outdoor DefTech speakers. I'm happy with the sound quality, but there are obvious issues with Play-Fi, hence the article I pasted below, which I can certainly relate to. My question: what is the alternative? I understand DLNA does not do room sync all that well, but perhaps some DLNA compliant products contain such syncing SW? I'm not interested in spending $0,000's per end point. The $350 PW Link fit the budget just fine, and I'm tempted to buy another one, but before I get too far down the Play-Fi highway, what are the alternatives?
 -
Hi All, I've been focusing a lot on the path into my DAC (MicroRendu to SU-1 powered by LPS-1 etc..) and think that's close to being nailed (for now anyway!) so I'm now wondering about the source side of things. Current source is a QNAP HS-251+ NAS with Roon installed. It's doing a decent job but I have two concerns: A - I spend a lot of time looking at "Waiting for Roon core" on my phone. (admittedly I'm not sure if that's the NAS, the phone or network). B - I'd like to add upsampling via either HQPlayer or Roon DSP. Probably HQPlayer. And the QNAP just doesn't have the juice to do that. I'd rather buy off the shelf rather than build. But would consider a custom build where the supplier does the actual building. Requirements are: Upsampling to 256 or 512 DSD Sending to MicroRendu as Roon or HQPlayer endpoint Silent or near silent as needs to sit on the rack Options I've been looking at include> Nimitra - have read great things about it. And seems great value. Only concern is whether the 4GB memory and the CPU have enough power to upsample to 512? SonicTransporter - They have Roon DSP ($1500) and HQPlayer ($1975) options. These definitely seem to have the power as are designed for it. And the synergy with the MR appeals. It also looks like I could re-purpose the 1TB SSD currently in the NAS and put it inside the SonicTransporter which would allow me to retire the NAS. One less box on the rack appeals. PinkFaun & SOTM do some very nice looking servers but once I tip into the $3k+ territory I start to wonder whether I should reconsider the whole thing and buy a high end audiophile server rather than trying to add to my MR>SU-1 path. And frankly I'm liking these too much to even consider parting with them so soon Oh and I'm ruling out the likes of Melco & Innous as I don't believe they have the necessary computing power to do the upsampling - is that correct? Any other recommended turnkey products or order to custom specs models that I should be investigating? Many Thanks, Alan
-
Lately I have been experiencing a number of messages from Roon on my ipads and iphone regarding a loss connection. I also have been losing my ethernet connection with either or both of my microrendu. Can this be an issue with the sonictransporter Audiophile ? Can this be related to the system upgrade to 2.5 ? It really is annoying to not be able to connect or to have your connection cut off all of a sudden. I had been running this set up without issues since last October.


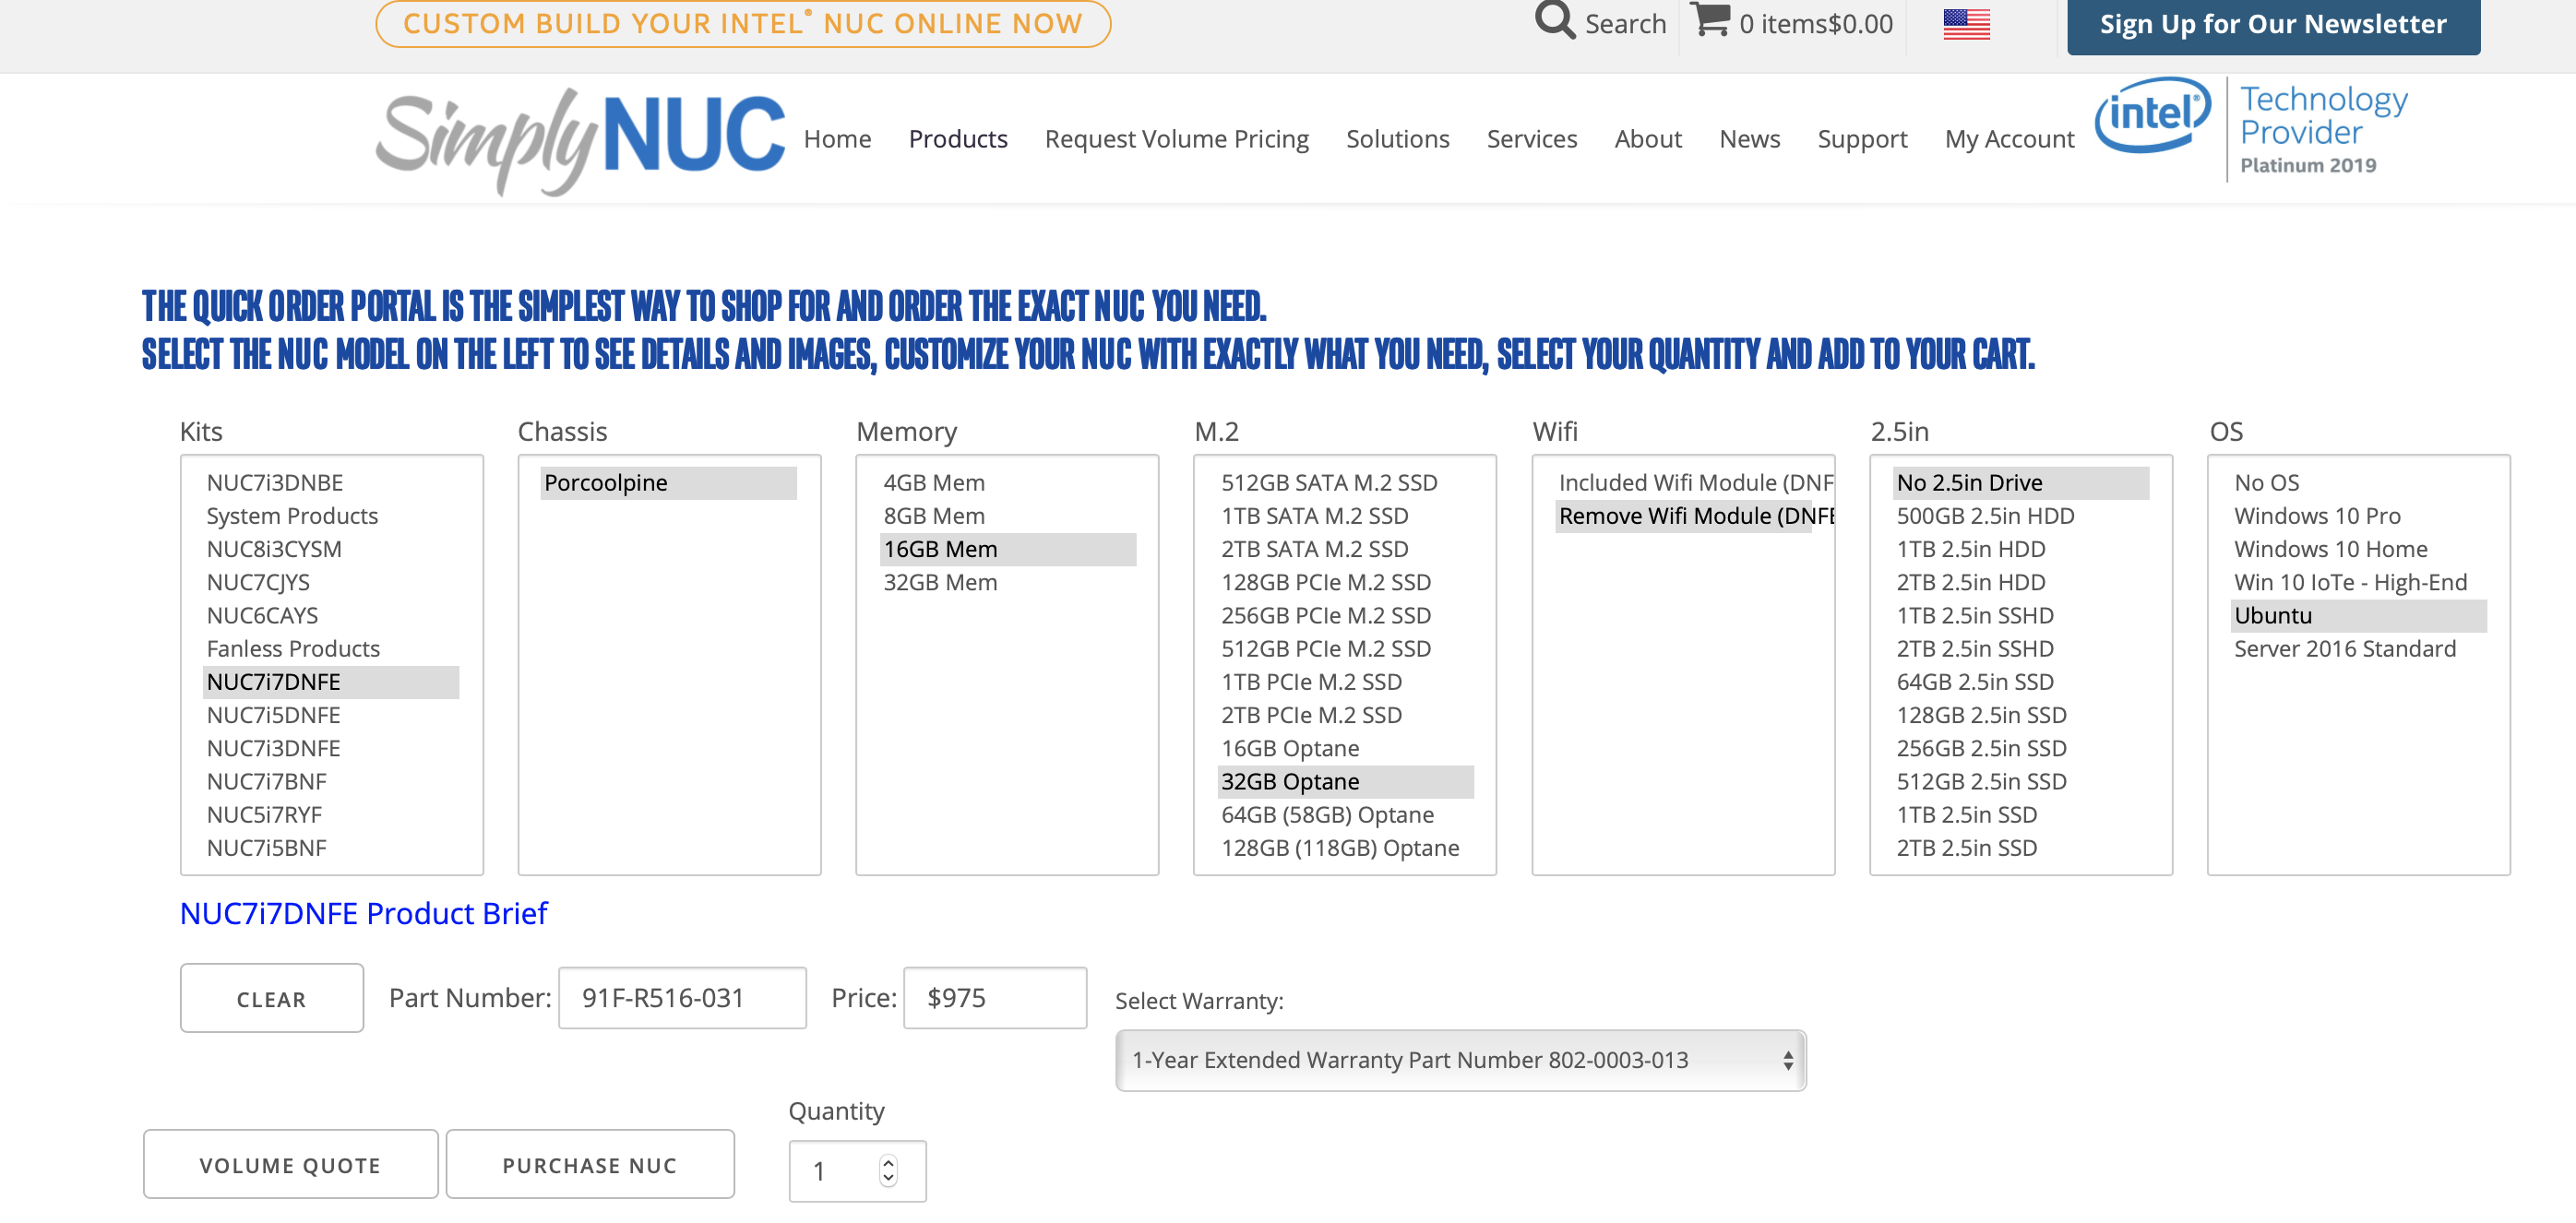


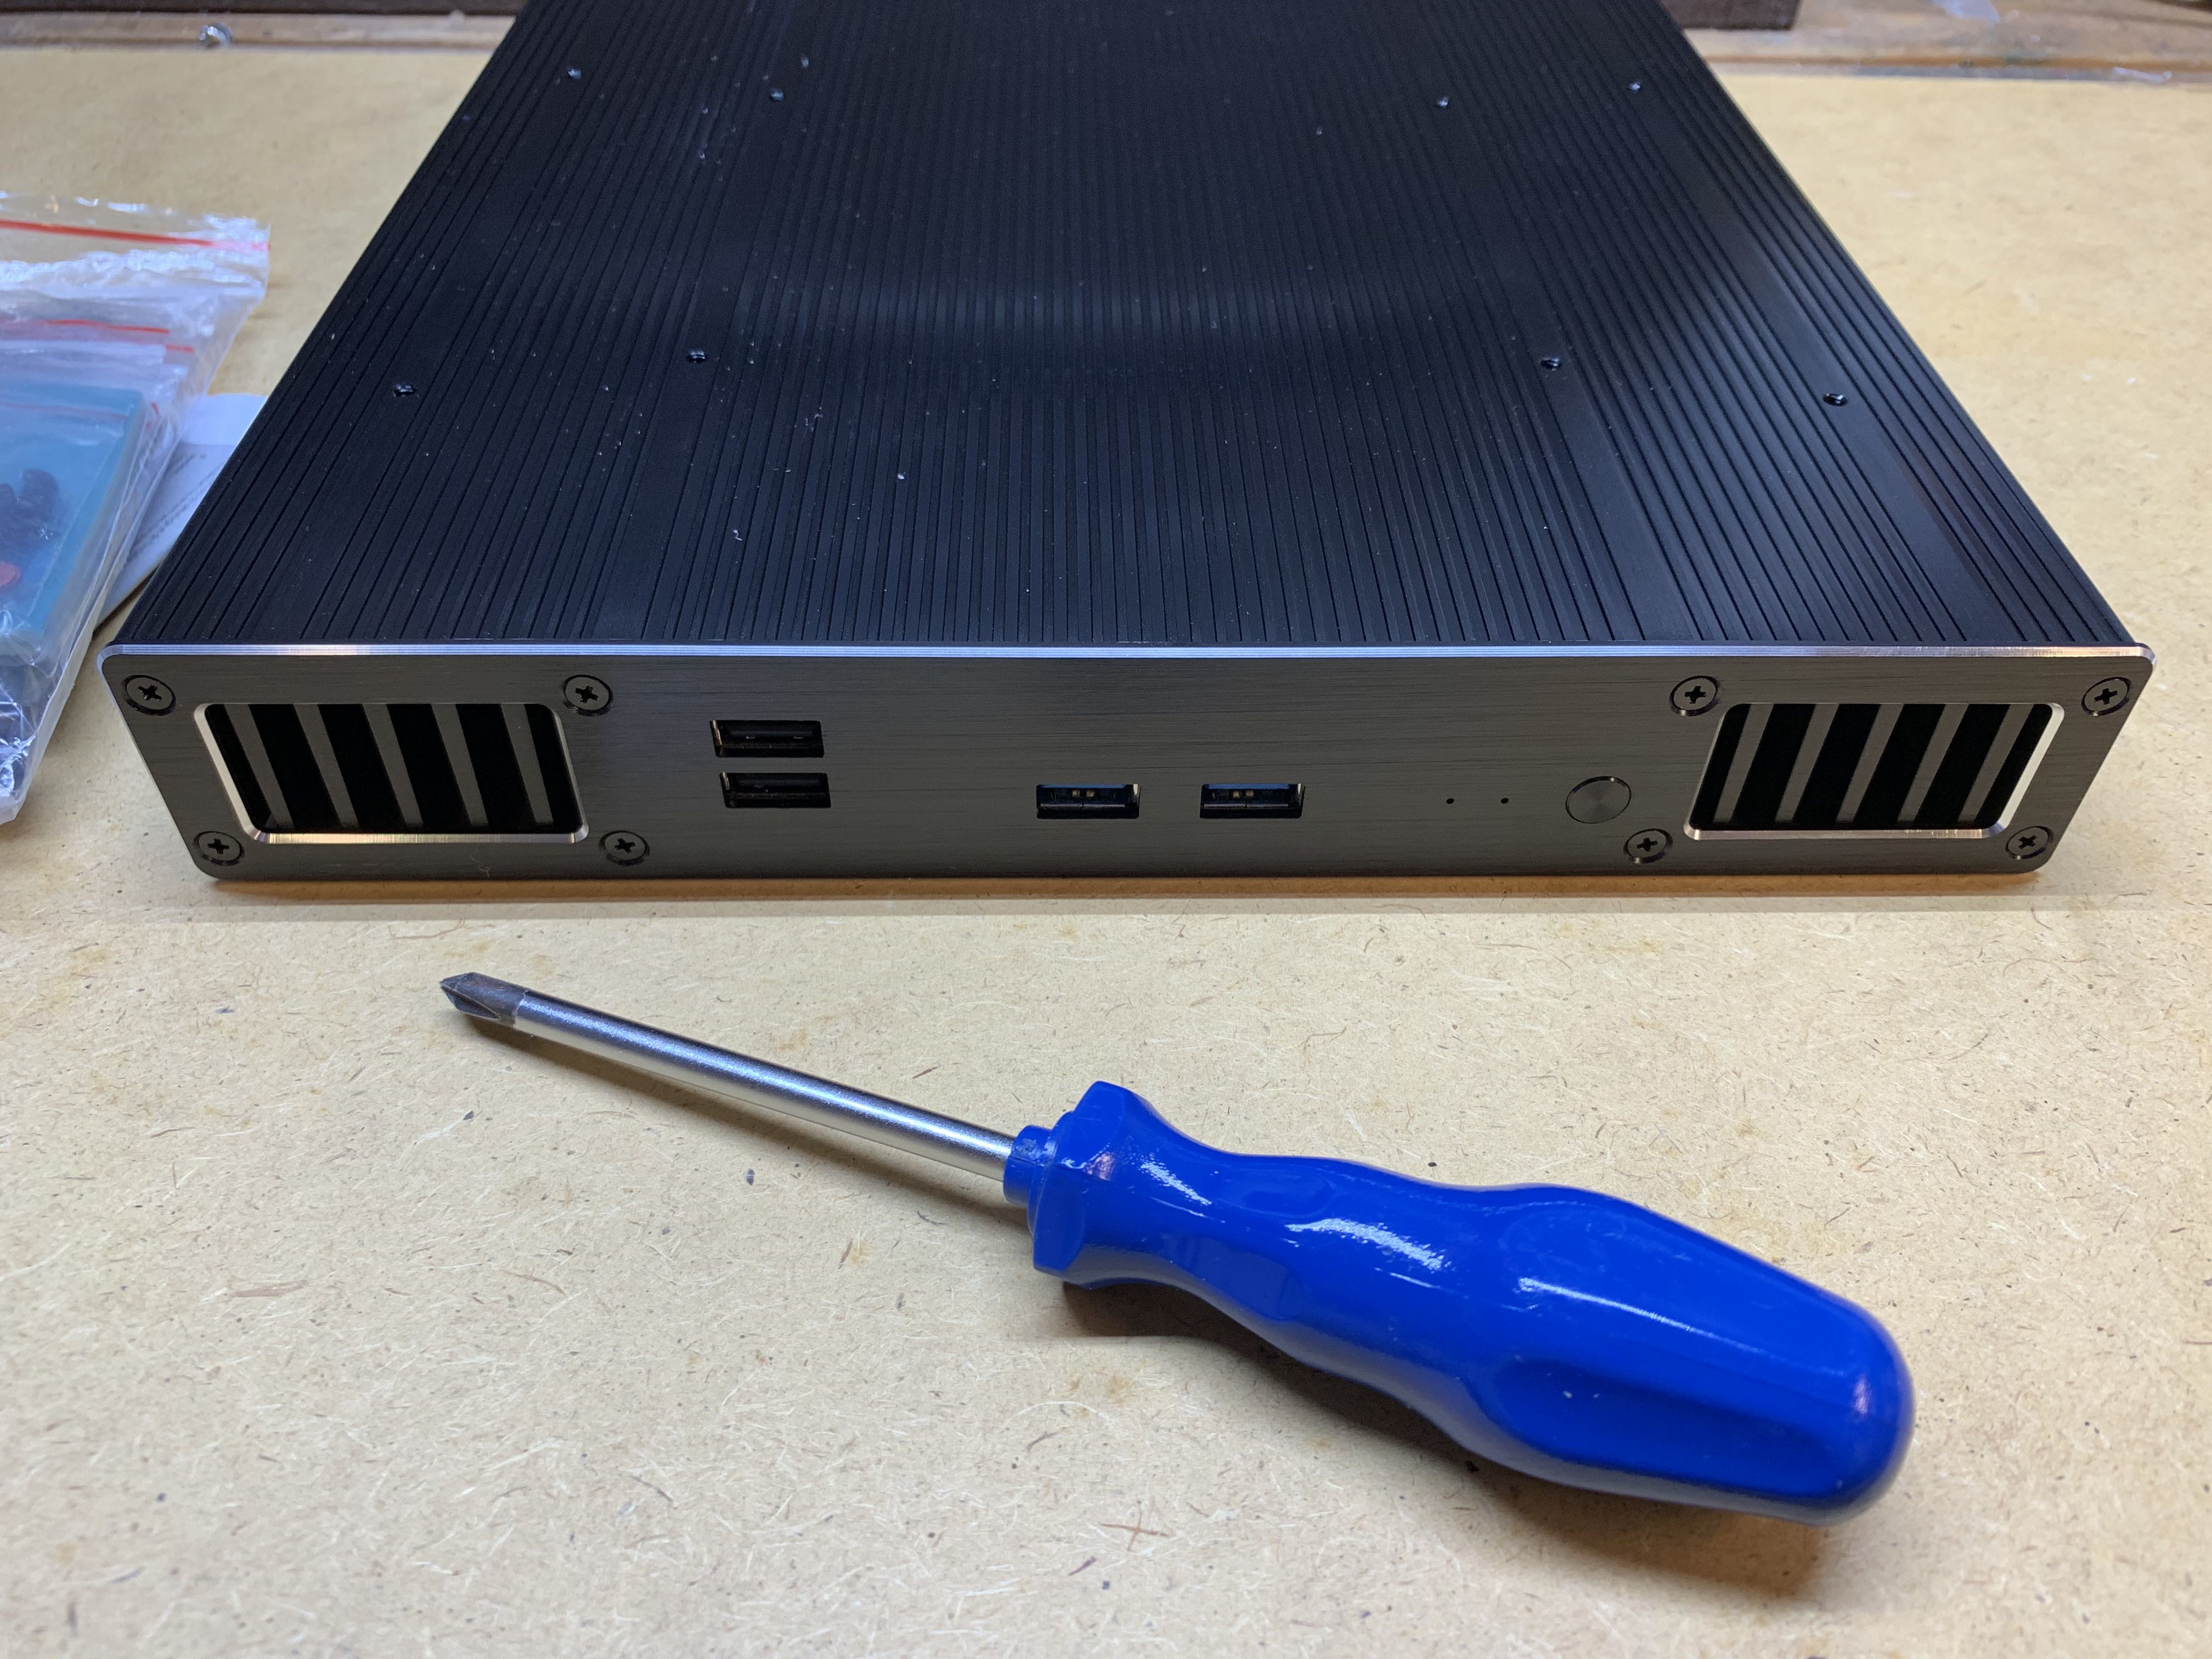

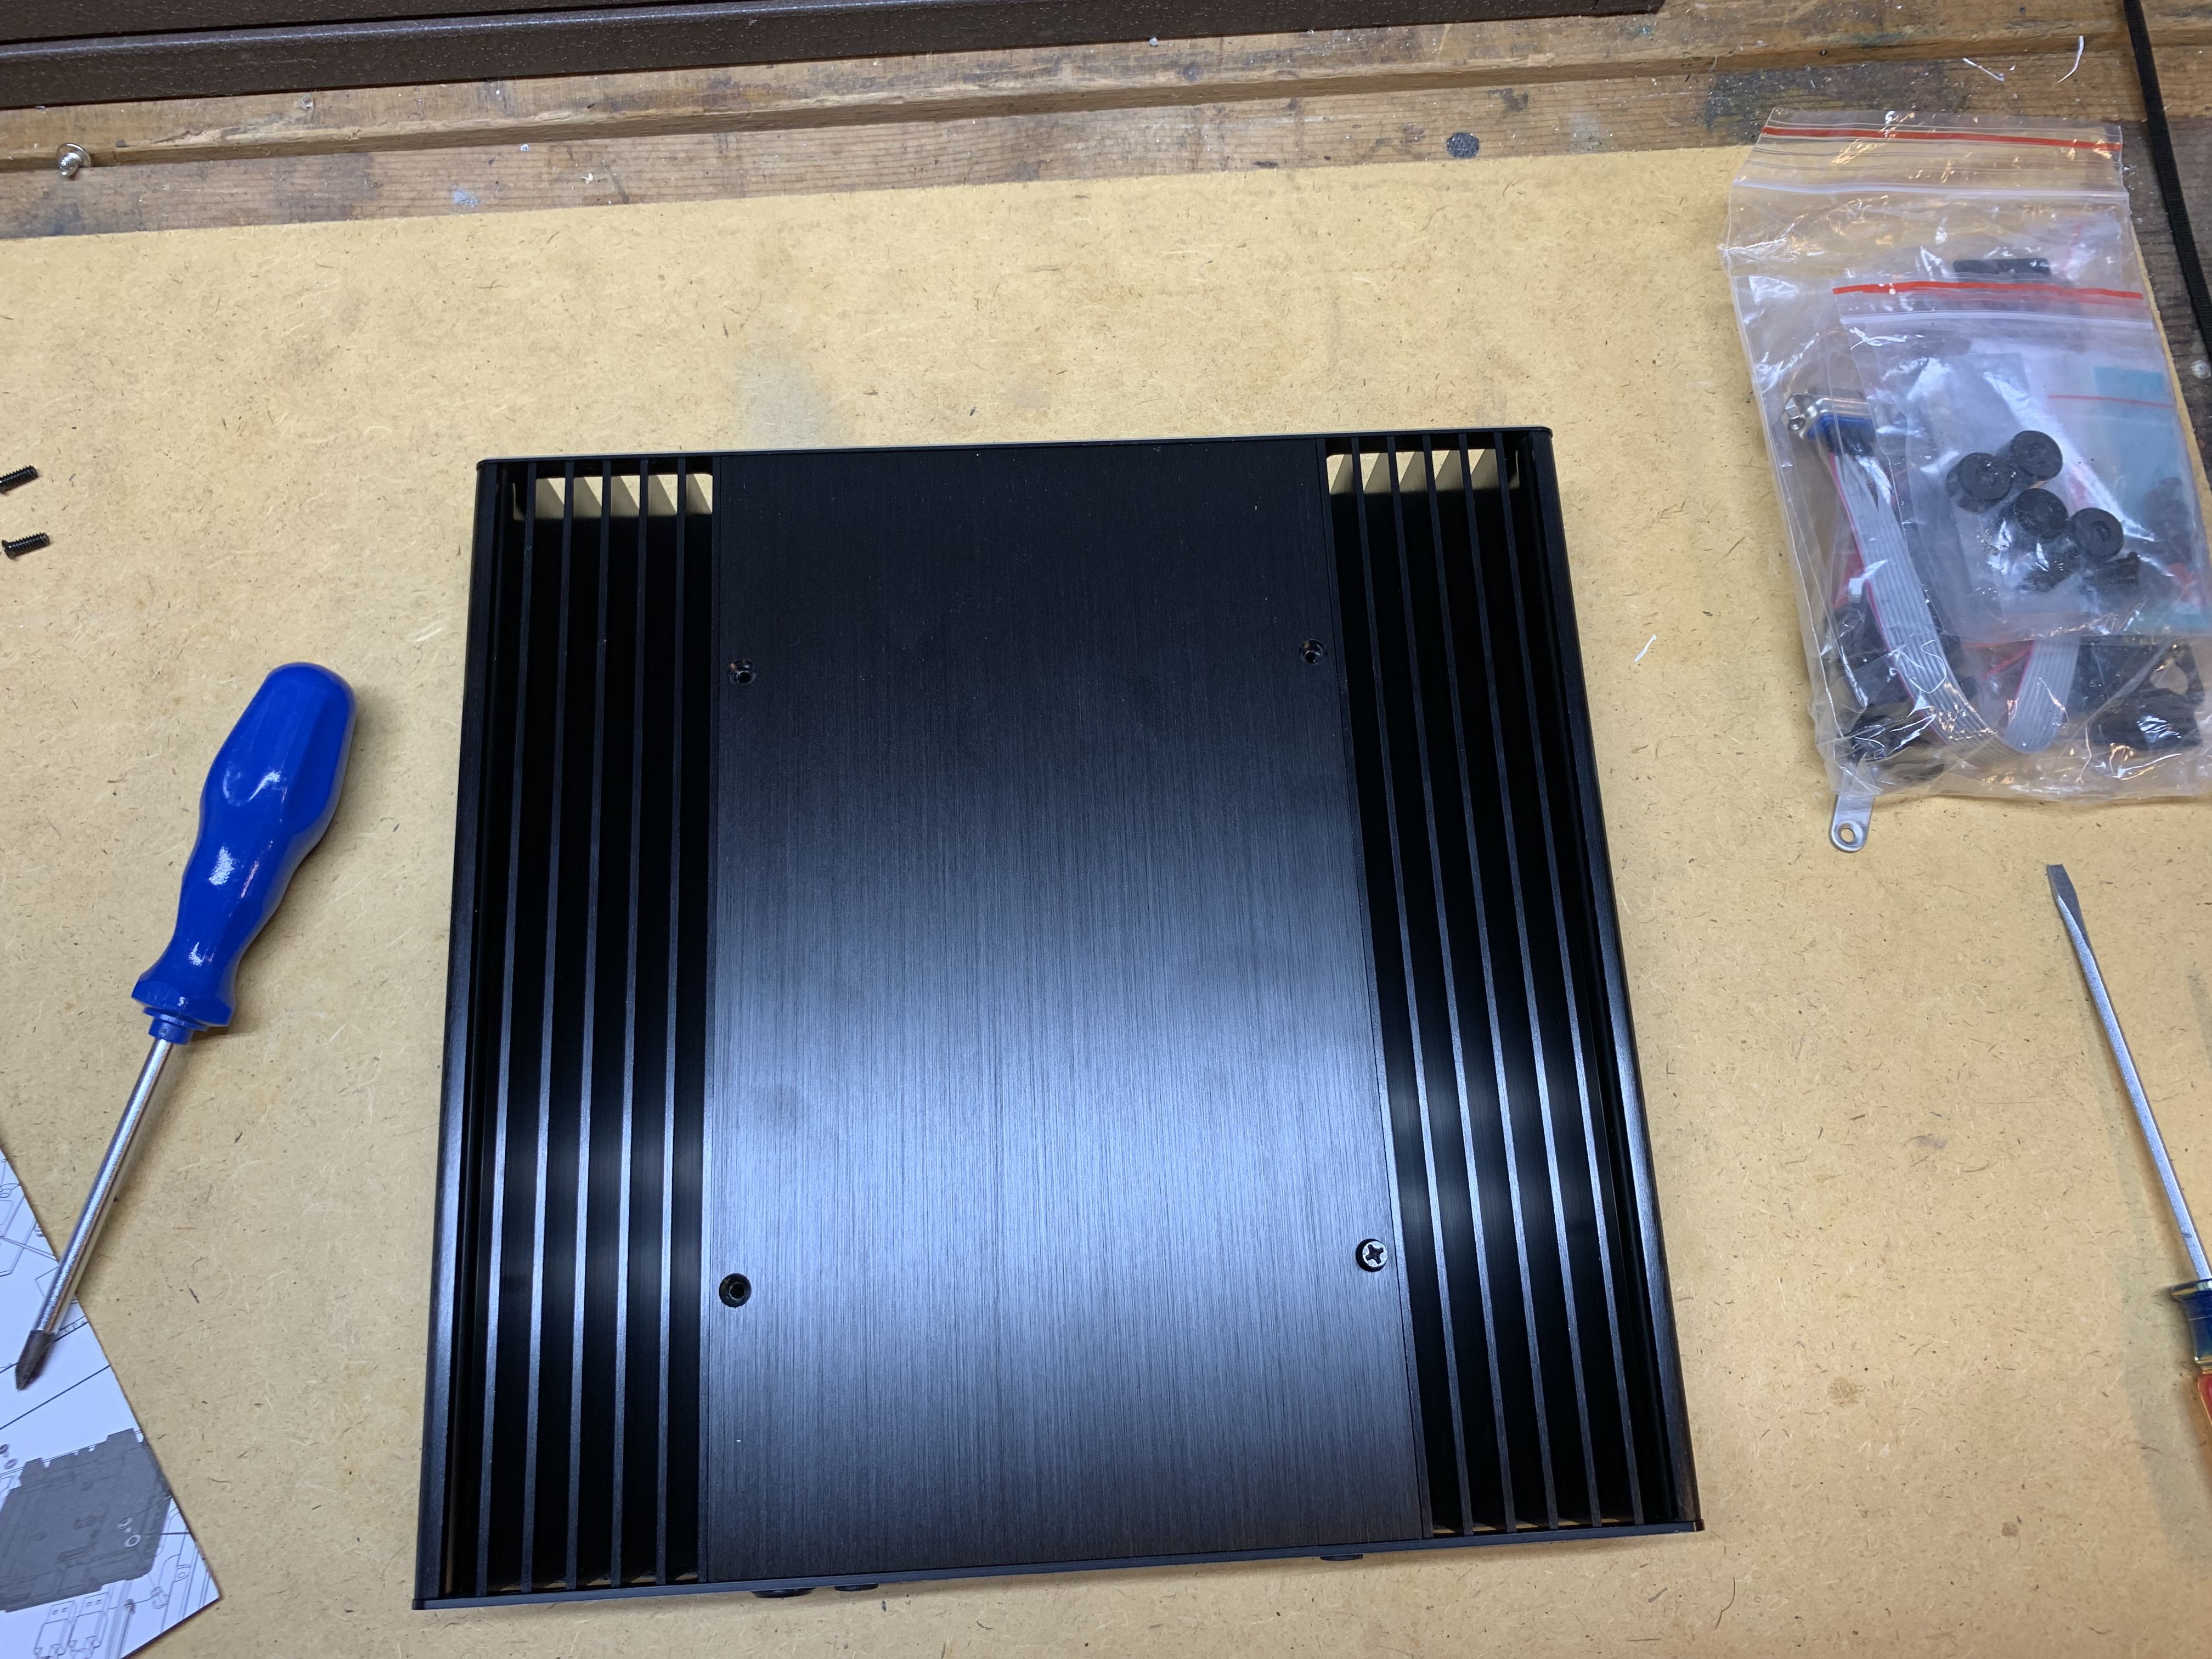
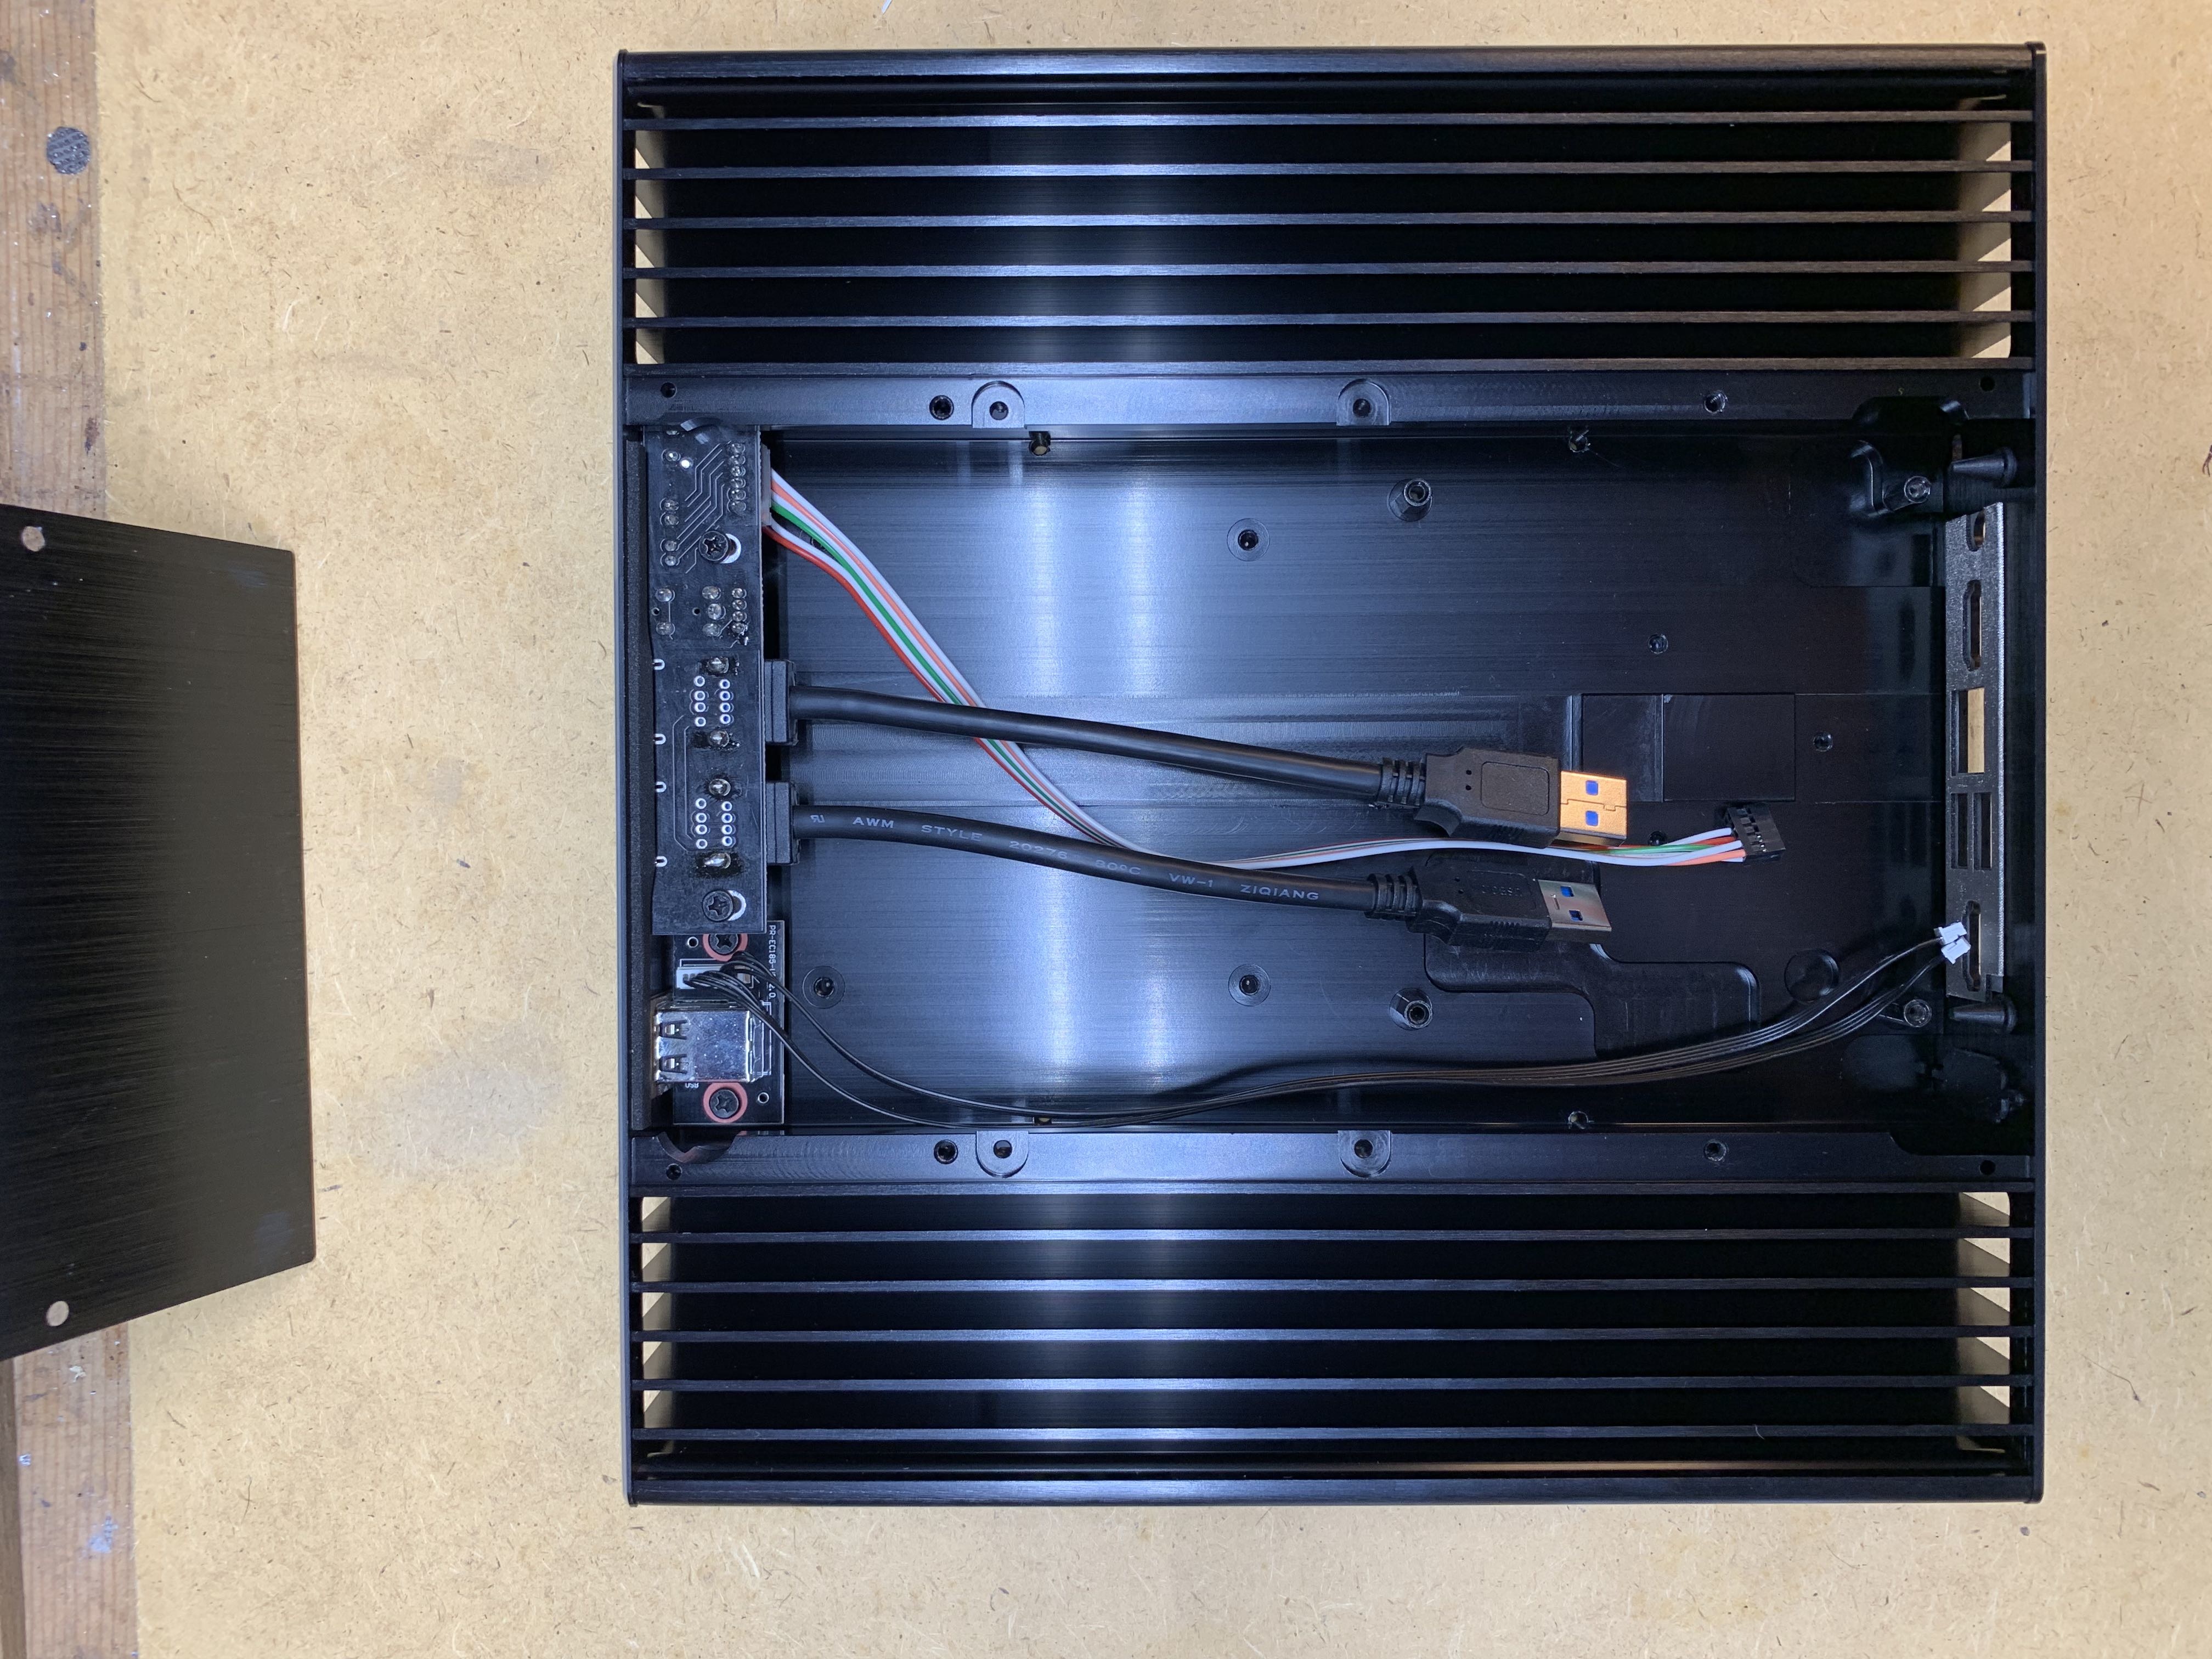

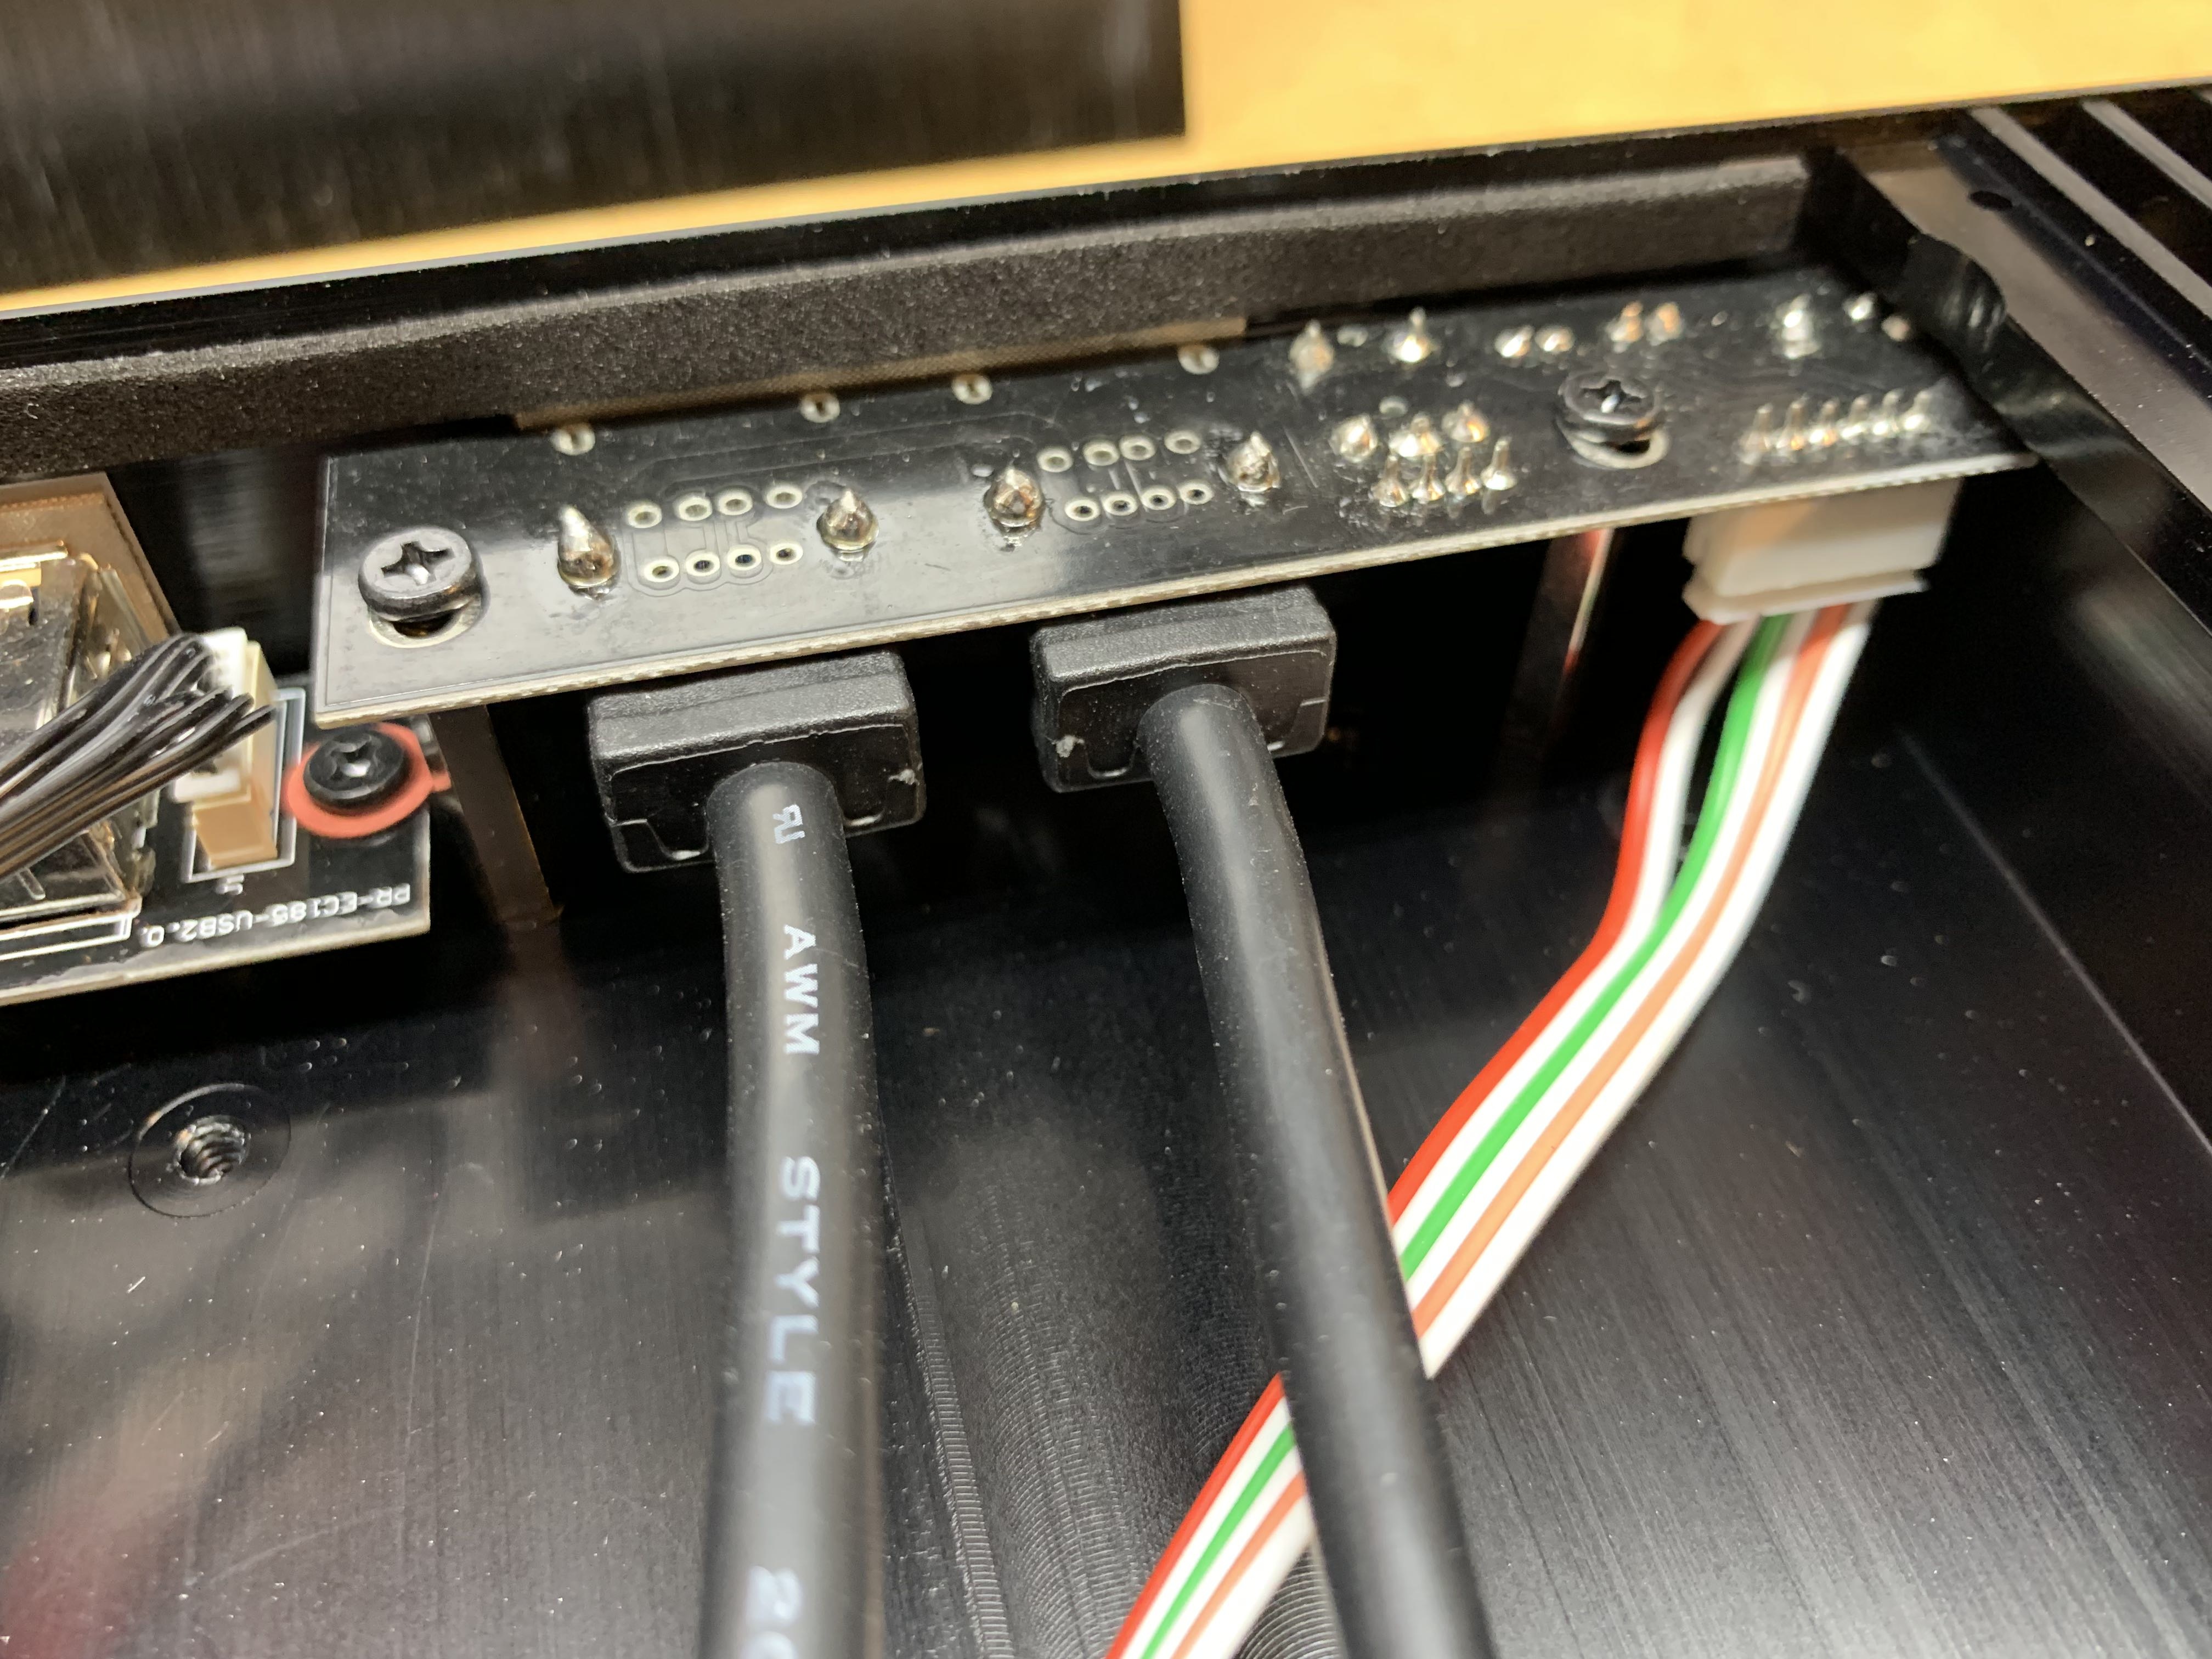
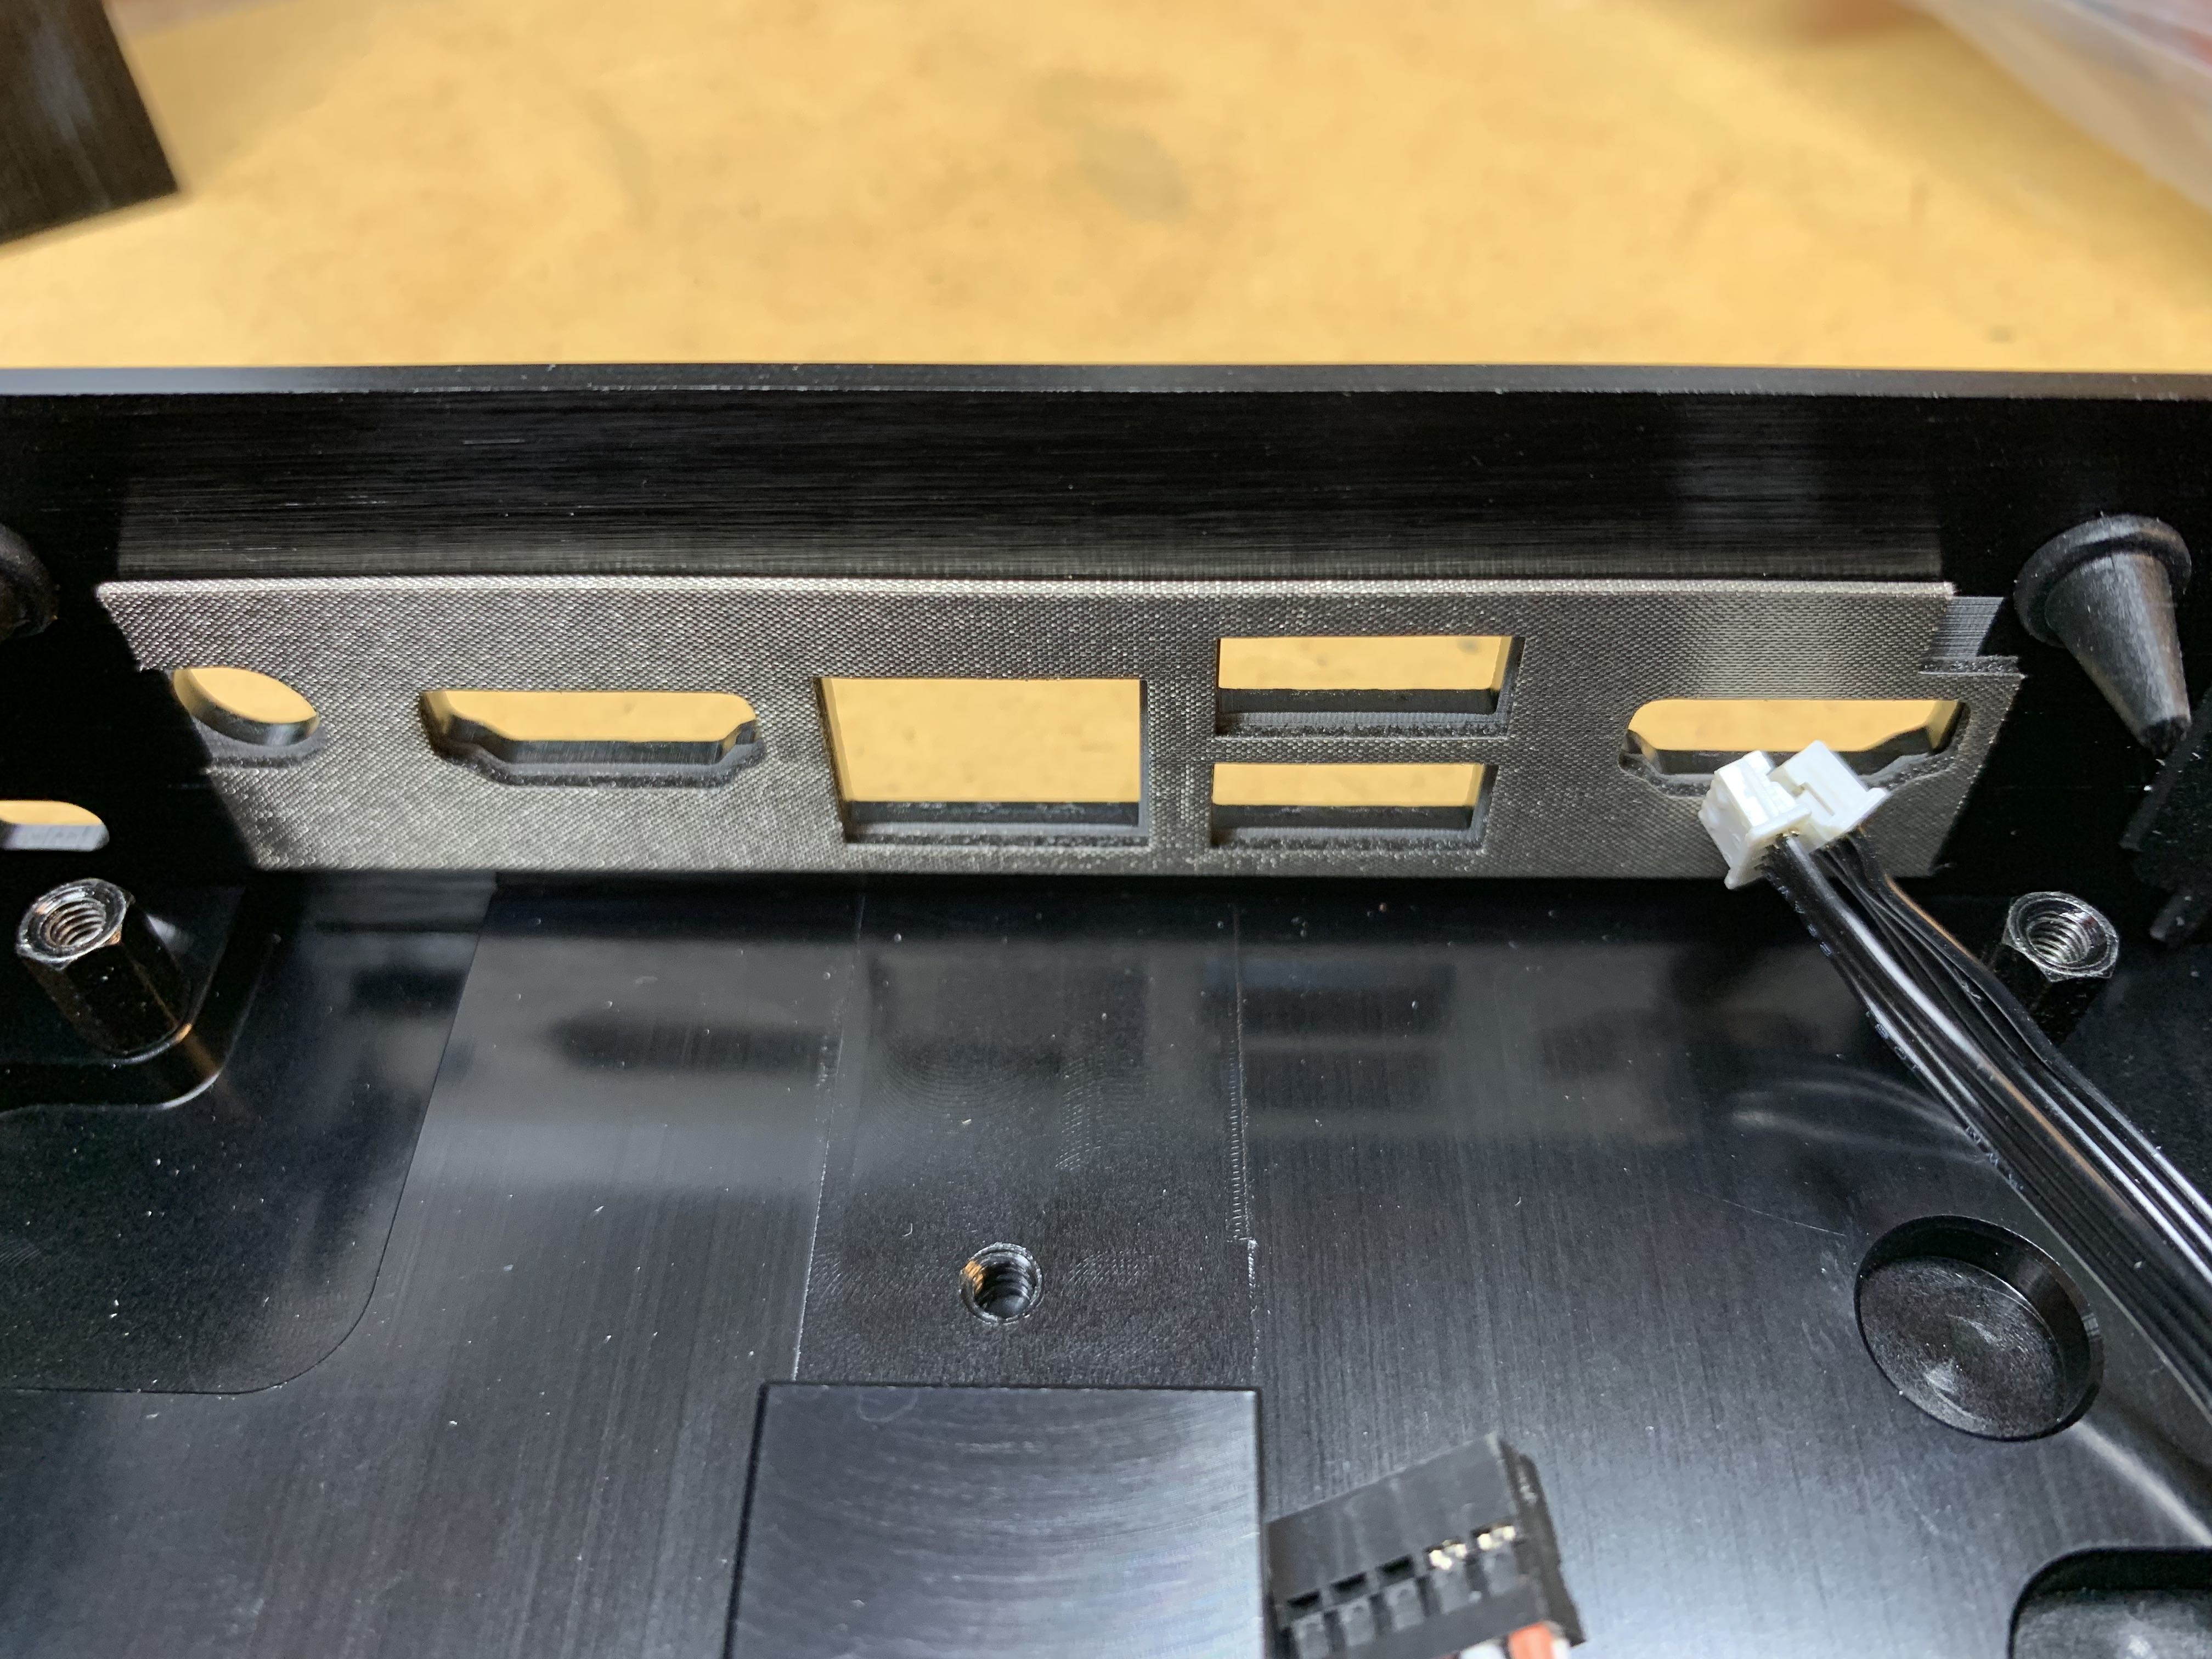
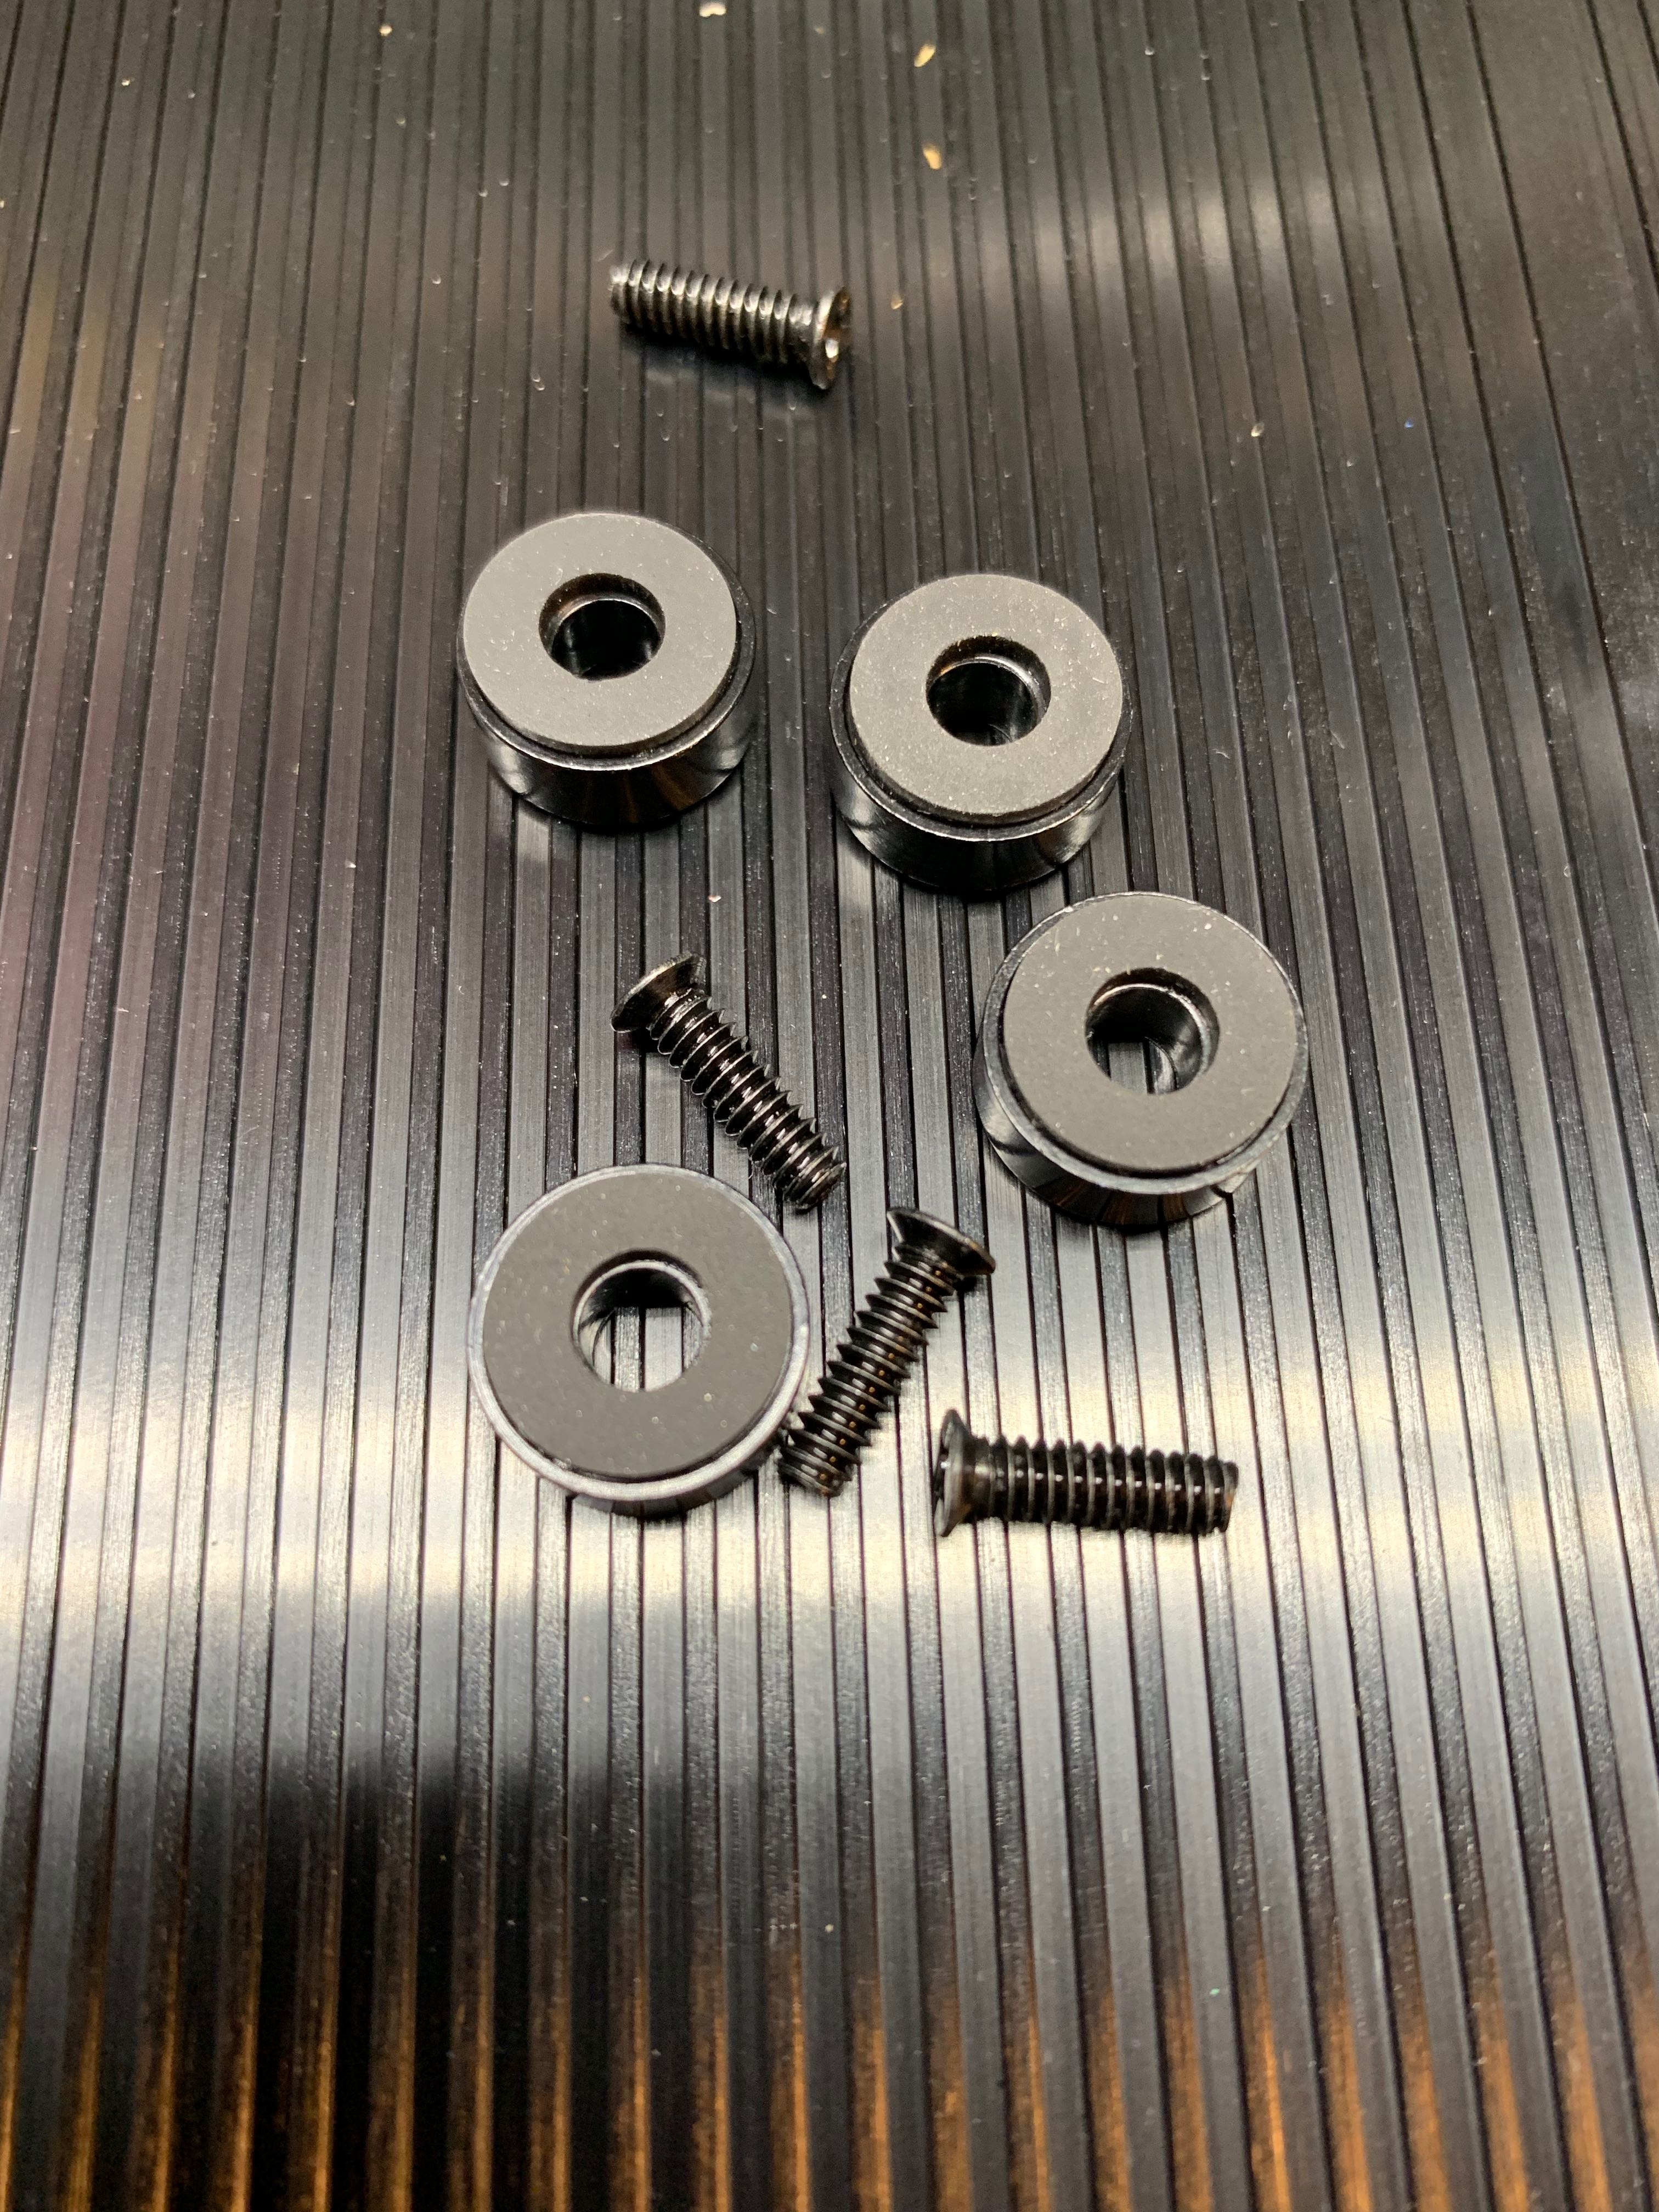

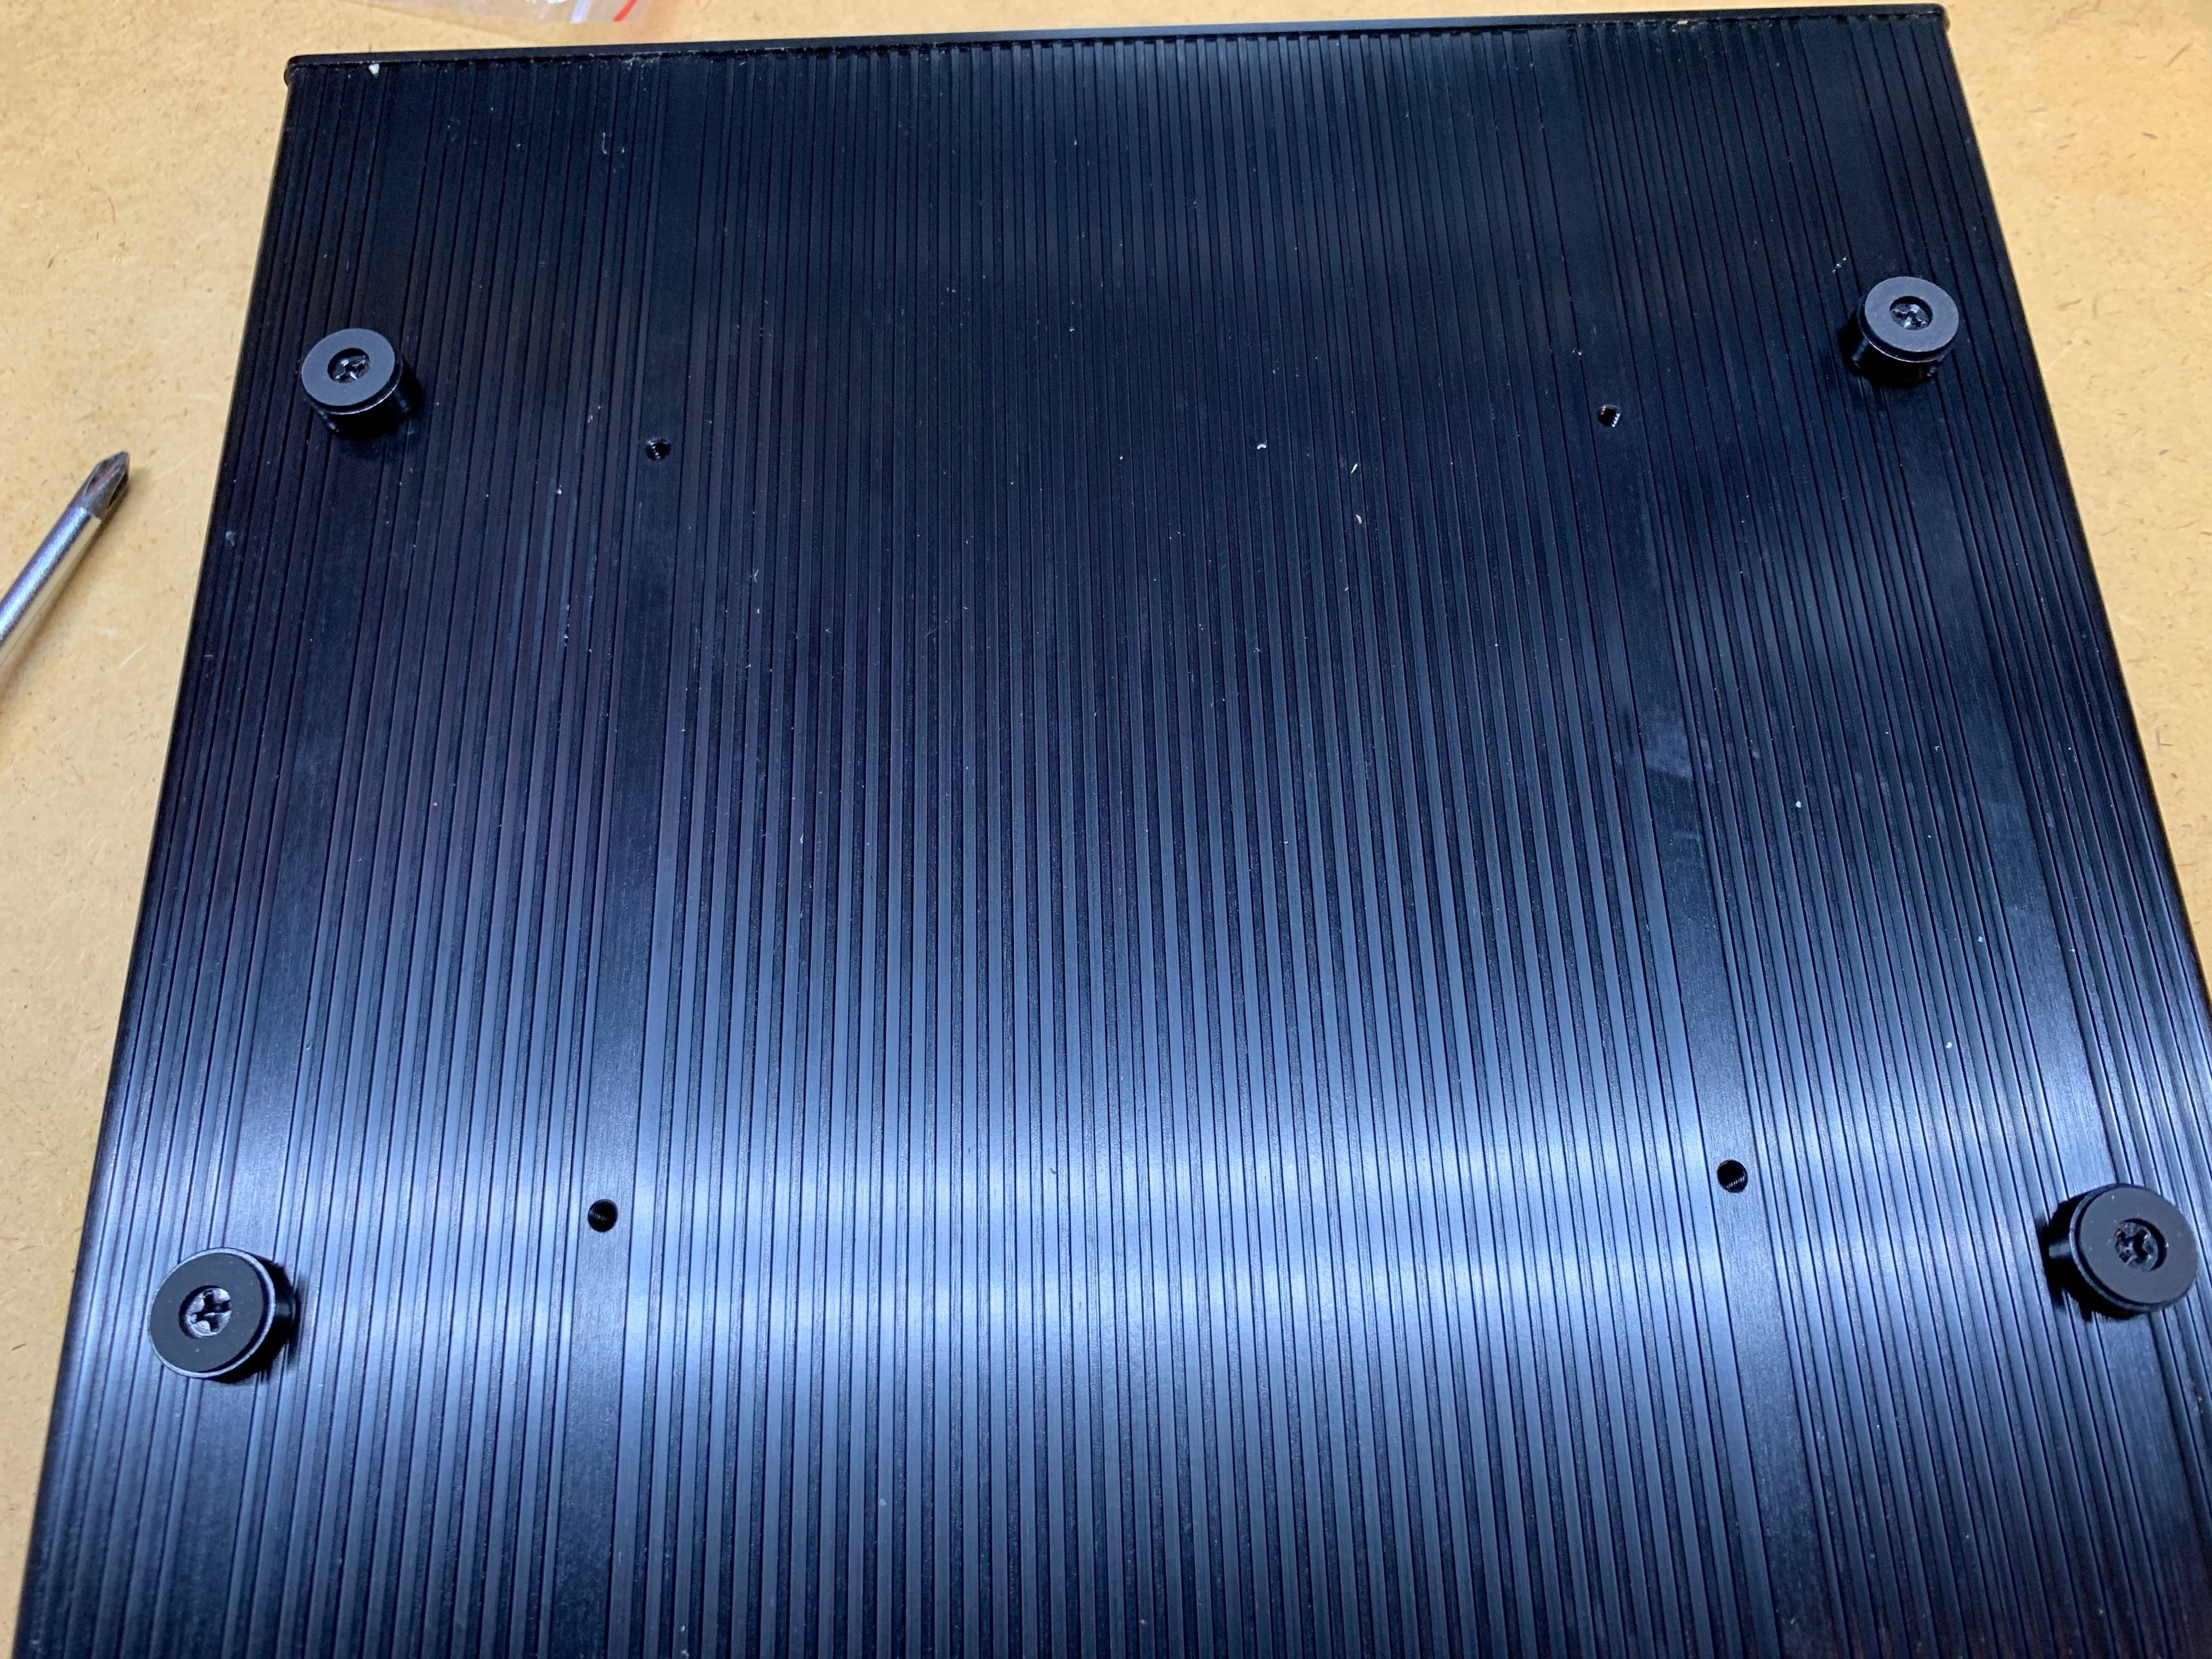
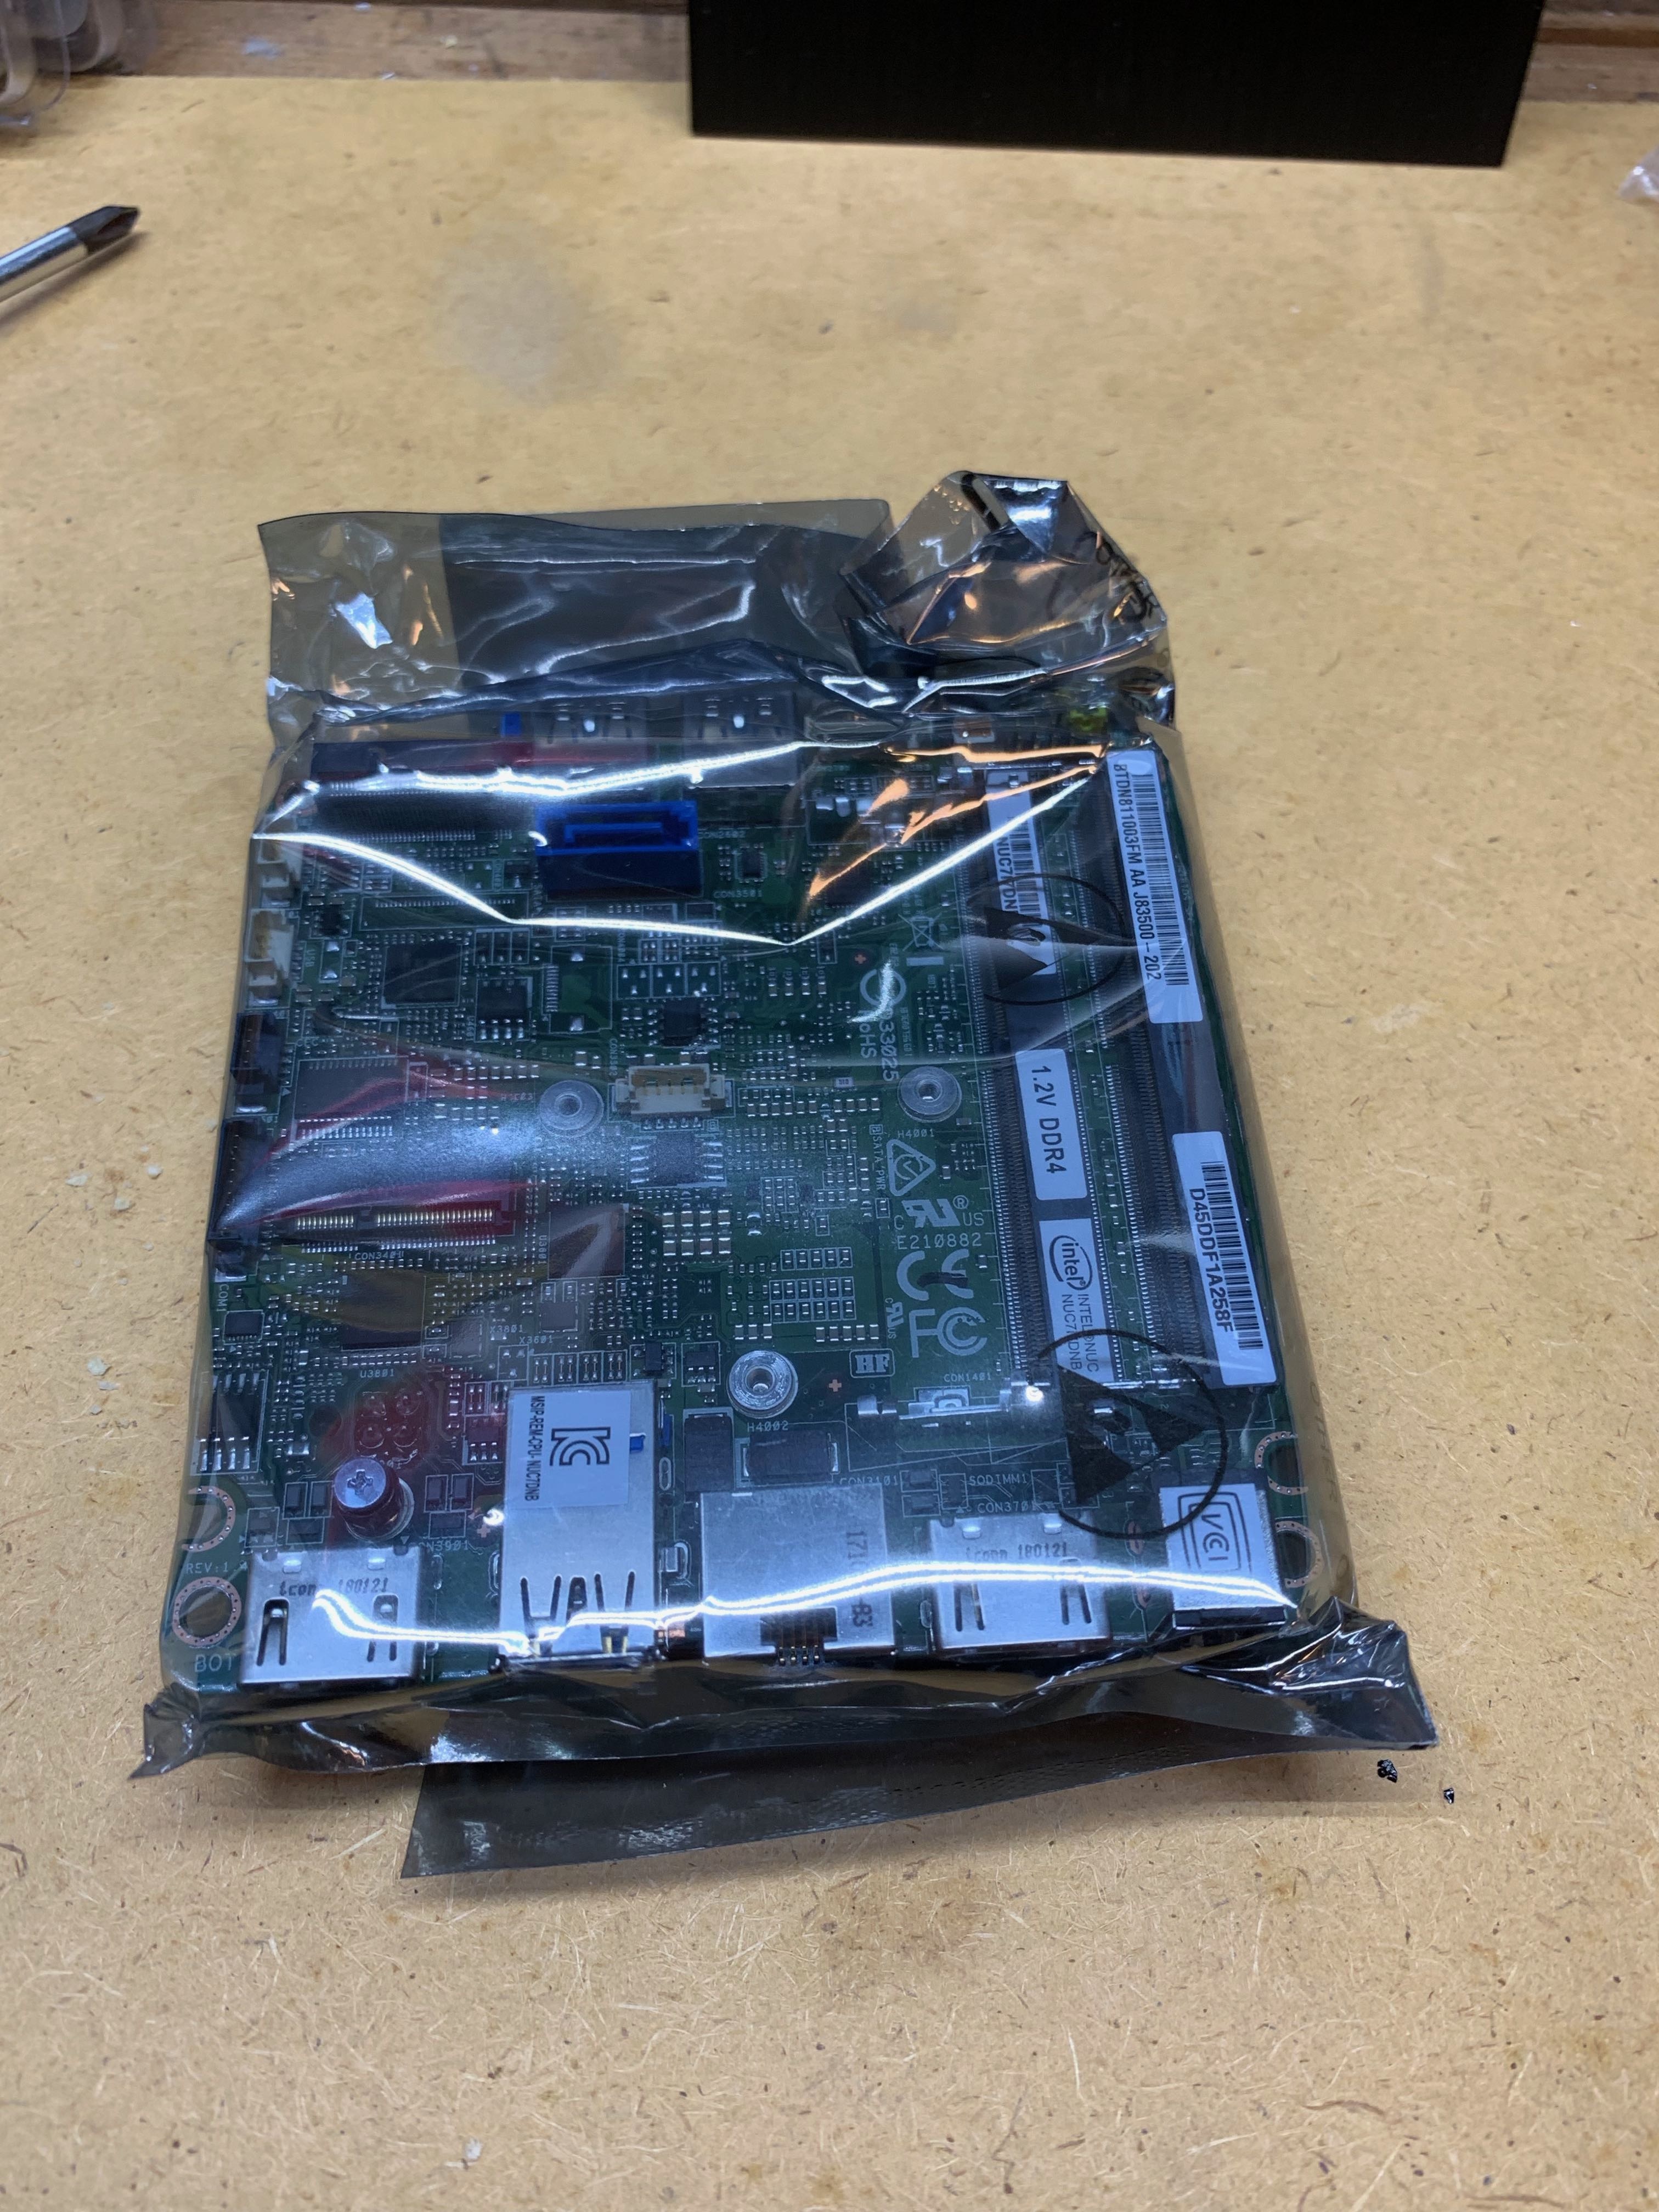
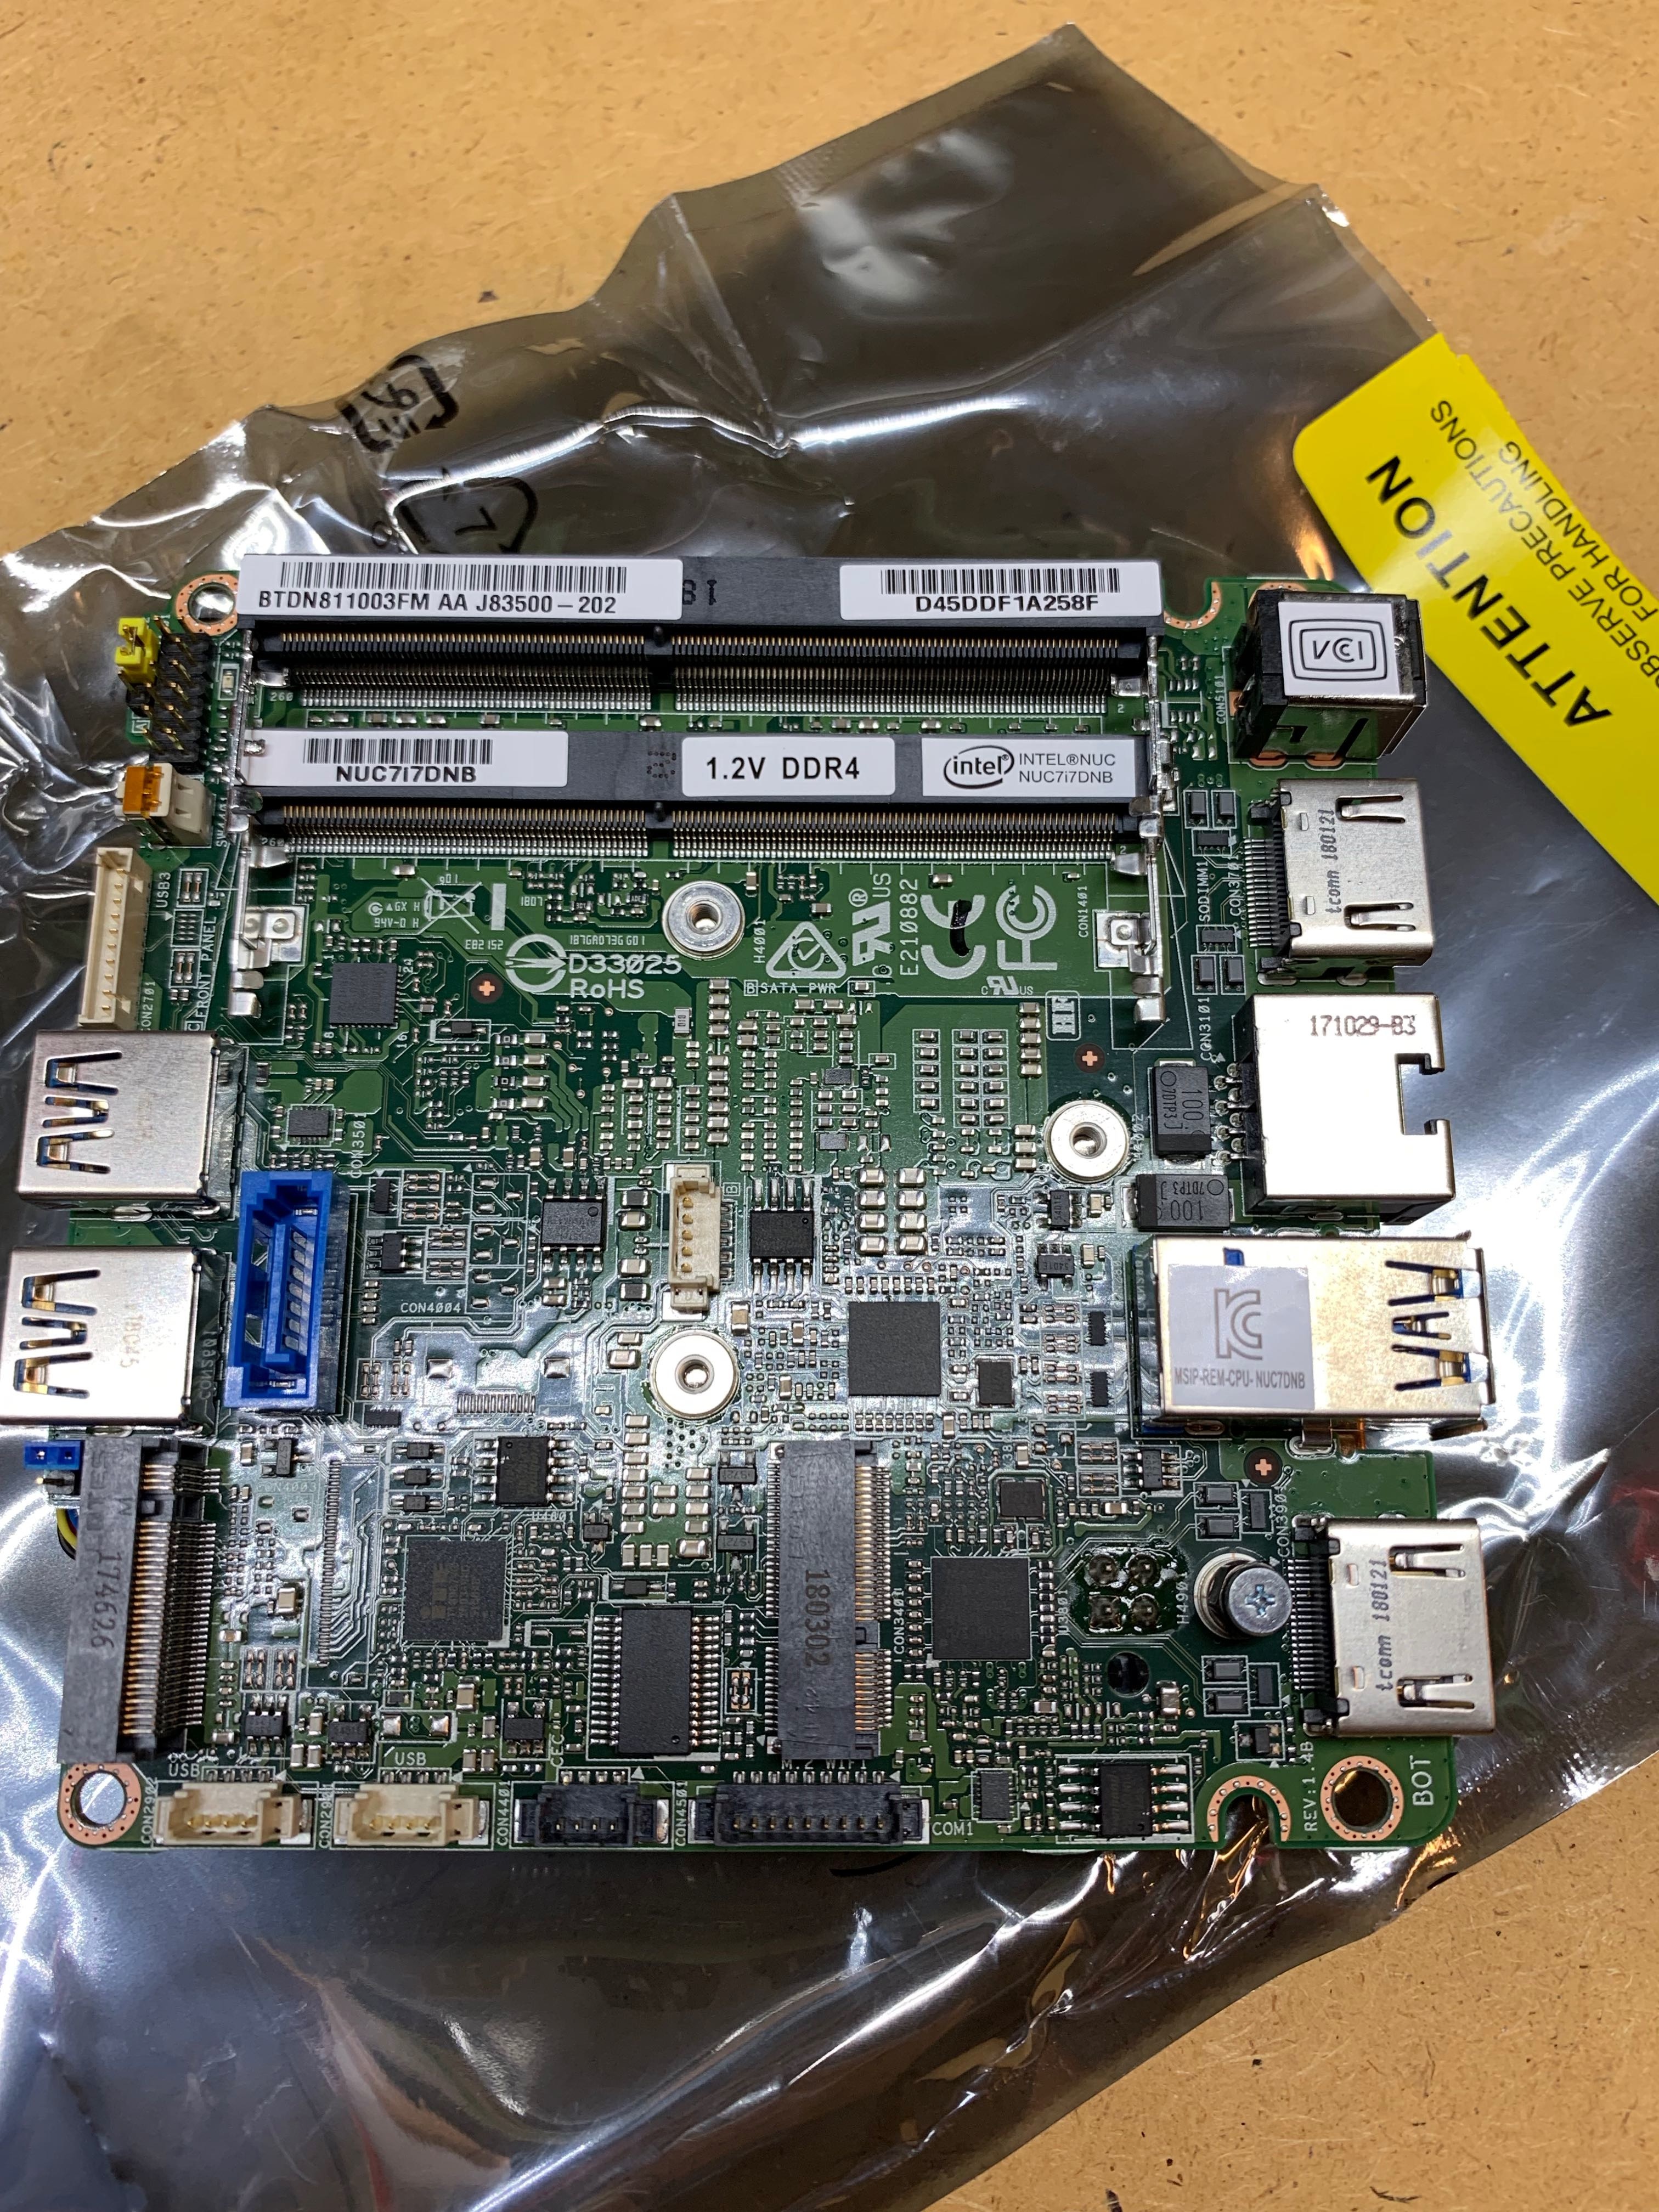

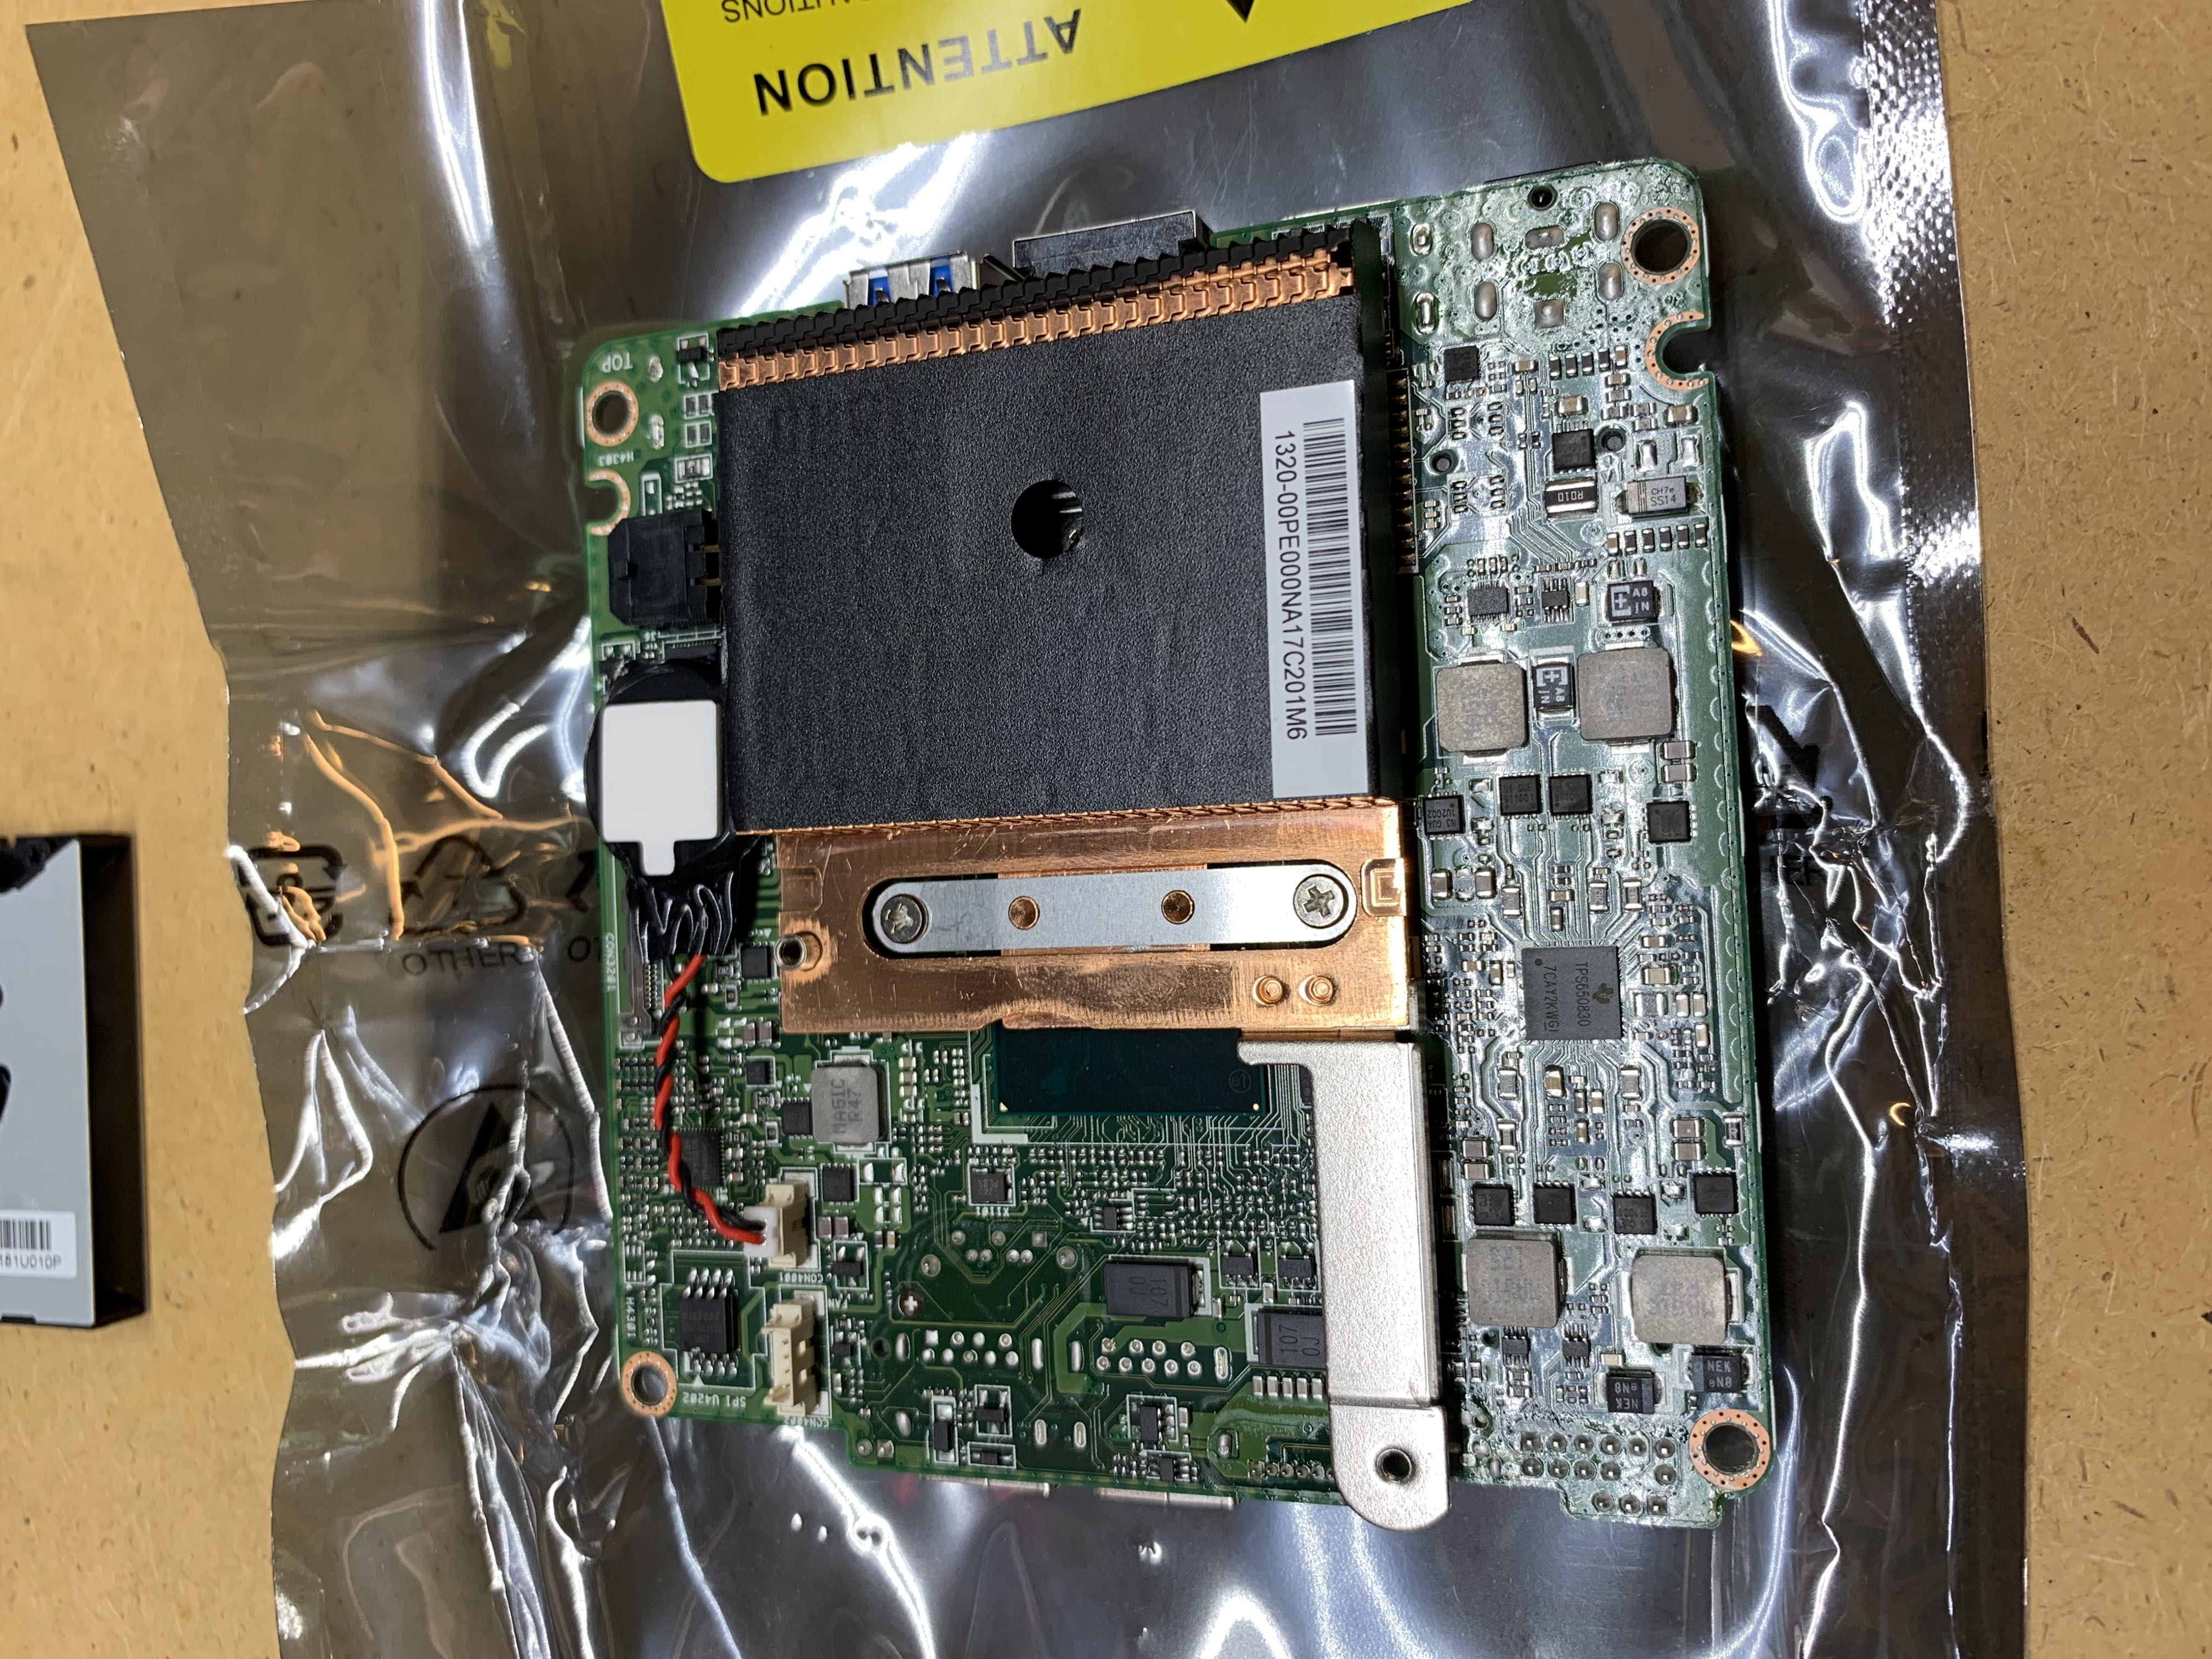


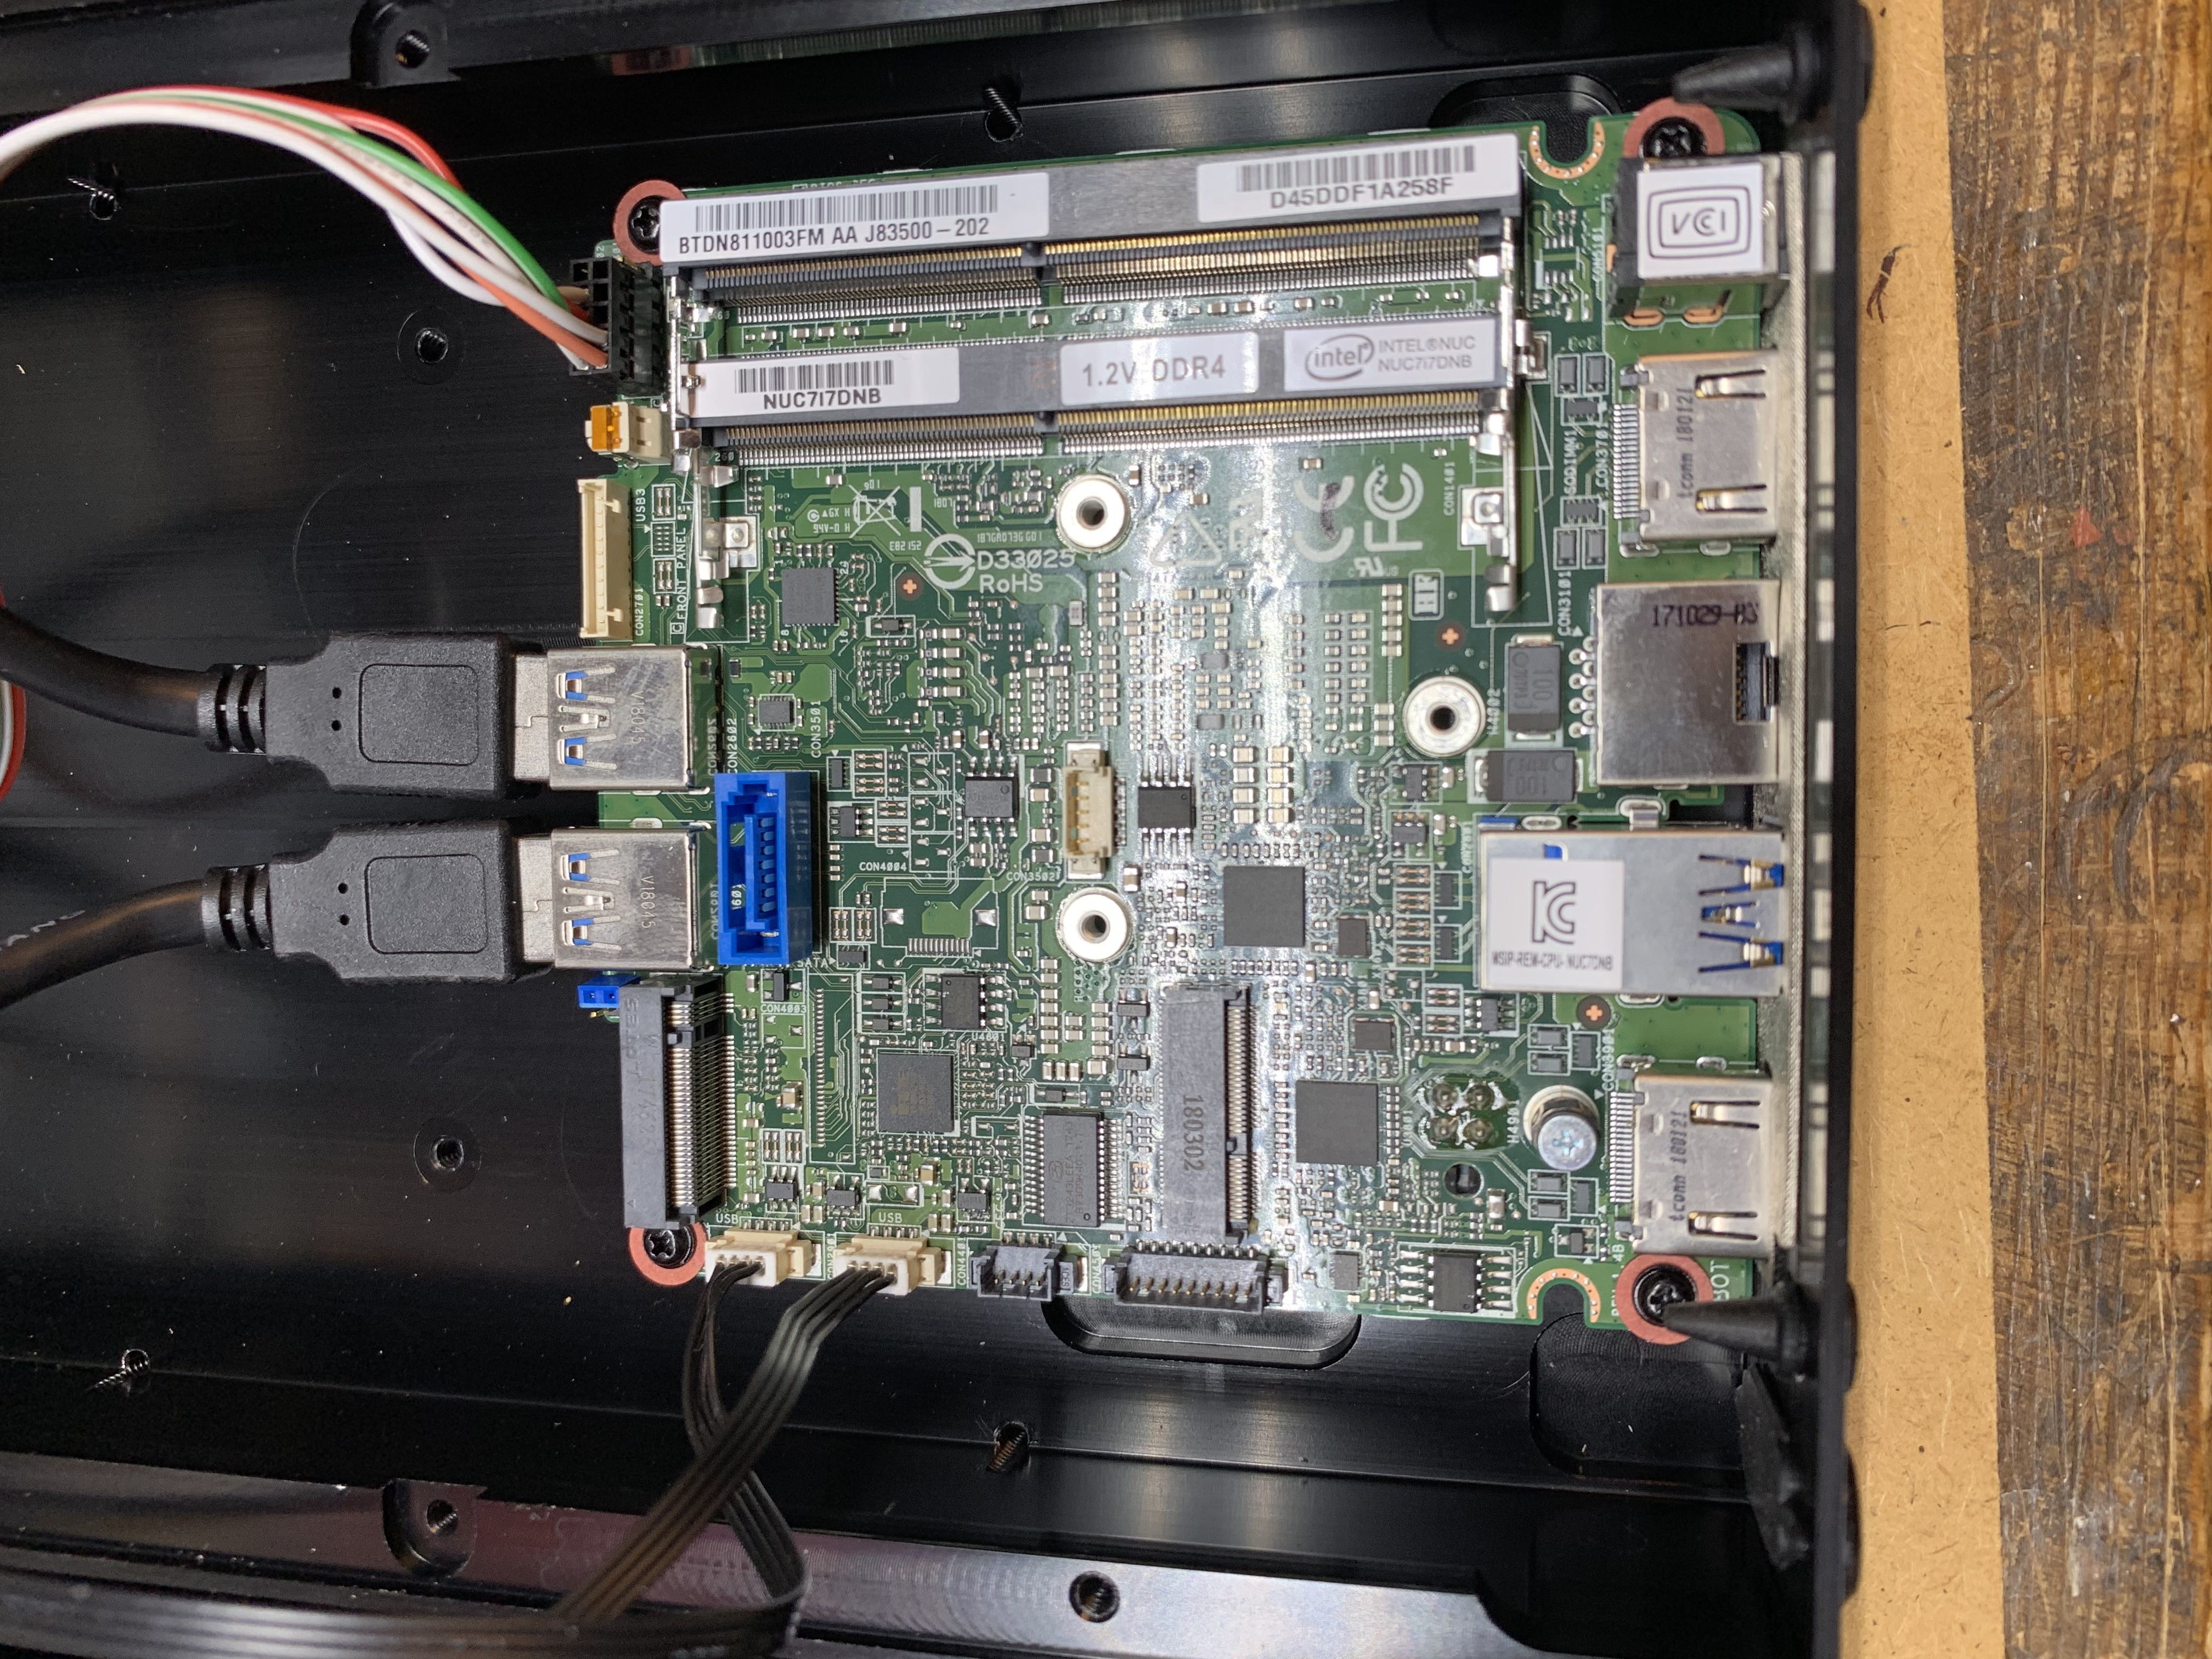

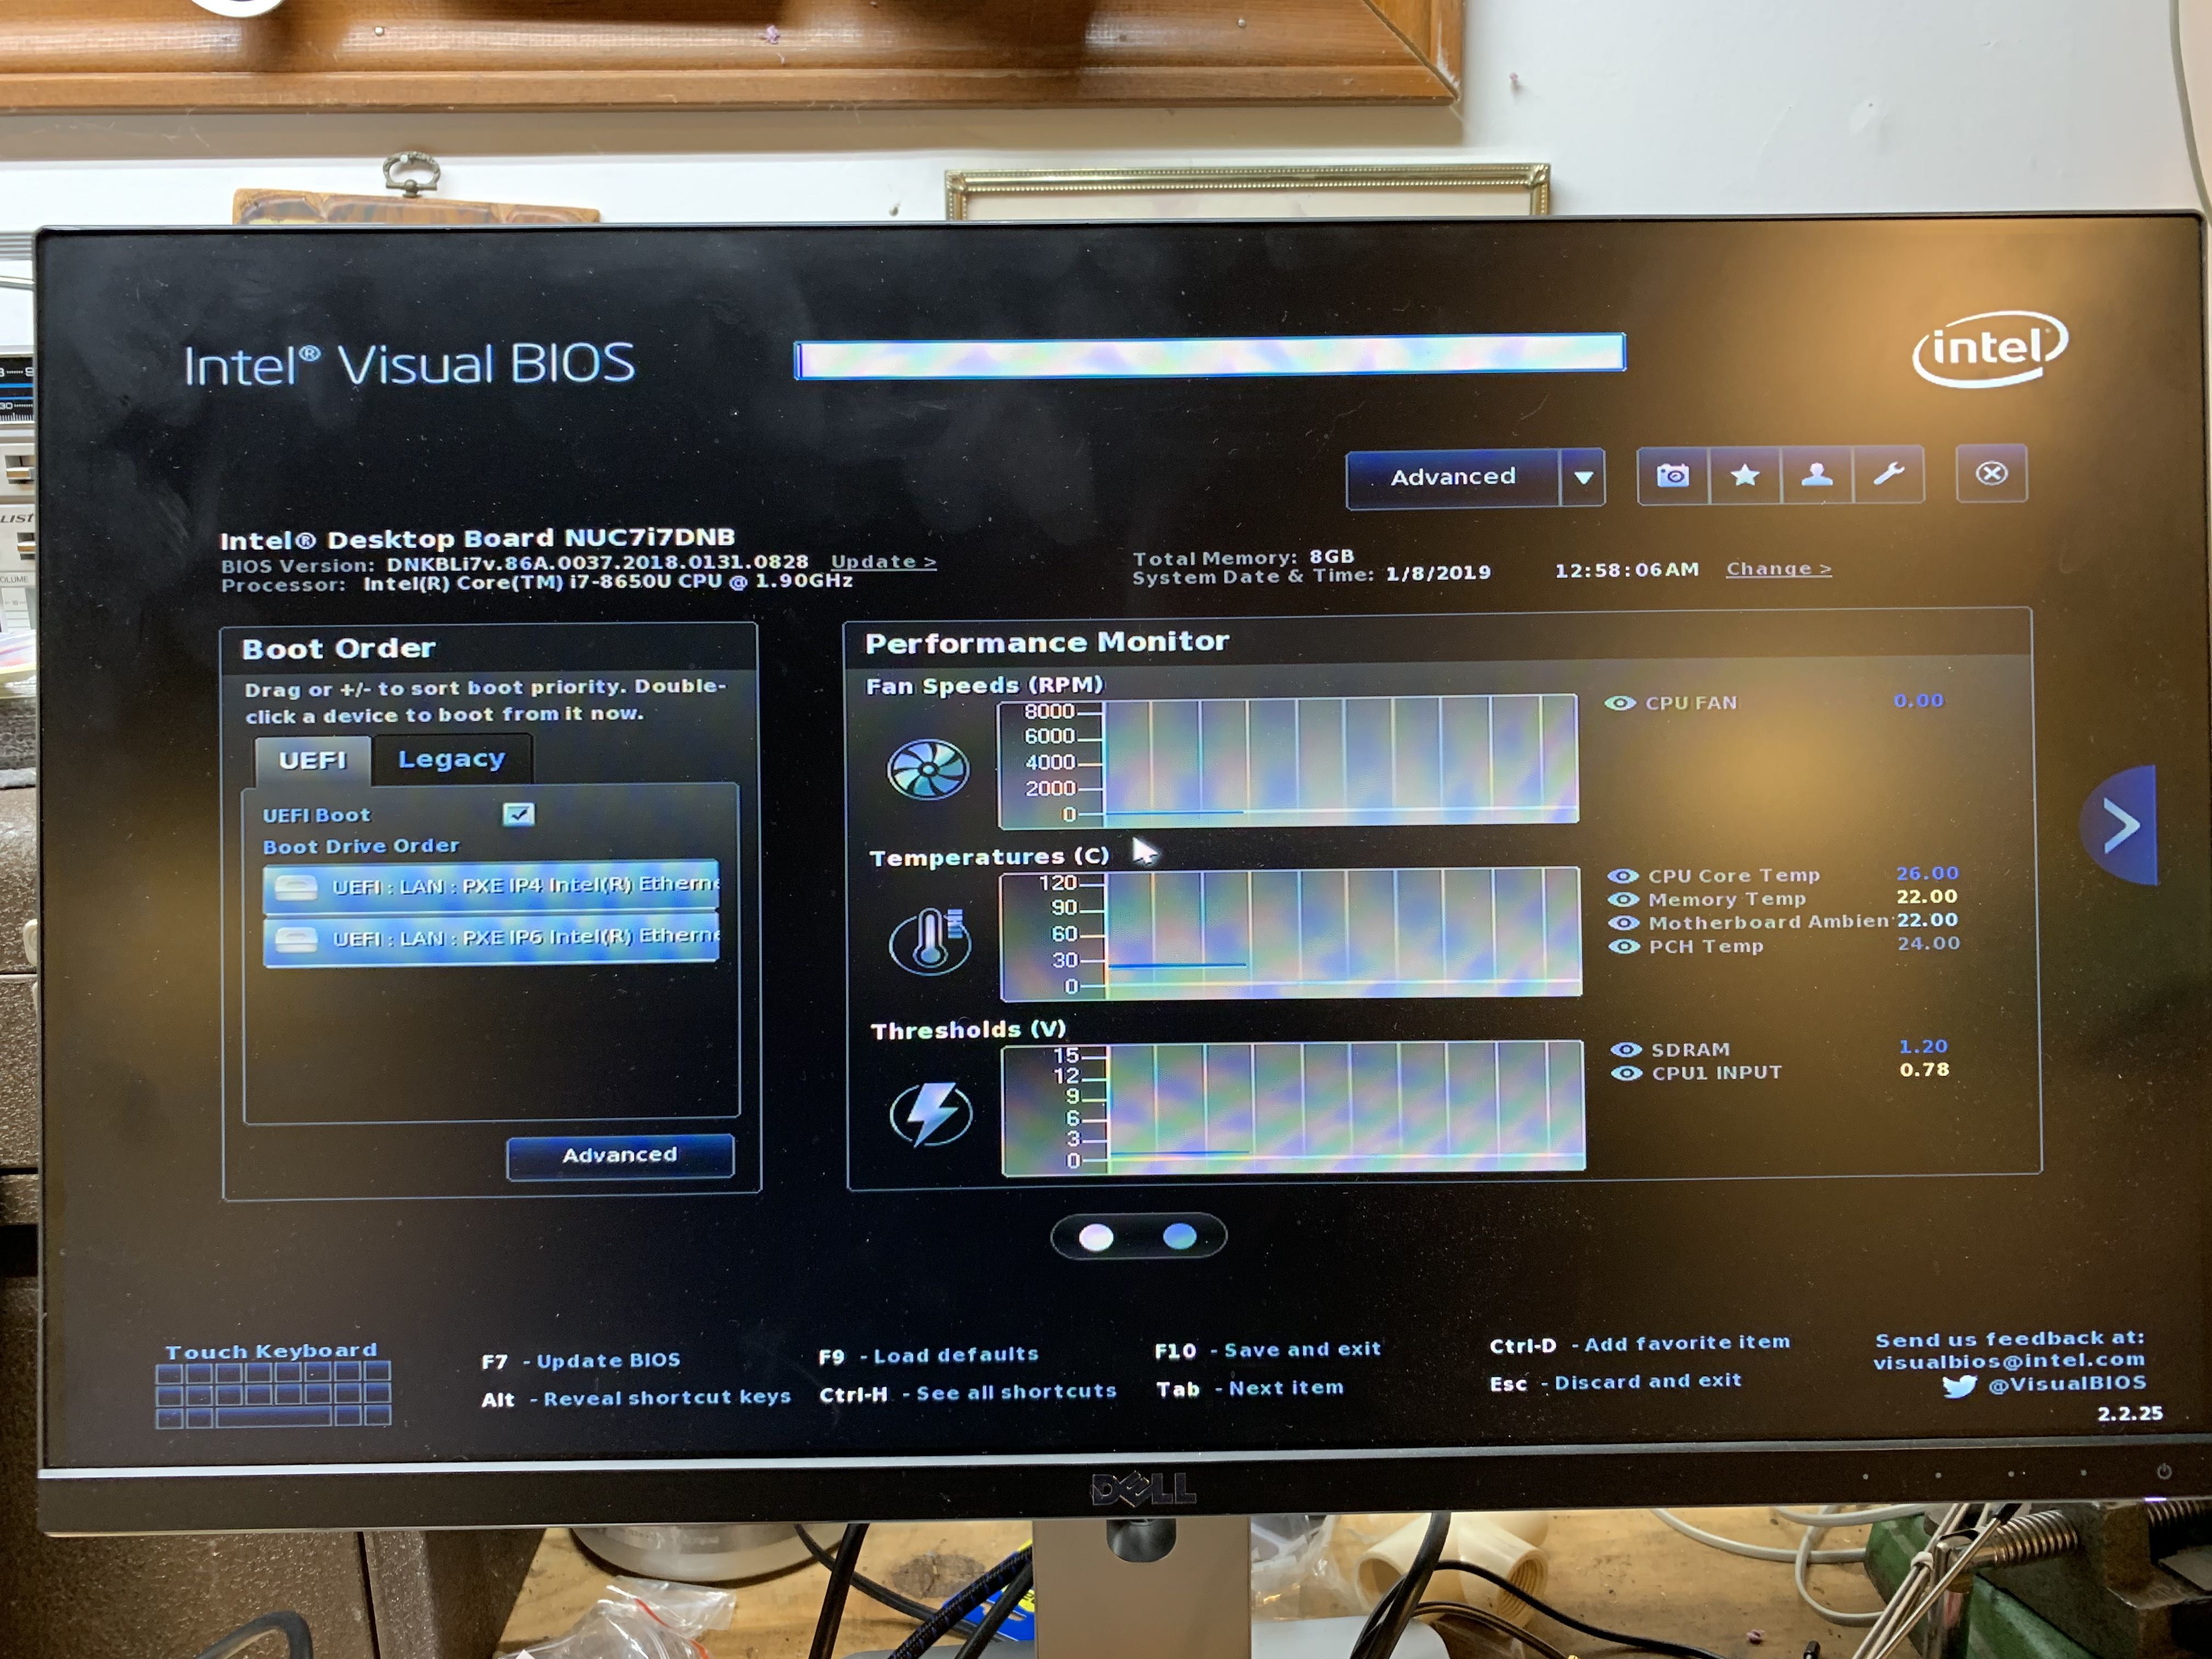


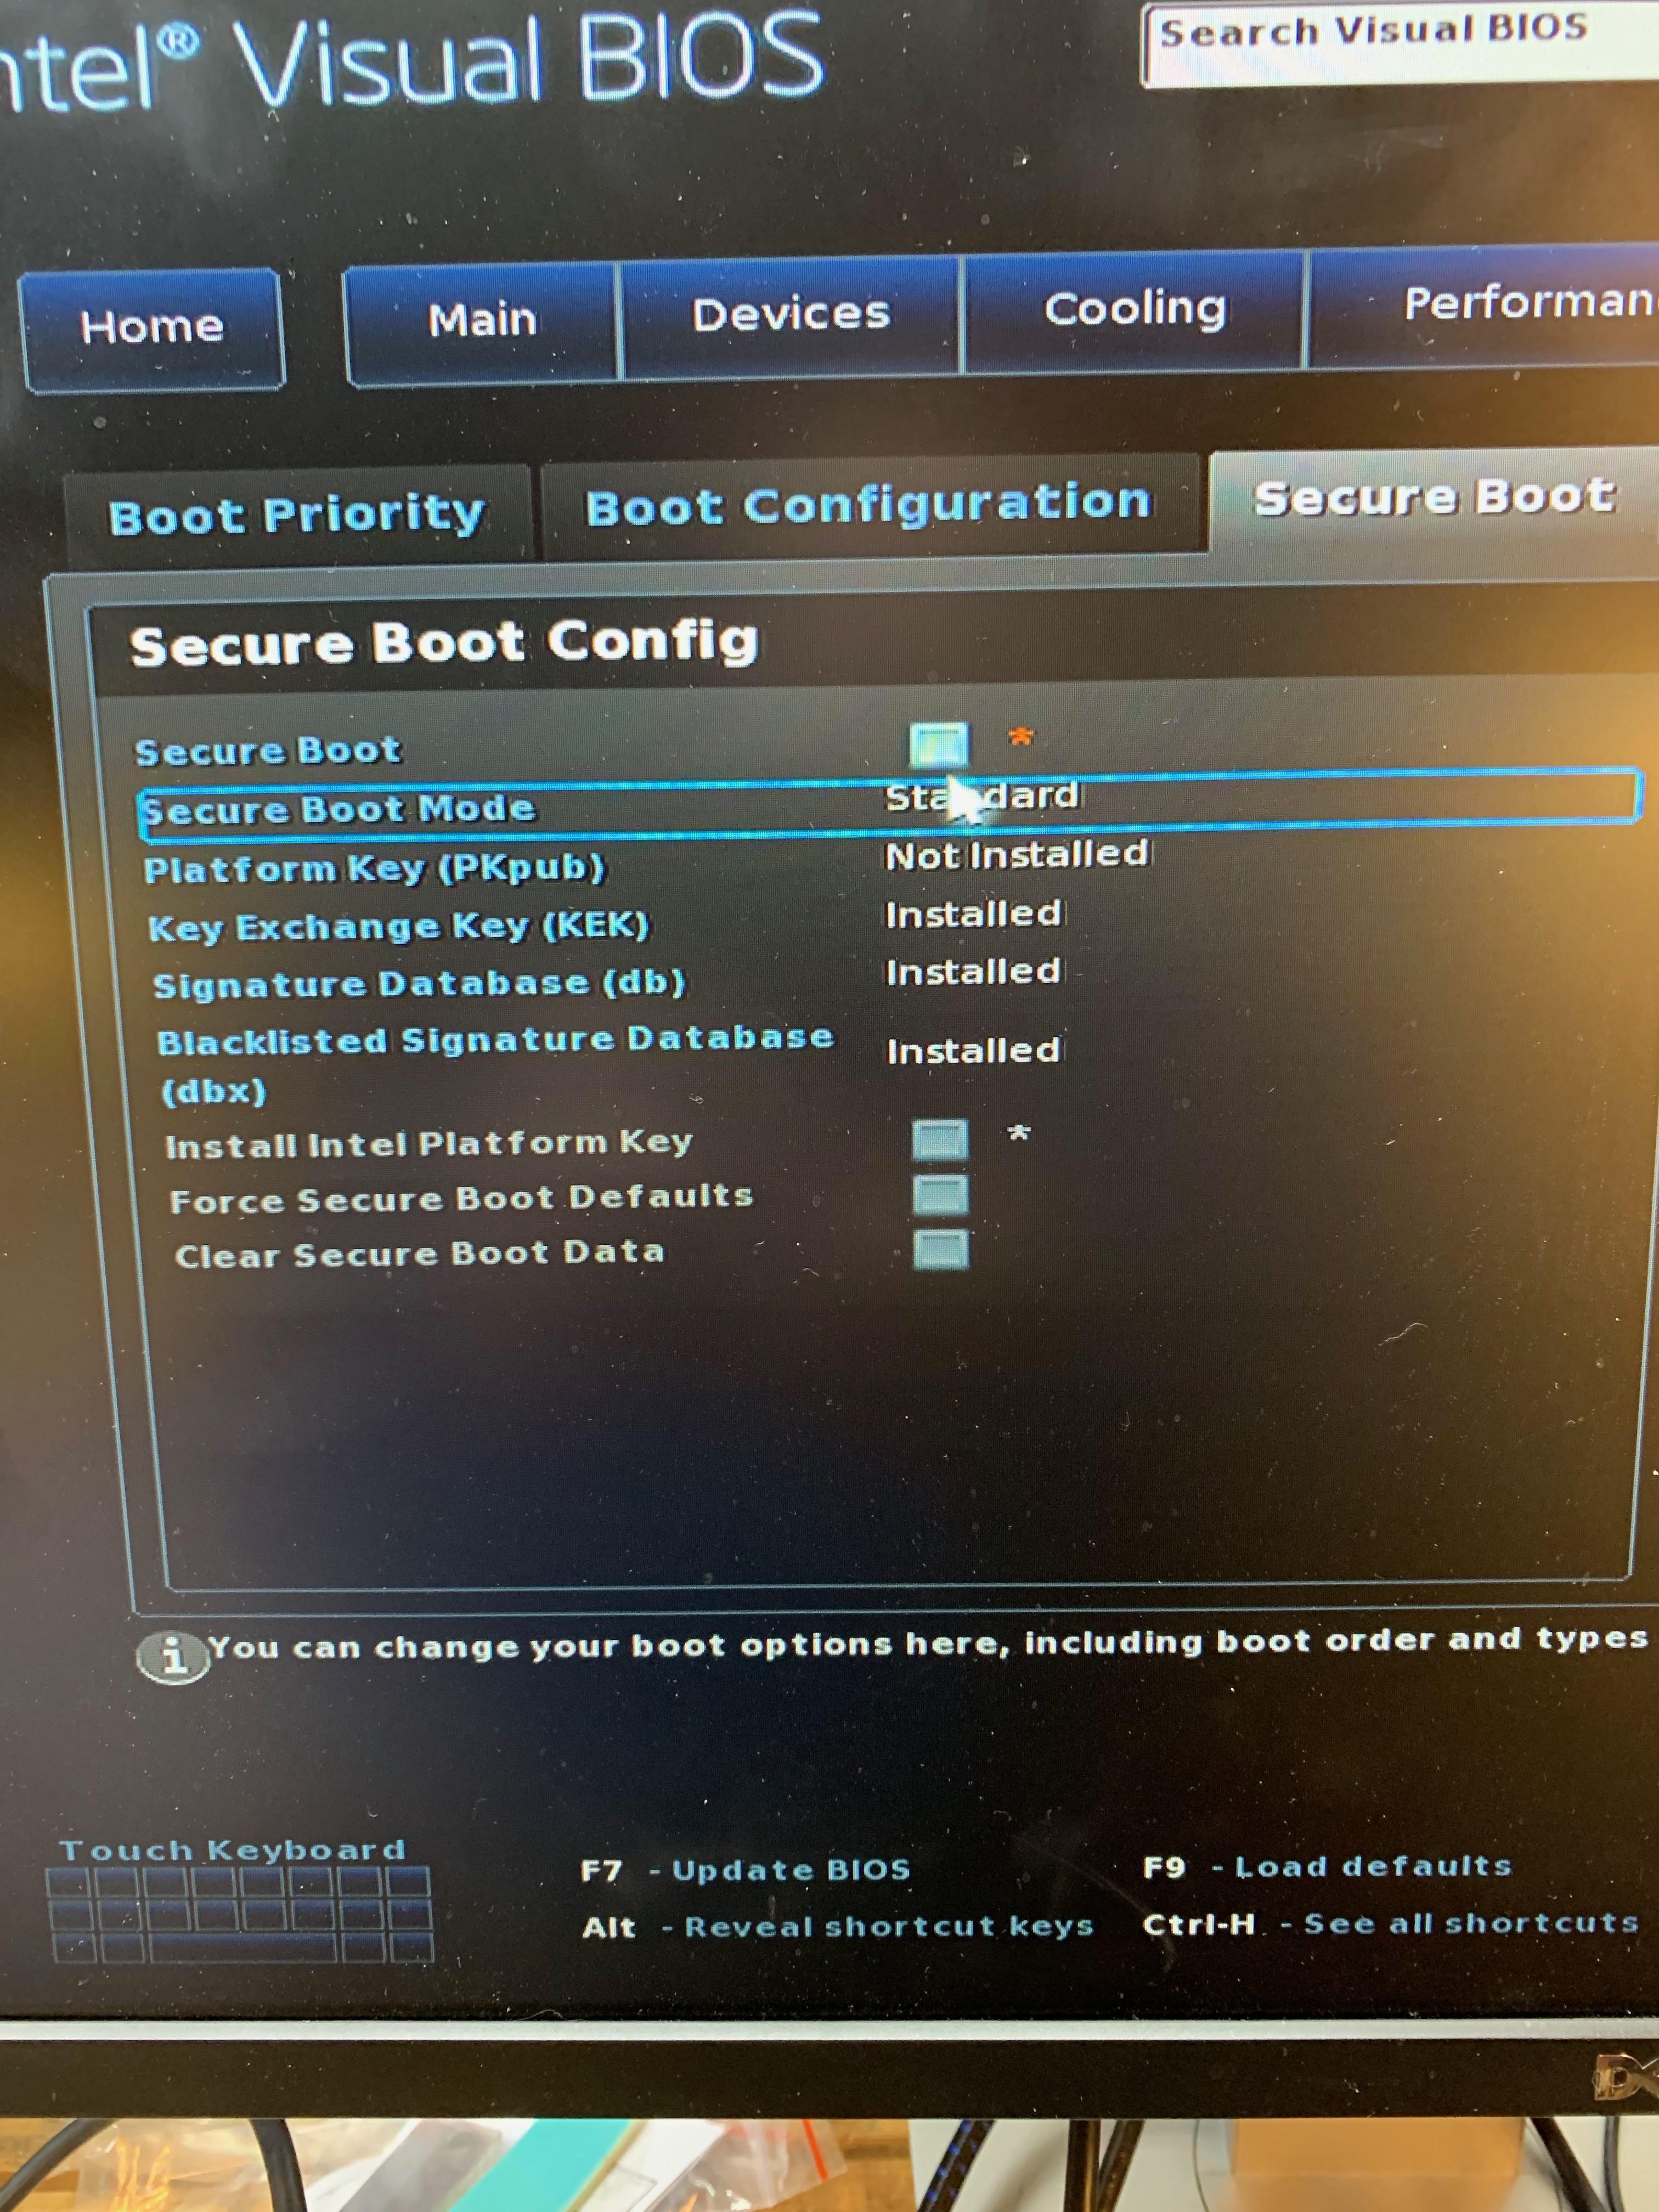
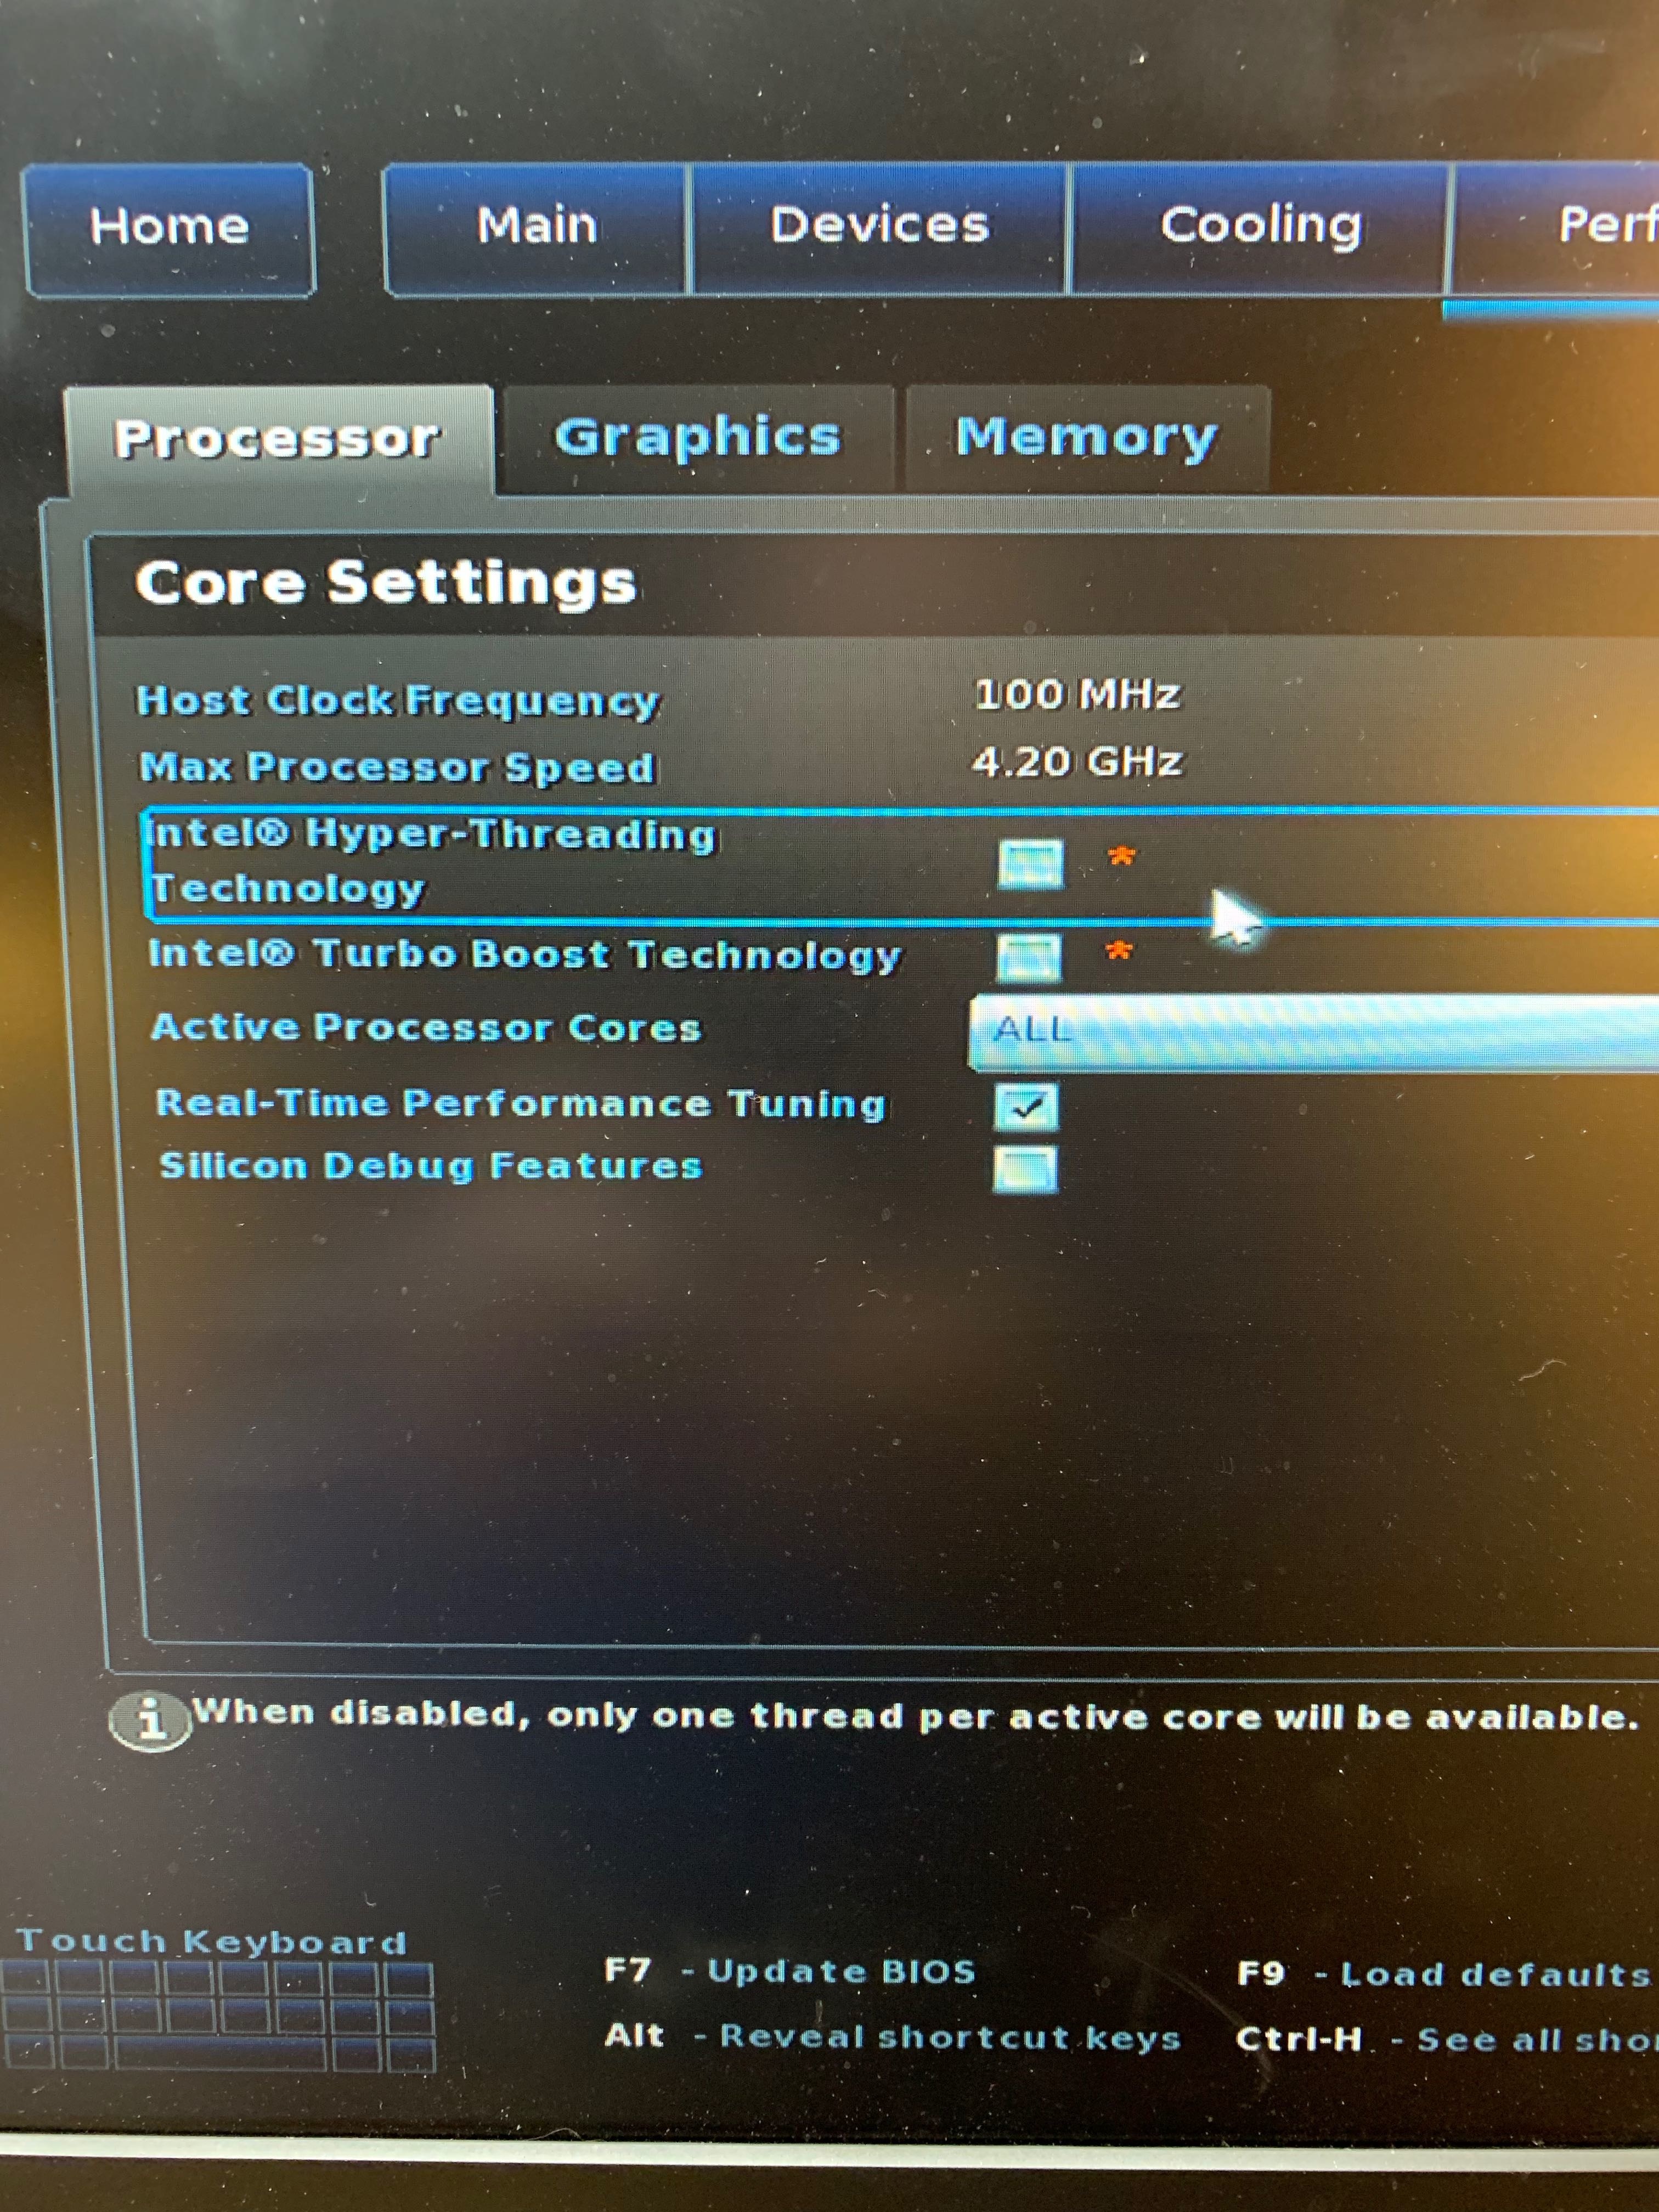

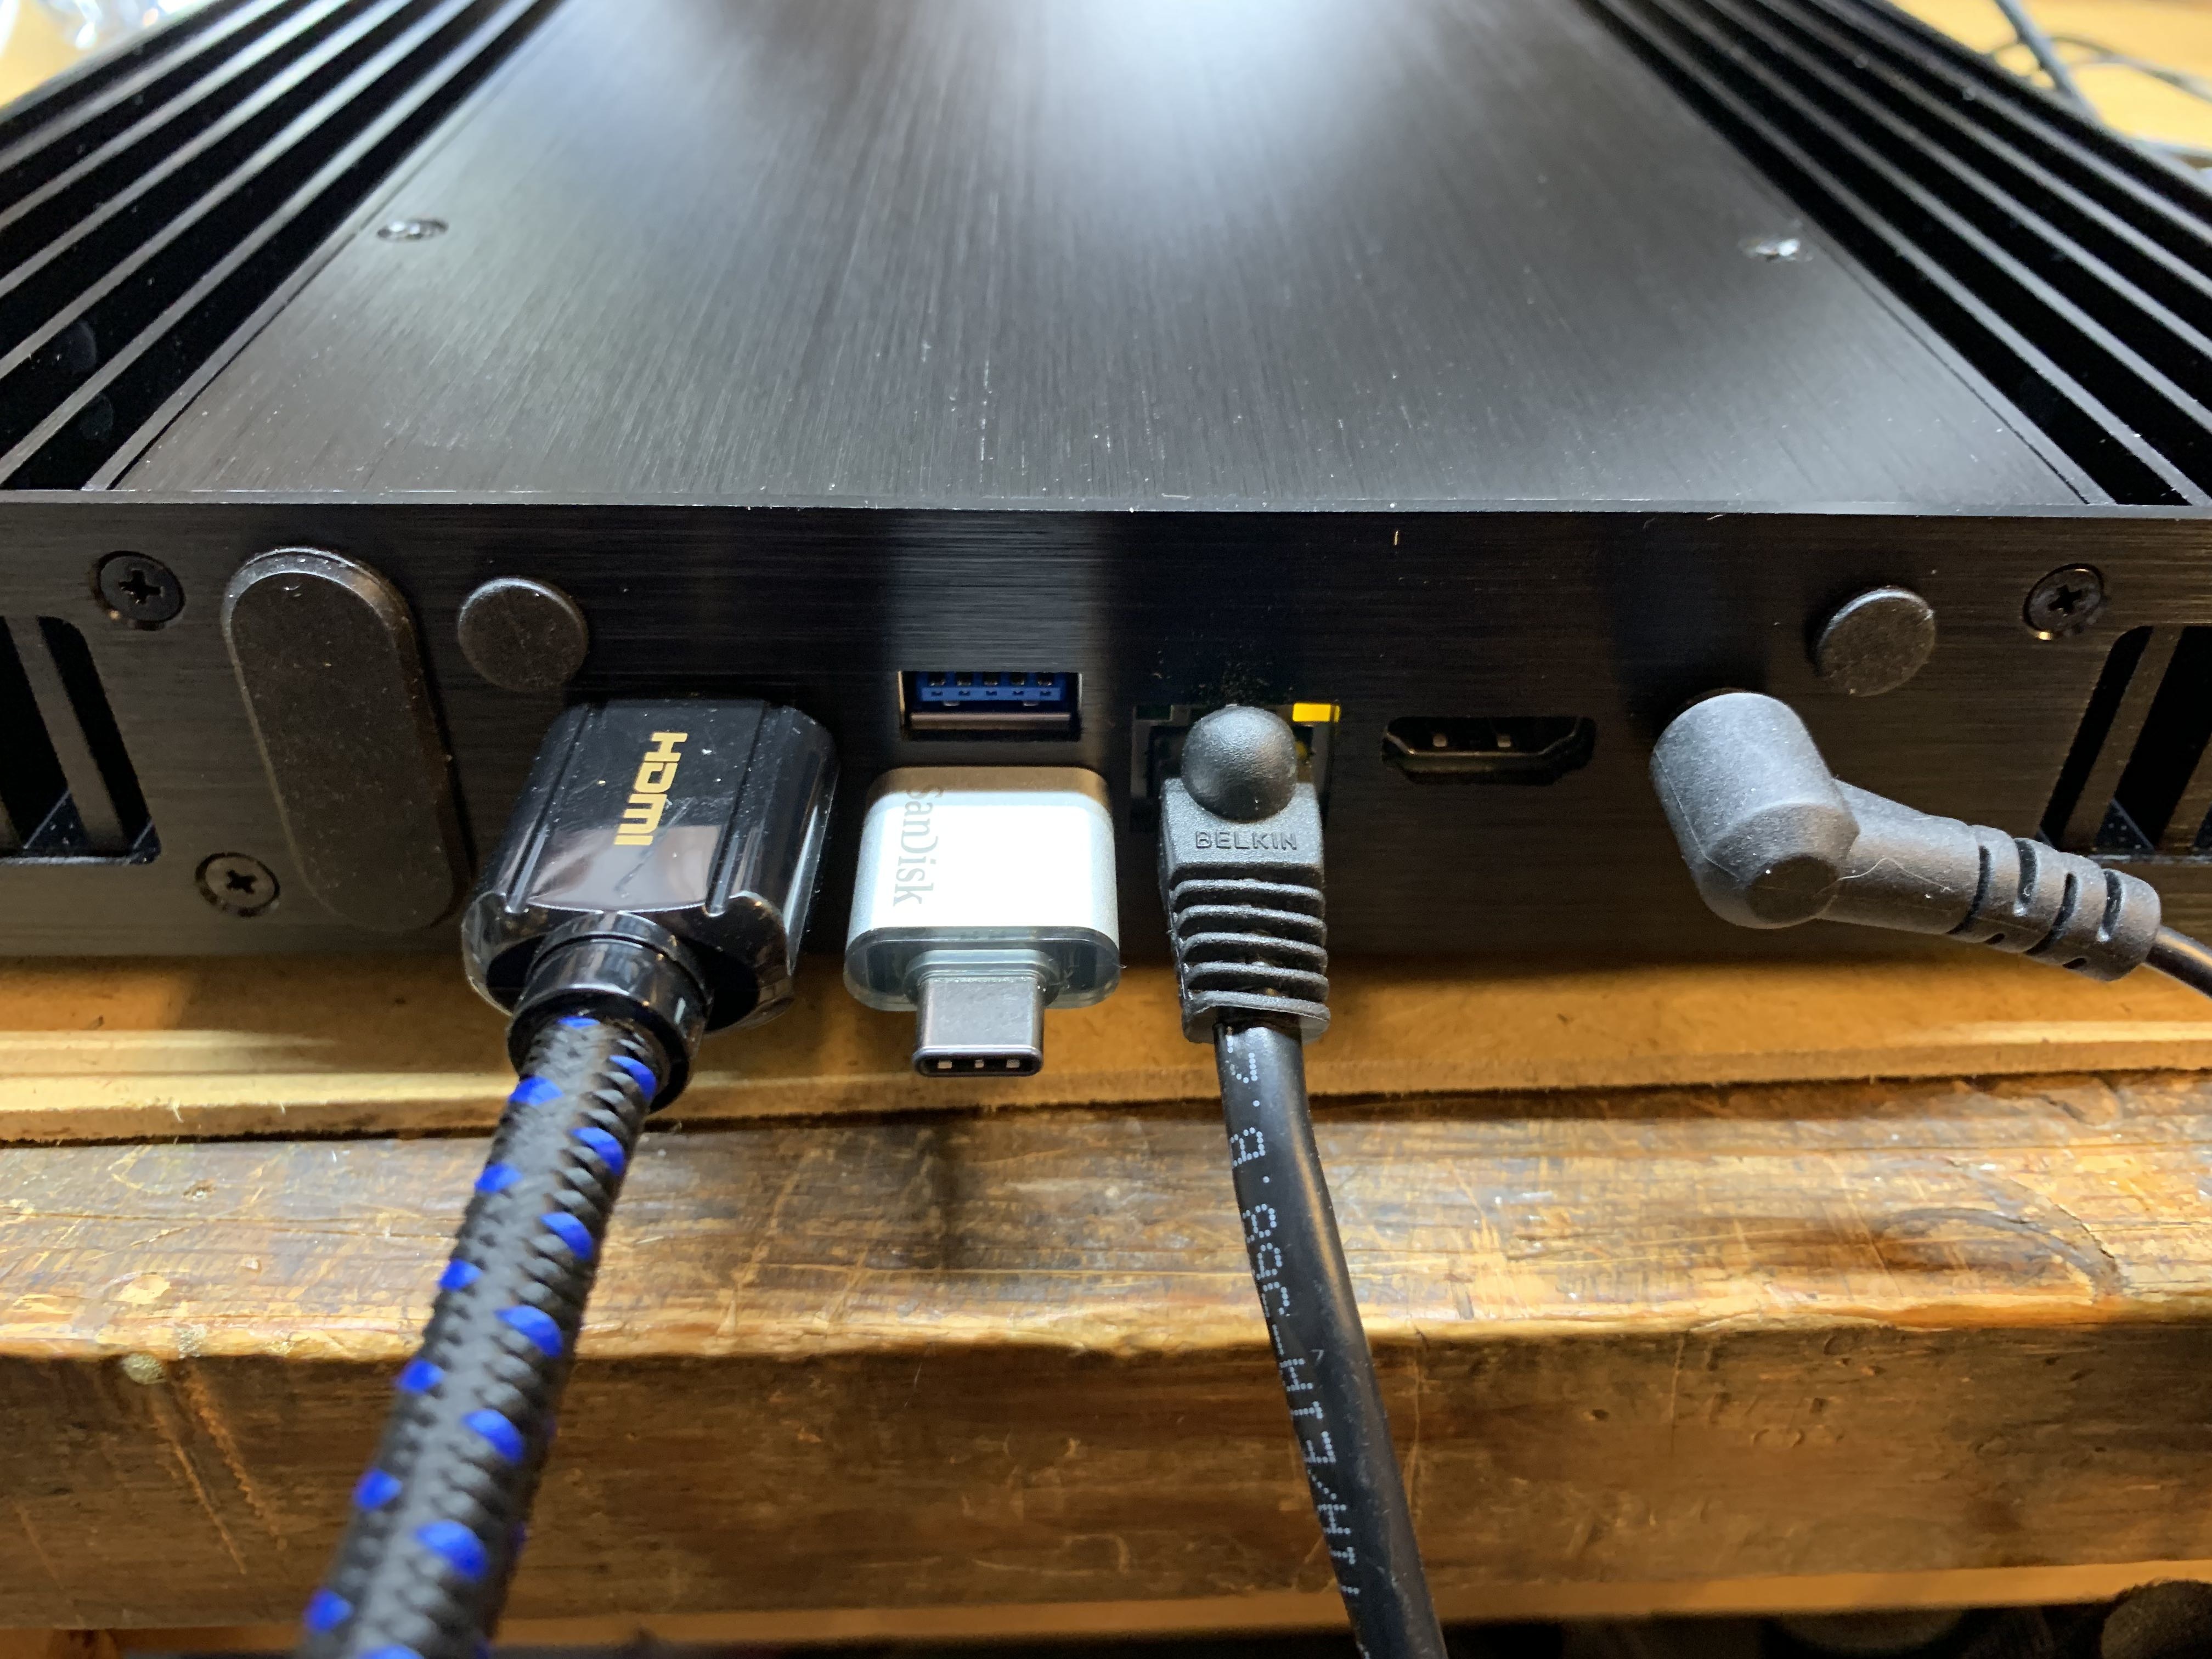
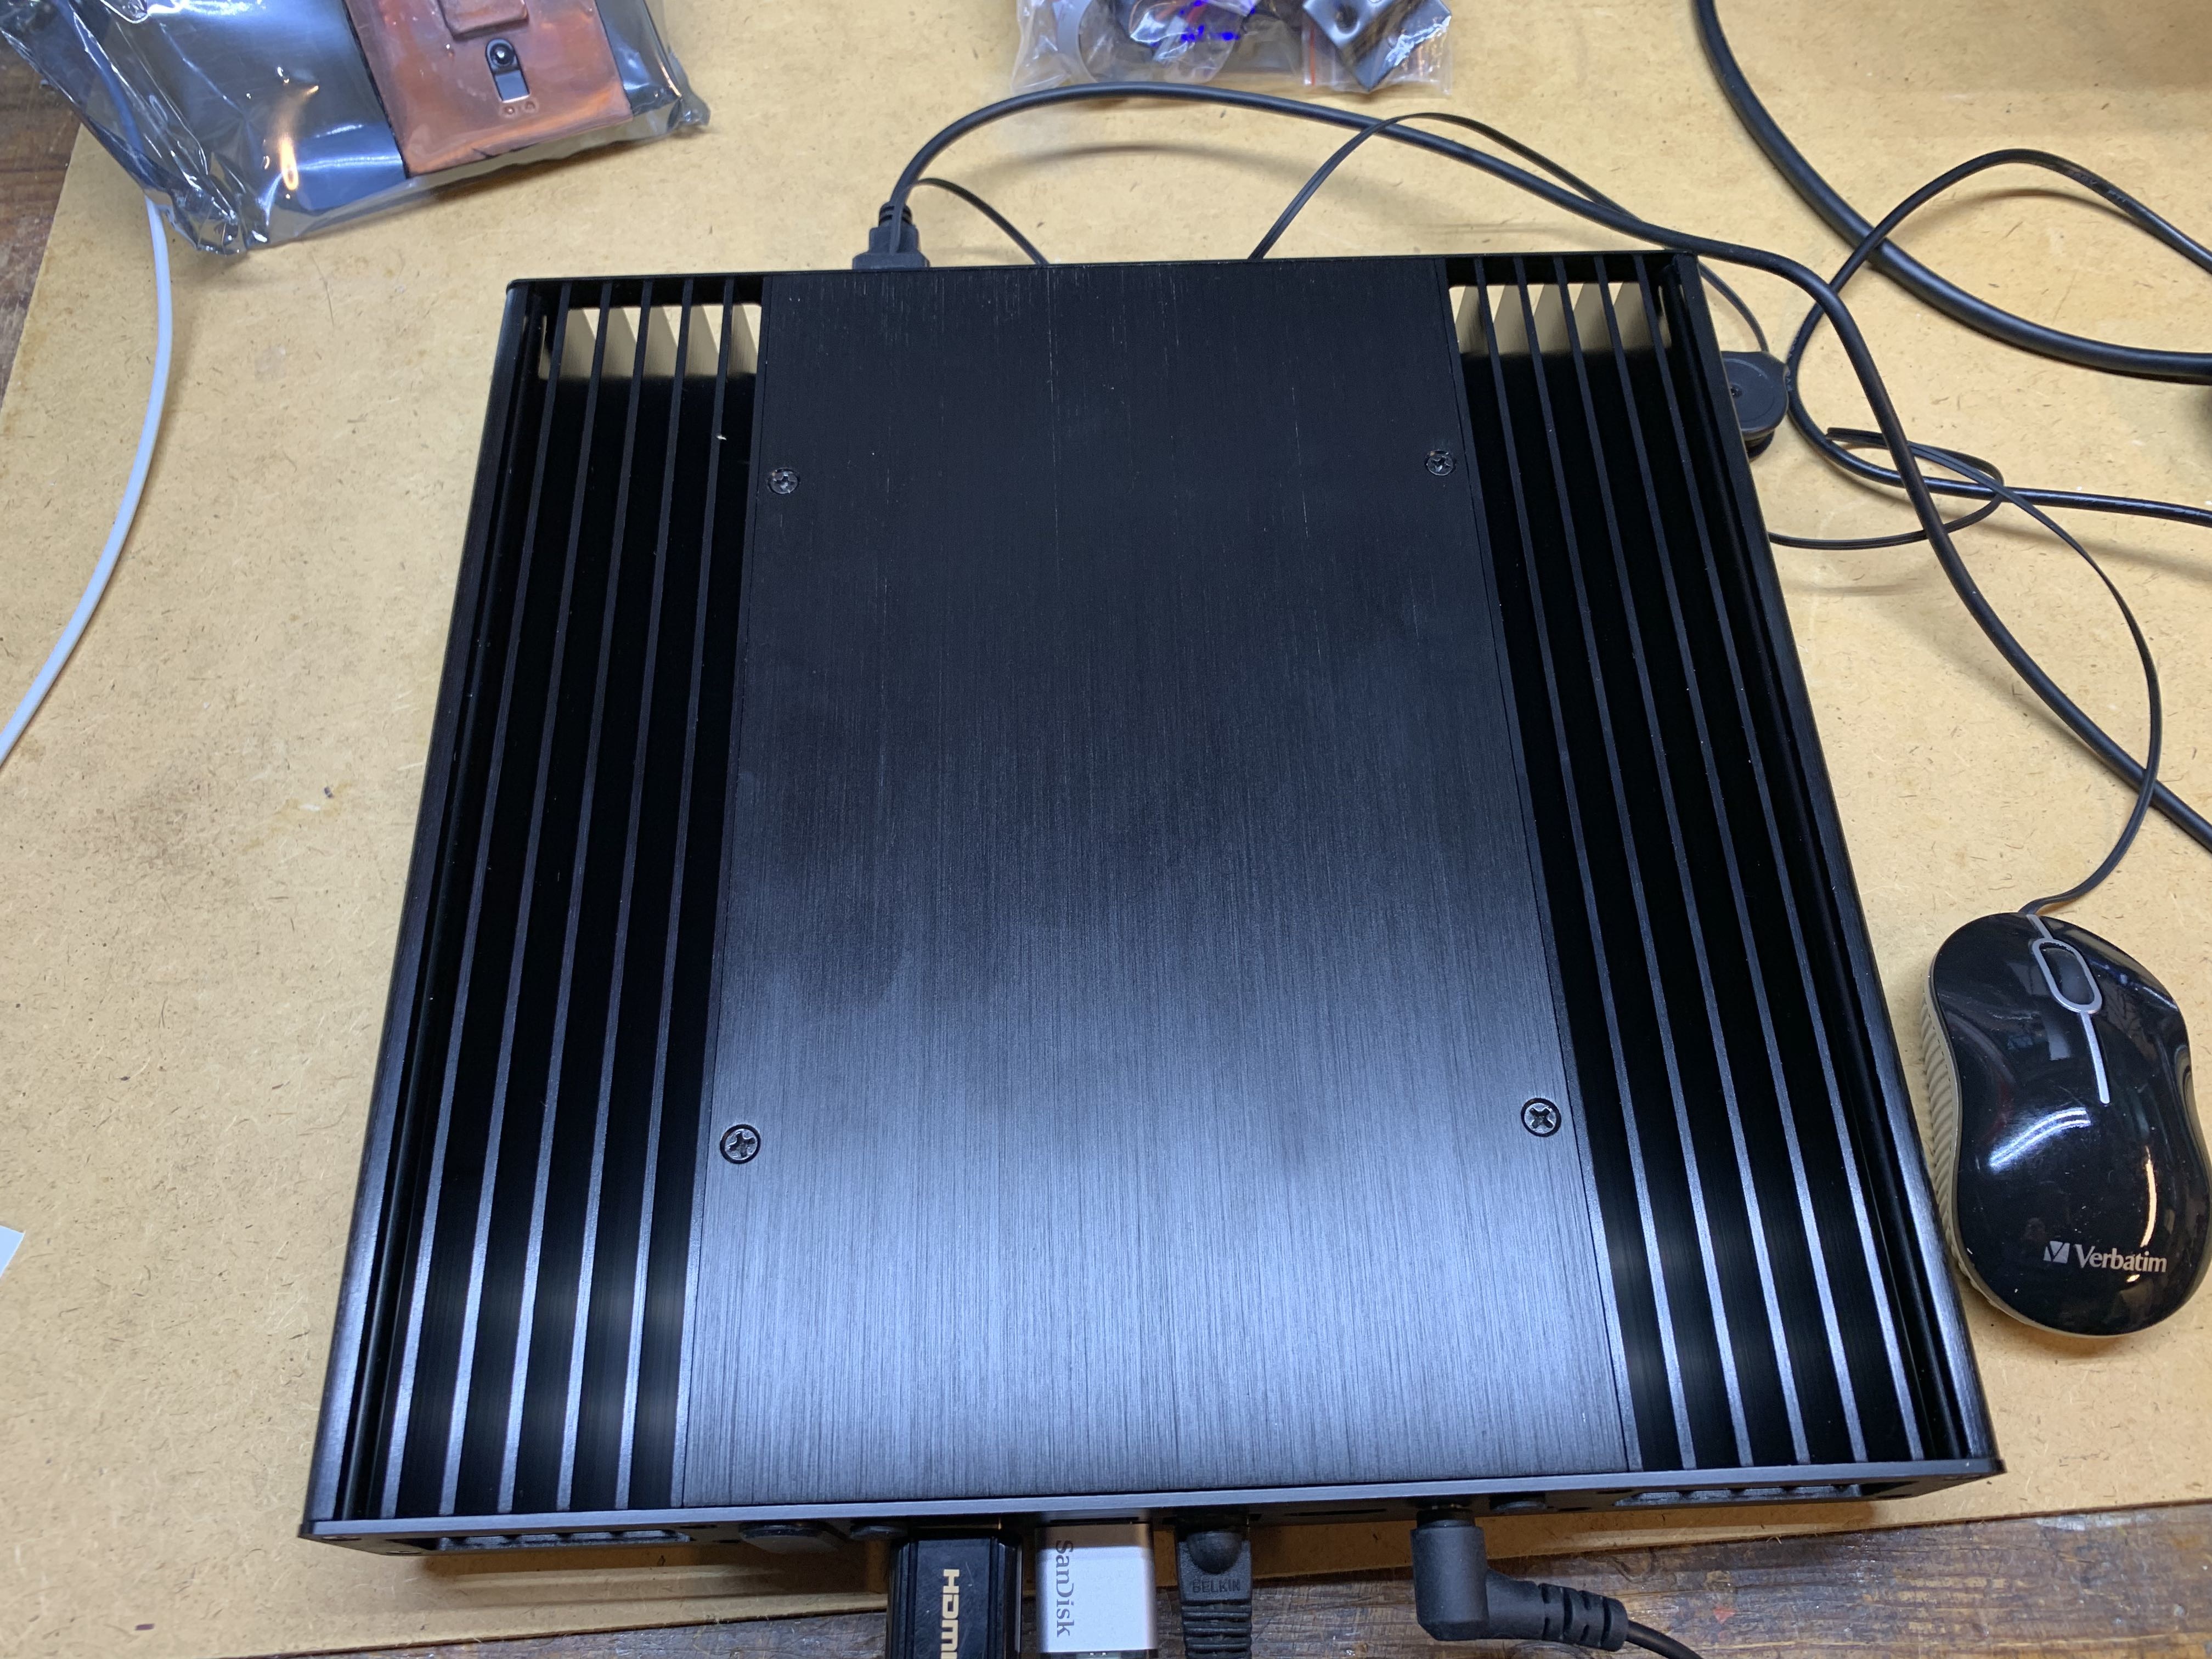

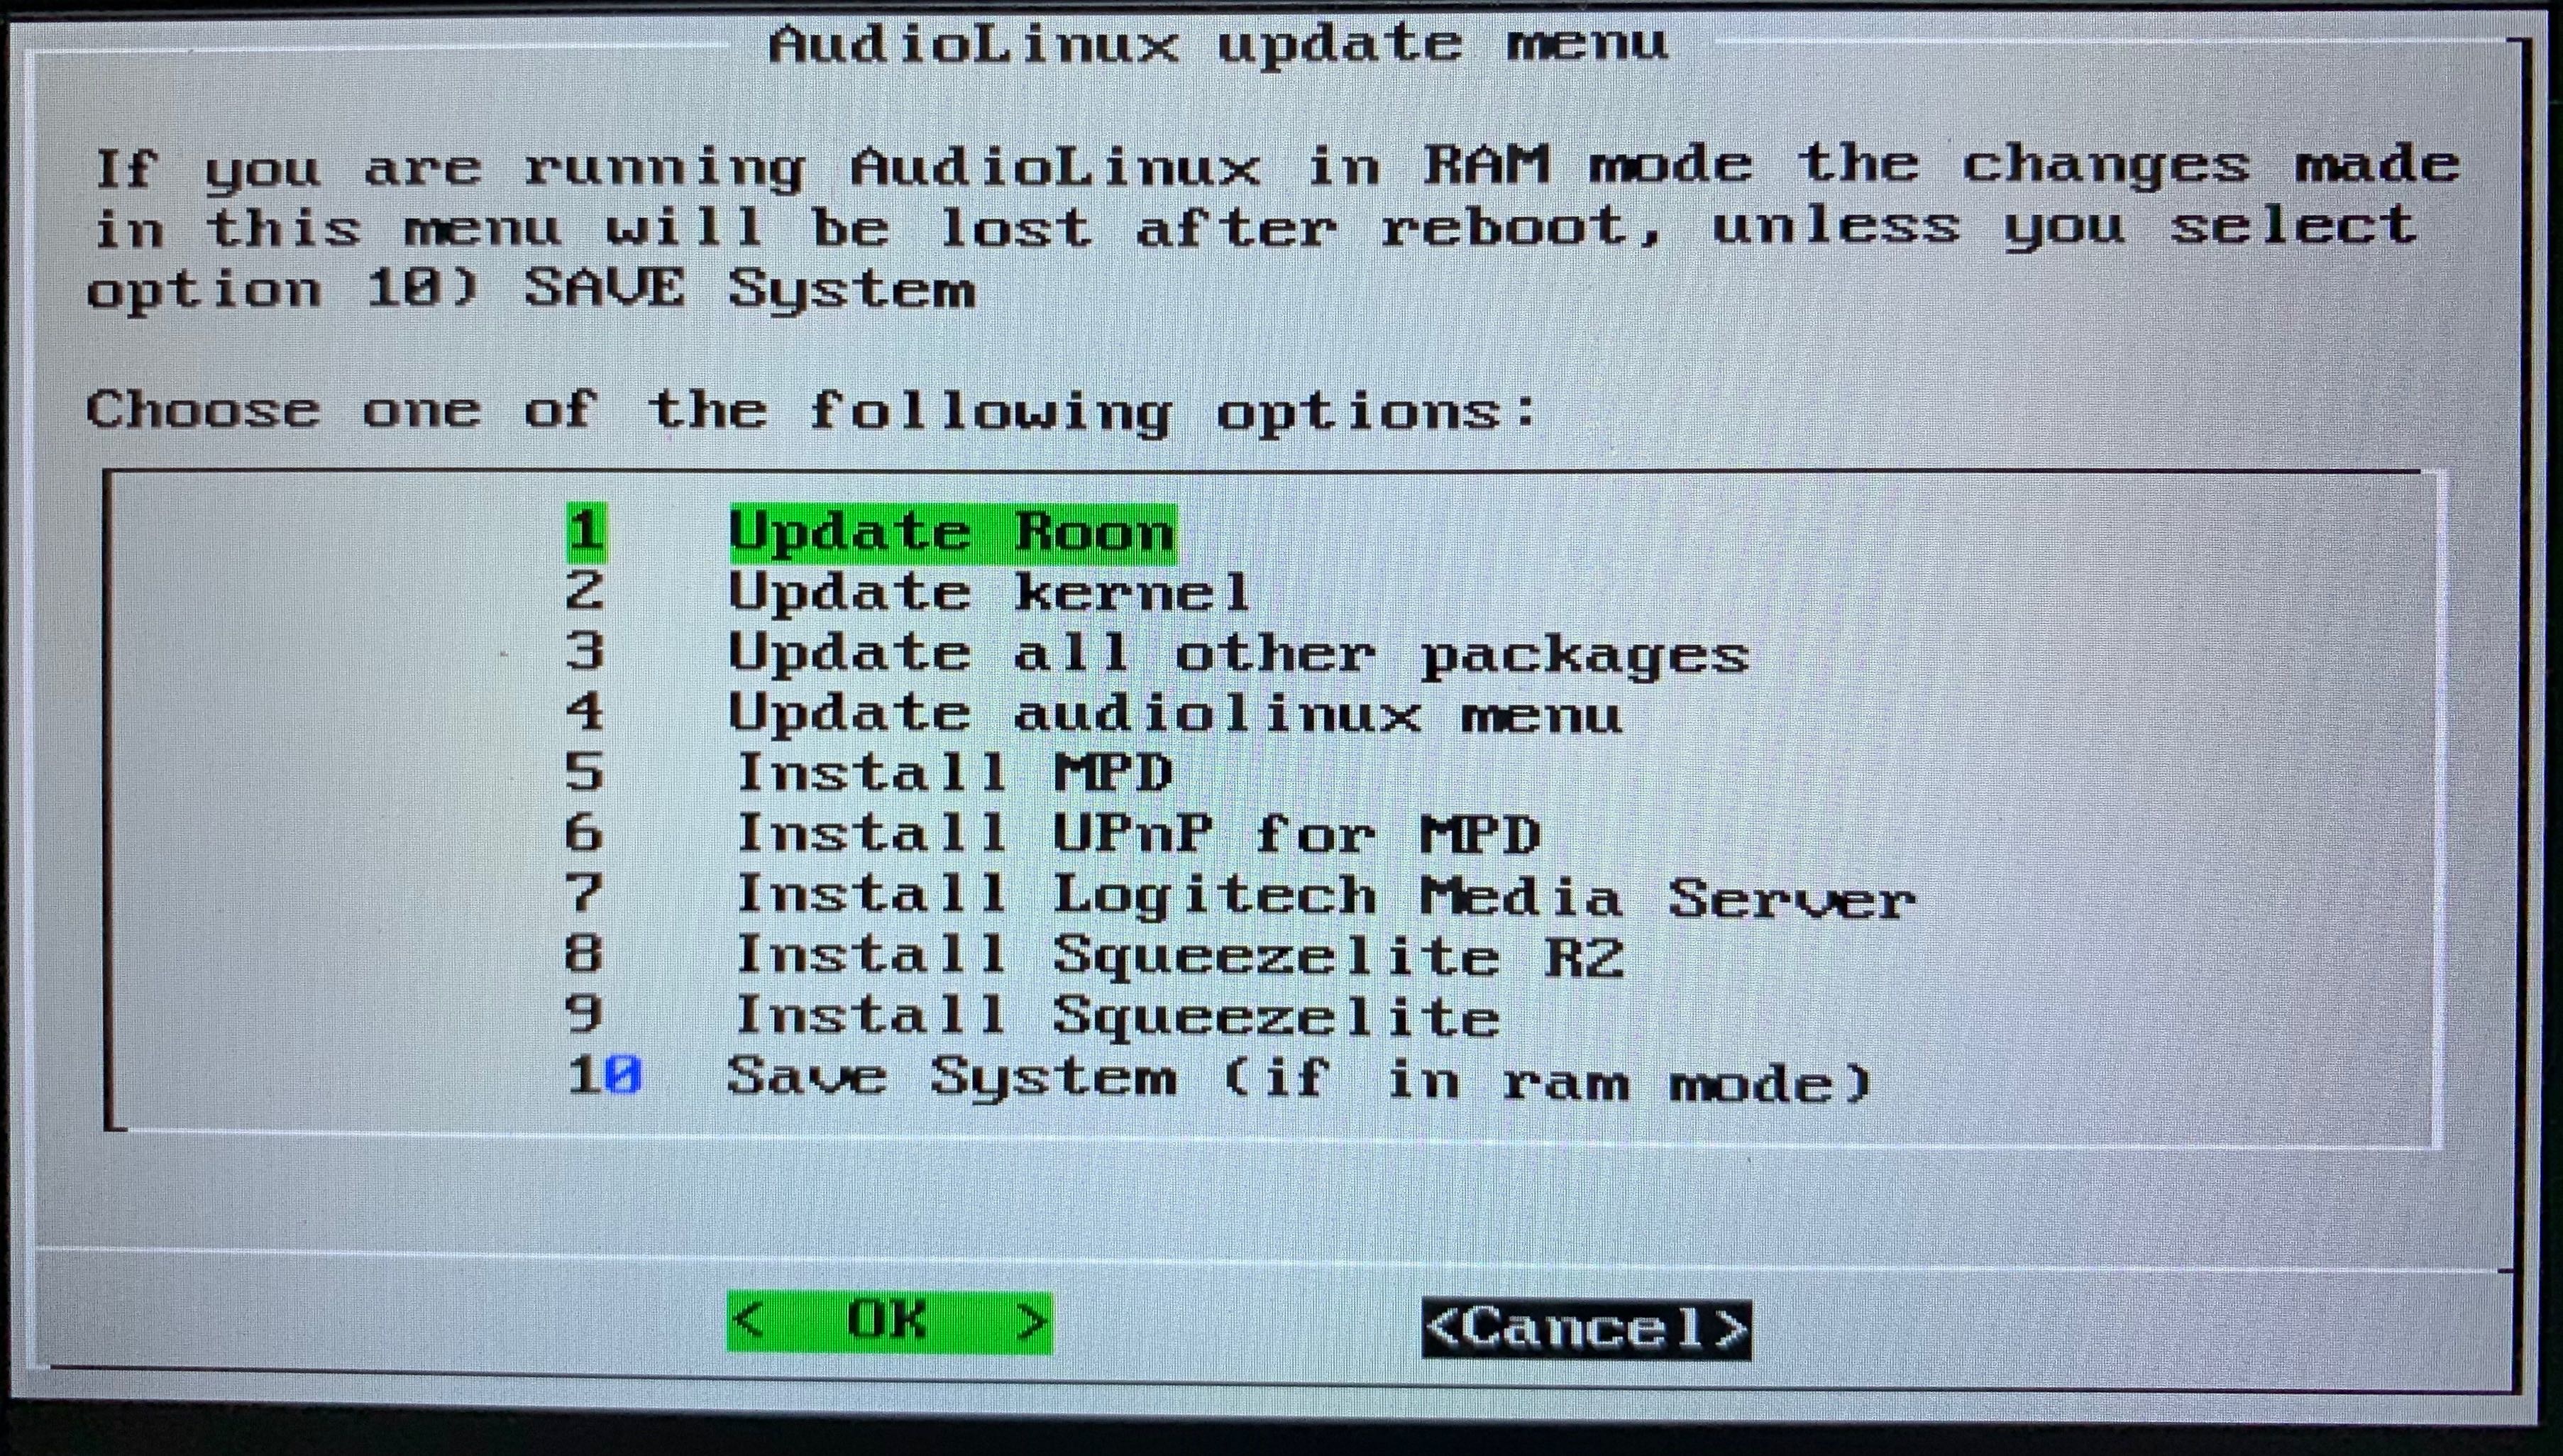
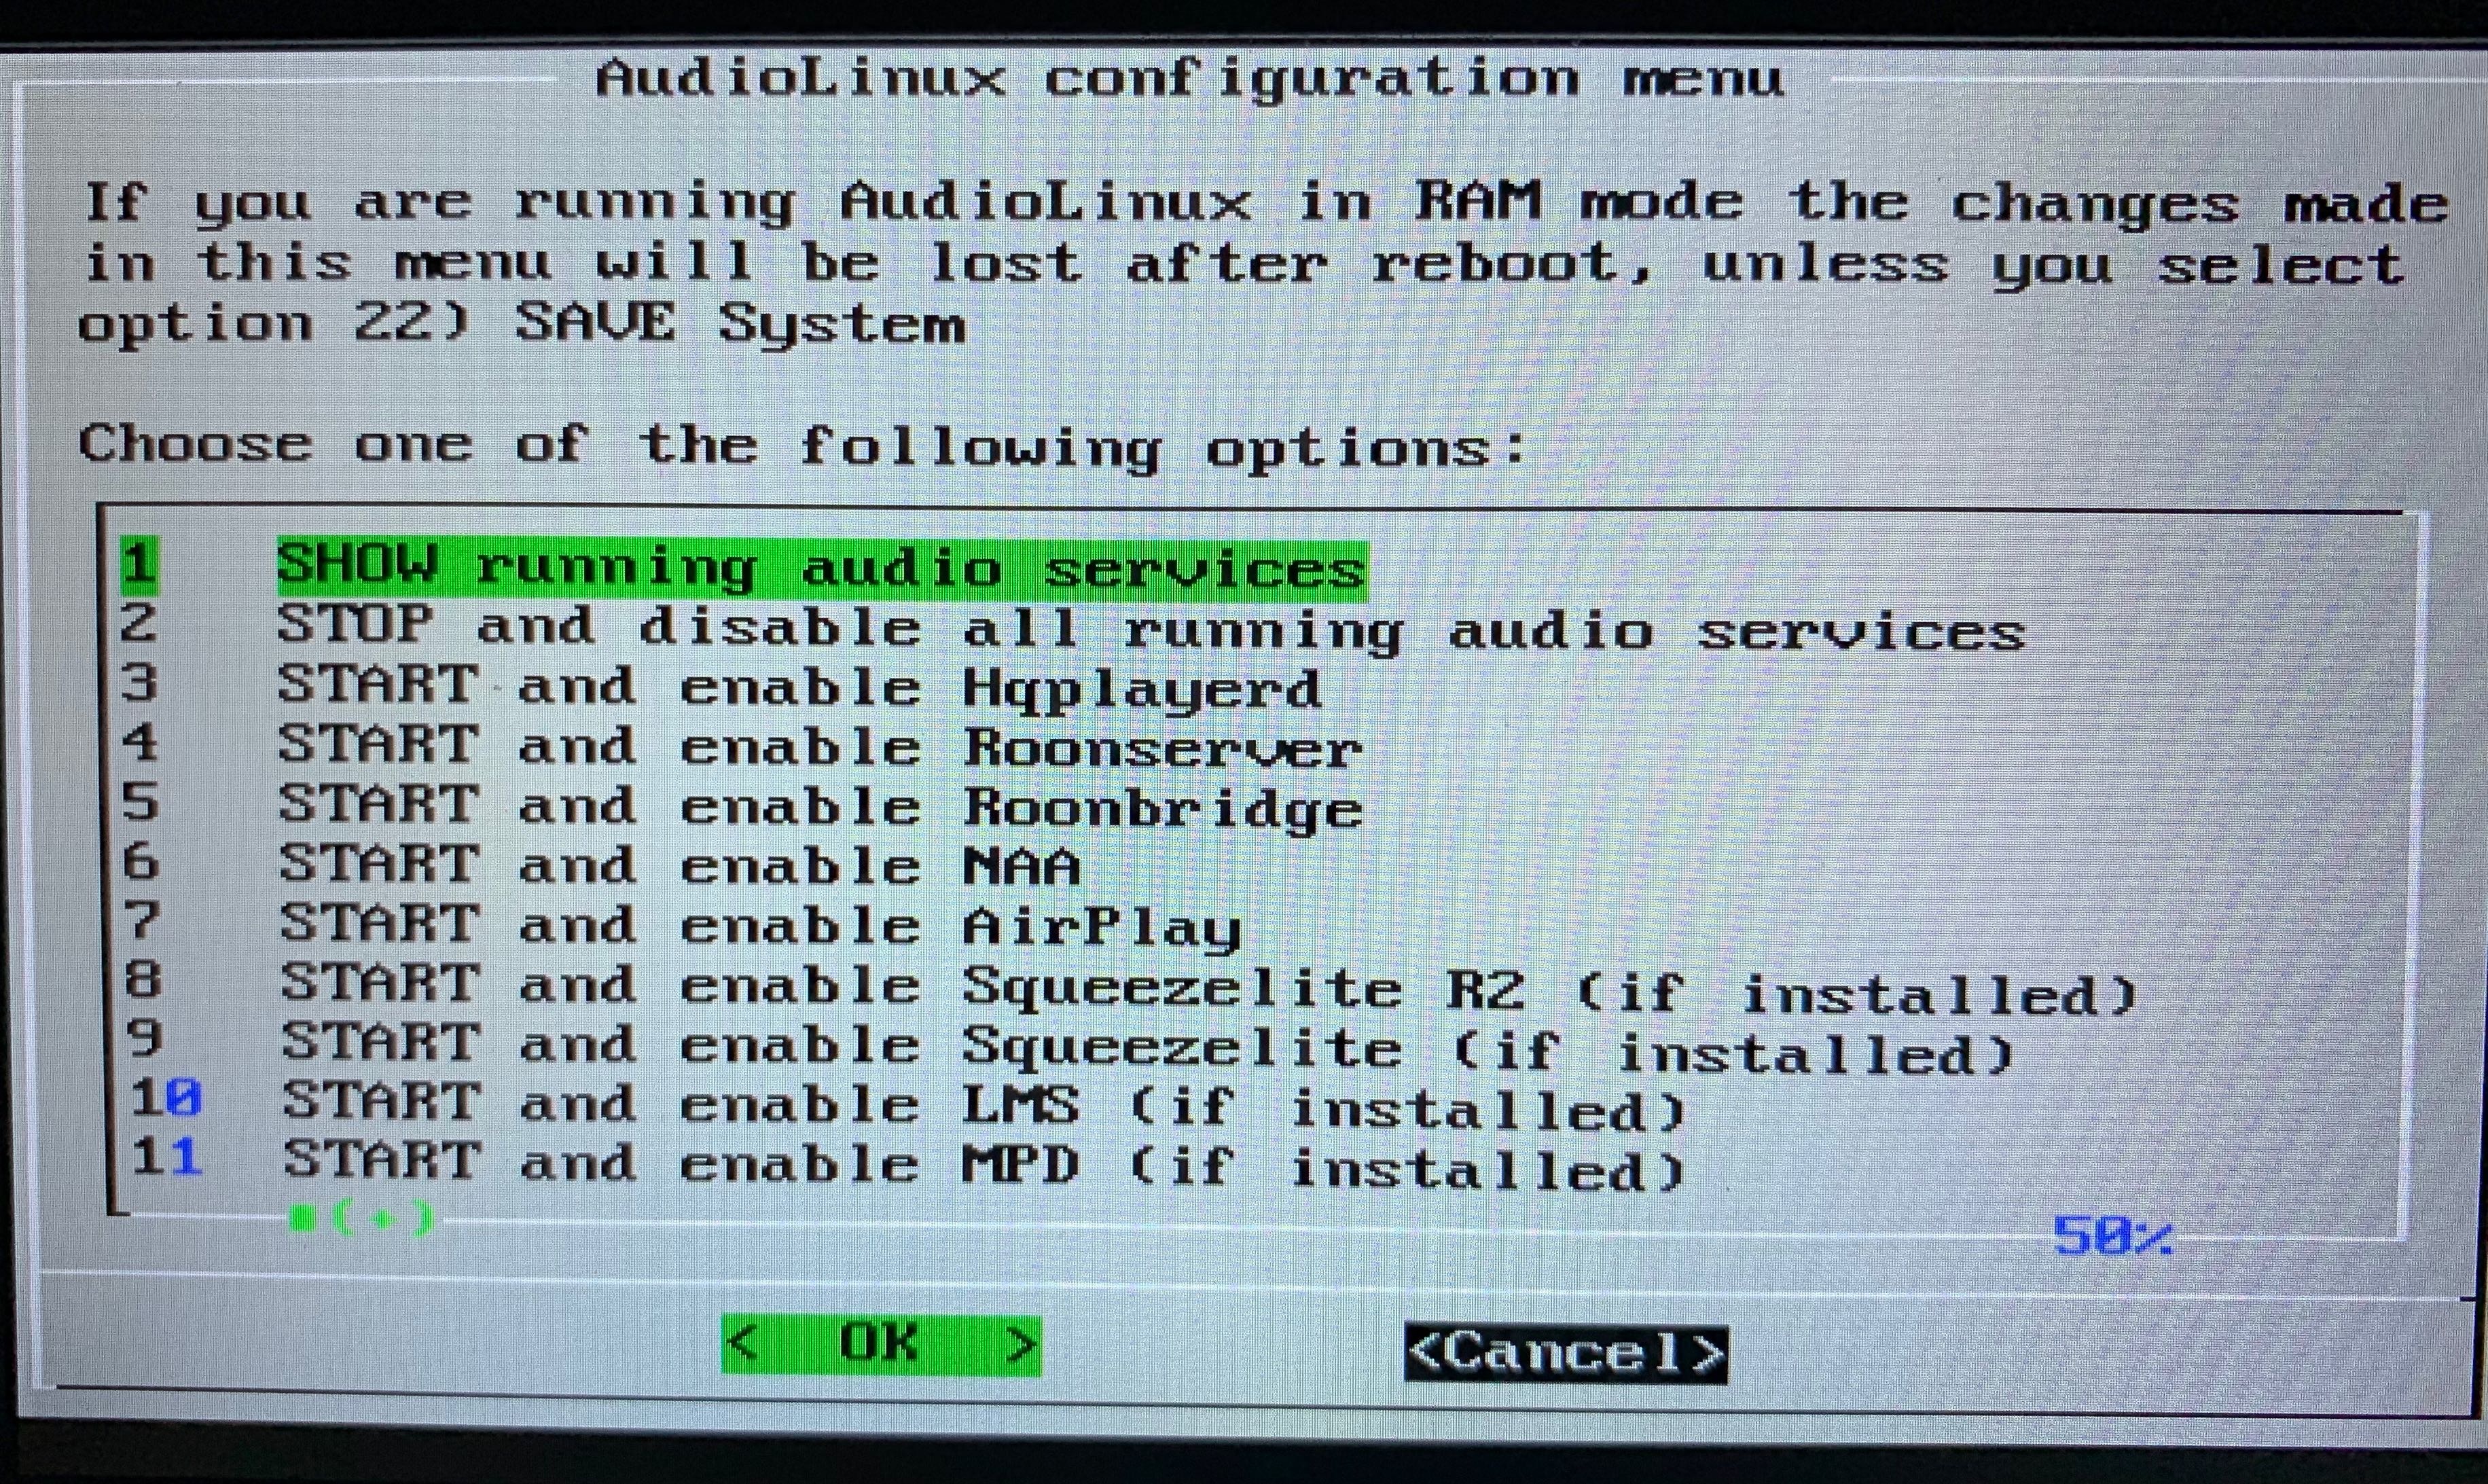
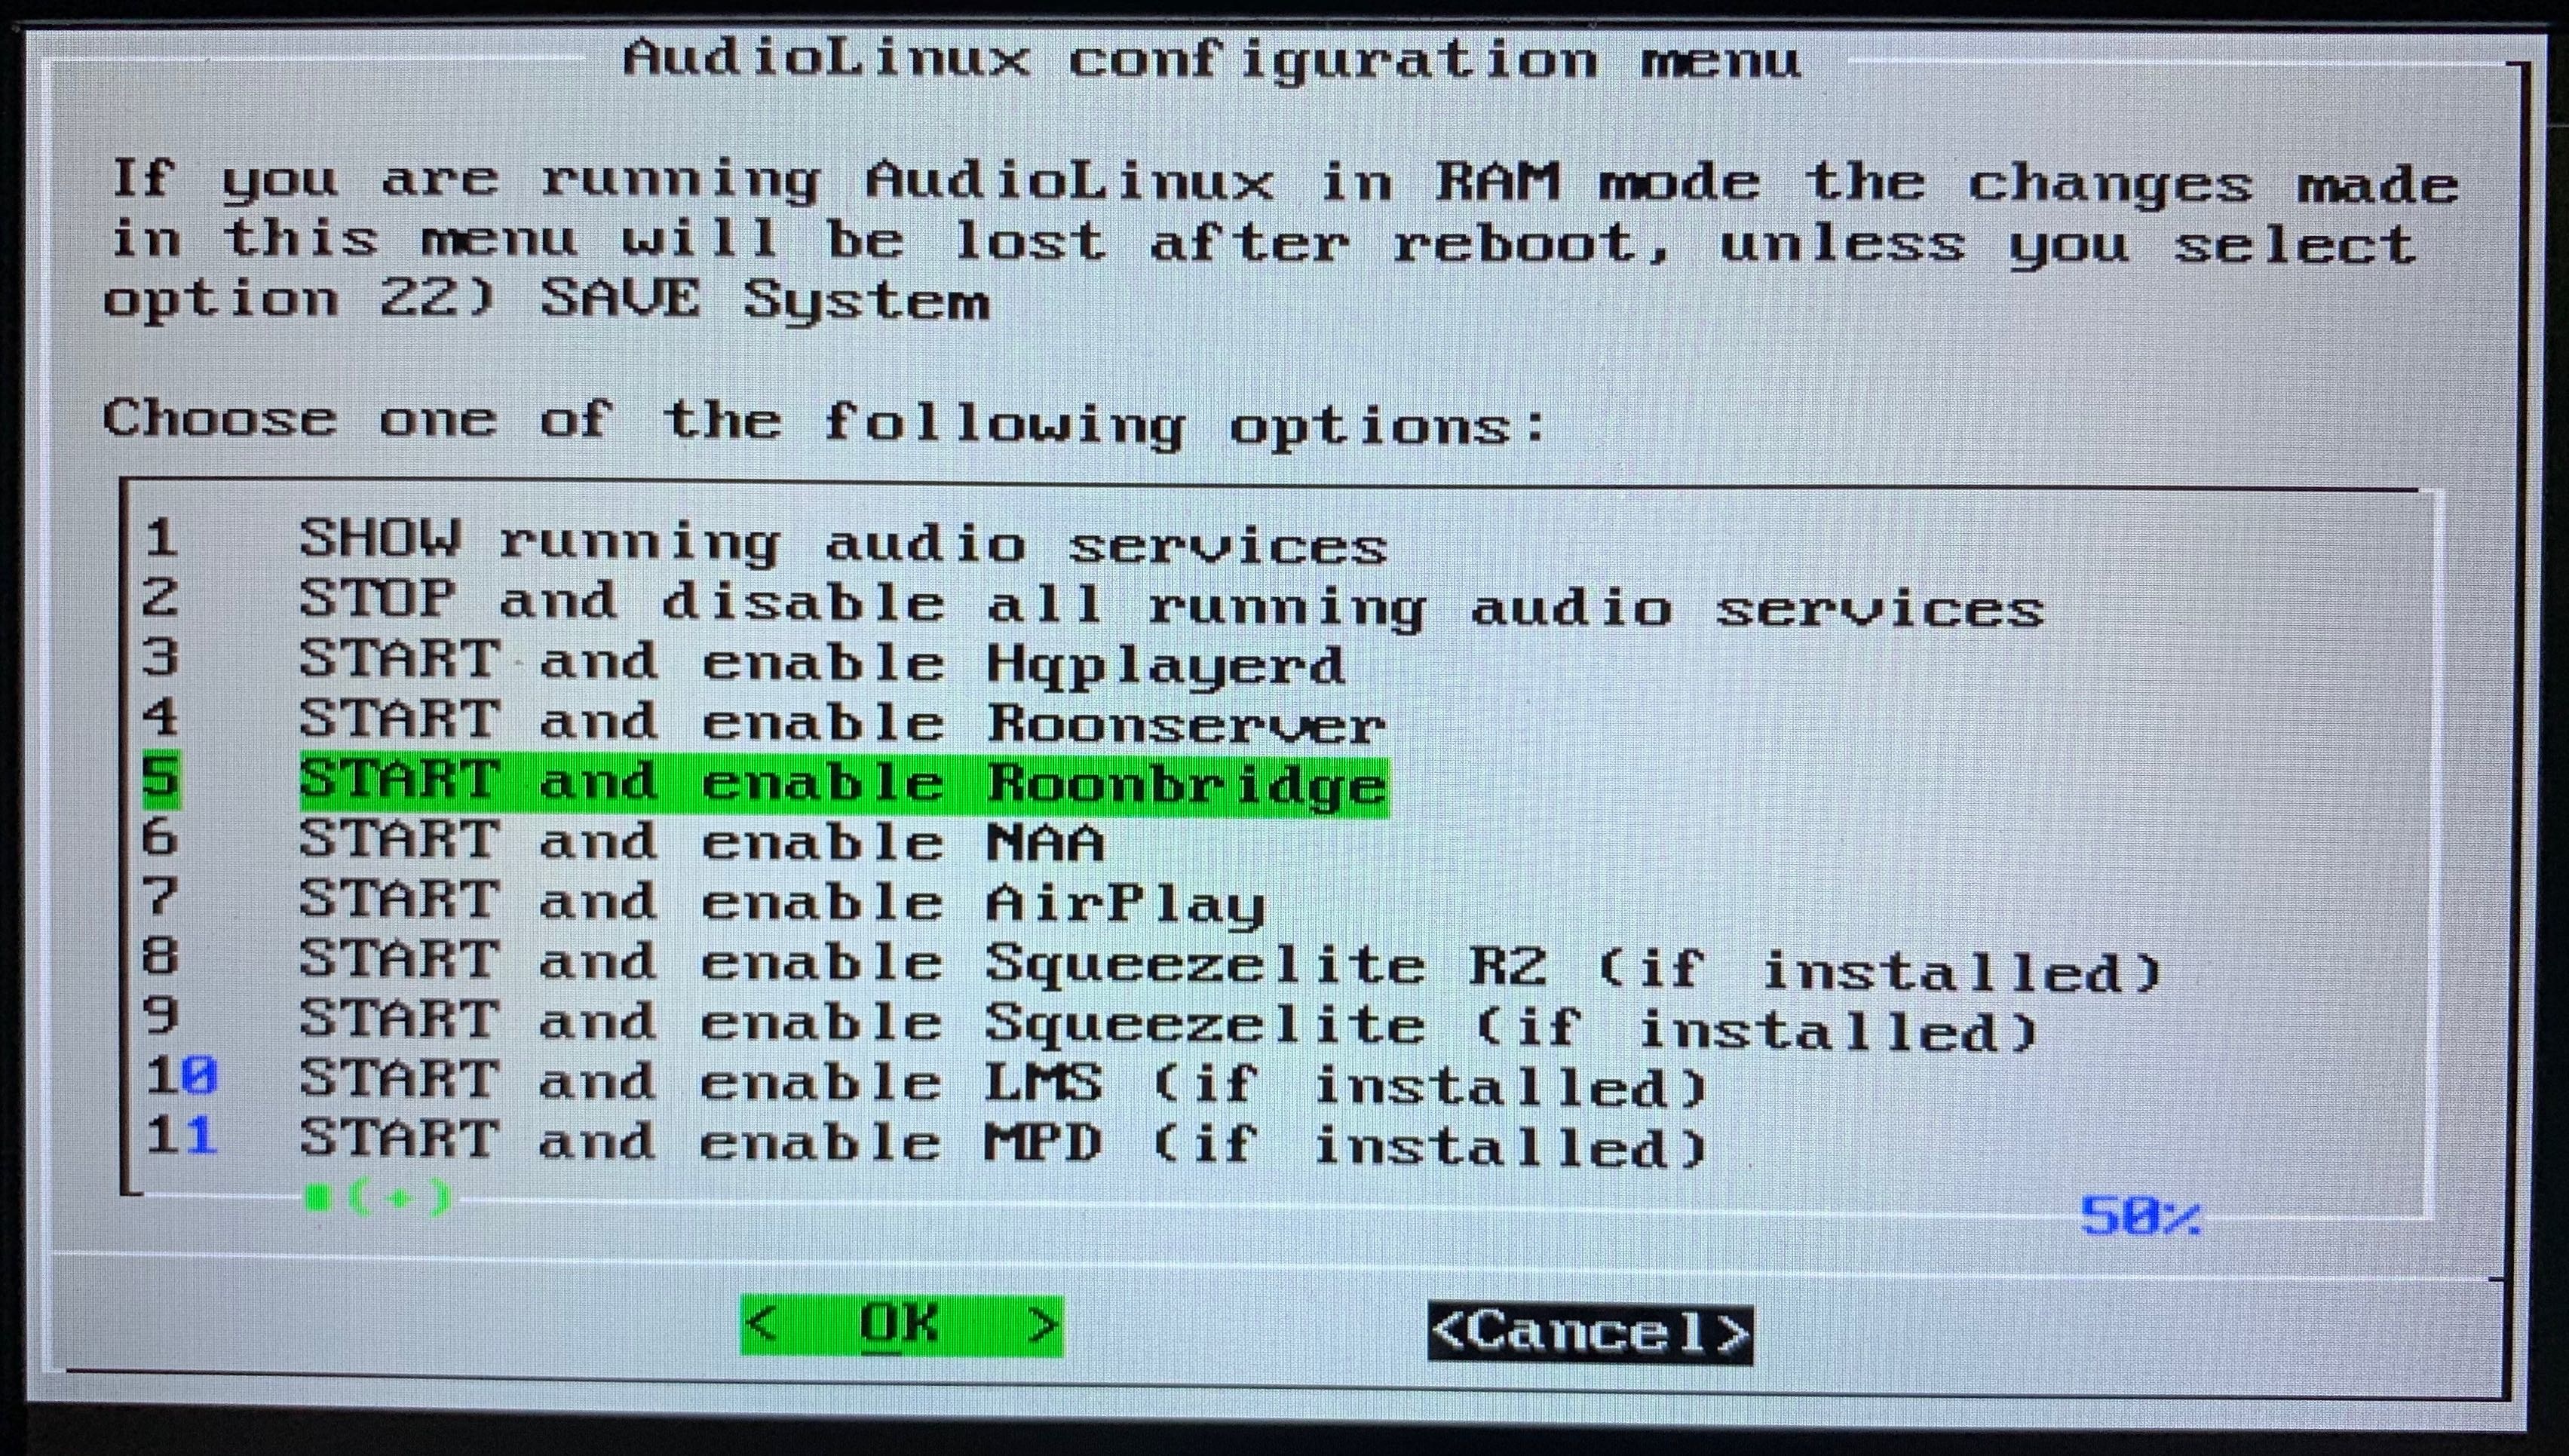
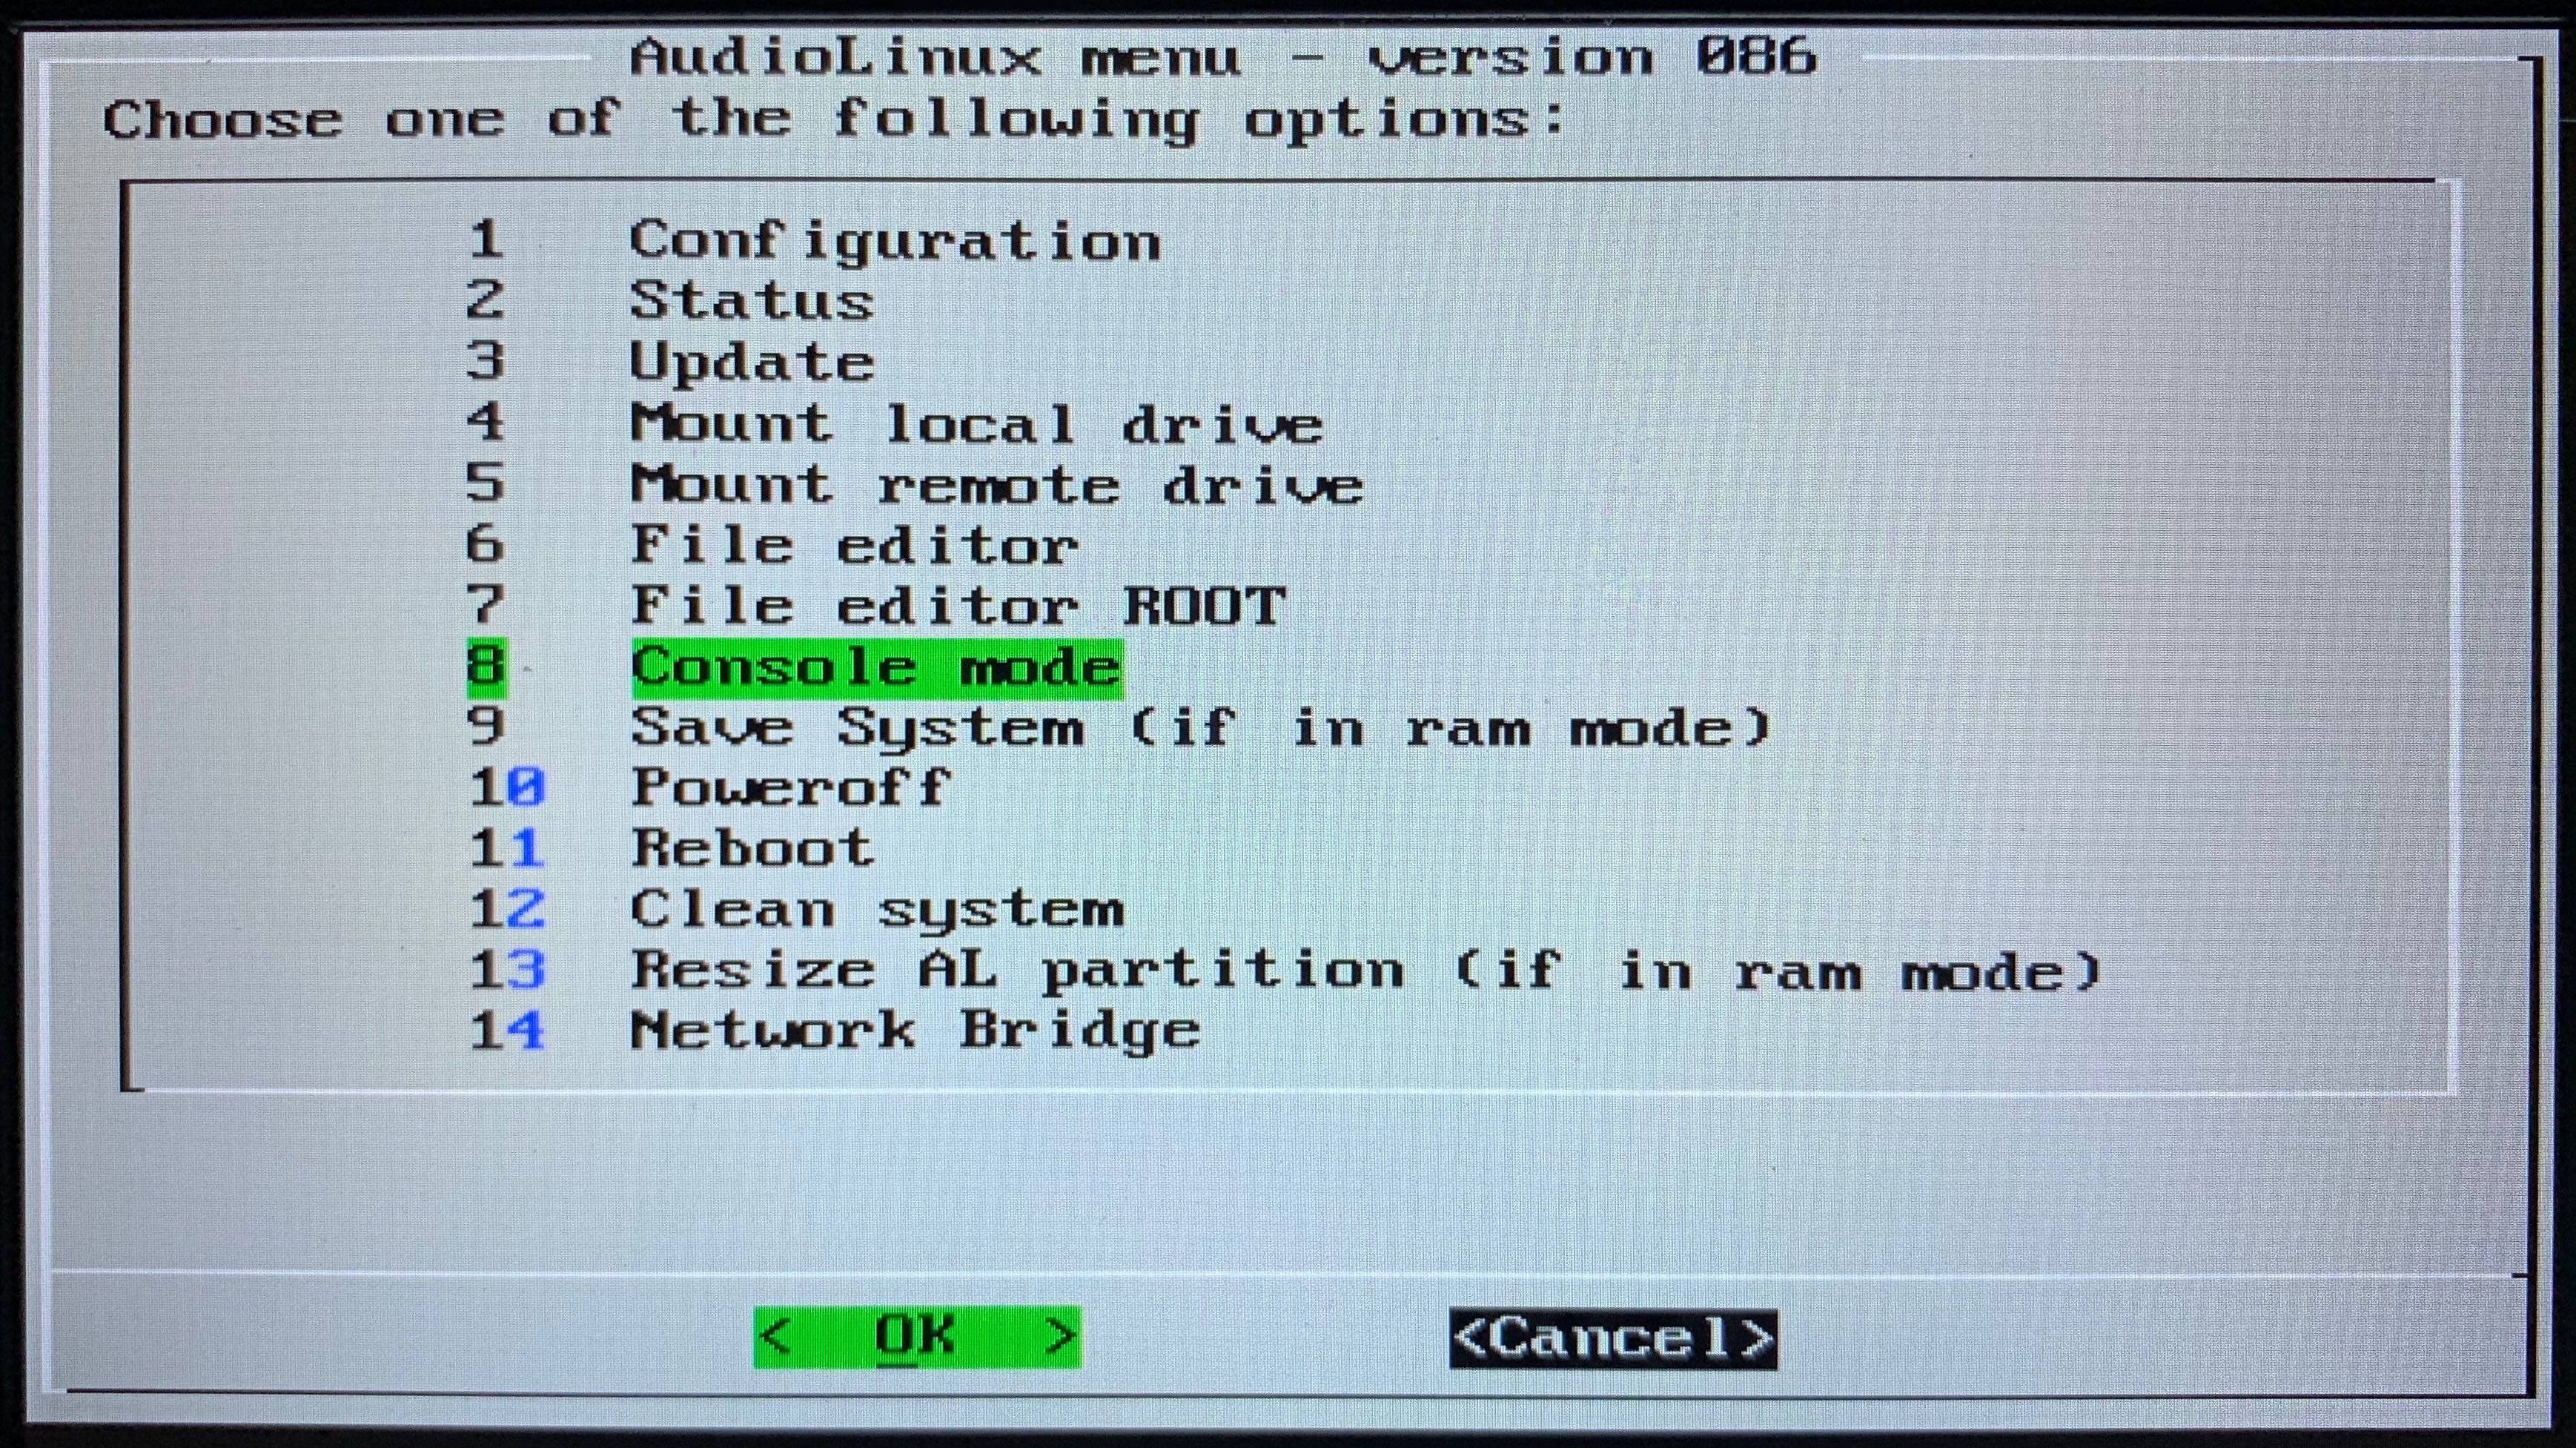
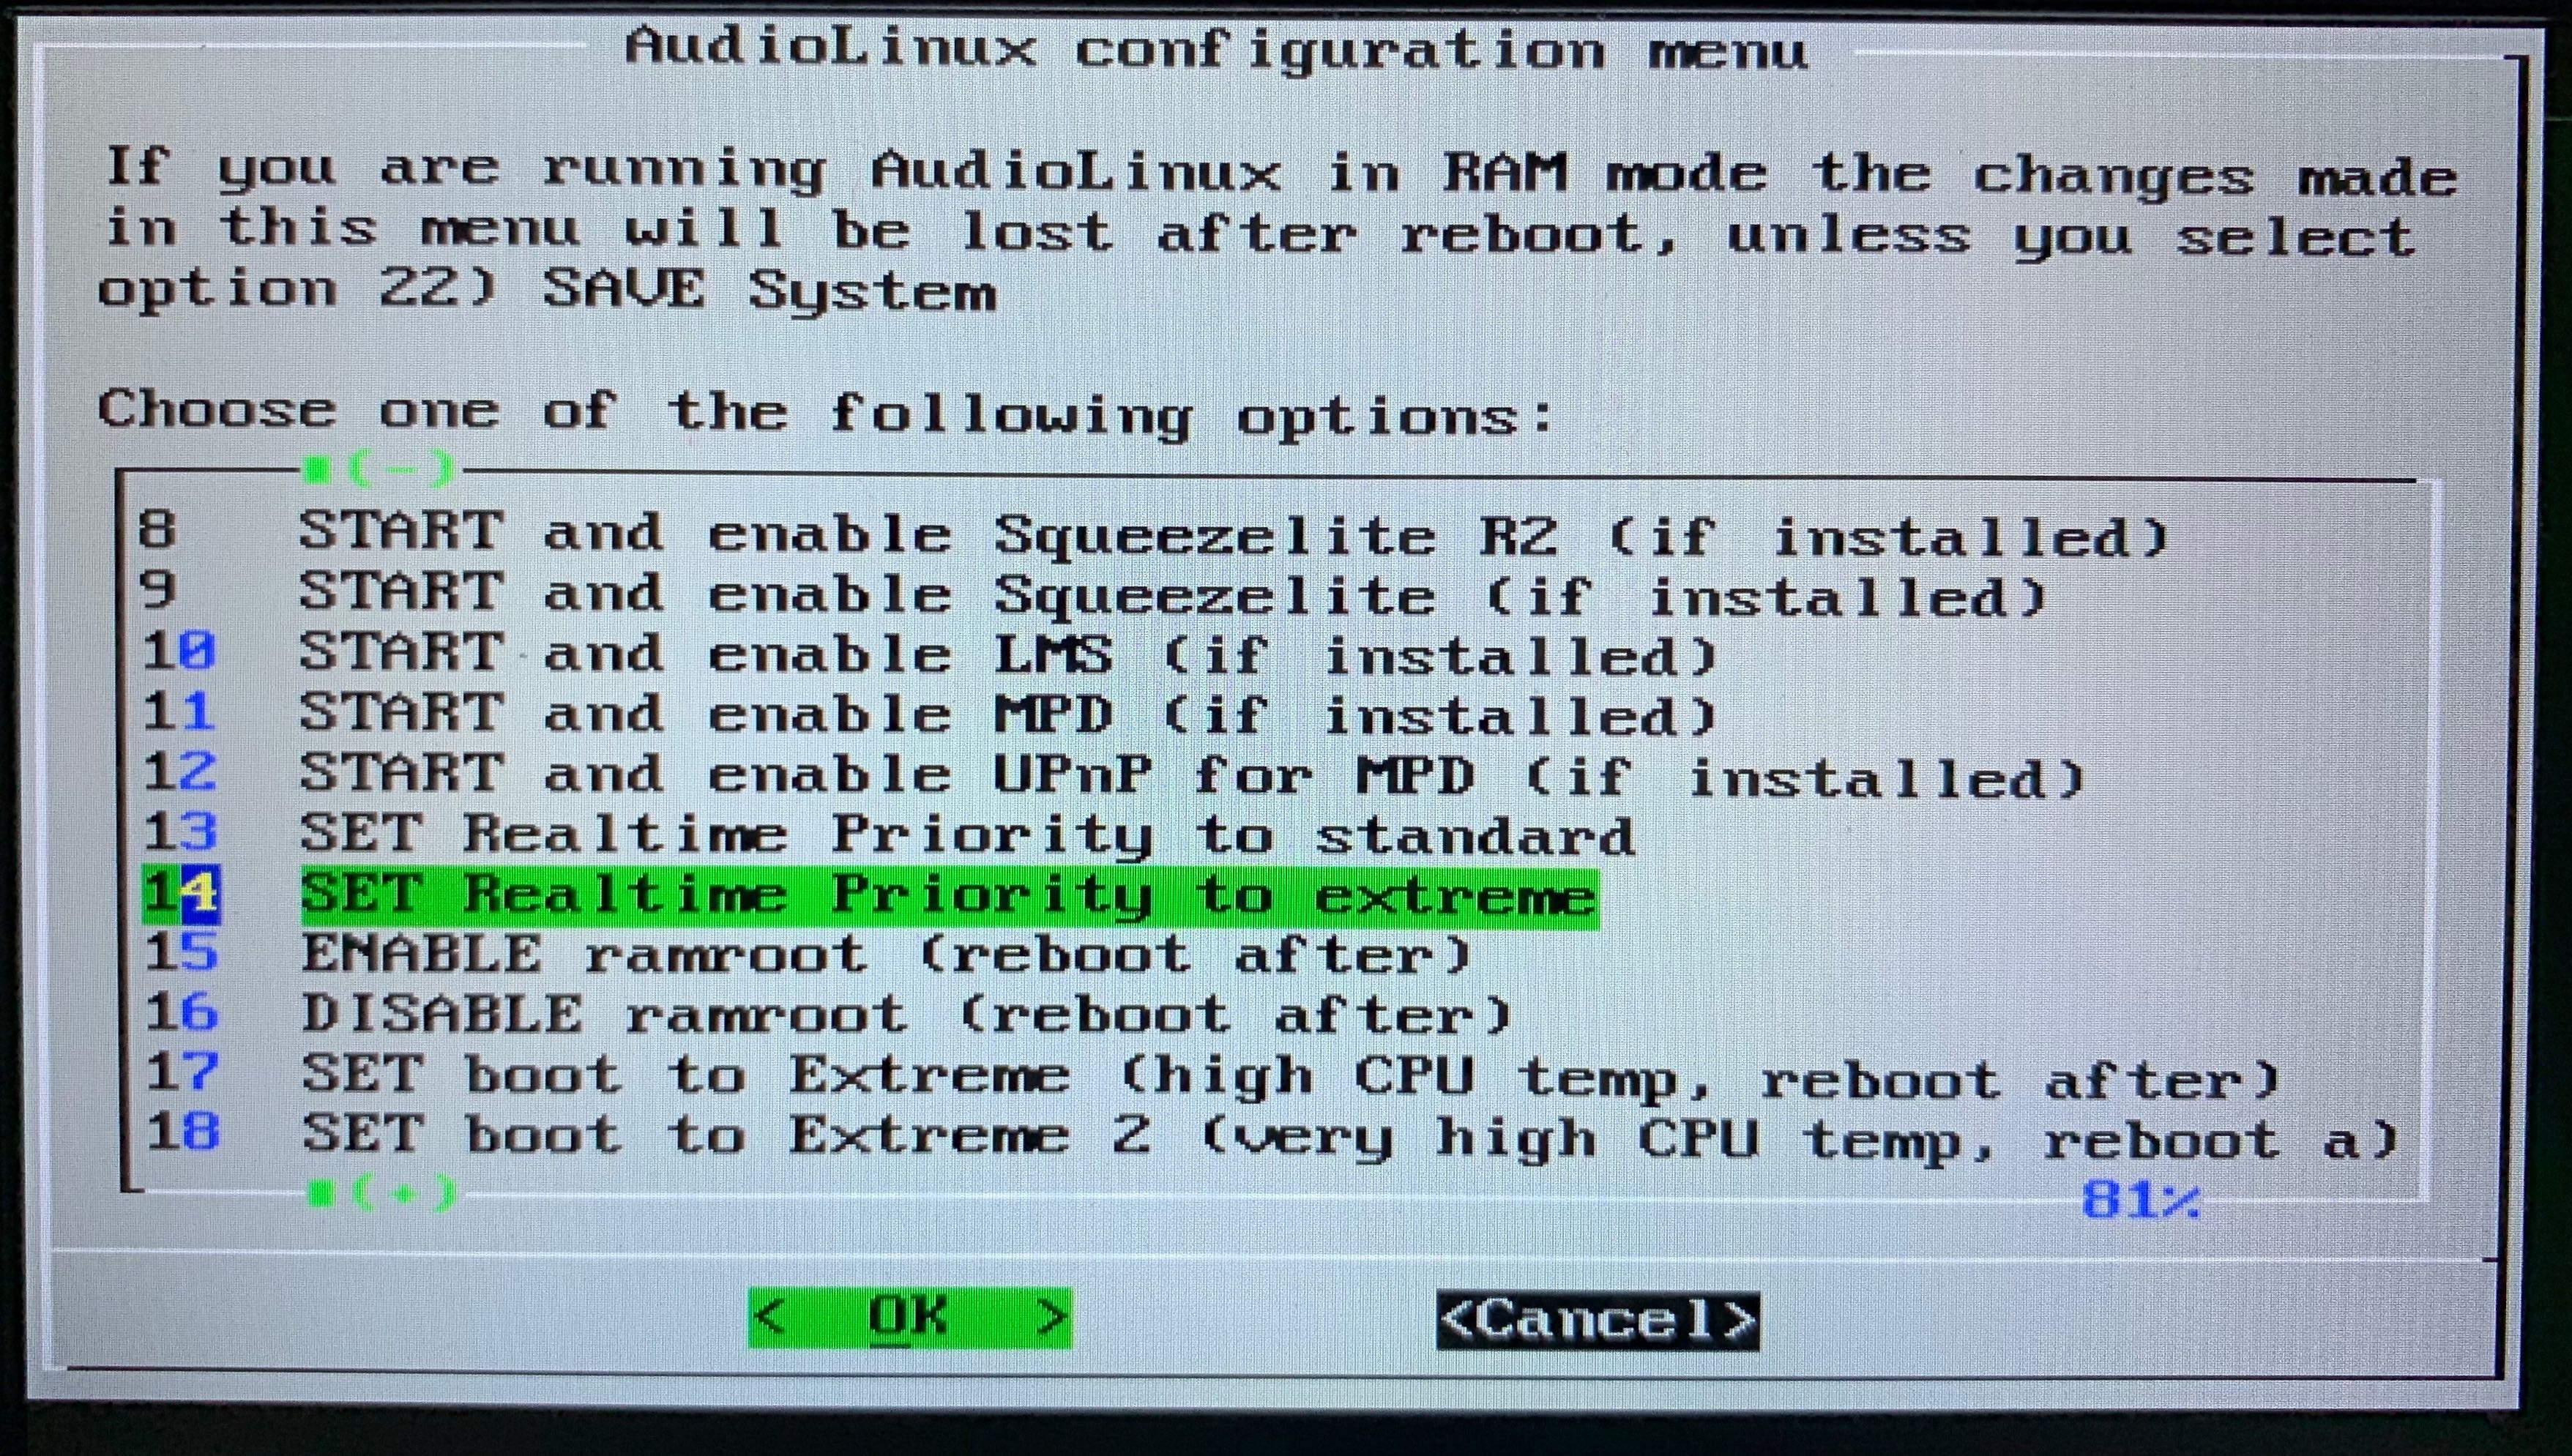
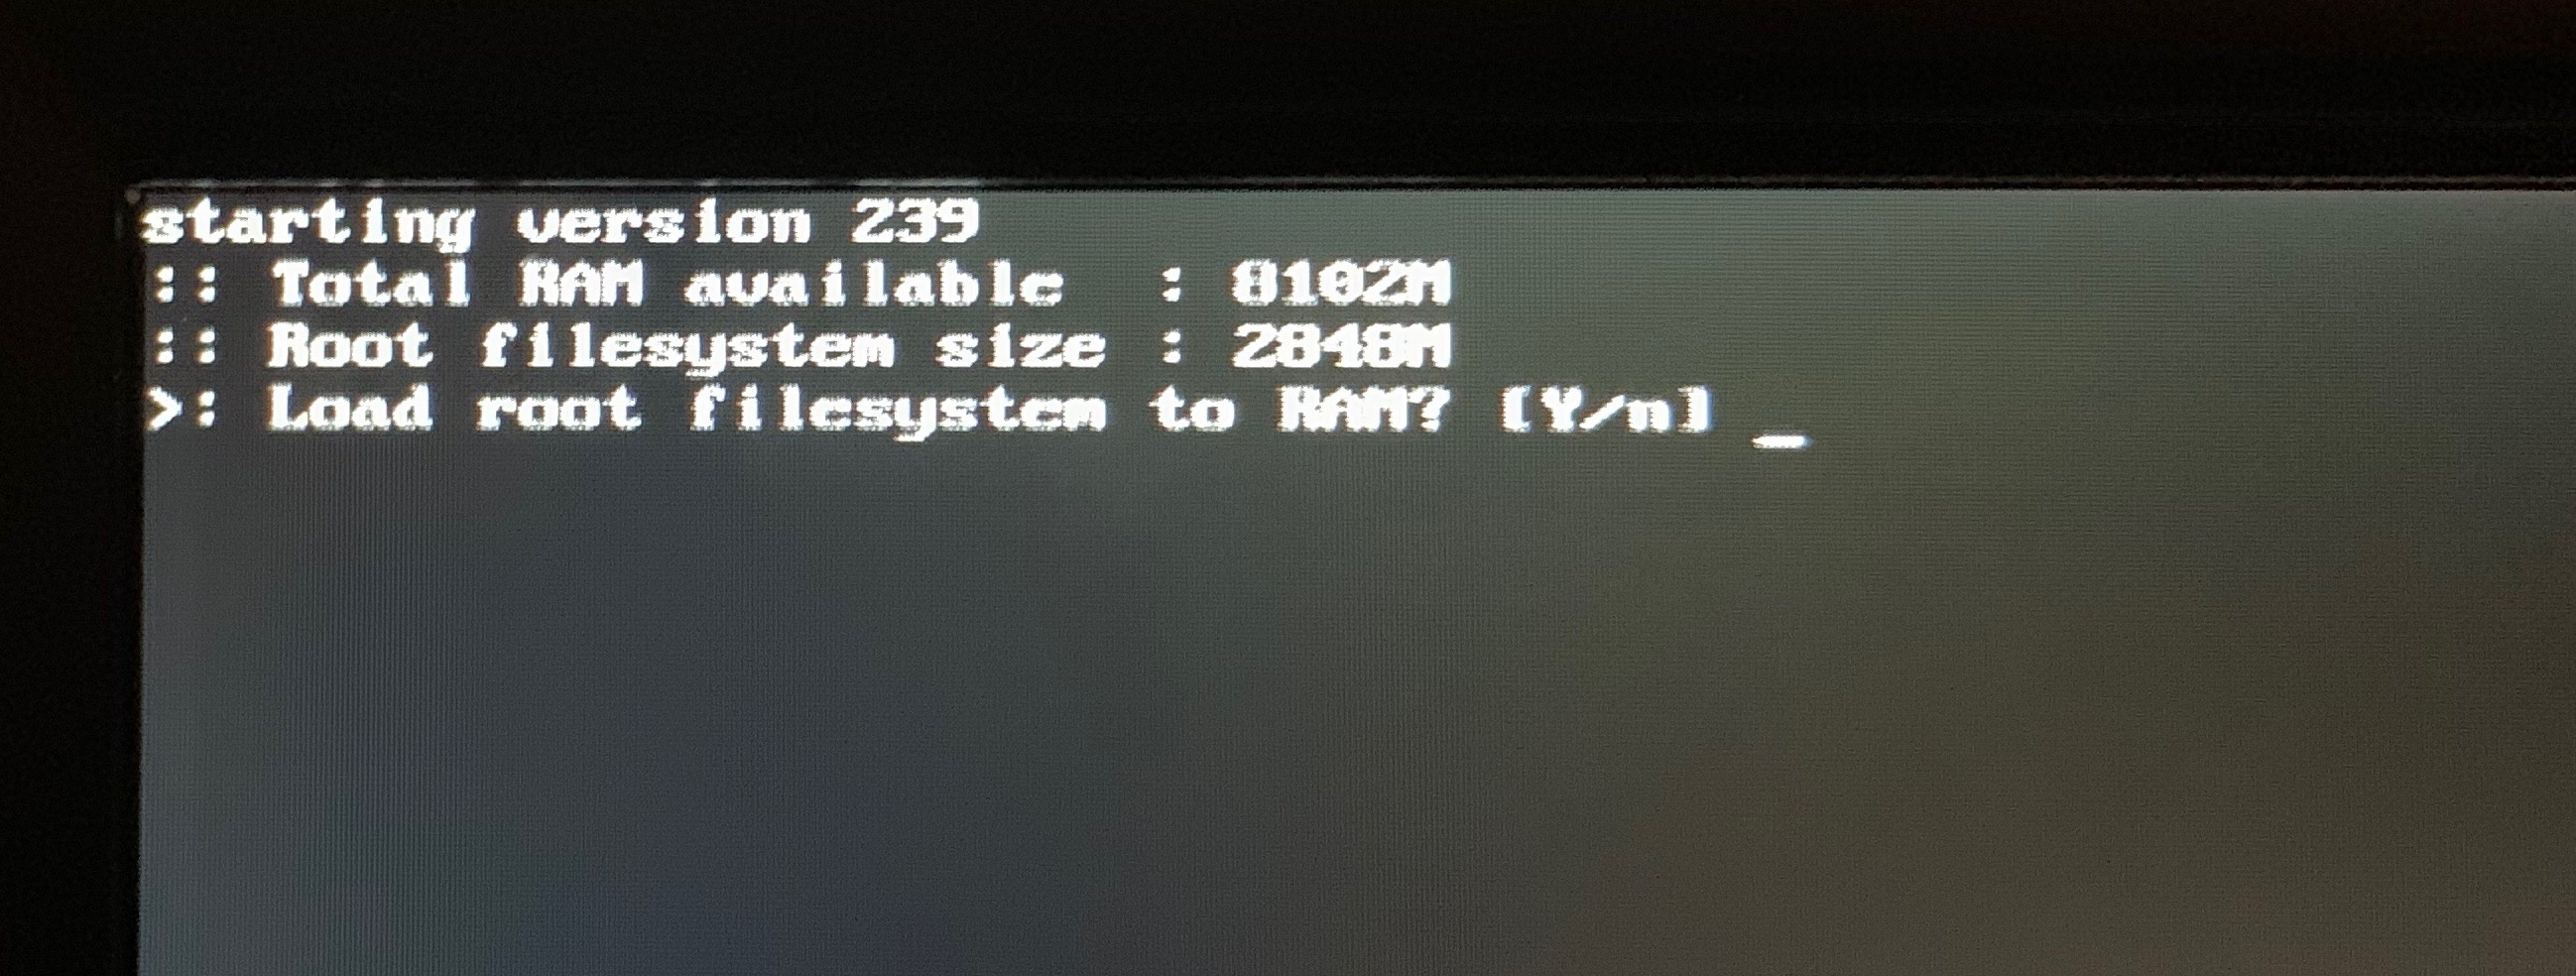
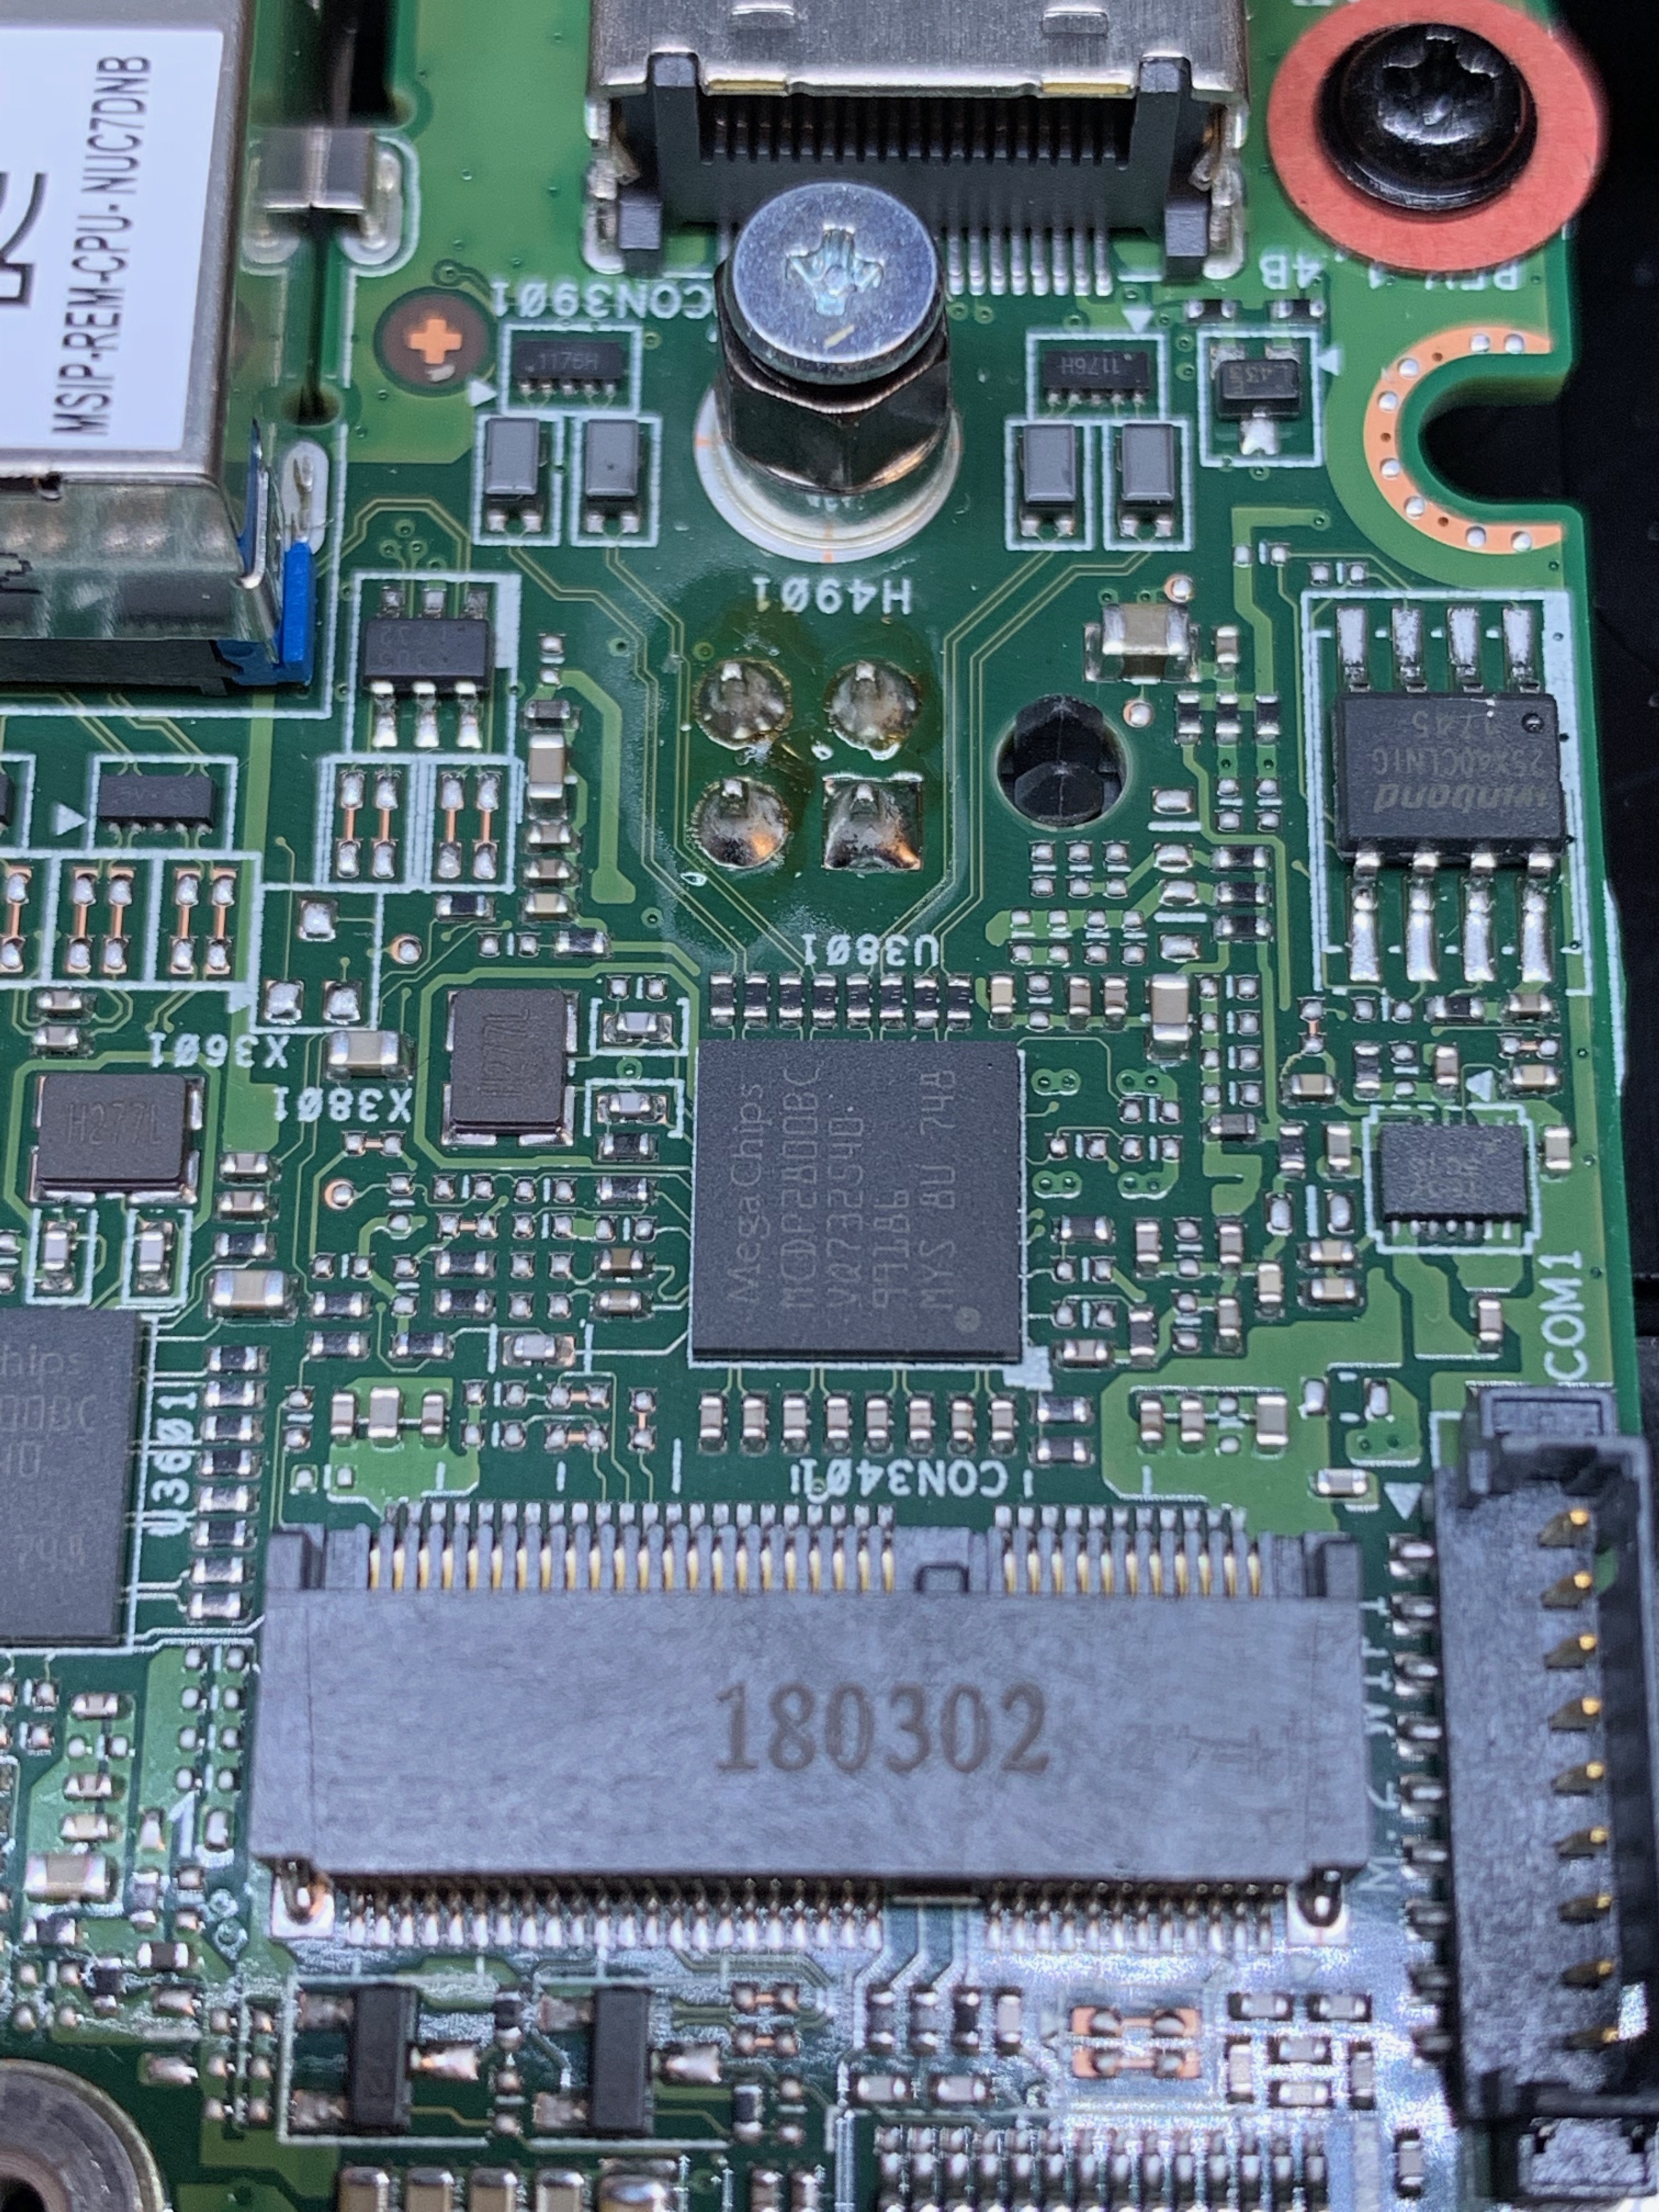
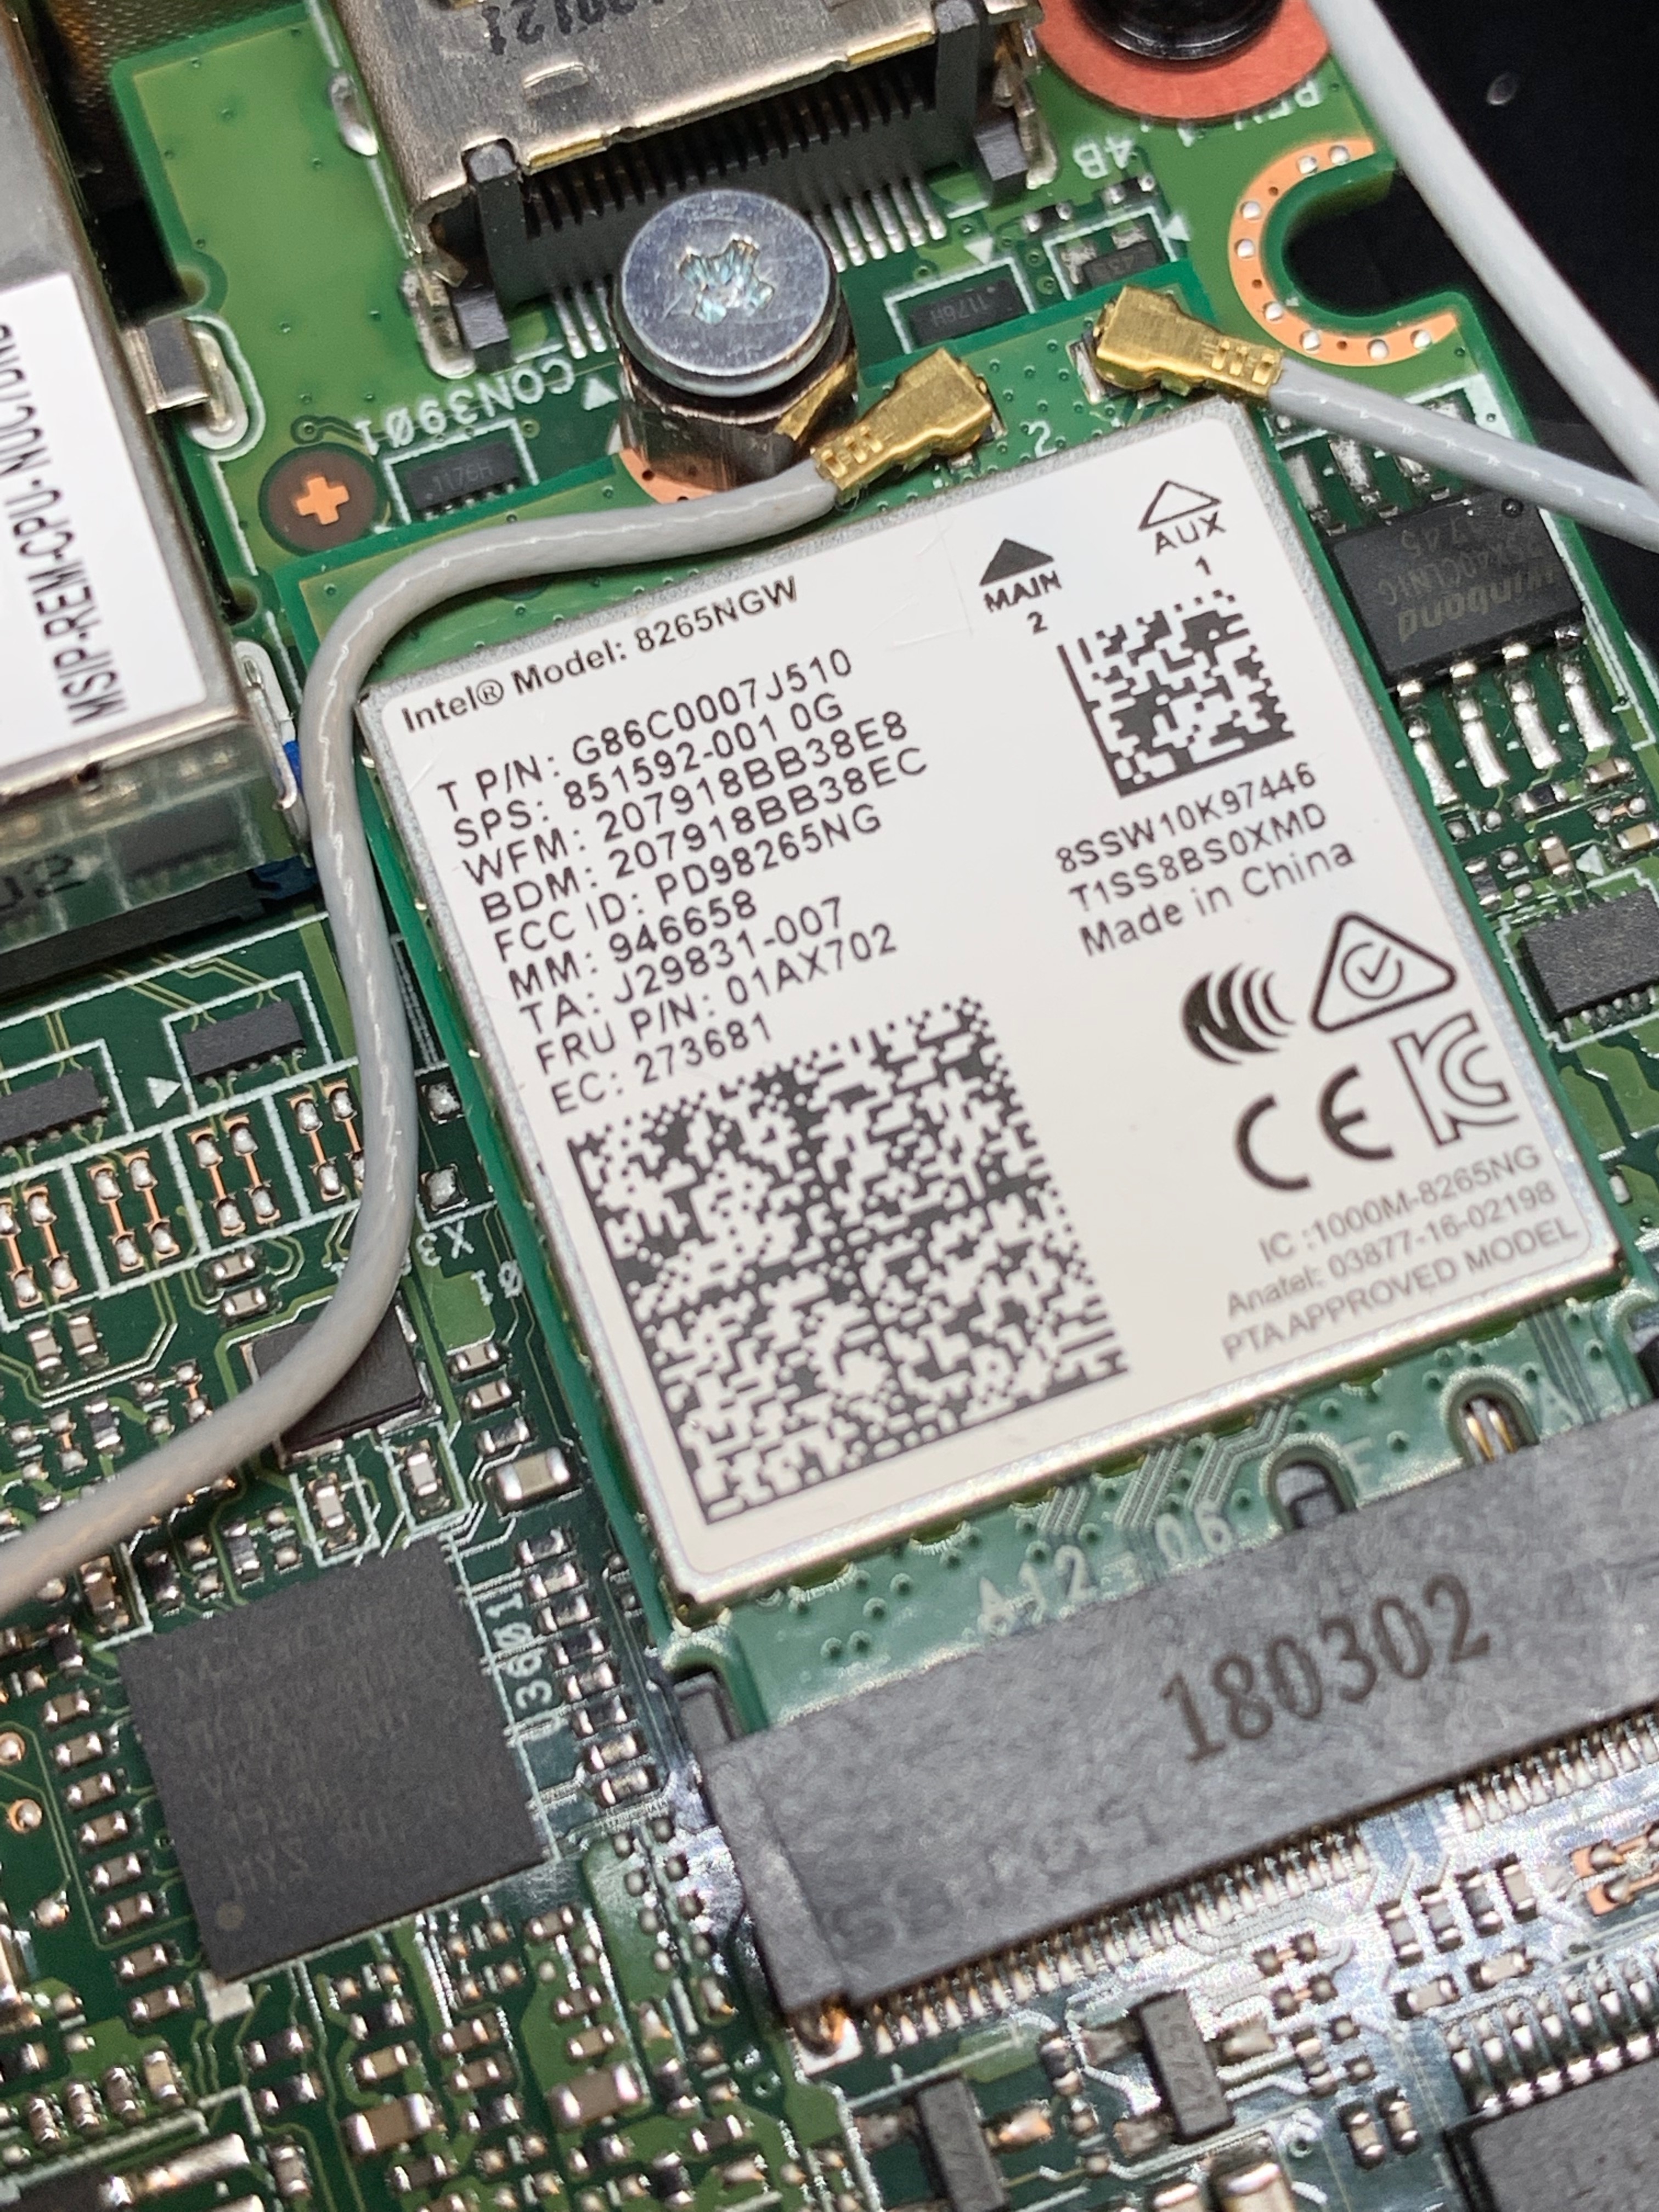
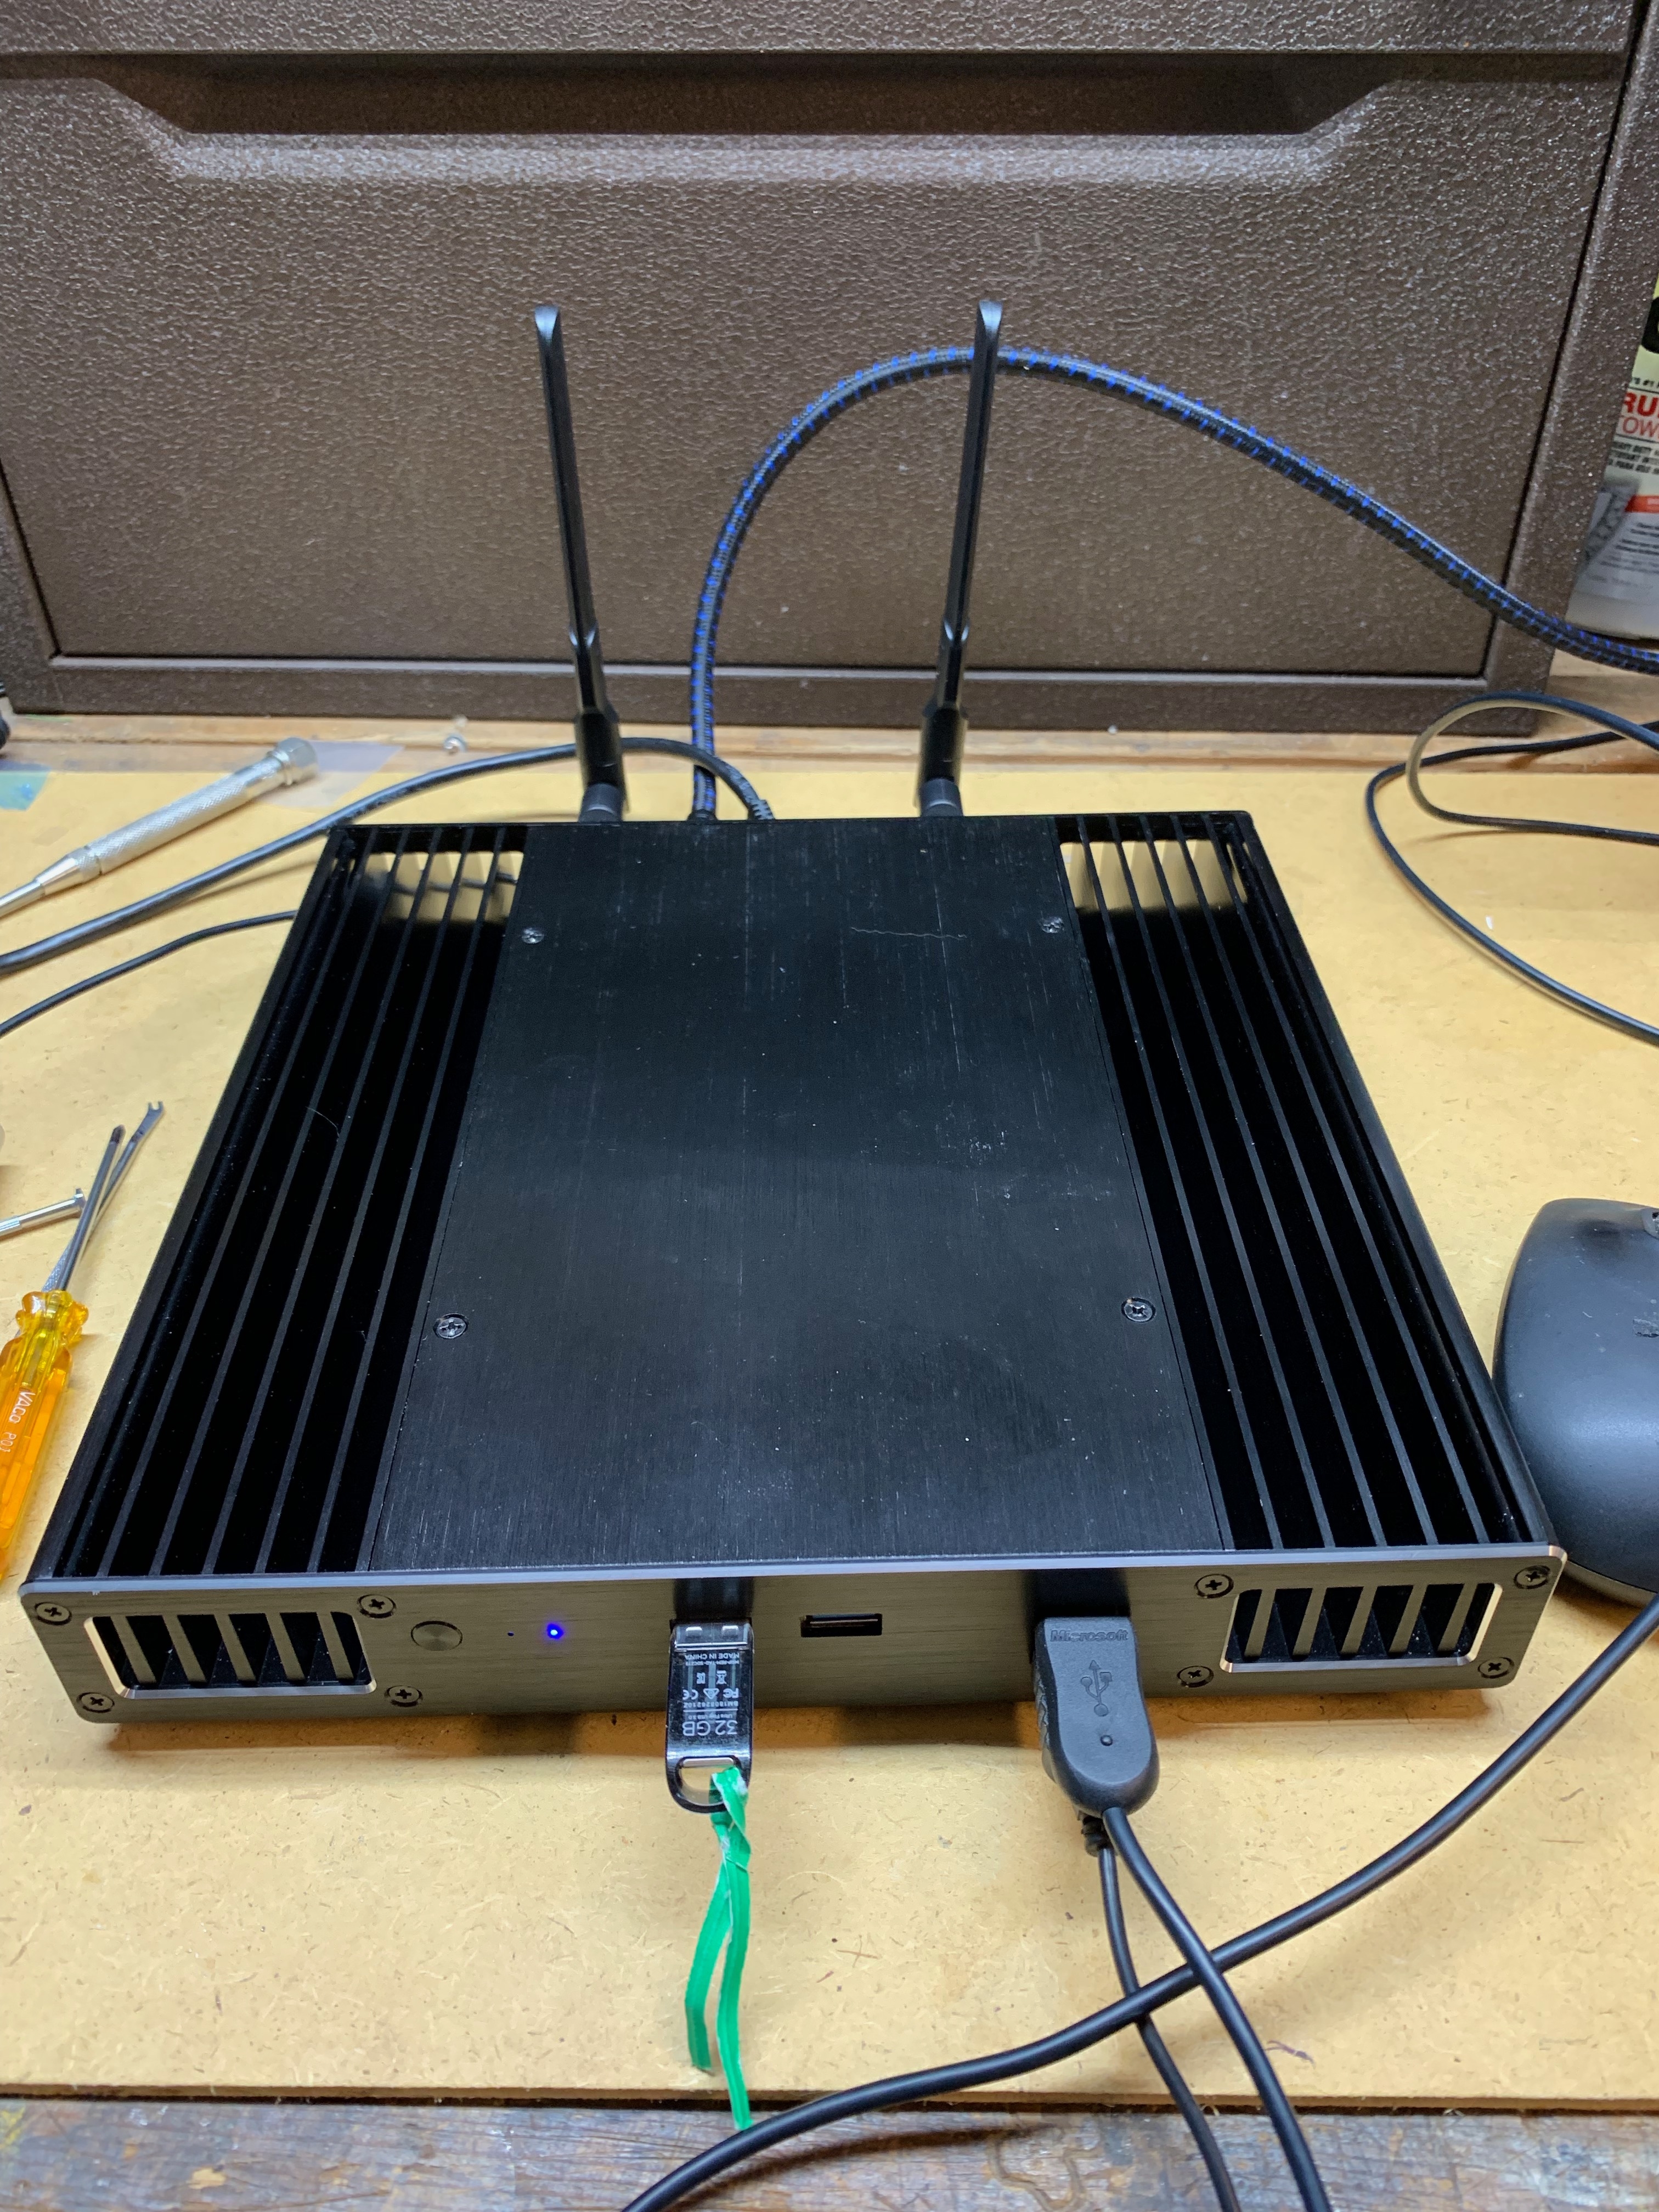
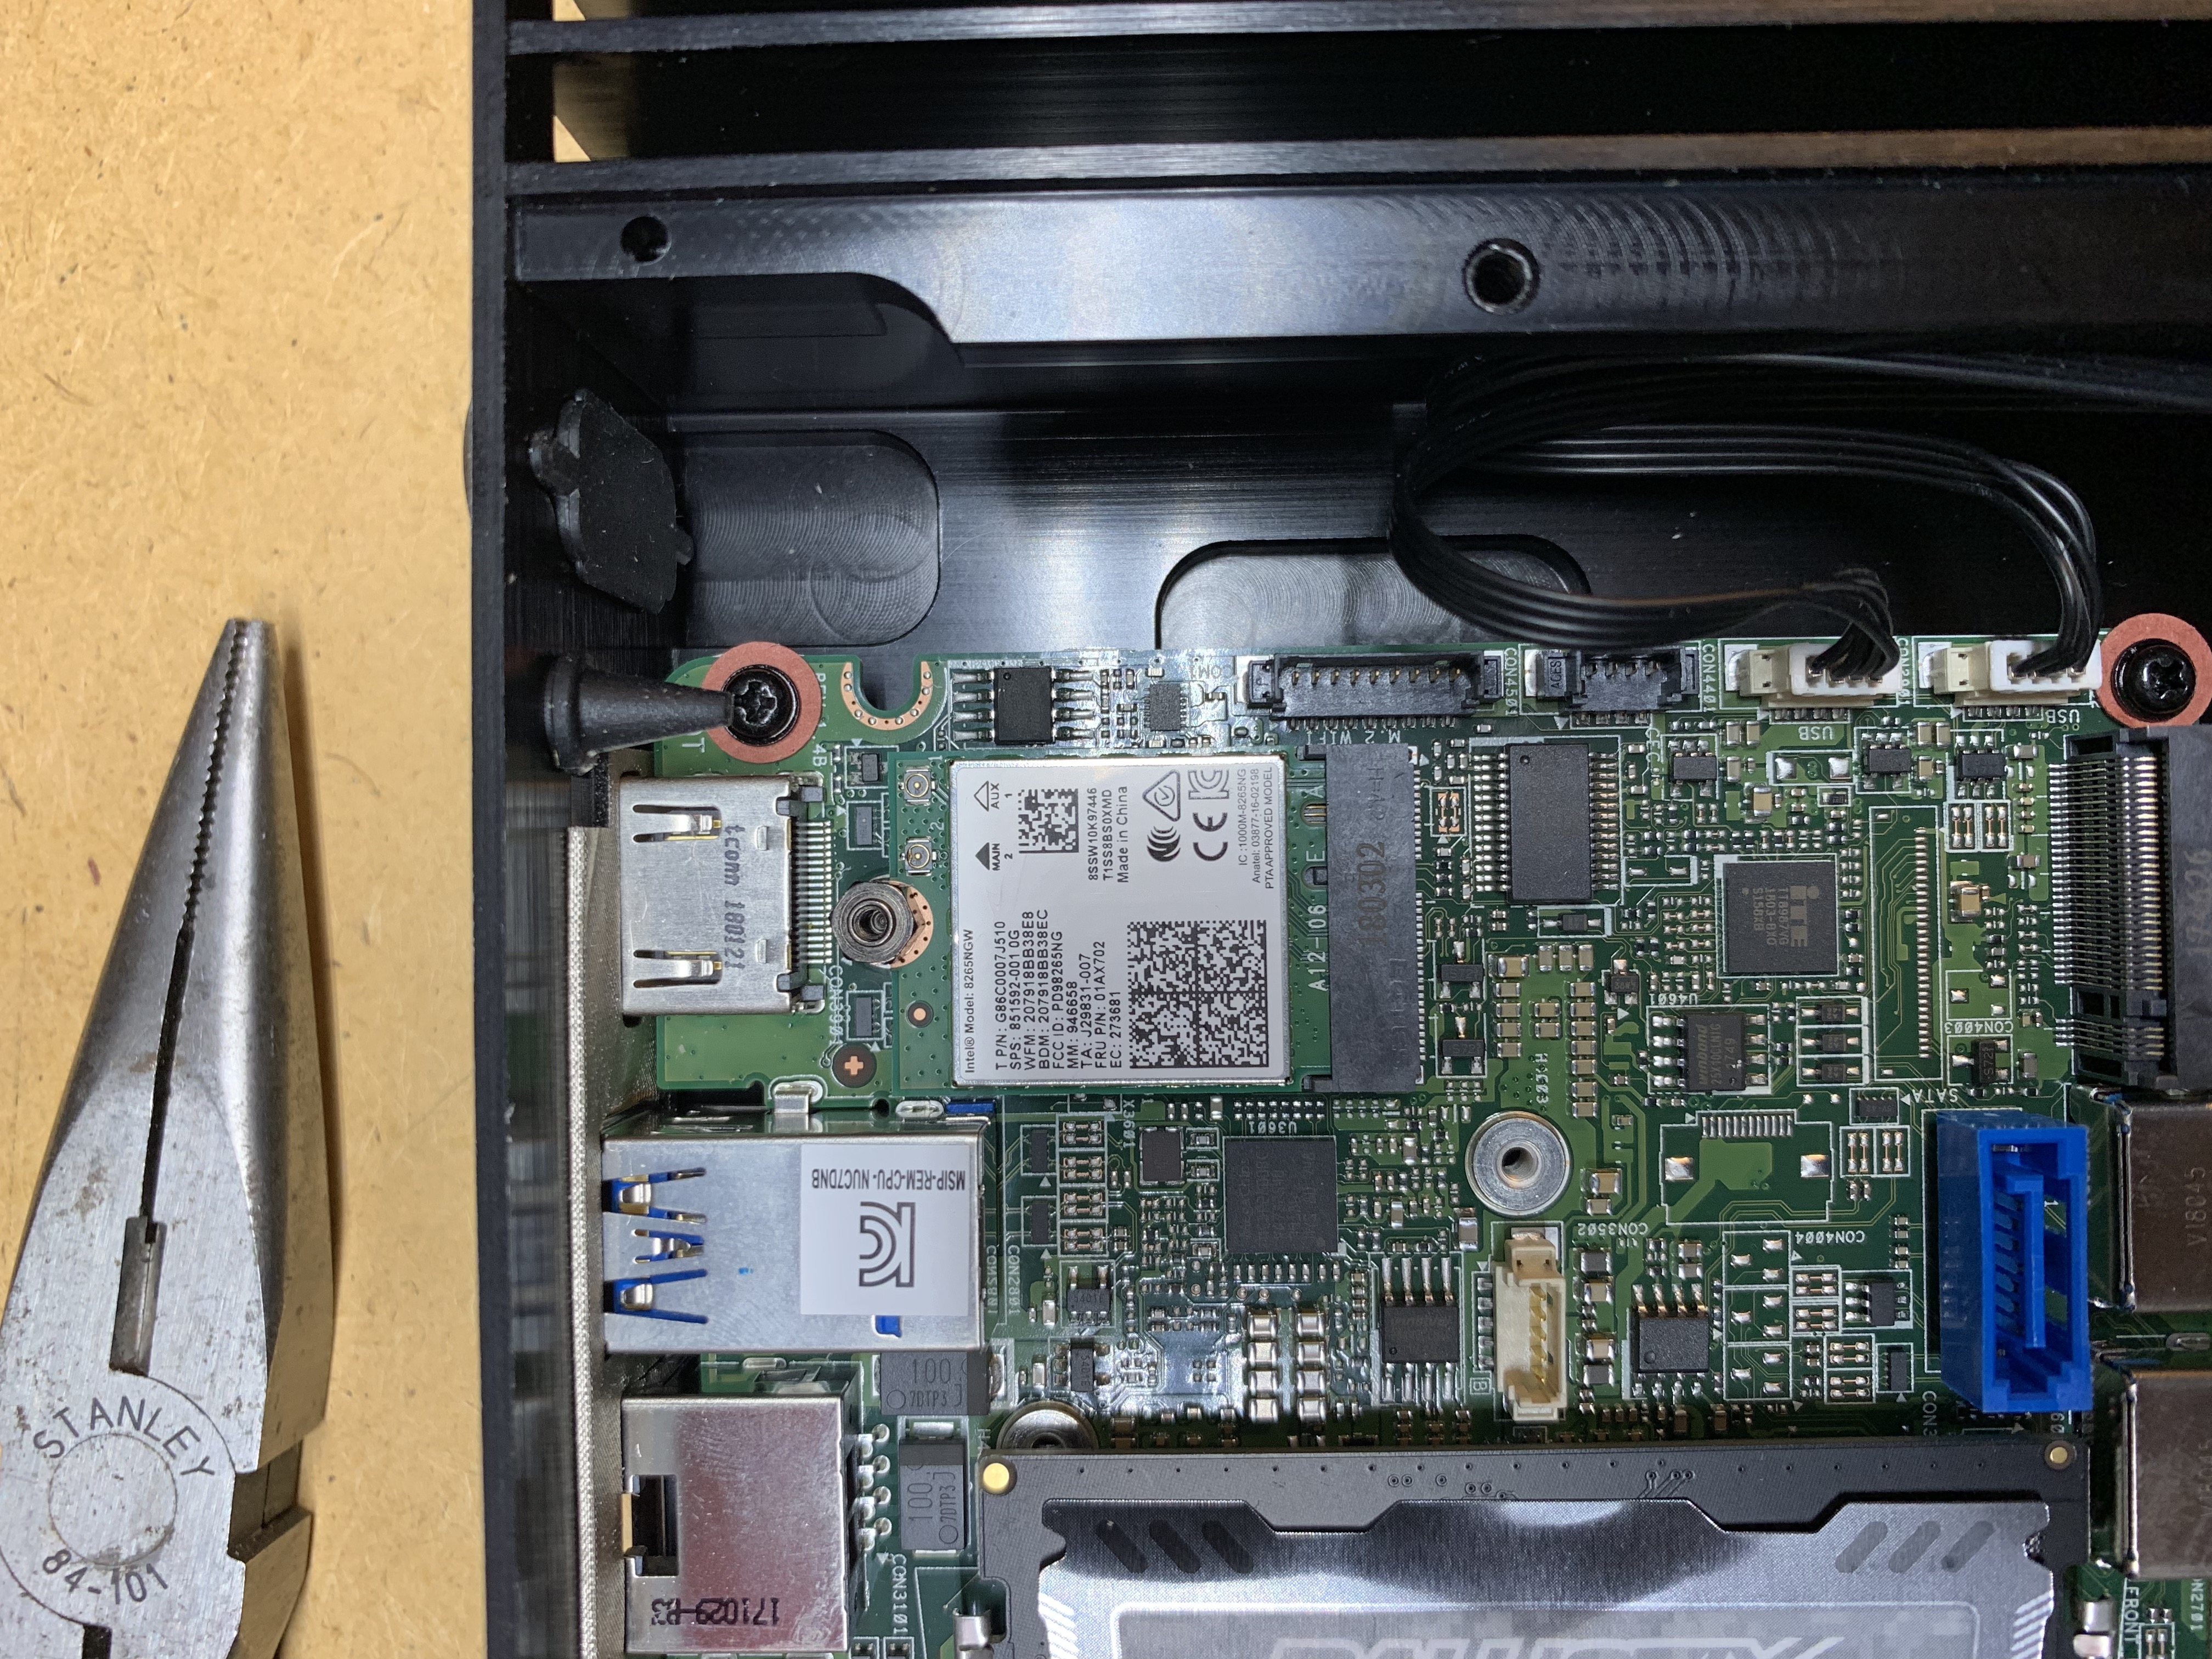
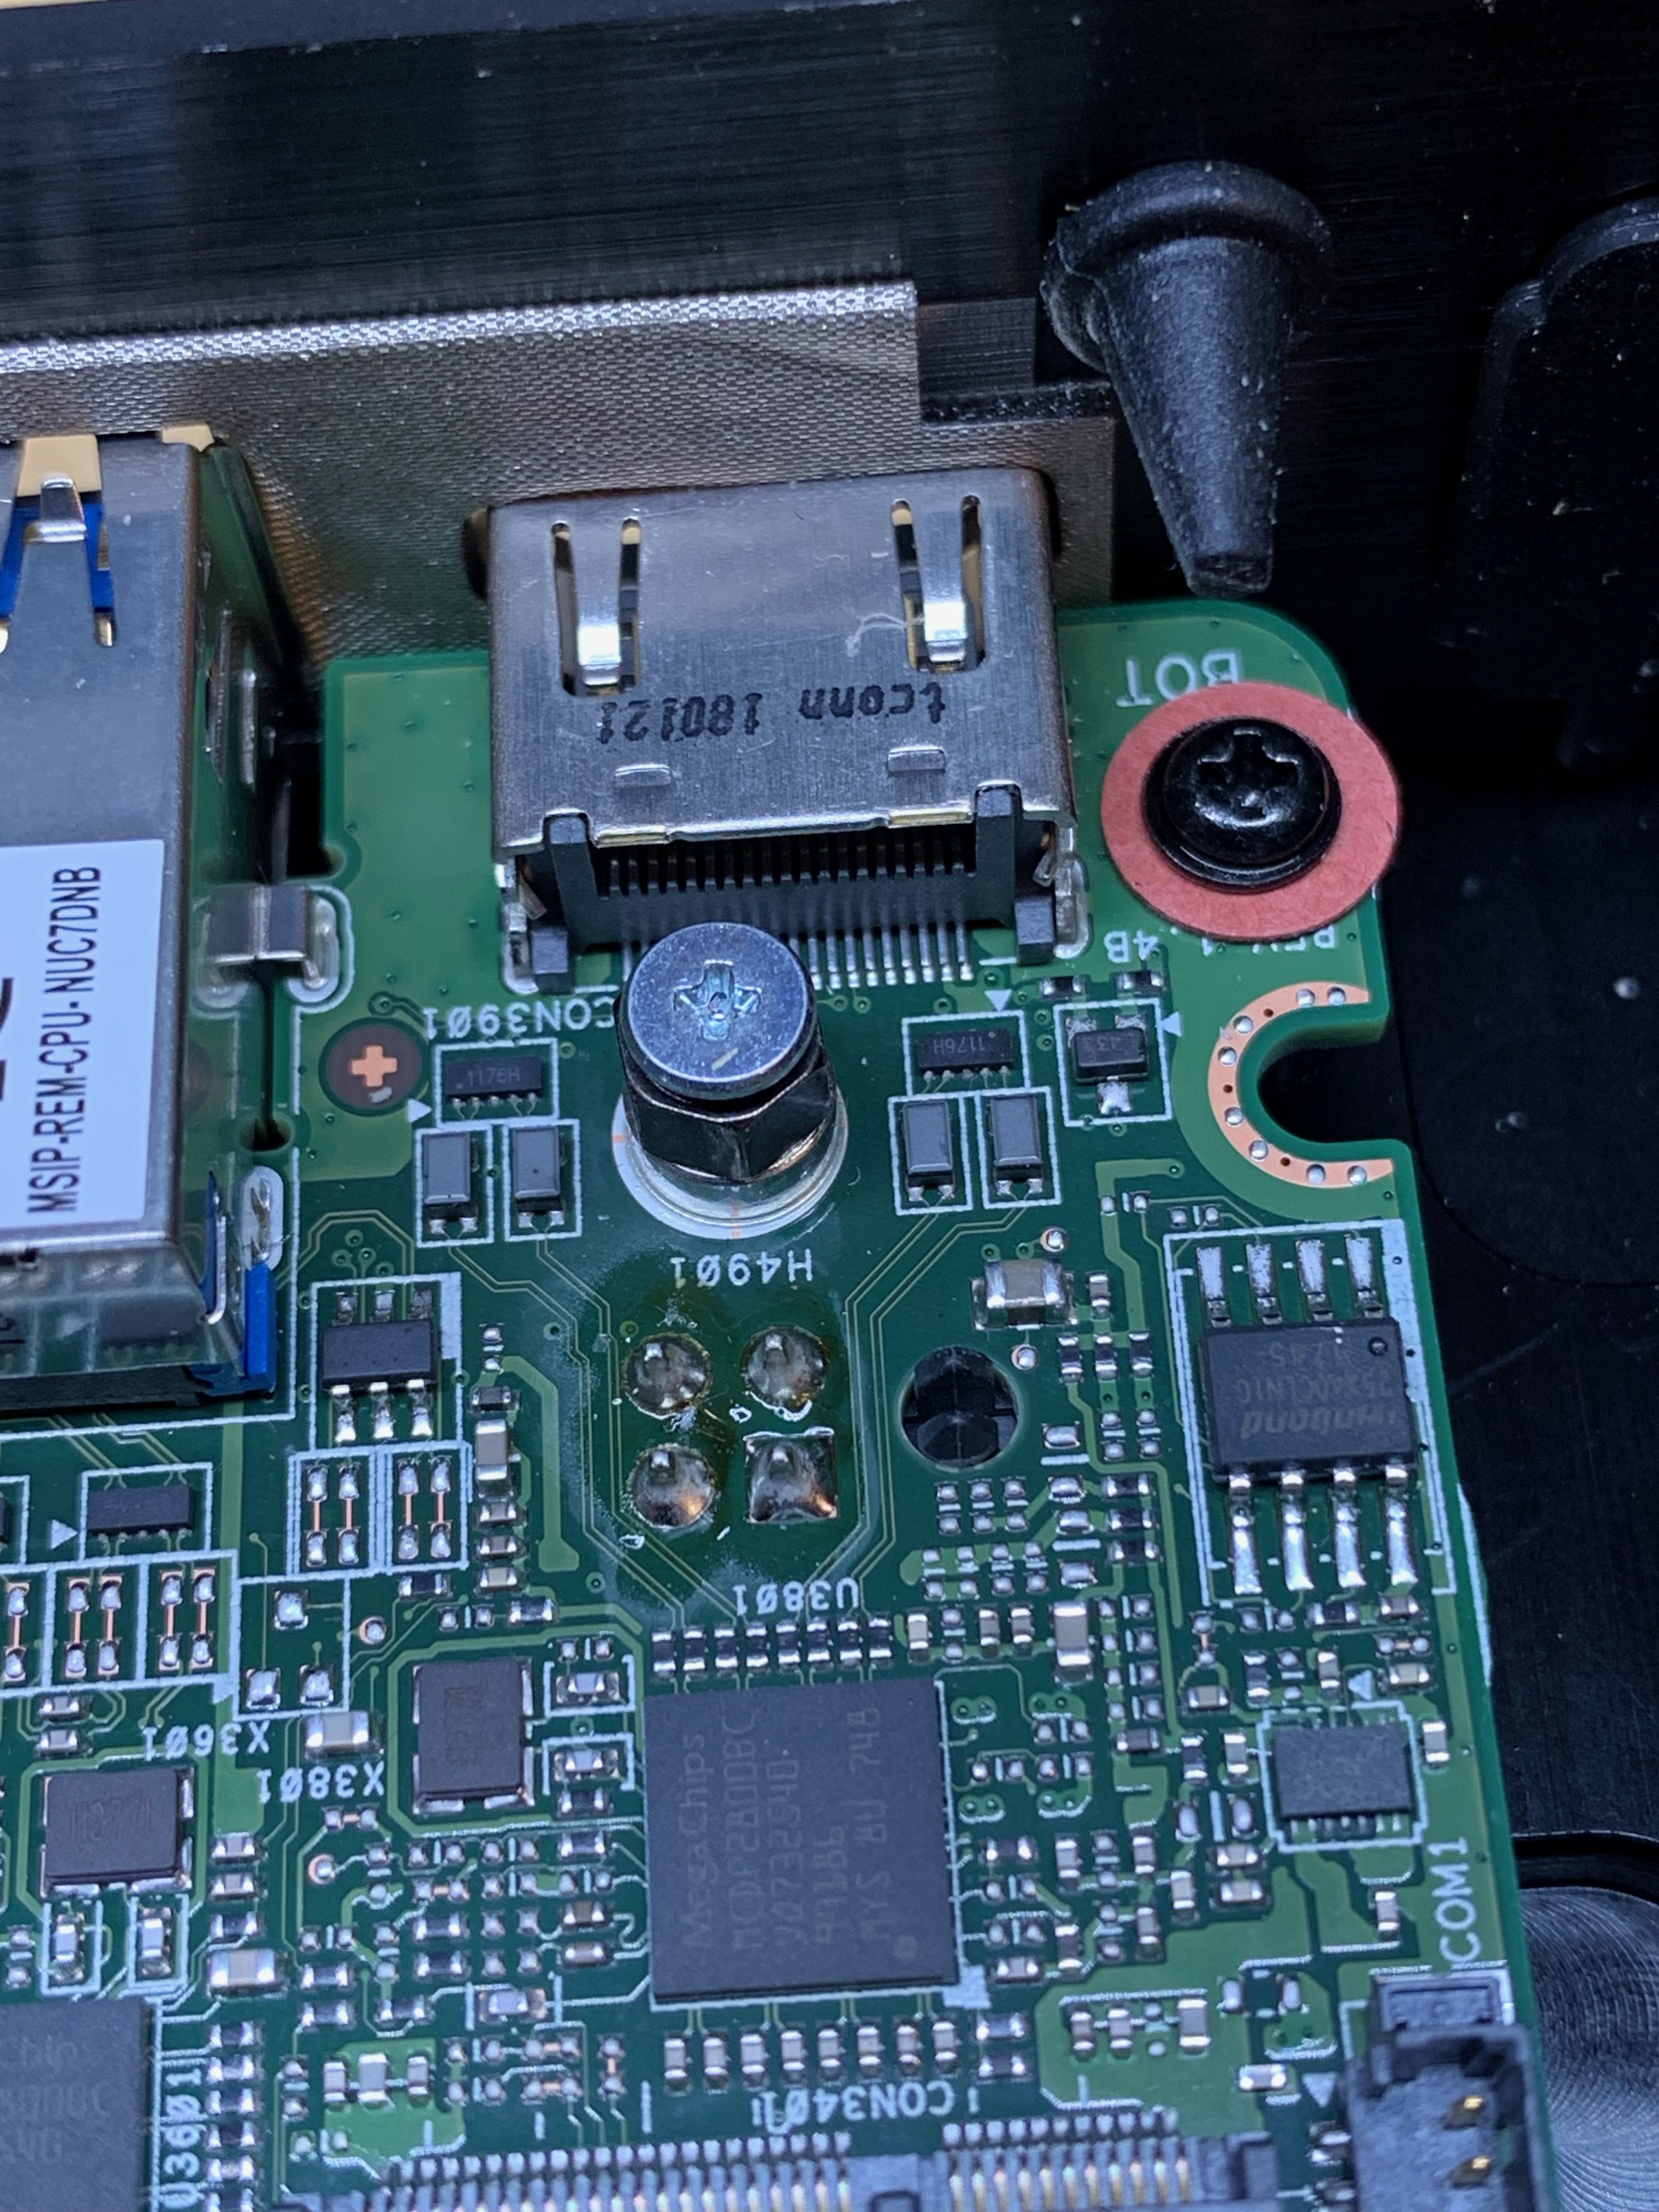

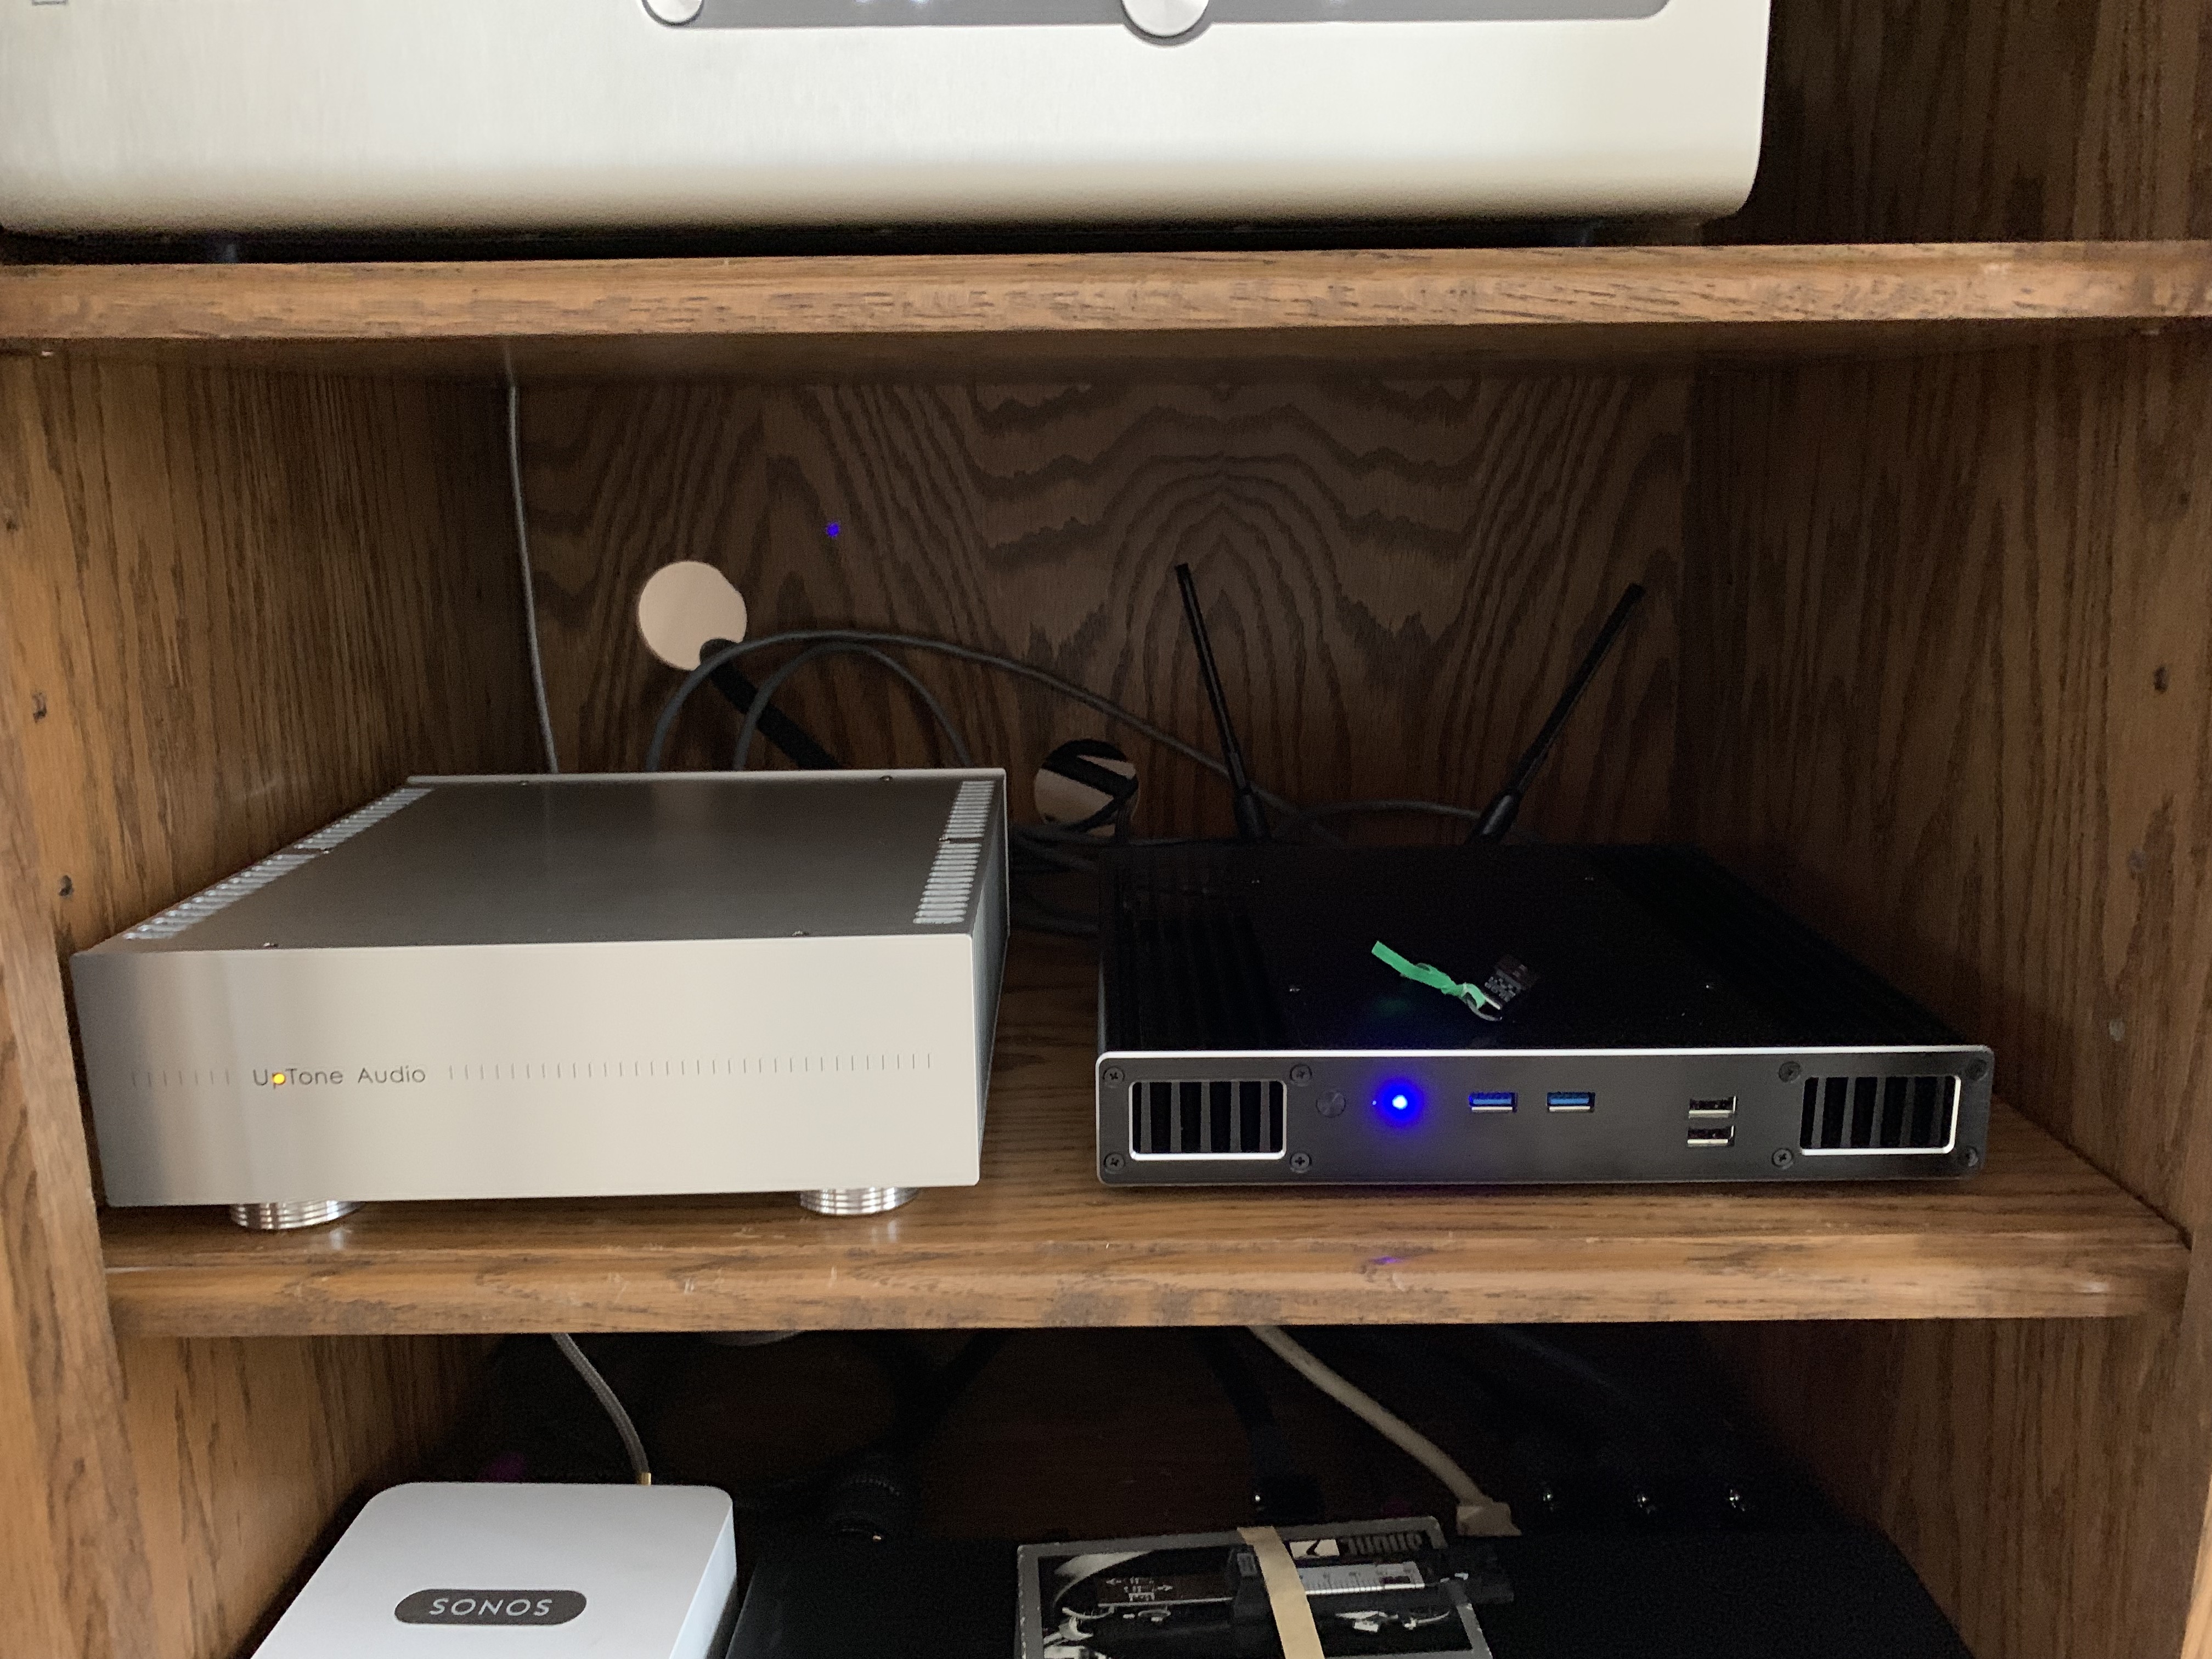
.thumb.jpeg.1701c7f1c4f880c62fdd0b0582f95043.jpeg)