


When I last updated everyone on my new listening room, I said "The sound right now is definitely livable" and "However, I am nowhere near satisfied with the sound." I wrapped up part one of this series by stating, "As it stands now, I really like the new listening room. I can't wait to get the acoustic panels installed to bring the sound quality up quite a bit. The room is a giant instrument and has the biggest affect on the sound quality of music. Forget about MQA, lossy, lossless, bit perfect, upsampling, music servers, or even speakers. If the room isn't good, the sound isn't good no matter what one does to the system."
Quite a bit has changed since I wrote that. My room sounds spectacular right now. This is the best sound I've ever had, period. What follows is a description of what has changed and what was done to get my room to its current level.
Step One - Acoustics
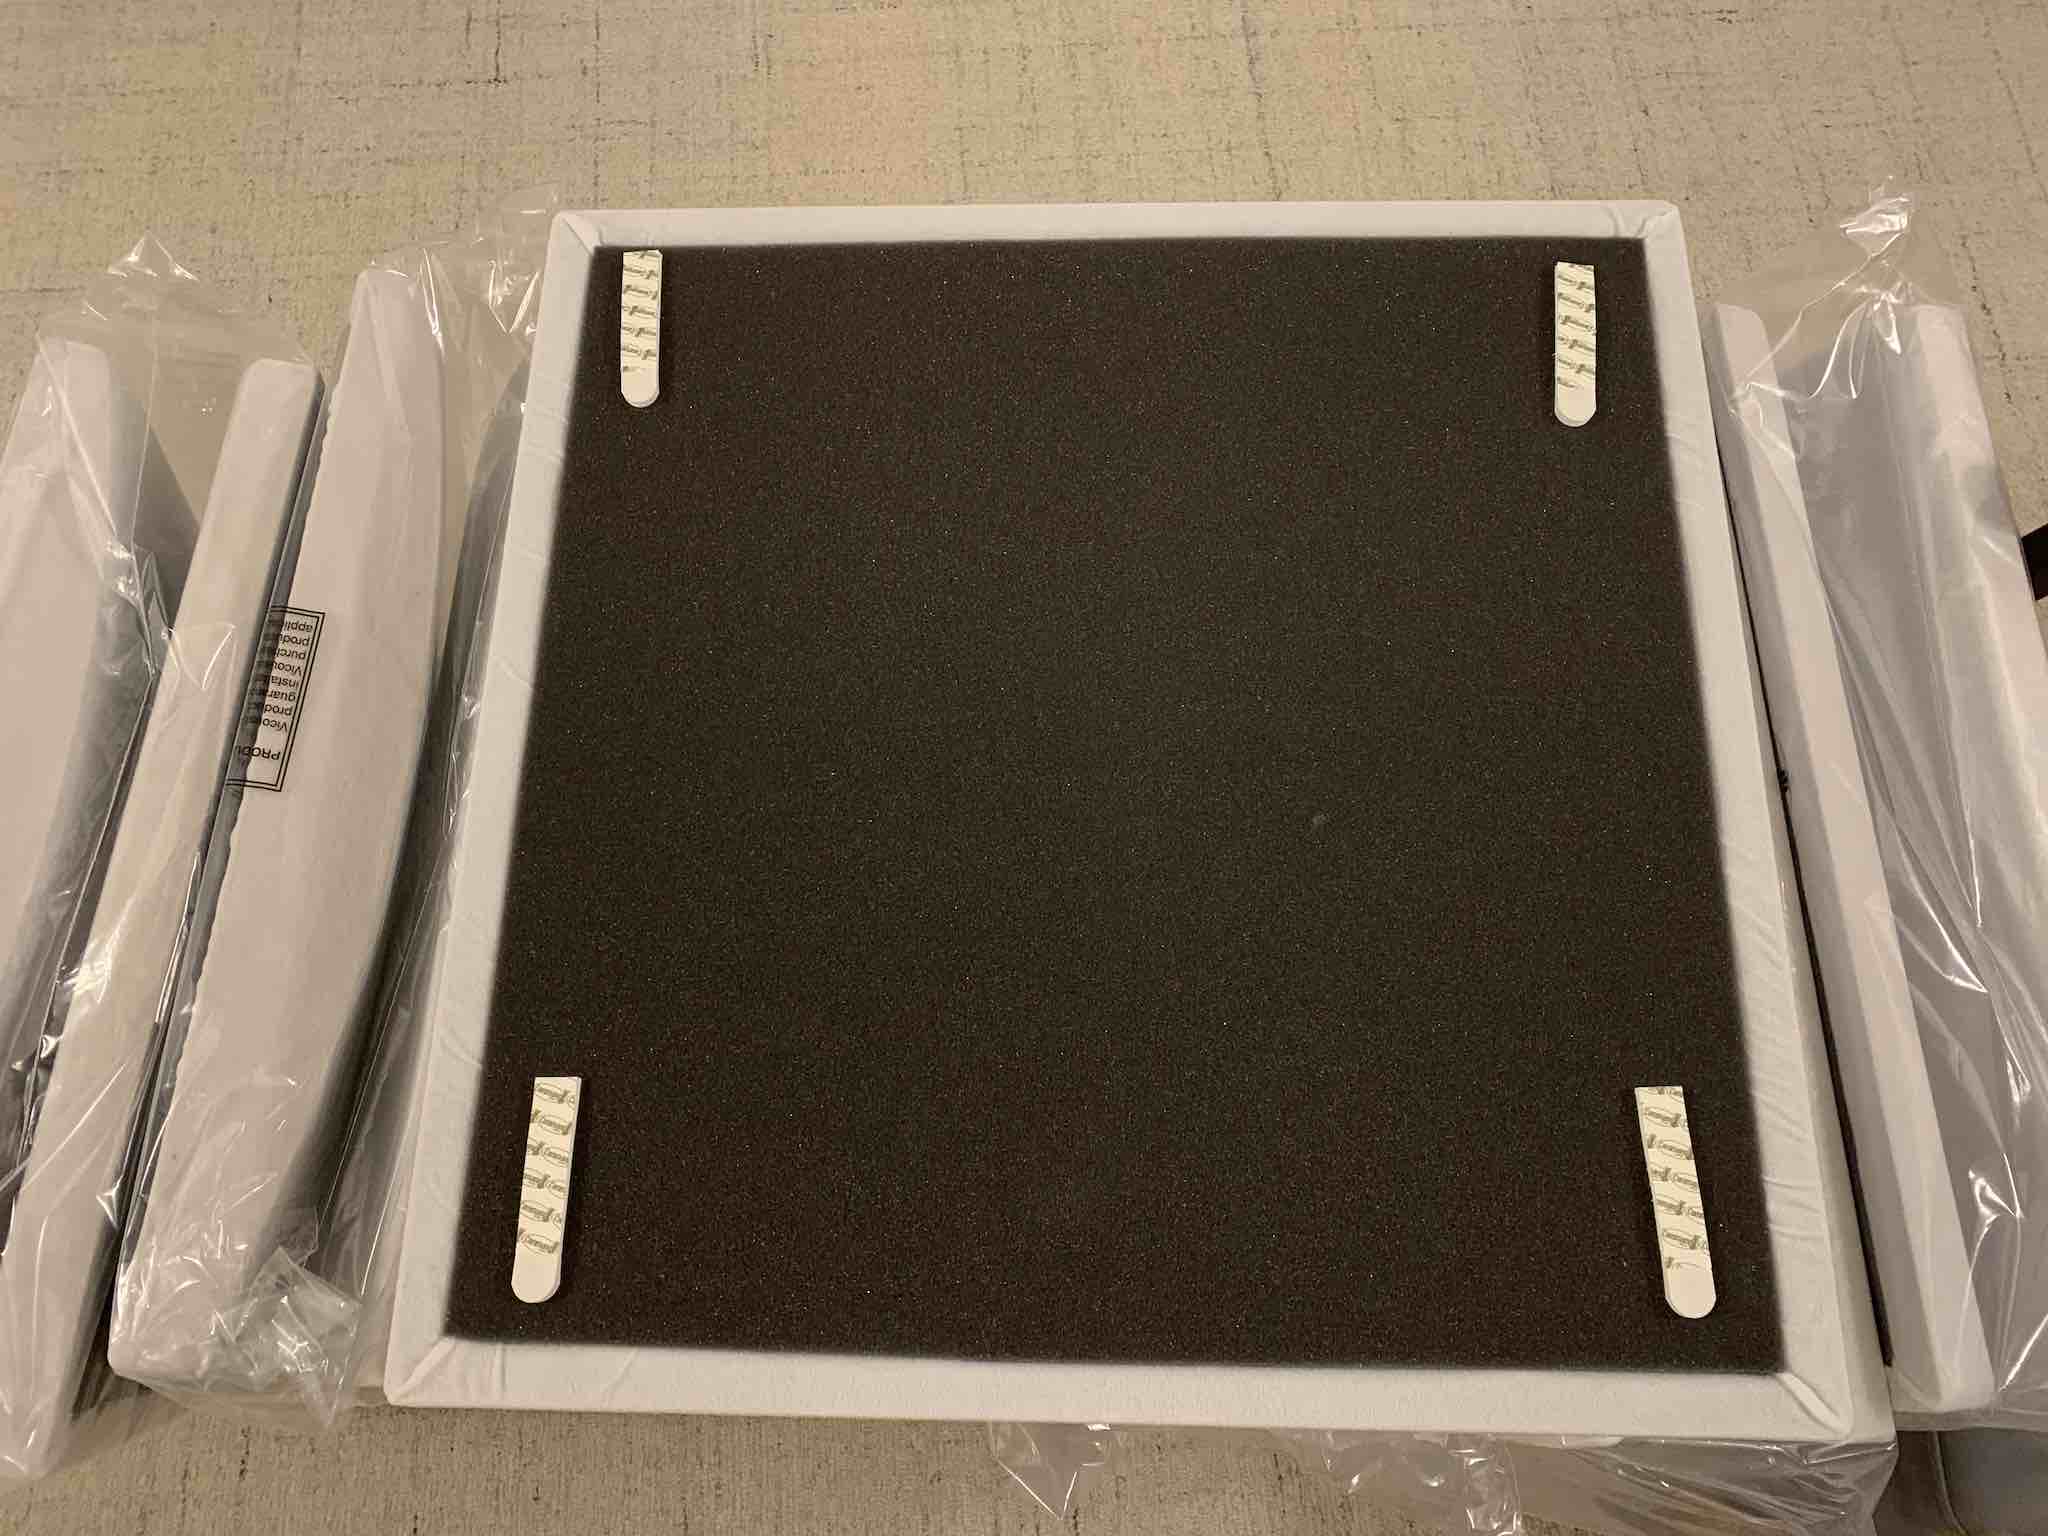
As I said in Part One, I worked with Vicoustic to come up with a plan for room acoustics. Vicoustic delivered a very detailed proposal (PDF 5.6MB) with predicted results, if I followed its recommendations. I bounced the recommendations around to a few friends in the industry and based on their input decided to order 2/3 of Vicoustic's recommended package as a starting point. I didn't purchase the recommended Super Bass Extreme Premium bass traps because I wanted to make sure any bass issues I had, once measured, would be remedied by these traps.
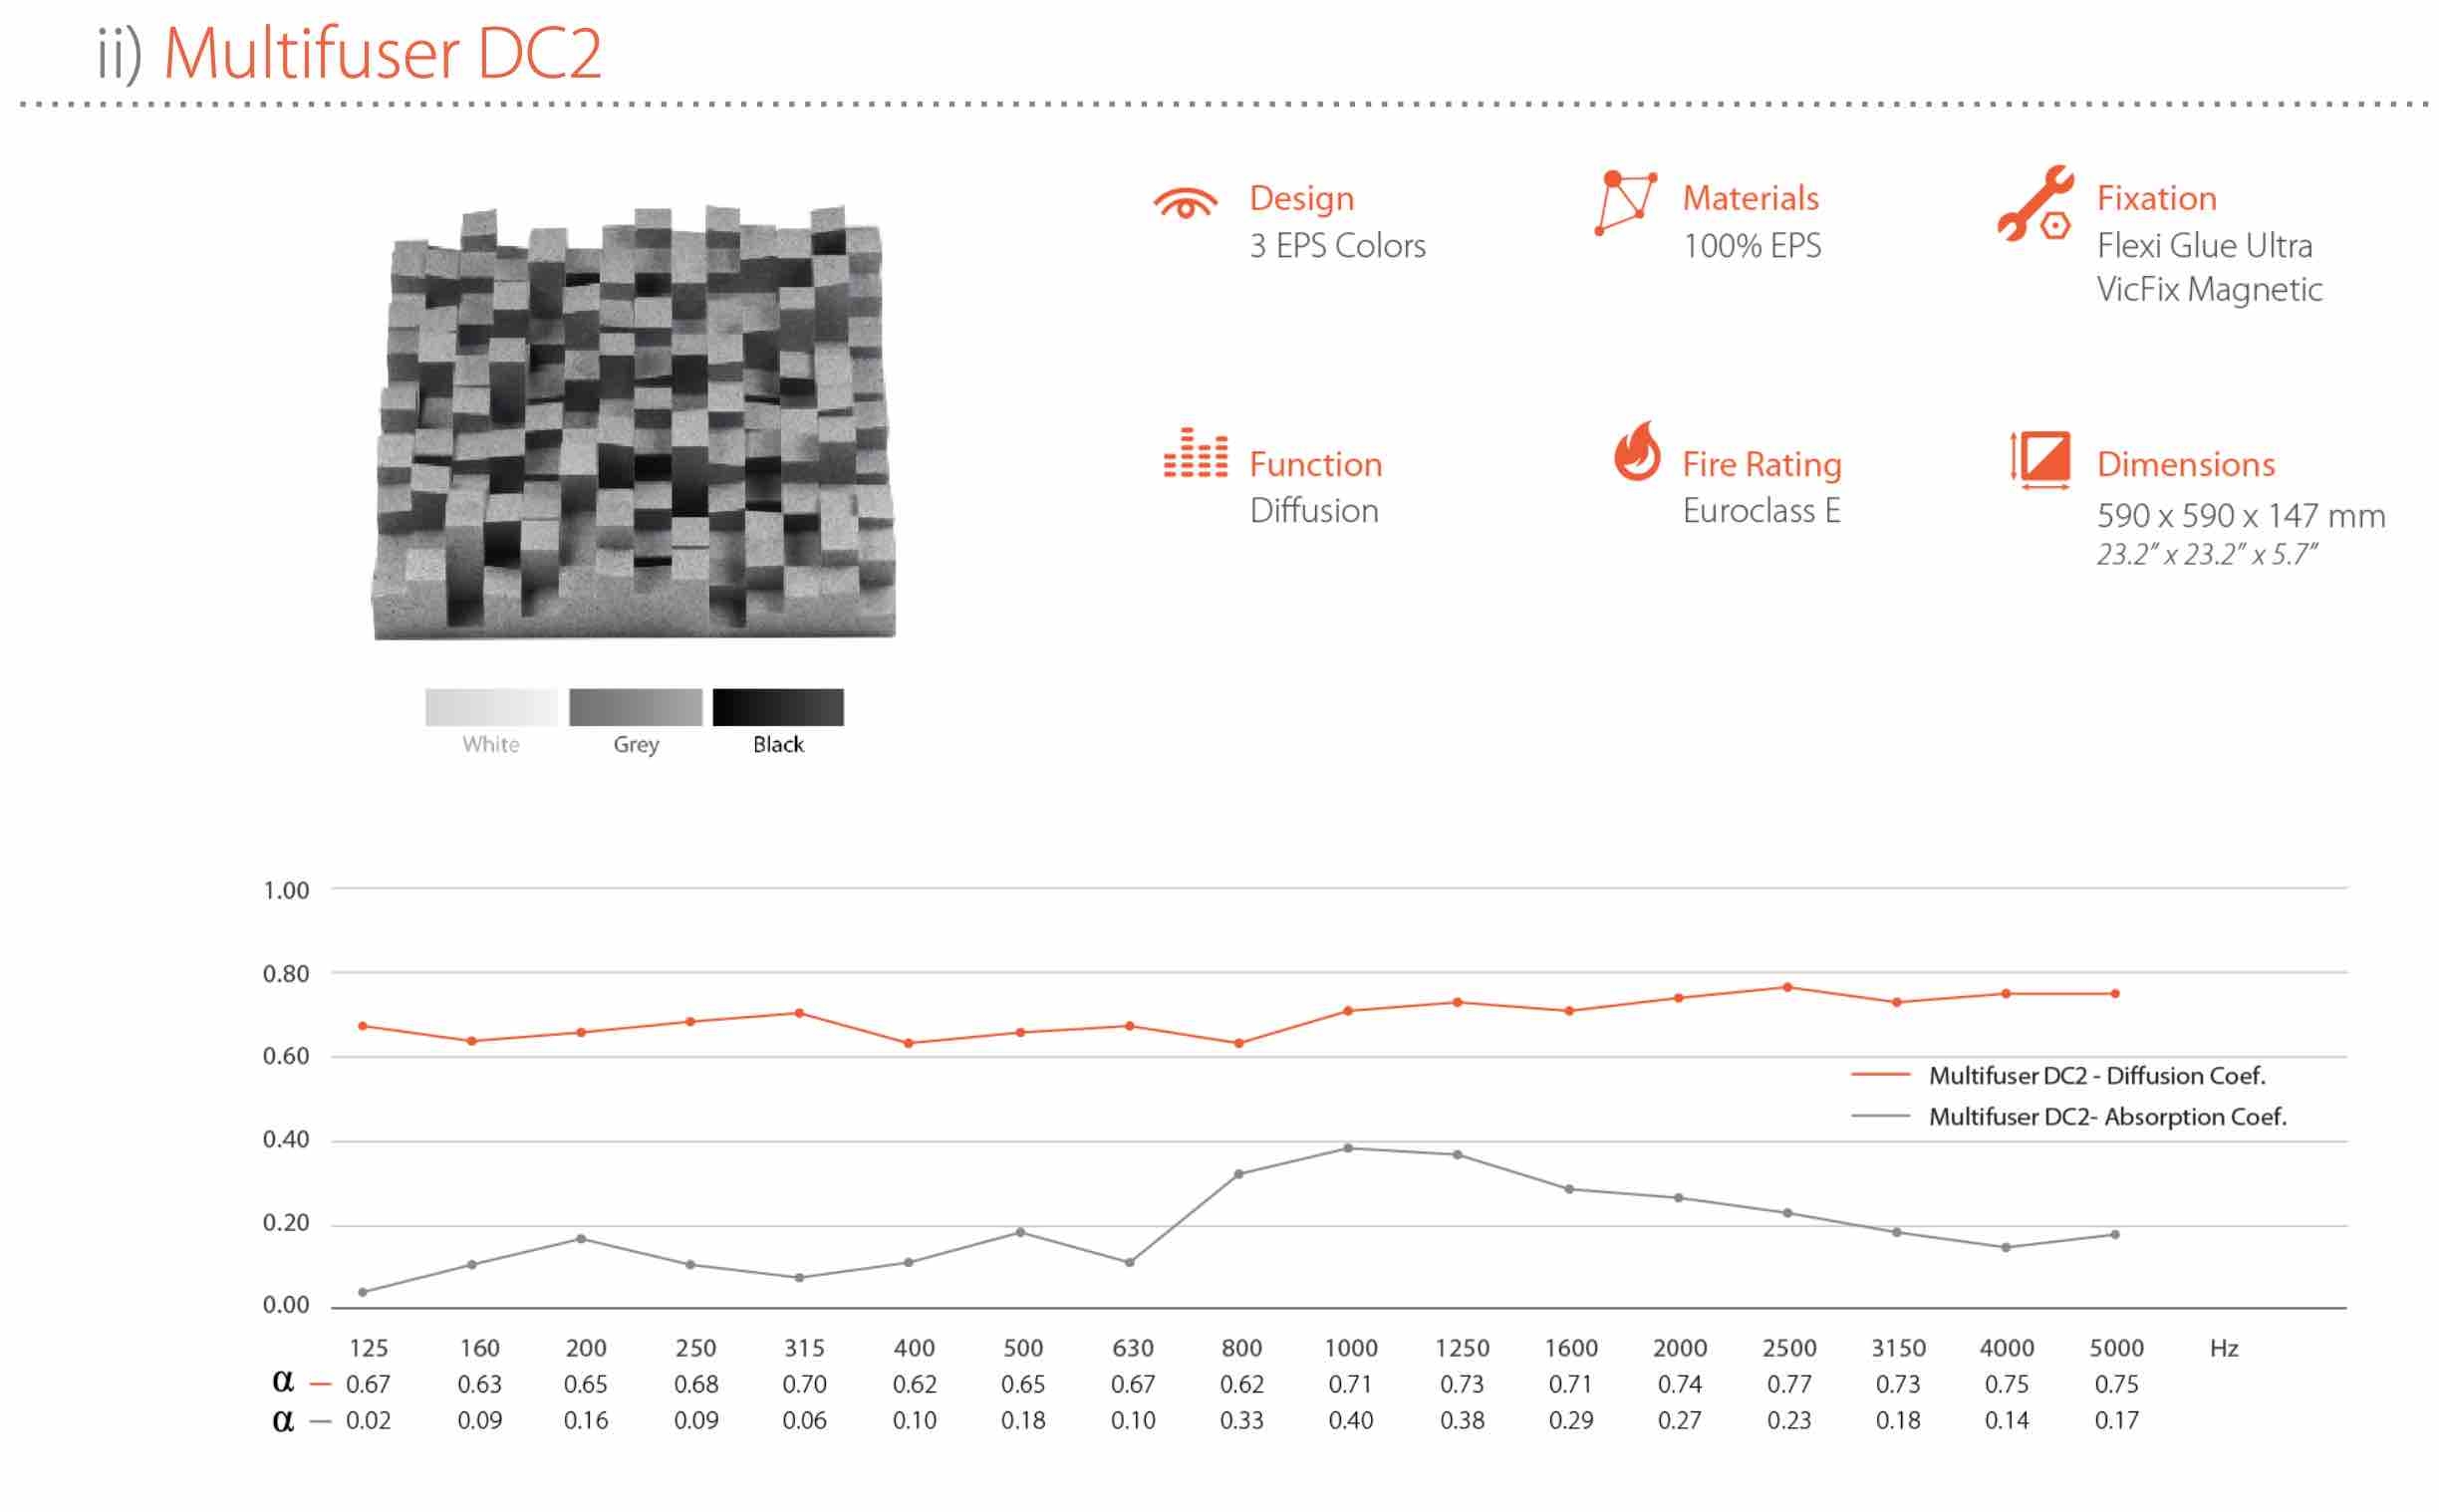
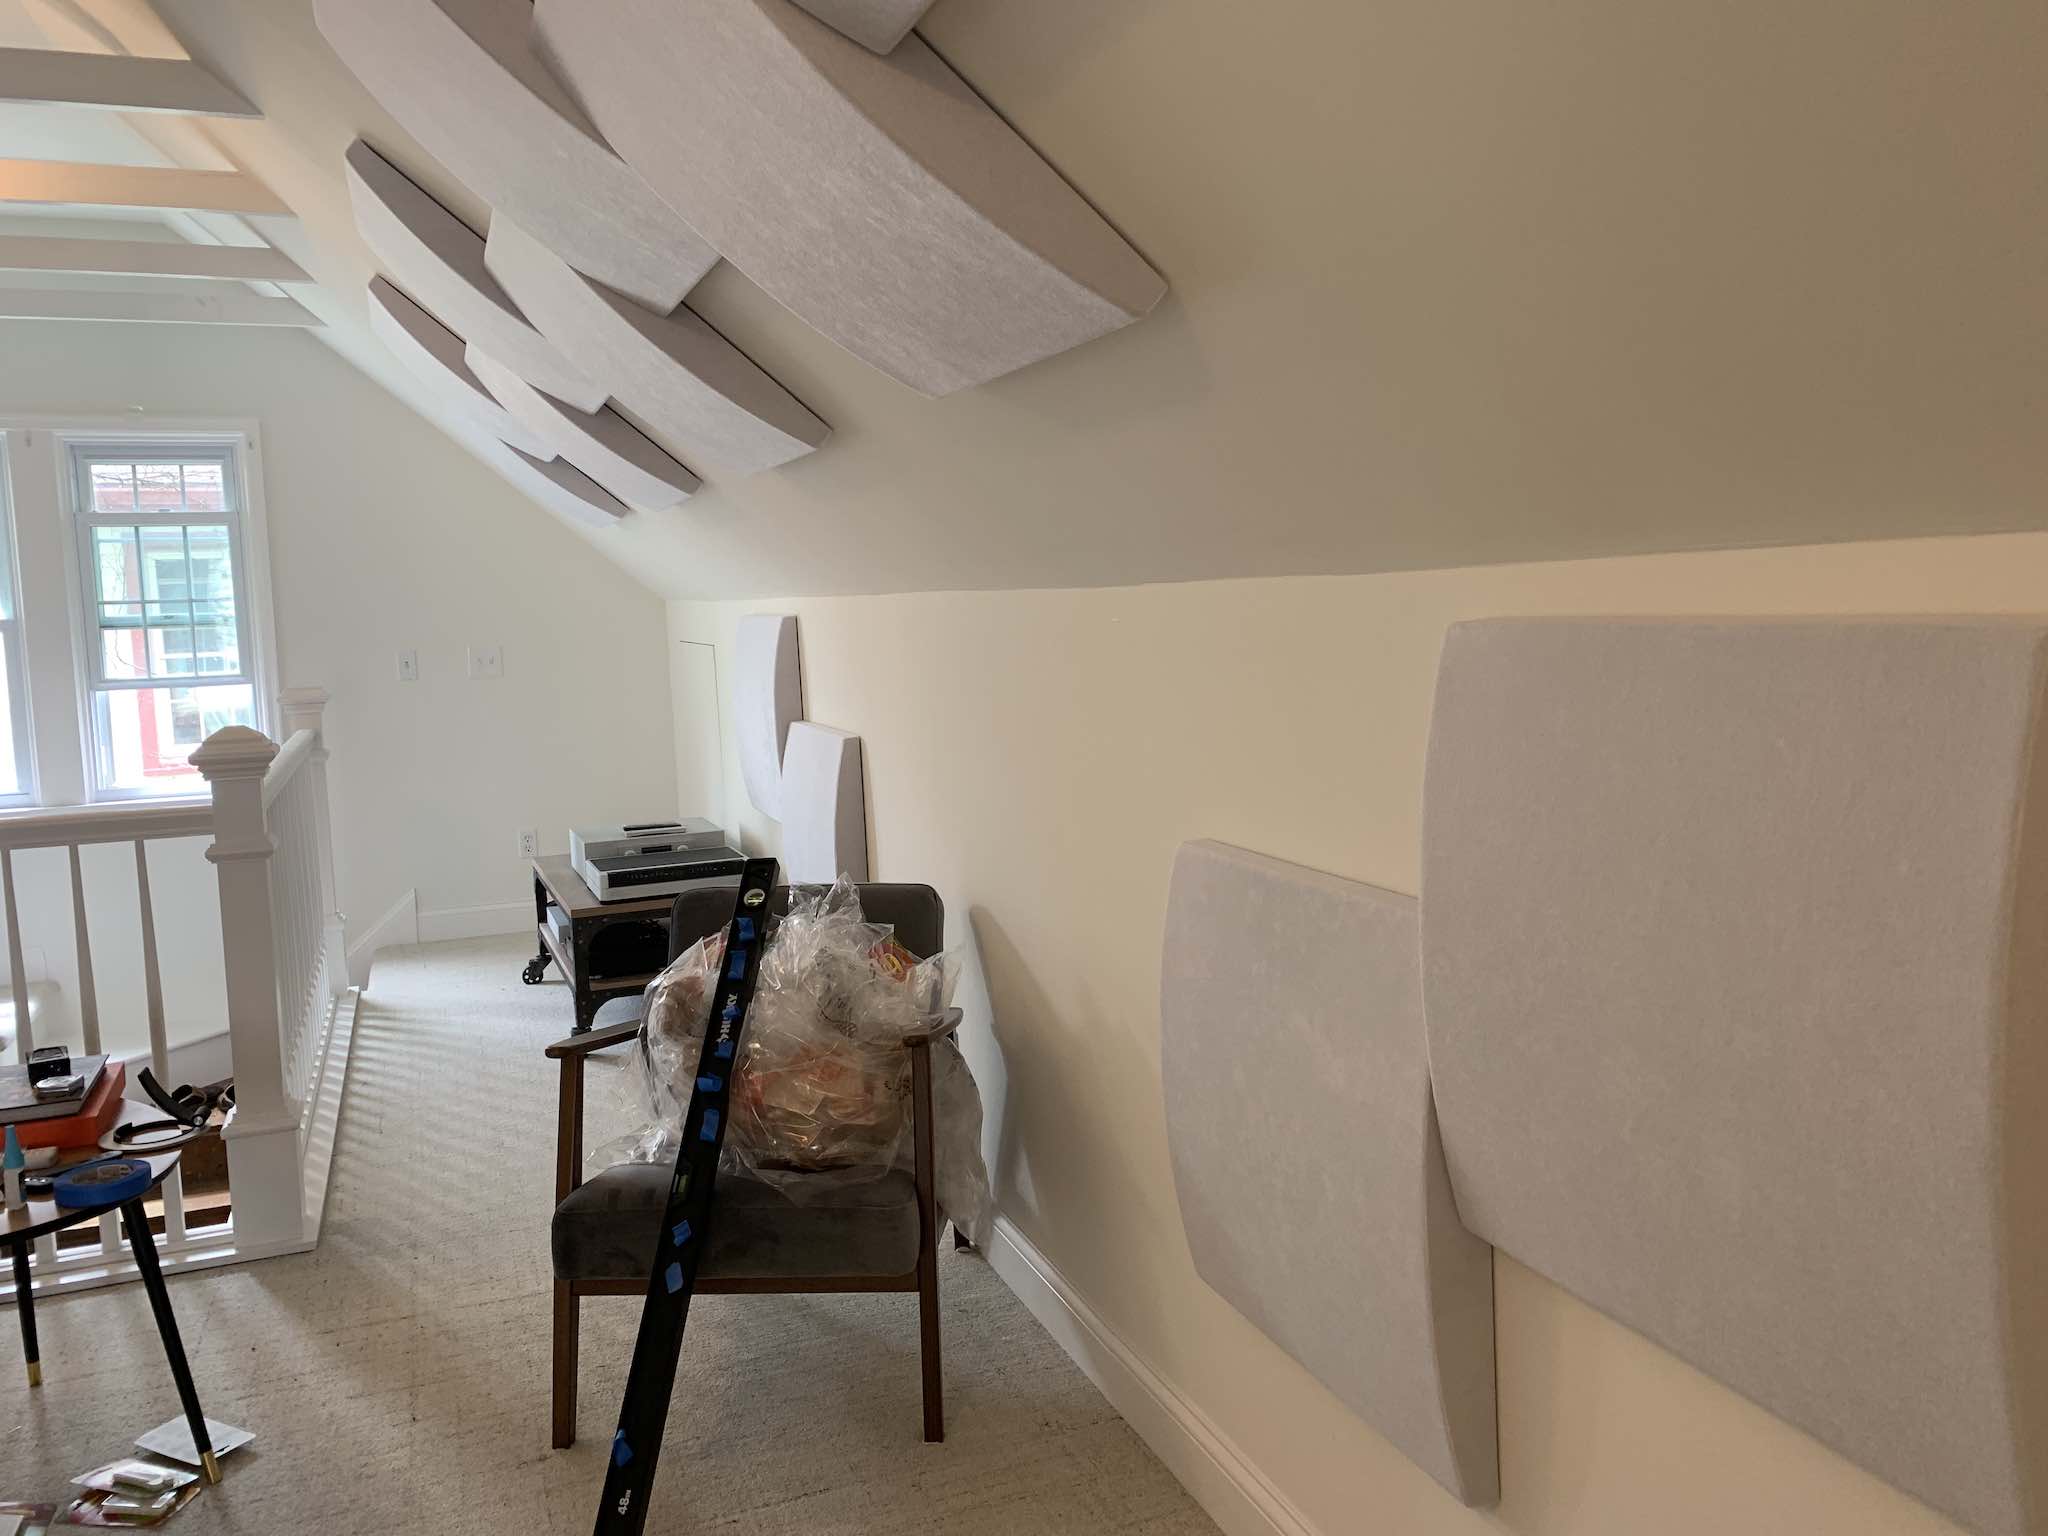
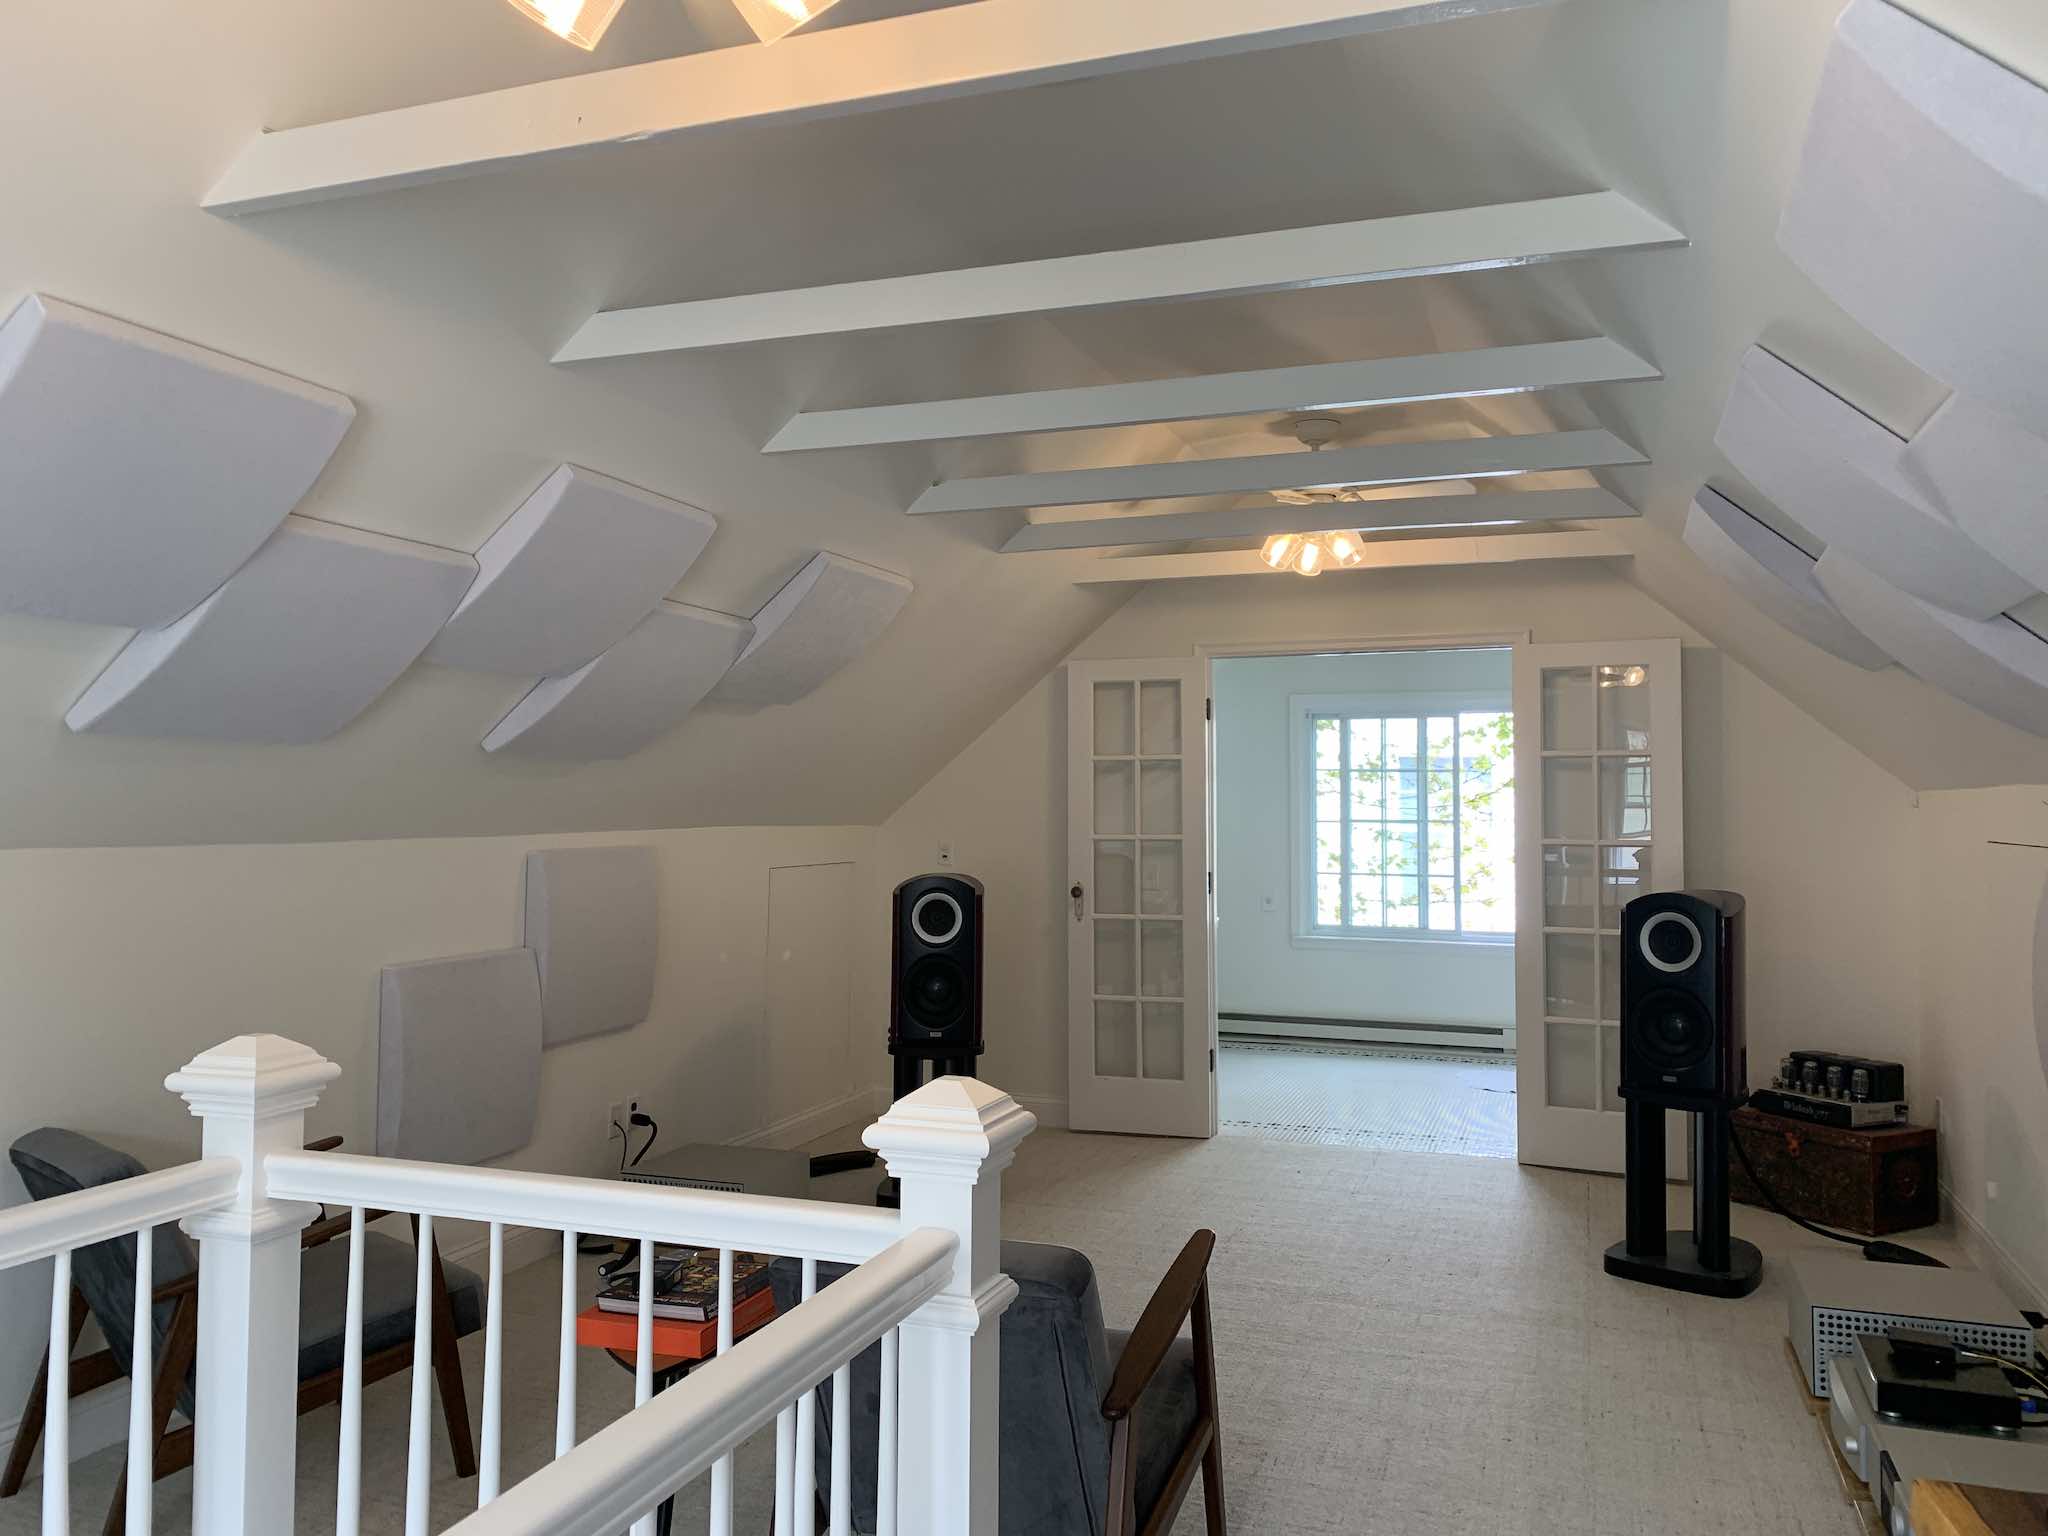
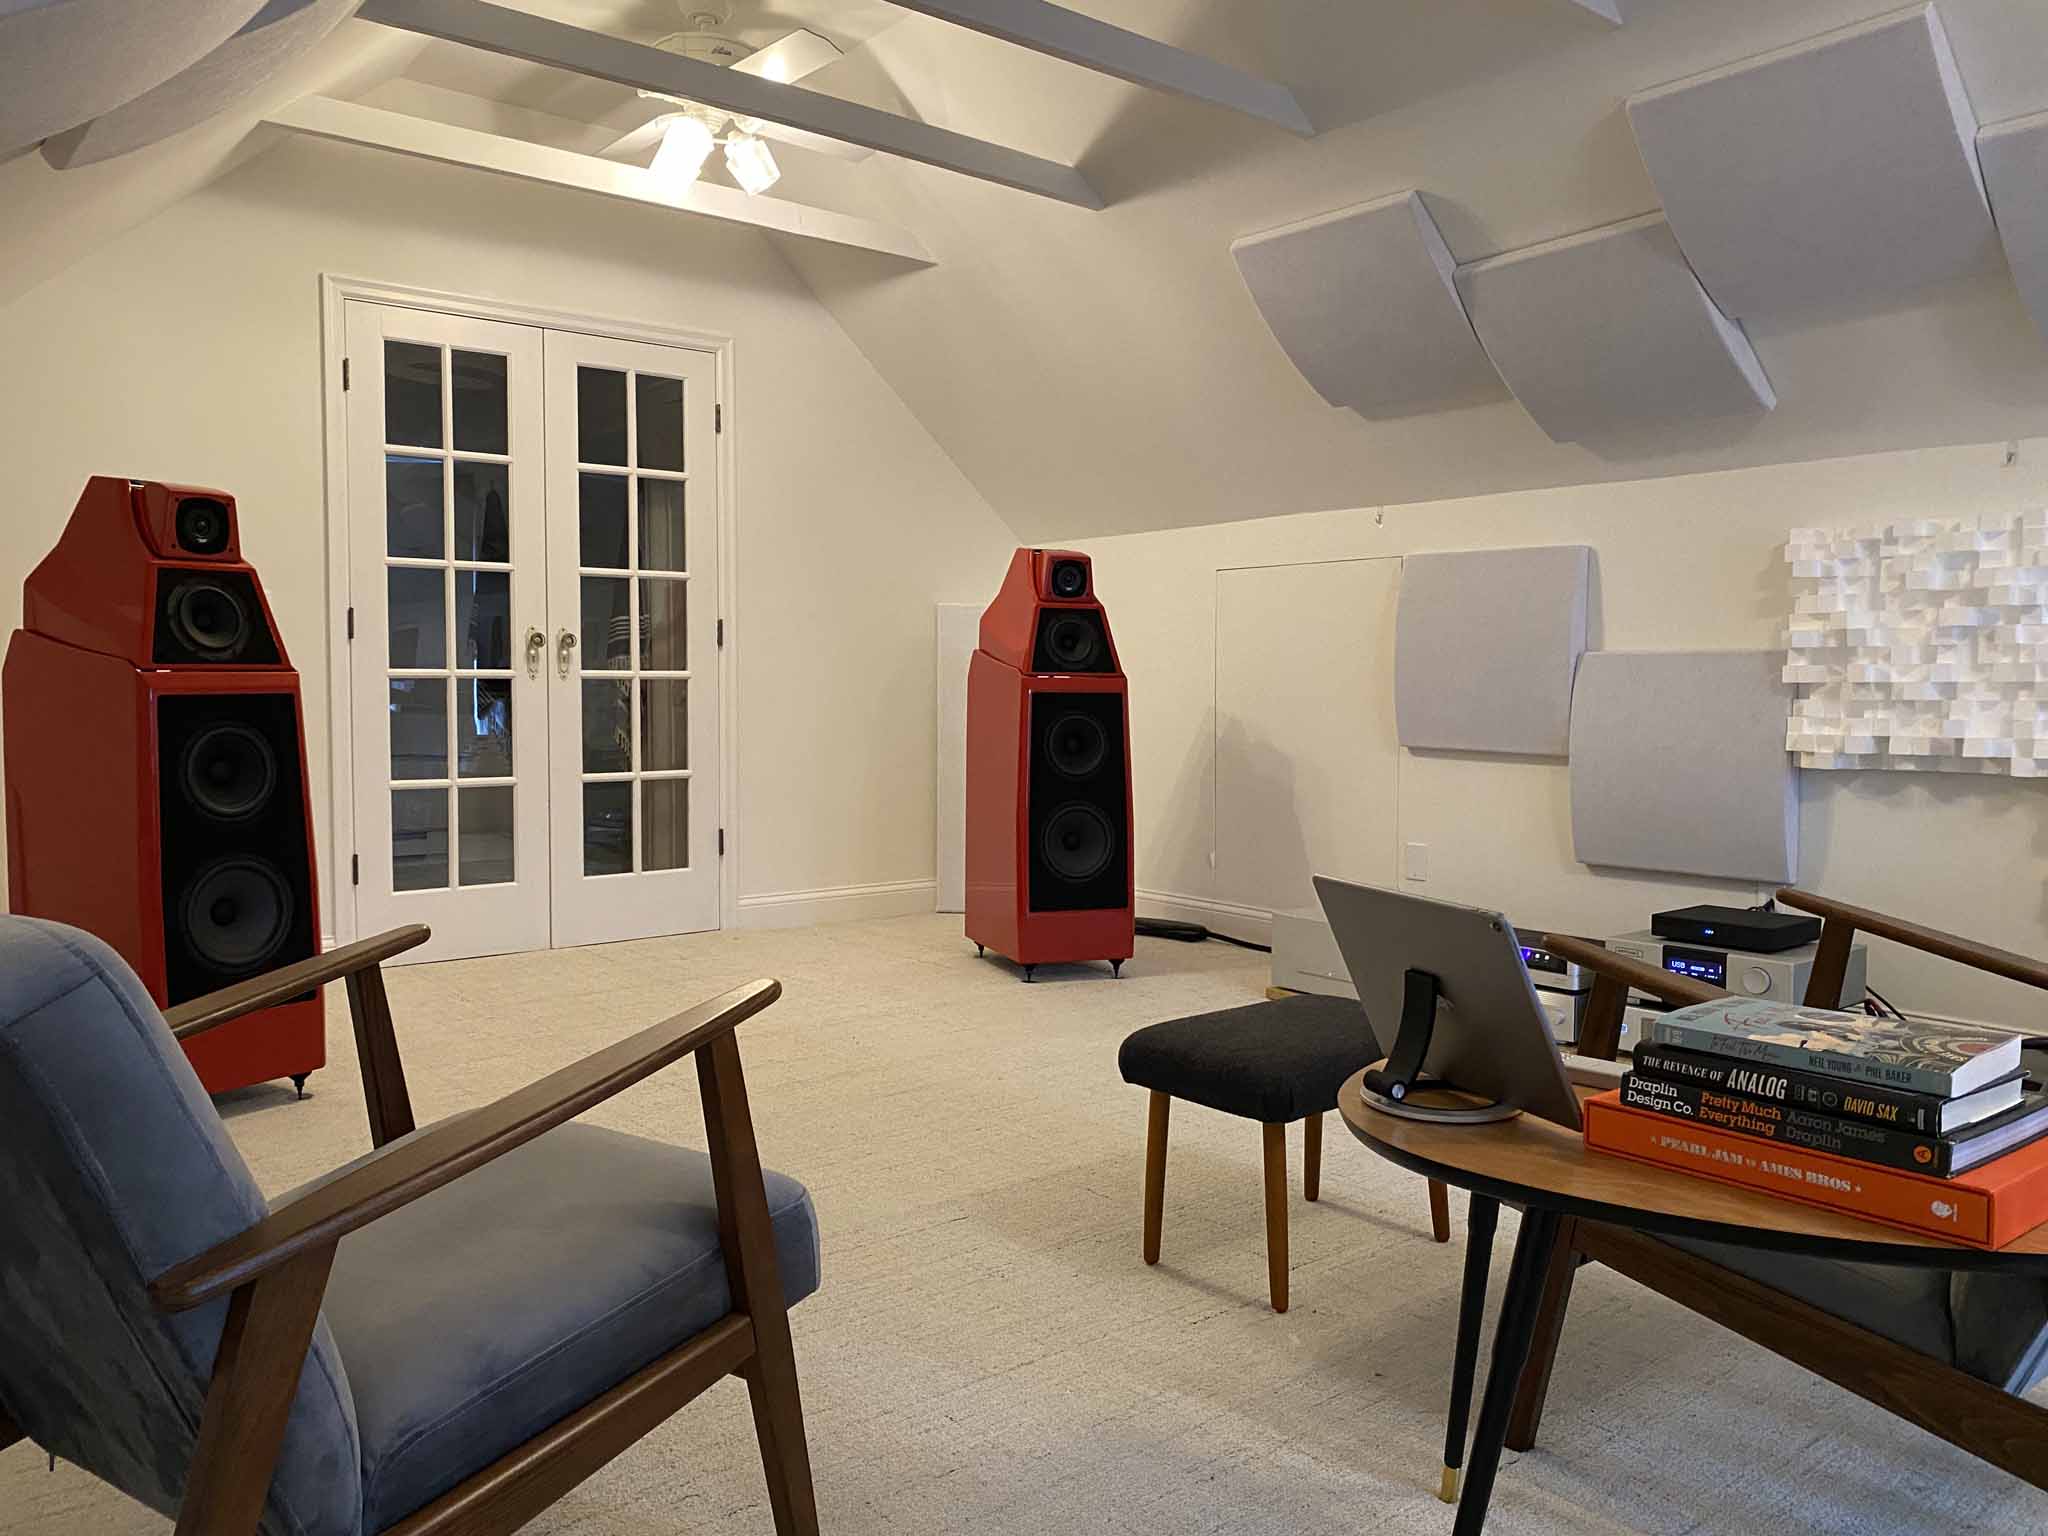
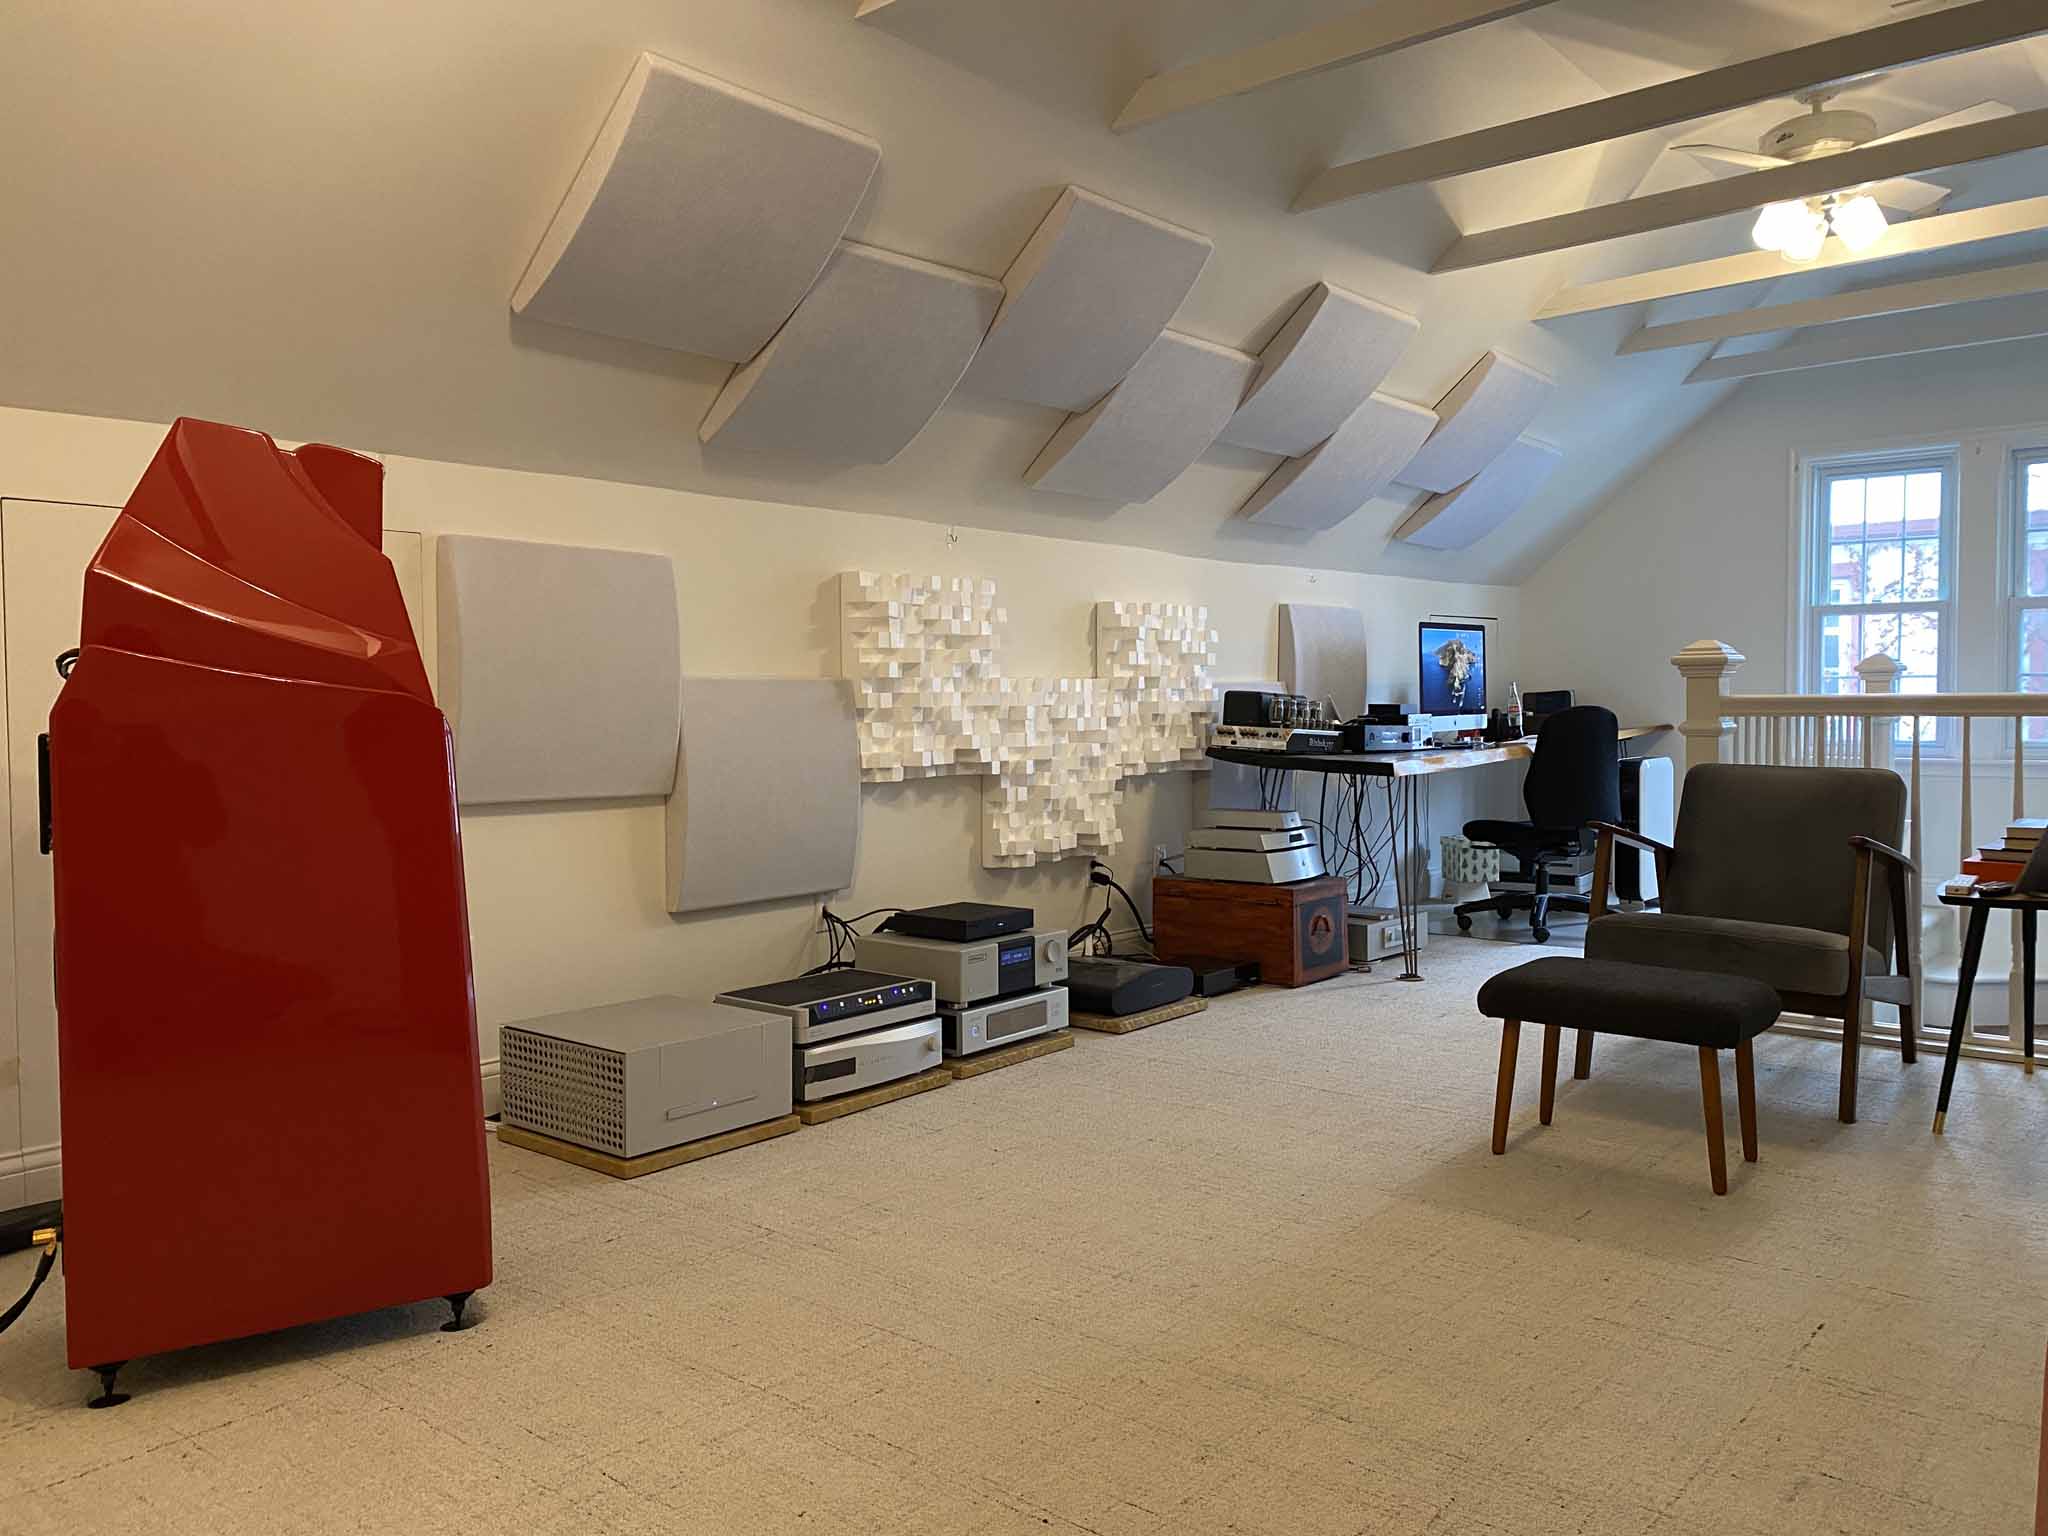
I purchased 24 Cinema Round Premium absorption panels and 6 Multifuser DC2 diffusion panels. Each product obviously serves a different function as can be seen in the images below.
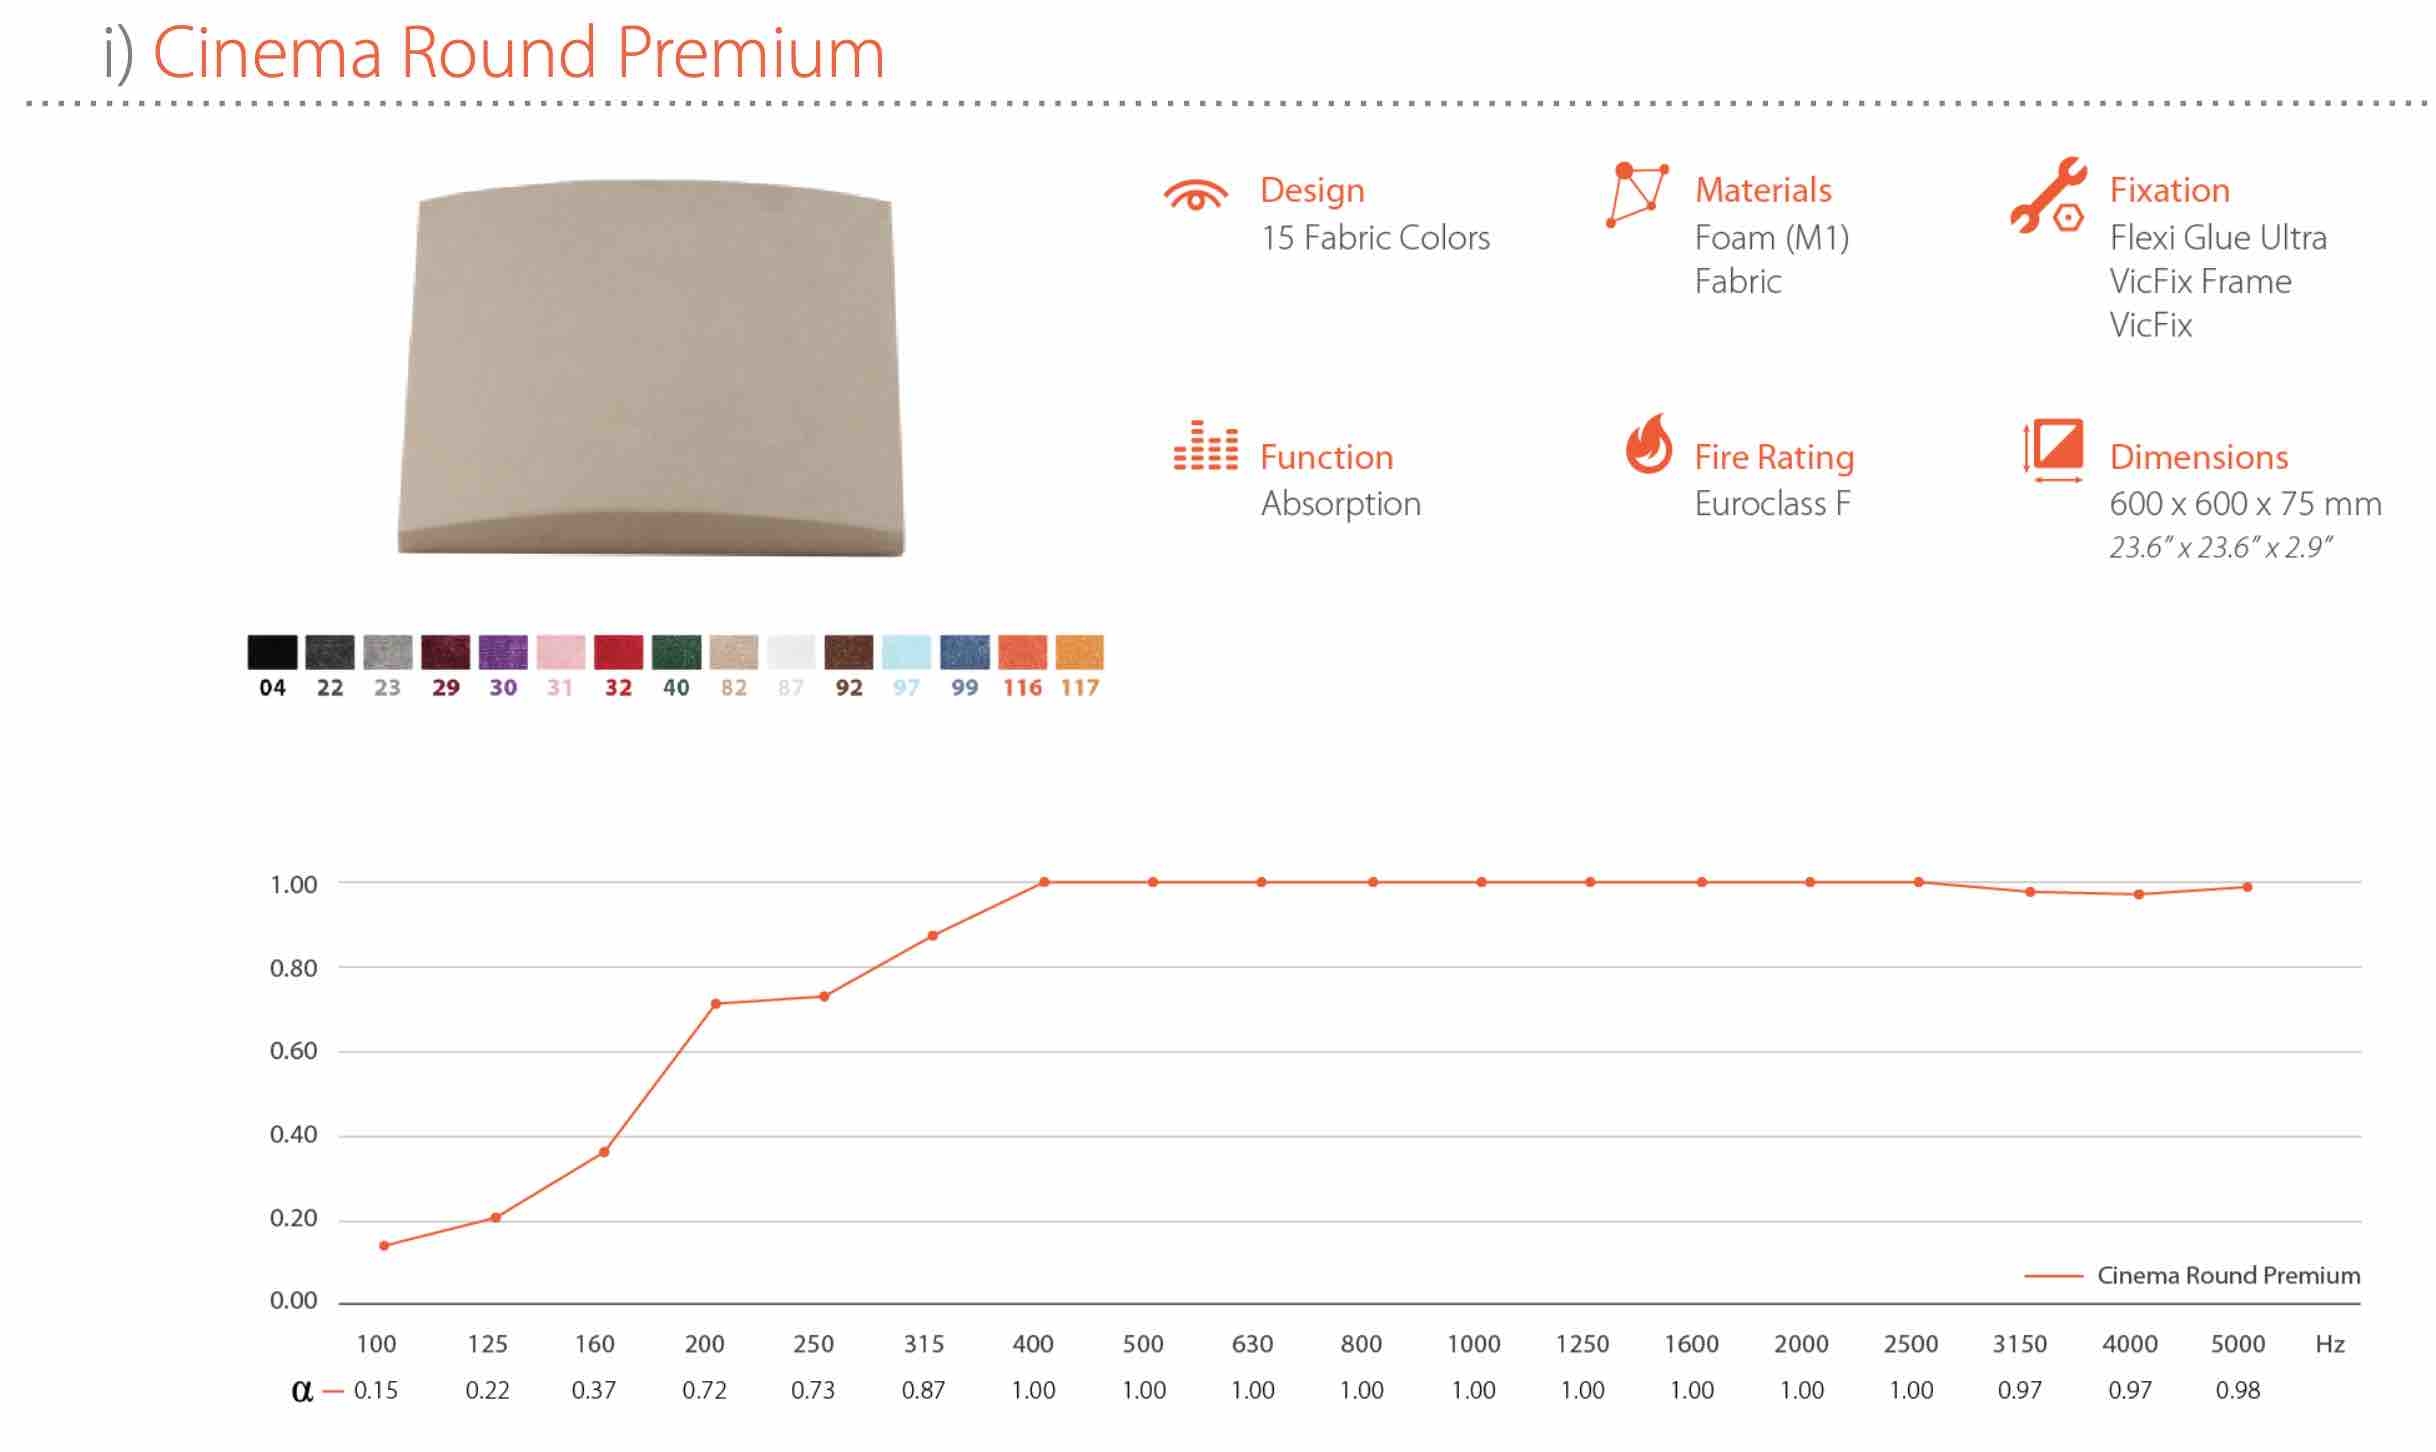
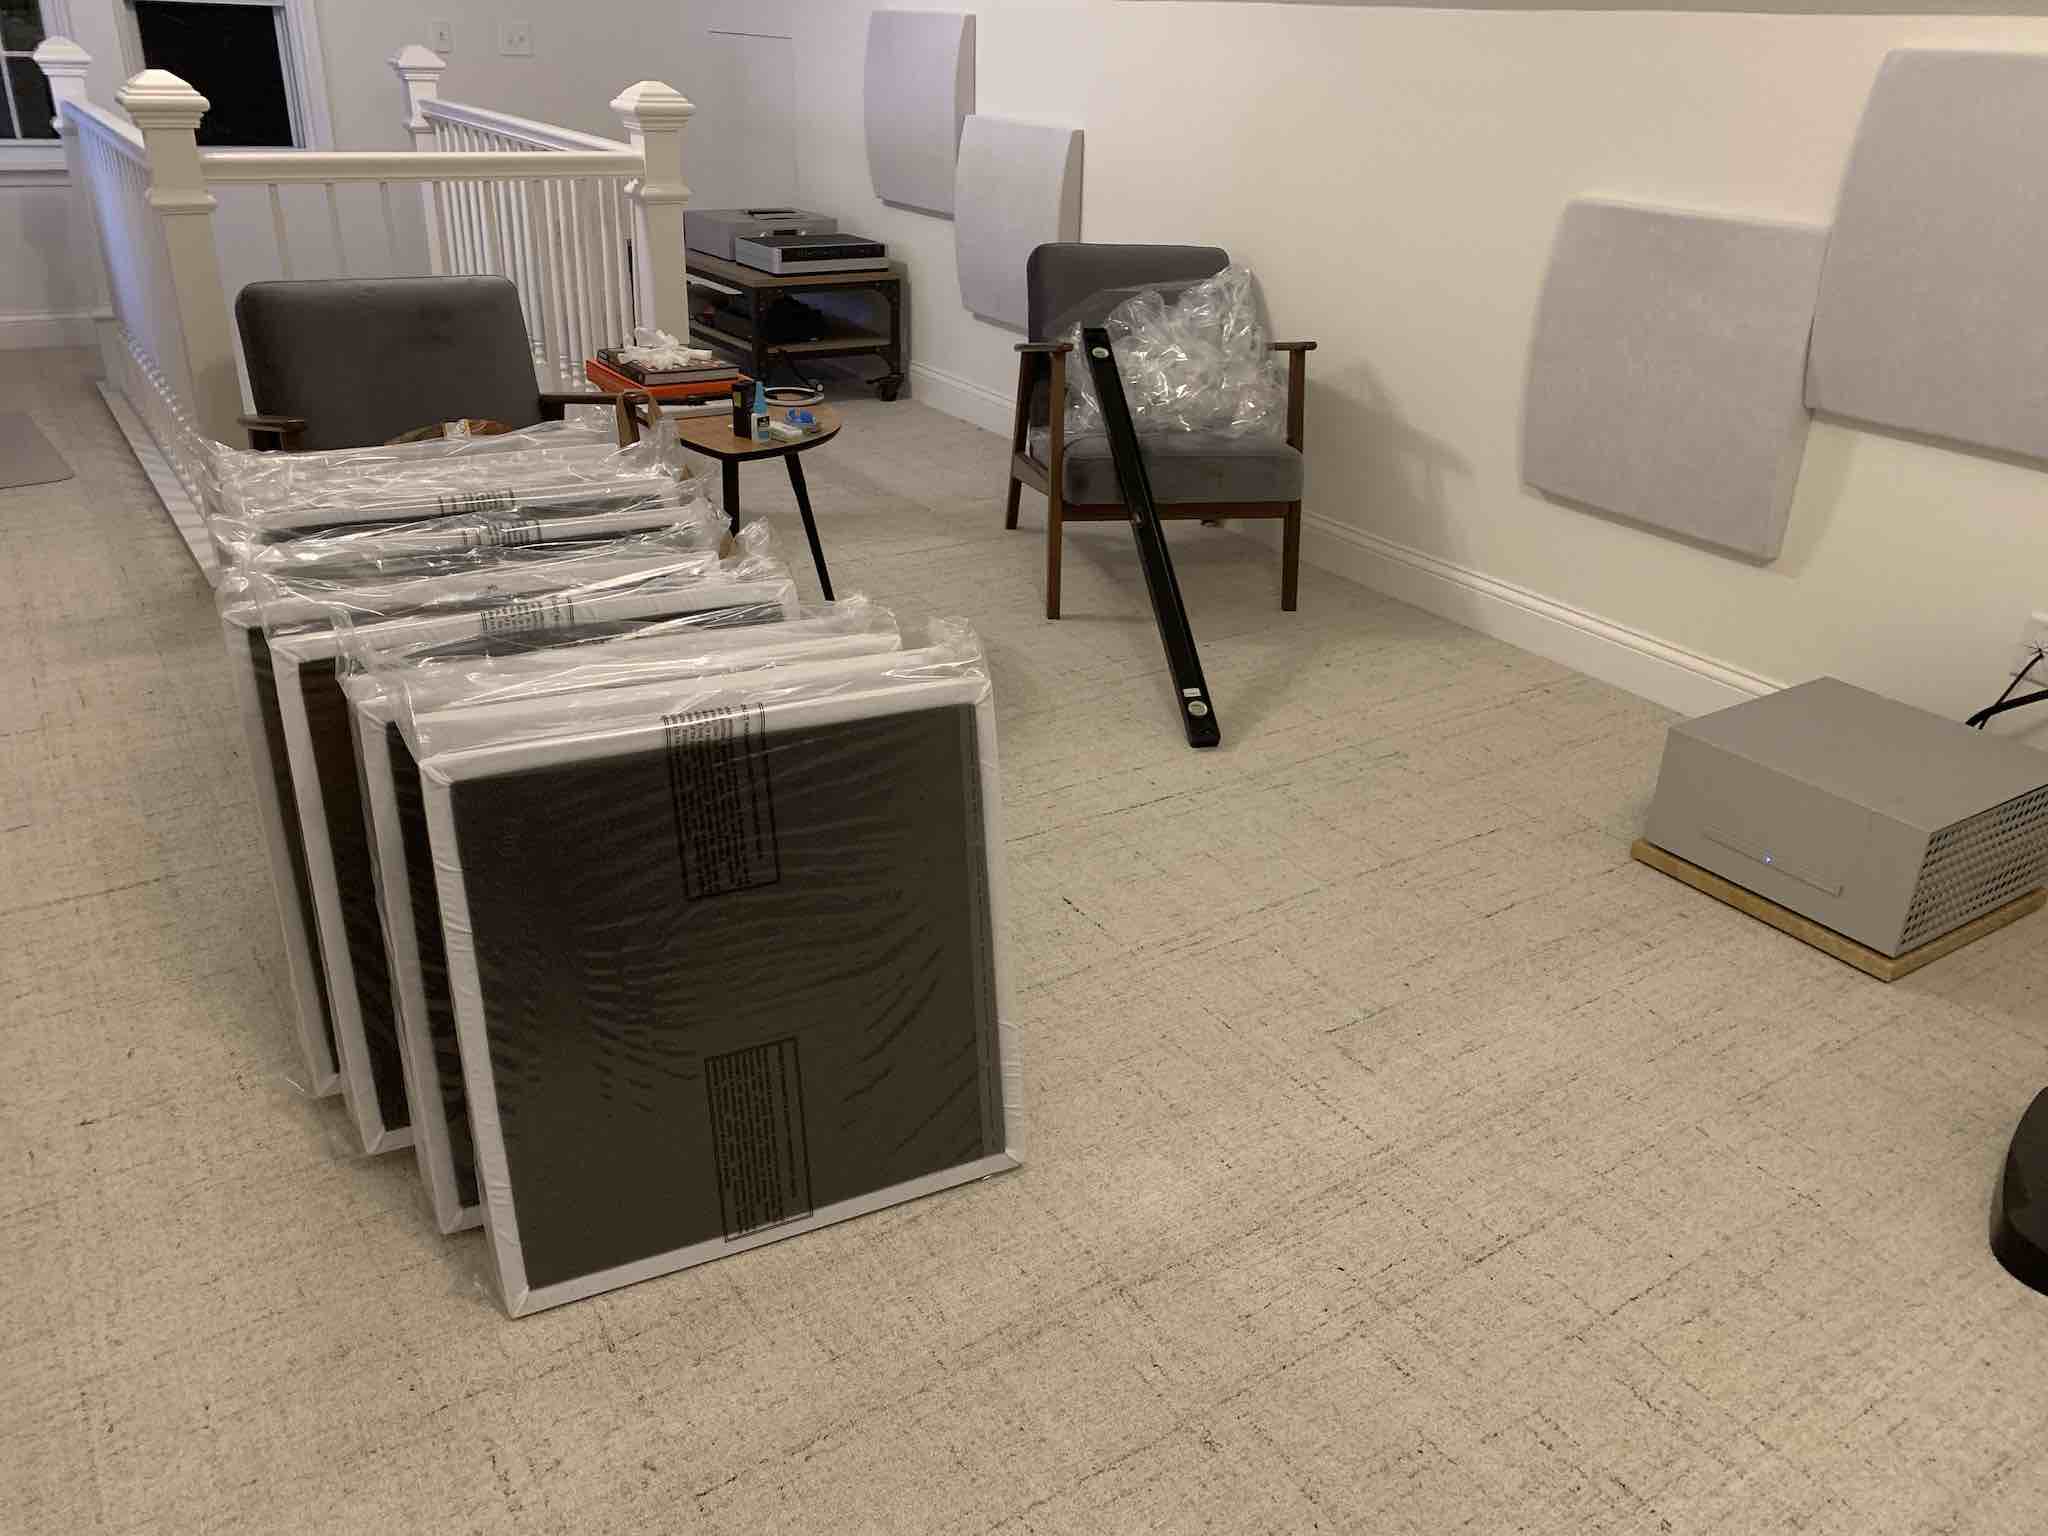
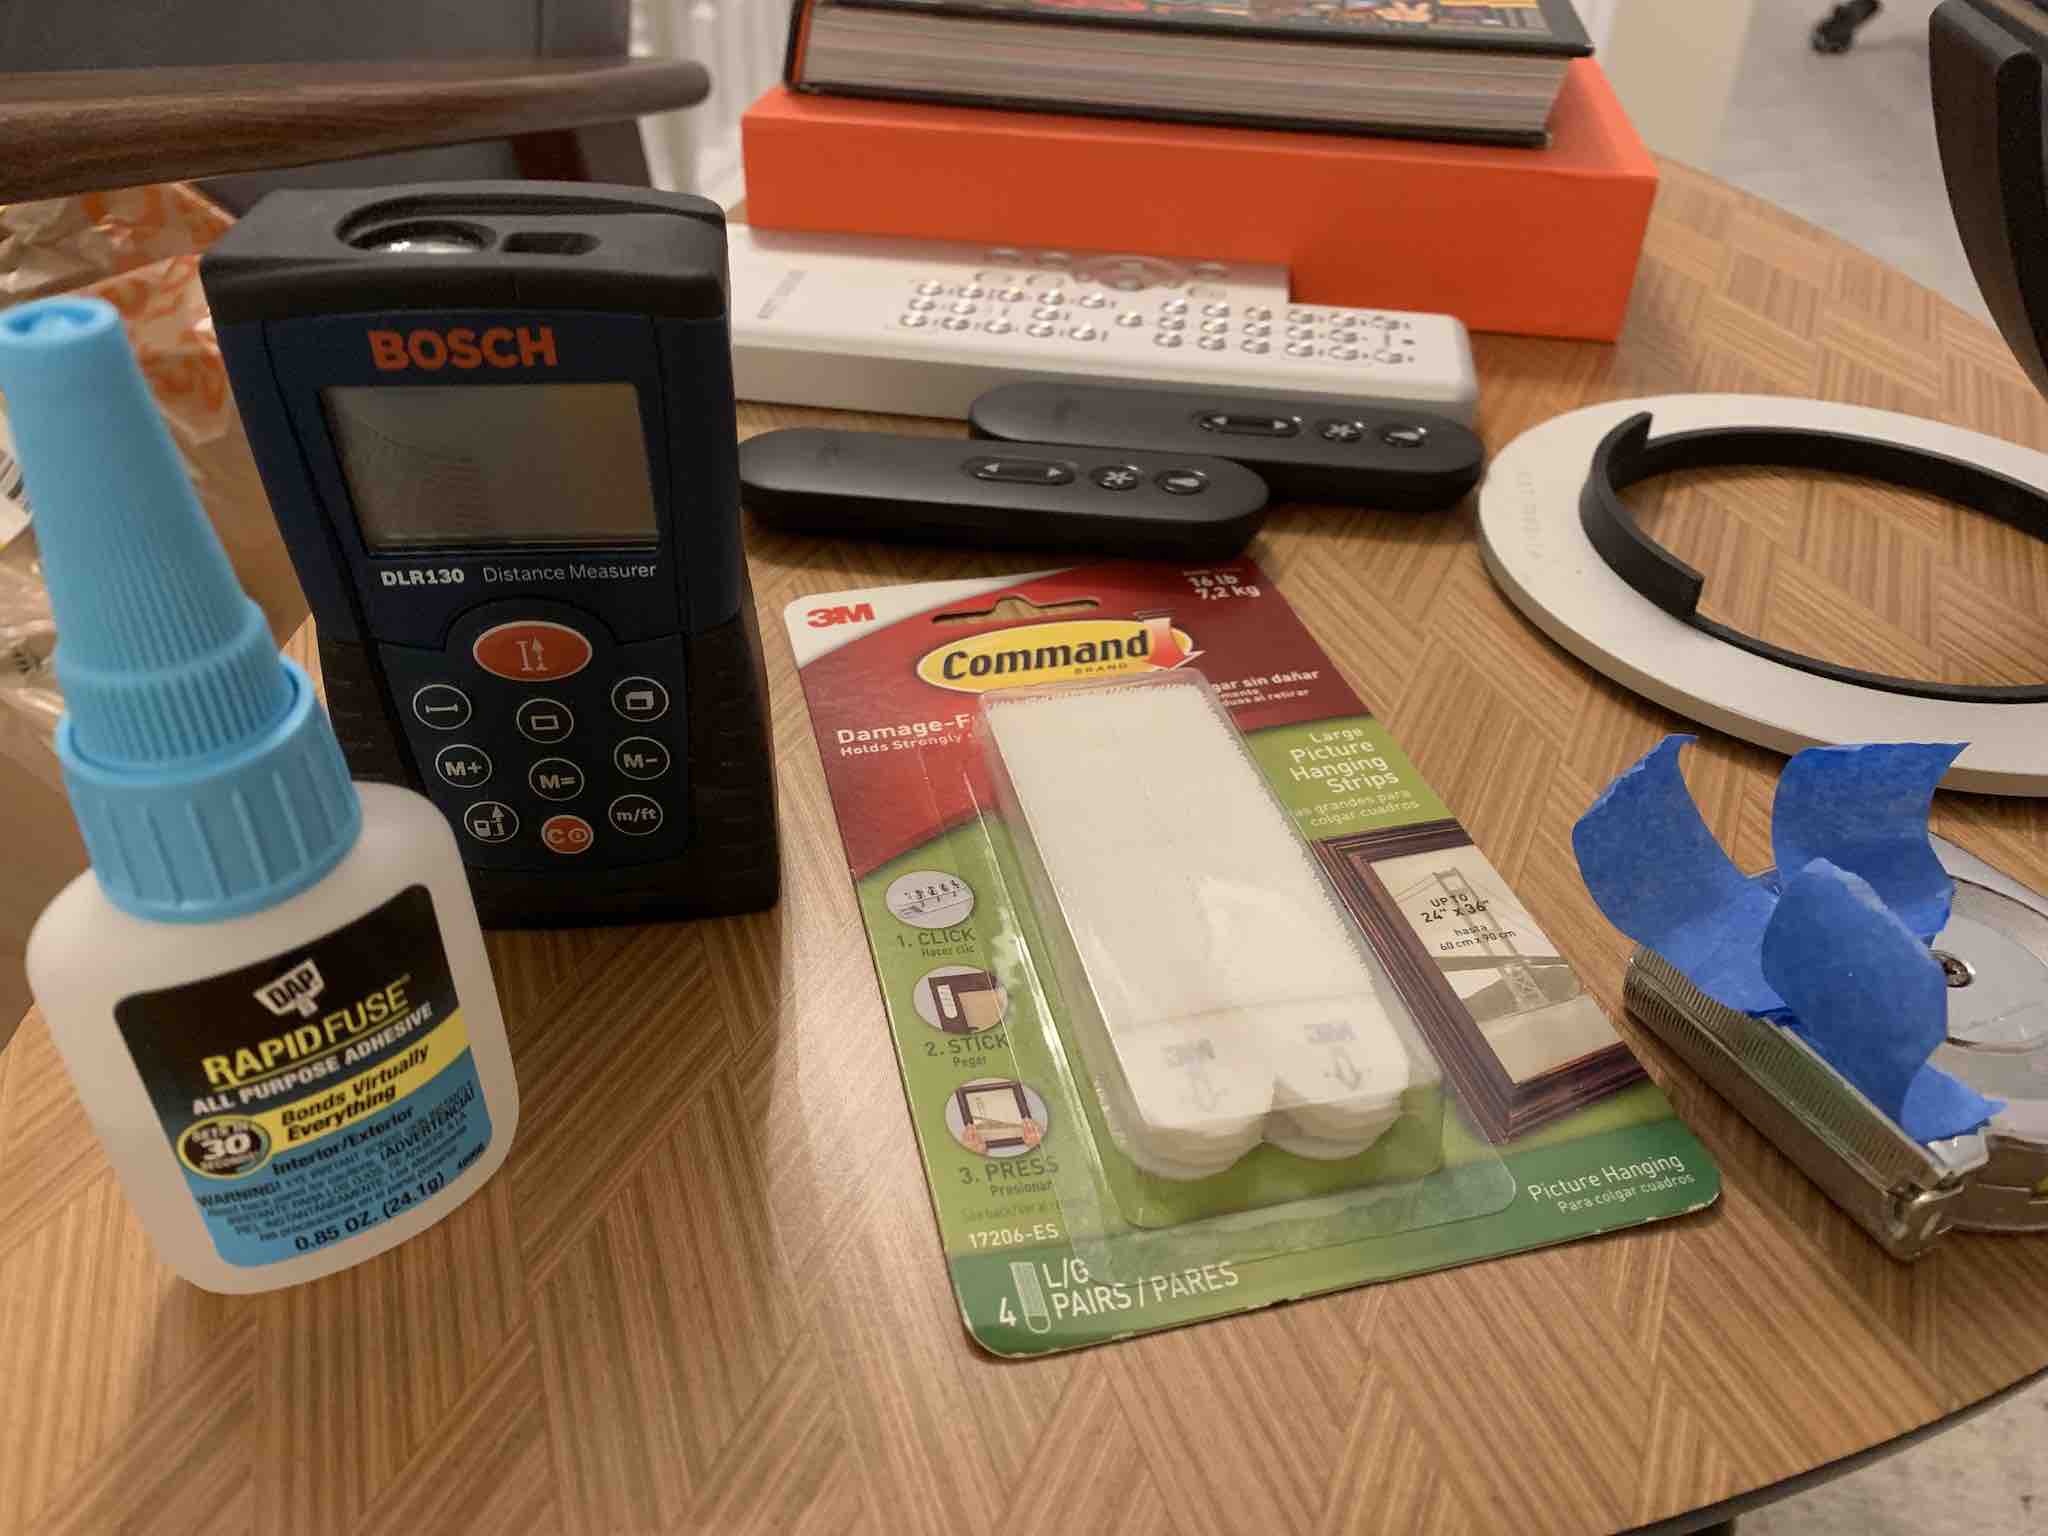
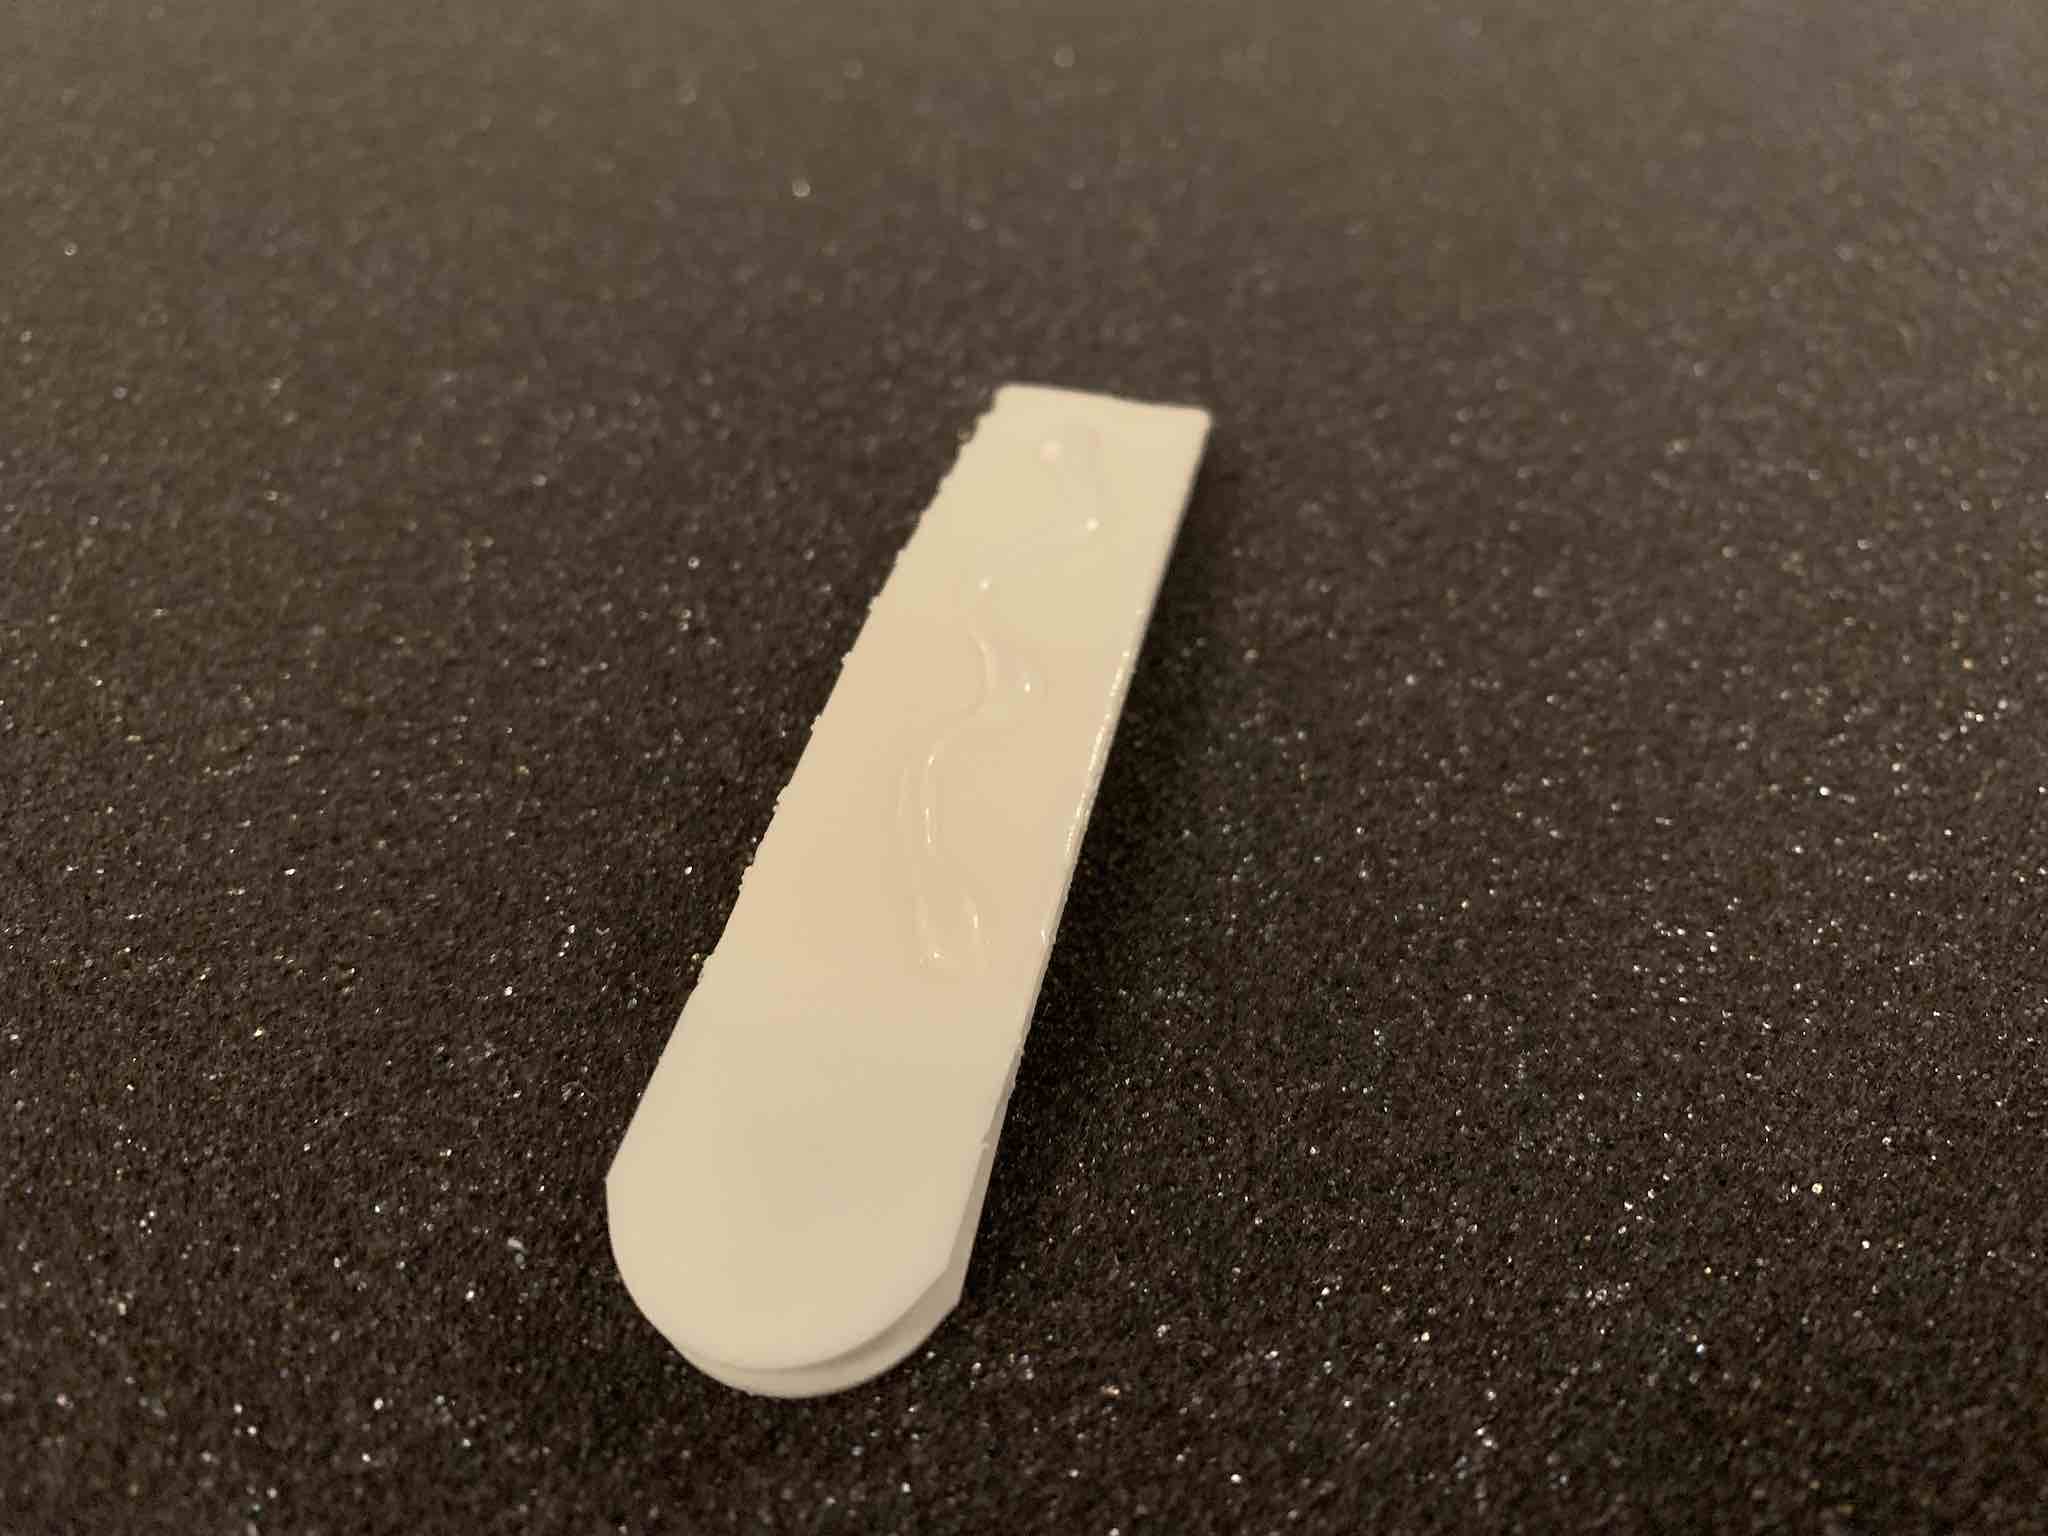
When the Vicoustic panels arrived, I installed them myself according to Vicoustic's recommended placement. I didn't want to put holes in my new walls, so I opted against a traditional mounting bracket type of installation. As funny as this might sound, I've had great luck hanging items on my walls using the 3M Command products. It was only logical that I tried mounting the acoustic panels using products from 3M's Command lineup.
My first attempt using only four Large Picture Hanging Strips (17206-ES) was a quick failure. Even though the strips have a weight limit of 16 pounds and the Cinema Round Premium panels weigh somewhere around 2 pounds, it wasn't meant to be. The panels fell off the wall shortly after I finished mounting them.
I switched to plan B, adding Rapid Fuse all purpose adhesive to the parts of the Command strips that touched the Vicoustic panels and my walls. The panels have been hanging on my walls without an issue for seven months. They didn't have an issue when the Summer heat made it very uncomfortable in my room, and so far the Winter cold hasn't effected them either. My room temperature gets down to about 60 in on the coldest Winter days, before my heater kicks in to warm things up before start working for the day. I don't expect my temperature fluctuations to effect the Rapid Fuse very much.
After installation of the absorption and diffusion panels, my room was immediately transformed. Prior to the panel installation I had a hard time talking on the phone while sitting at my desk because the sound bounced off the walls like an echo chamber. After the installation, everything was perfect. Not too much absorption, but just enough to make the room sound great for phone calls and even more important for listening to music.
This was a larger sound quality improvement than any piece of electronic equipment I've ever placed in my system. Even those with bronze ears could tell the difference in sound was night and day. From my listening chair, the harsh reflections were gone and the room's effect on the music was incredibly reduced. I can't recommend acoustic treatments enough to everyone who values good sound.
I held off fine tuning the sound of the room because at the time, my TAD CR1 speakers were about to be sold and shipped off to their new owner. I figured I'd need some bass traps, but thought I'd cross that bridge when I go to it.

Step Two - New Speakers
 In My New Speakers Have Arrived article I finished by saying, "Once the speakers are moved into my listening room, a representative from Wilson will fly out to set them up using the Wilson Audio Setup Procedure. I'm sure I will give this procedure a shot on my own just to start listening. I'm like a kid on the night before Christmas. I'm really excited and there's nothing I can do about it until the new Alexia Series 2 speakers are setup. Look for much more about the speaker setup, my first impressions, and room measurements in the following weeks."
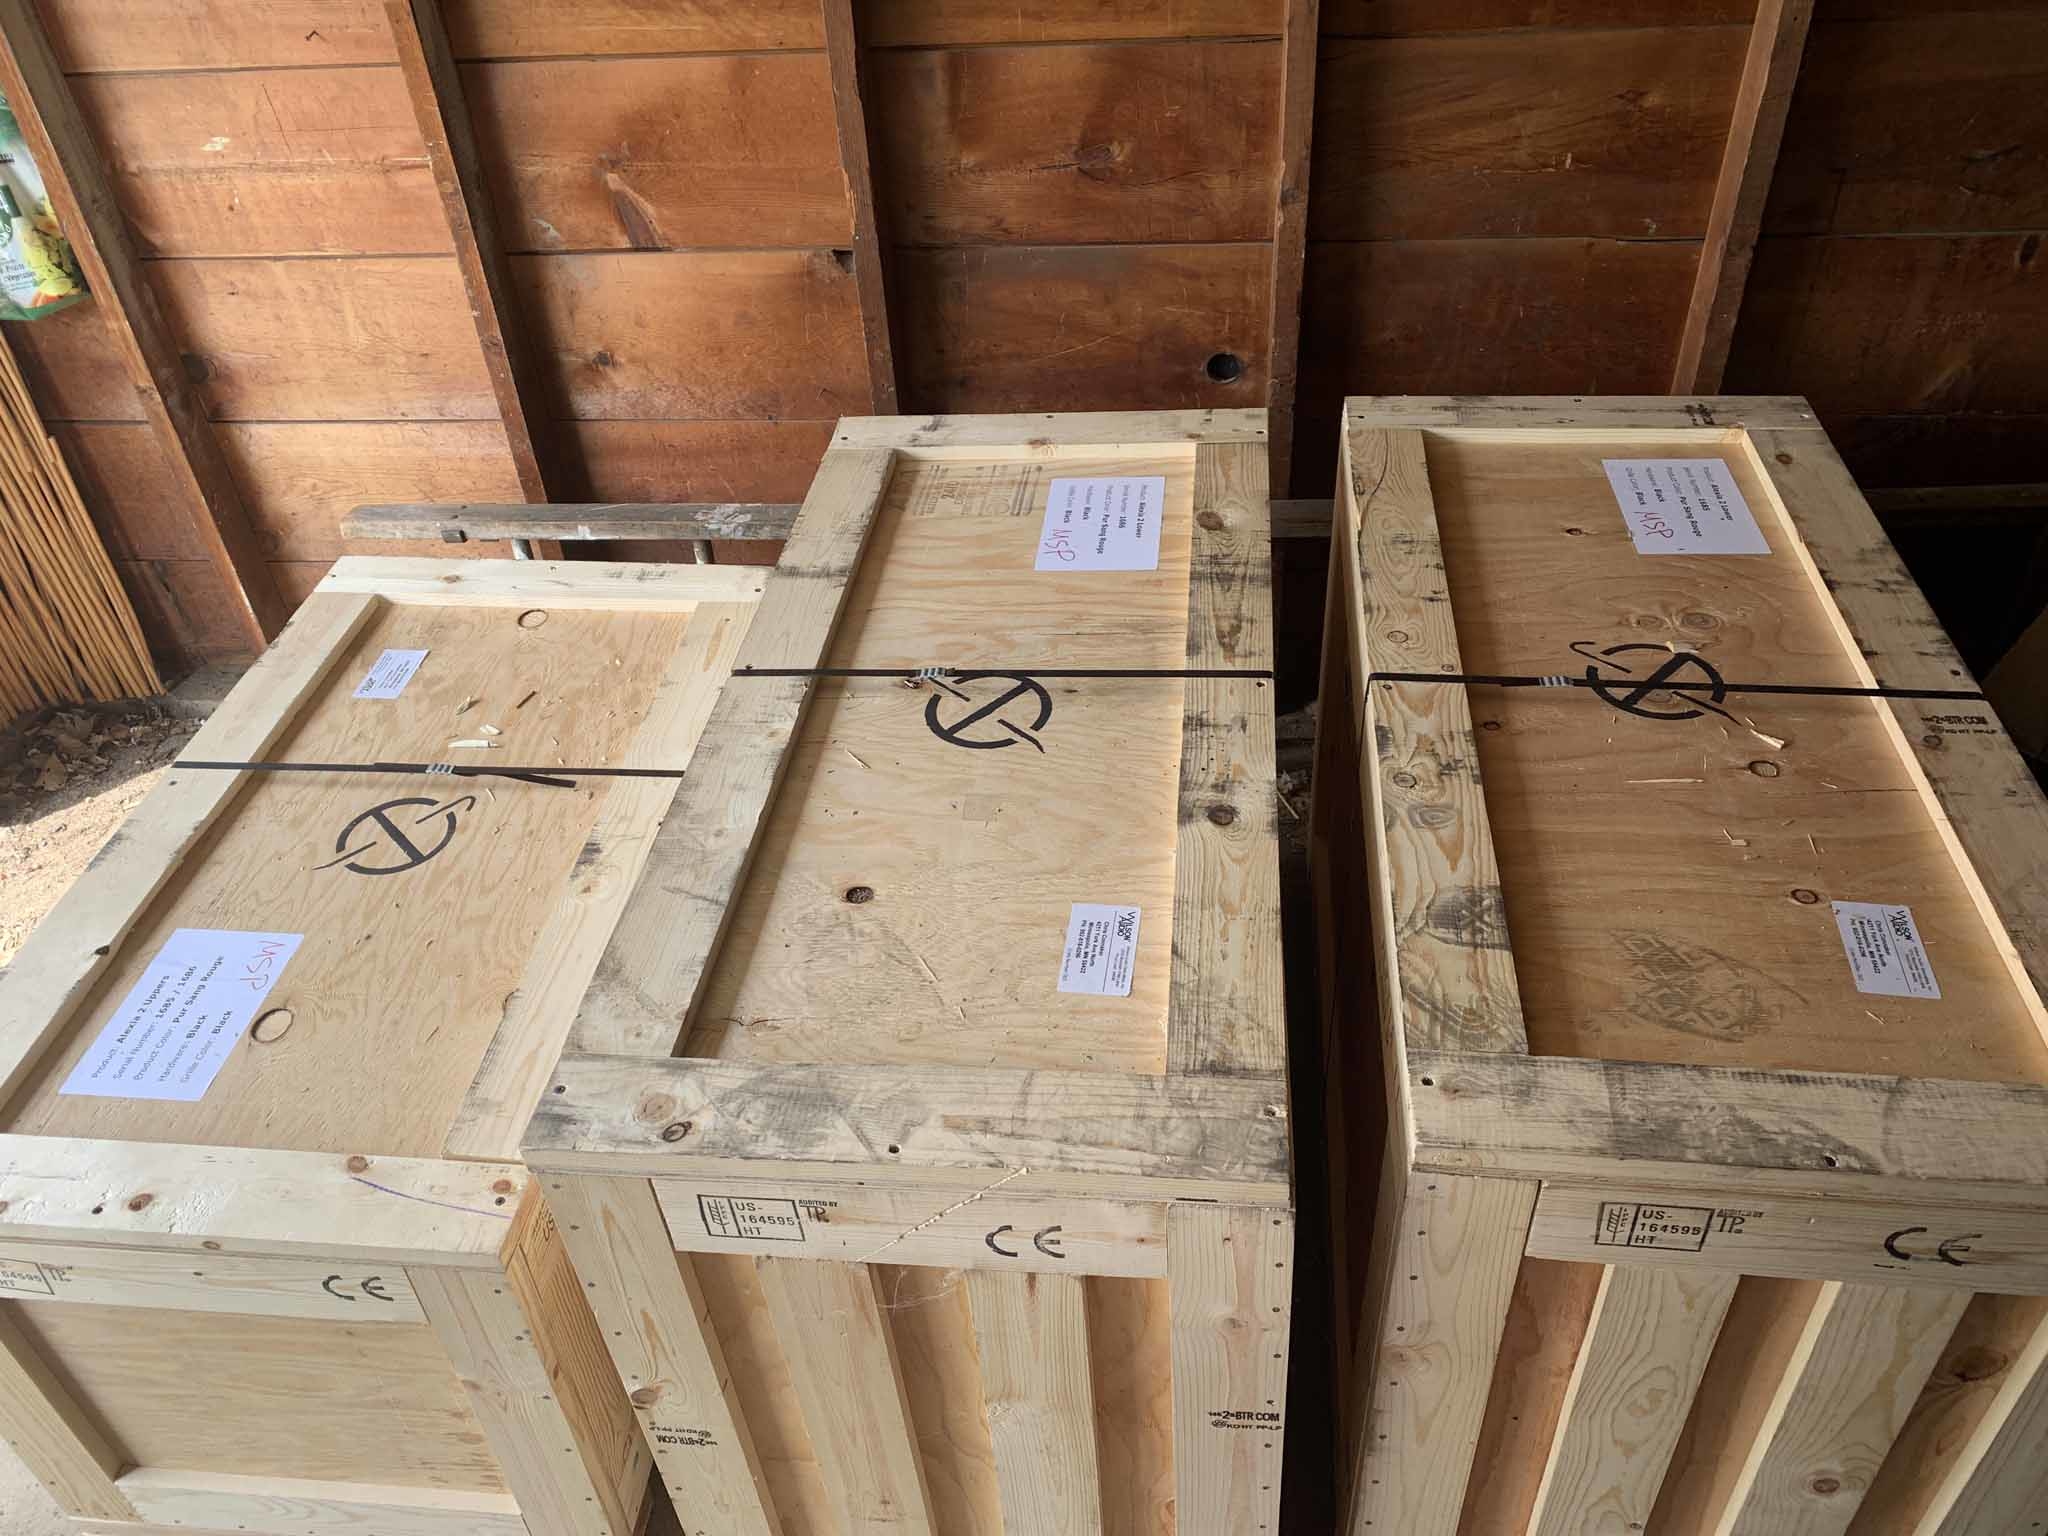
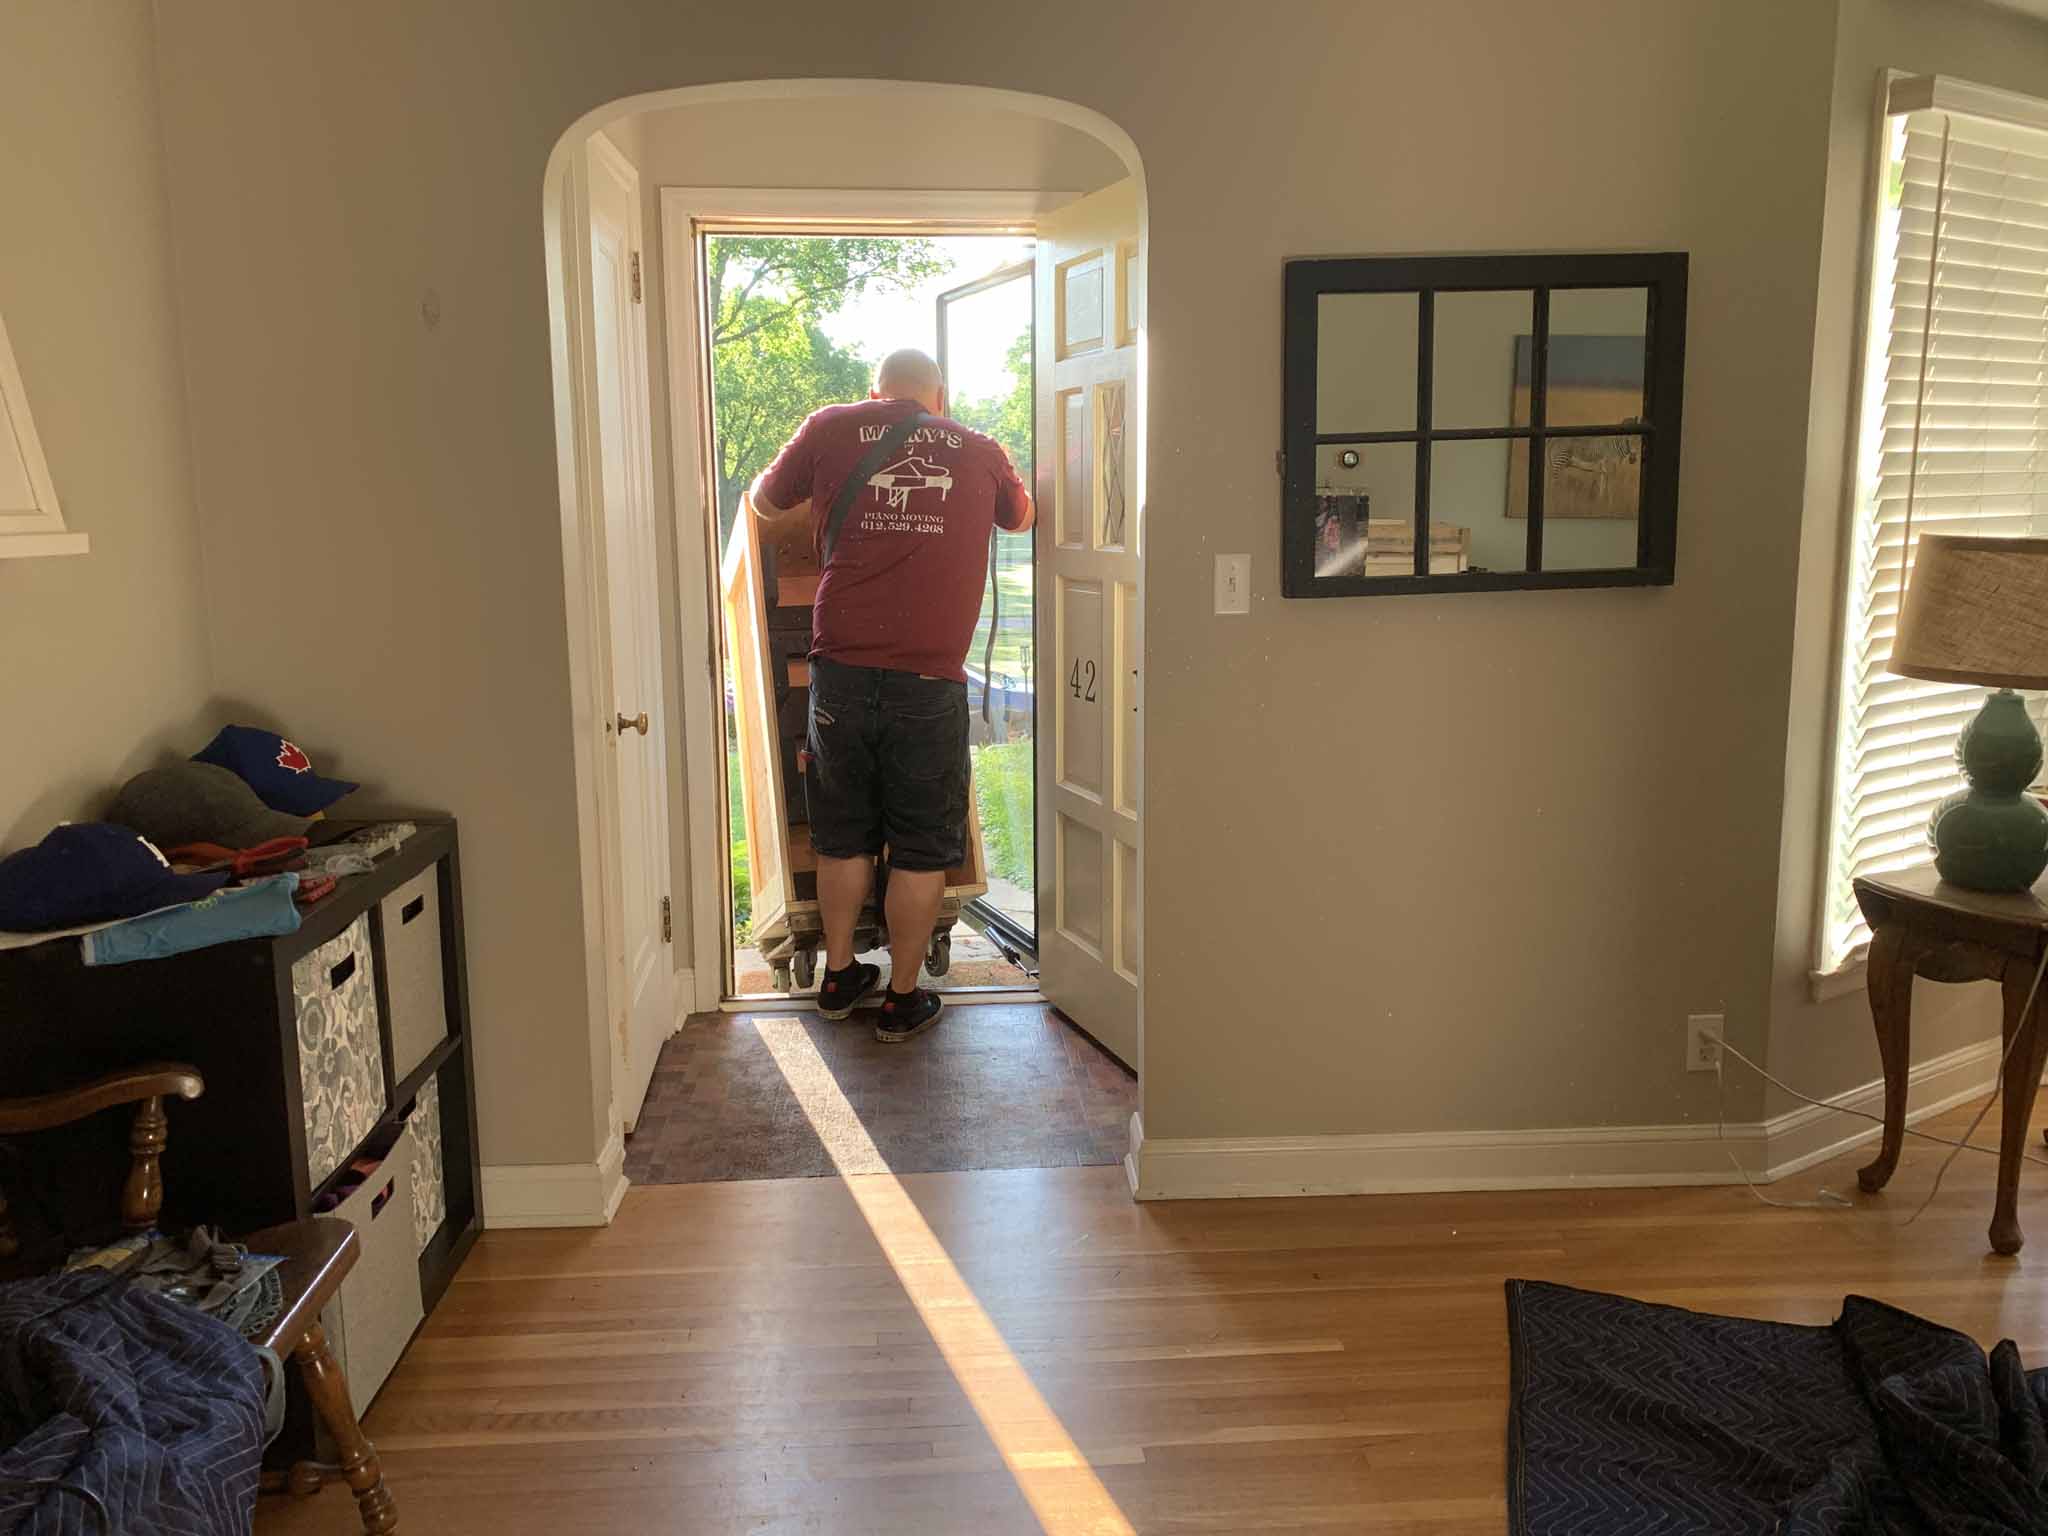
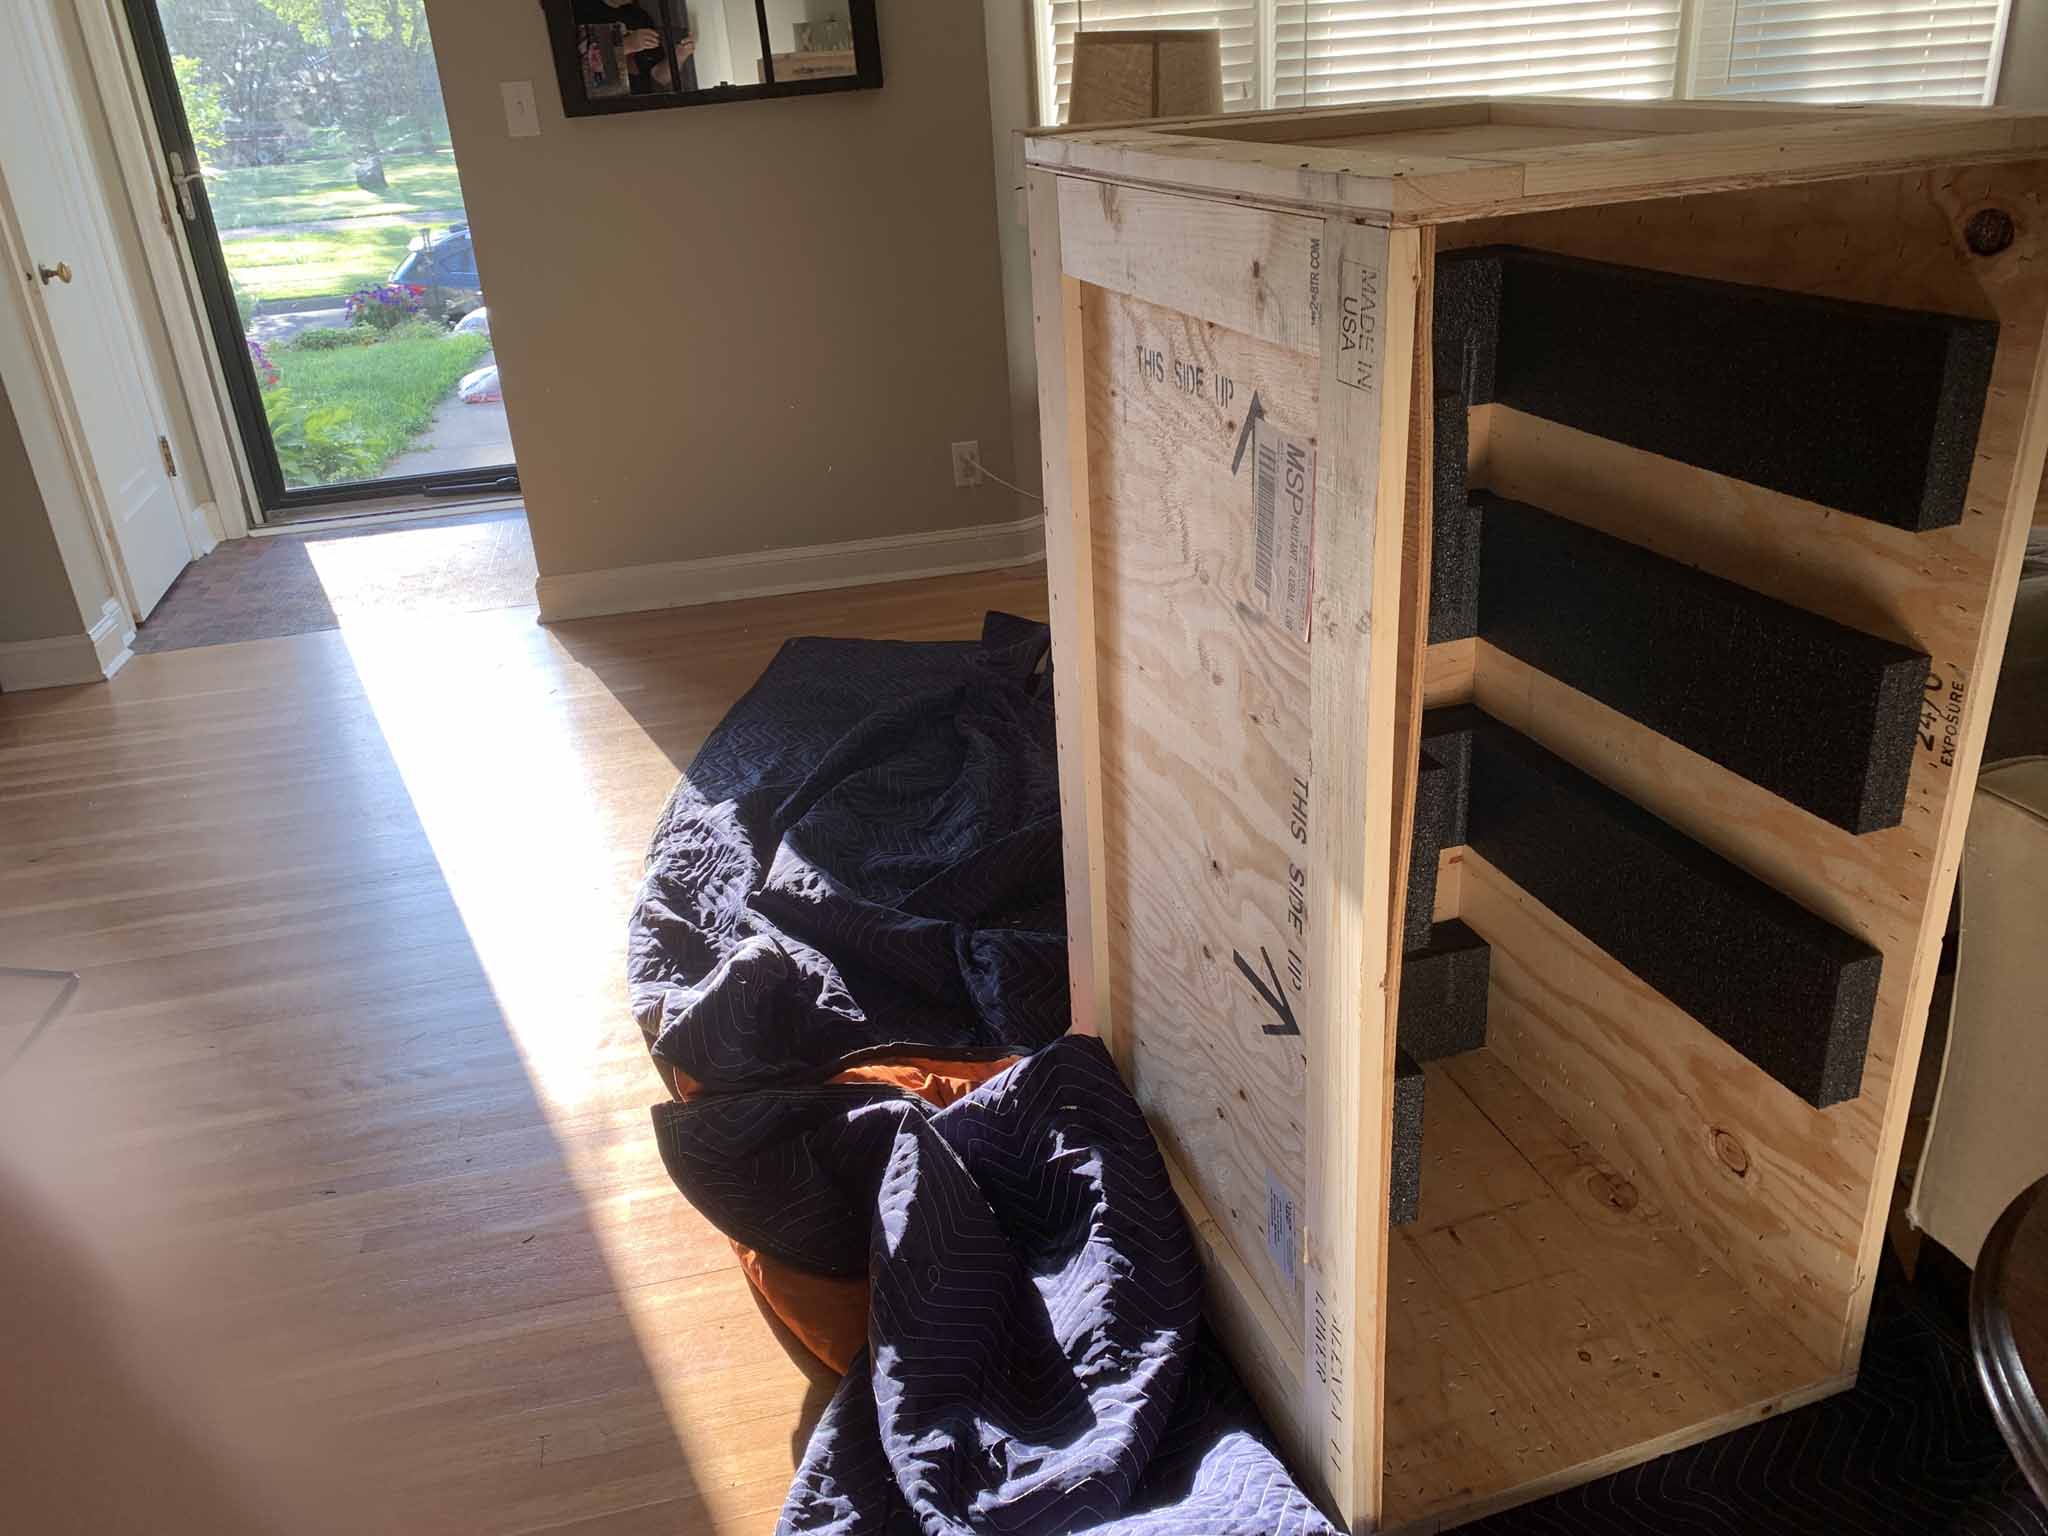
As usual, things took longer than I'd hoped. Getting the speakers into my listening room wasn't a task a guy like me could handle on his own. In fact, I don't think any one person should attempt to bring Wilson Audio Alexia Series 2 speakers up 14 stairs through a narrow, freshly painted stairwell.
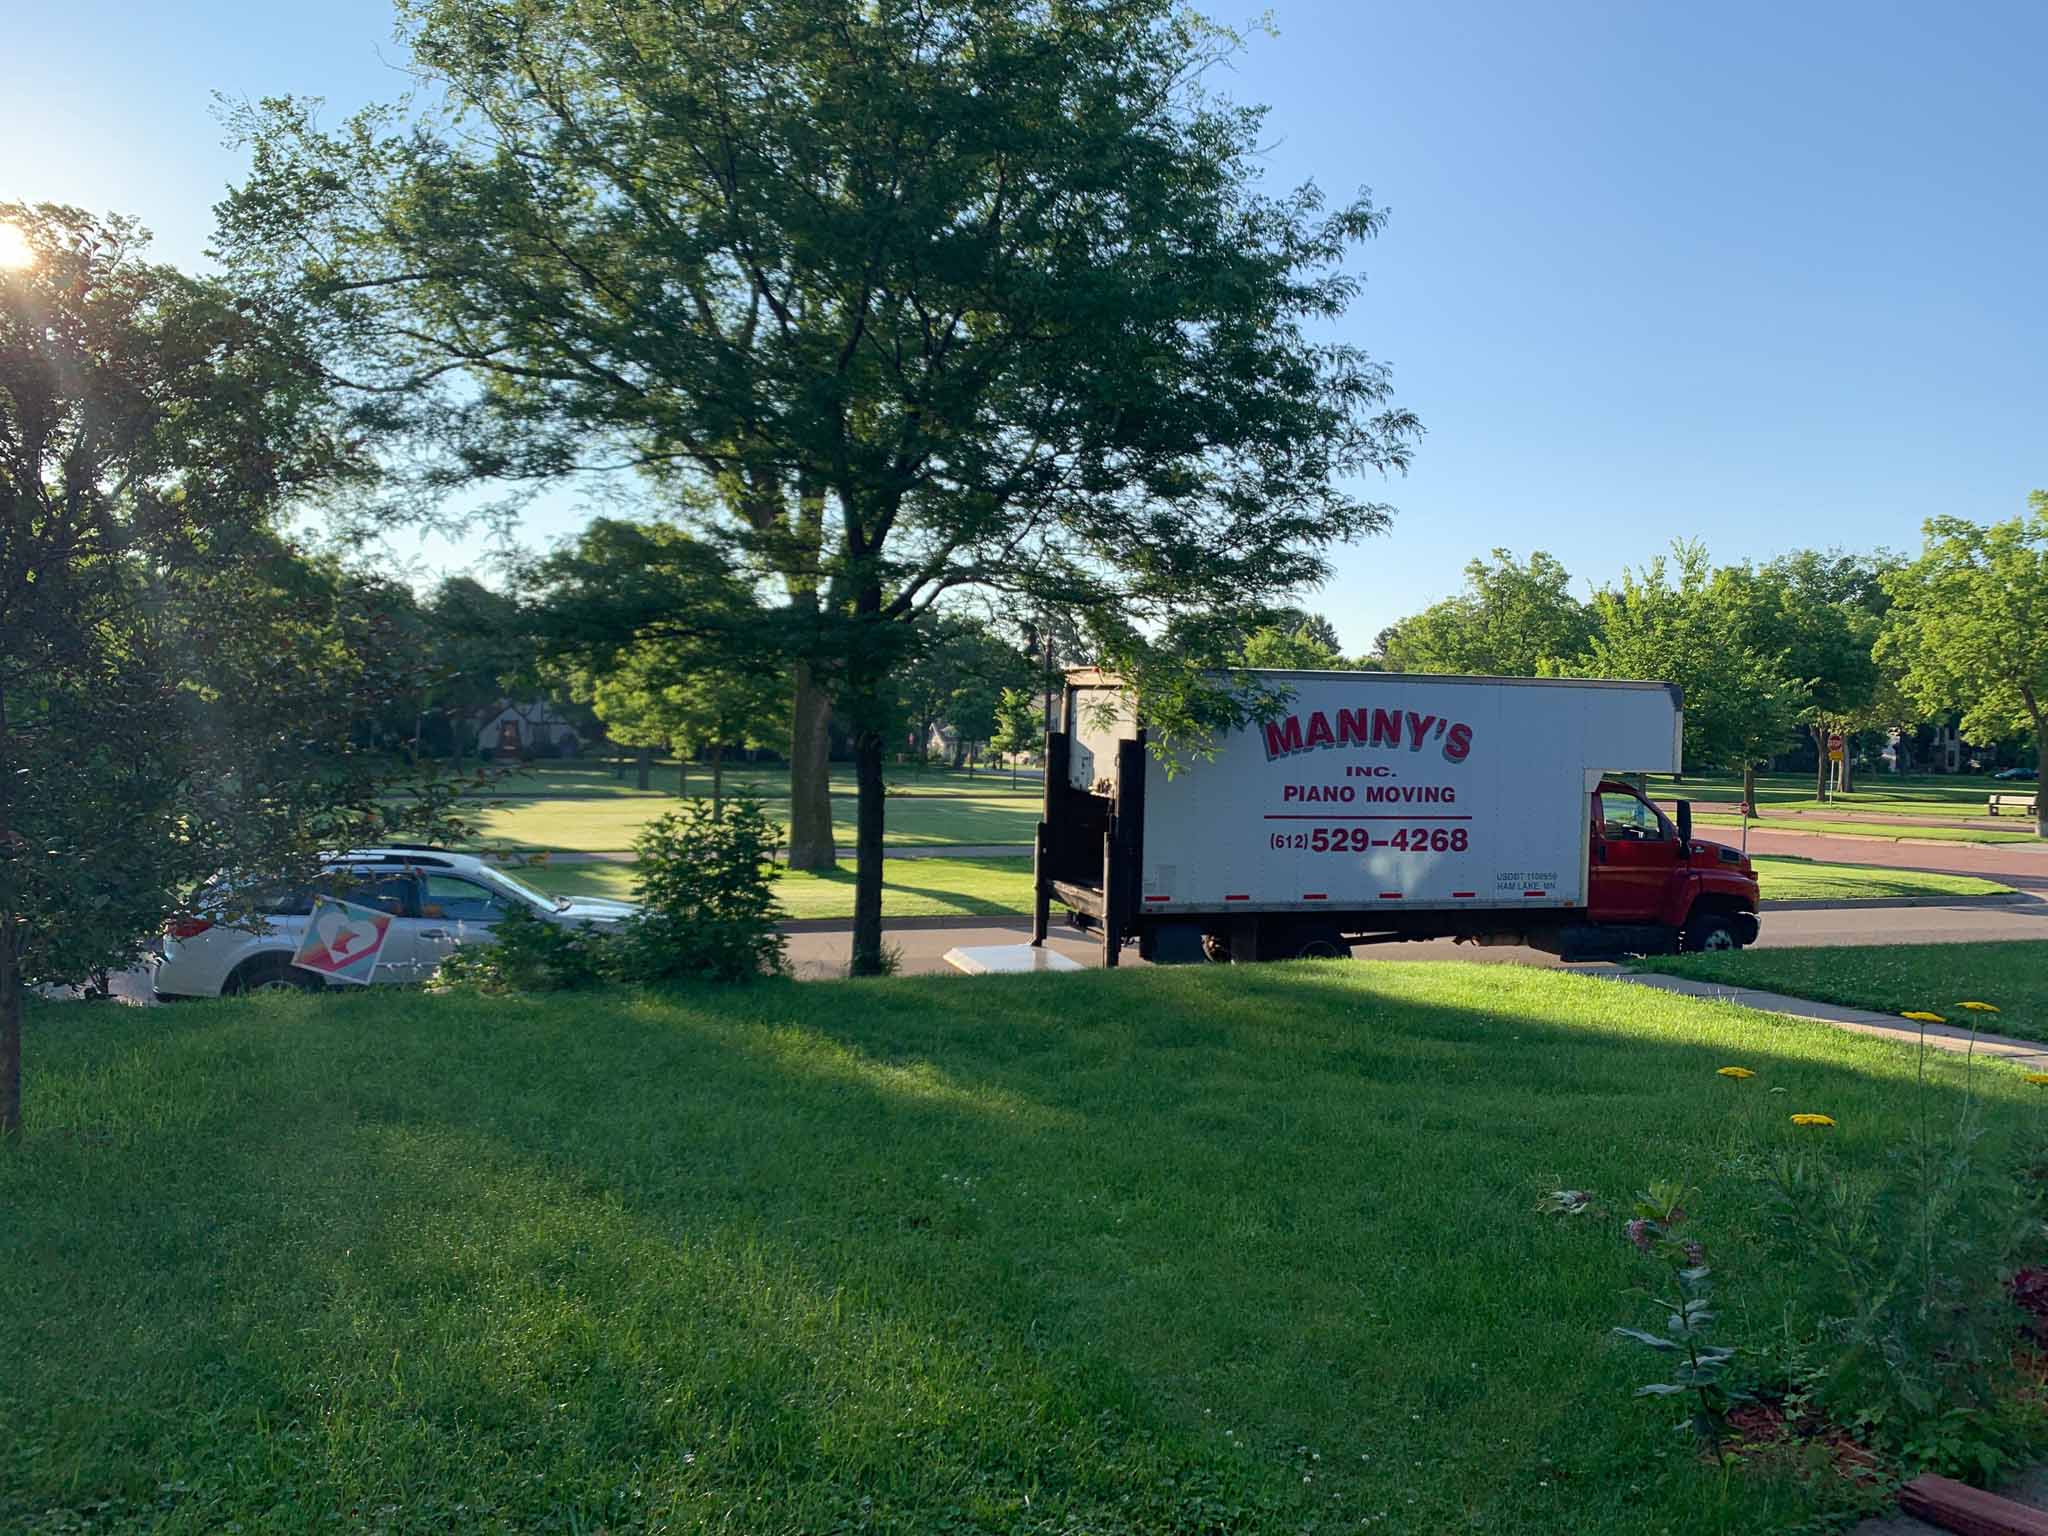
I called a few moving companies in Minneapolis who thought I sounded like Charlie Brown's teacher talking when I said I needed my 260 pound, $60,000 speakers moved from my garage into my upstairs listening room. Fortunately, a nice lady at one of the companies told me to call Manny's Piano moving. One phone call and $300 later, I had two guys at my door ready to carefully move some speakers.
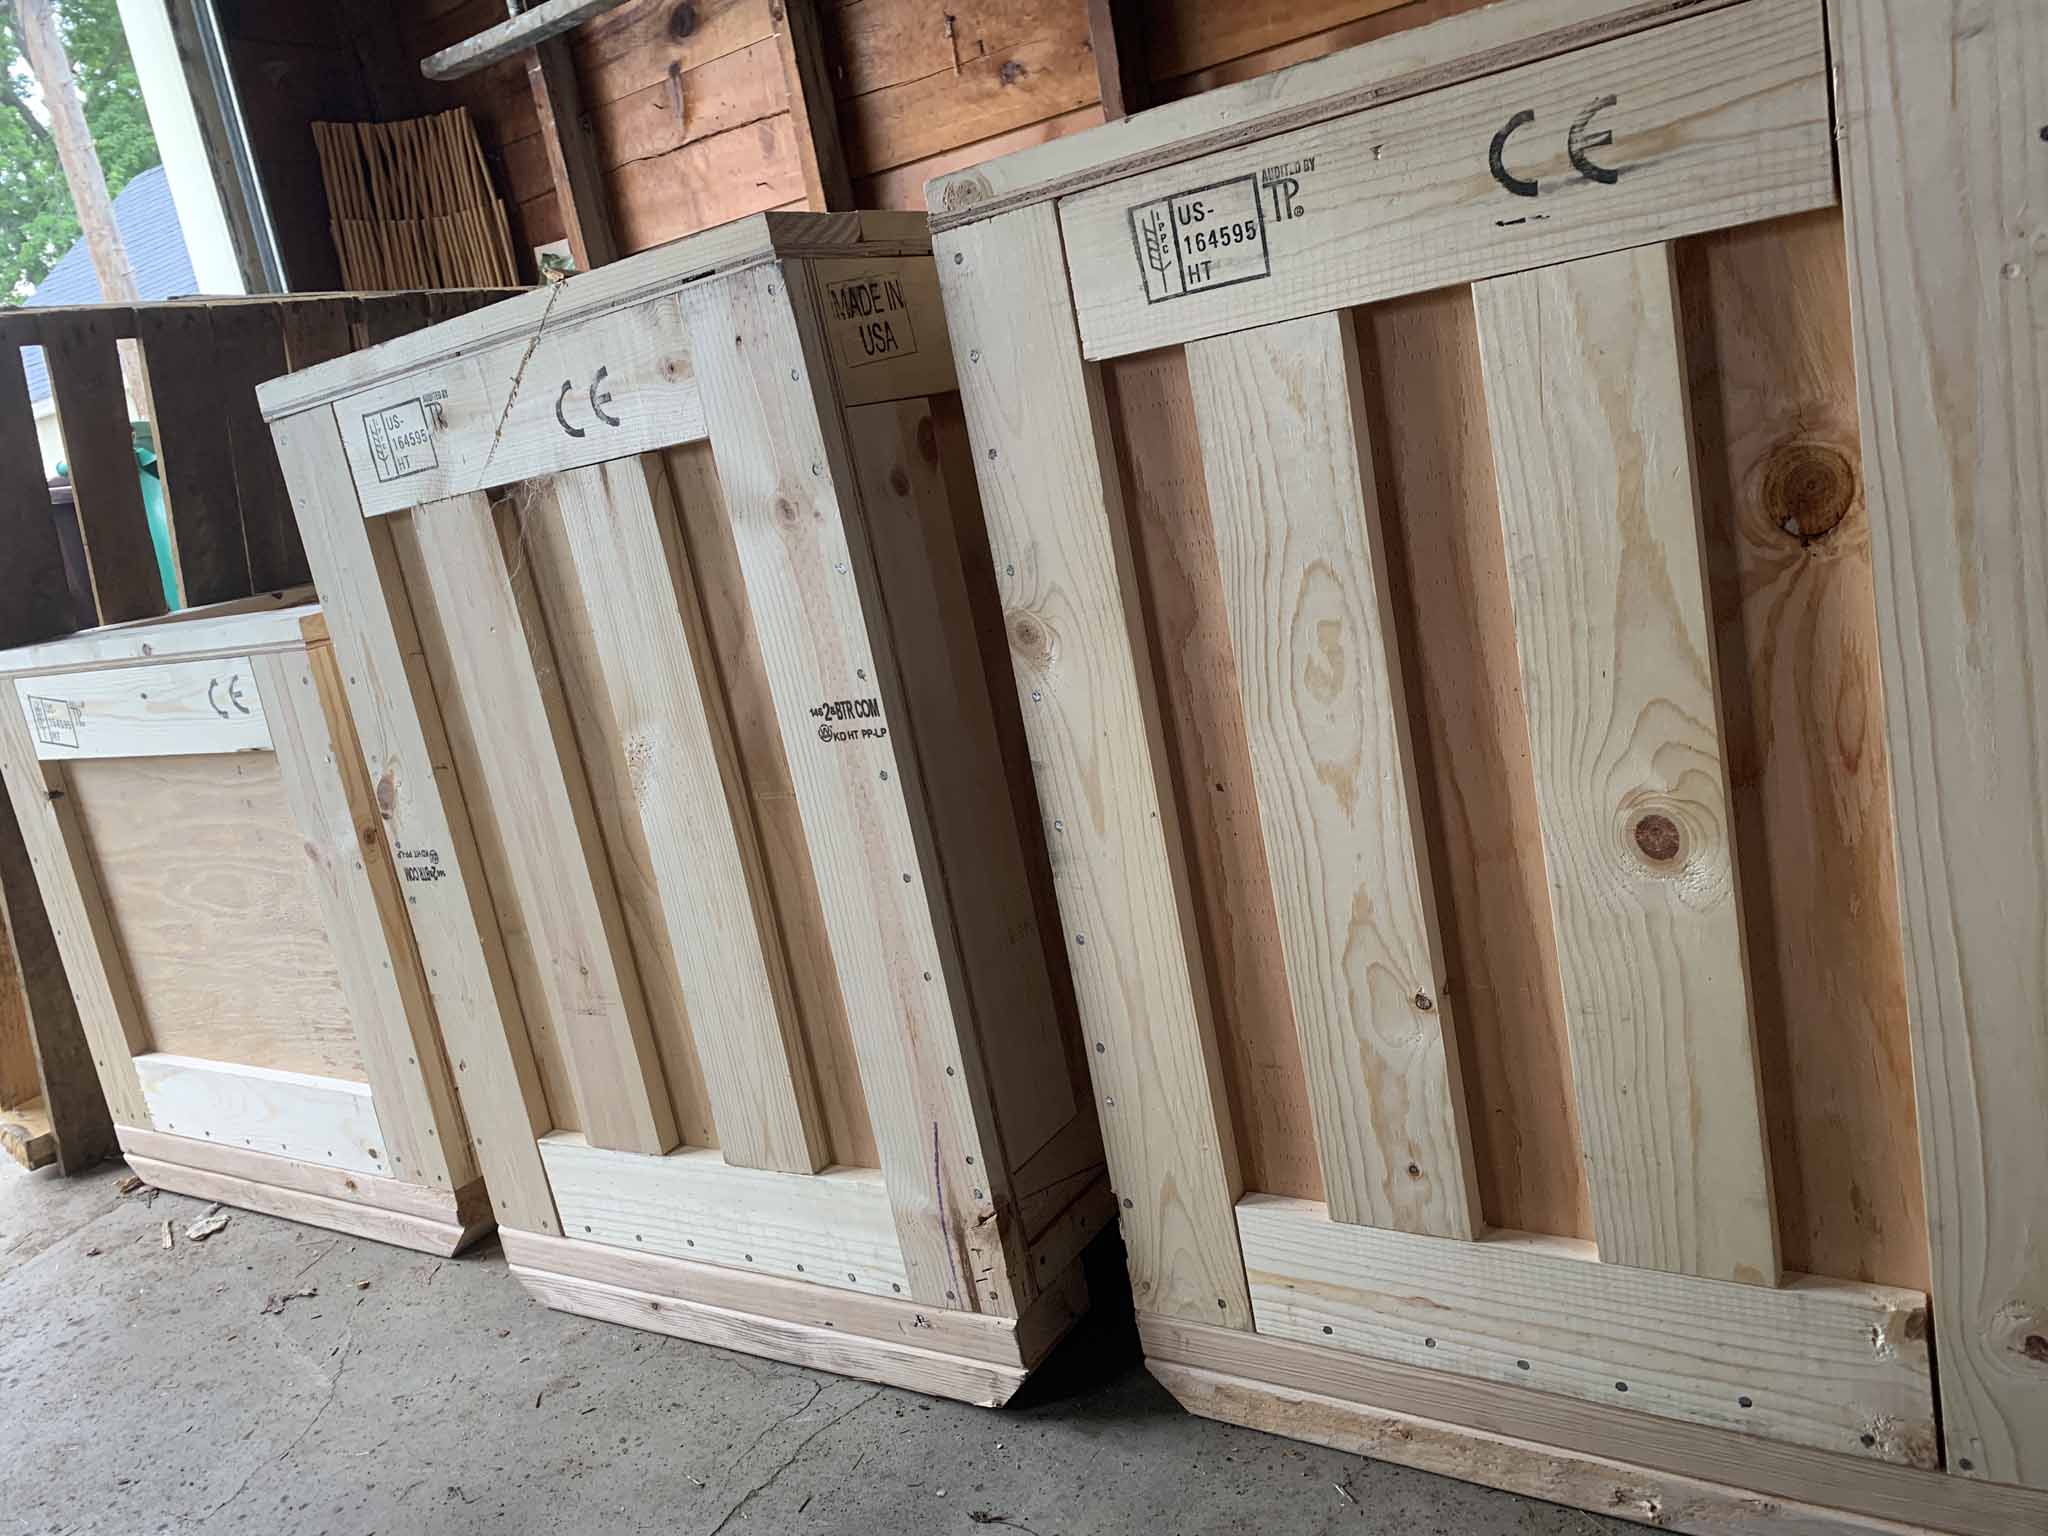
The speakers arrived in wooden crates that caused one of the movers to comment on the very solid build quality. "Those were made the right way." Said the guy who'd been working at the company for decades. He's seen a few packages and crates in his time.
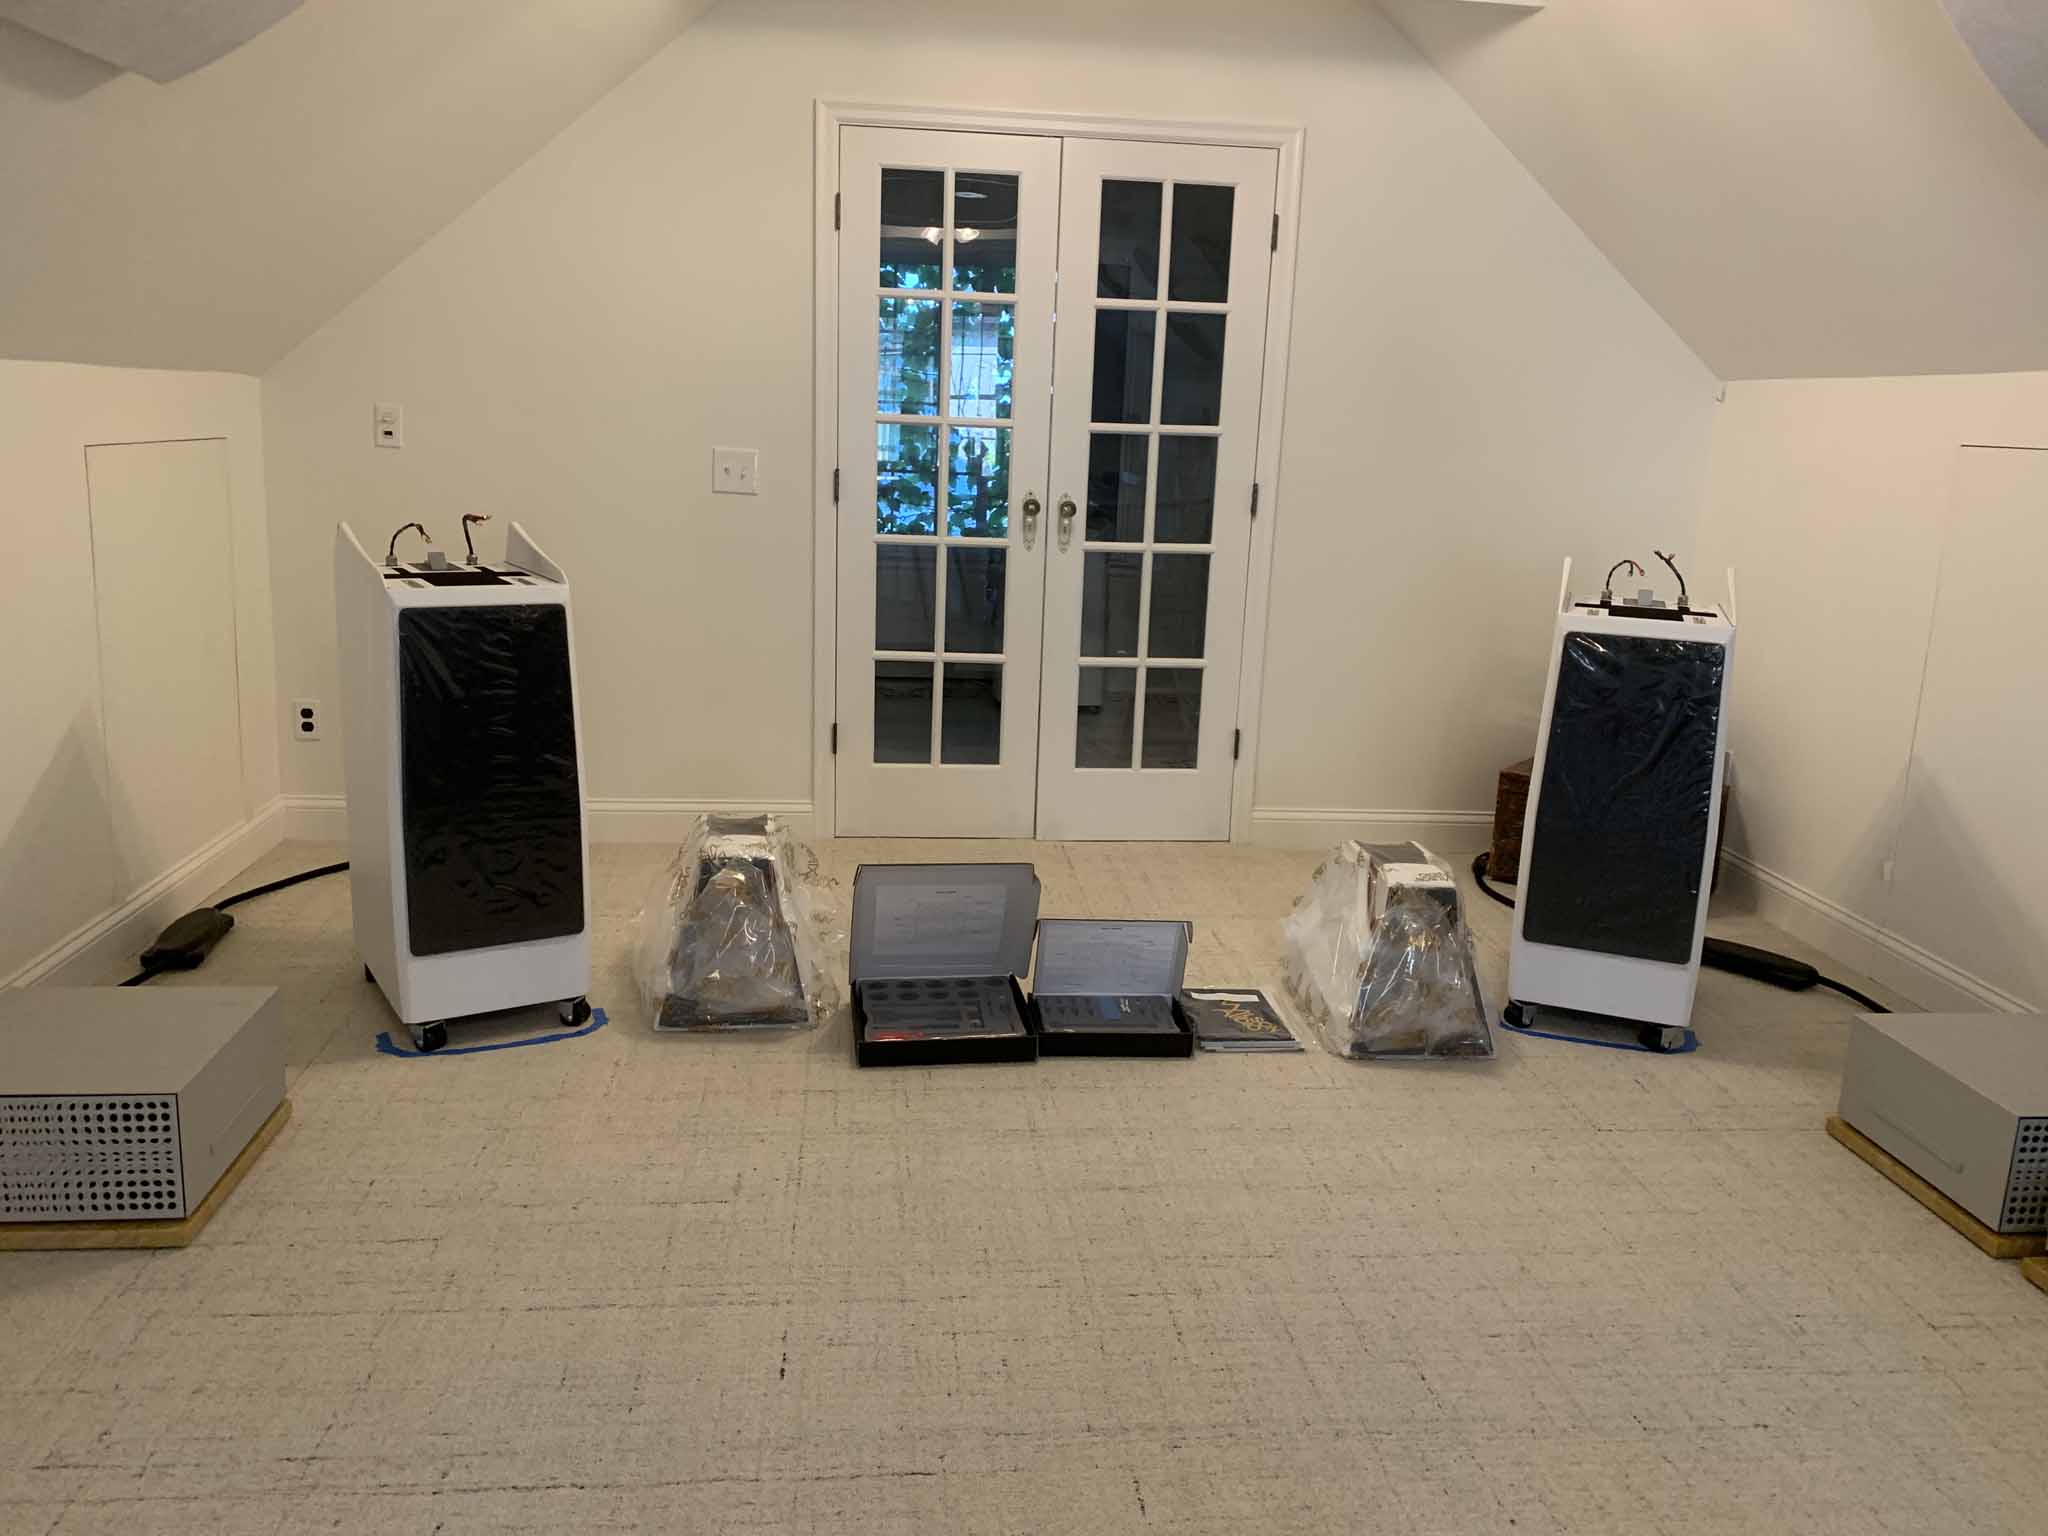
After watching the duo carefully bring the speakers up to the second floor listening room, it was time to peel off the protective layer of plastic. Wilson speakers ship with a thick protective plastic layer covering all the paint. This makes the speakers appear to be white before the real color is revealed under this layer.
I peeled the protective layer off and opened the 60 page Alexia Series 2 user manual (PDF 2.7MB). A lengthy user manual isn't what one wants to read before listening to new speakers for the first time. However, I knew that if I didn't at least attempt to install the speakers correctly, I'd only hear a fraction of their quality.
I read the manual and adjusted the speakers according to the measurements and charts. Wilson makes this part fairly straight forward. The difficult part of placement within the room and fine tuning this placement was beyond what I wanted to attempt and I new someone form Wilson was coming out to help with the setup anyway.
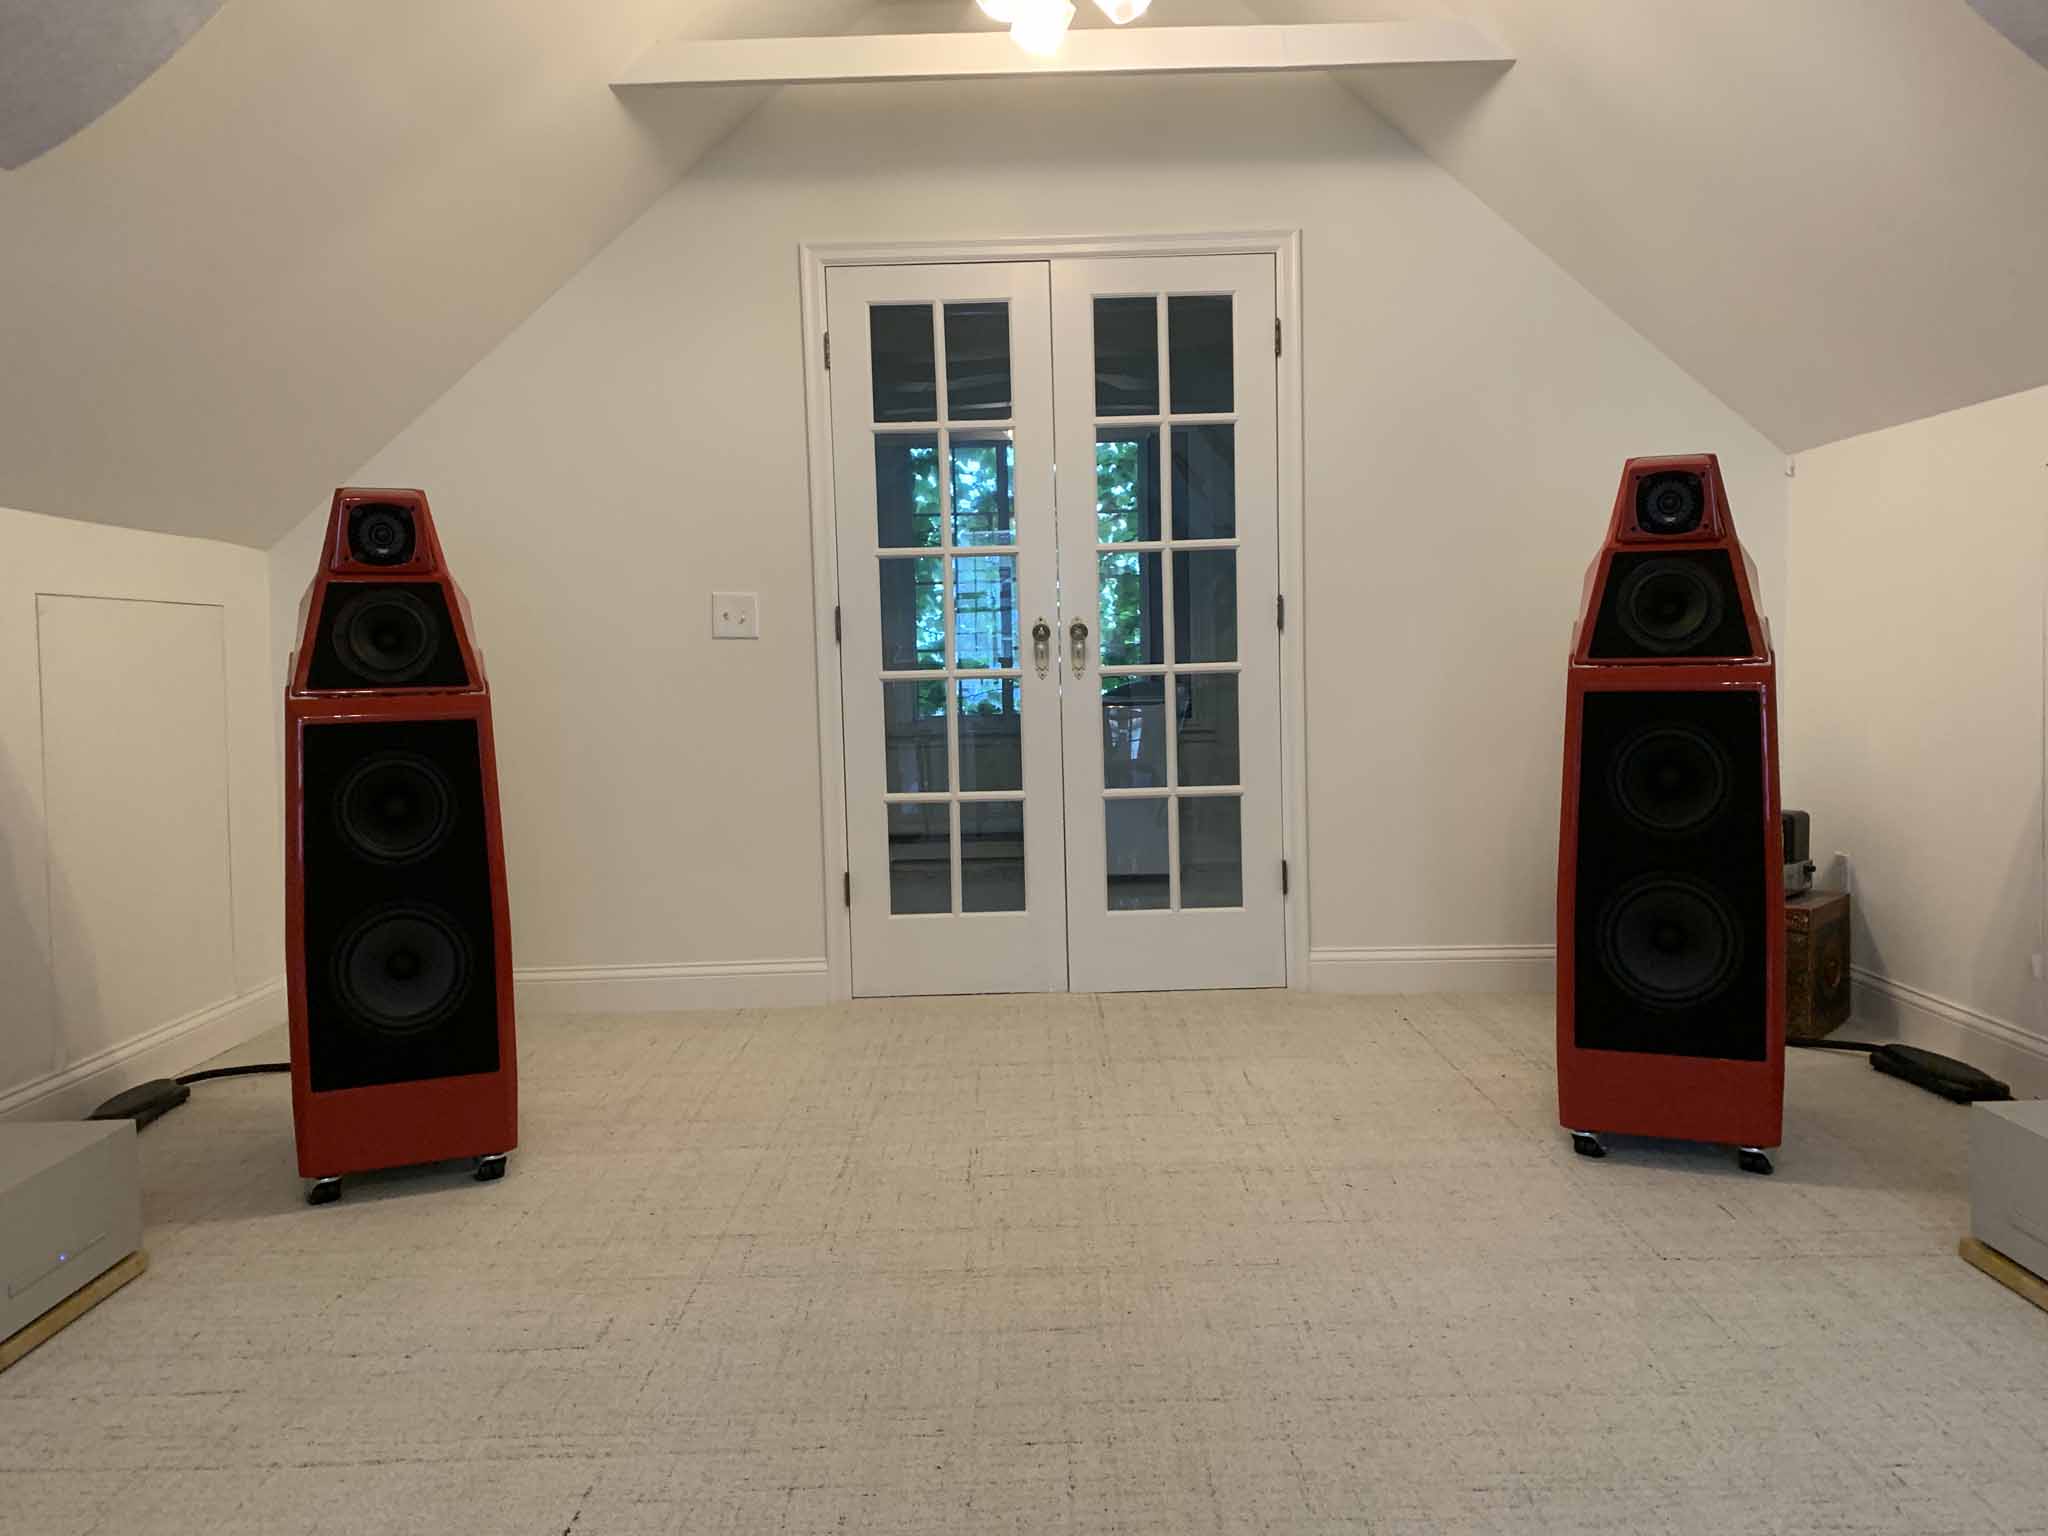
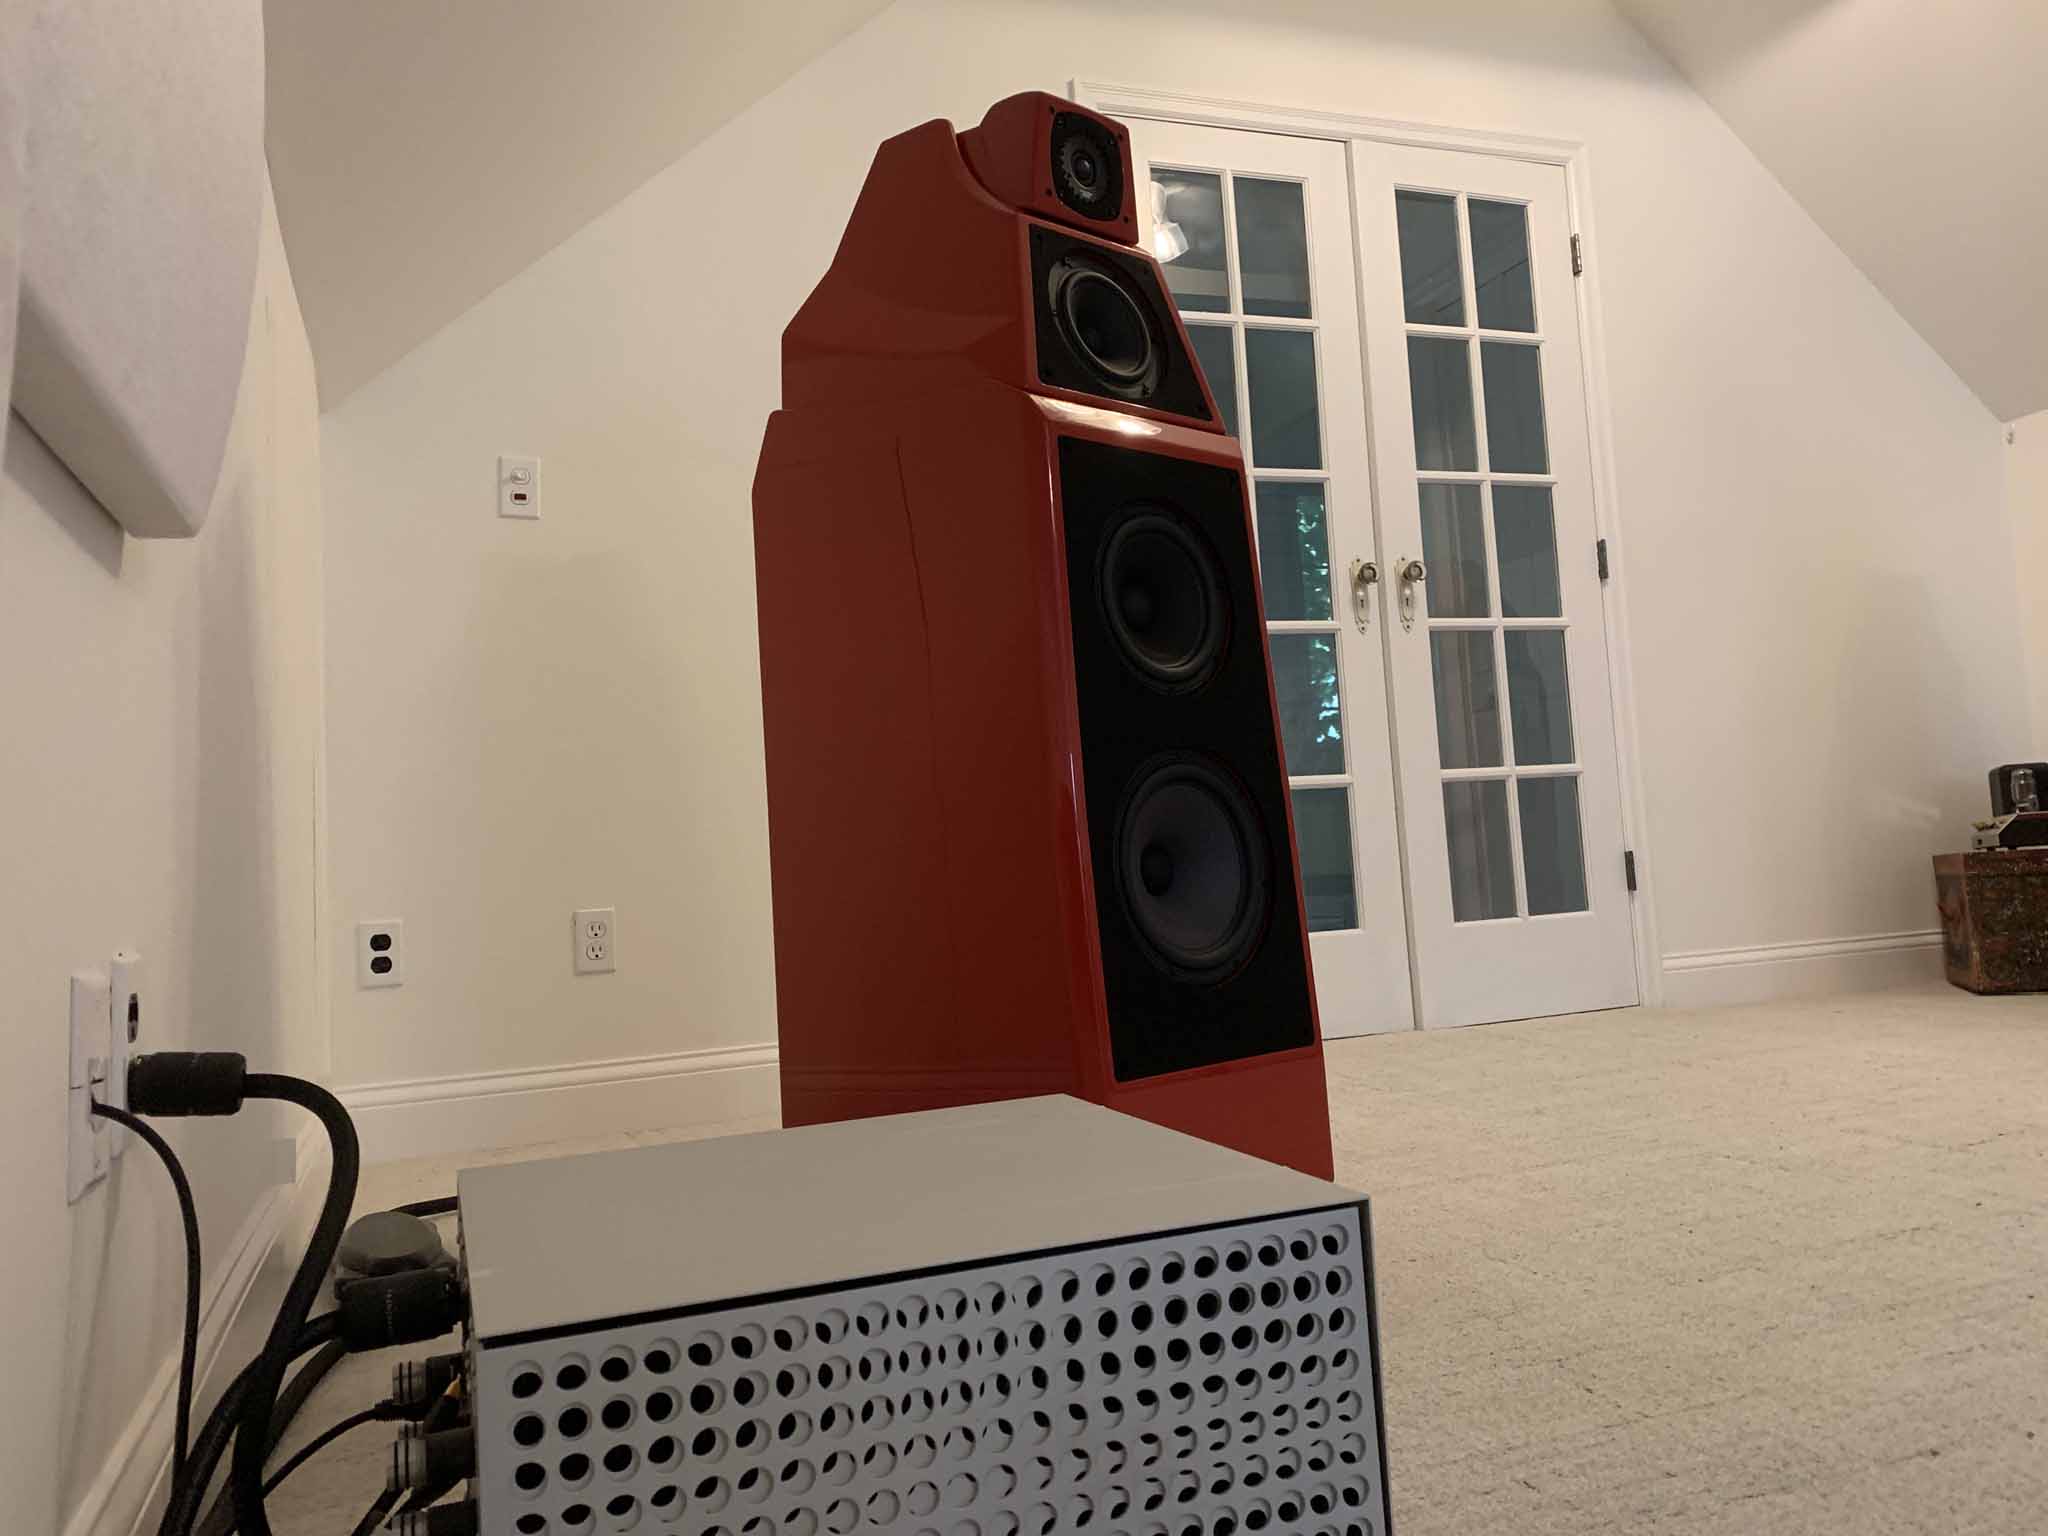
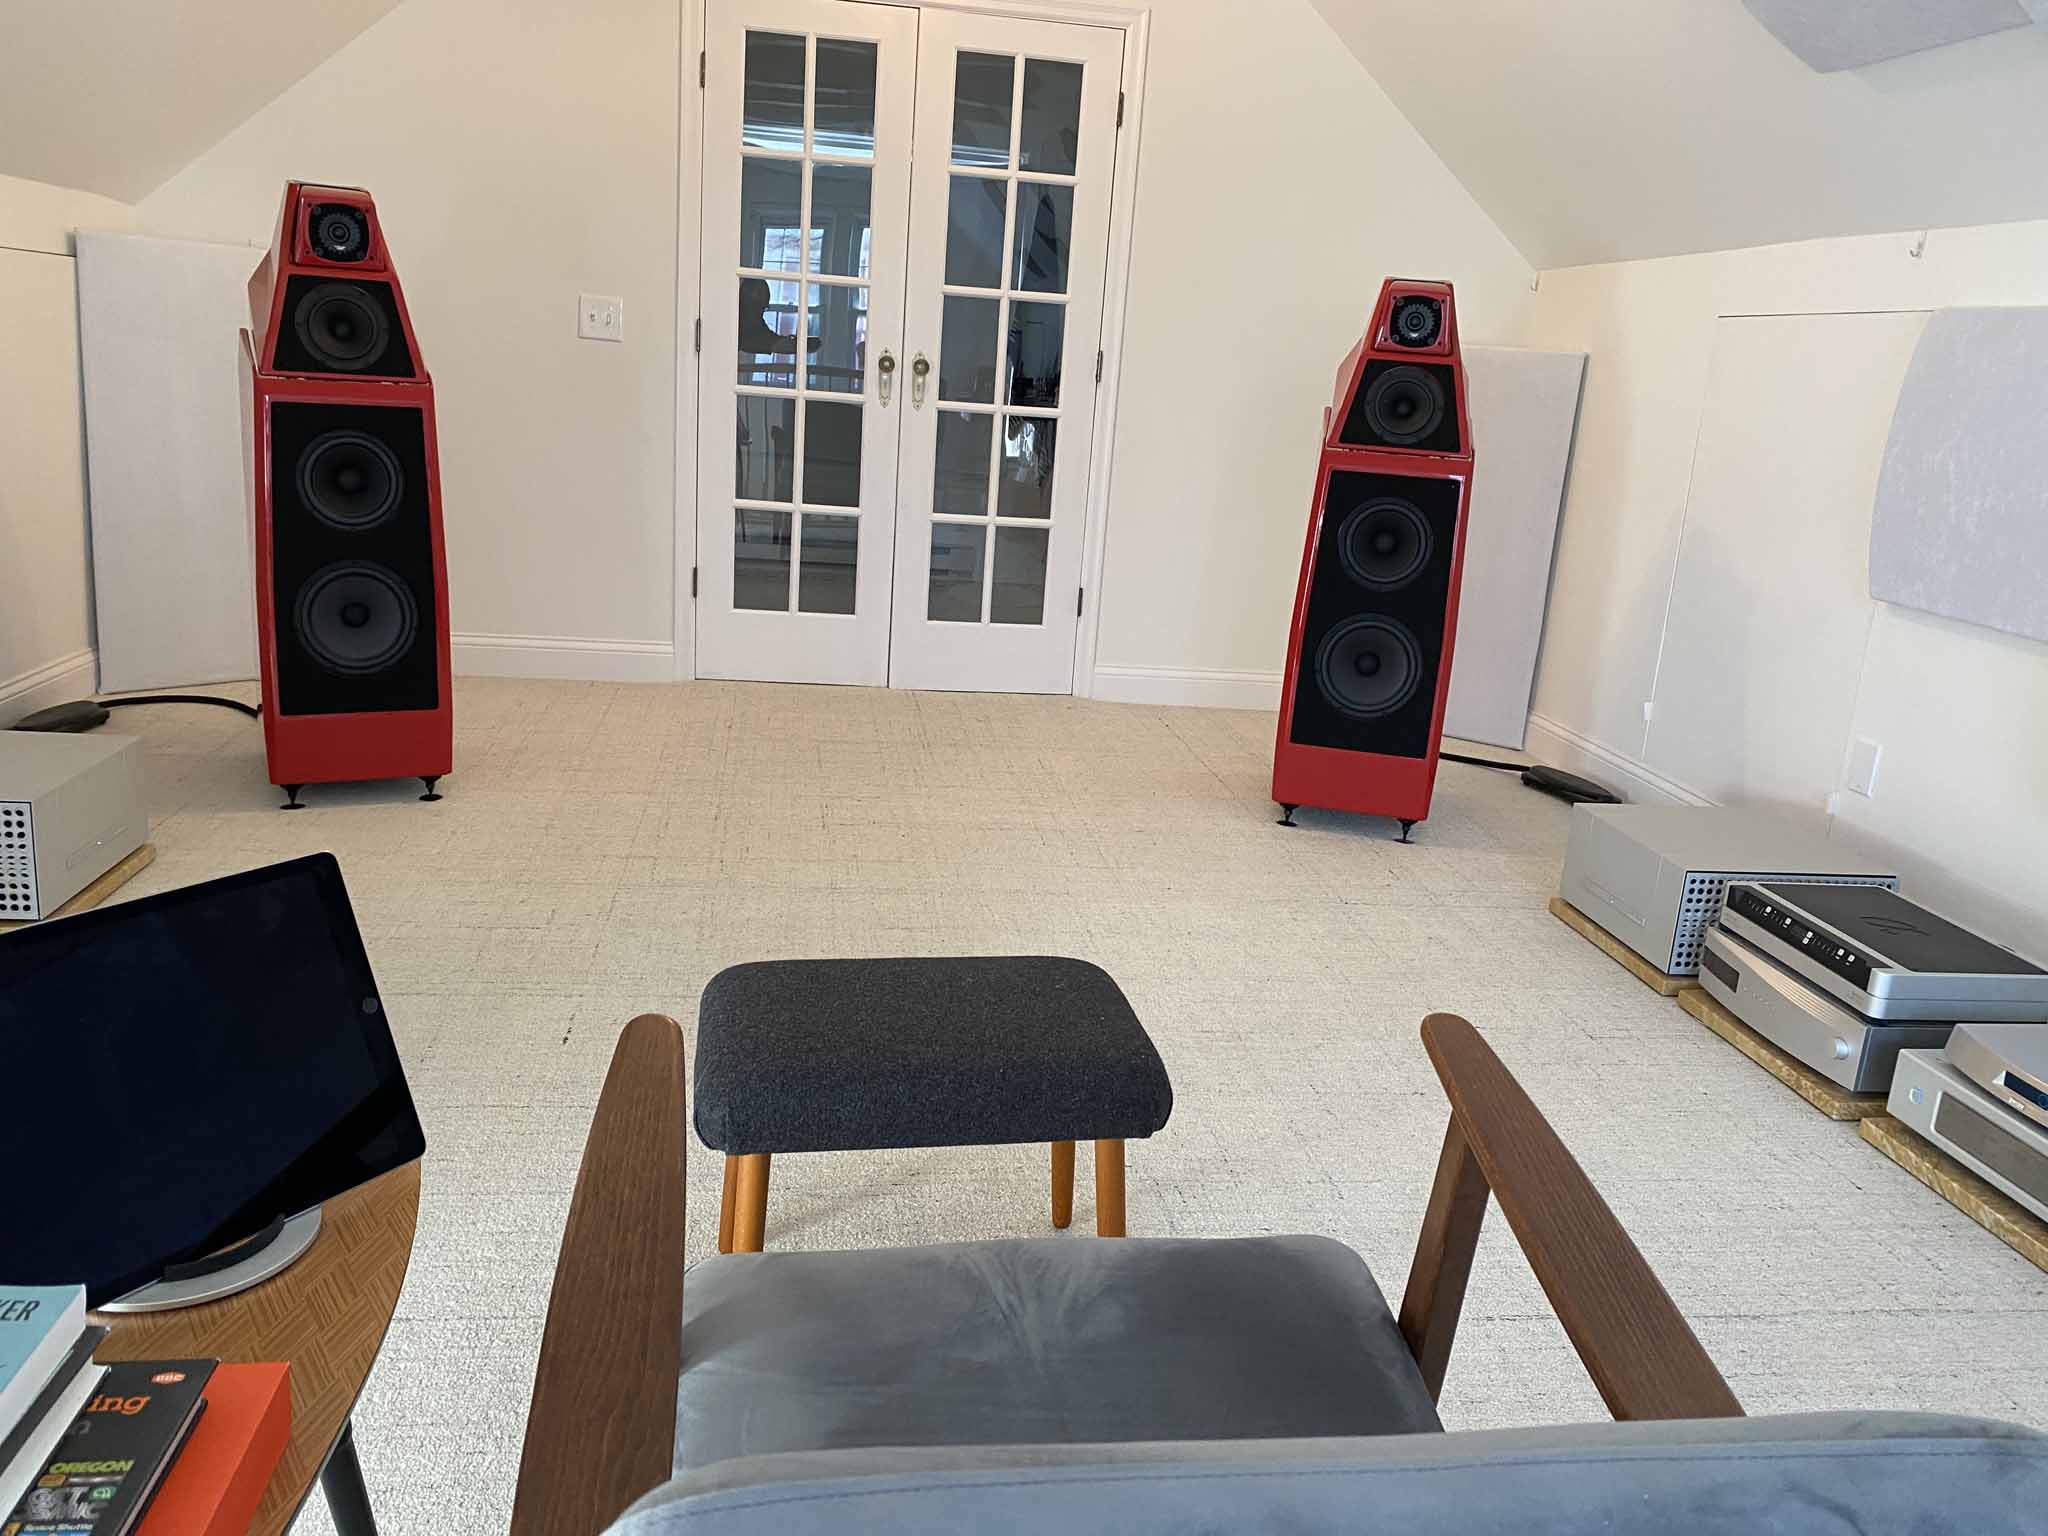
I finished speaker setup, connected my amps, and pressed play on my new Alexia Series 2 speakers. As an audiophile who has had a few pairs of new speakers in his life, I must say this is one of the funnest things to do after a new speaker setup. Listening to all of one's favorite tracks again for the first time. It brings out more in each track and identifies differences between old and new speakers right away.
I absolutely loved what I heard through the Alexia Series 2 speakers. I was apprehensive to sell my speakers with beryllium tweeters and beryllium midrange drivers and replace them with soft dome tweeters and Cellulose/Paper Pulp Composite midrange drivers. Not that either material in and of itself is better, but I was used to the sound of beryllium after seven years of listening through TAD CR1s. To my delight, the sound was fantastic.
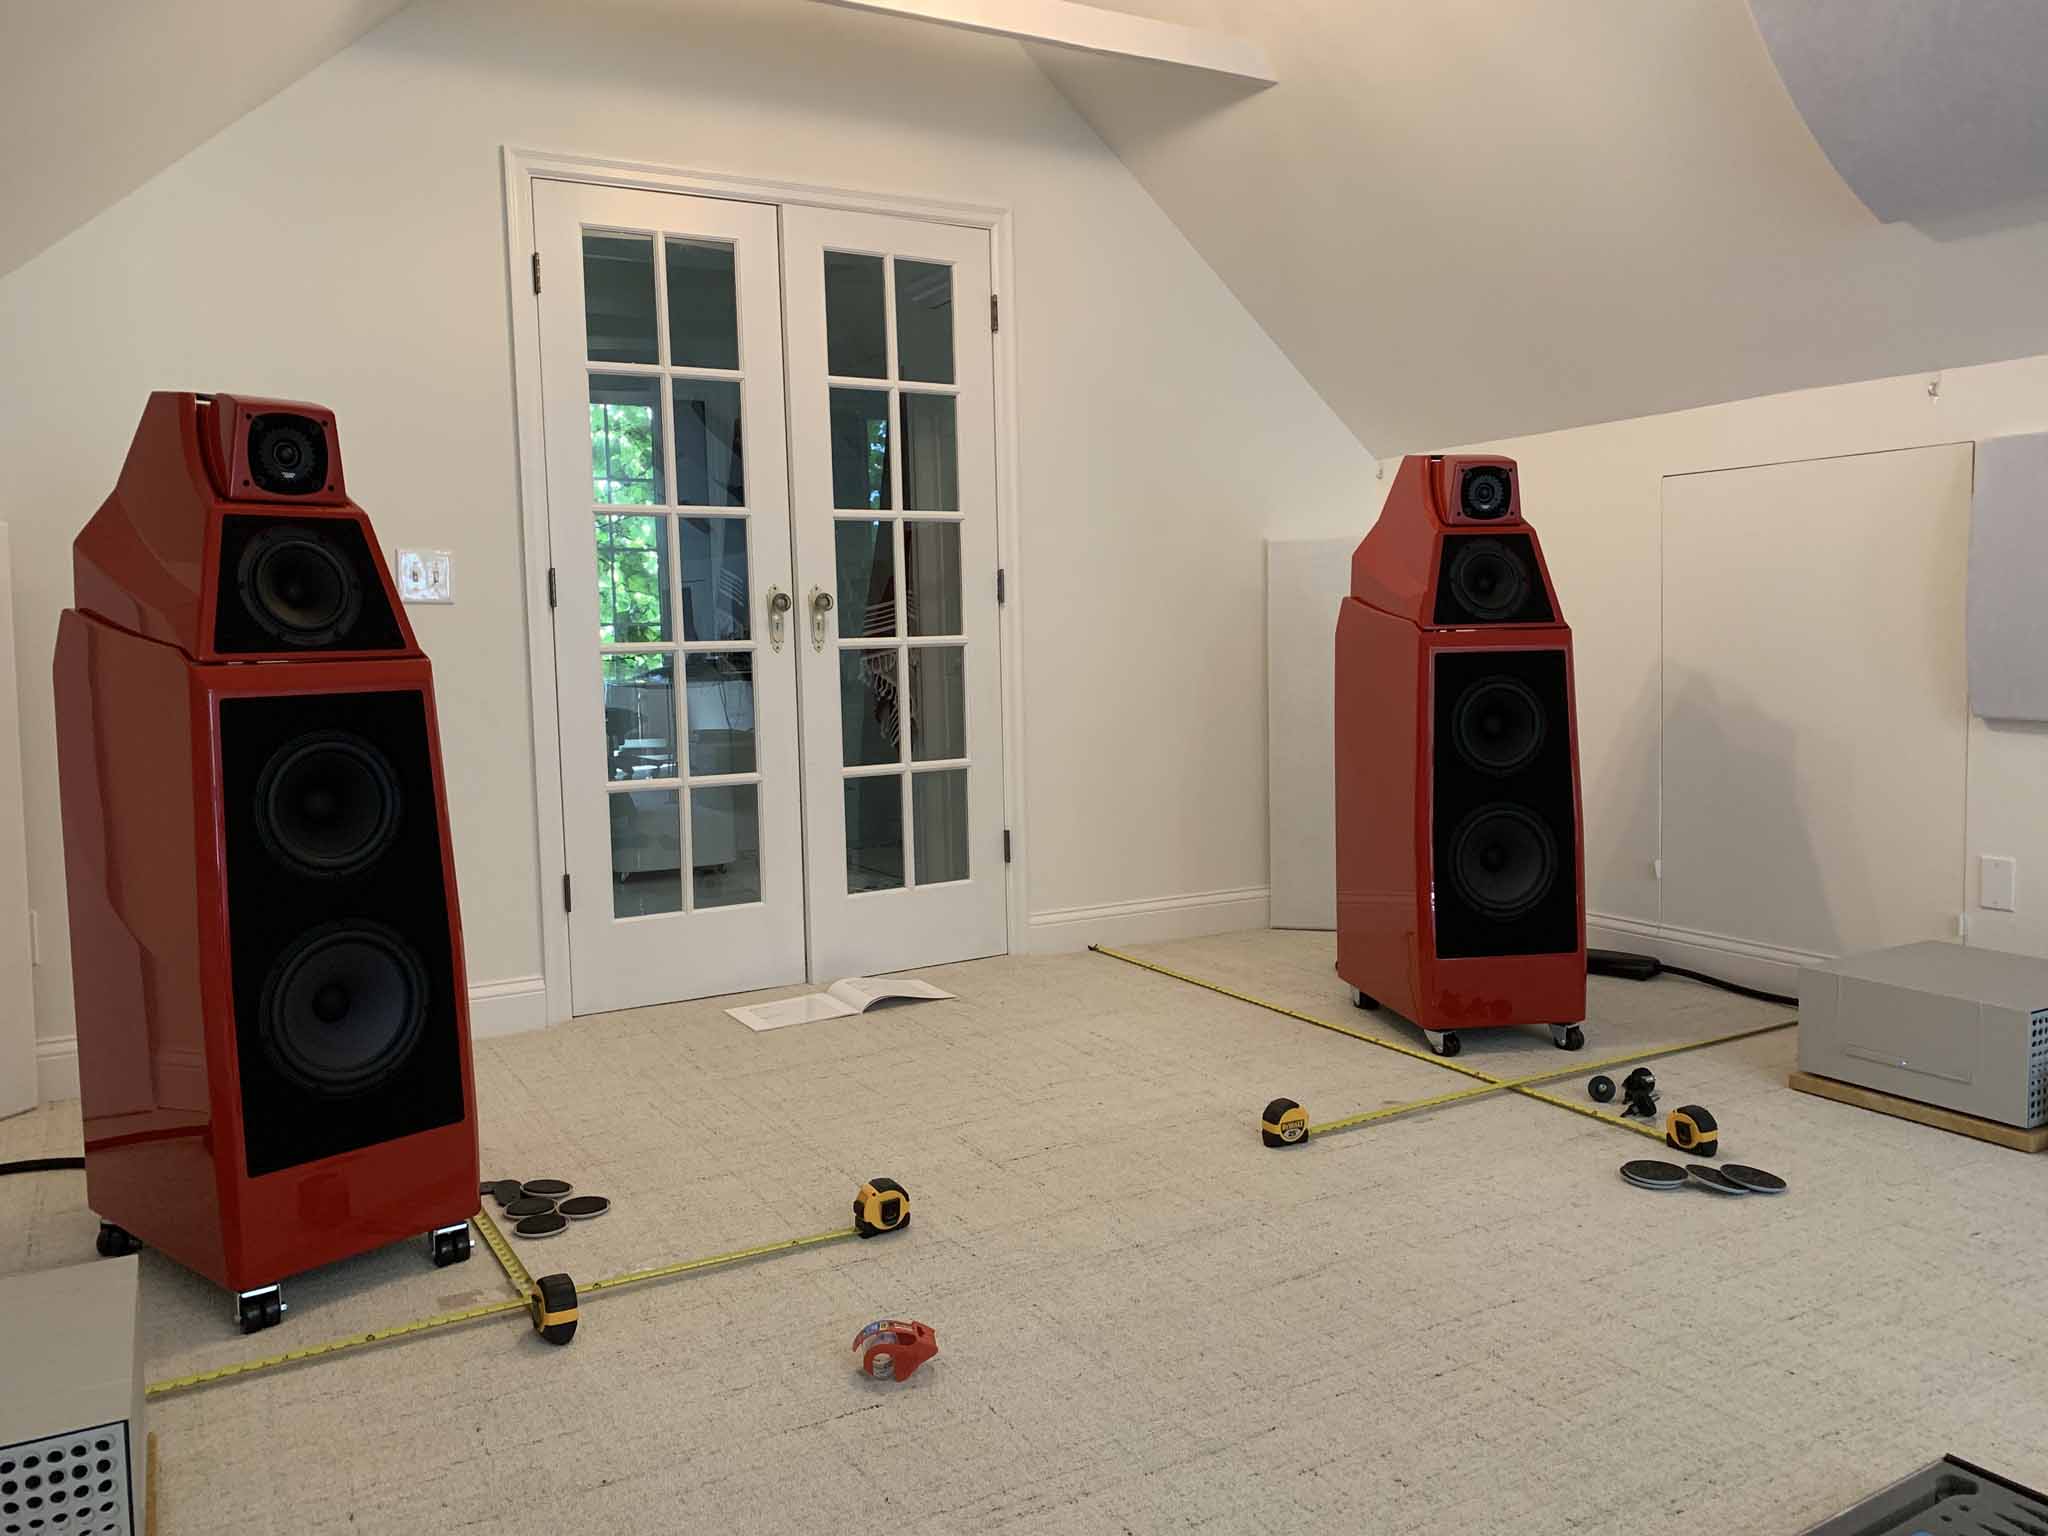
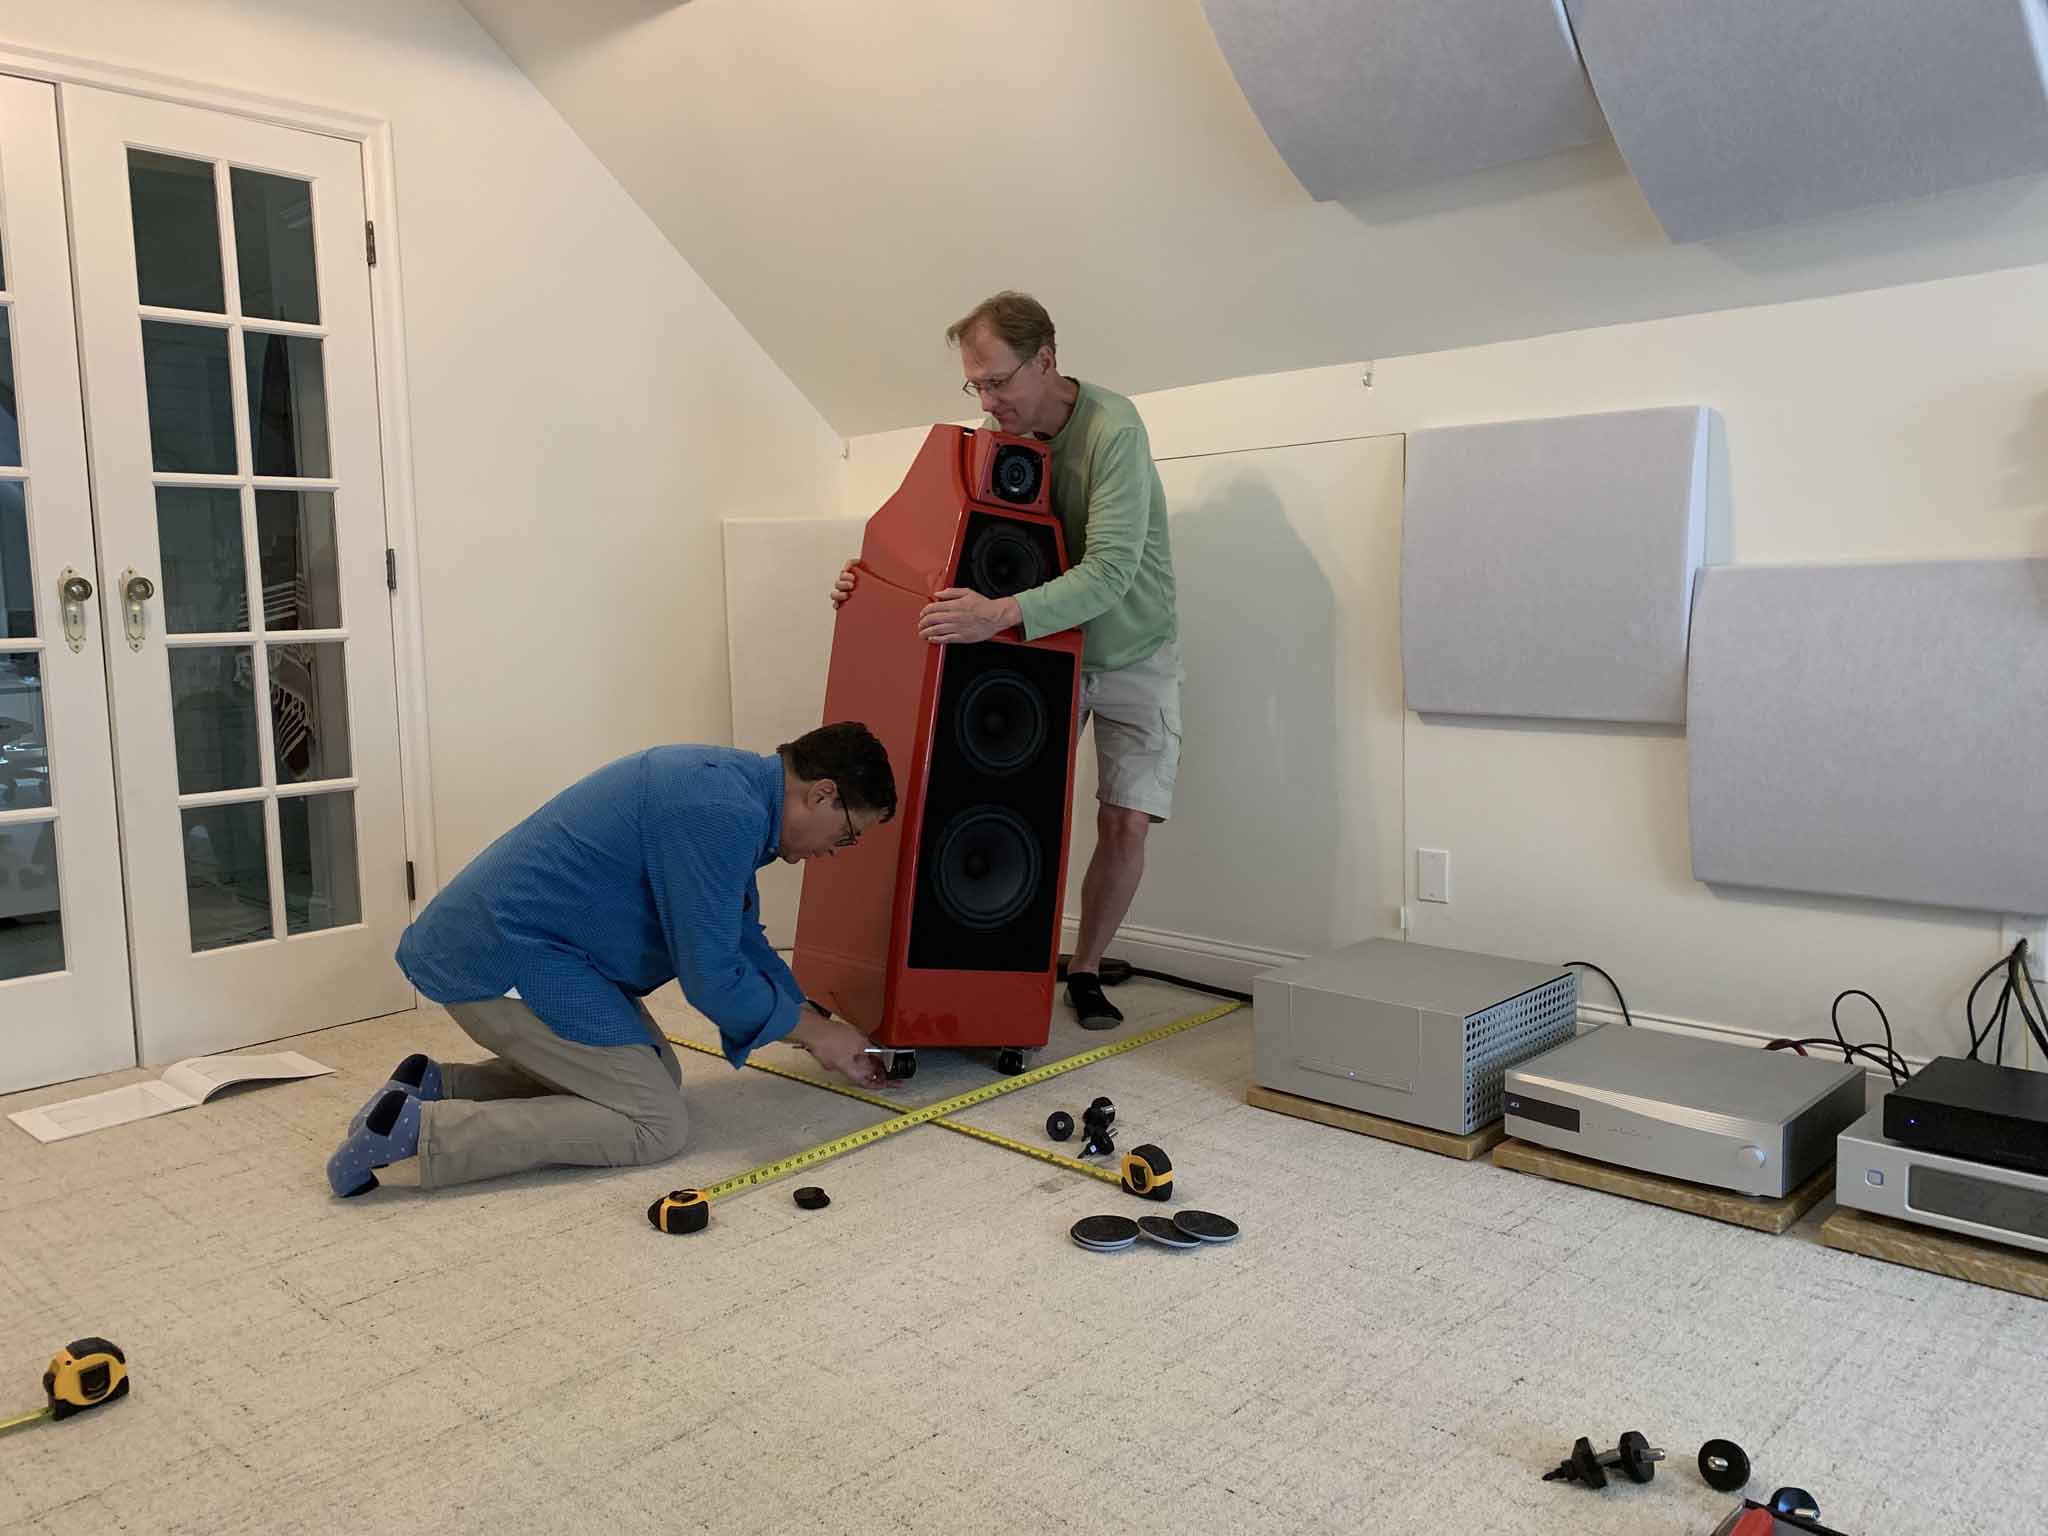
It took several weeks before schedules aligned and Wilson's John Giolas could make it out to Minneapolis to run through the Wilson Audio Setup Procedure with the speakers in my room. Given that John's official title is Director of Marketing at Wilson, I was skeptical and I told him as much. What does a marketing guy know about placement of speakers? It turns out, John is a master at speaker setup.
Every step of the setup was documented by John and verbally relayed to me as he made adjustments. John told me everything he did along the way and why he did it. Moving the speakers as he talked also enabled him to hear the reverberation off the side walls and find the perfect general position for the speakers.
John then took over the iPad and listening chair to fine tune speaker's position down to the smallest of fraction of an inch. Once the final position was settled, the spikes went in the speakers and it was time to listen to my 100% fully setup speakers for the first time. I was impressed with John's work throughout the day and equally impressed with the results at the end of the day. John noticed I'd mis-configured the tweeter housing, causing a slight timing issue (that was later verified by measurements) and moved the speakers only a couple inches from my initial placement. But, the end results were dramatic. I'd never had a better "first listen" than later that evening.


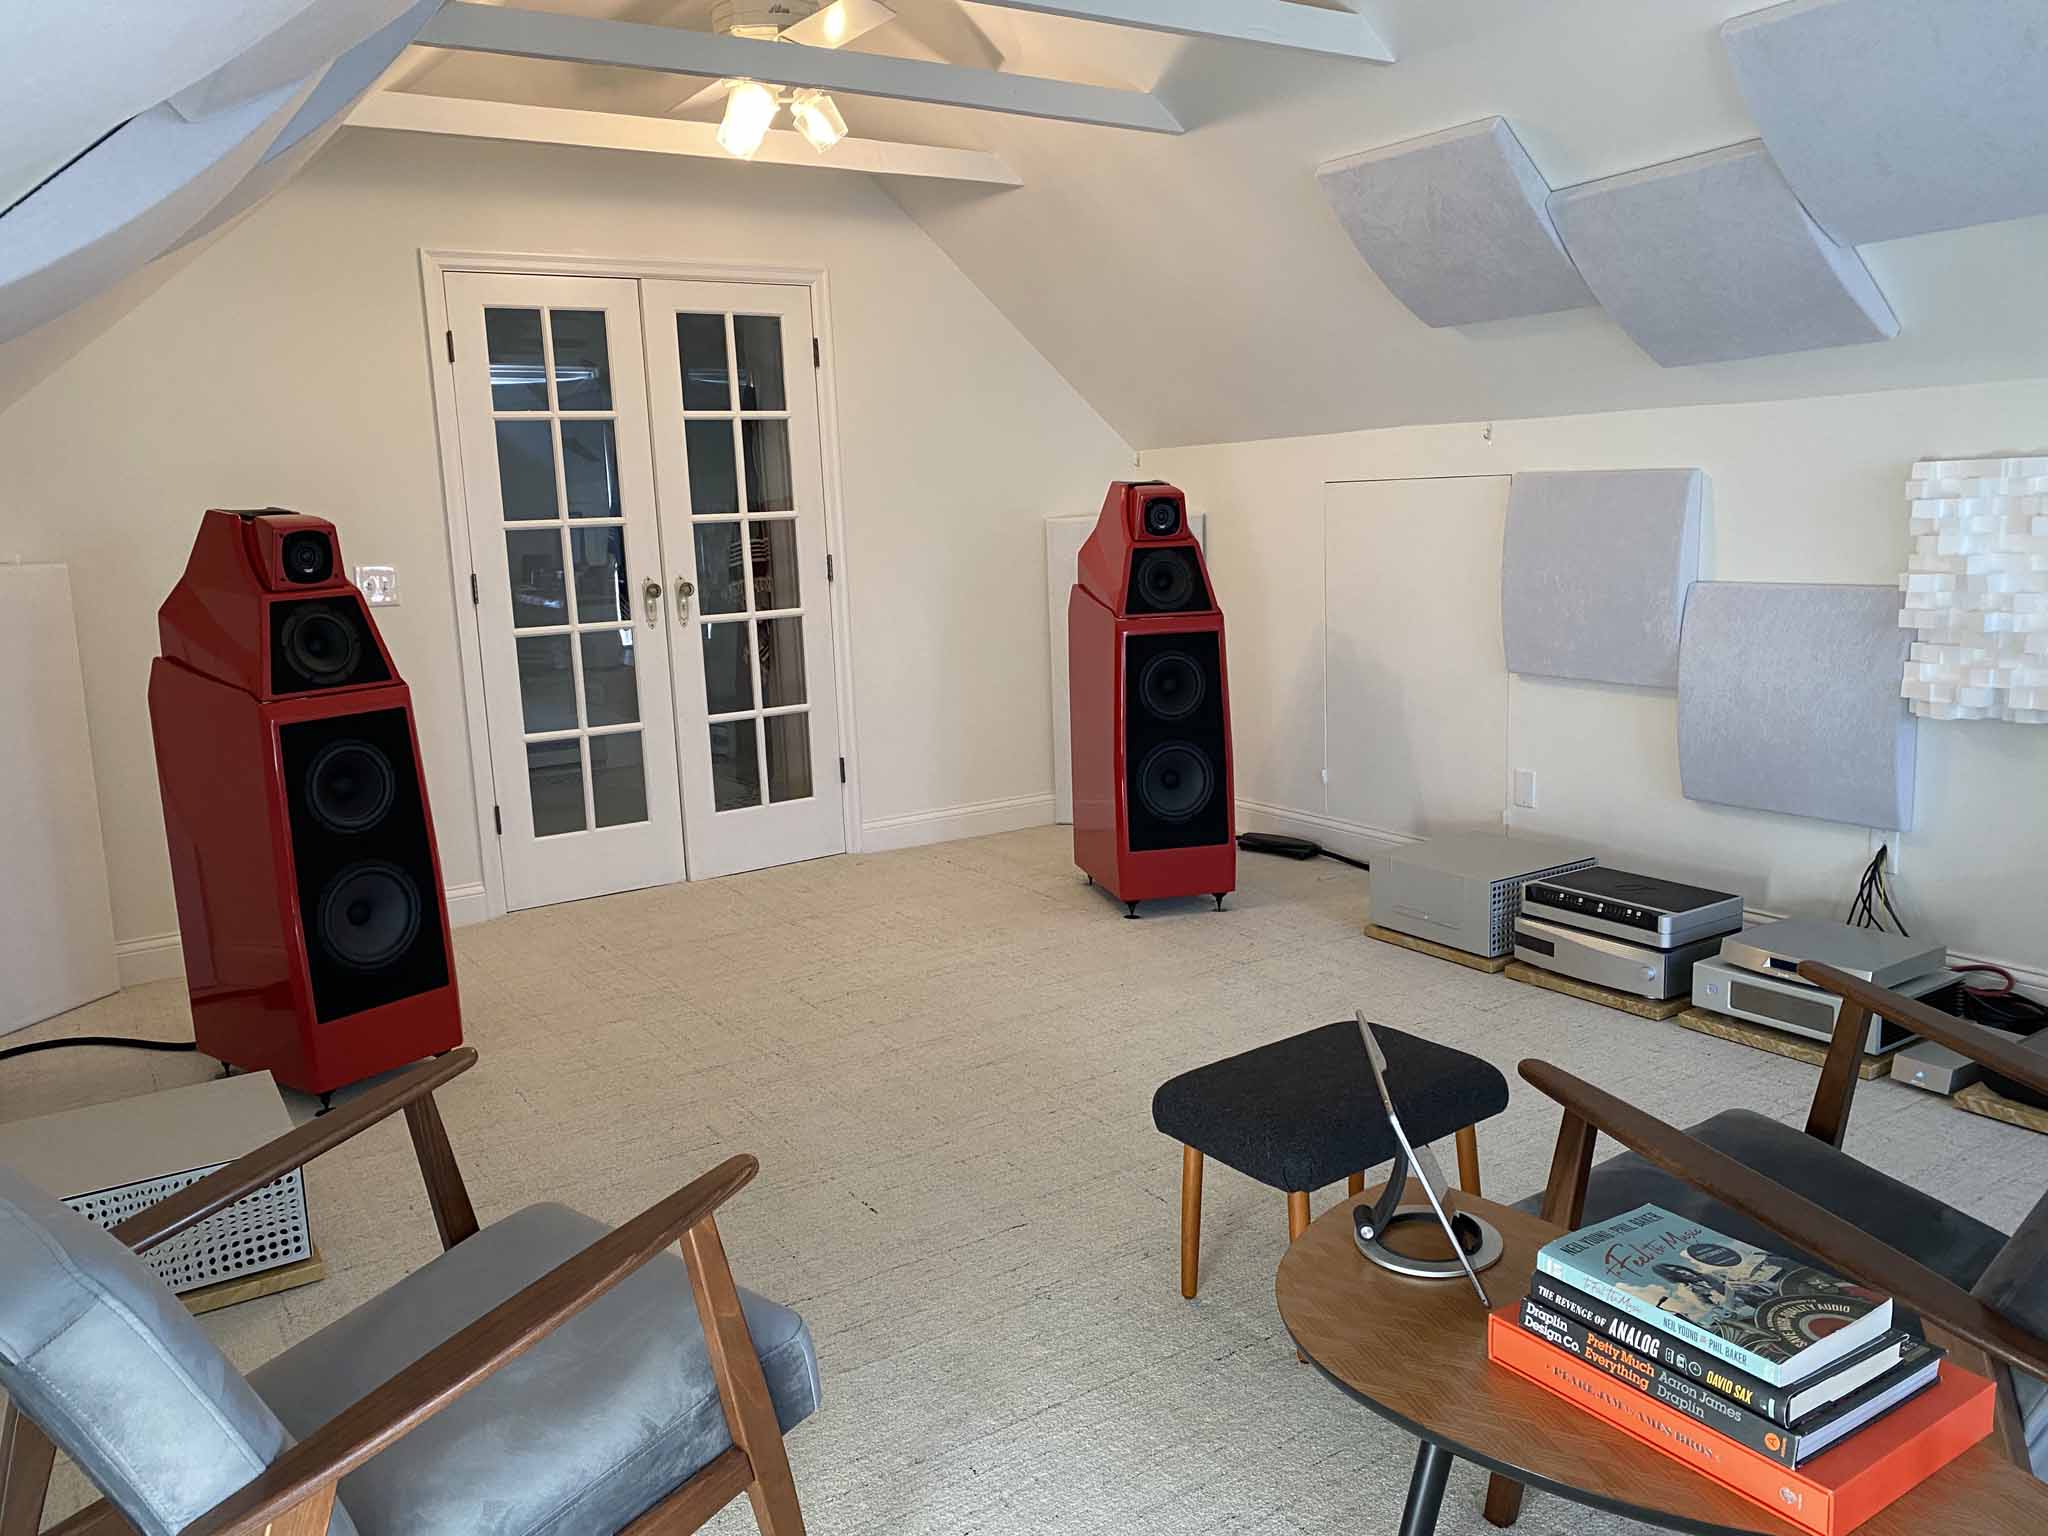
Step Three - Bass Traps
Once the speakers were in their final resting places and I'd had several days to play all types of music, I noted a couple bass humps in my listening room. Like all rooms, these are expected. I pulled out my miniDSP umik-1 USB Measurement Calibrated Microphone and used Room EQ Wizard to take some basic measurements of my room. Indeed, I had a large bass hump and suck-out that was easily heard by my ears and seen by my eyes on the graphs.
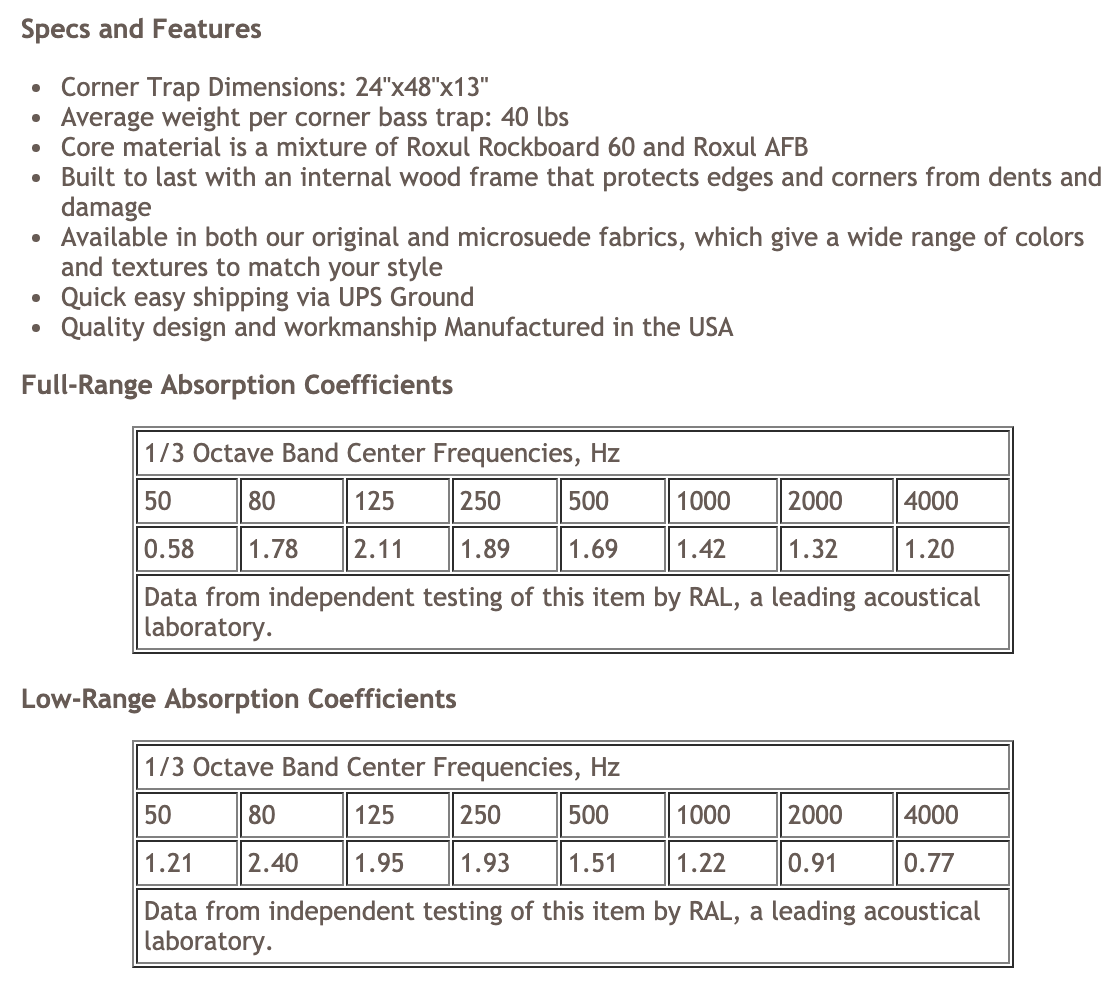
It was time to look closer at bass traps. I talked to more friends in the industry and settled on a pair of ATS Acoustics Corner Bass Traps (24x48) in the Guilford of Maine Snow color, for the two corners behind my speakers. I really liked these bass traps for two reasons, first the price was right (although shipping can be a killer), and second ATS offers them in both full range and low range. I selected the low range version that absorbs low frequencies and reflects high frequencies. I didn't need any additional high frequency absorption.
Here are specs of the bass traps and difference between the full range and low range traps, and an image of one in my room.
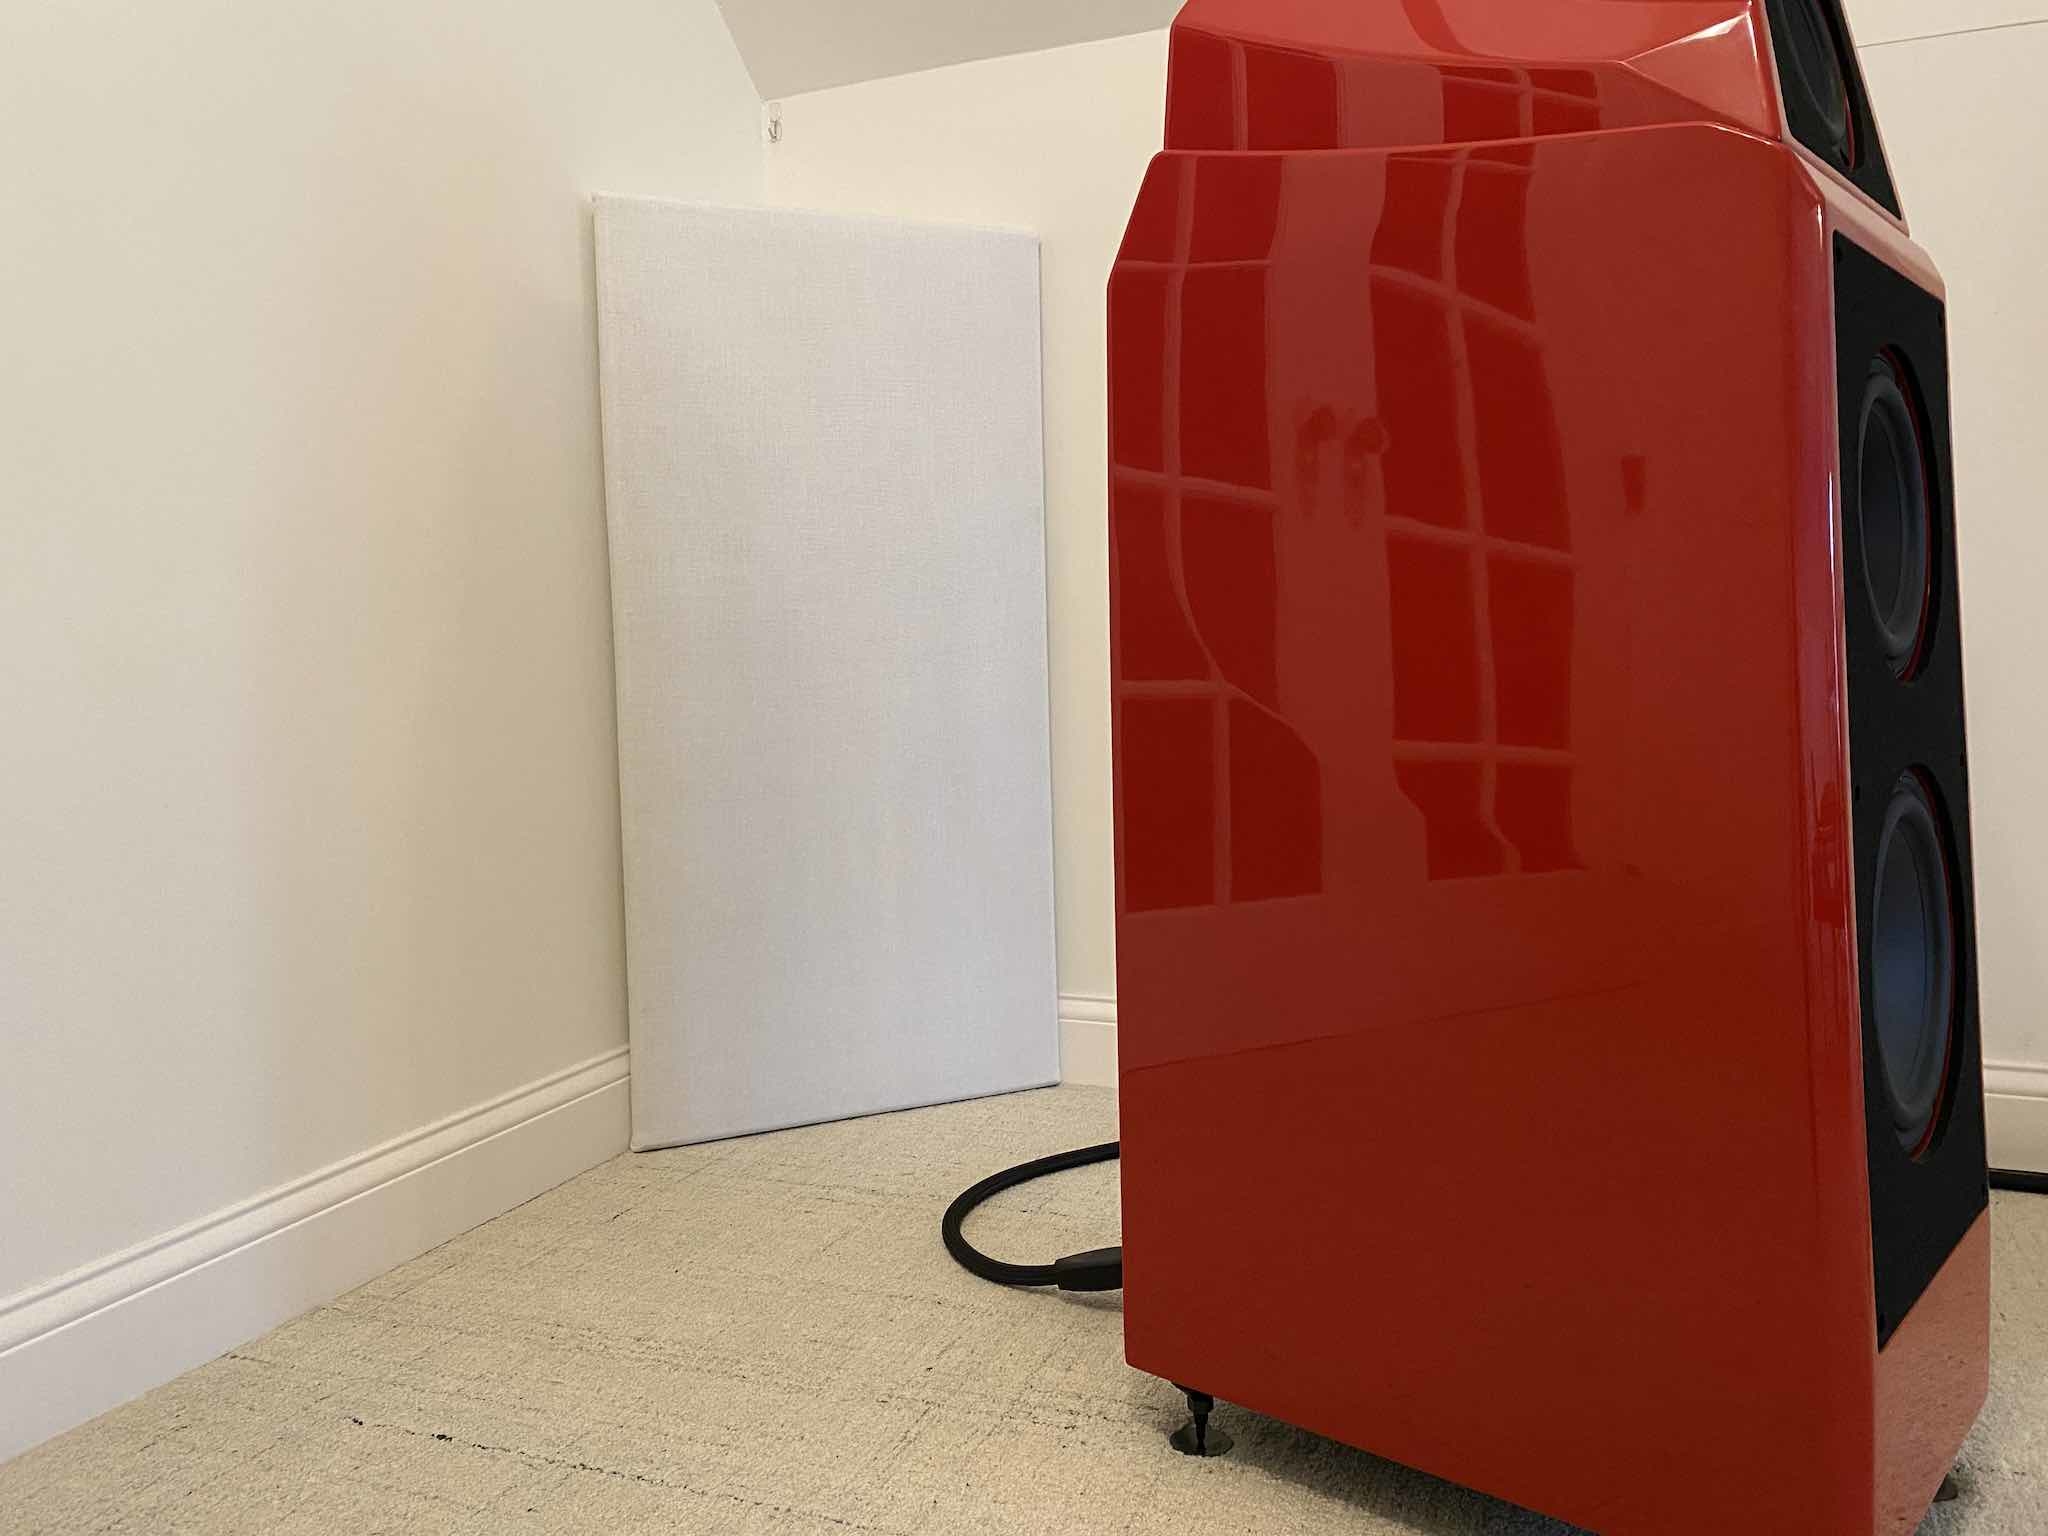
I installed the bass traps without much fanfare. They just sit in the corner without any hardware installed to couple them to the wall. Such hardware is available if desired. The overall effect of the bass traps was minimal but a positive for my listening enjoyment. The lowest frequencies can be hard to tame due to the length of the sound wave. I found this out through personal experience. This lead me to step four in my effort to fine tune the room even further.
Step Four - DSP
I've been interested in DSP / room correction since hearing a wonderful demo at an audio show many years ago. In the years since, I've read a bit about it and dabbled with a couple apps, to see what I could do in my own system. Once I had measurements of my new room and confirmed them with what I heard, it was time to get serious with DSP. I talked to Mitch Barnett @mitchco of Accurate Sound, who literally wrote a book on DSP and is well versed in the writings of almost all the industry experts. Mitch gave me enough information to get going on my own, but I soon realized I was in way over my head. If I was interested in messing around and getting decent results, I would've been fine continuing on my own. However, I wanted the best results money could buy. I asked Mitch to continue helping me because I was out of my league.
I discovered that there are so many facets to DSP / room correction that the average guy has little chance of getting the best out of his system without help. Heck, I even committed the cardinal sin of thinking a flat frequency response at the listening position was desirable. Turns out listening to the experts and trying different industry standard curves is the route most traveled for good reason.
Mitch coached me through taking measurements of my room. For the most part this was easy, but when things go wrong, it helps to have Mitch. In my case he knew what options to enable or disable and even worked with the creator of Audiolense, Bernt Rønningsbakk on a couple possible issues.
After sending Mitch my room measurements, taken through Audiolense with the umik-1, he delivered a couple convolution filters to me via email. I added these filters to Roon, where I could easily switch between them to determine sonic differences. It was equally as easy to disable the convolution filters for comparison to bit perfect playback as well.
At first I wasn't thrilled with the results. I believed the transients were rounded at the edges far too much for my taste. This coupled with the fact that I was used to listening without any DSP for my entire life, made me frustrated. I reported back to Mitch everything I heard, liked, and disliked. His response to me was very reassuring. He said not to worry because there are many industry standard curves to try and many small adjustments he can make to the filter.
Over several weeks Mitch sent me more filters to try. I was traveling much of this time, so I assume we could've hammered out my issues pretty quick if I could dedicate more time to the effort. Mitch sent filters based on ITU, B&K and Bob Katz target curves before sending the EBU 3276 target curve. I liked the direction he was taking my system with the ITU curve, but when I pressed play with the EBU 3276 curve enabled, I was sold. My system was really singing. My room was out of the picture, and the music was right there in front of me.
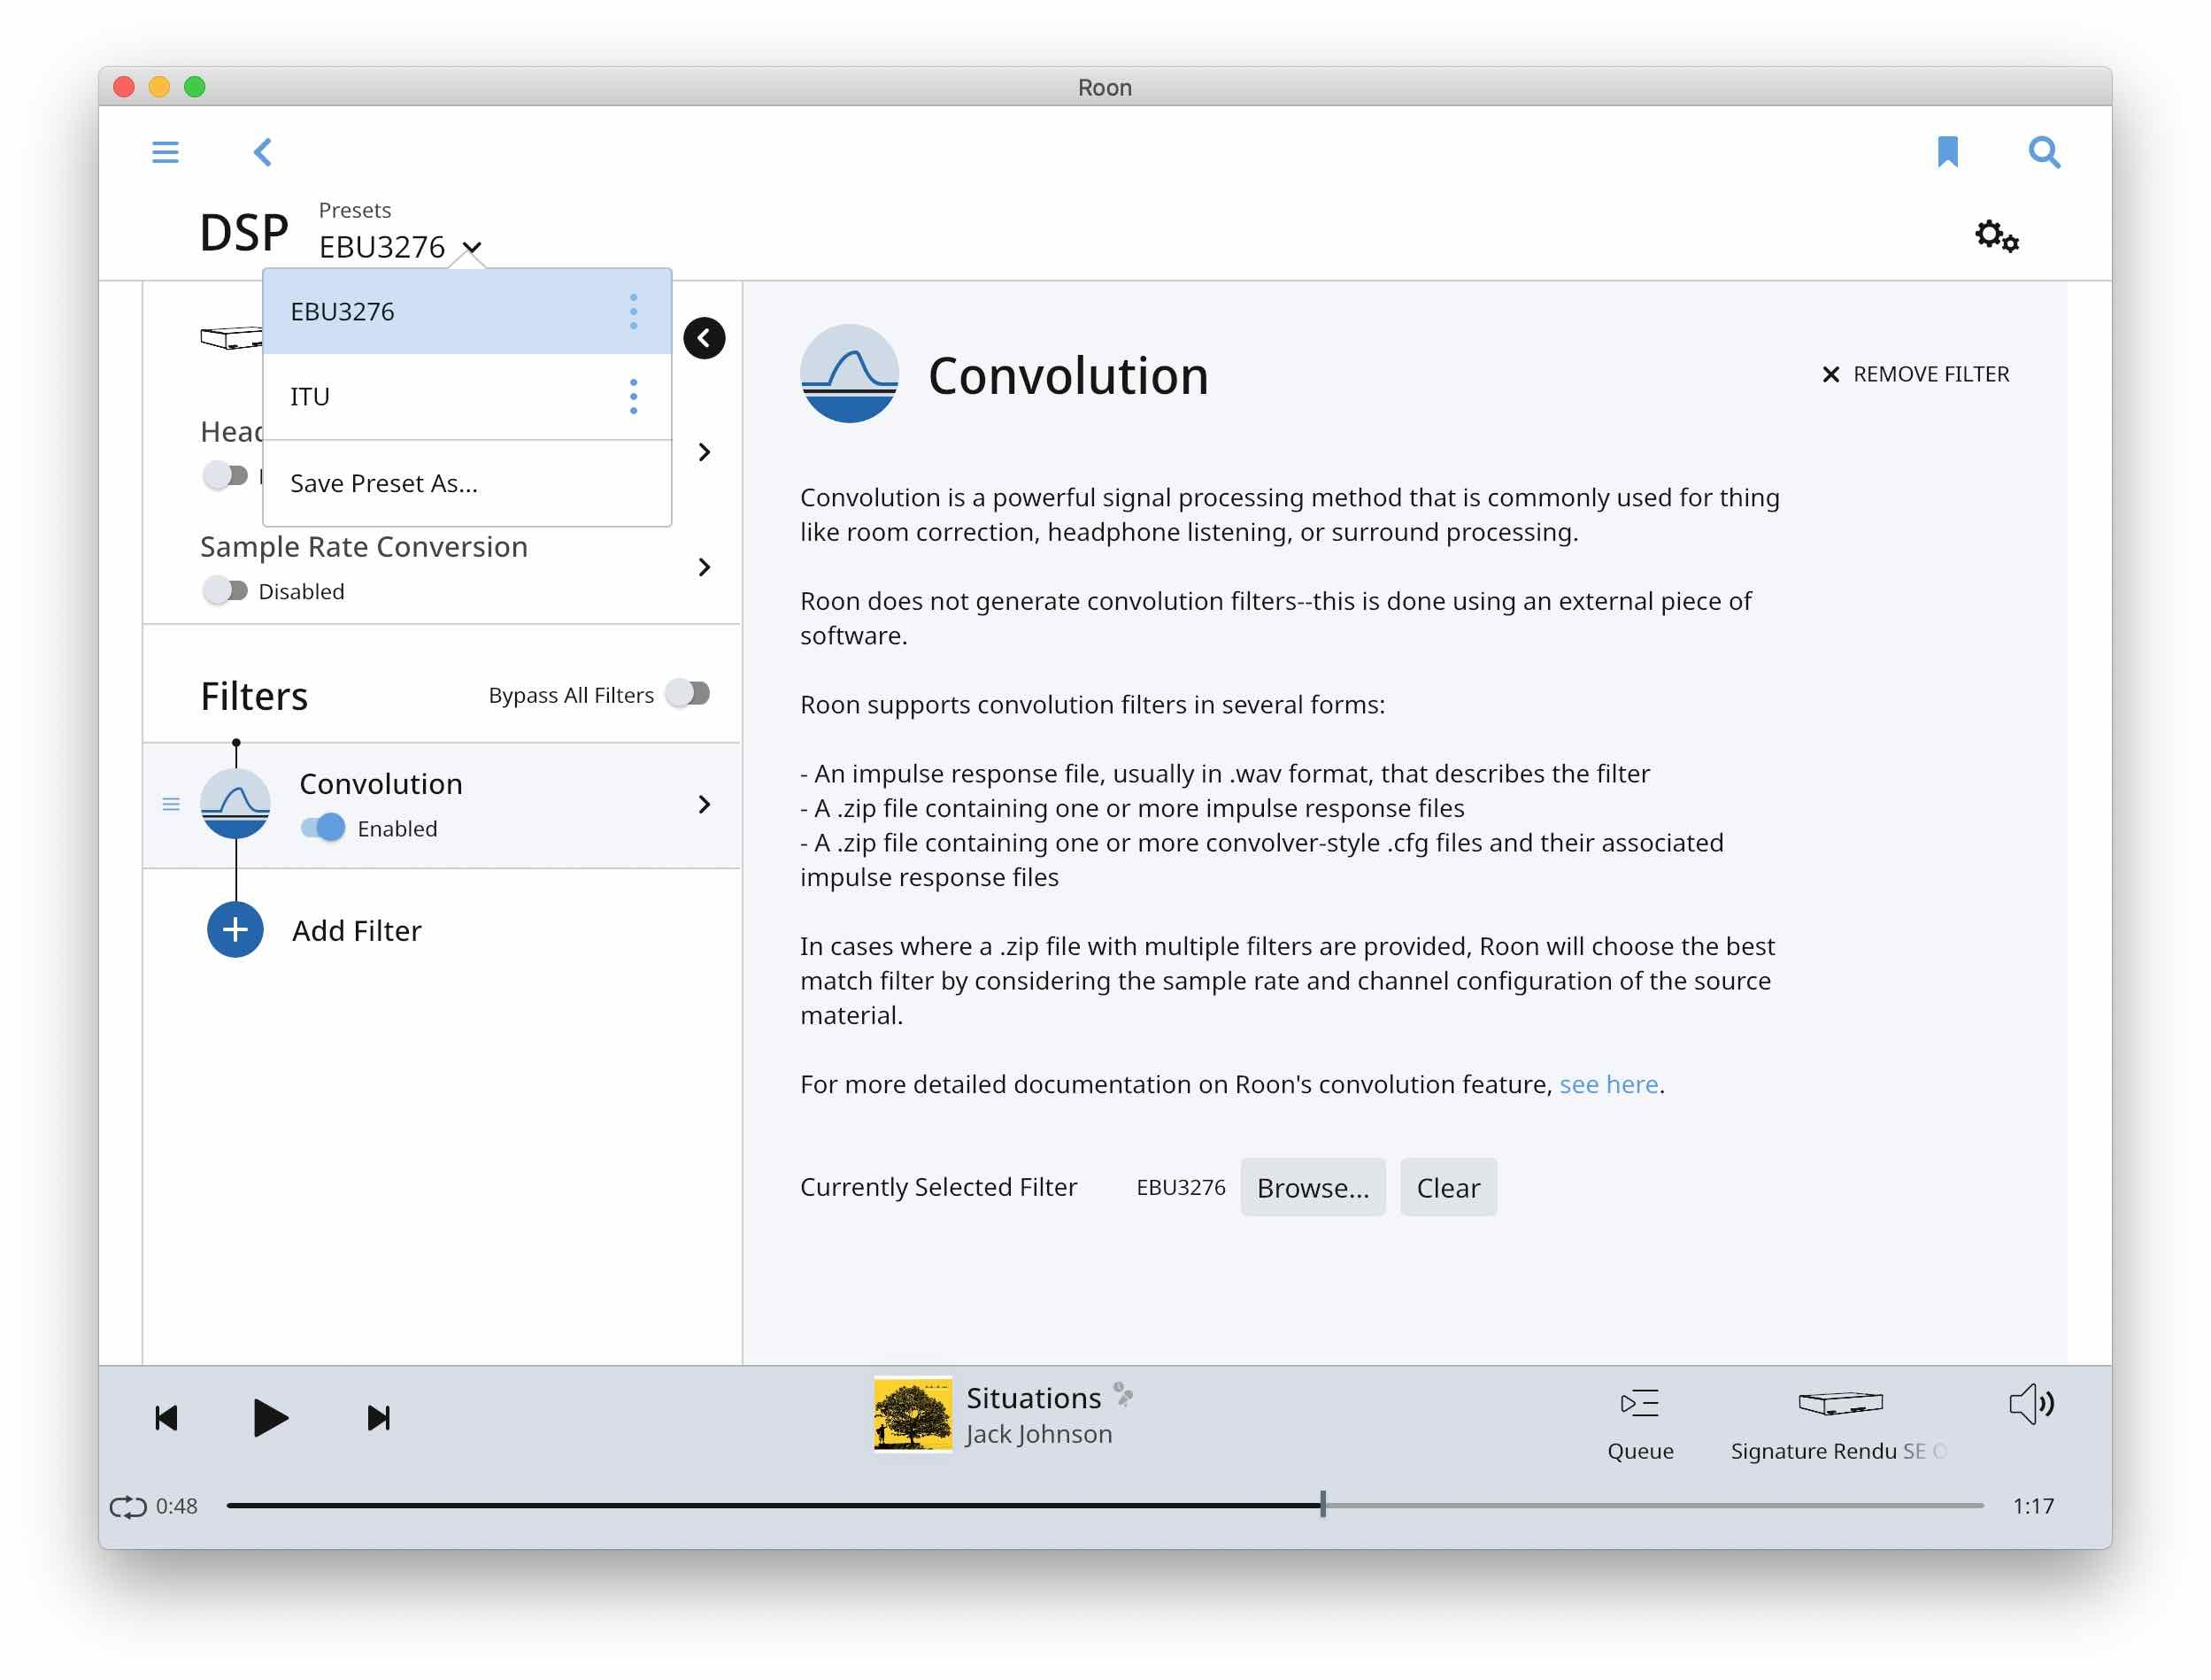 The beauty of DSP is that I can enable or disable it with the press of a finger. I don't have to use it all the time and no physical component changes need to take place for me to use my system either way. In Roon or JRiver, or any app that supports convolution filters, it's as simple as tapping the option. In addition, all of the DSP takes place on my Roon core running on a QNAP NAS. This means that any changes to the audio happen (obviously) in the digital domain before the audio reaches my DAC. This is critical for a guy who reviews DACs for a living. If the changes took place after the DAC, reviews would be a much harder thing to accomplish.
In terms of where DSP ranks on my list of things that change a system's sound the most, I believe it's right up there with acoustic treatments. And by change, I mean a change for the better and more accurate to the source. As a hard core, knuckle-dragging audiophile I used to be anti-DSP. Now that I know the benefits of a professionally calibrated system, I'm all for it and think people are crazy for not trying it. As audiophile we obsess over the smallest details and spend tens of thousands of dollars (or more) on equipment. This equipment may never have a chance to show us what's its got if our rooms aren't perfect. DSP is cheap. If you try it and don't like it, you aren't out much money and you don't even have to worry about an extra component on the shelf collecting dust. It's all software. But, if you like it, DSP can change your life.
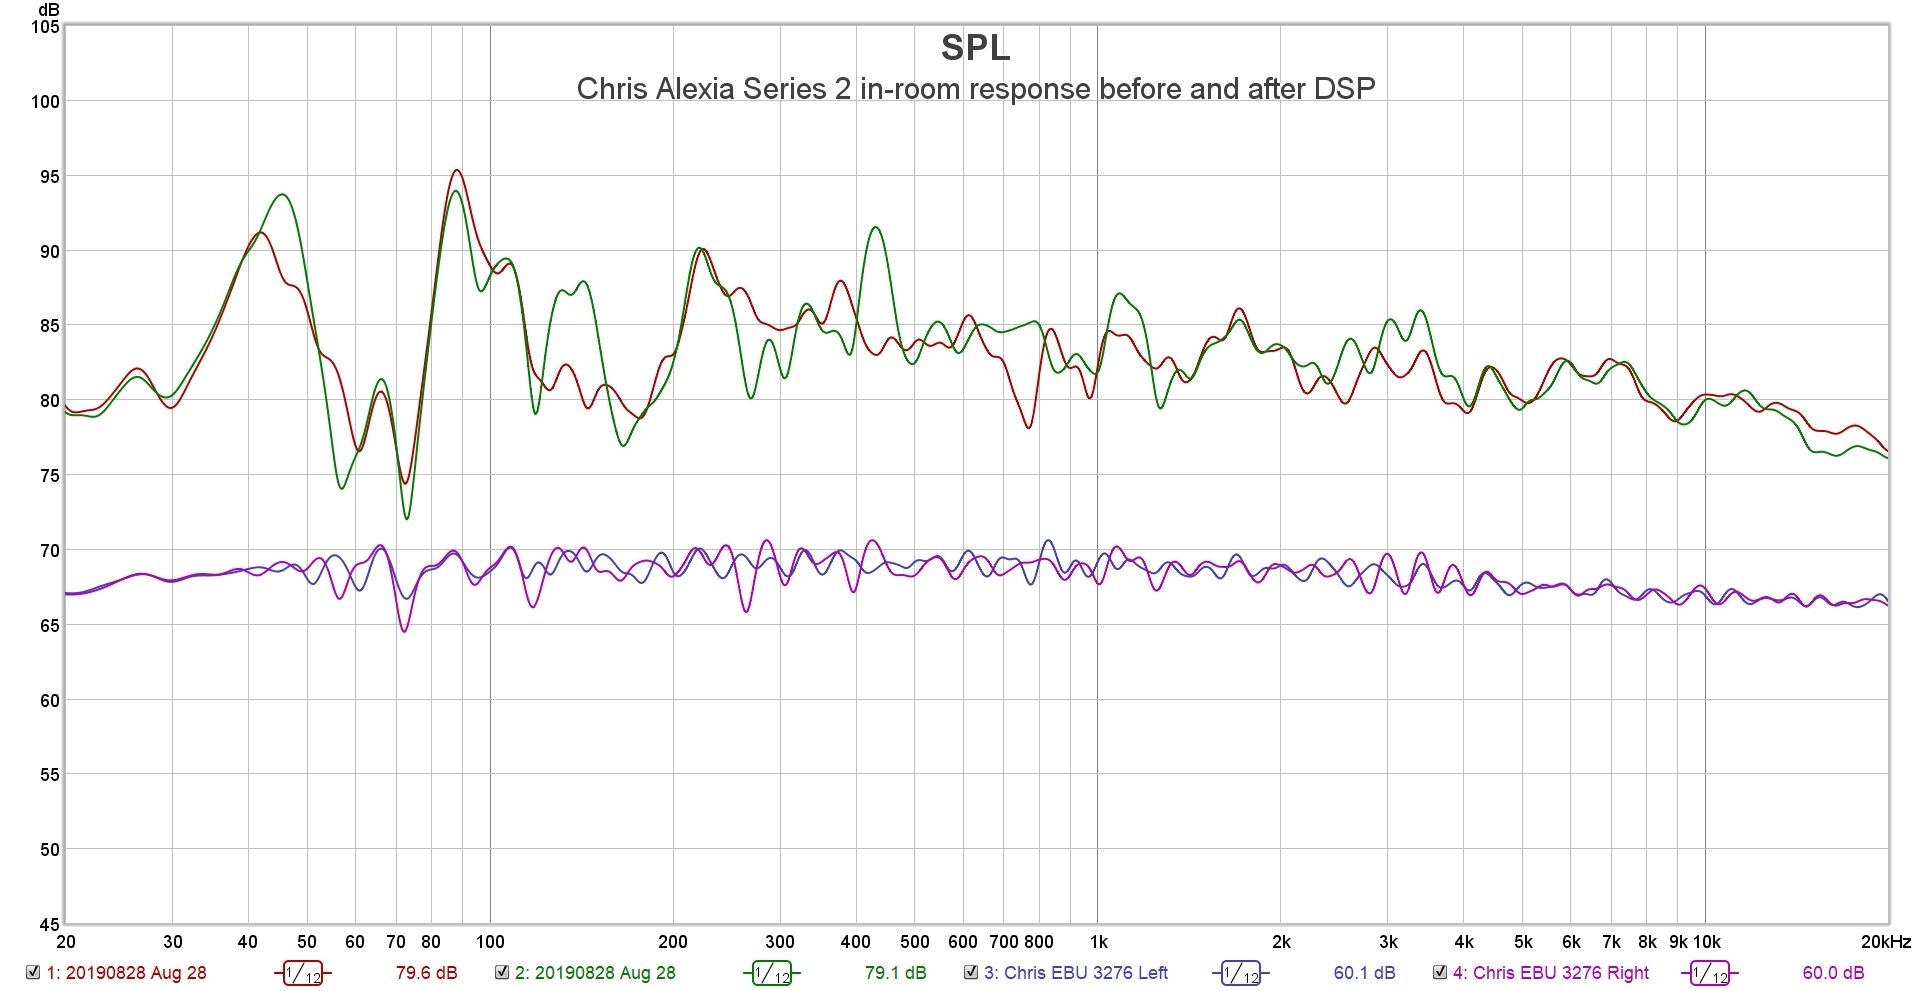
My in-room response before (top) and after (bottom) DSP / room correction using the EBU 3276 target curve.
New Room Wrap Up
It seems like forever ago that I was in my basement listening room with a pair of TAD CR1 speakers and a 6.5' ceiling bouncing. Moving my listening room up to my attic has turned out terrific. I finally went through the right steps to get my room sounding great and it has paid off immensely. Enlisting Vicoustic through its online Acoustic Treatment Project was the first step and it did wonders for my room. It set me on the right course, and set me up for success further down that course. Getting new Wilson Audio Alexia Series 2 loudspeakers has been a dream come true for me as an audiophile. I've never been happier with a set of speakers in my life (sorry Andrew Jones). Adding the bass traps as a touch-up passive method of taming the bass was another step forward although the smallest step of the four I've taken on this journey. The final step of having my room professionally calibrated and convolution filters created was likely the easiest, now that I know to let the professionals handle the tough parts, and right up there for most effective. Hands down DSP is the most cost effective way to get a system and room sounding better.
I feel like I'm not giving my speaker much credit in this wrap up. I must say, without the acoustic treatments and DSP, these speakers wouldn't have been able to perform at their highest levels. The thing to remember is that I'm not DSP'ing the speaker or any of my components, I'm DSP'ing my room. No speaker has a chance of sounding good without the proper environment. Now that my room is in order, the Alexia Series 2 shines like no other speaker I've had at home. I don't know where I'd go from here, and I'm not even entertaining the thought. These feel like end-game speakers to me.
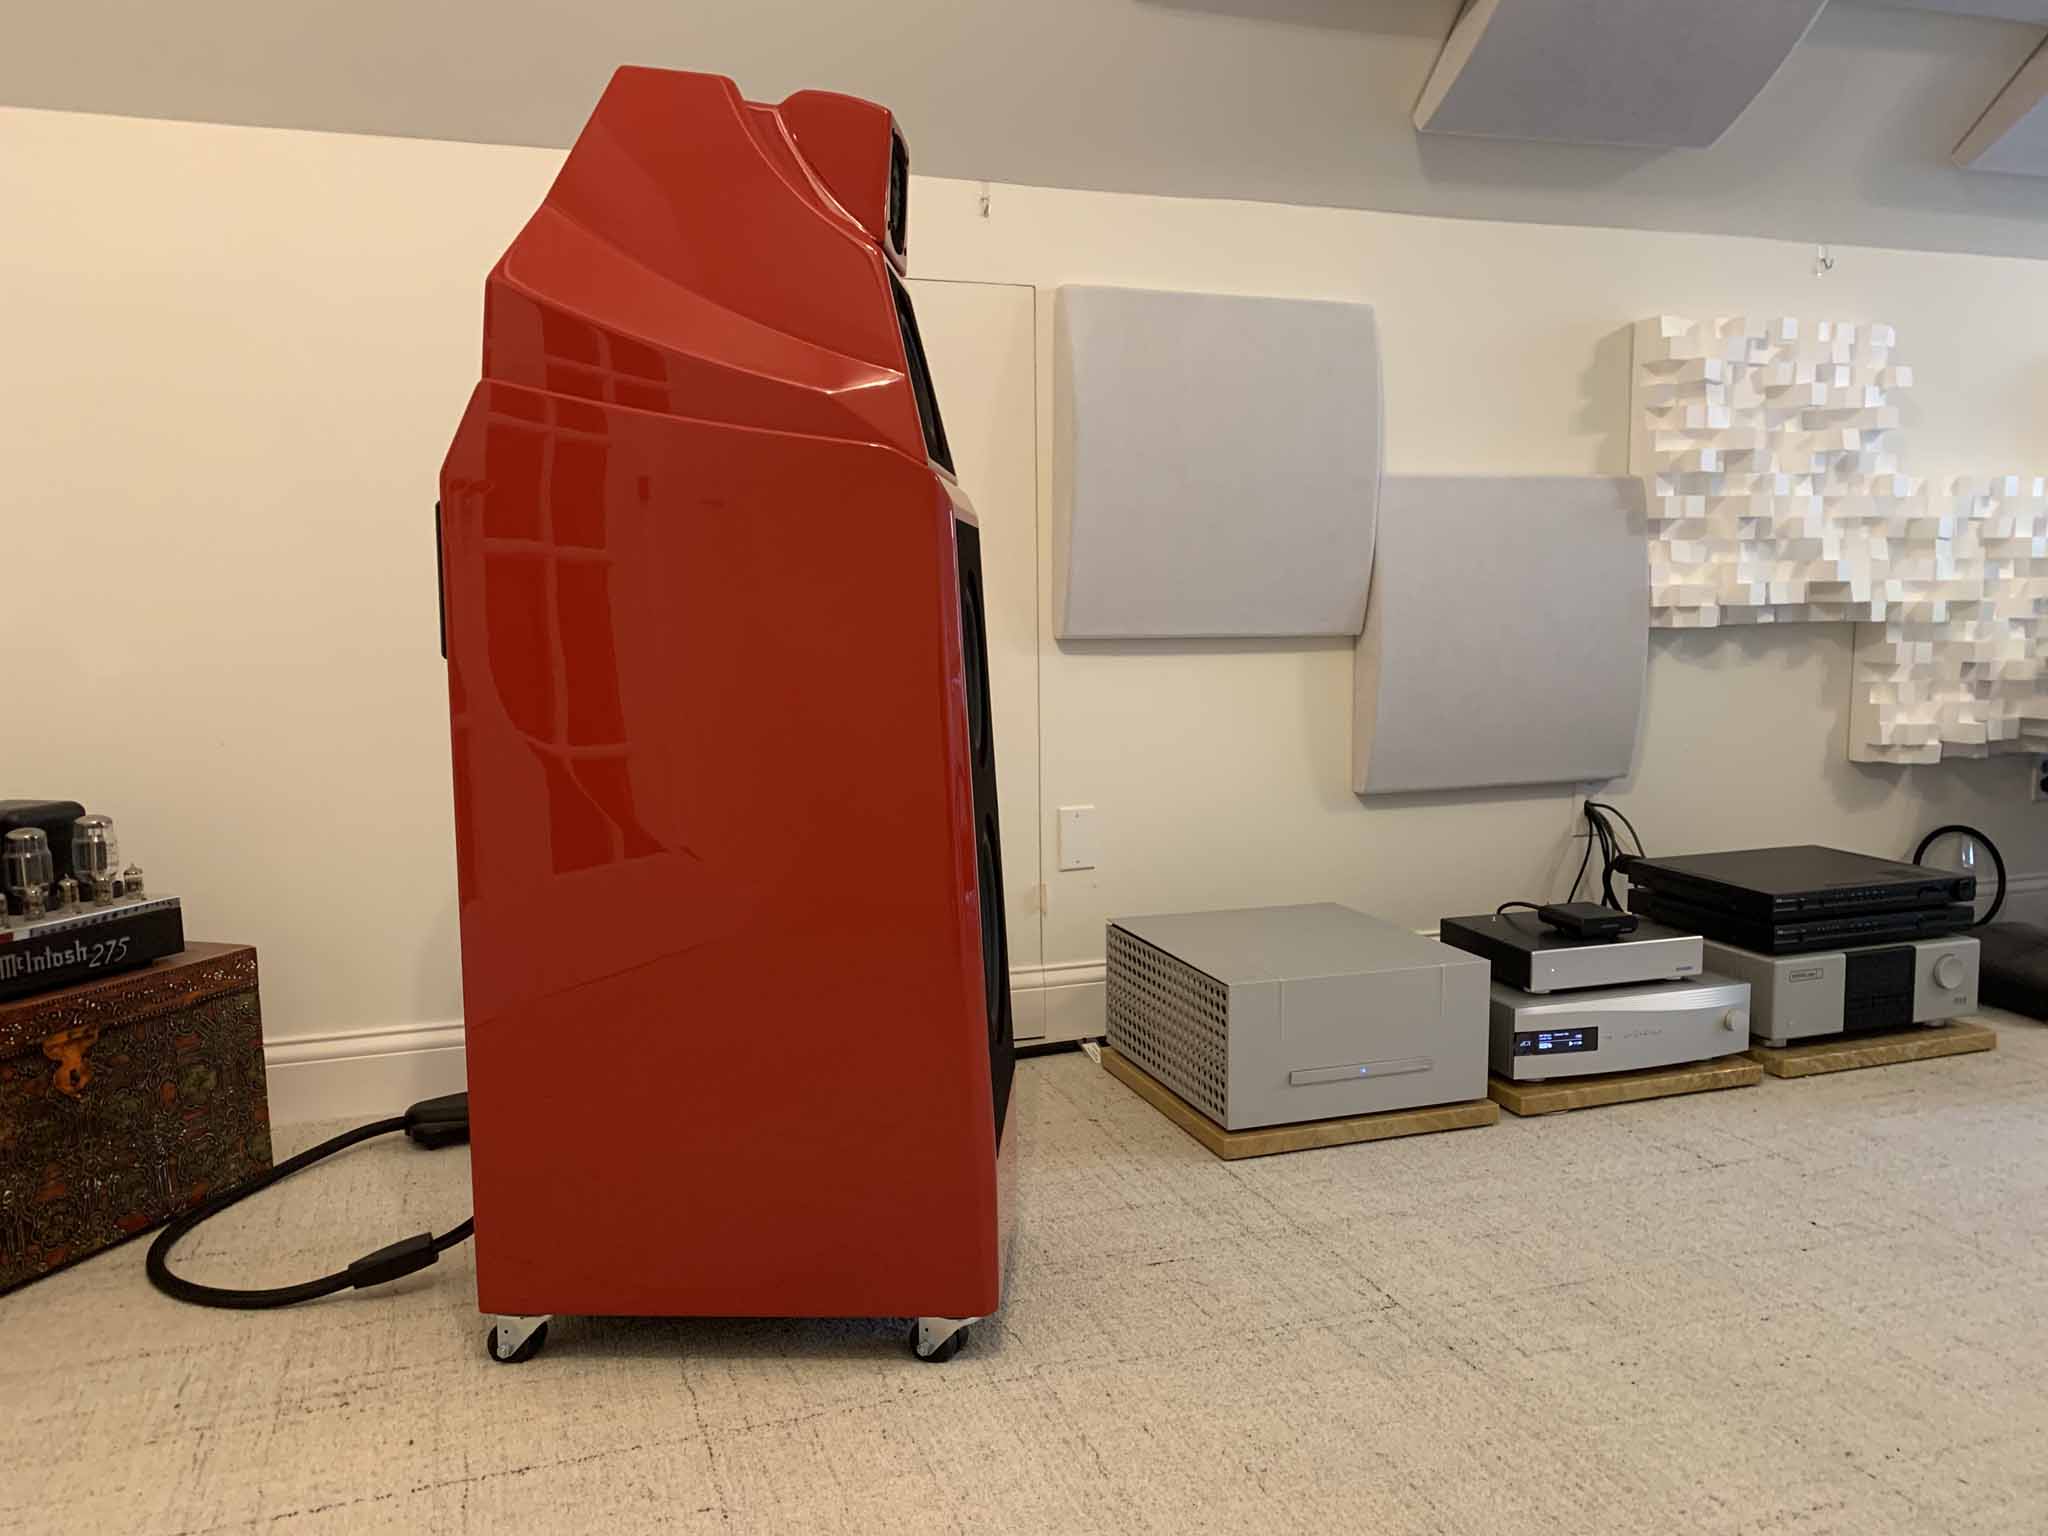
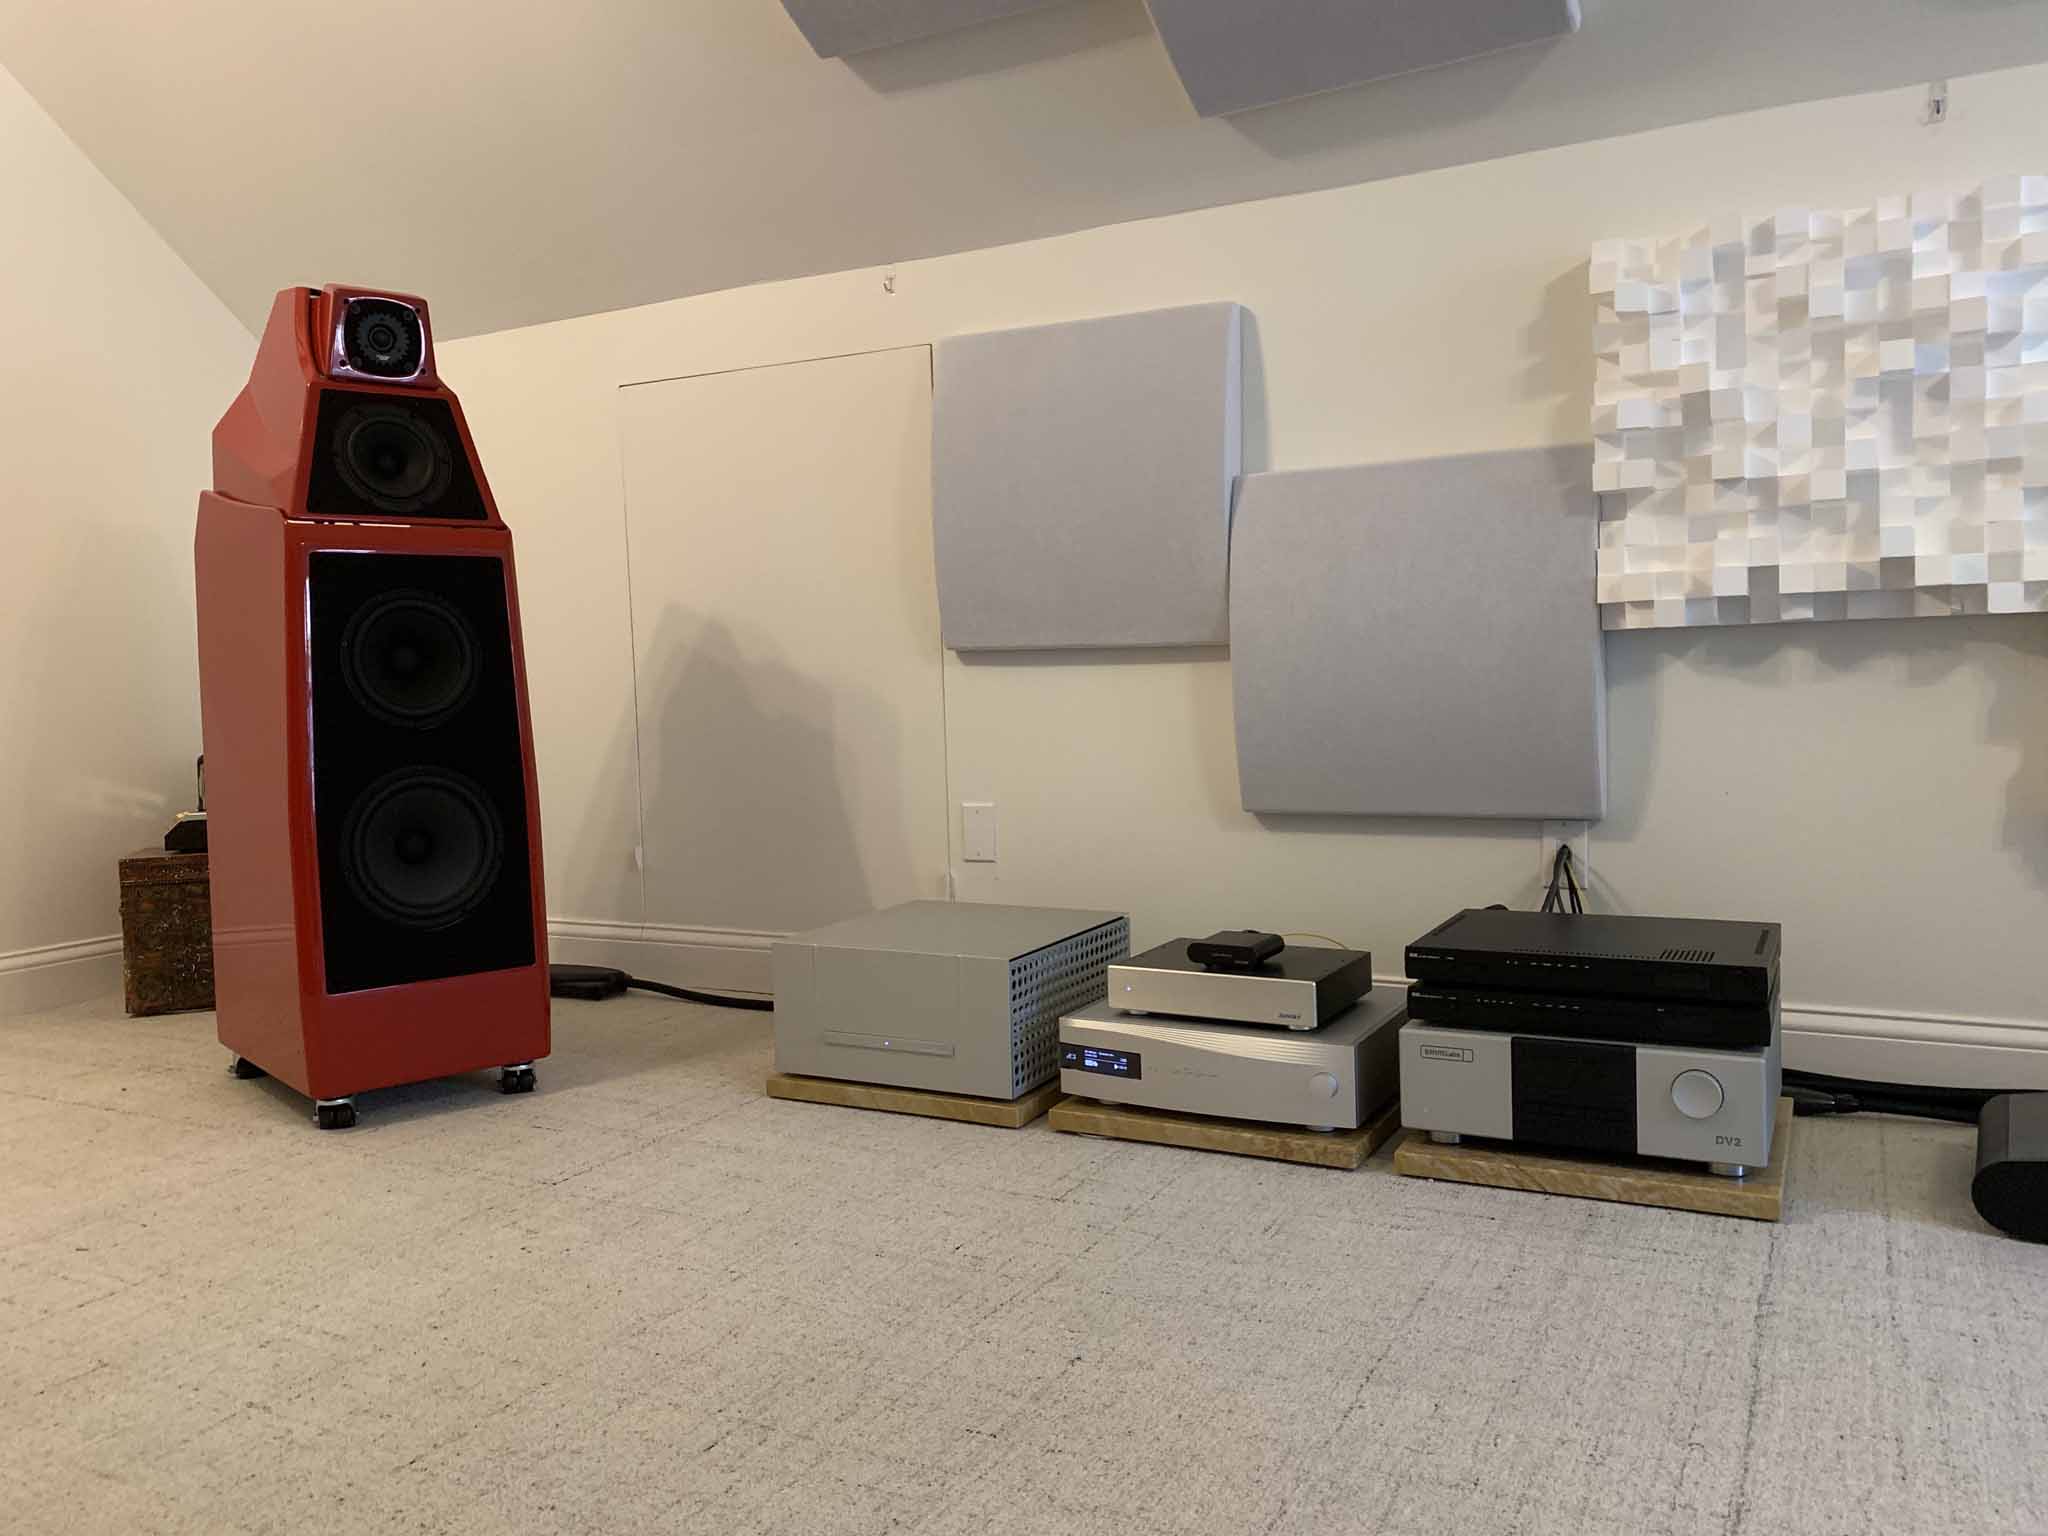
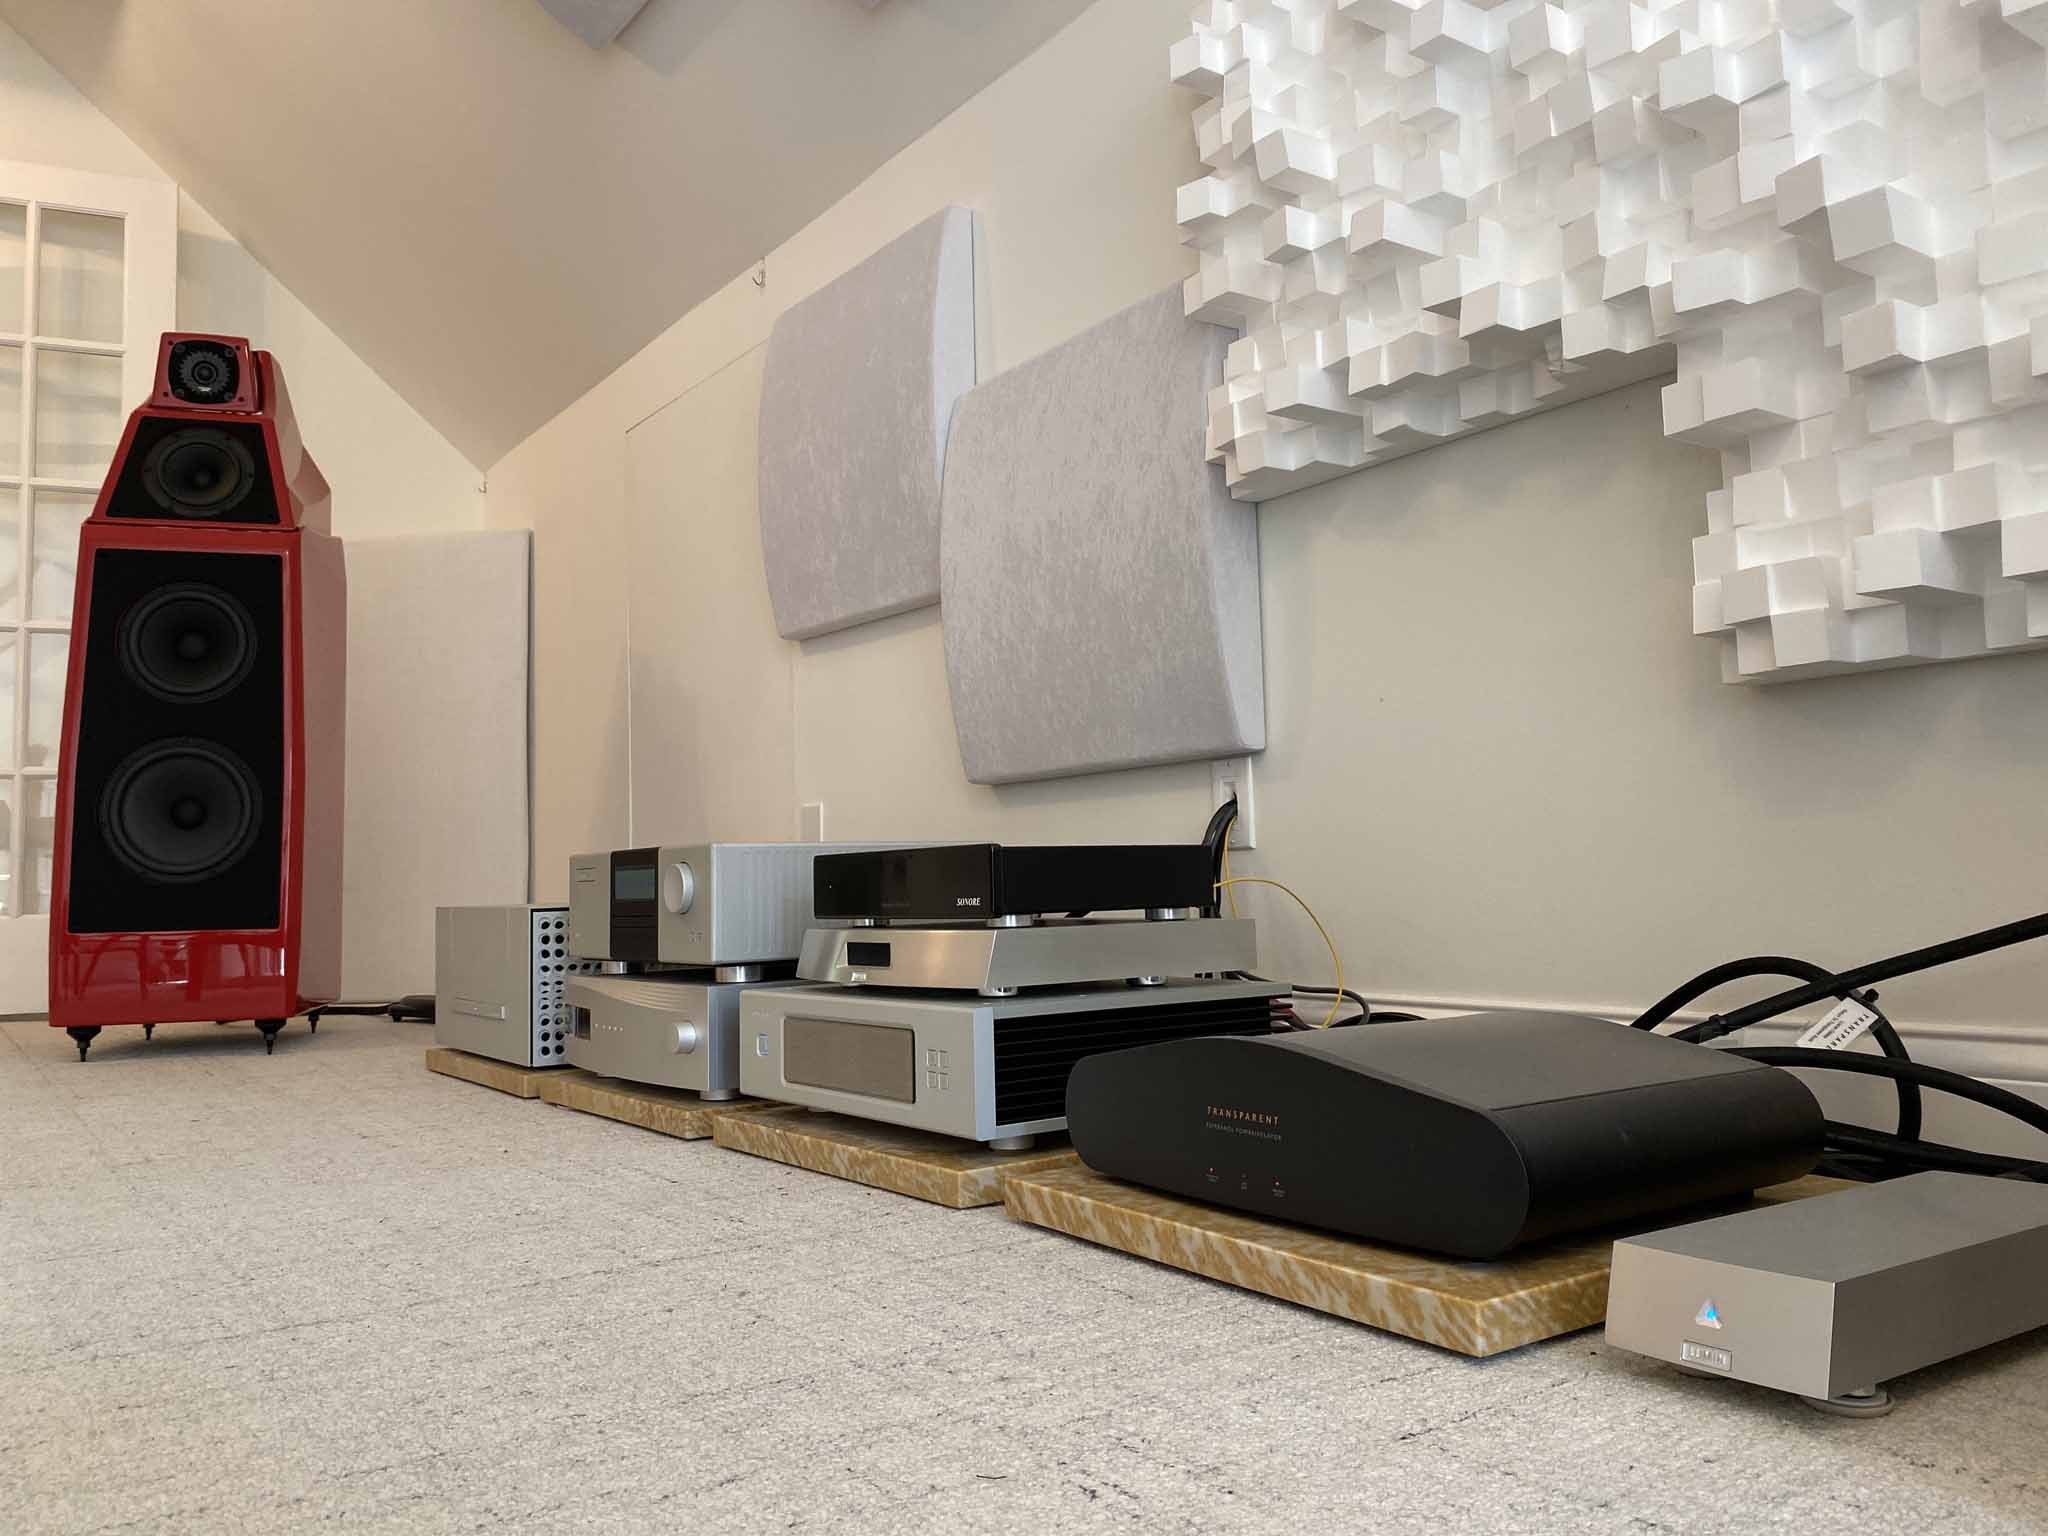
Current Equipment:
- Source: QNAP TVS-872XT Roon Core, Aurender W20SE, LattePanda Alpha 864s
- DAC: dCS Rossini, EMM Labs DV2, Berkeley Audio Design RS3
- D-to-D Converter: Sonore Signature Rendu SE (optical), APL HiFi DNP-SR, EMM Labs NS1 Streamer
- Amplifiers: Constellation Audio Mono 1.0 / Monoblock Power Amplifiers
- Preamplifier: Constellation Audio PreAmp 1.0
- Loudspeakers: Wilson Audio Alexia Series 2
- Remote Control Software: Roon Remote, JRemote, Aurender Conductor
- Remote Control Hardware: iPad Pro
- Playback Software: Roon, JRiver, JPLAY FEMTO
- Network Attached Storage (NAS): QNAP TVS-872XT
- Audio Cables: Transparent Audio Reference Interconnects (XLR & RCA), Transparent Audio Reference 110-Ohm AES/EBU Digital Link, Transparent Audio Reference Speaker Cables
- USB Cables: Transparent Audio Premium USB Cable
- Power Cables: Transparent Audio Reference Power Cables
- Power Isolation: Transparent Audio Reference Power Isolator
- Ethernet Cables: Transparent Audio High Performance Ethernet Cables
- Acoustic Room Treatments: Vicoustic Diffusion and Absorption, ATS Acoustics Bass Traps
- Network: Ubiquiti UniFi Switch 24, Ubiquiti UniFi Switch 8-150W x2, Ubiquiti UniFi Security Gateway Pro 4, Ubiquiti UniFi AP HD x2, Ubiquiti FC-SM-300 Fiber Optic Cable x2, UF-SM-1G-S Fiber Optic Modules x4, Calix 716GE-I Optical Network Terminal, CenturyLink 1 Gbps download / upload


Recommended Comments
Create an account or sign in to comment
You need to be a member in order to leave a comment
Create an account
Sign up for a new account in our community. It's easy!
Register a new accountSign in
Already have an account? Sign in here.
Sign In Now