


Audio: Listen to this article.
This week I completed most of a listening room project I'd thought about for a couple years. During the process, I installed a newly designed Sonore opticalModule Deluxe. Today, I couldn't be happier with how everything turned out and the level of performance I'm getting.
Backstory
I moved my audio system into a new listening room nearly five years ago. Since that time I've thought quite a bit about how to improve the space sonically and visually. It's just how I think, whether the improvements are needed or not. One improvement I've wanted to attempt, but could never figure out how to pull off, is moving my audio components out of the listening space proper and into the adjoining crawl space.
The items that I've always struggled to solve have been audio cabling, data routing via the network, and heat. I'm very fortunate to have my own listening space and a wife who encourages me to improve it how I see fit. Because of this I can put holes in walls, holes in the floor, and do some otherwise crazy stuff.
What, Why, and How
The most difficult issue to solve has always been heat. The crawlspace is insulated, but still heats up to very uncomfortable temps because of the sun hitting the roof. Combine this with audio components that tend to run fairly hot and give off their own heat, and it's a recipe for disaster.
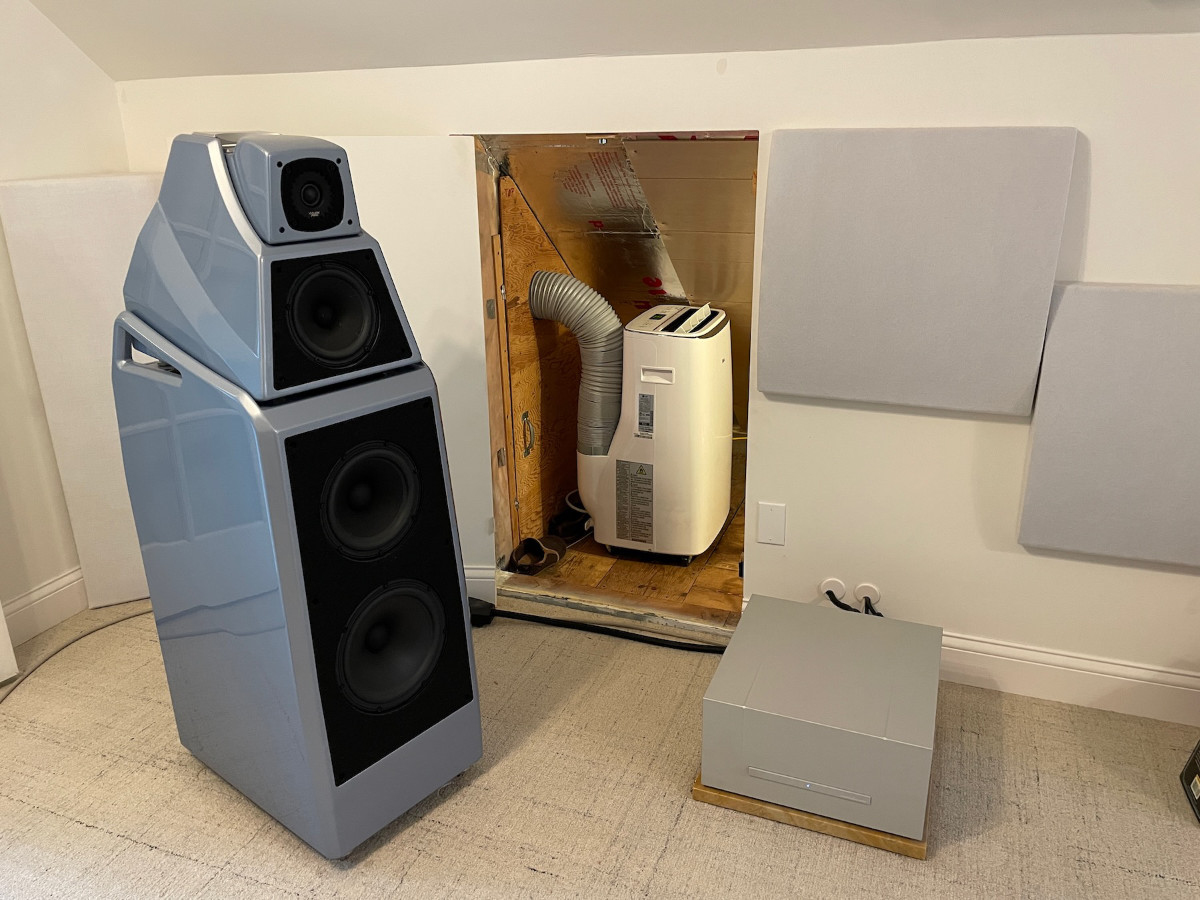
Over the weekend an idea came to mind that made this component move possible. I thought, what if I cut a six inch hole in the access panel between the crawl space and the unfinished attic next to my listening room, then installed a portable air conditioner in the crawl space and ran the flexible vent hose through the six inch hole? The attic has free flowing air vents to the outside, so the A/C unit is essentially outputting its hot air through a window. A trip to the local hardware store for a six inch hole saw and other miscellaneous essentials, and I was headlong into the project.
Why go through all this trouble? Because visual clutter eats away at my quality of life. Looking at a dozen components and twelve channels worth of interconnects and power cables causes my brain to get overloaded, for lack of a better term. Even though some of the components feature wonderful aesthetic designs, they are still objects in my field of view and they all need at least a couple cables. When I listen to music I want to relax and not be bothered by stacks of gear and a rat's nest of cabling. I feel crowded and encroached upon by gear that seems to multiply with new boxes for this or that. It's a first world problem I know, but ideally I'd only have loudspeakers visible in my room.
Back to climate control in the crawl space. I installed an LG LP1419IVSM portable air conditioner because I already had it. Last year I replaced the LG with a Midea MAW08V1QWT U-Shaped window air conditioner that enables the window to close, essentially places the noisy compressor outside. I highly recommend this Midea unit!
I set the LG air conditioner's fan on low and the temperature to 75. The small crawl space is quickly and quietly cooled, even with all the components powered up. I can hear the LG unit if I shut off everything else in my room and really listen for it while the compressor is active. It doesn't really bother me because I never do that, but I am considering adding ROCKWOOL insulation to both keep the cold air the tiny bit of sound locked in the crawl space.
Note: The LG air conditioner isn't able to shut off its fan one the are is brought to the desired temperature. To reduce power consumption, I purchased an Inkbird ITC-308-WiFi. This device has two outlets. One turns on when the temperature is above a specified threshold, and the other turns on when the temp is below a specified threshold. Obviously only a single outlet is on at one time. I use one in my chicken coop, that turns on the heater outlet when the temp gets too cold outside. The LG AC unit is connected to the "cooling" outlet configured to turn on when the temperature in the crawl space is at or above 77 degrees.
Once the temperature was under control, I moved almost all my components into the crawl space. I didn't move the front left and right Constellation amplifiers because I haven't yet figured out how to reduce the heat in the crawl space on the West side of my room. The AC unit is only on the East side because I can run the vent hose out to the ventilated attic.
Five Mytek Brooklyn+ amps, two Transparent power units, a Constellation Preamp, Aurender W20SE, dCS Rossini APEX, Sonore signatureRendu SE optical, Merging Technologies HAPI MkII, and a few other items are all in the crawl space. I've always used power outlets in the crawl space for my components, so power was no issue. The remaining cables to be run back through the walls were for the center channel speaker, the subwoofer, and the two main amplifiers.
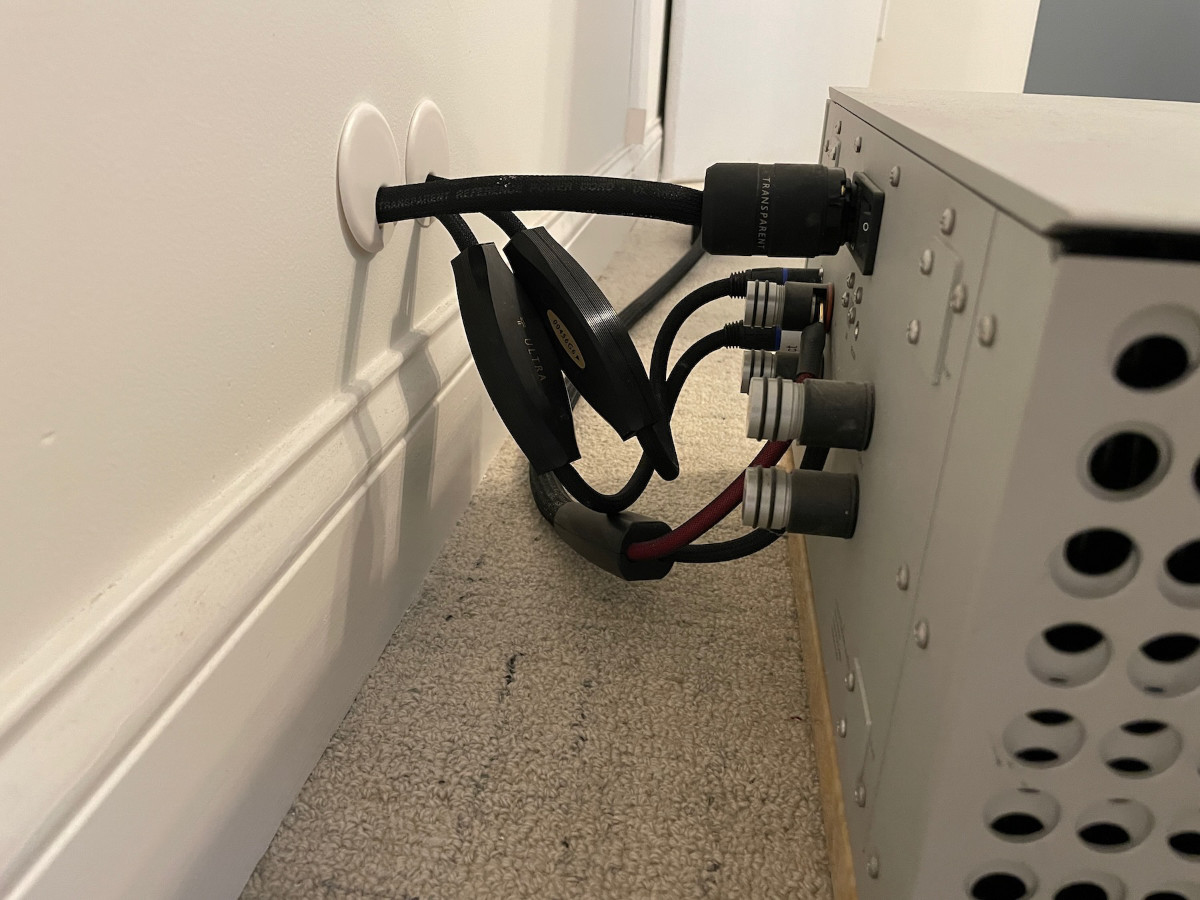
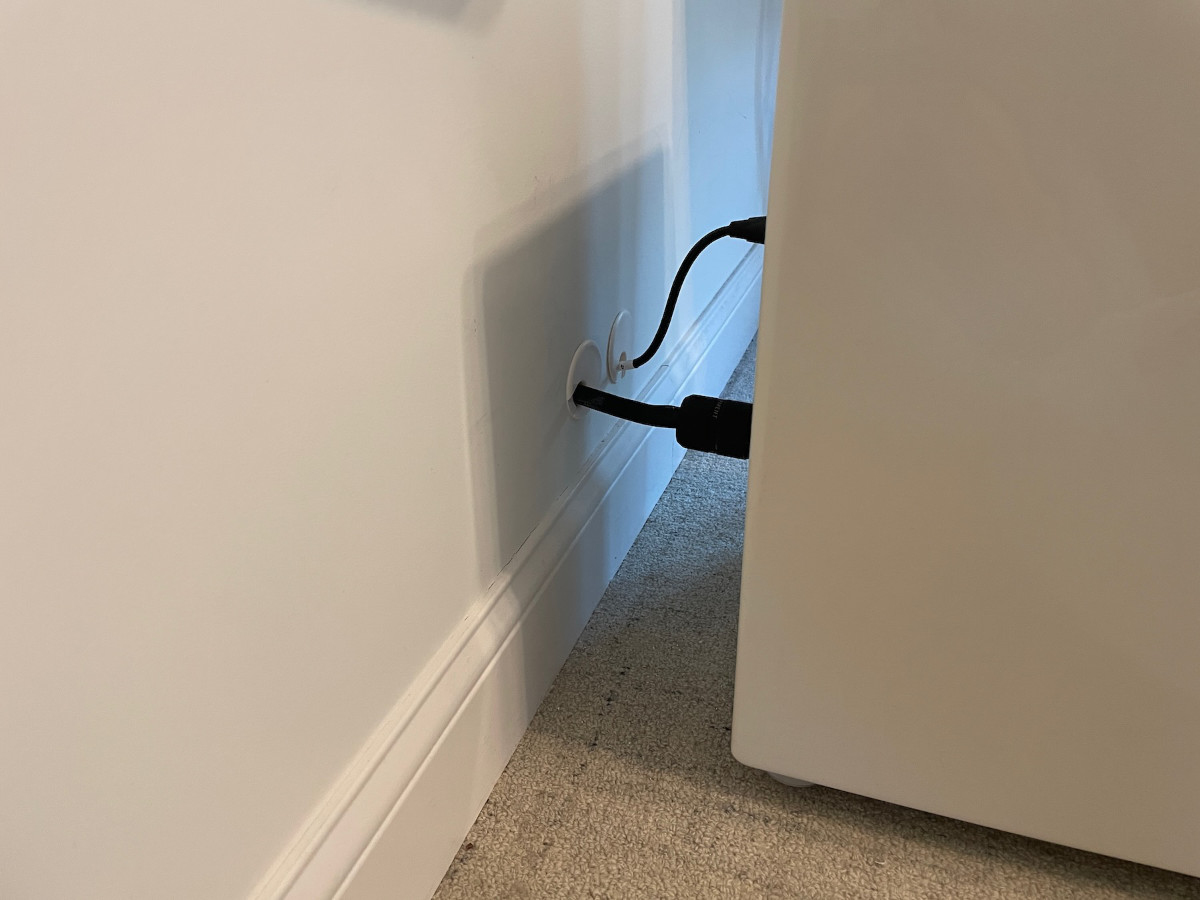
I drilled two 2 inch holes through the walls behind the amplifiers. One hole for the power cable. One hole for audio cables. I used the 2 inch size because it can accommodate the large end of a high end power cable. One mistake I made was purchasing 2 inch Furniture Hole Covers to finish the holes. These covers are terrible because they fall out of the hole easily and the cover doesn't snap into place easily. I've since ordered Twist Lock Grommets for these holes. I use the same grommets in other areas of my room and love them.
I also drilled two 2 inch holes behind the subwoofer. The subwoofer needs power and a single XLR audio cable. I prefer to separate all audio cables from power cables, even though both are shielded very well.

My home network is fairly extensive, with 16 strands of fiber optic cabling from the basement to the listening room on the upper level. In the East Sid crawl space with all the audio components I have a small fanless 8 port switch, connected via fiber to the basement, fiber to a Sonore signatureRendu SE optical, and copper to the Aurender and dCS units. In the West side crawl space I have a Netgear AV switch (link) that handles all of my Ravenna audio traffic (immersive audio system).
As part of this component move, I also moved my CAPS Twenty computer to the basement. The CAPS computer needs to be physically connected to both my main network and my Ravenna network via different network cards. The main network is simple because I just plug in its 10Gb Ethernet card to the basement switch a few feet away. Connecting it to the Netgear switch two floors above required a different solution and series testing.
Ravenna is an audio protocol that is robust enough to record entire symphony orchestras in DXD, with low latency and no dropped packets. There are no do-overs when recording live performances. To achieve this robustness, specific network cards and switches are required. Nothing crazy, but they must meet the minimum specifications. If there is any hint of an issue, the Merging Technologies software will scream at you in red letters. I've experienced it during my testing.
This is where I entered an unknown. I needed to connect CAPS to the switch upstairs, but didn't want to take a chance with a fiber capable network card that wasn't certified for Ravenna. If the card and its driver don't support PTP, it won't be pretty. My solution was to stay with the JCAT NET Card XE, per it via the JCAT OPTIMO 3 DUO and output Gigabit Ethernet cover copper CAT7 cable to a newly designed Sonore opticalModule Deluxe with Sonore custom power supply. I connected the opticalModule Deluxe to a strand of fiber in the basement, and connected the opposite end of that fiber cable to an SFP module in the Netgear AV switch in the West side crawl space next to my listening room.
 This provided CAPS Twenty with a direct connection to the Ravenna network. I was unsure if it would work due to the Ravenna requirements and the incredibly high data rates I require for my twelve channel immersive audio system. I don't like to mess around, so I went right for the jugular. I queued up the highest resolution, best sounding track in my immersive library and let it rip through the newly designed Sonore opticalModule Deluxe. BINGO! My 12 channel 24 bit / 352.8 DXD album from Morten Lindberg's 2L label sounded stupendous With the full isolation provided by the Sonore opticalModule Deluxe. Not a single sonic hiccup while playing the entire album!
Let's calculate the bit rate for a second. The tracks are 24 bit, but I send the audio out of the Merging driver at 32 bits. This makes the equation (number of channels x bit depth x sample rate = bit rate) 12 x 32 x 352,800 = 135,475,200 or 135 Mbps! Comparing this to CD quality 2 x 16 x 44,100 = 1,411,200 or 1.4 Mbps, one can see how much more musical data is being sent.
Why does this even matter? Because some high end audio devices struggle with ultra high bitrate music. Much of this is two channel audio sent through applications such as HQPlayer or PGGB. An upsampled 2 channel file sent at 24 bit / 1,536 kHz has a bit rate of 73.7 Mbps, and is enough to choke many devices. As one can see, this is close to half of the bit rate I sent through the new Sonore opticalModule Deluxe, and playback was smooth as silk. It's also not lost on me that the sound was absolutely perfect. The new opticalModule Deluxe will remain in my immersive system, no matter what configuration changes I dream up next.
Wrap-up Notes
When I first moved the components into the crawl space, I also moved a bunch of stuff out of my listening room. This changed the listening environment a bit because sound could no longer bounce around the components (in a good way). At first I was devastated. I hated the sound. I was hearing bass bounce off the east side wall, where all my components previously sat. This now empty space was an issue, but there was no way I was going to bring the components back out.
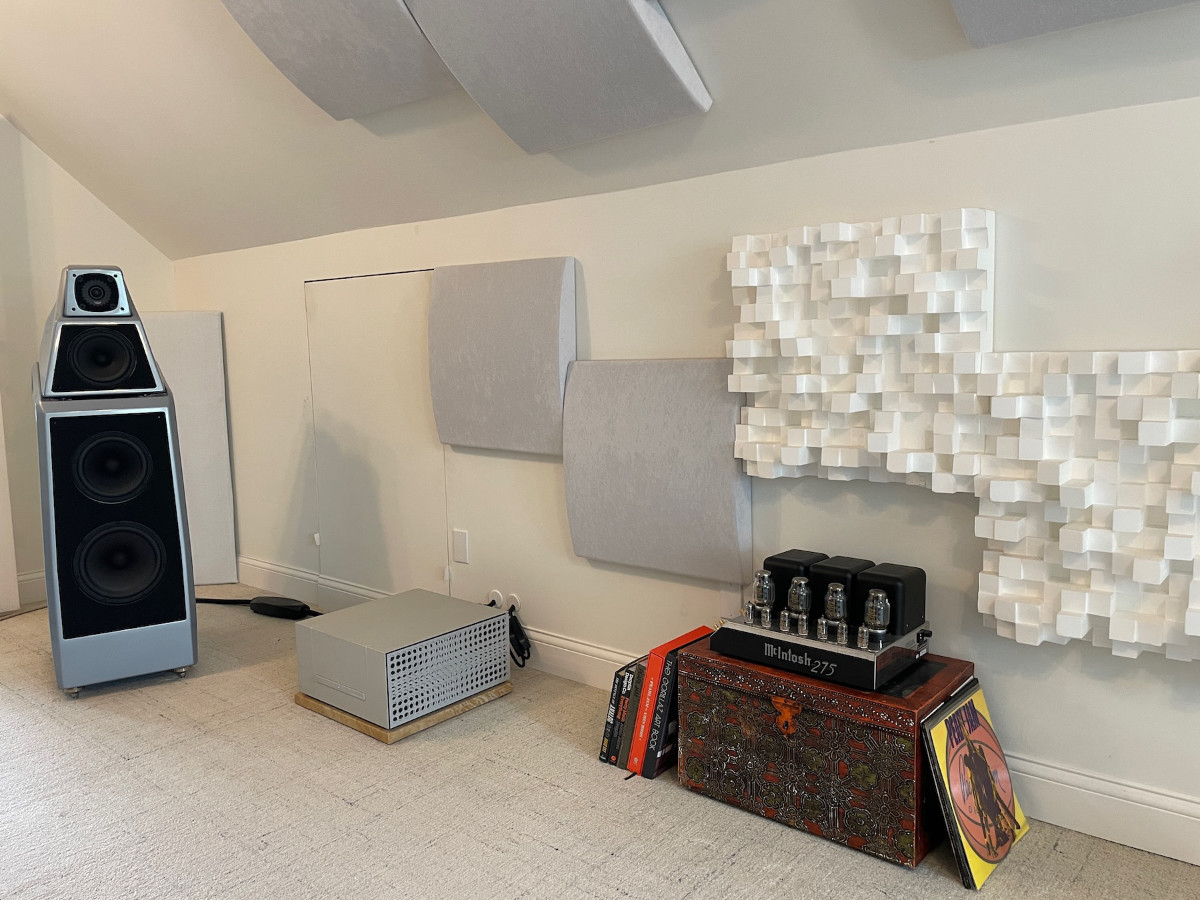 I pushed an old chest, with a McIntosh MC275 amp on top, and a few records and books, into place. This made a huge difference, but still wasn't perfect. Then I pushed the chest a couple inches closer to the wall and all was right in the world. I go goosebumps. The sound was perfect! I never would've thought that last couple inches would make a difference, but I repeated this experiment a few times and reproduced the sonic benefits every time. Room setup matters!
Some readers may be asking how I control the Constellation preamp without access to the infrared receiver on the preamp's front panel. I connect a USB cable from the Aurender W20SE to the Constellation unit. This enables will control of the preamp via Aurender's Conductor app for iPad and iPhone. It's one of those little known features that's huge!
Eagle-eyed readers may also have noticed the original 2 inch Furniture Hole Covers require a 2 inch hole in the wall, but the newly ordered Twist Lock Grommets require a 2 3/8 inch hole. This poses a problem because hole saws work best with a pilot drill bit to hold the drill steady. The solution to making a larger hole with a hole saw is to use a hole saw guide and adapter, and to place the smaller hole saw inside the larger hole saw. Here are a couple photos of the tool. This will save you hours of time some day :~)


Last, what's next on my list of listening room improvements? The one that scares me most, but one that I think of all the time now, is what to do with the center channel speaker cable. My current plan is to put a hole in the carpet directly behind the speaker stand, drill through the floor, then run the cable to the east side craw space and back up through the floor to the Mytek amp. I don't have confidence that I can pull this one off by myself, so I want to hire a real professional, with skills and the right tools. I don't even think I could watch while the professional cut into the wool carpet.
In addition to that cable routing, I dream of routing power and data cabling under the floor and up through the floor directly under my listening chair. This would enable me to remove cables running from the West side wall, across the floor, to the listing position. Perhaps the same person who routes the center channel speaker cable can tackle this one for me. I won't be able to watch this either.
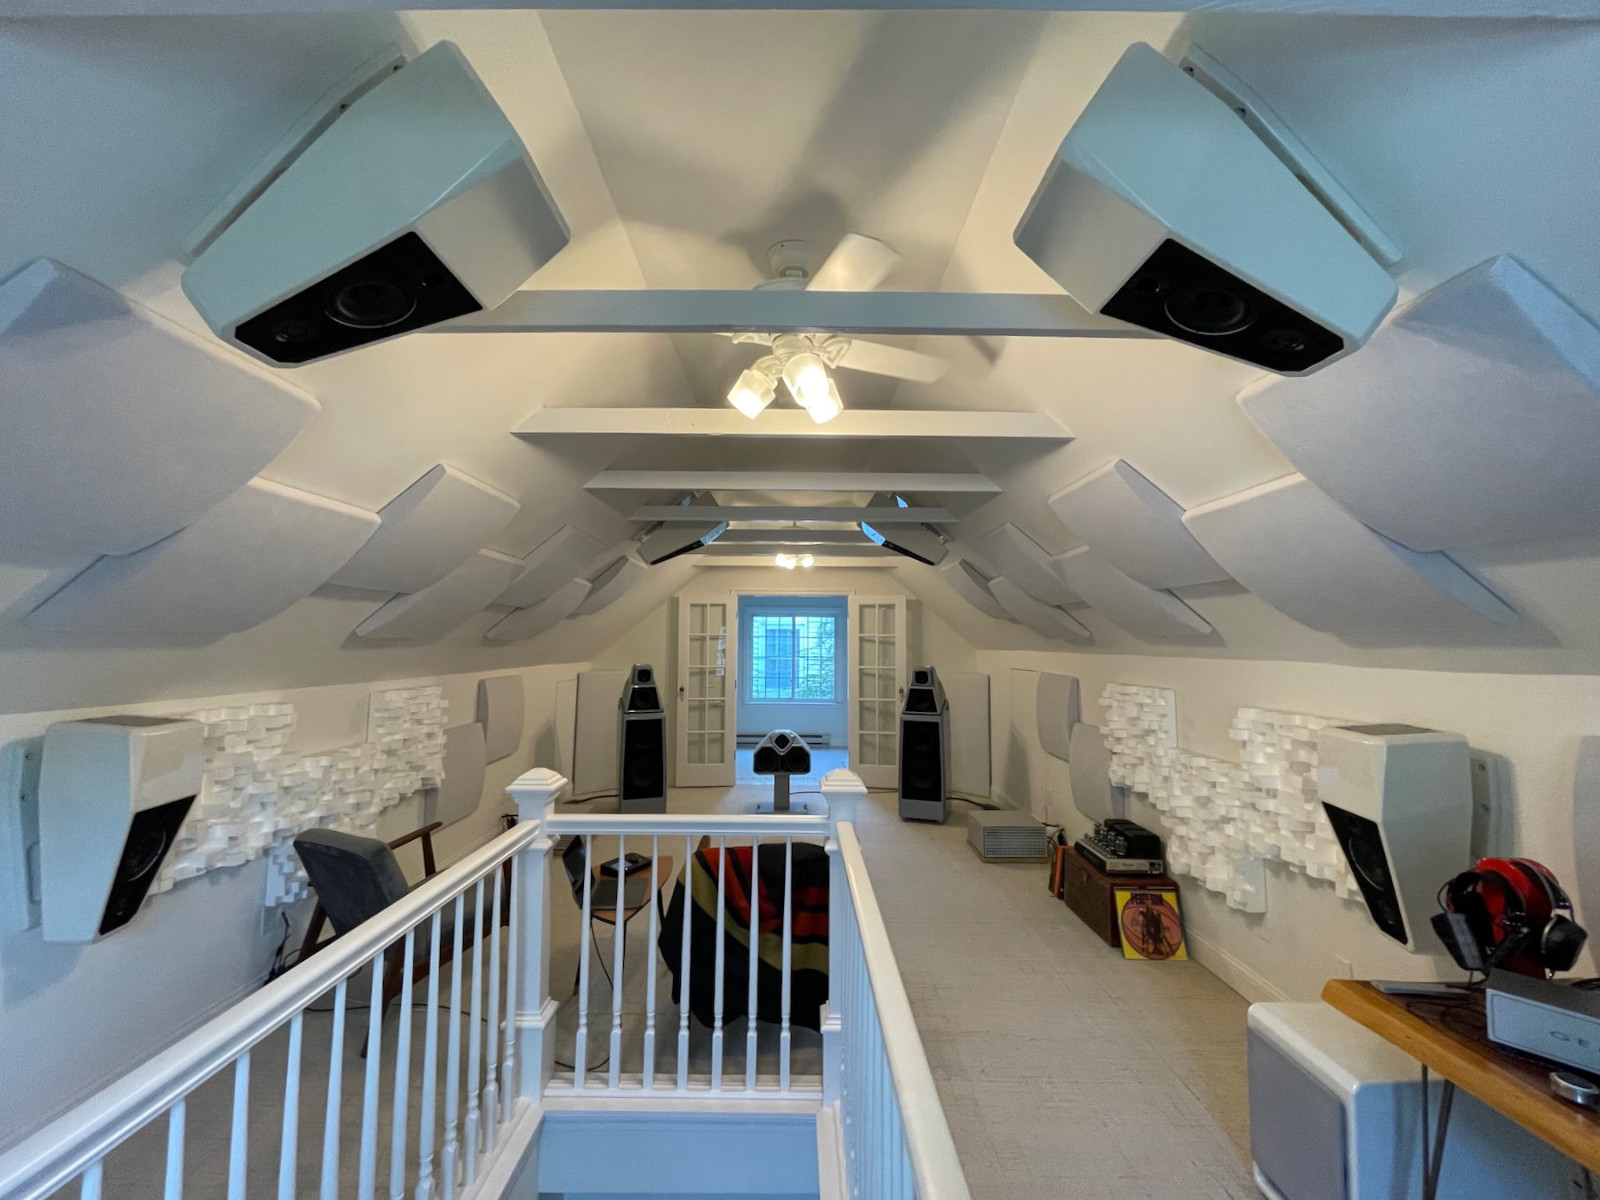
Anyway, I'm thrilled with the results of the component move and the placement of the new Sonore opticalModule Deluxe into my immersive system. What started out as a bare room with two TAD speakers in 2018, keeps improving and continues to improve the quality of my music listening life.


Recommended Comments
Create an account or sign in to comment
You need to be a member in order to leave a comment
Create an account
Sign up for a new account in our community. It's easy!
Register a new accountSign in
Already have an account? Sign in here.
Sign In Now