


Audio: Listen to this article.
It has been quite a while since I wrote about using a Raspberry Pi or other single board computer in my HiFi system. The main reason for this lack of articles is because audio manufacturers have created some amazing products to fill the void I attempted to fill with my How-To articles. For example, when I first started writing about this stuff, Sonore hadn’t yet launched the microRendu, creating a whole new category of products that still flourishes many years later. In fact, I just received my updated Signature Rendu, and can say the team has absolutely nailed it! Stay tuned for much more on that front.
Now that the Raspberry Pi 5 is in stock and accessible to nearly everyone, I think it’s a great time to investigate something I’ve wanted for many years, but HiFi manufacturers have so far avoided. Again, if this product existed, I’d likely geek-out in the forum until the wee hours of the morning with other tech savvy audiophiles, while focusing on products people can purchase on the front page. But, sometimes we have to take matters into our own hands, to increase our enjoyment of this wonderful HiFi hobby.
The Need
I like to use FIR convolution filters in my headphone system, my two channel stereo system, and my twelve channel immersive audio system. In my view, this leads to objectively and subjectively better performance that’s unobtainable any other way. Using these filters can really narrow the choice software / hardware options for music servers. The server or app must have a built-in convolver, support plugins such as Accurate Sound’s Hang Loose Convolver, or output to a loopback interface to pipe audio to a standalone app such as Hang Loose Host. Sure, there are some DIY solutions to get around this, but I don’t wish them on my worst enemy.
Note: I love feedback and people who recommend other options that work, but please make sure you’ve actually use the options you recommend in the comments below AND that they meet the requirements listed here.
The need I sought to address with the Raspberry Pi 5 is how to use JPLAY for iOS, MinimServer, streaming from Tidal, all over UPnP, and with convolution. Essentially a network convolution engine that sits between one’s music and one’s DAC.
I’ll cut right to the chase, I found a two ways to accomplish this and one additional way that still needs tweaking to work perfectly.
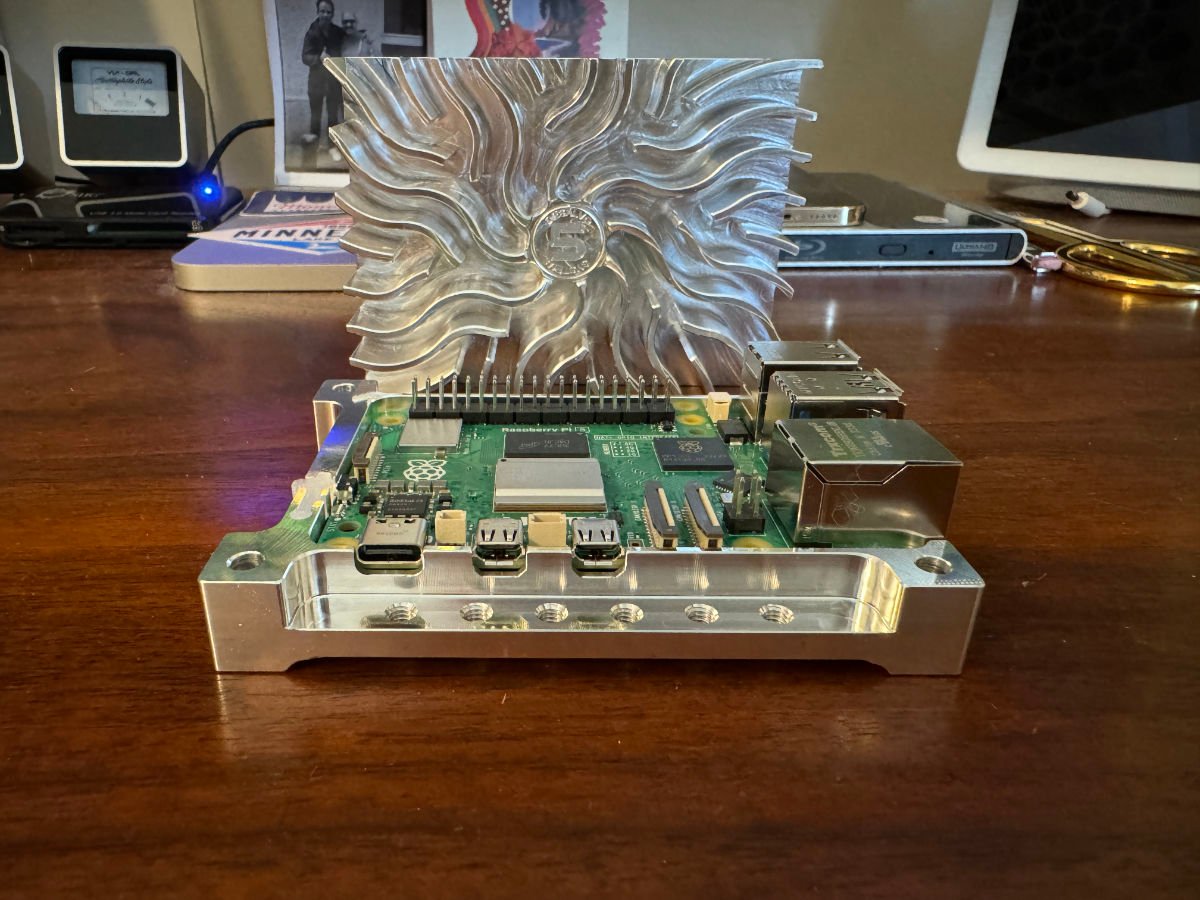
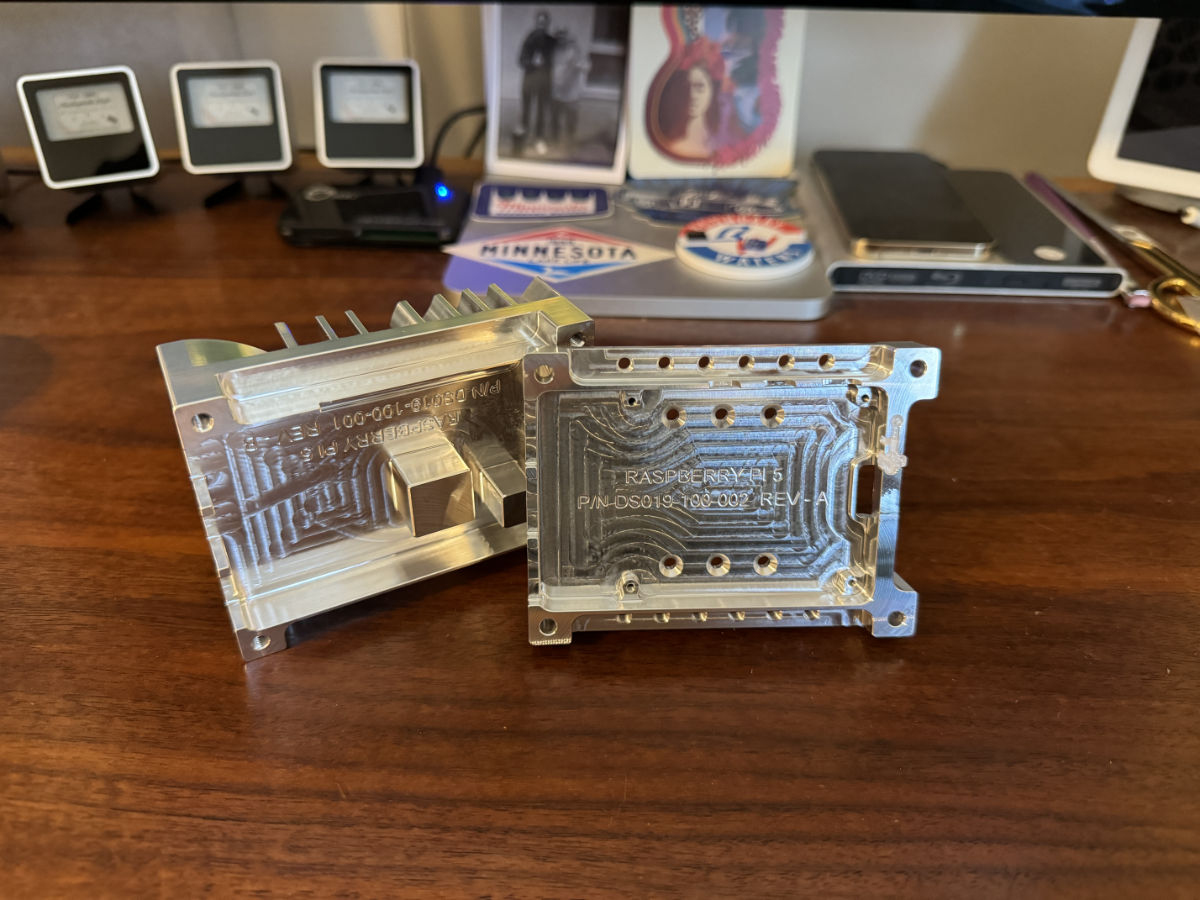
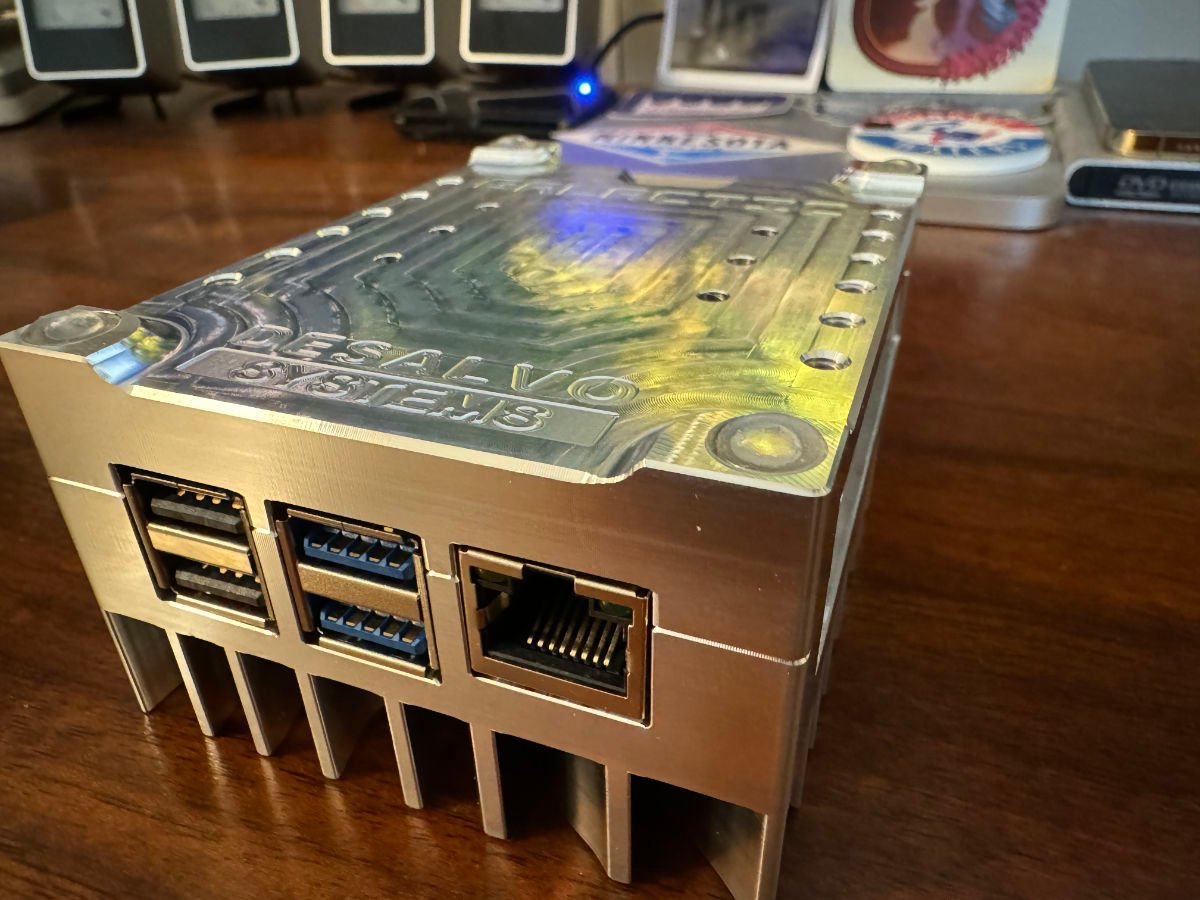
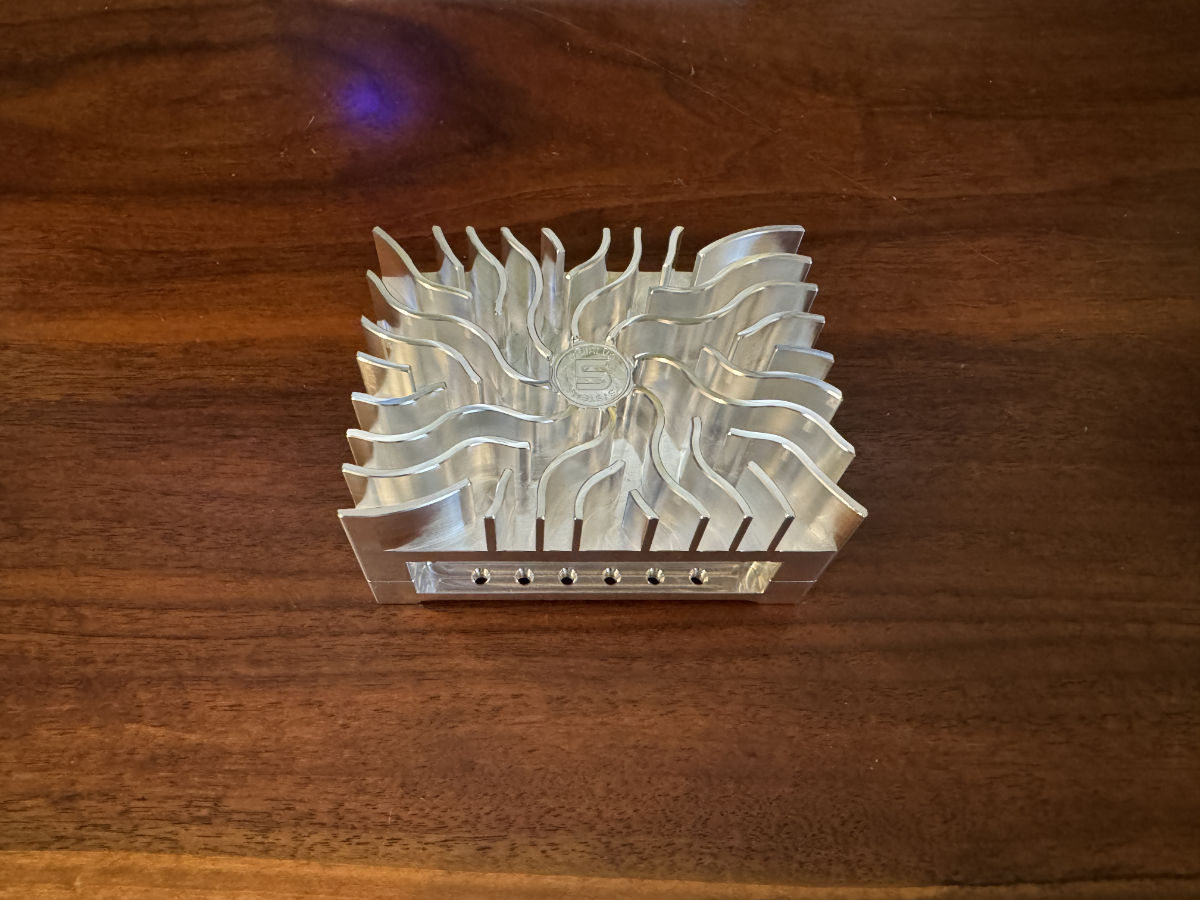
I picked up a Raspberry Pi 5 with 8GB of RAM. Not that I need 8GB, but I wanted it just in case. I also picked up three Samsung Pro Plus microSD cards, so I could test different installations on the same Pi very easily. To top it off, I found the coolest fanless Pi 5 case I’ve ever seen, and immediately ordered it.
The Galactic case for Raspberry Pi 5 from Desalvo Systems is nothing short of amazing. It’s, “fully CNC machined from 6061-T651 aerospace aluminum and includes all Stainless Steel hardware.” Desalvo also offers copper cases for the Pi 4 that would look right at home next to a D’Agostino system. The Galactic case was simple to assemble with the Pi 5 inside and came with everything I needed. It’s machined superbly and fits better than most hands in most gloves. I love this thing.
Method One
This is currently my preferred method, but it doesn’t use my preferred convolver (Hang Loose). Playing stereo music only, this isn’t a showstopper, but for immersive audio I believe Hang Loose is a must. Method one runs headless, without the bloat of a desktop GUI, which is one reason I love it.
 Method one uses a Raspberry Pi 5 running Ubuntu Server 23.10 (64-bit). The Pi is a UPnP renderer and host the convolution engine. It runs upmpdci as the renderer outputting to MPD. MPD is configured to output to Pipewire which uses its built-in convolution engine for process my FIR filters at sample rates from 44.1 kHz to 384 kHz, before sending the audio out to my dCS Rossini or dCS Lina via USB.
I store my library on a QNAP NAS running MinimServer. I control everything from an iPhone 15 Pro Max or iPad Pro (M1) running JPLAY for iOS. Using JPLAY for iOS I can select anything from Tidal or my local MinimServer library, and send it to the Pi as the audio endpoint with the tap of a finger, and all the audio is processed with my convolution filters before entering the dCS DAC.
Most people will read that and think ho-hum, because they don’t use UPnP and convolution. That’s OK, this isn’t for everyone. Those of us using UPnP and convolution, will get it immediately. The convolution engine runs on the UPnP renderer, meaning whatever is sent to the Pi, is processed for room correction with the FIR filters.
Complete installation guide can be found below, with proper commands etc…
Note: I used this guide to setup auto login - https://ostechnix.com/ubuntu-automatic-login/
Method Two
Method two uses a Raspberry Pi 5 running Raspberry Pi OS (64-bit port of Debian Bookworm) with the full Raspberry Pi desktop environment. This requires a keyboard, mouse, and monitor for the initial setup. The Pi is still a UPnP renderer with convolution engine, but different software to accomplish the task.
 I installed JRiver Media Center and set it up as a UPnP renderer, for receiving audio only. The rest of my music remained on my QNAP running MinimServer and Tidal, with JPLAY for iOS as my control point. JRMC has its own built-in convolution engine, but I prefer Hang Loose Convolver. I downloaded and licensed HLC and added it to JRiver via VST3 plugin. In my brief testing, Hang Loose used less system resources than the built-in convolver, enabled me to upsample the filters while keeping the number of filter taps proportional to the sample rate, and presents nice meters to make sure audio is flowing through the convolver while testing.
After initial setup I used VNC to connect to the Pi to make adjustments, but it’s still less than desirable to run the full desktop GUI.
I’m sure some readers may be asking why not just use JRiver as the server instead of a QNAP with MinimServer, since it’s already installed on the Pi. That certainly could be done, but I wanted to use the Pi as more of a drop-in DSP man in the middle type of device that can fit into an existing UPnP setup and enable convolution with nearly any USB DAC. Nobody has to reconfigure anything in an existing setup to get this working.
Method Three
This is the method that initially got me excited about the project and that I spent over a week trying to perfect. I was only partially successful, but believe some additional tweaking could get it working correctly. There’s only so much time in the day to spend on this stuff. I hope some of the geeks in the Audiophile Style community will take a shot at this and let me know how we can get it working.
 Method three is similar to method two in that it uses a Raspberry Pi 5 running Raspberry Pi OS (64-bit port of Debian Bookworm) with the full Raspberry Pi desktop environment. I’d prefer to not use the GUI, but until Hang Loose Convolver is updated to support headless operation, a desktop GUI is the reality.
This method is also similar to method one in that it uses upmpdci and MPD and Pipewire. Rather than using Pipewire’s convolution engine, I wanted to use Hang Loose Convolver. Given that HLC has an interface for selecting the input and the output, I thought it would be fairly straightforward to select a Pipewire interface for input and a dCS DAC for output, routing the music through HLC for my convolution filters. Boy was I wrong. At least so far.
I configured a virtual loopback in Pipewire and configured Pipewire to ignore the dCS USB DAC. I set MPD to output to Pipewire, Pipewire to output to the virtual interface, and HLC to accept the audio from this virtual interface, then output to the DAC.
he main sticking point that I can’t get around is auto sample rate switching. I can’t get Pipewire and Hang Loose Convolver working in tandem, with Pipewire controlling the virtual interface and signaling to HLC that it should change it’s sample rate, and having HLC change the rate for the USB DAC as well.
Without Hang Loose running, the Pipewire virtual interface properly adjusts to the sample rate every time. I have a feeling it’s related to exclusive control or some miscommunication between the two apps. I’ve reached out to the developers, but so far haven’t found a solution.
One other potential issue is also a showstopper. Buffers and latency with the Pipewire virtual interface are critical. I struggled to get any audio to play smoothly, without stuttering. I’m unsure if this is related to the sample rate issue or something else. I take one issue at a time, and will cross this bridge if I can get auto sample rate switching to work. Without auto sample rate, I have no need to good audio.
Method Four
 I know I said there were only three methods, but there’s one more I’ve been working on. Pipewire supports AES67 audio over Ethernet. This will work with my Merging Technologies Anubis and HAPI Mk2, which supports Ravenna and AES67. In theory I could use the Pi as a network DSP device running convolution for my immersive system. This would relieve DSP duties from my MacBook Pro and enable me to send 12 channel audio from my Aurender ACS10 through the Pi for room correction, then to my 12 channel DAC.
I’ve been working on this only for a day or so, but have yet to get it working. I also don’t know if the Pi 5 can handle 12 channels of convolution, with filters using 65,000 taps. The geek in me says to keep working on this just to see if I can get it full functional. There are some steep hurdles with this one, and I don’t know if I have the time to dedicate to this. I’d appreciate some assistance from the other Ravenna / AES67 users around here, who may have a little bit of spare time. If we all put in a little time, perhaps we can get a big payoff.
Raspberry Pi 5 Wrap Up
I realize this article isn’t for everybody. But, nothing is. For those who use UPnP and want convolution for something like room correction, this article may change your listening life. Using an inexpensive Raspberry Pi 5 as a drop-in DSP / man in the middle type of device that can fit into an existing UPnP setup and enable convolution with nearly any USB DAC, is a big deal.
I can’t wait to see how members of this community extend the aforementioned methods, improve the methods, and even come up with better solutions altogether. In addition, I’d be even happier if some manufacturers enable a convolution engine on their UPnP renderers, making this accessible to even the most technically challenged audiophile and the audiophile without interest or time to taste a Raspberry Pi.
About the author - https://audiophile.style/about
Author's Complete Audio System Details with Measurements - https://audiophile.style/system
Steps to install Method One:
sudo apt install alsa-utils
sudo apt install mpd
sudo add-apt-repository ppa:jean-francois-dockes/upnpp1
sudo apt install upmpdcli


Make mpd run as a user

mkdir ~/mpd
mkdir ~/mpd/playlists
mkdir ~/mpd/music

sudo nano /etc/mpd.conf - change the listed directories to the directories created above, then change user it runs as to your user


sudo service mpd stop
Sudo systemctl disable mpd.service

echo "export XDG_RUNTIME_DIR=/run/user/$(id -u)" >> ~/.bashrc
source ~/.bashrc

systemctl --user --now enable mpd.service


sudo apt install pipewire-audio wireplumber
systemctl --user start pipewire.service

mkdir ~/.config/pipewire/
mkdir ~/.config/pipewire/pipewire.conf.d/
mkdir ~/.config/wireplumber/
mkdir ~/.config/wireplumber/wireplumber.conf.d/


sudo nano /usr/share/pipewire/pipewire.conf

    default.clock.rate          = 48000
    default.clock.allowed-rates = [ 44100 48000 88200 96000 176400 192000 352800 384000 ]


sudo nano /etc/mpd.conf

audio_output {
    type            "pipewire"
    name            "Pipewire Sound Server"
}

systemctl --user restart mpd.service


Run alsamixer to set USB DAC volume to max


Download convolver.conf below and place it here > ~.config/pipewire/pipewire.conf.d/

https://audiophilestyle.com/uploads/monthly_2024_03/convolver.conf.zip


wpctl status to get the ID of the convolver sink
wpctl set-default 33 or whatever the number is of the new convolver sink


To switch between filter and no filter
wpctl status to find the ID number of the interfaces
In my case, this, and it switches instantly.
wpctl set-default 66
wpctl set-default 33


Recommended Comments
Create an account or sign in to comment
You need to be a member in order to leave a comment
Create an account
Sign up for a new account in our community. It's easy!
Register a new accountSign in
Already have an account? Sign in here.
Sign In Now