


![]()
Warning: This article is technical in nature, but is far from rocket surgery. The step-by-step how-to instructions below make the process extremely easy. That said, this article isn't for everybody.
This is the second article in the CA Geek Speak series (Link to first article ![]() ). If you have a USB DAC and want to turn it into a network capable device or if you want to setup multiple zones for playback and control via iPad for less than $100 per zone, then this article is for you. The instructions below provide a step-by-step guide for creating a UPnP / DLNA / OpenHome renderer with Ethernet input and USB output for connection to a USB DAC. In a way, this device can be considered the poor man's Auralic Aries (Review Link
). If you have a USB DAC and want to turn it into a network capable device or if you want to setup multiple zones for playback and control via iPad for less than $100 per zone, then this article is for you. The instructions below provide a step-by-step guide for creating a UPnP / DLNA / OpenHome renderer with Ethernet input and USB output for connection to a USB DAC. In a way, this device can be considered the poor man's Auralic Aries (Review Link ![]() ) or SOtM sMS-100 Mini Server (Review Link
) or SOtM sMS-100 Mini Server (Review Link ![]() ). In the previous Geek Speak article readers were forced to log in to the device and make configuration changes via command line. This time I've taken care of all the configuration myself. Readers simply need to download the preconfigured image file and flash it to a Beaglebone Black (Rev. C) following the instructions. That's it.[PRBREAK][/PRBREAK]
). In the previous Geek Speak article readers were forced to log in to the device and make configuration changes via command line. This time I've taken care of all the configuration myself. Readers simply need to download the preconfigured image file and flash it to a Beaglebone Black (Rev. C) following the instructions. That's it.[PRBREAK][/PRBREAK]
This device is a tiny 2.4" x 0.82" x 3.54" Beaglebone Black fanless computer running Linux and a couple pieces of preconfigured software. It connects to a home network via wired Ethernet and connects to an audio system via USB. With this device in an audio system the user can stream music from a NAS or any computer running JRiver Media Center and have full control over music selection and volume for a single or multiple zones with an iPad or similar device. I highly recommend using JRiver and JRemote. Whether using a single device connected to a USB DAC in a main audio system or using several of these devices connected to audio systems throughout a home, JRemote makes control of everything extremely simple. Currently this renderer supports both PCM and DSD via DoP playback. I've tested PCM up through 24 bit / 192 kHz and DSD 64 without any issues. Gapless playback at all sample rates is also supported. I am unsure exactly what USB DACs are supported, but I know that USB DACs capable of functioning without drivers on Mac OS X should work just fine with this renderer.
![]()
[ATTACH=CONFIG]17349[/ATTACH][ATTACH=CONFIG]17350[/ATTACH][ATTACH=CONFIG]17348[/ATTACH]
![]()
Details for Geeks
MP version - Music Player Daemon 0.19.9
upmpdcli version - upmpdcli-0.9.0
Linux version - BeagleBoard.org Debian Wheezy Image 2015-03-01 (3.8.13-bone70)
Username = root
Password = (no password / blank)
Requirements
BeagleBone Black (Rev. C required) ![]() ($60)
($60)
BeagleBone Black case ![]() ($10)
($10)
Power Adapter (5 volts, 2 Amps, 10 Watts) ![]() ($9)
($9)
MicroSD Card with Adapter ![]() (~$10)
(~$10)
SD Card Reader ![]() (~$13) (Optional)
(~$13) (Optional)
Win32 Disk Image ![]() ($0) (Windows users)
($0) (Windows users)
Ethernet cable
NAS Drive or computer for music storage
Tablet for control such as iOS or Android device
UPnP Server software such as JRiver Media Center ![]() or MinimServer
or MinimServer ![]()
UPnP Control Point software such as JRemote ![]() (when used with JRMC) or BubbleUPnP
(when used with JRMC) or BubbleUPnP ![]()
Step-By-Step Mac OS X
- Connect the MicroSD card to the computer
- Open Disk Utility (Applications > Utilities > Disk Utility), select select all volumes under the MicroSD card, then select Unmount. In my example the volume is named 8GB. (Image Link 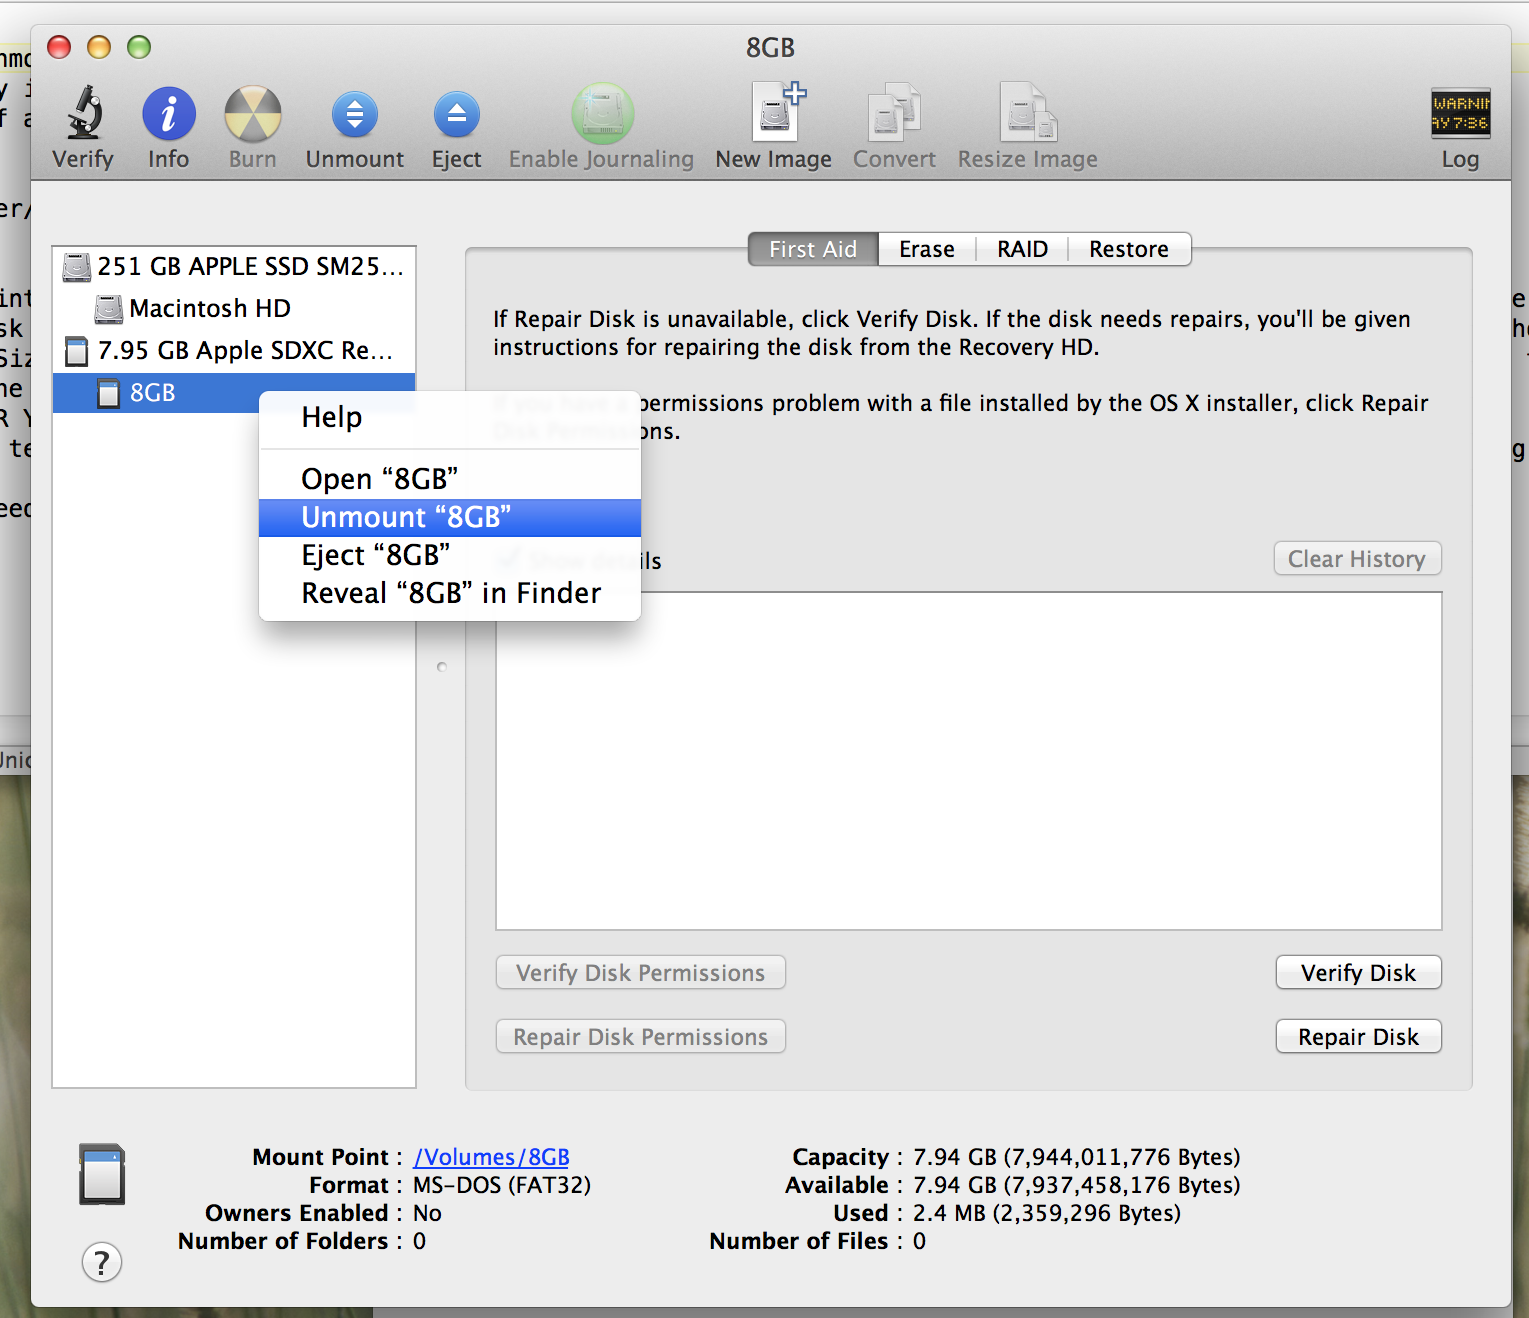 )
)
- Download the preconfigured image file (USB Output Version ![]() ). (HDMI Output Version
). (HDMI Output Version ![]() )
)
- Double-click the downloaded preconfigured image file named CA-NetAudio-1.0.img.zip. This will automatically extract the image file named CA-NetAudio-1.0.img
- Open the Terminal app (Applications > Utilities > Terminal)
- Type -> sudo su (without the arrow ->)
- Enter your password if asked.
- Type -> diskutil list
- Take note of the disk number of the MicroSD card connected to your computer. My MicroSD card is listed as /dev/disk1. The MicroSD card should be easily identifiable by its small size. My MicroSD card is listed as 7.9 GB (Image Link 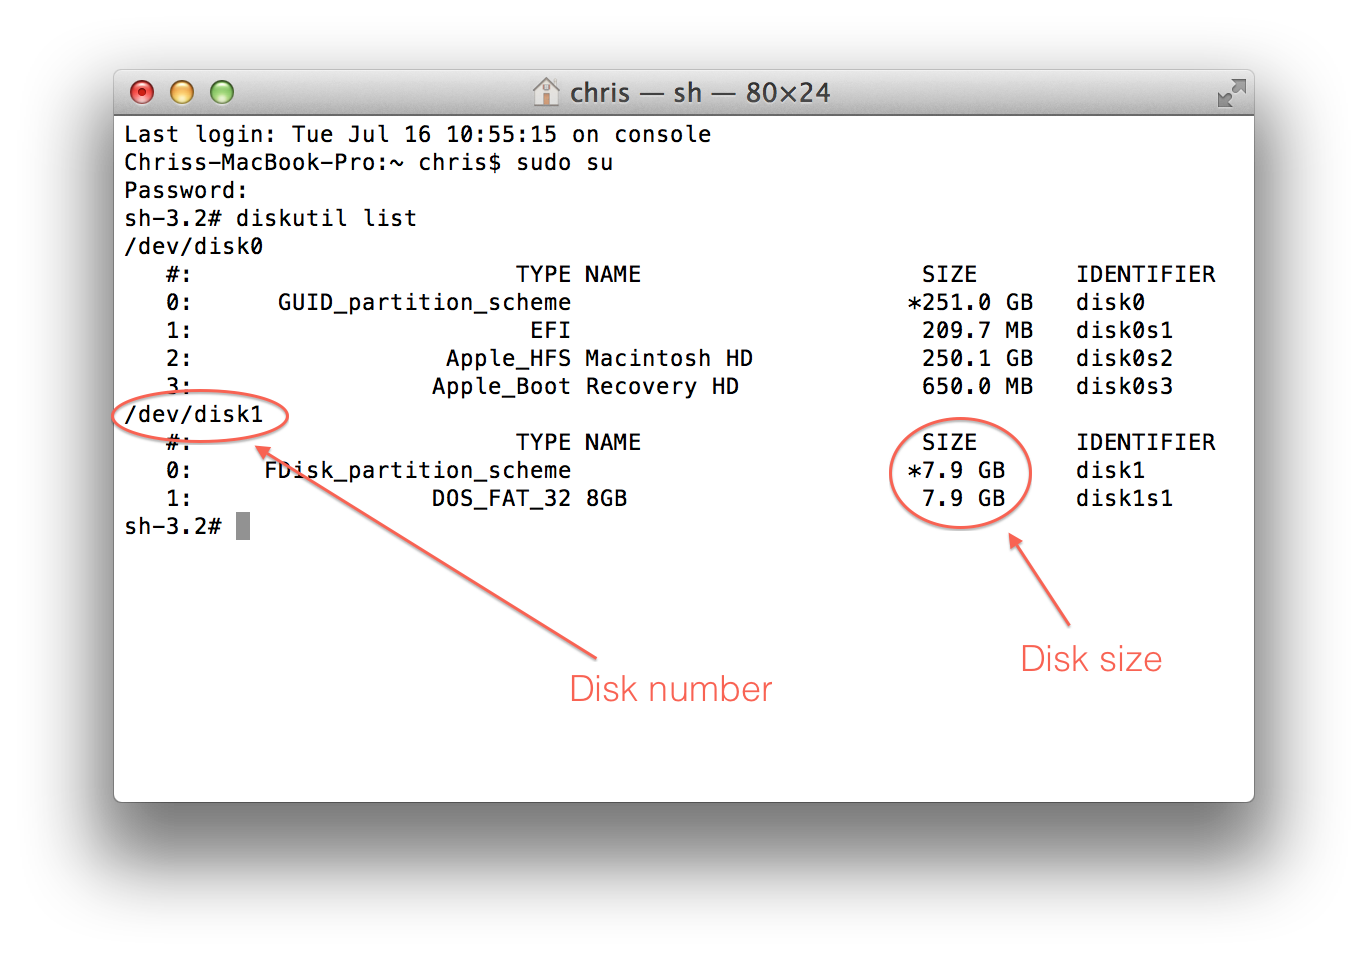 )
)
- Type -> sudo dd if=
- Drag the preconfigured image file named CA-NetAudio-1.0.img on to the Terminal window to automatically fill in the path to the file (Image Link 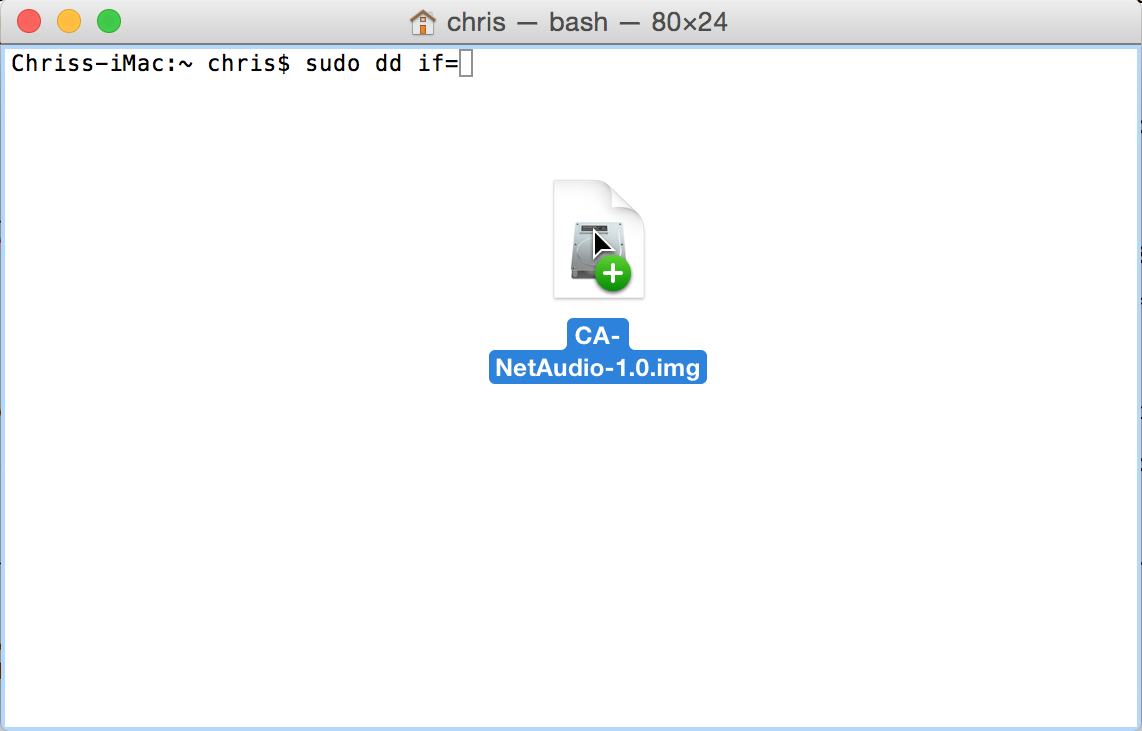 ) You can also type this in manually if desired.
- After dropping the image file on to the Terminal window the command line should read something like this >> sudo dd if=/Users/chris/Desktop/CA-NetAudio-1.0.img (Image Link 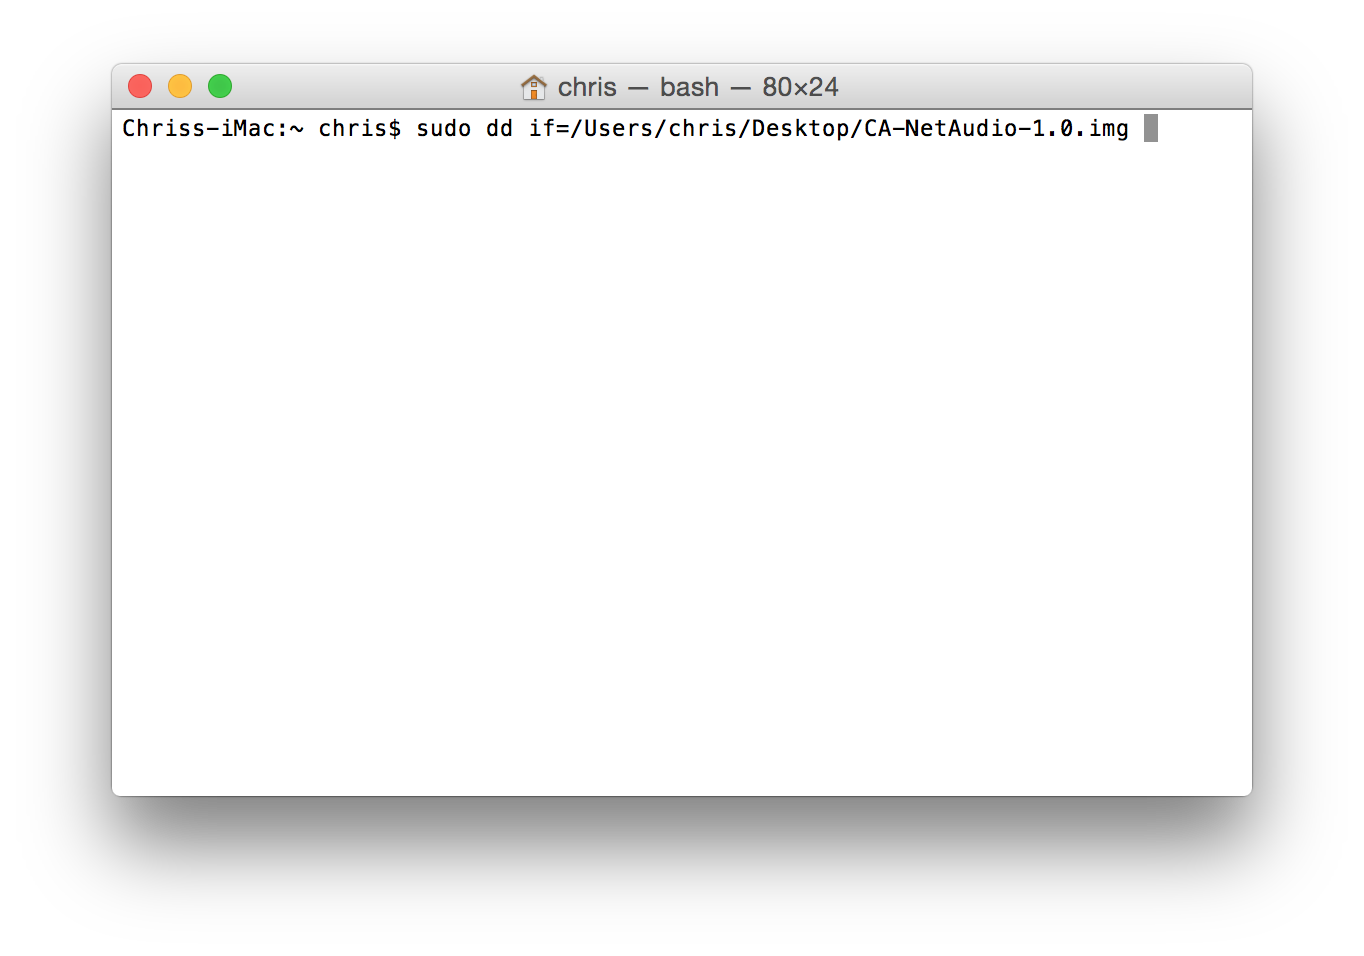 ).
).
- Make sure there is a single space after the path to the preconfigured image file named CA-NetAudio-1.0.img entered in the previous steps.
- Type -> of=
- Then enter the disk number of your MicroSD card. In my case this is /dev/disk1
- The text should look something like this of=/dev/disk1 (Image Link 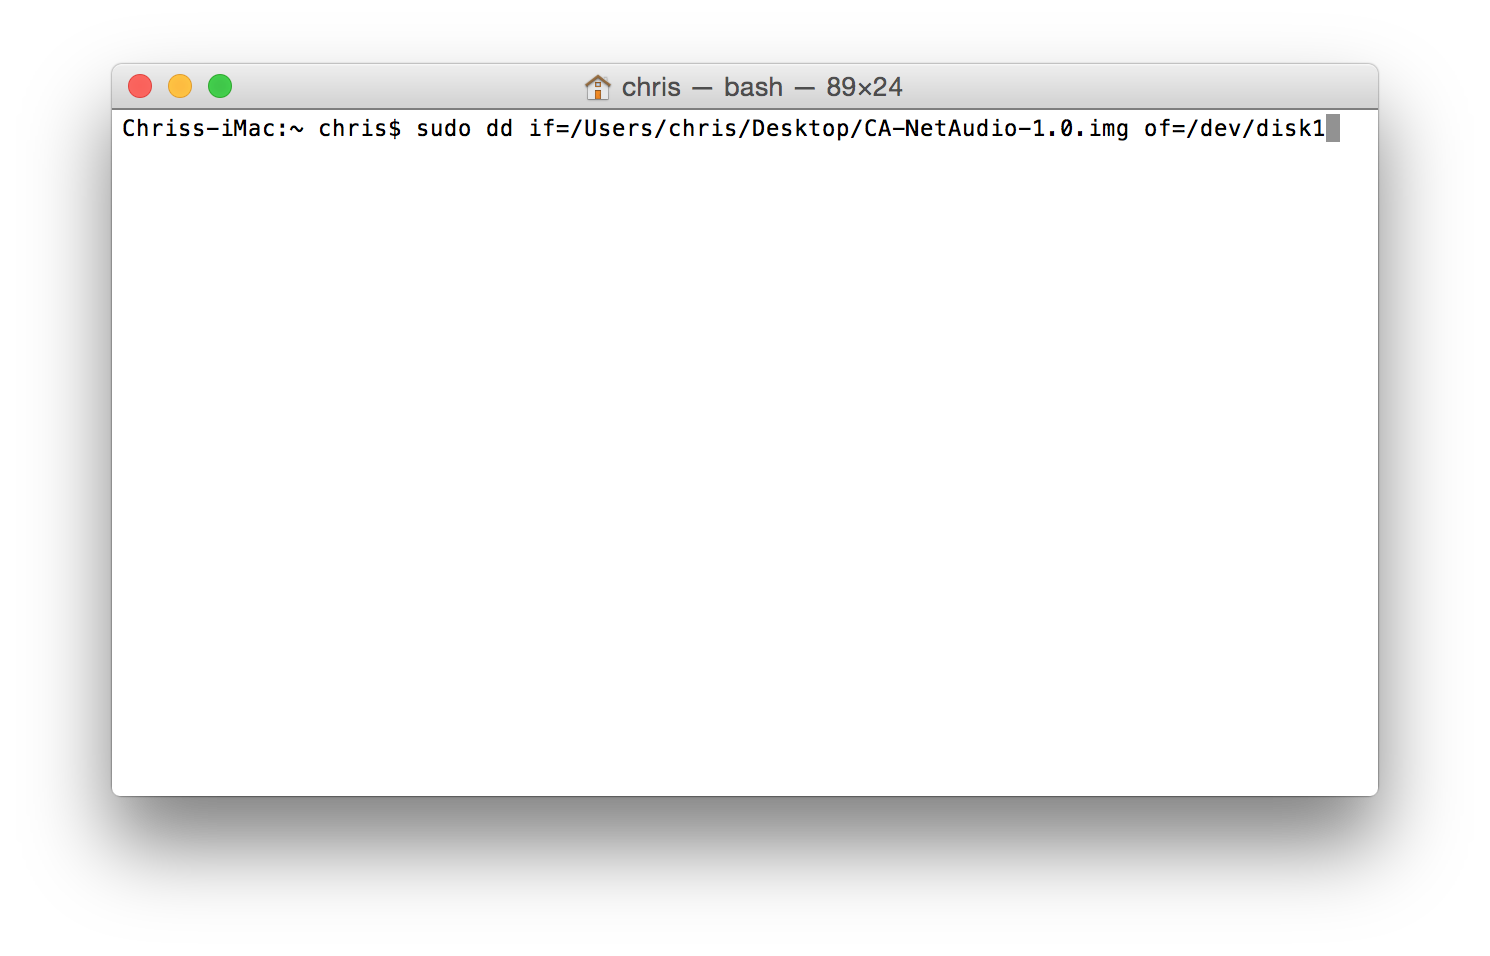 ).
).
- Make sure there is a single space after the path to your MicroSD card entered in the previous steps.
- Type -> bs=1m
- The entire line should now look something like this >> dd if=/Users/chris/Desktop/CA-NetAudio-1.0.img of=/dev/disk1 bs=1m
- Here is an image of my Terminal (Image Link 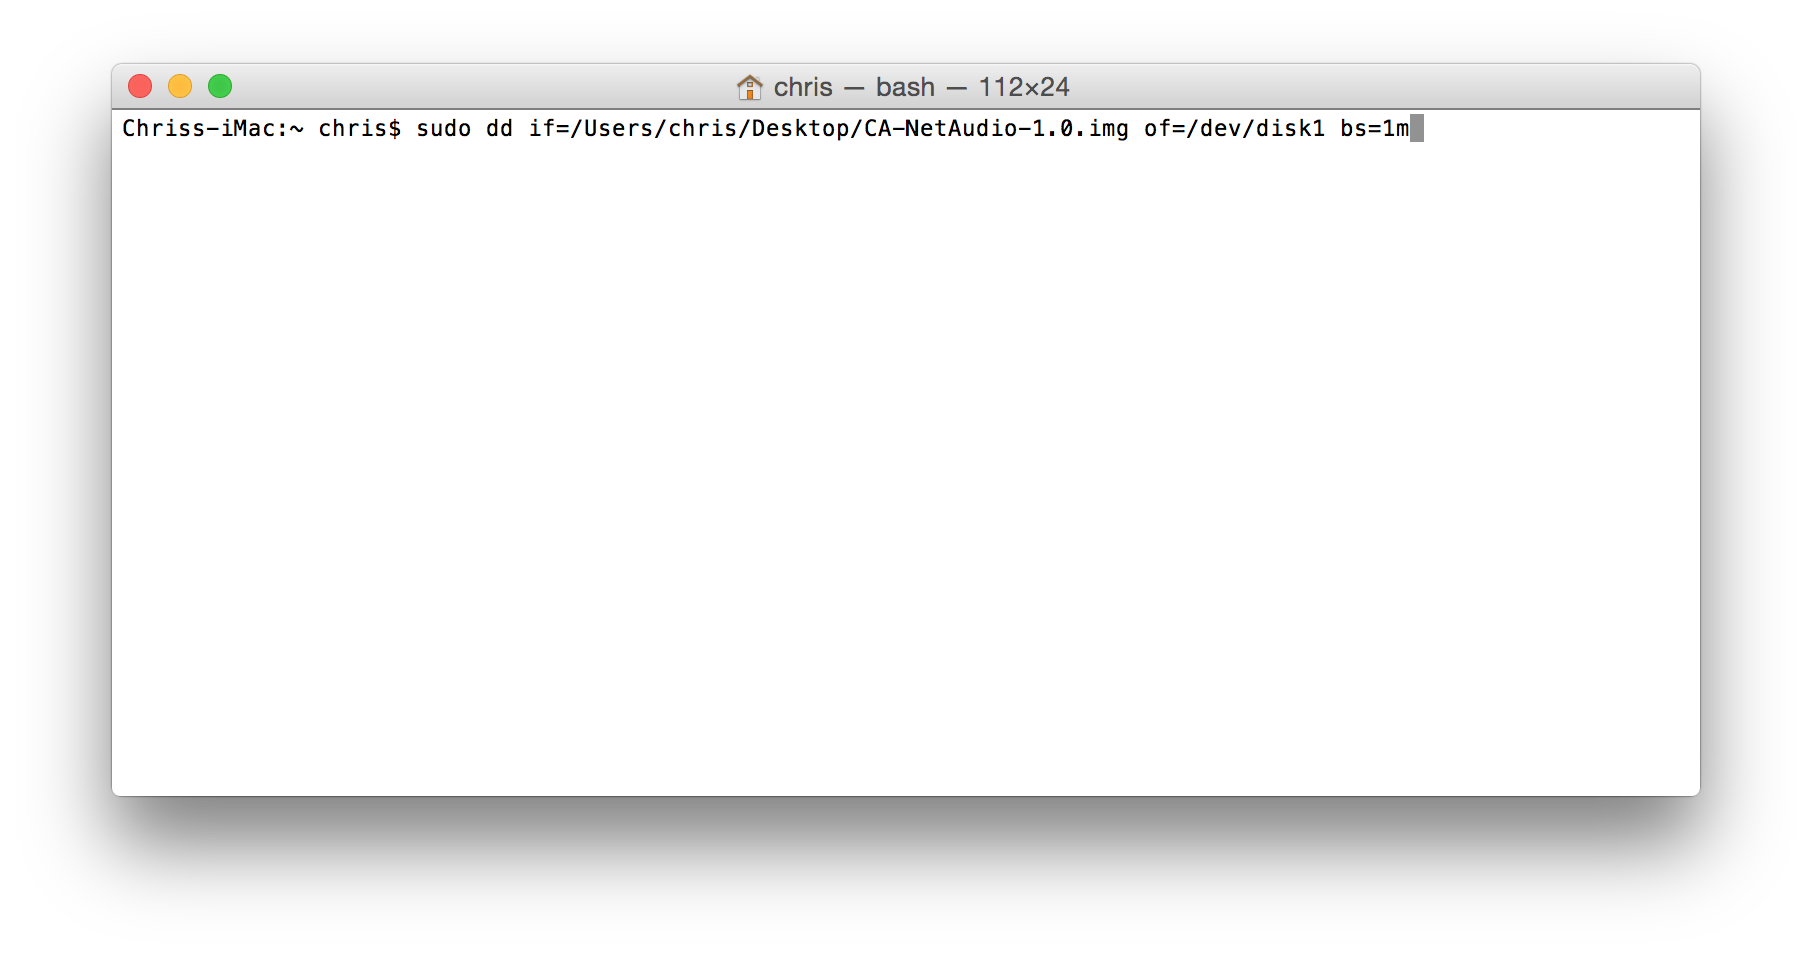 )
)
- Hit Enter on your keyboard and wait for the image to be written to the MicroSD card. This will take several minutes and appear like your computer is stuck. Please wait for the command to finish.
- Once the image has been written to the MicroSD card the Terminal window will list something like this.
3781+1 records in
3781+1 records out
3965190144 bytes transferred in 2489.137016 secs (1592998 bytes/sec) (Image Link  )
)
- If you receive an error message stating "Resource busy" (Image Link 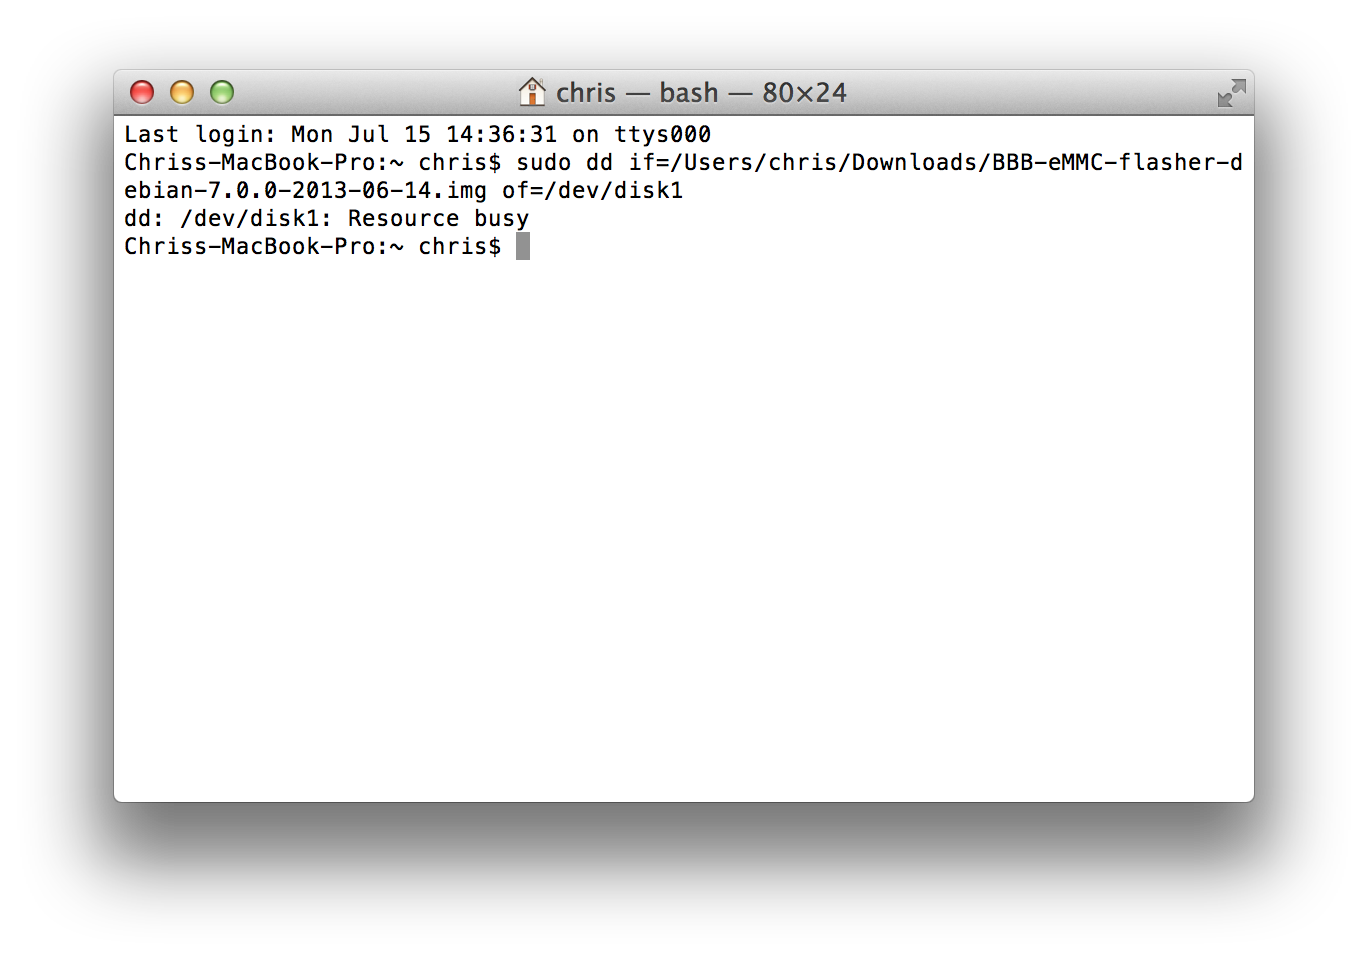 ) you likely skipped step 2. Please unmount the volume and try again.
- Open Disk Utility (Applications > Utilities > Disk Utility), select the MicroSd card, click Eject or Eject Disk via the right-click menu.
- Place the MicroSD card into the BeagleBone Black's MicroSD card slot.
- Hold down the small Boot Switch / Button 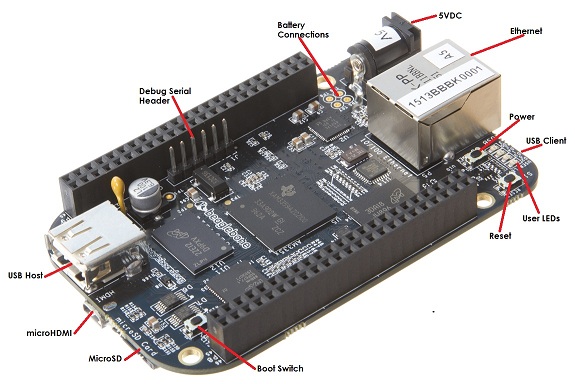 while connecting the power supply to the board.
- As soon as one of the User LEDs illuminates, release the Boot Switch / Button.
- The User LEDs should continue flashing while the MicroSD card image is copied to the on-board eMMC flash memory. The process should take about five minutes.
- When all four User LEDs are illuminated steady, pull the power supply from the board and remove the MicroSD card. Or, the board will power down automatically if you wait long enough after the copy is complete.
- Connect an Ethernet cable to the board and your USB DAC to the USB port and re-connect the power supply.
- The BeagleBone Black will boot up and automatically appear as a UPnP / DLNA / OpenHome renderer in your application of choice such as JRiver Media Center. If using JRiver Media Center the device will appear as a new zone named NetAudio. To send music to the device simply select NetAudio, then select the music you want to play.
- That's it.
Step-By-Step Windows
- Connect the MicroSD card to the computer
- Install Win32 Disk Image Link ![]()
- Download the preconfigured image file (USB Output Version ![]() ). (HDMI Output Version
). (HDMI Output Version ![]() )
)
- Right-click the downloaded preconfigured image file named CA-NetAudio-1.0.img.zip. Select Extract All (you may have to click Next after this). This will extract the image file named CA-NetAudio-1.0.img into a folder with the same name CA-NetAudio-1.0.img.
- Open Win32 Disk Imager
- Make sure the MicroSD card drive letter is selected under Device (Image Link  )
)
- Select the small folder to the left of the Device drive letter and browse to the file previously extracted named CA-NetAudio-1.0.img. Don't select the .zip compressed file.
- Click the Write button and Yes to any popup questions.
- Eject the MicroSd card when Win32 Disk Imager finishes writing the image.
- Place the MicroSD card into the BeagleBone Black's MicroSD card slot.
- Hold down the small Boot Switch / Button while connecting the power supply to the board.
- As soon as one of the User LEDs illuminates, release the Boot Switch / Button.
- The User LEDs should continue flashing while the MicroSD card image is copied to the on-board eMMC flash memory. The process should take about five minutes.
- When all four User LEDs are illuminated steady, pull the power supply from the board and remove the MicroSD card. Or, the board will power down automatically if you wait long enough after the copy is complete.
- Connect an Ethernet cable to the board and your USB DAC to the USB port and re-connect the power supply.
- The BeagleBone Black will boot up and automatically appear as a UPnP / DLNA / OpenHome renderer in your application of choice such as JRiver Media Center. If using JRiver Media Center the device will appear as a new zone named NetAudio (Image Link 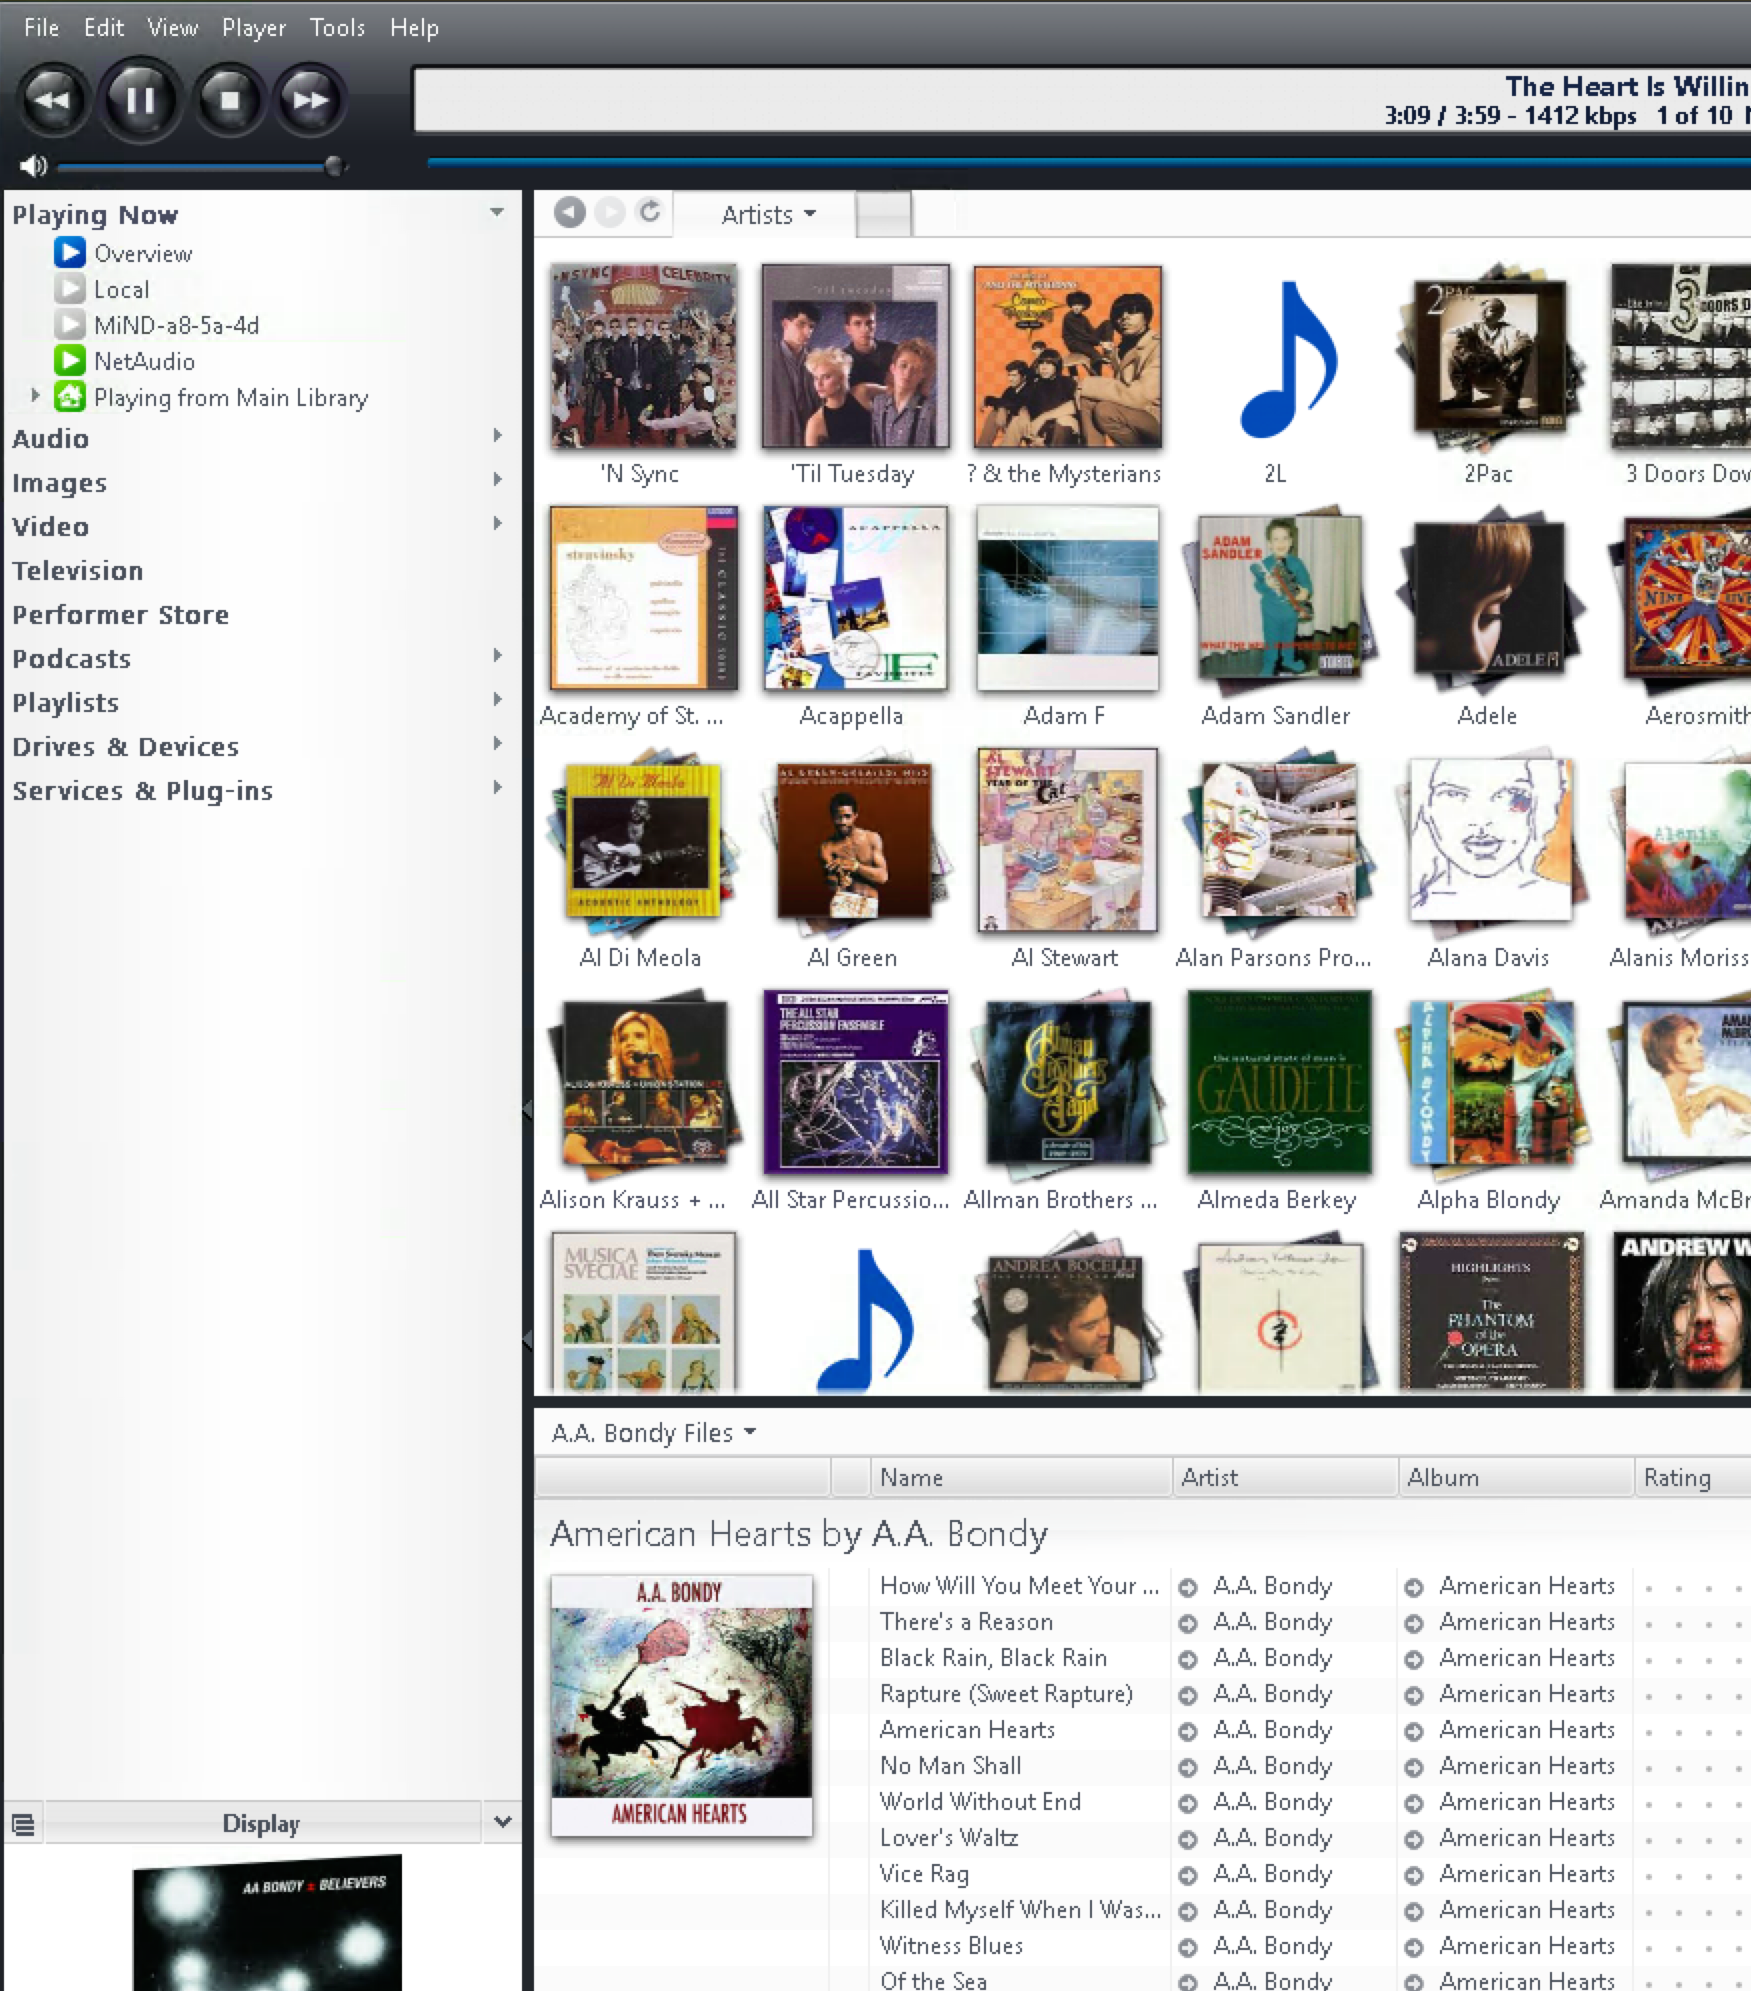 ). To send music to the device simply select NetAudio, then select the music you want to play. The device will also appear automatically in JRemote as a zone called NetAudio (Image Link
  ).
).
- That's it.
Please let me know if you find errors in this guide. I will keep it updated as appropriate and update the preconfigured downloadable image. Tips, tricks, and tweaks are also encouraged!
![]()
![]()


Recommended Comments