


Audio: Listen to this article.
Hi Guys, last week I completed a little project that I'd wanted to do for a couple years. It isn't 100% related to our mutual love of music and high quality audio, but it's related to the placement of one of my music servers. This is something to which many people can relate, I'm certain.
When I aded a Merging Technologies Anubis to my audio system and started using my MacBook Pro more frequently, I had to run Ethernet and power cables across the floor of my listening room to the chair in my listening position. Given that I'm usually the only person in the room and I know where the cables are, it isn't the biggest of deals to step over them. But it still bothered me because I hated the way it looked.
The only solution to this problem was to drill a hole through the wool carpet and the wood floor, install a recessed floor box, and run cables under the floor between the joists to the box. I was paralyzed for several weeks trying to figure out how to find the joists under the flooring and thinking about potential issues that may arise once I cut the hole. What follows is how I completed the project. Not as a step by step procedure that others can follow, but more of a here's what's possible and how it's can be done. Hiring professional would've been much easier and saved me a lot of stress :~)
 Finding the Joists
There’s no turning back once a hole is cut into the carpet and the wood floor. This is why my anxiety about the project was sky high. If I drilled the hole and ran into a floor joist, I’d be left with an unusable hole in the floor. Keep in mind this hole needed to be five inches! The first thing I needed to do was find the floor joists.
I tried stud finders with zero success. I even purchased the strongest neodymium magnets I could find (N55 rating) in an attempt to find the nails anchoring the floorboards to the joists. That was unsuccessful as well.
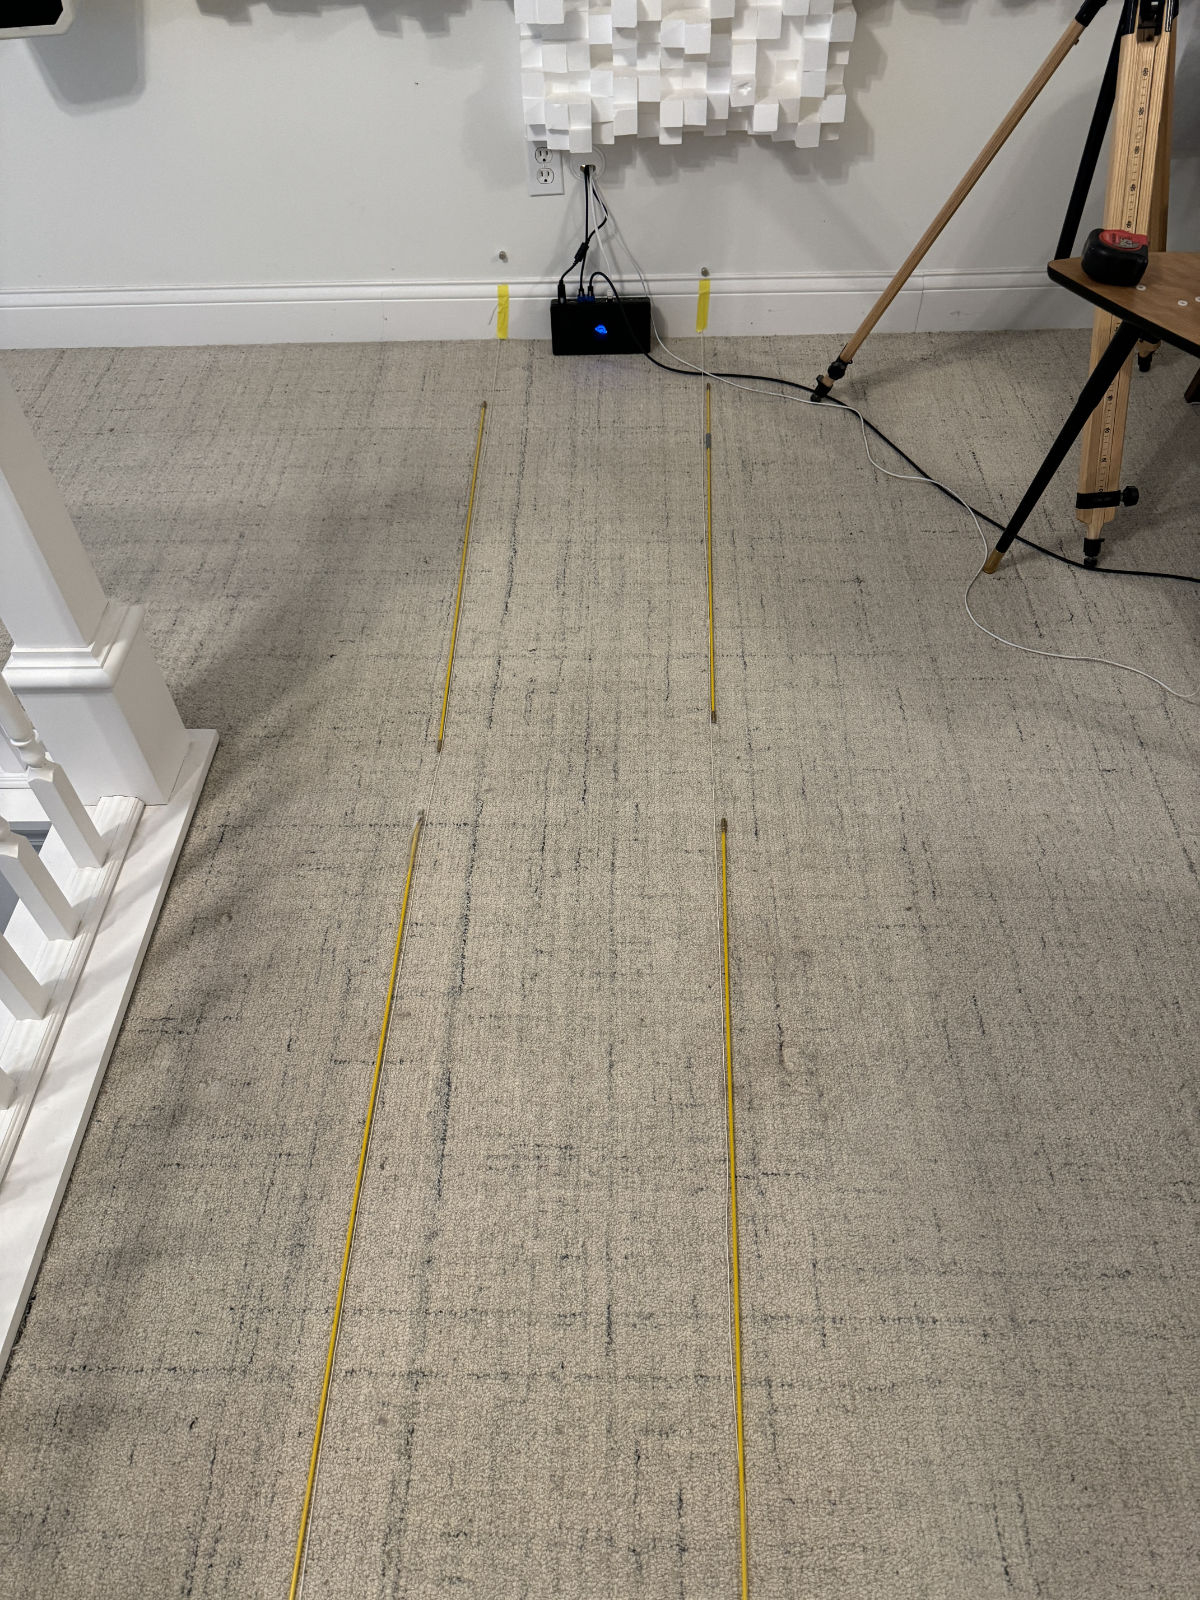
Plan B was to find the joists in the crawl spaces on both sides of the room, by locating the visible nails in the floor. Then, using the magnets, stuck on the wall, to identify the joists from inside the listening room. Once I had the magnets on the wall (one magnet on each side of the drywall for each joist), I ran string from magnet to magnet across the room. This gave me the exact location of the joists under the carpet and wood floor. Really not that hard, but it flummoxed me for a long time.
All Clear
I used a six inch hole saw in the crawlspace to cut through the floor. Because this is behind the wall and not visible in the listening room, the hole could be larger than really necessary. Once the hole was done, I attached a camera to fiberglass rods and started pushing the rods into the hole, toward my listening position. I needed to know if there was anything blocking the path from where the wires entered the space under the floor to where they needed to come out, under my chair. Fortunately the path was clear.

Recessed Floor Box
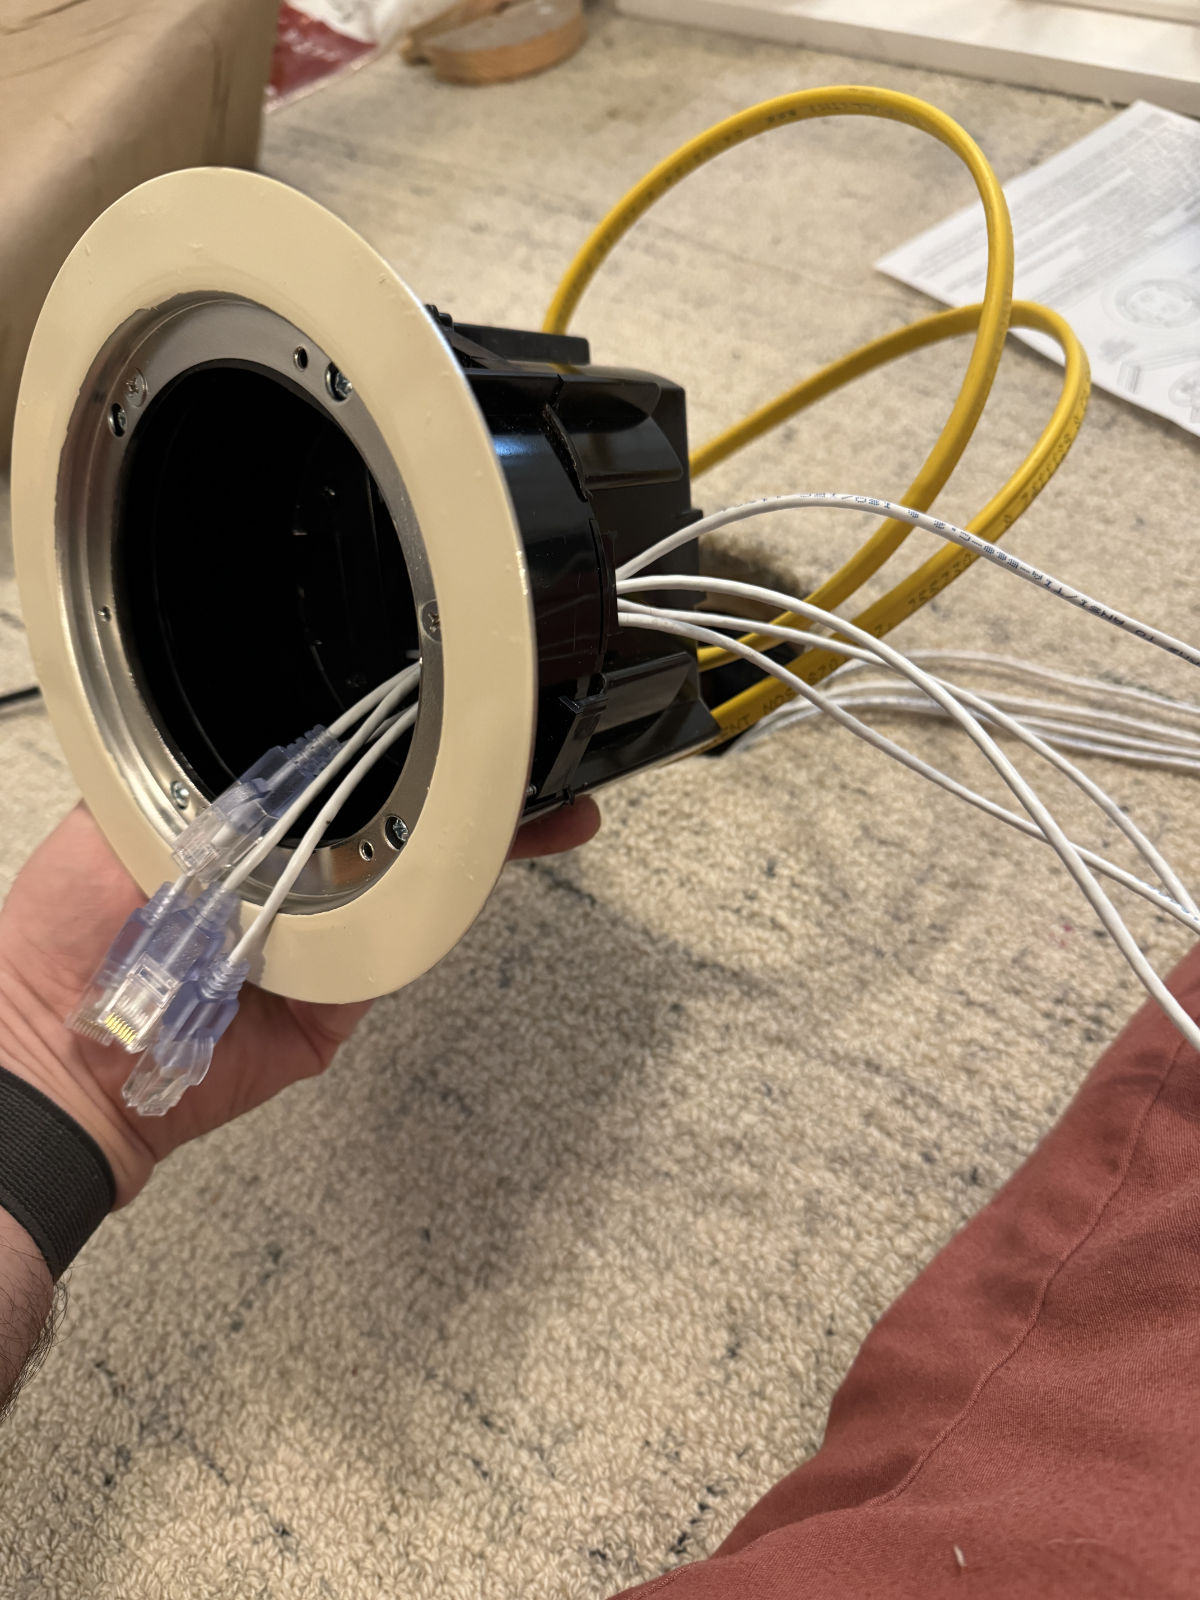
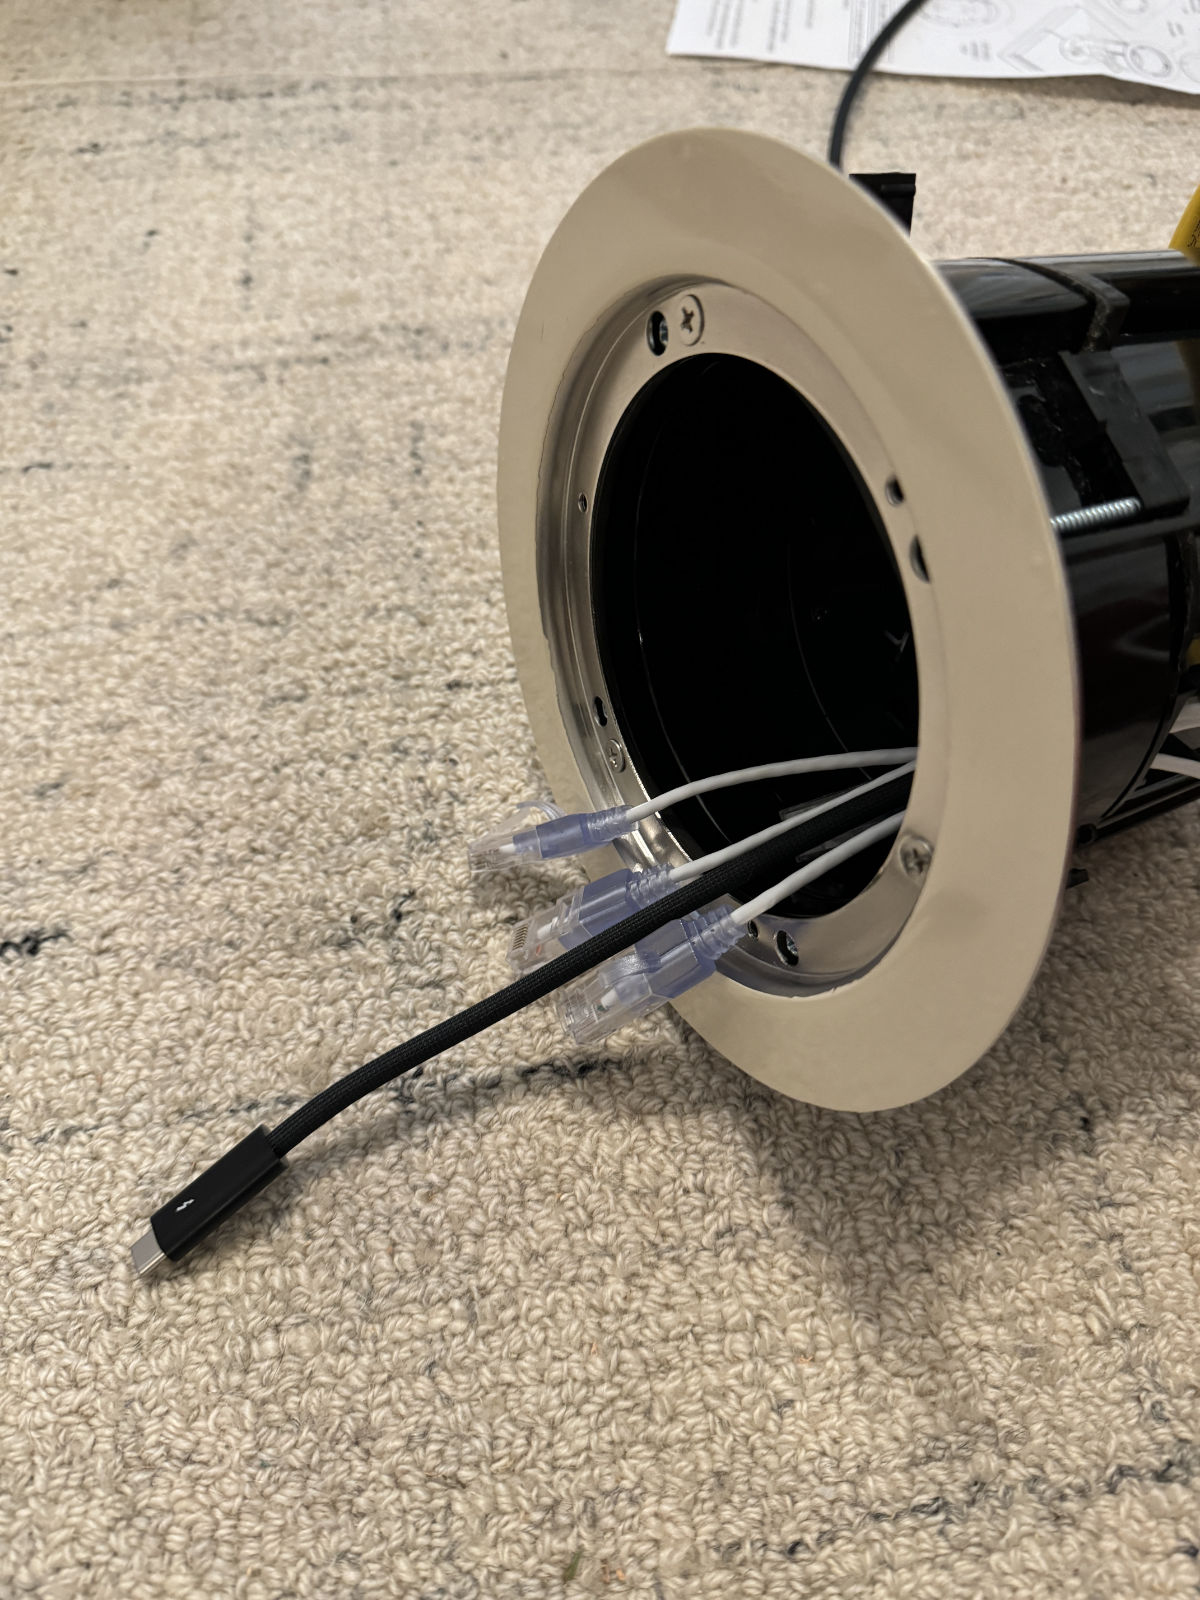
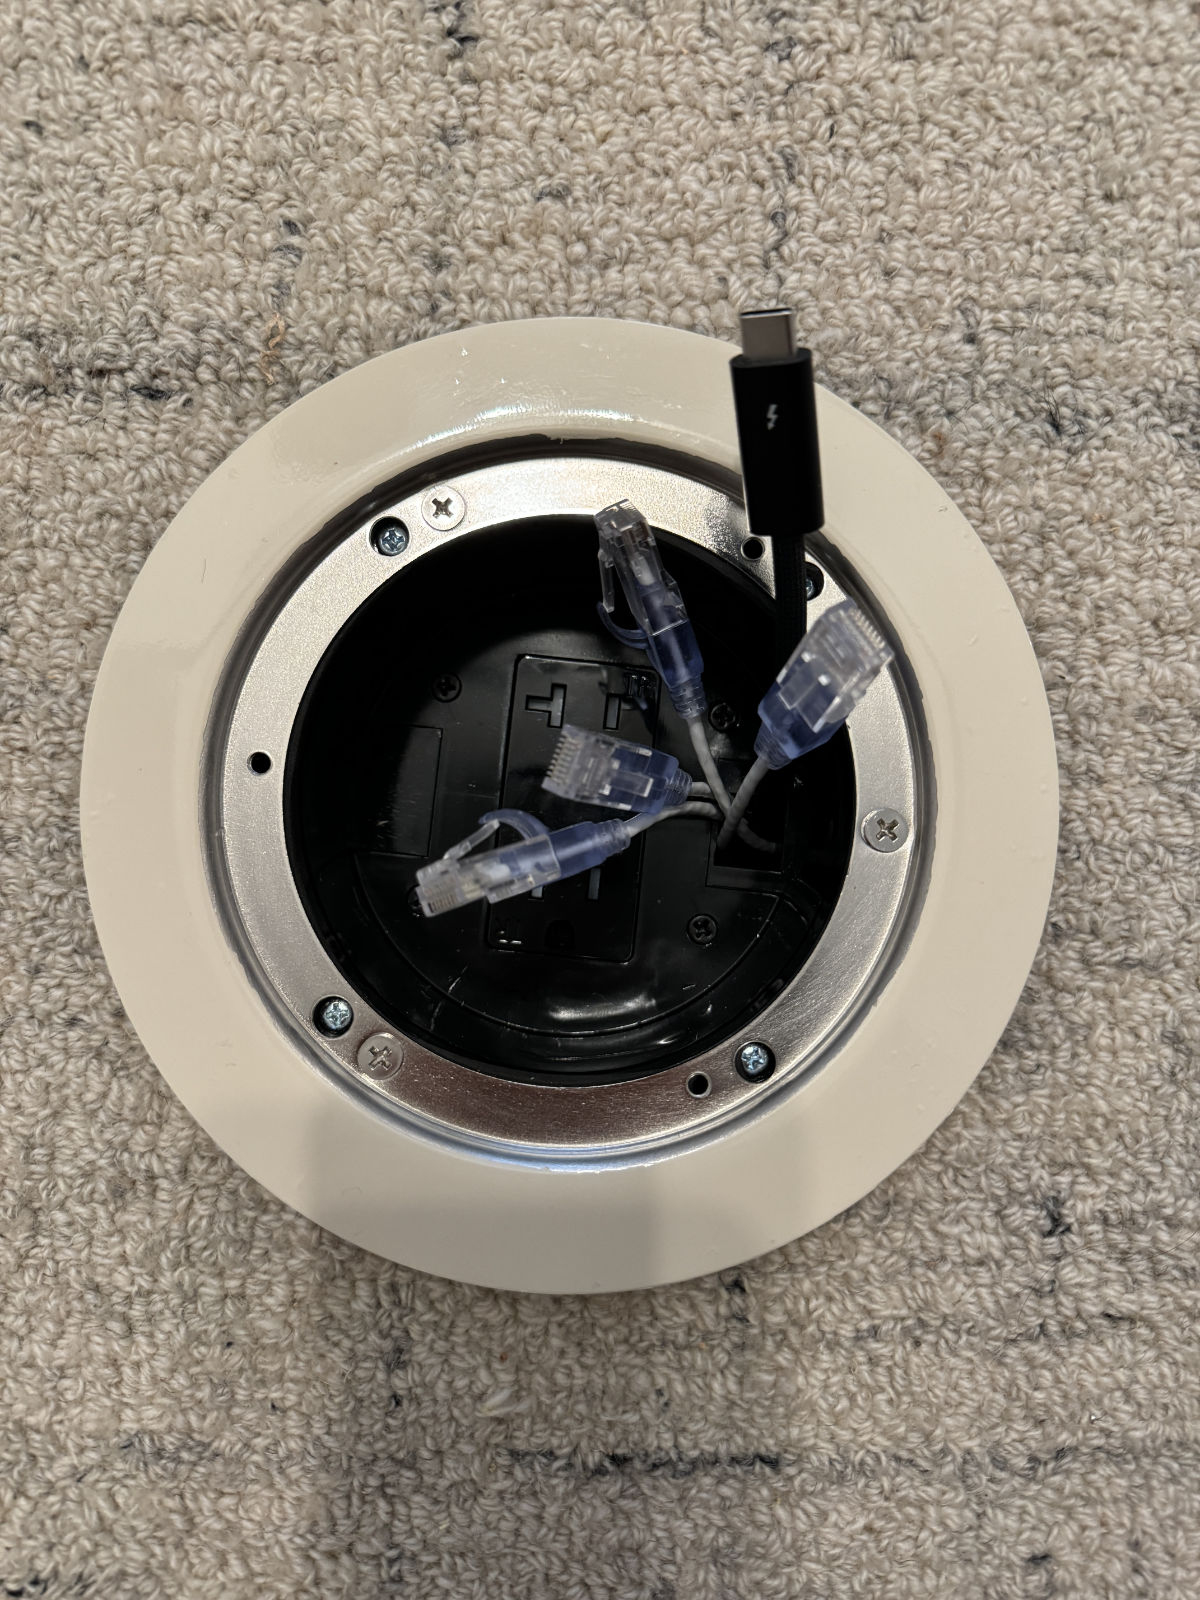 Ideally I’d cut a small hole in the carpet and floor to run power and data cables. The more I searched, the more people I found saying a small recessed floor box like this doesn’t exist because power and data shouldn’t coexist so closely. I settled on an Arlington FLBR5420 recessed power and data round floor box. It required a five inch round hole in the floor, which is bigger than I wanted, but it had everything I needed. Two power outlets, space for data cables, and space I could use for other cables, such as Thunderbolt 4. The color choices for these boxes aren’t the best, so I ordered the nickel finish, and used vinyl to cover it in the color of my choice. The same vinyl used on cars and trucks for lettering.
I charged up the batteries, put the arbor and hole saw into the drill, and measured five more times. I couldn’t screw this up. Then I cut the hole with a grimacing look on my face. Success! I had sawdust all over me and the carpet, but I also had a perfectly round five inch hole between the floor joists without any obstructions.
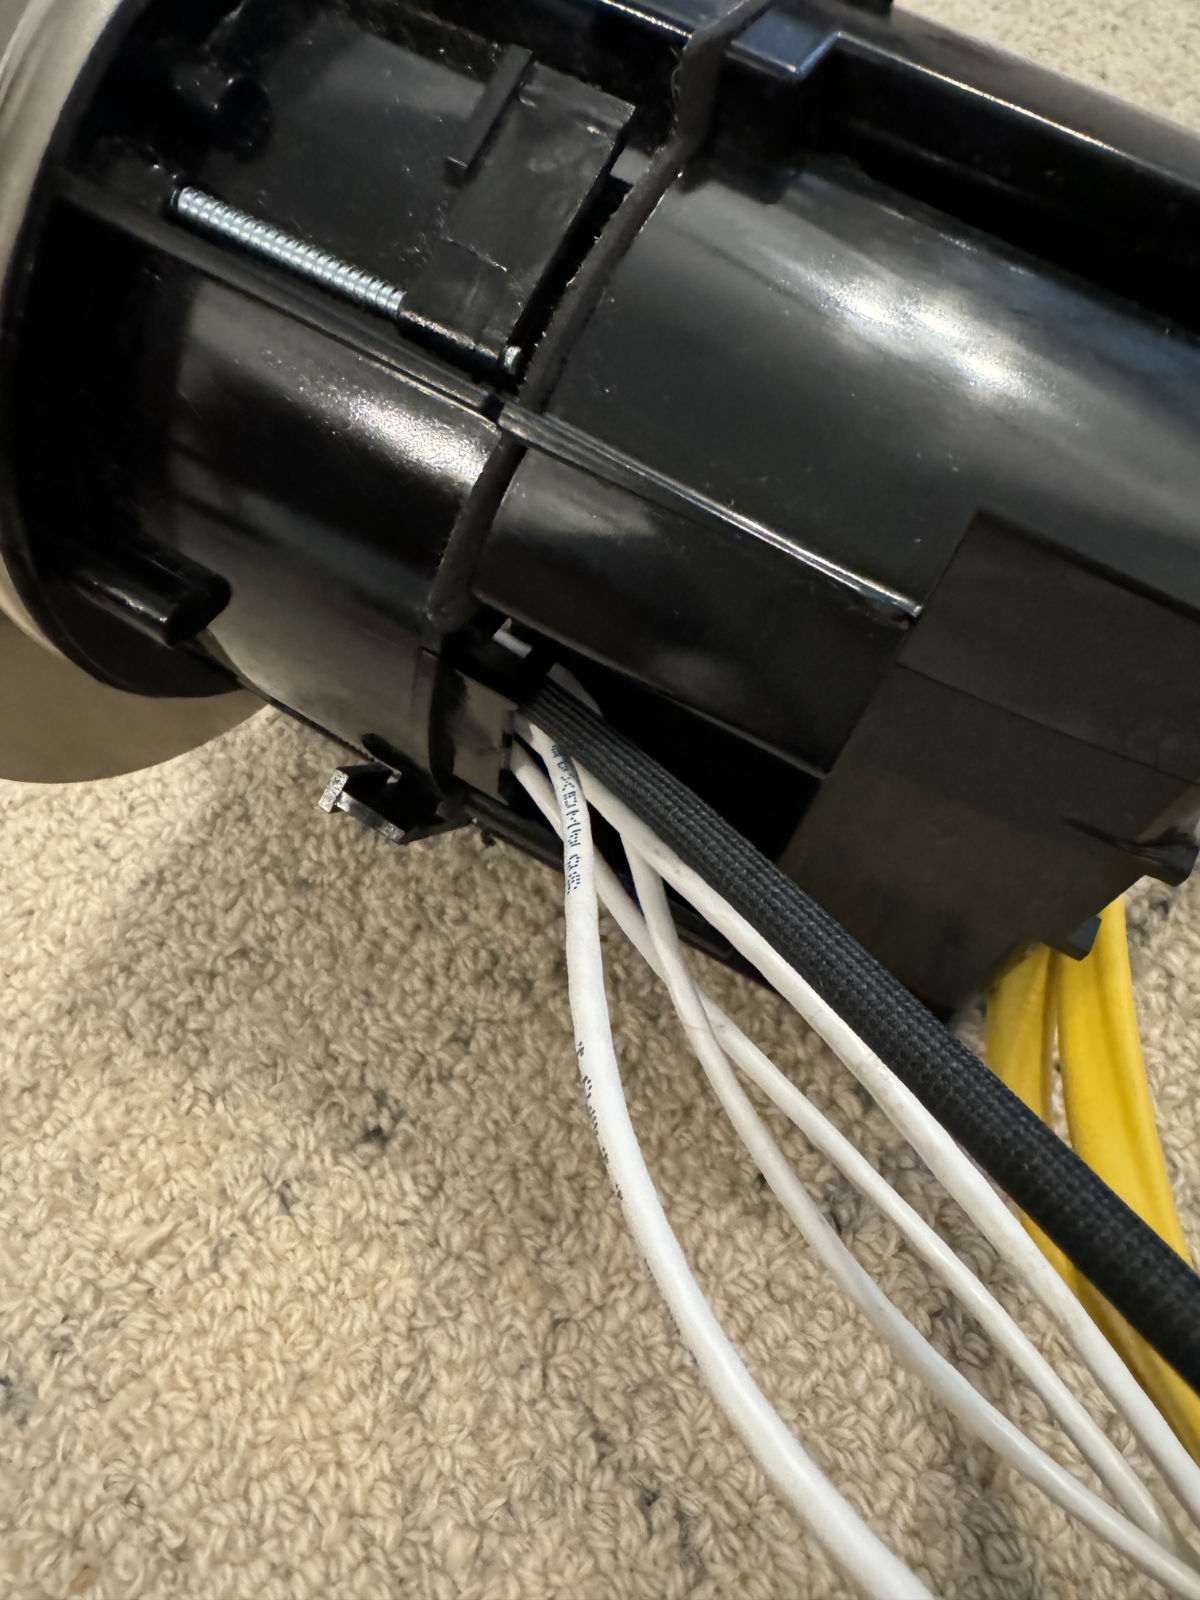
I ran romex cable for the power outlets, five 50 foot Ethernet cables, and an extension cord, using tape and the fiberglass rods. Huh, five Ethernet and an extension cord? Yes, here’s why.
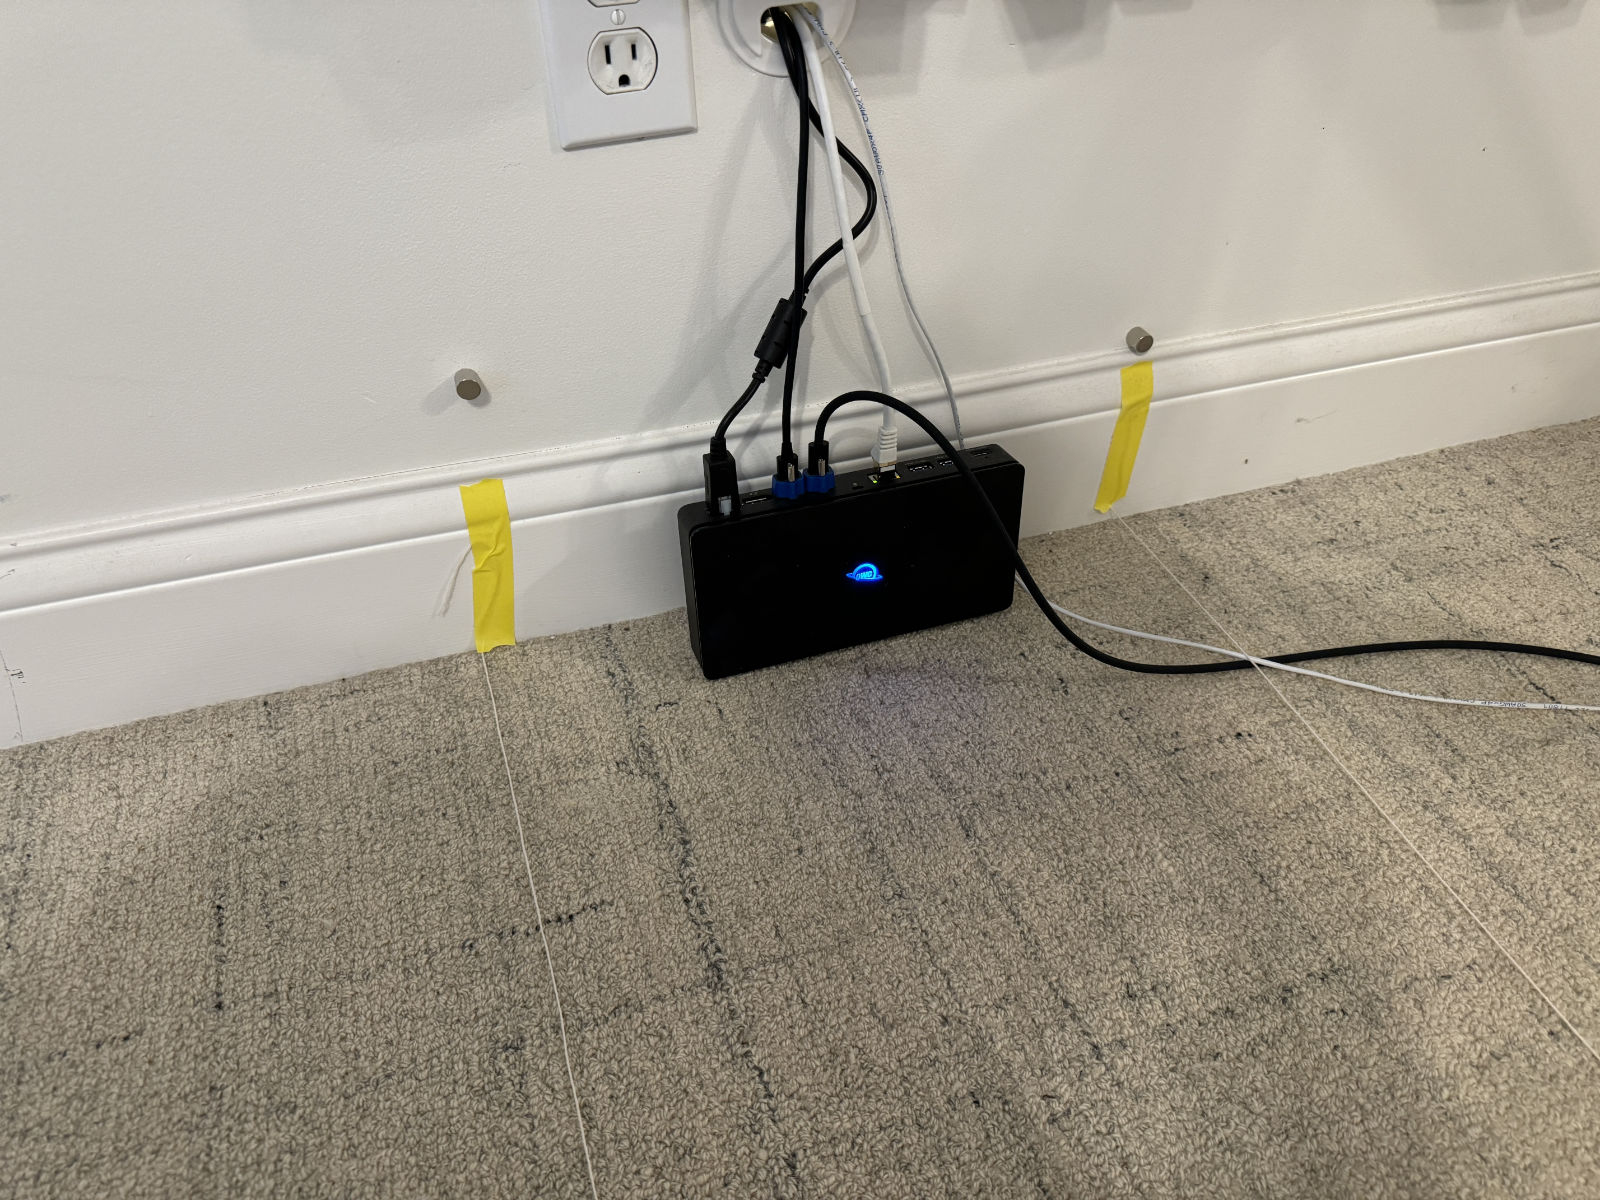
I connect my MacBook Pro to a Thunderbolt dock with 10 Gb/E and power. This doc is 4.3 inches wide, so I decided to put it in the newly cut hole and keep in under the floor. The doc requires power, which is provided by the extension cord I ran under the floor. It couldn’t be plugged into the new recessed outlet because that outlet is only accessible inside the listening room, not from under the floor.
I use Ethernet at my listening position for the Merging Anibus, 10 Gb/E dock, and Sonnett Thunderbolt AVB adapter. That’s three cables used up on day one. An extra cable for another device is handy to have available, as is another cable if I get a different Merging Anubis with two Ethernet ports.
Routing Ethernet through the floor box and connecting the romex to the power outlet in the box was simple. Once the cables were routed and attached I put the box into the hole. One nice thing about this box is the fact it doesn’t require more holes in the floor to hold it down. Three screws under the in-use cap turn little flaps that move upward to tighten the box to the floor.
The usual caveat of “make sure you have a professional install something like this and do it to the local code” applies.
Wrap Up
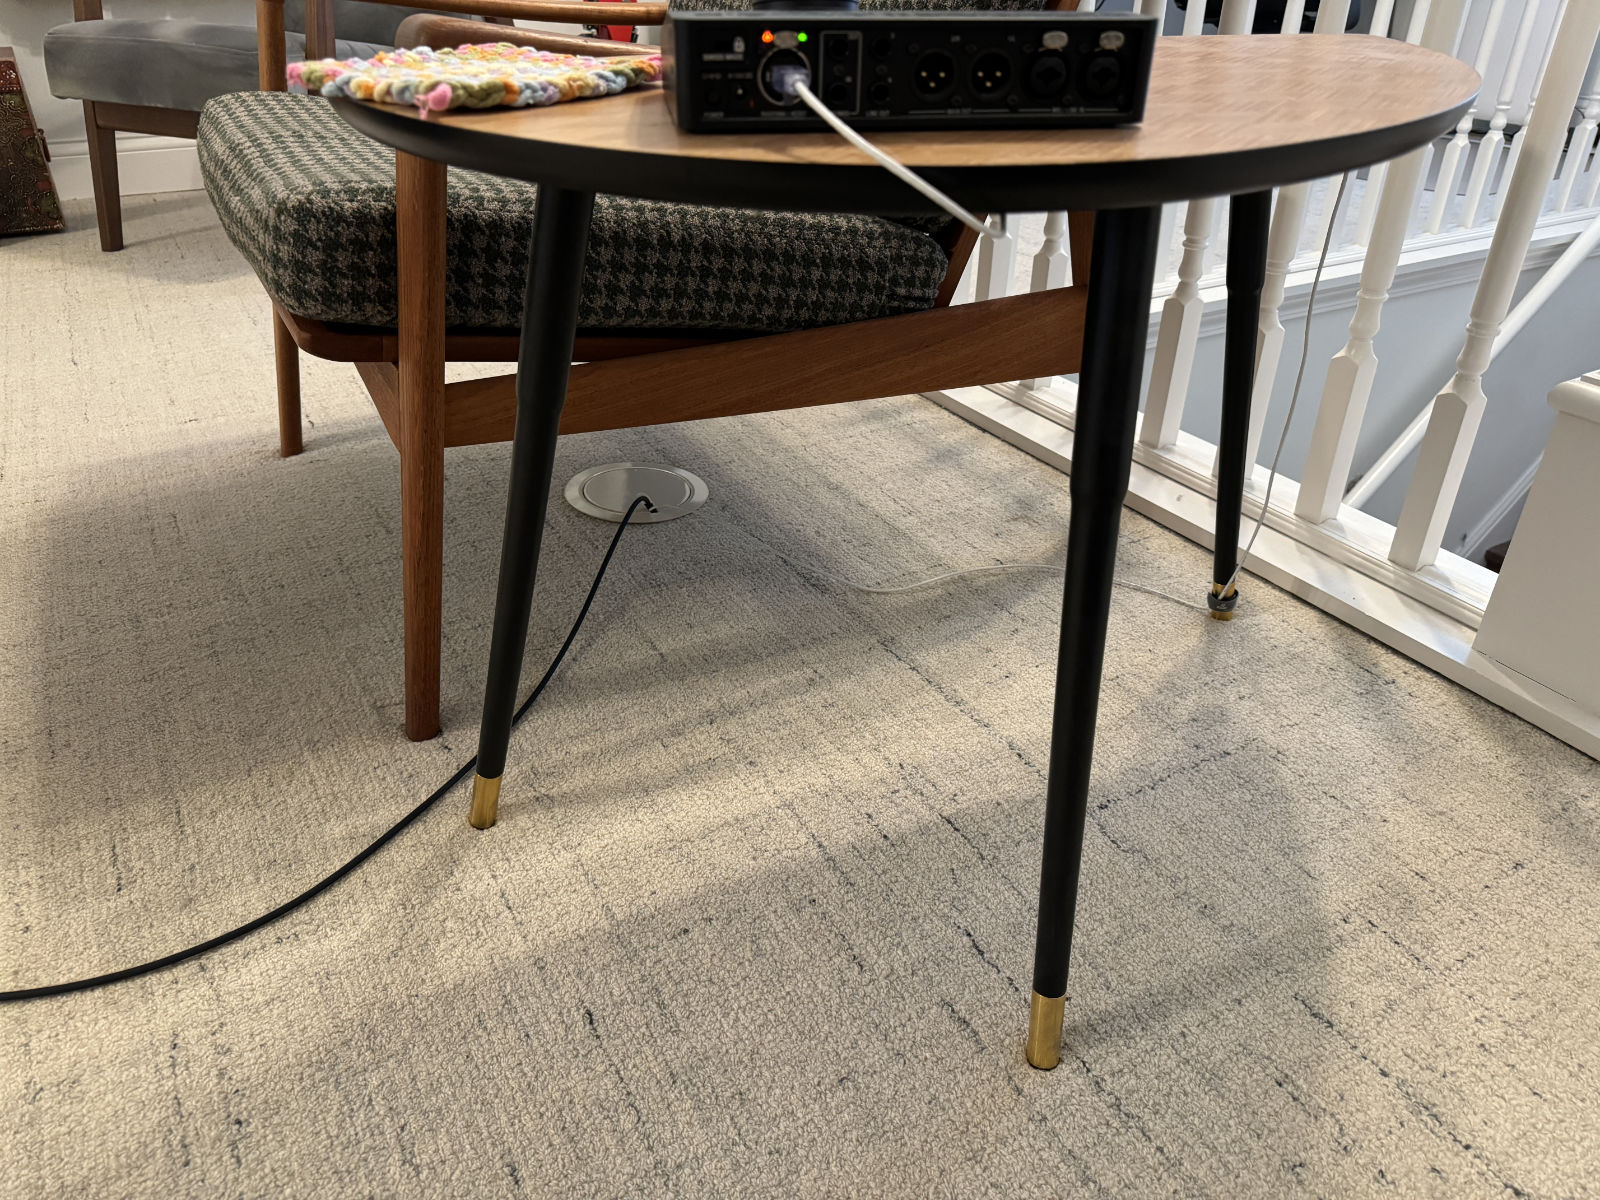
I’m very happy I finally installed the recessed floor box. No more cables running across the floor for people to trip on or for me to look at with displeasure. I like how it all turned out, even the vinyl over the nickel colored cap. I wish I was a crazy enough audiophile to say it improved the sound quality of my system, but not even I will go that far :~)


Recommended Comments
Create an account or sign in to comment
You need to be a member in order to leave a comment
Create an account
Sign up for a new account in our community. It's easy!
Register a new accountSign in
Already have an account? Sign in here.
Sign In Now