Search the Community
Showing results for tags 'xeon'.
Found 2 results
-
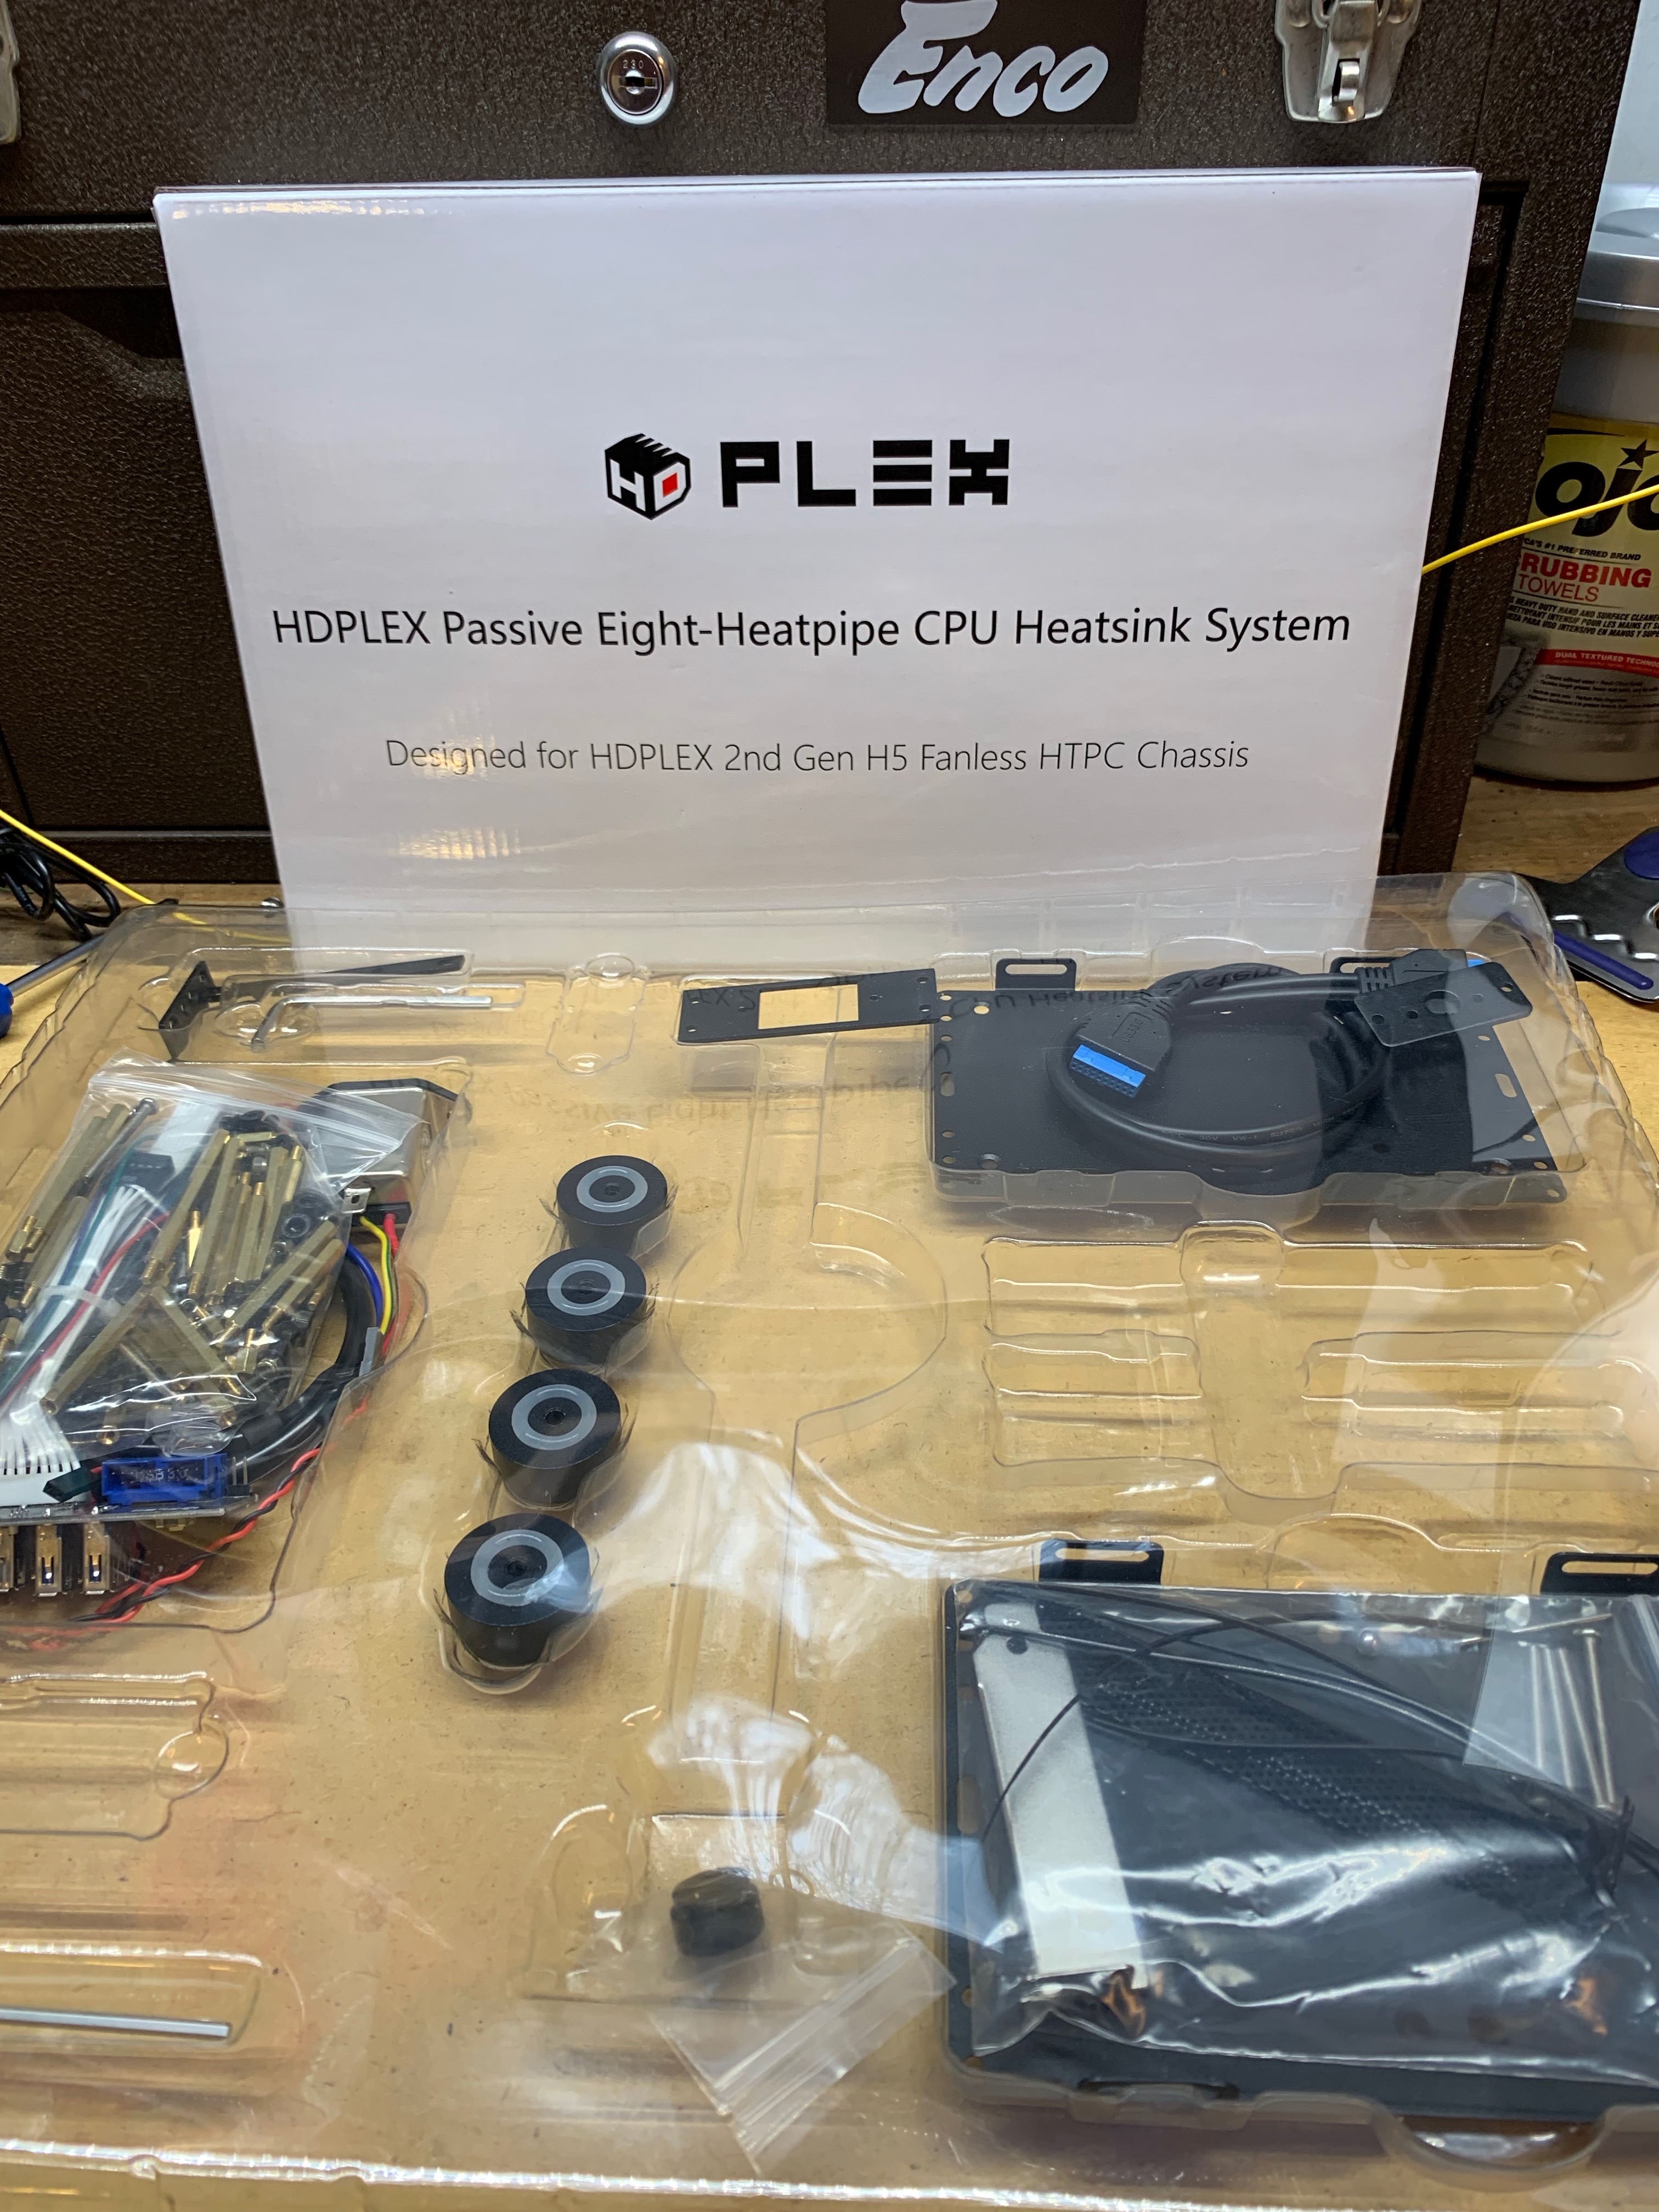
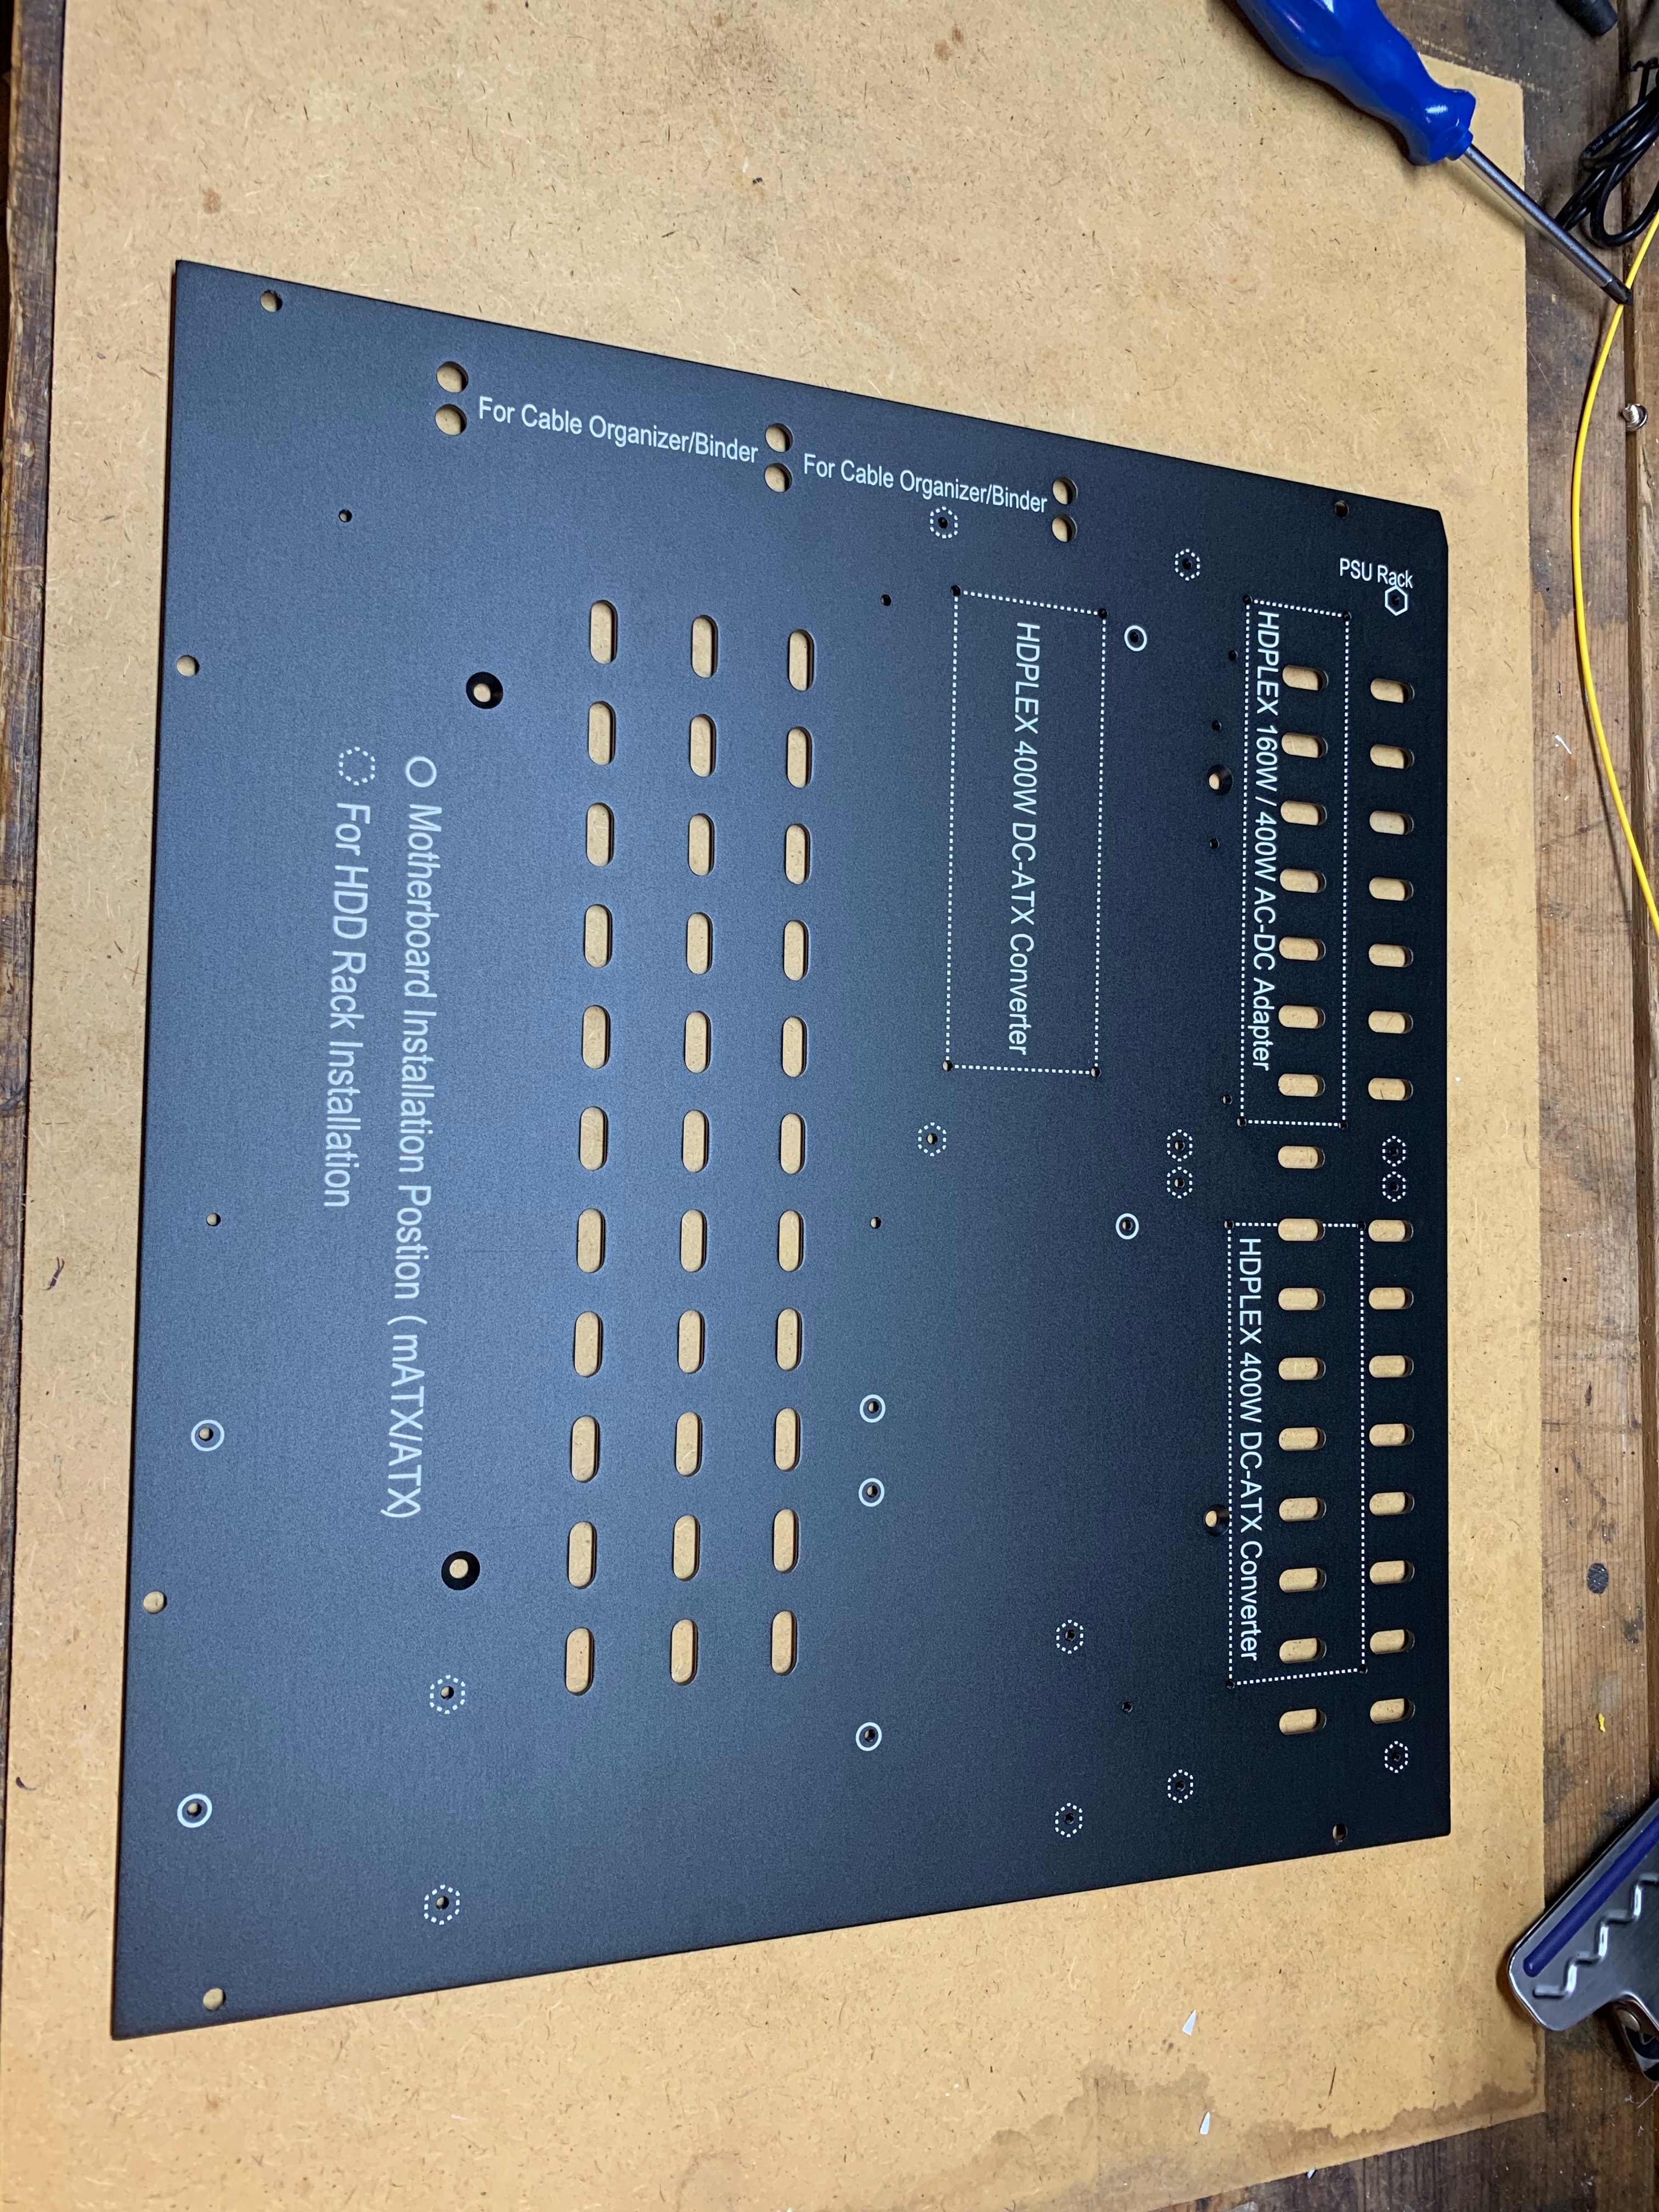
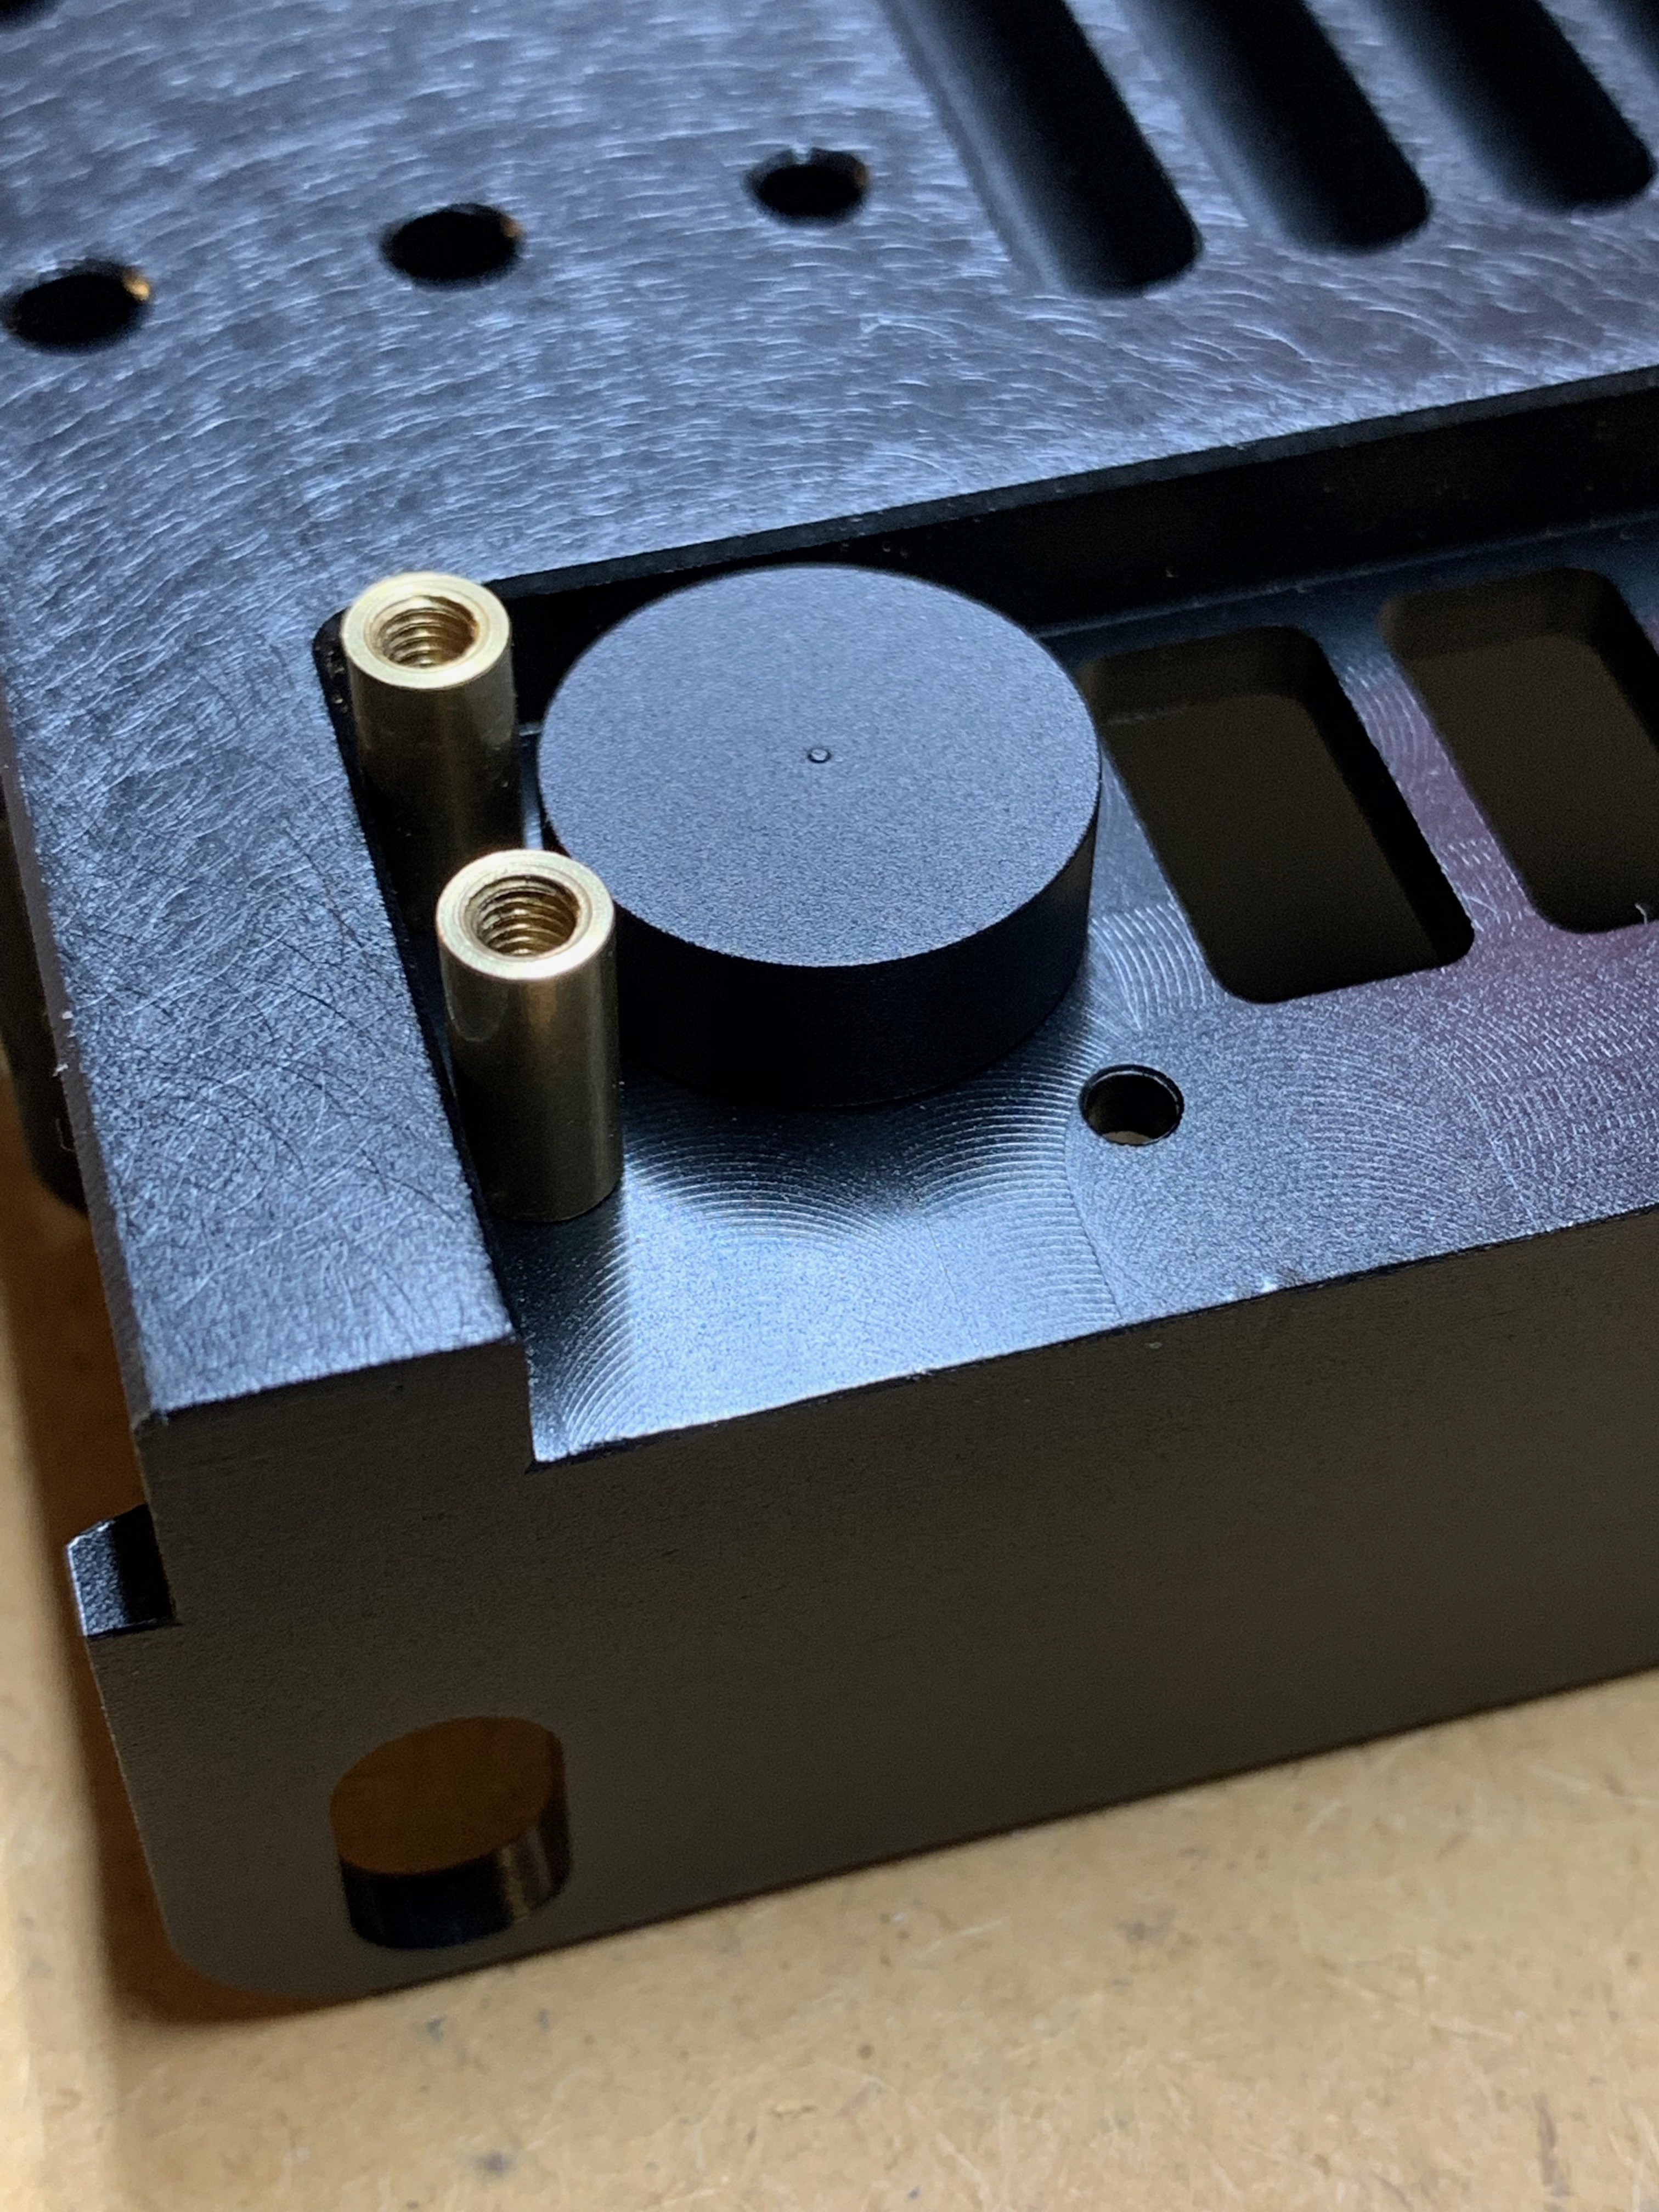
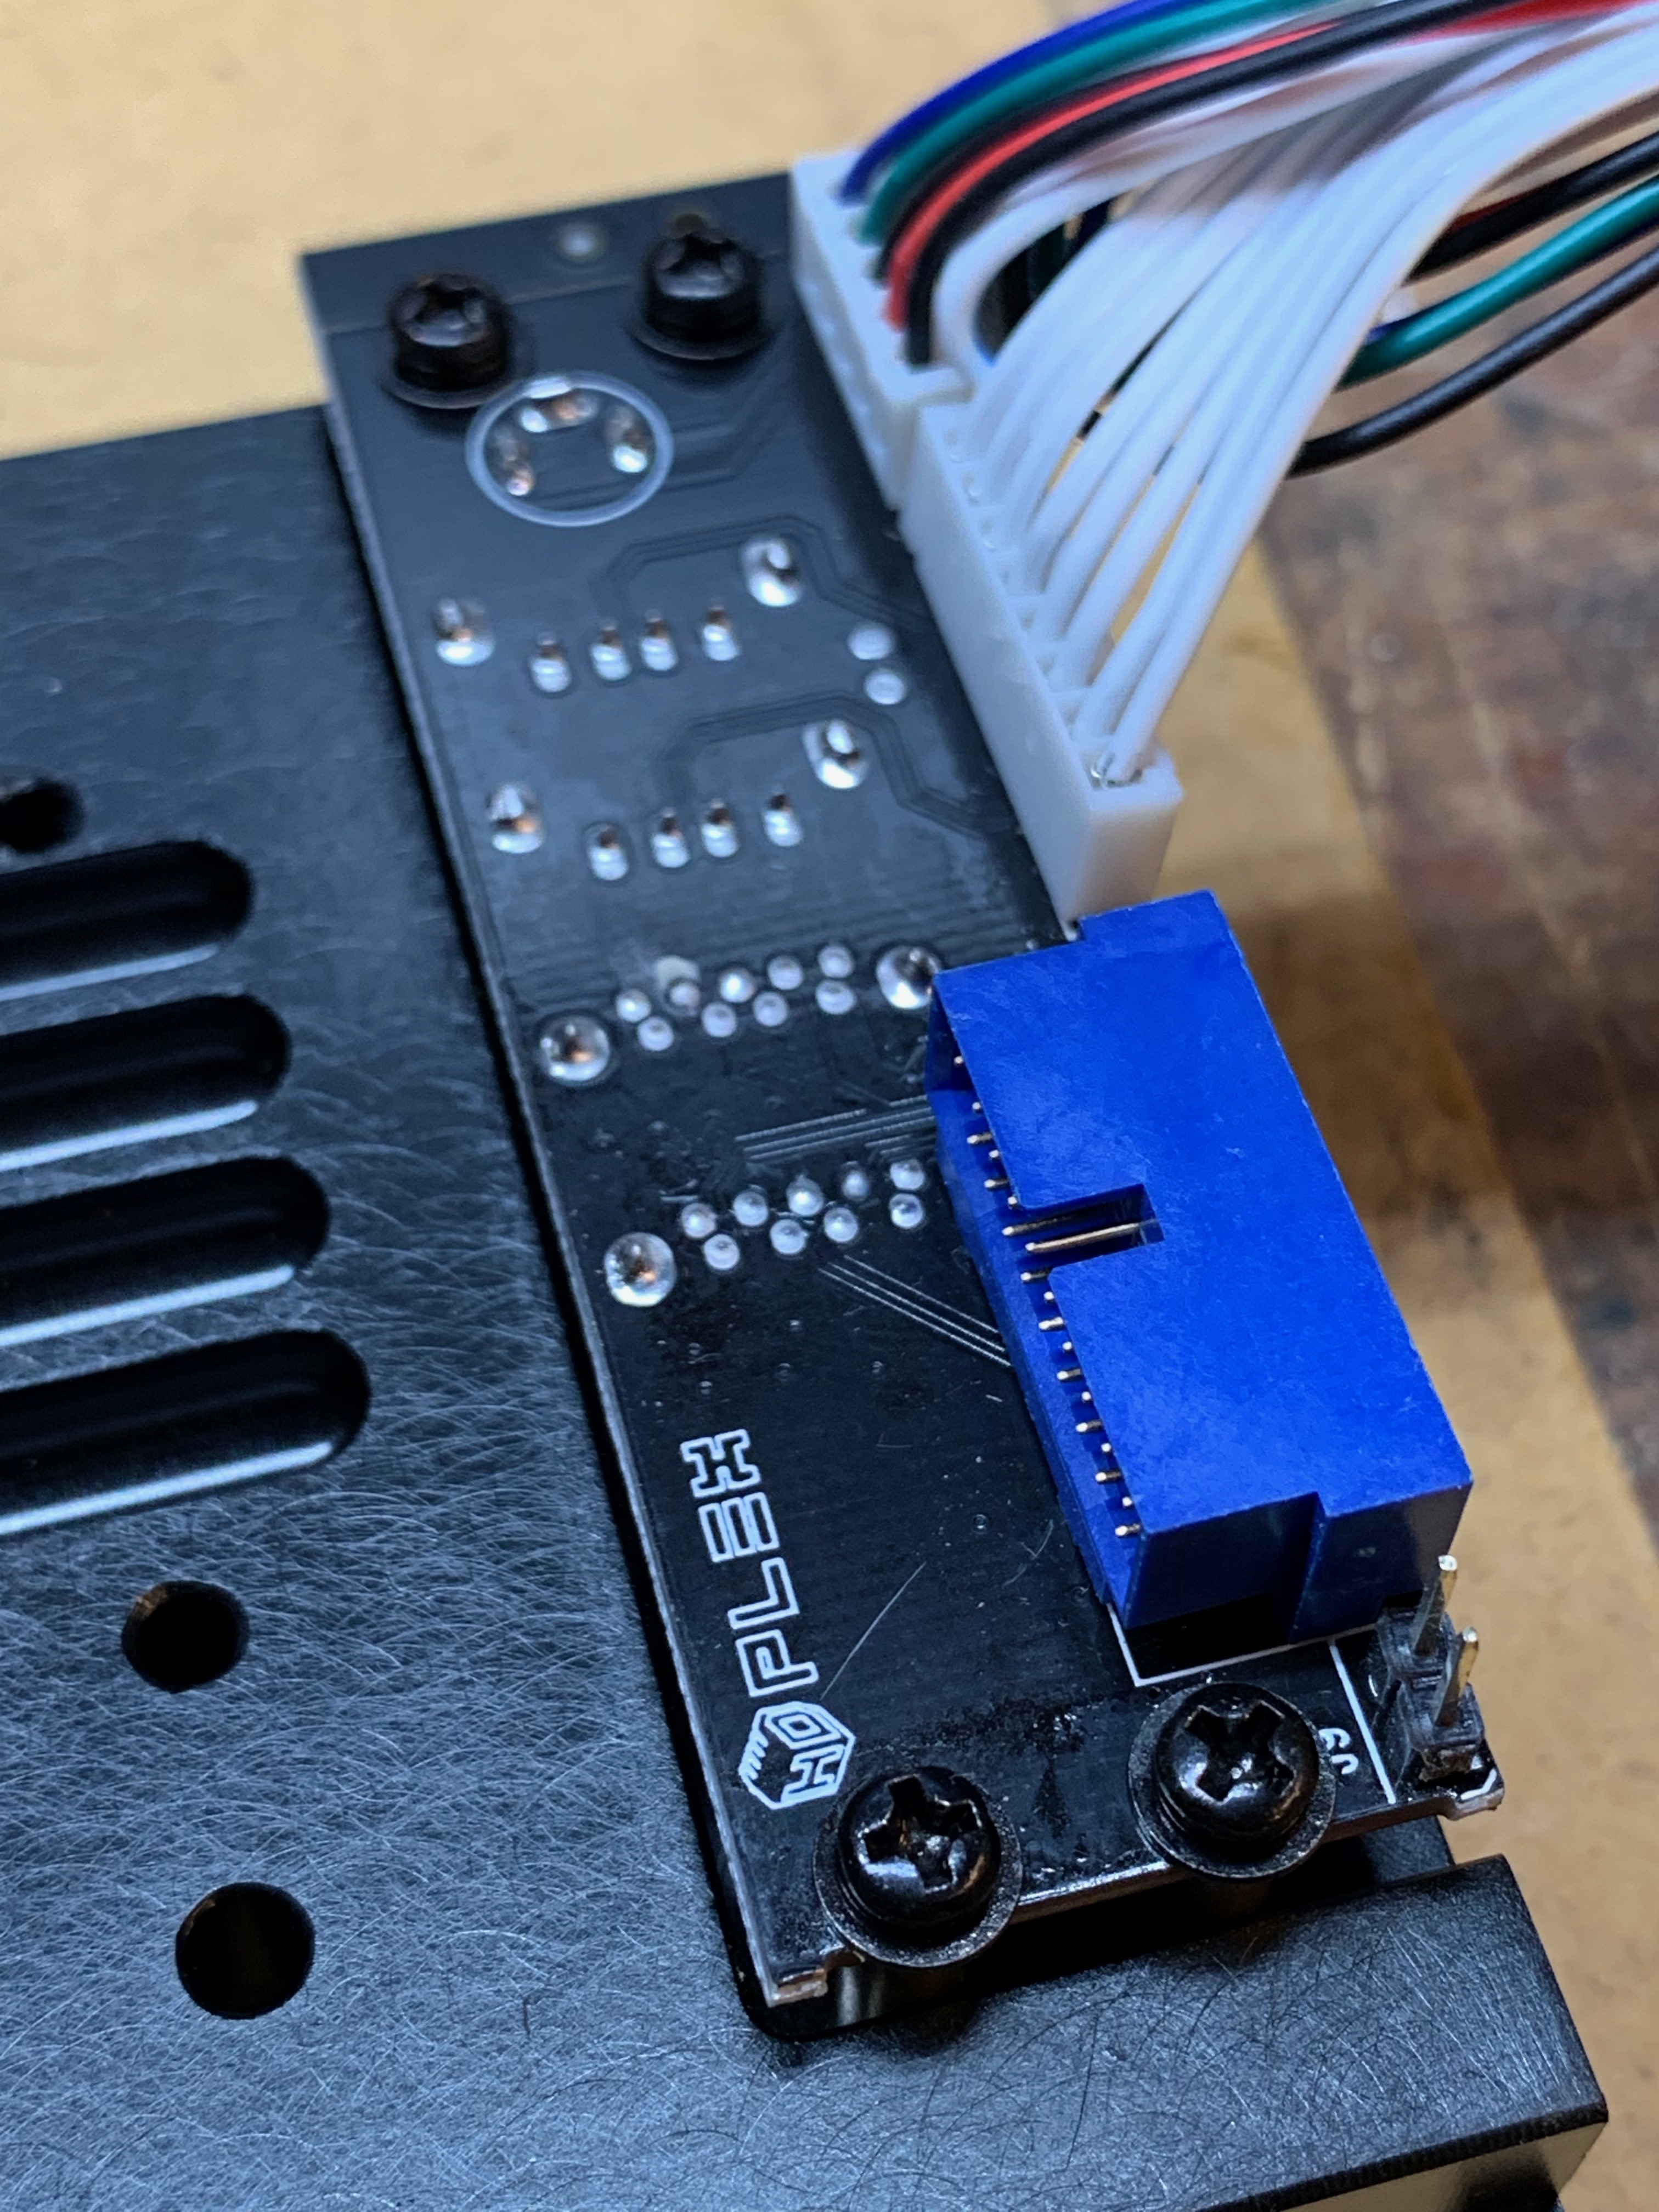
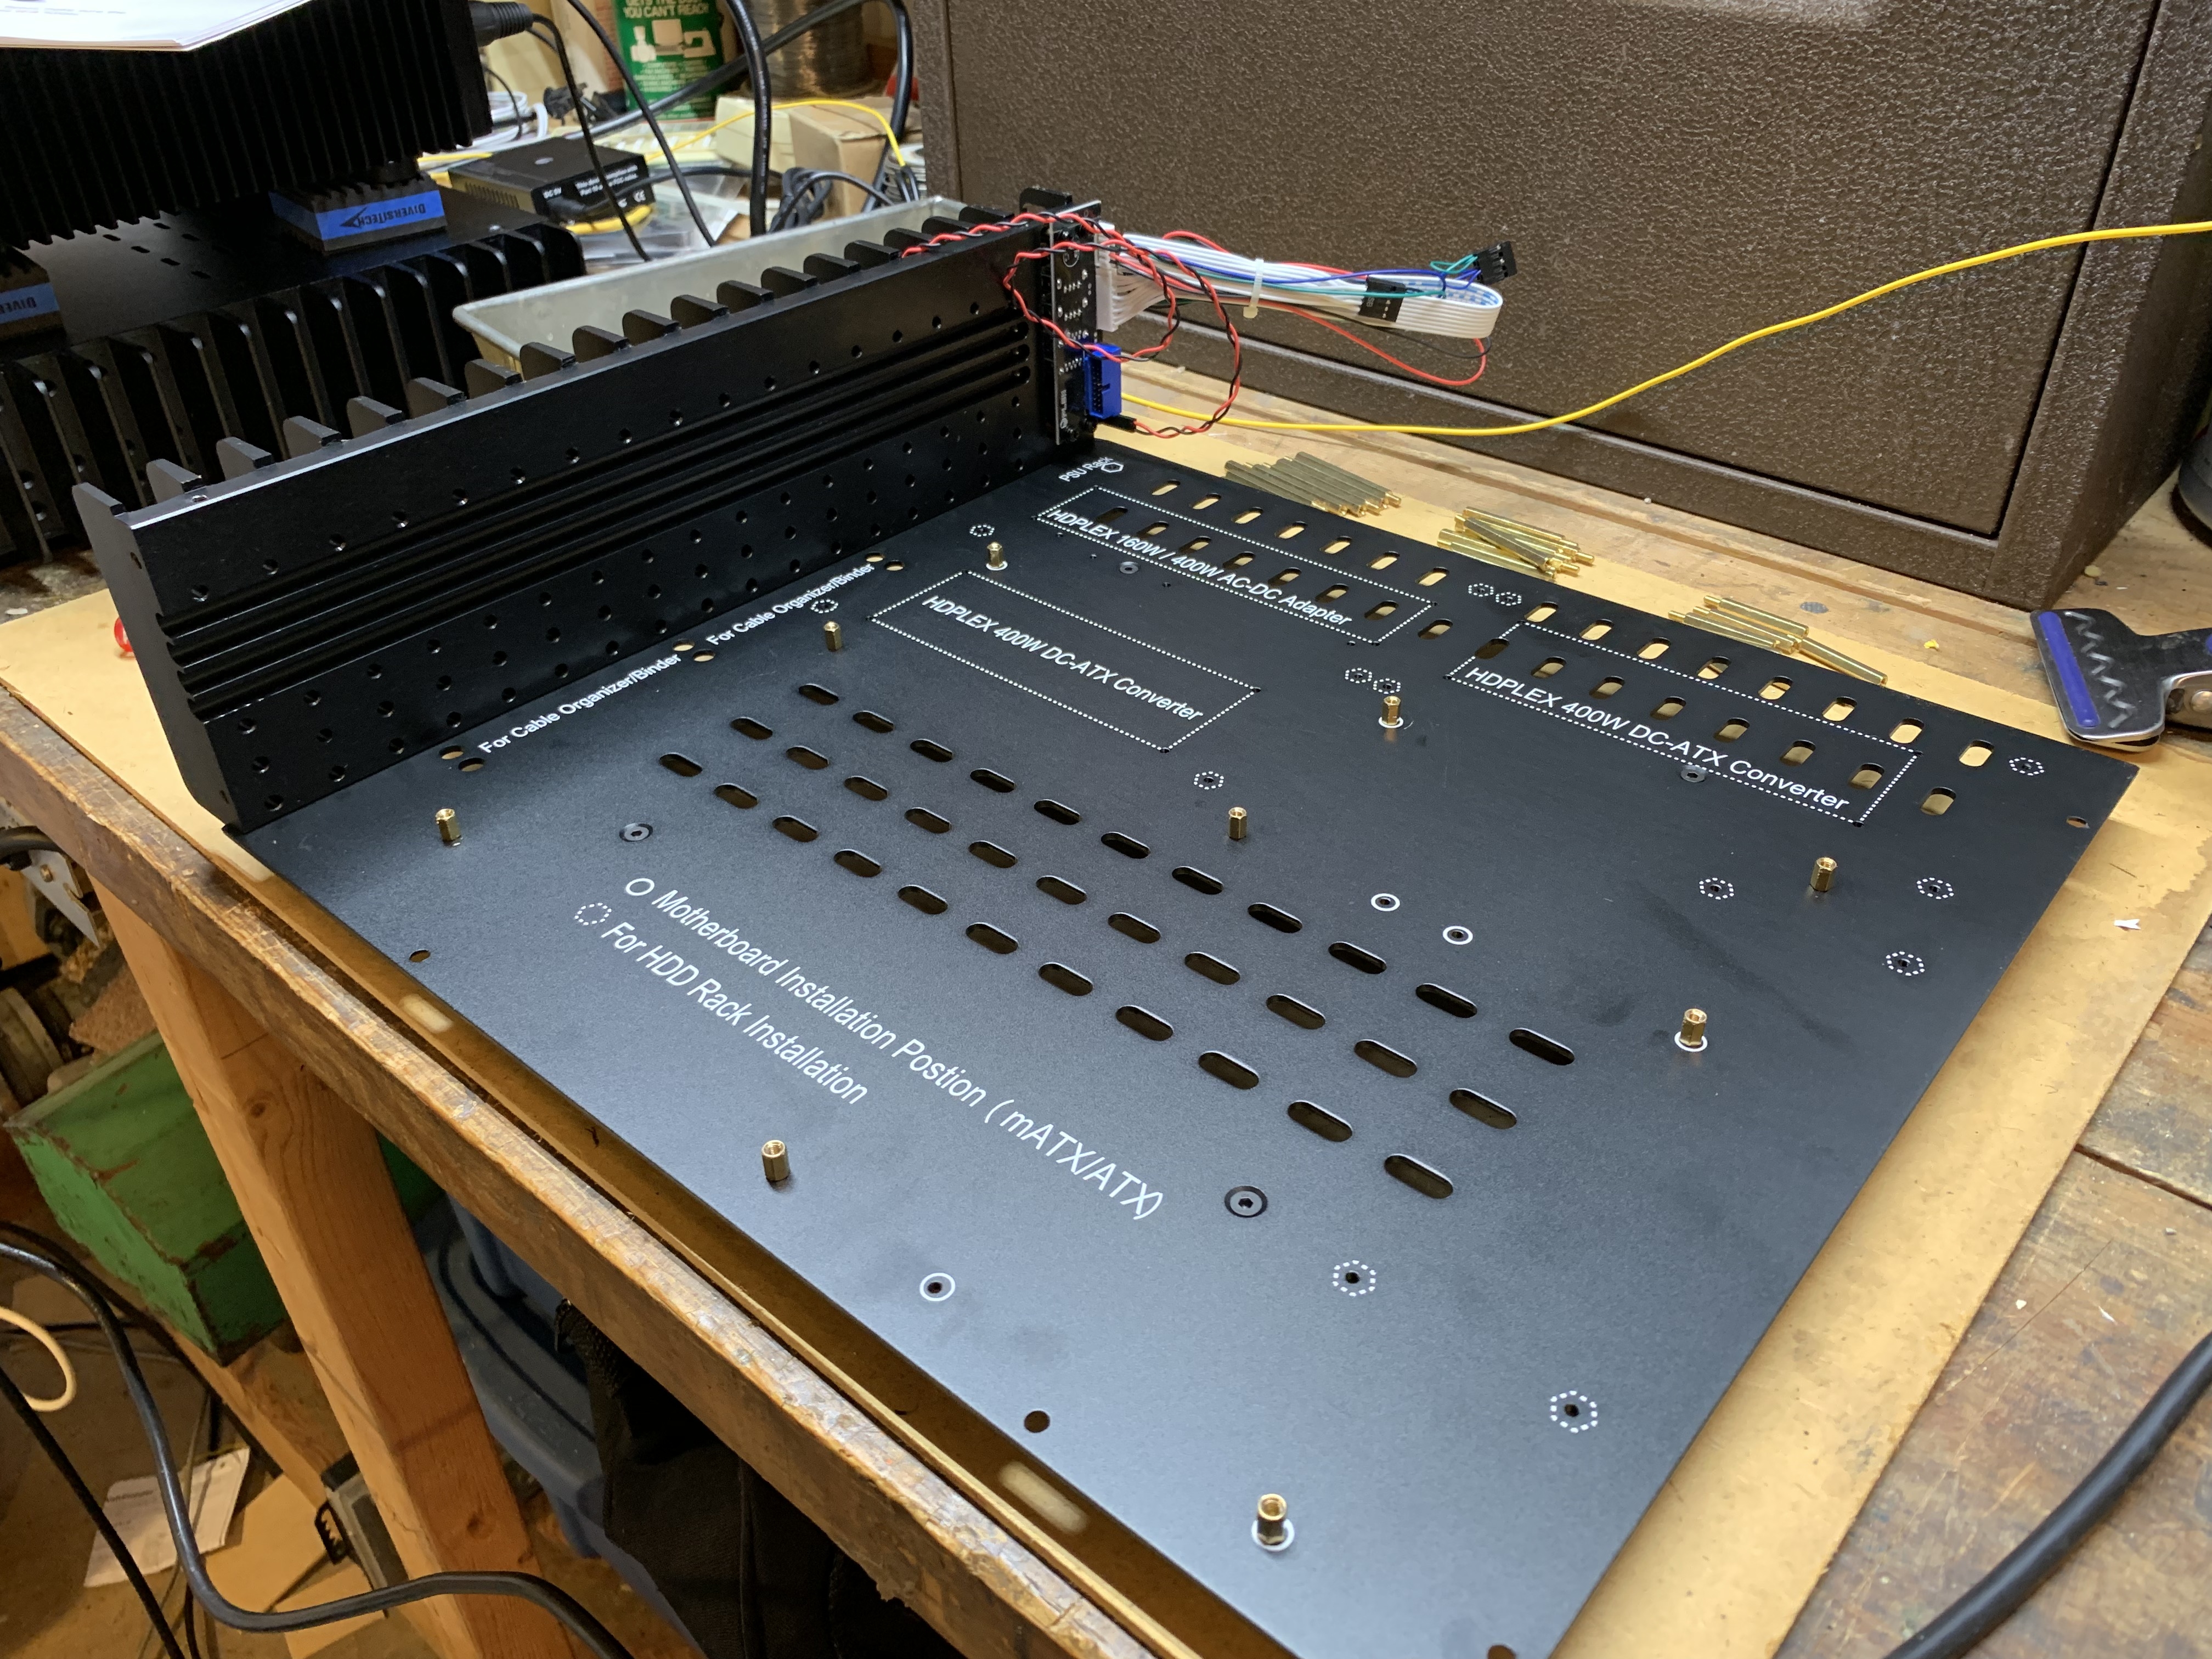
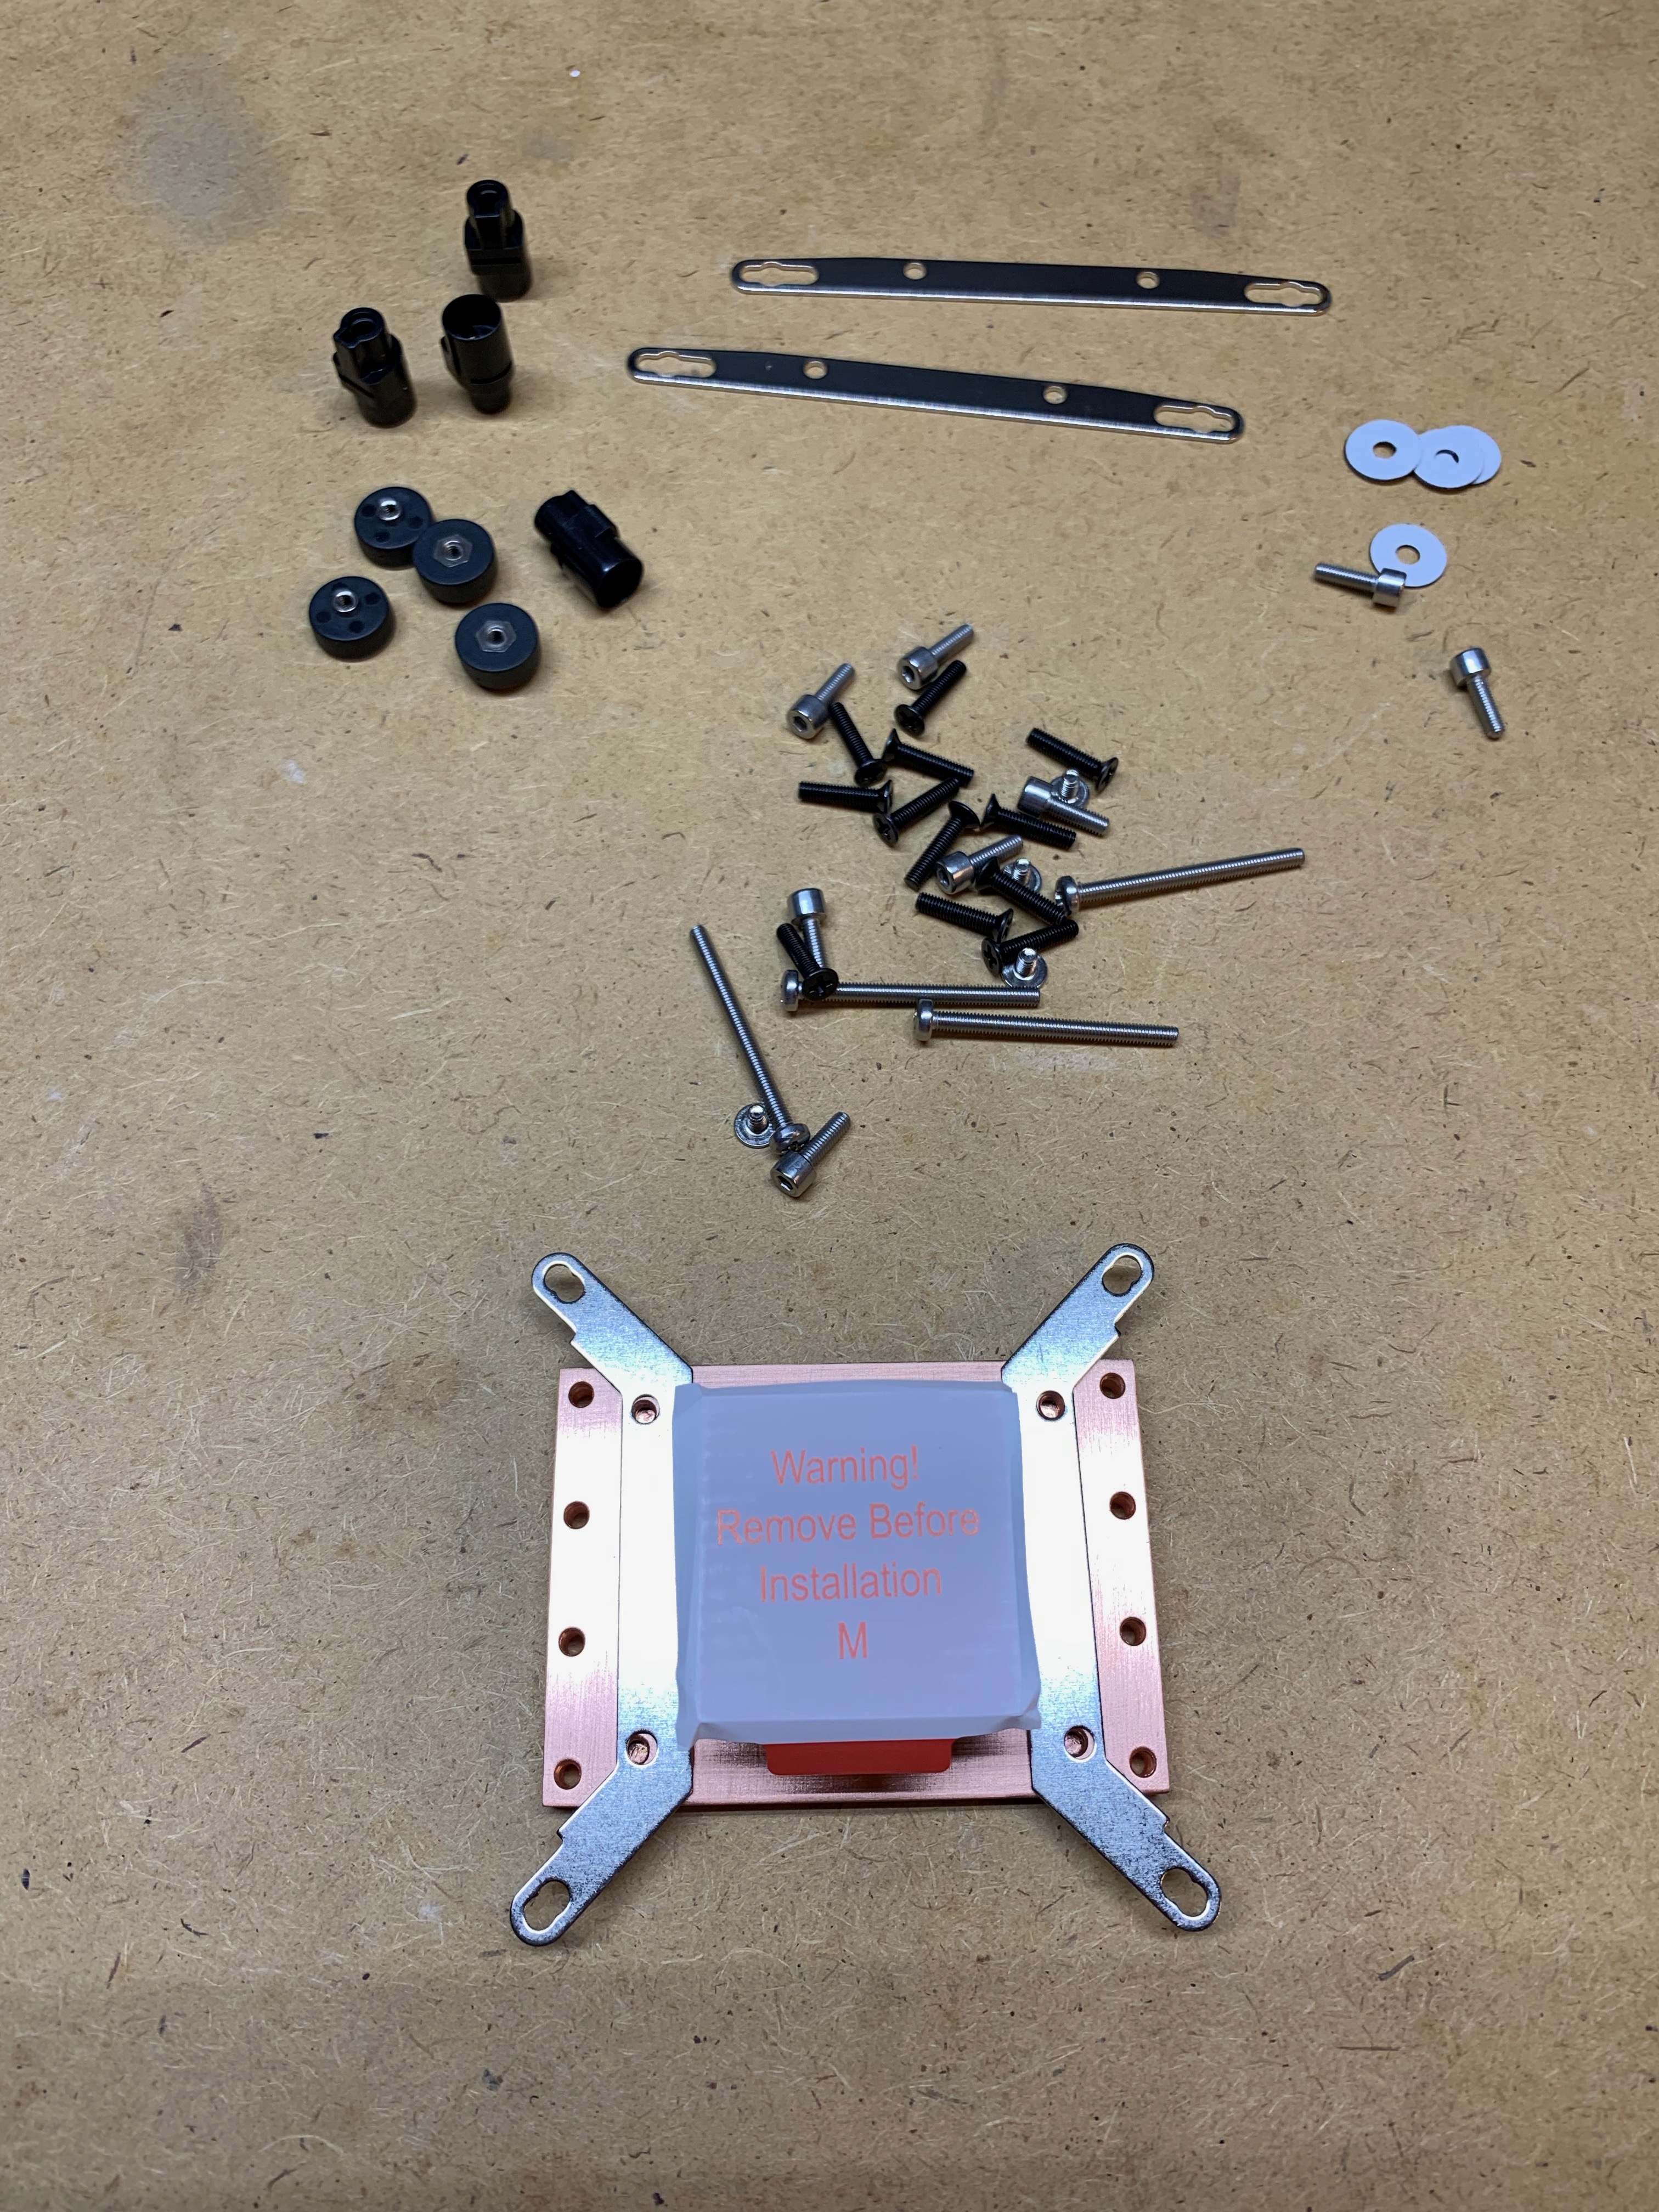
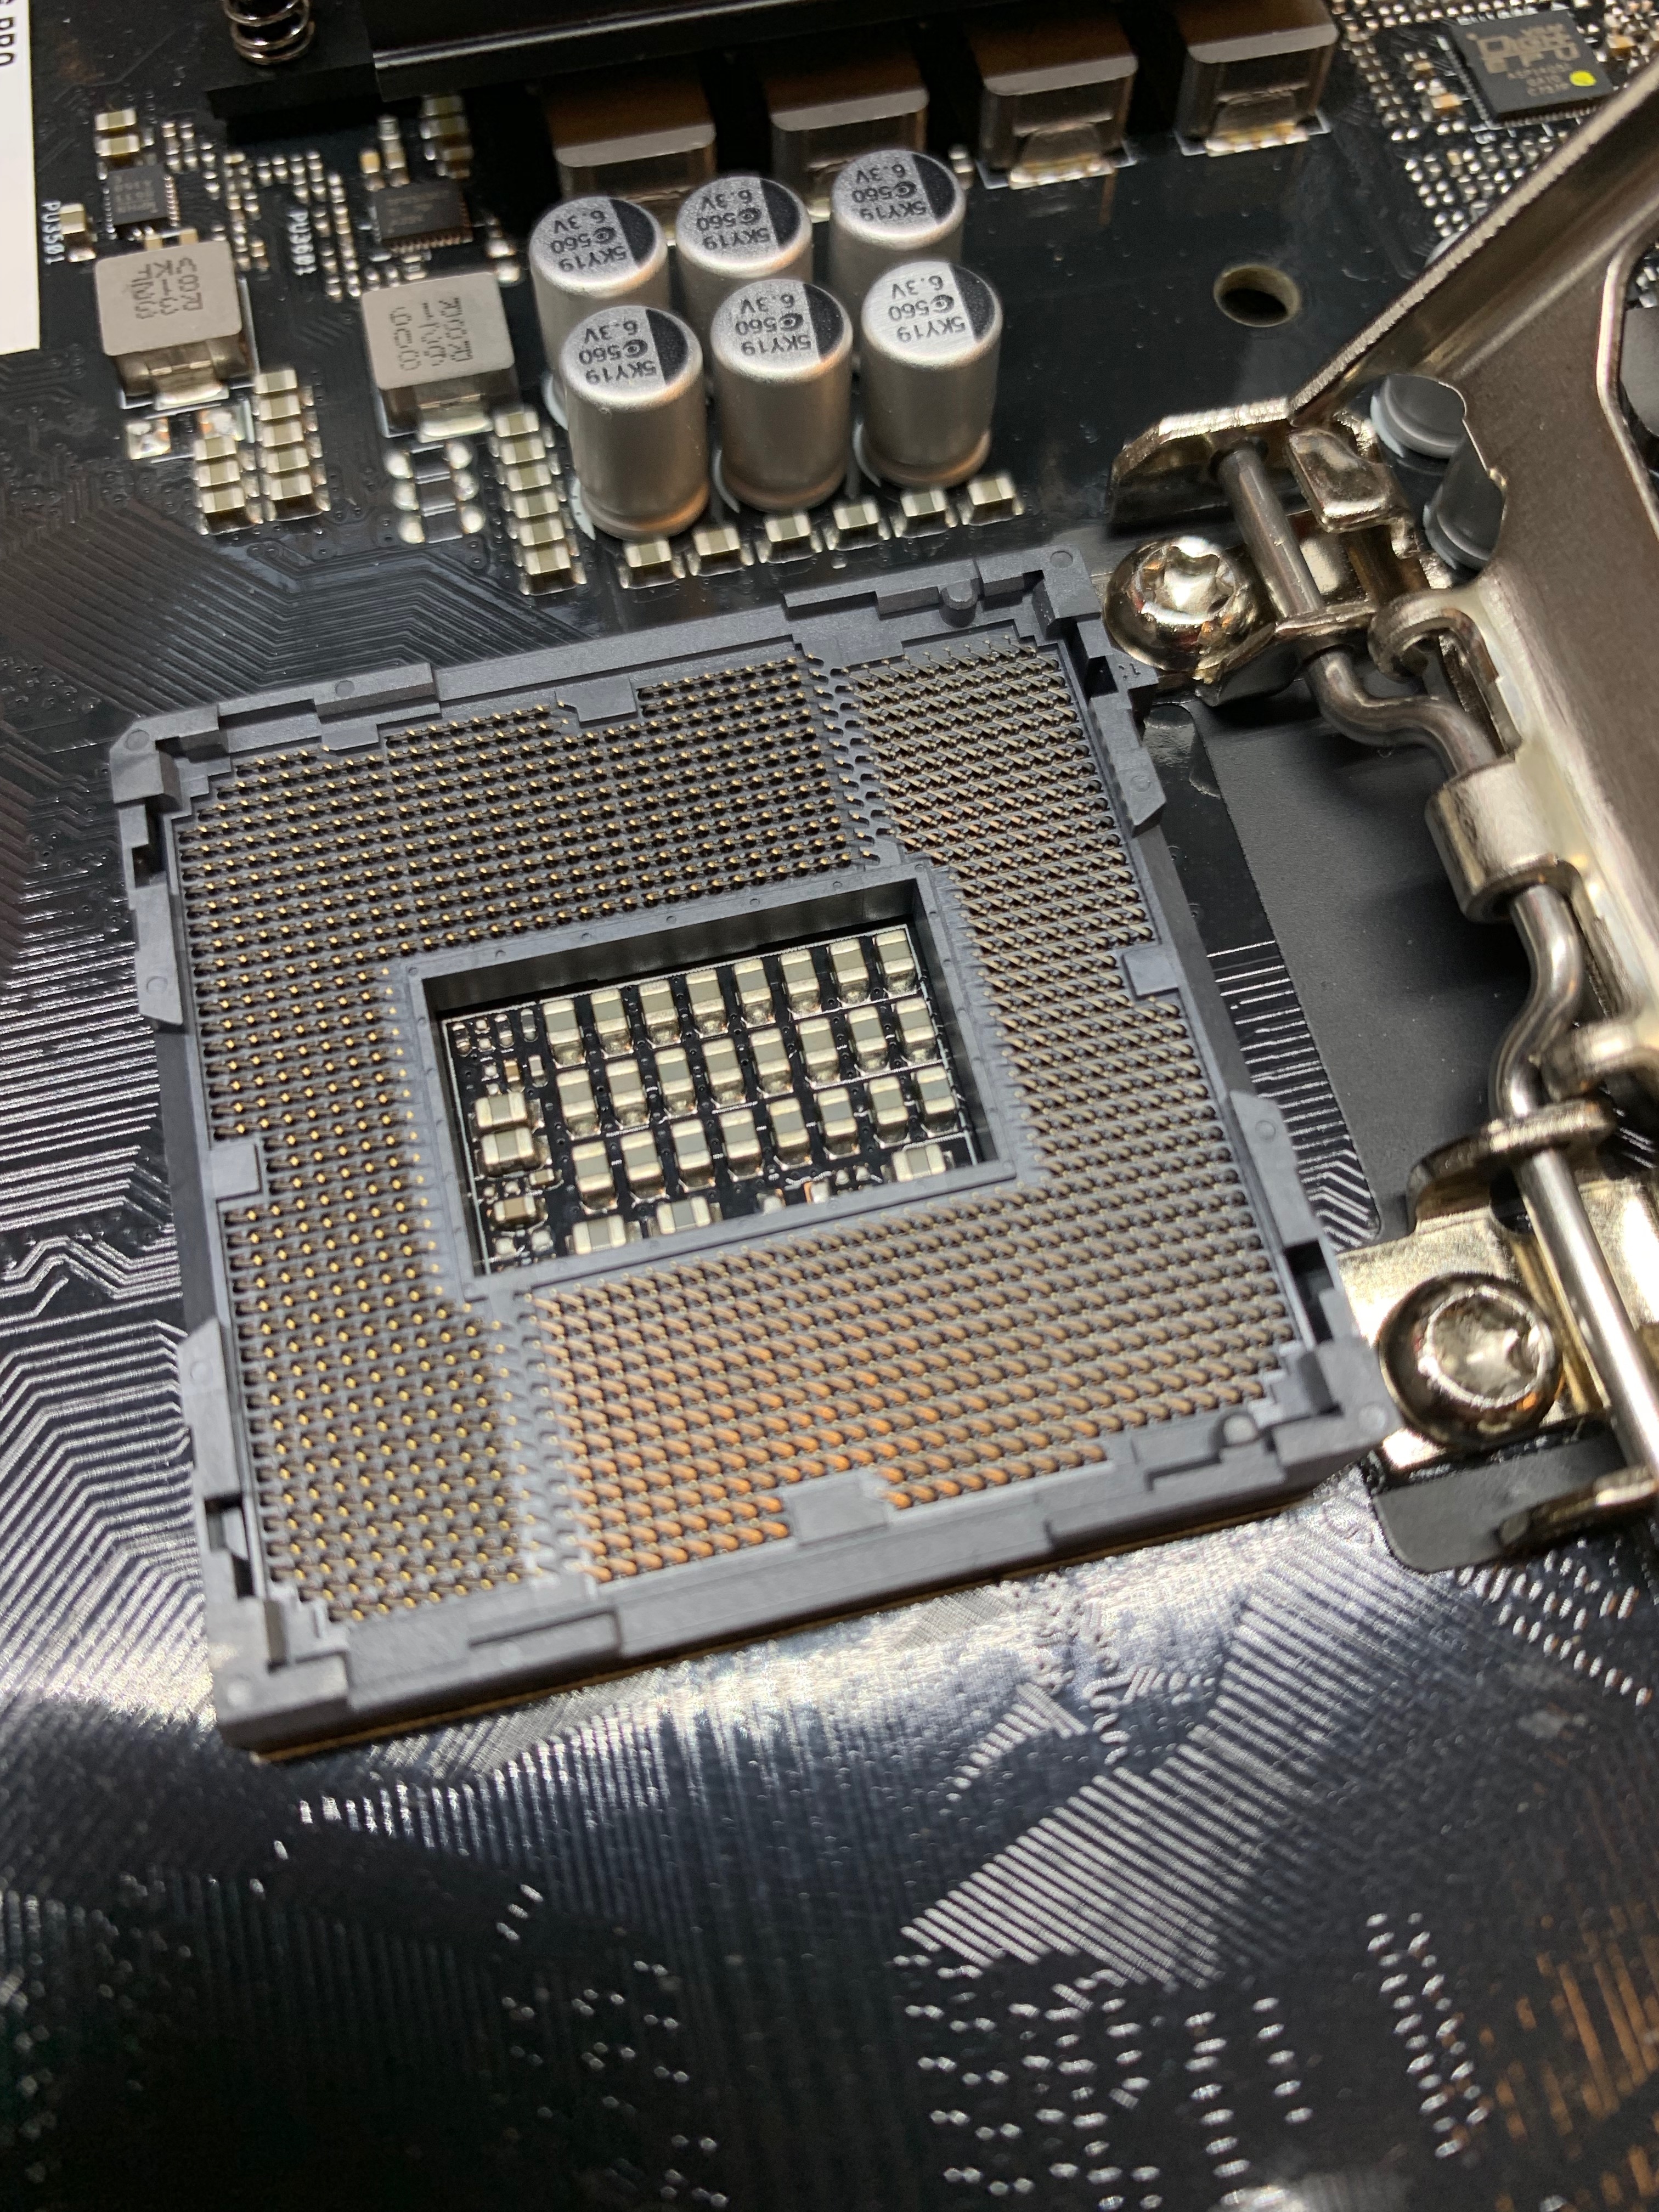
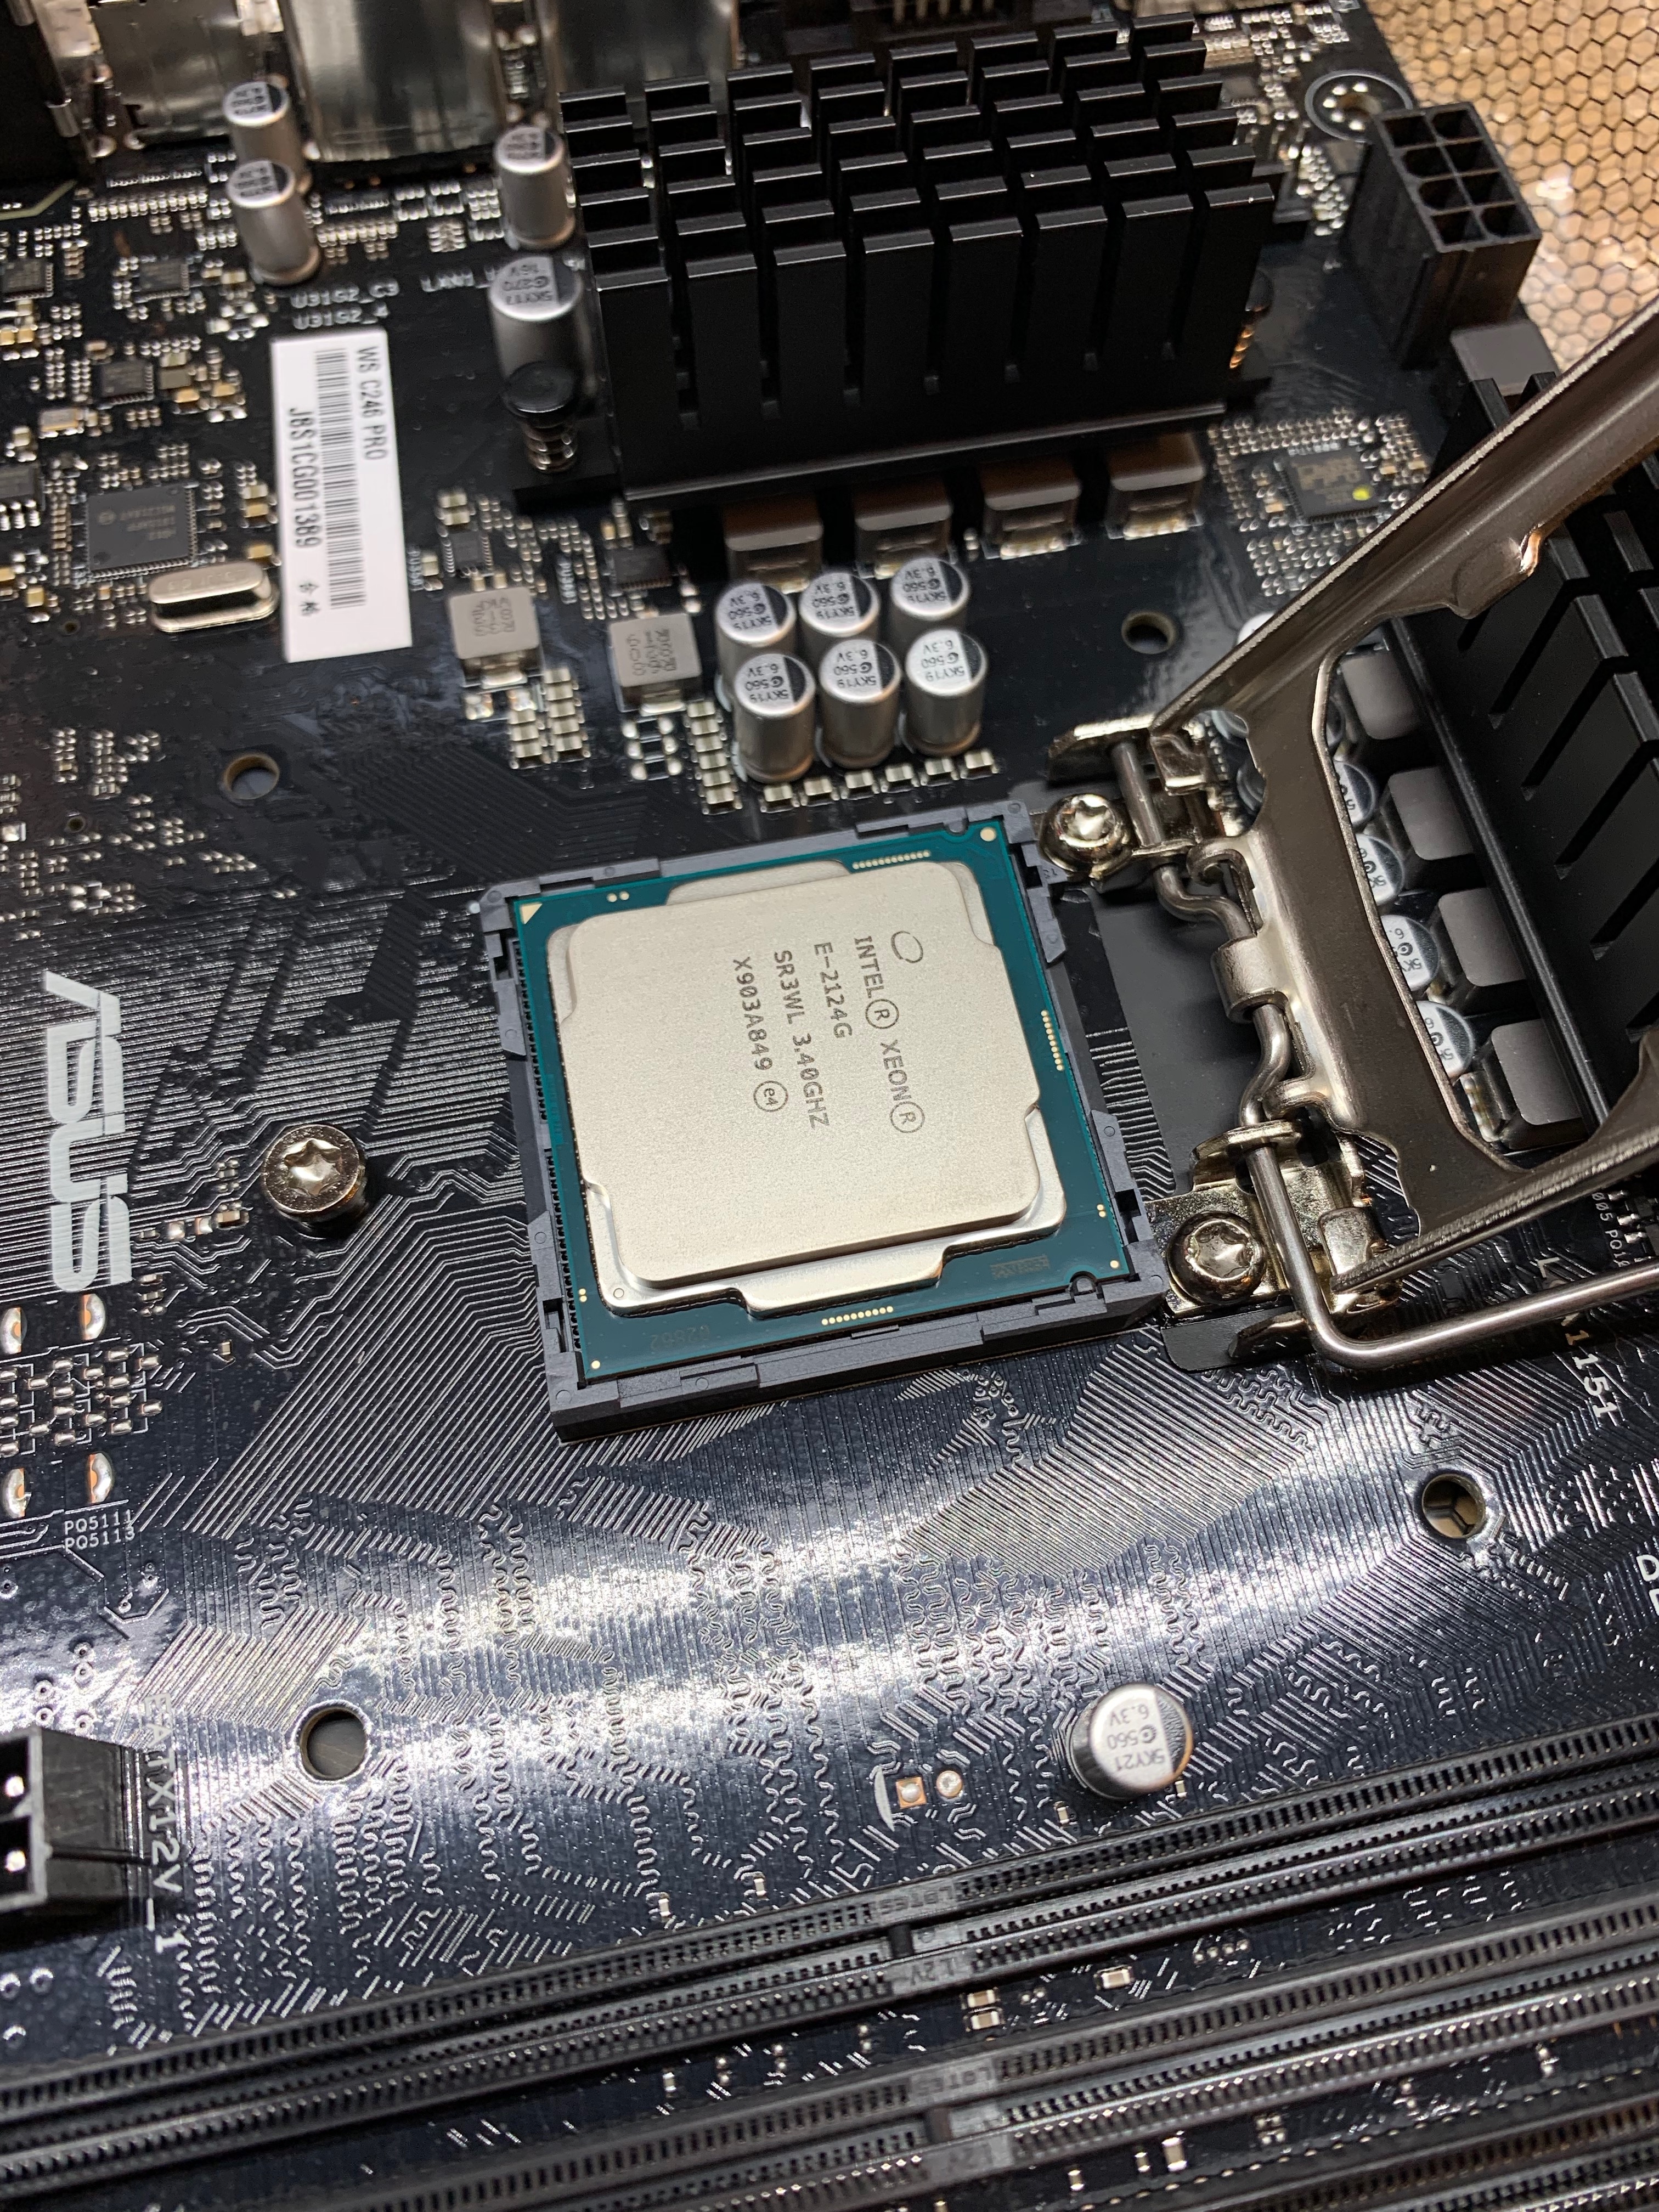
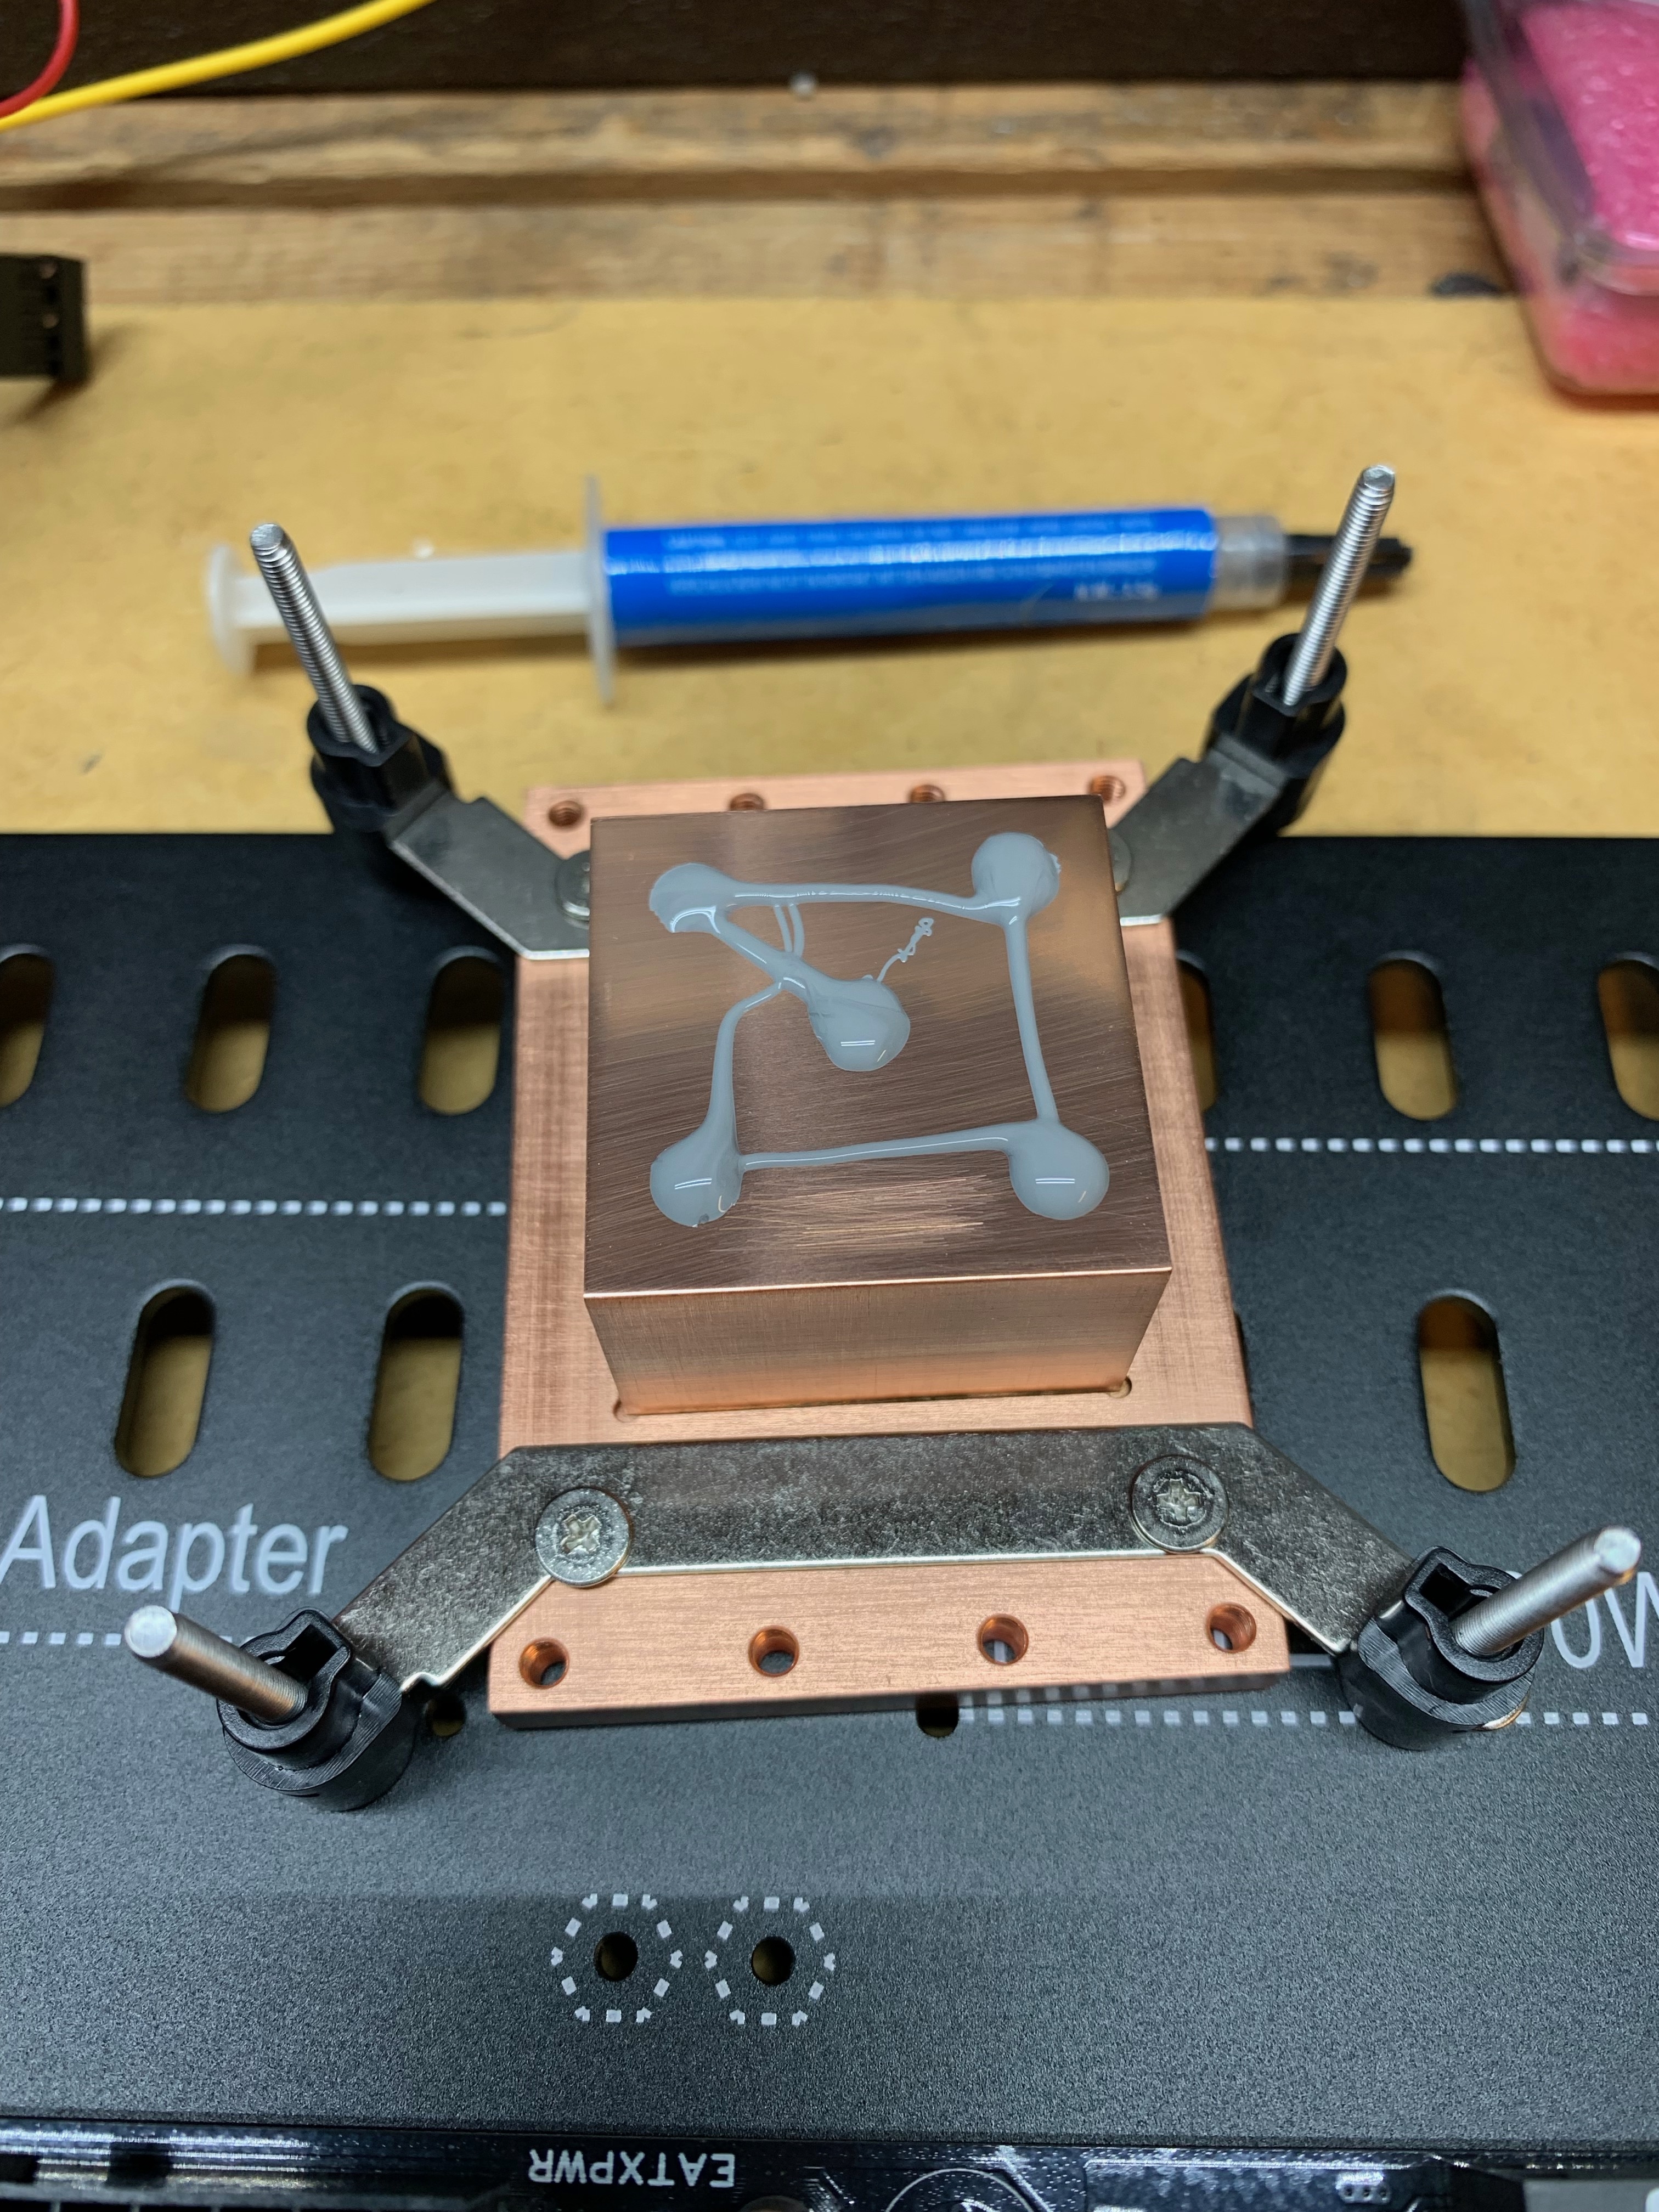
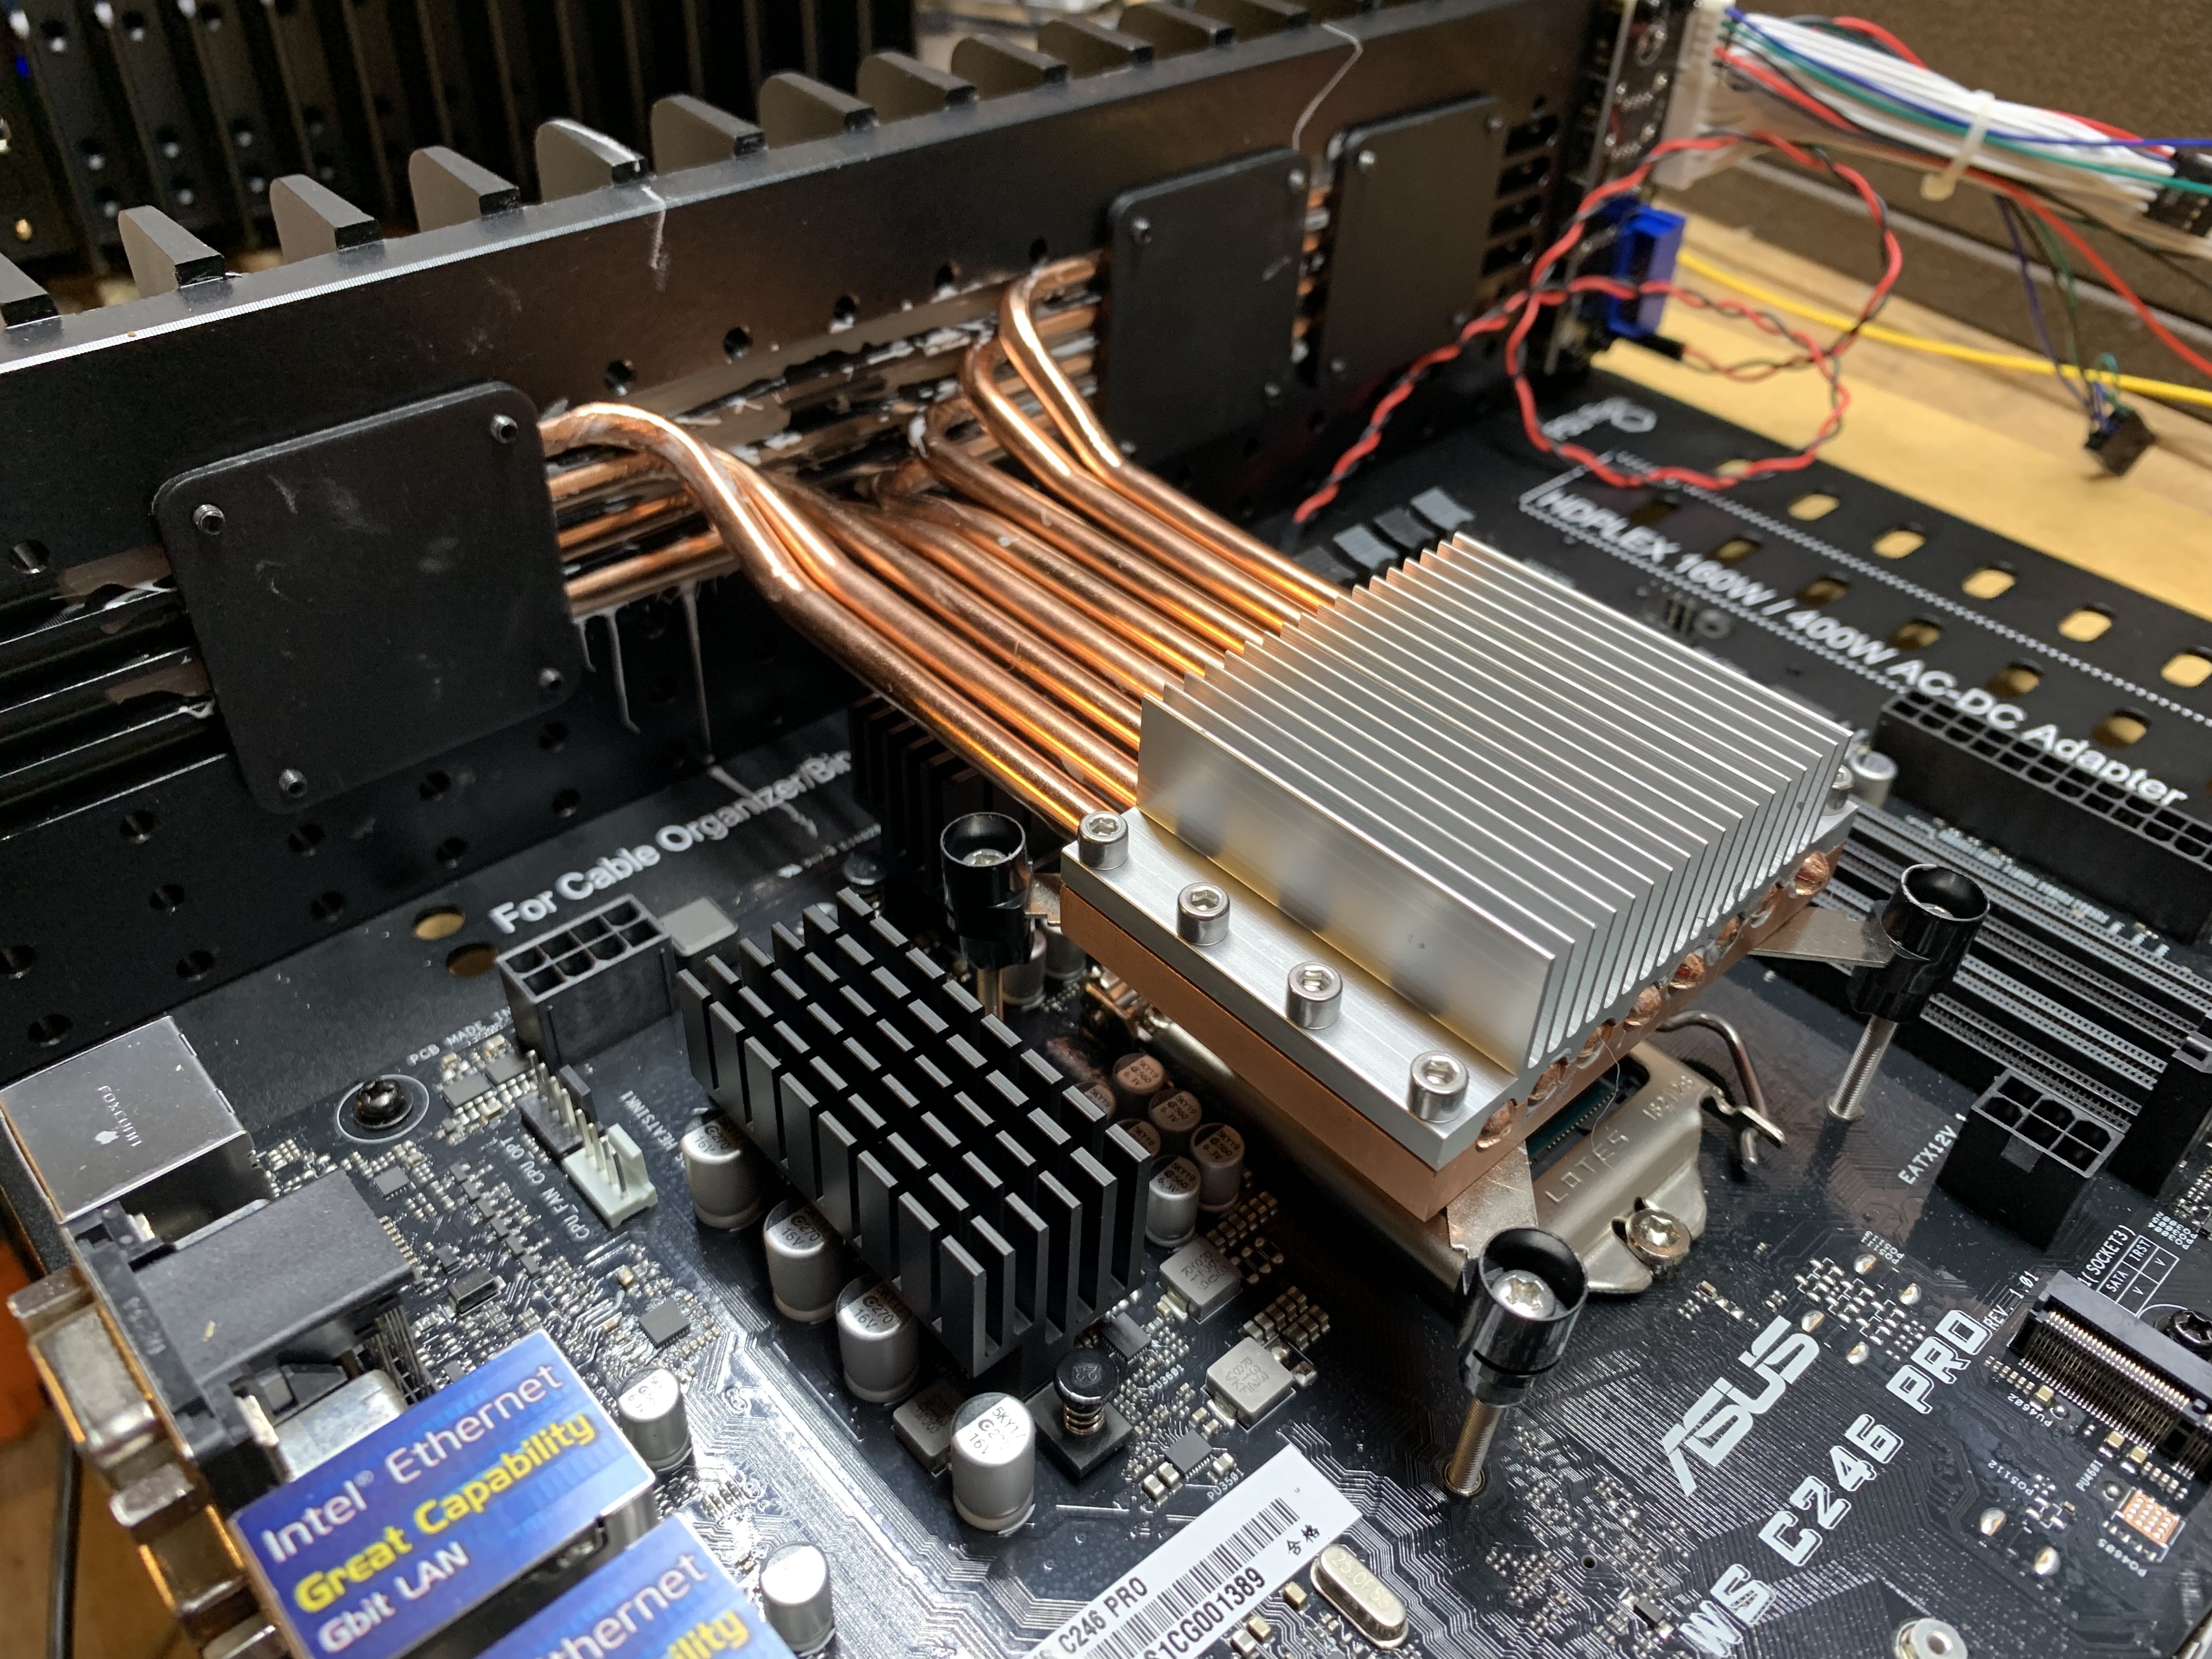
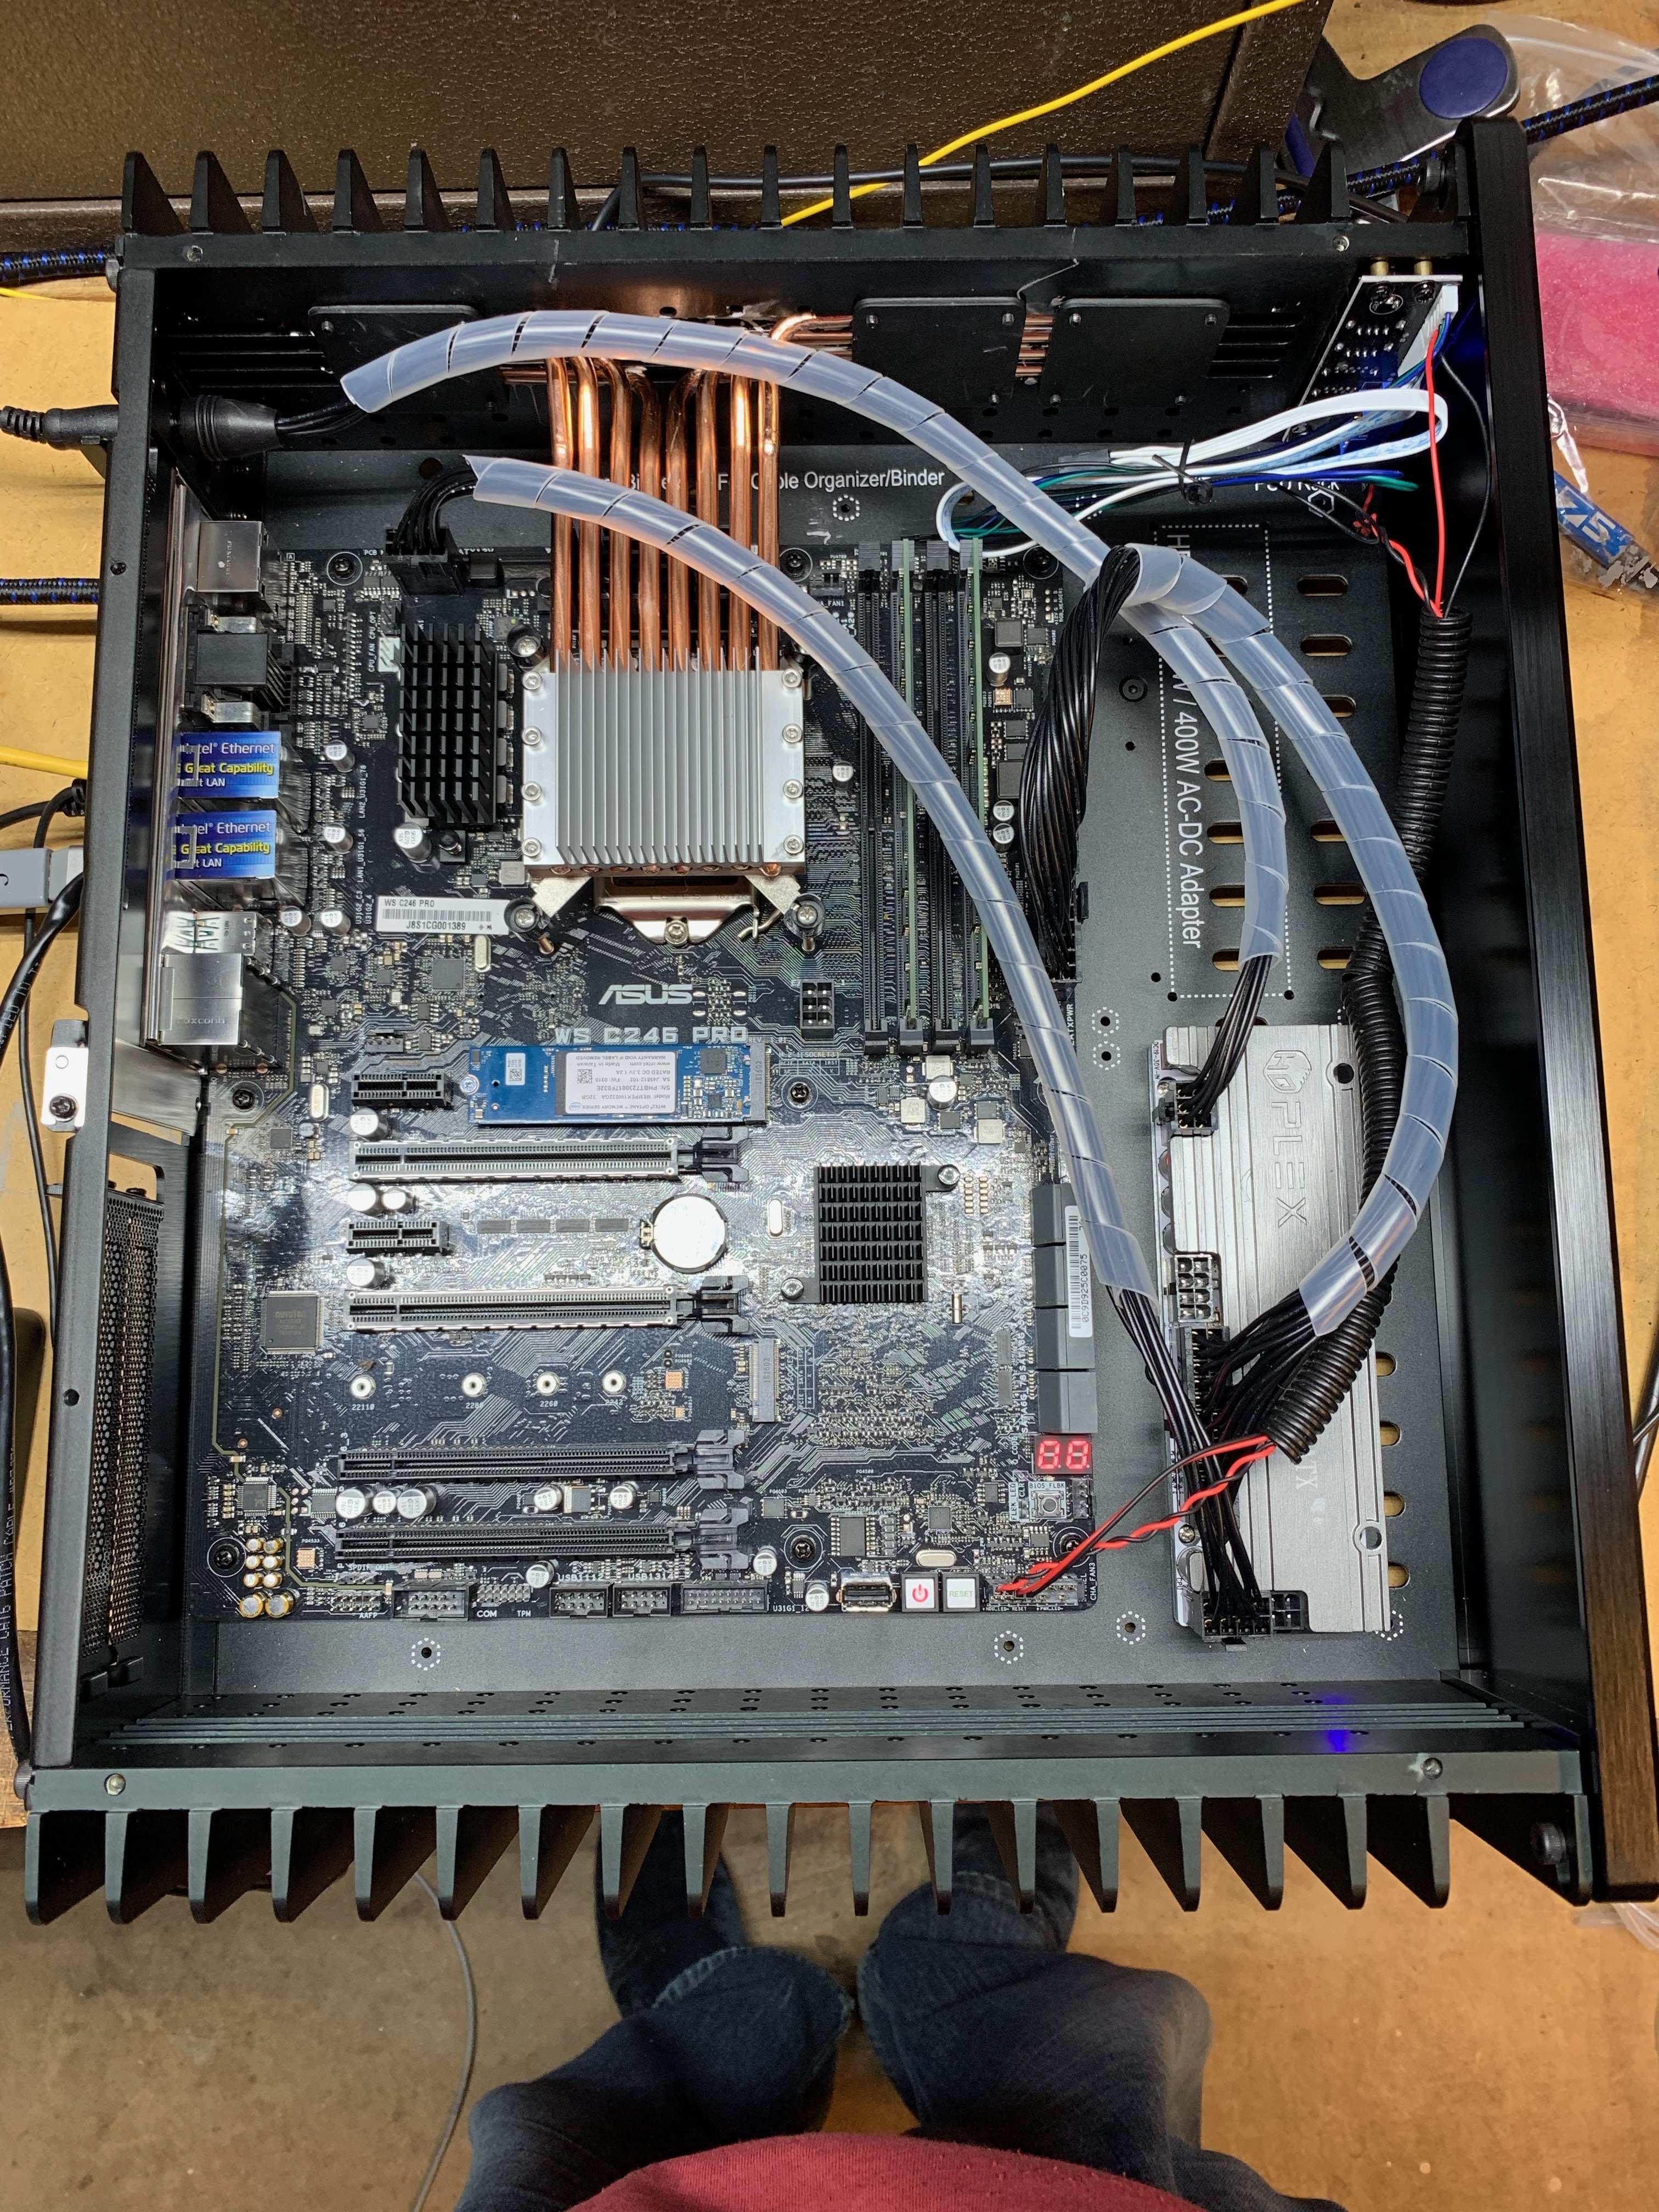
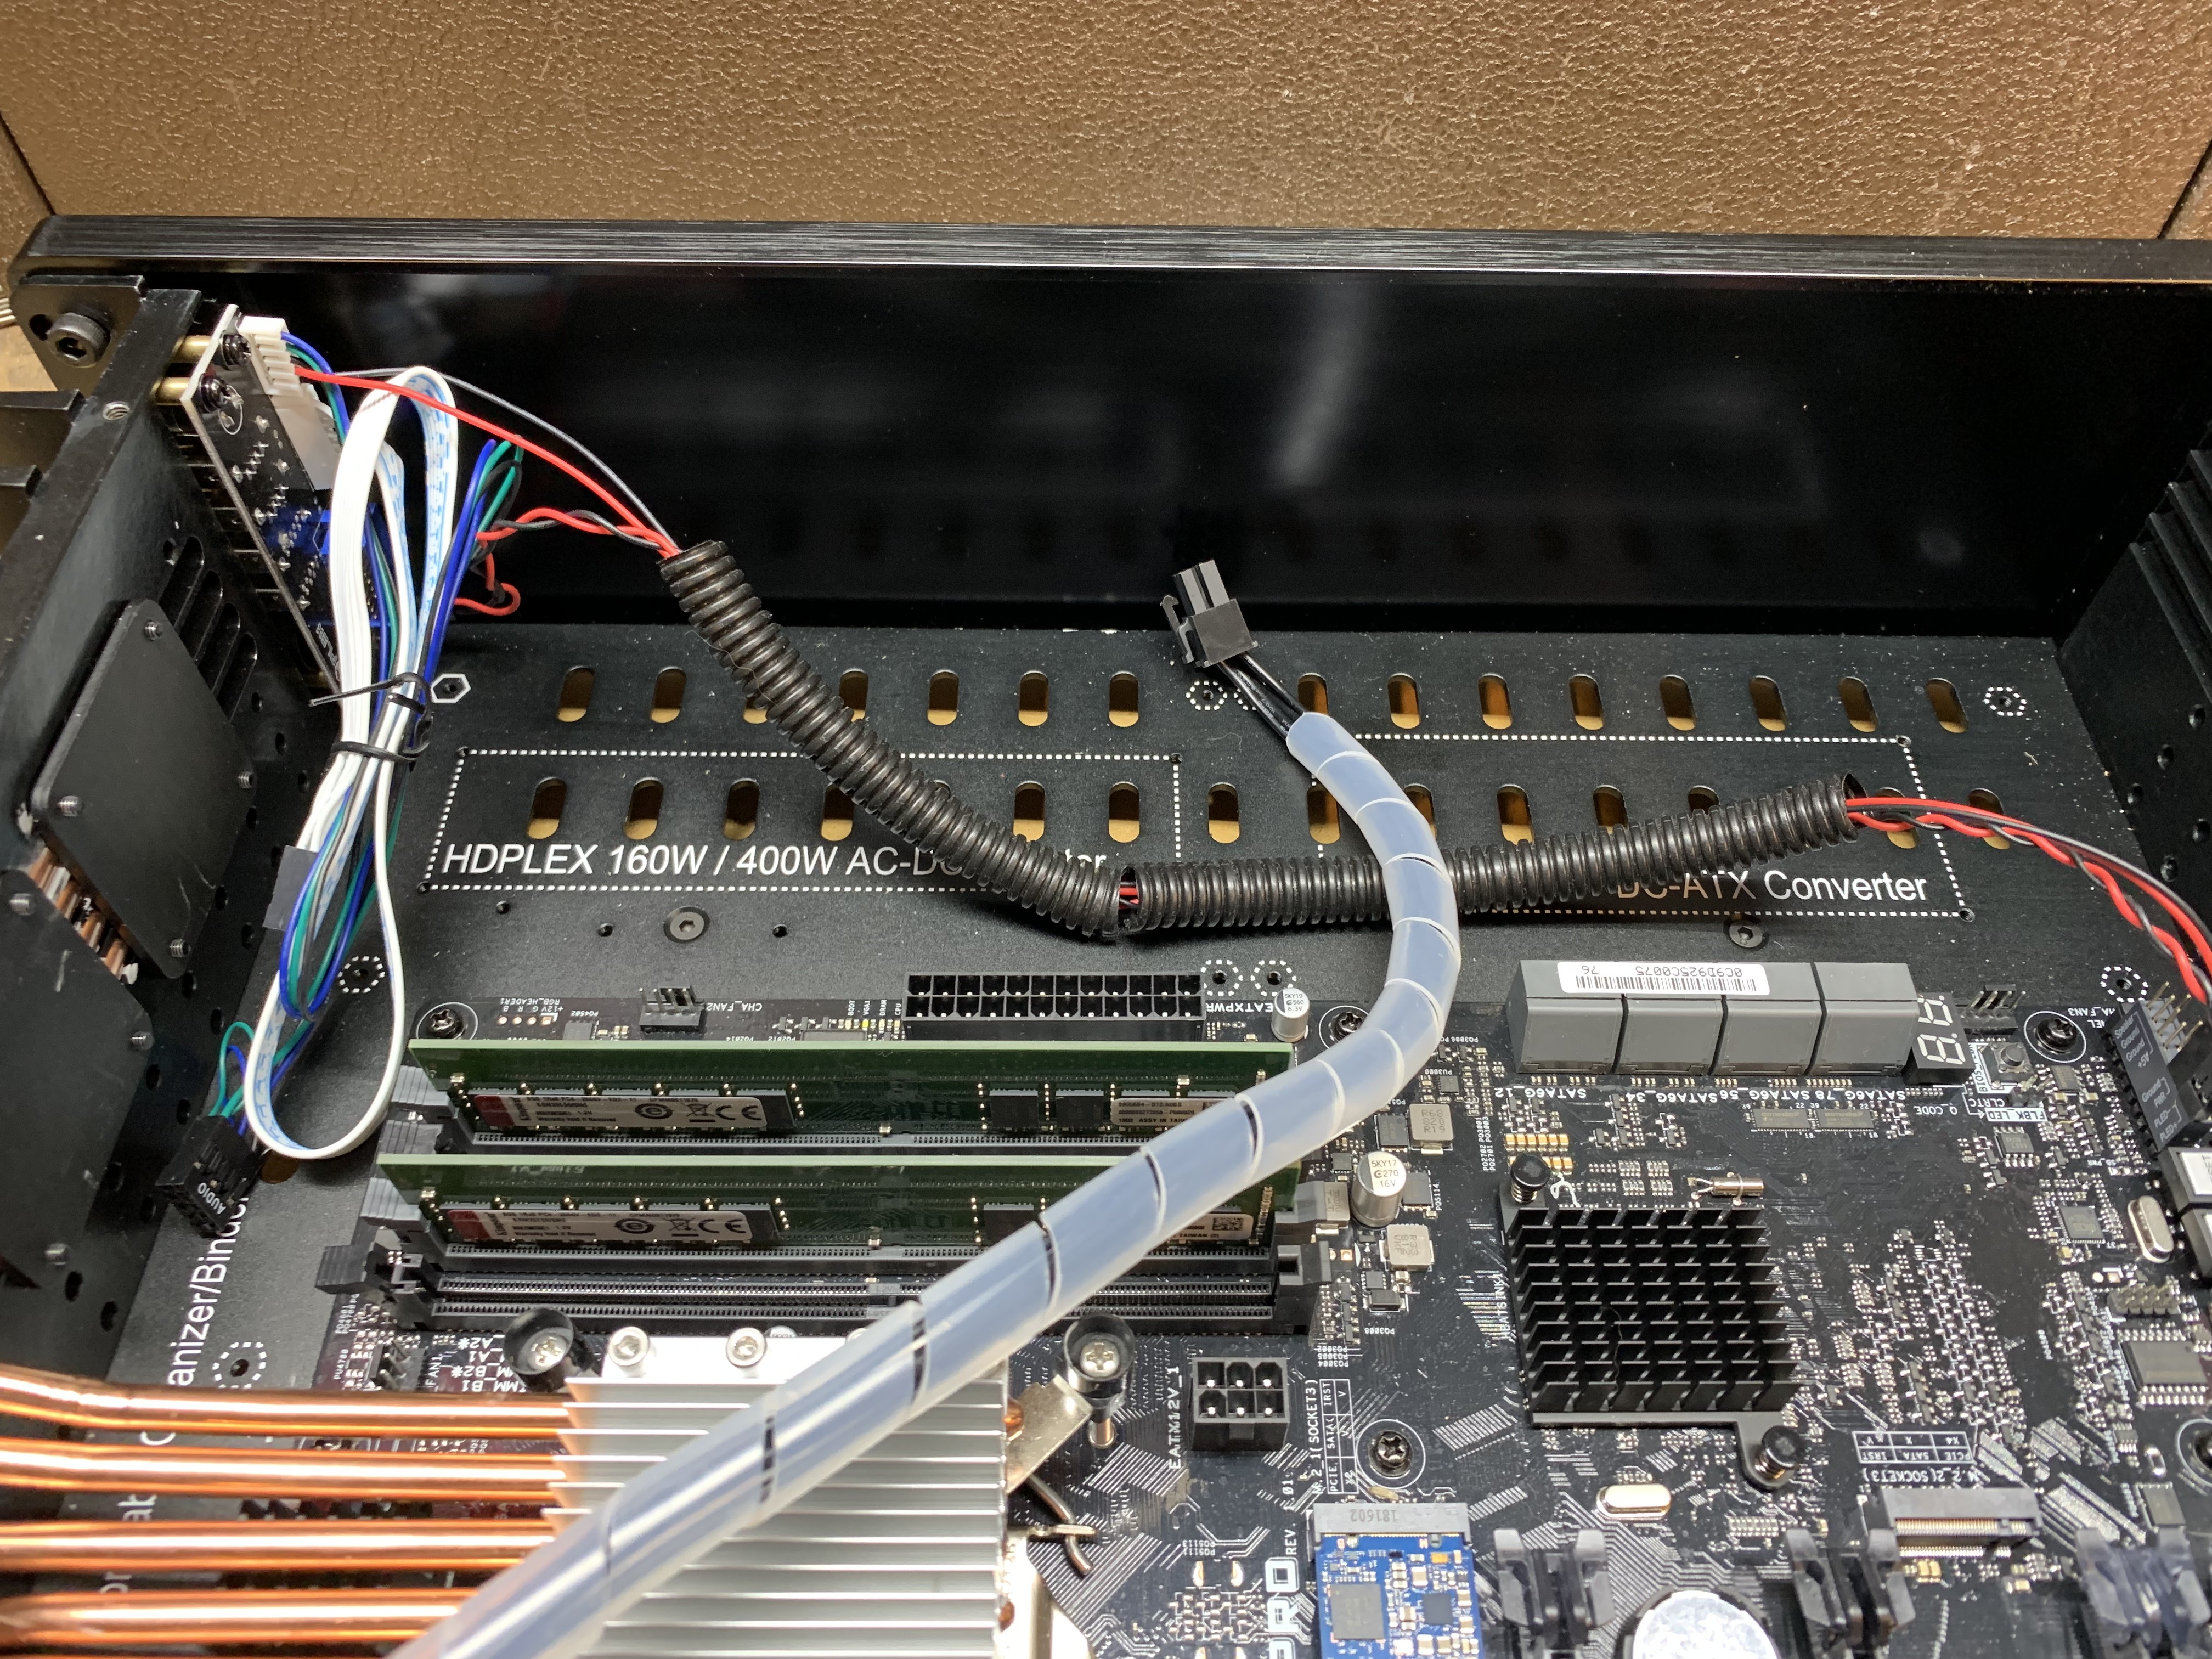
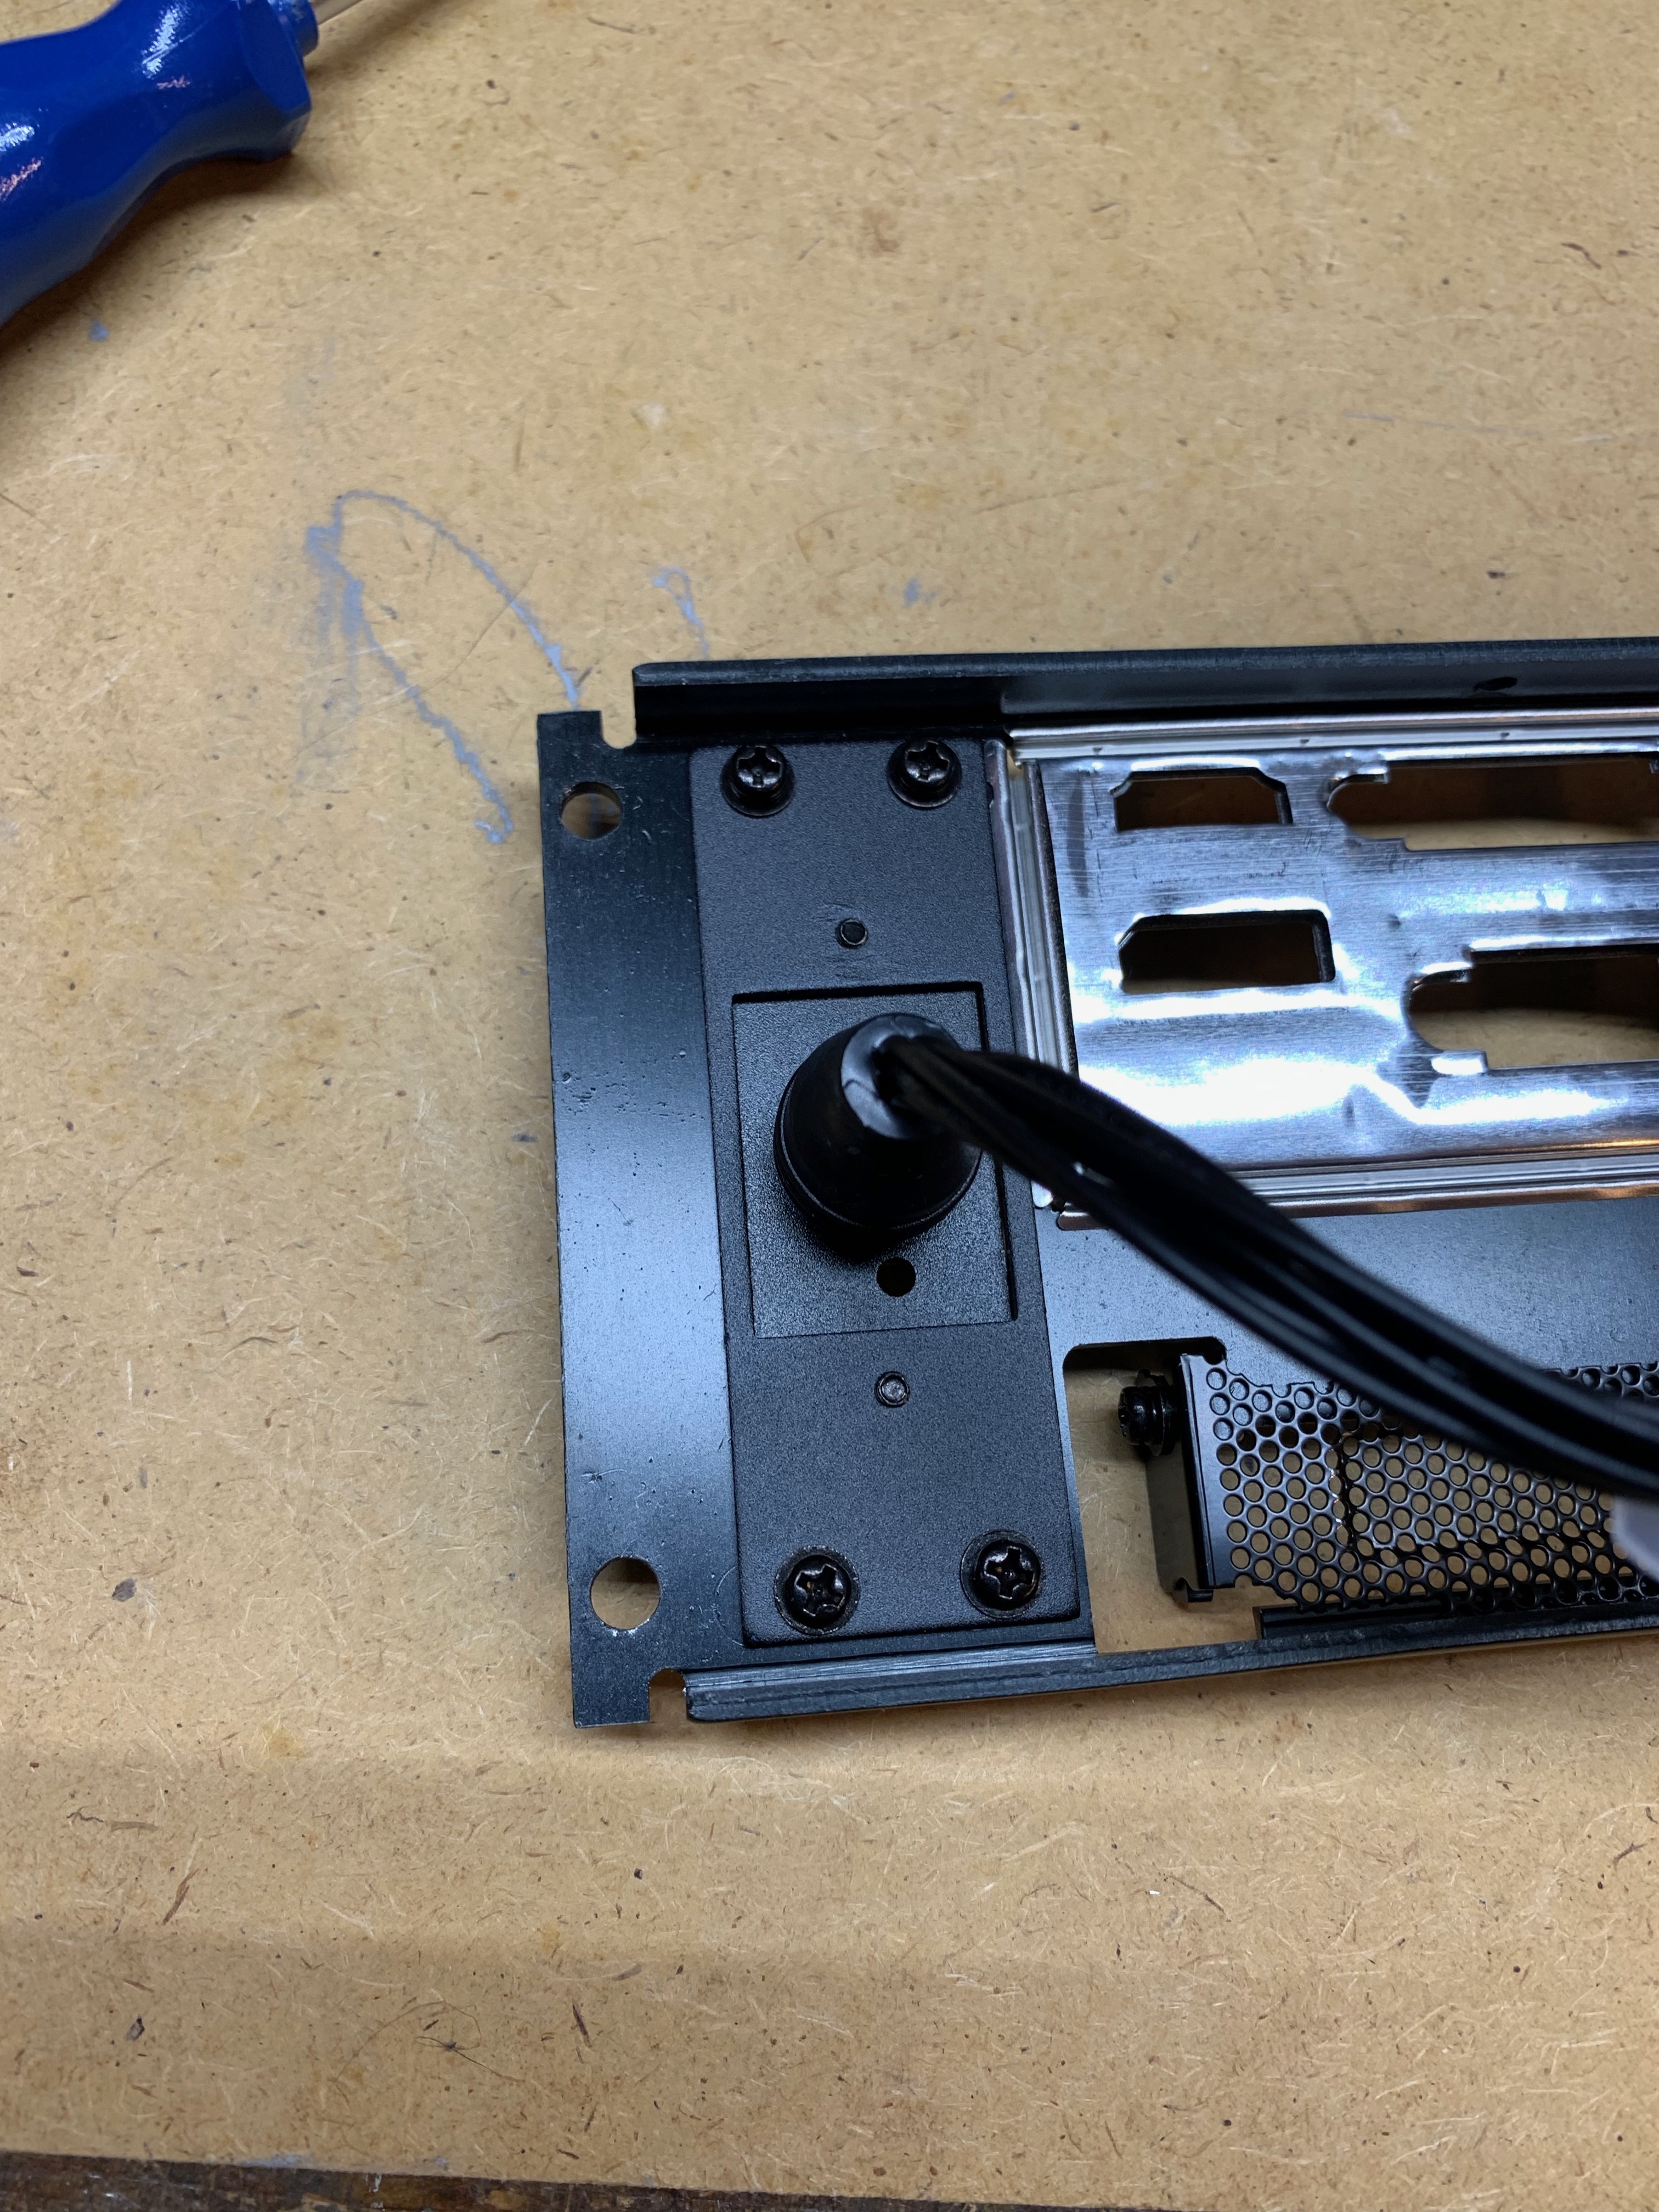
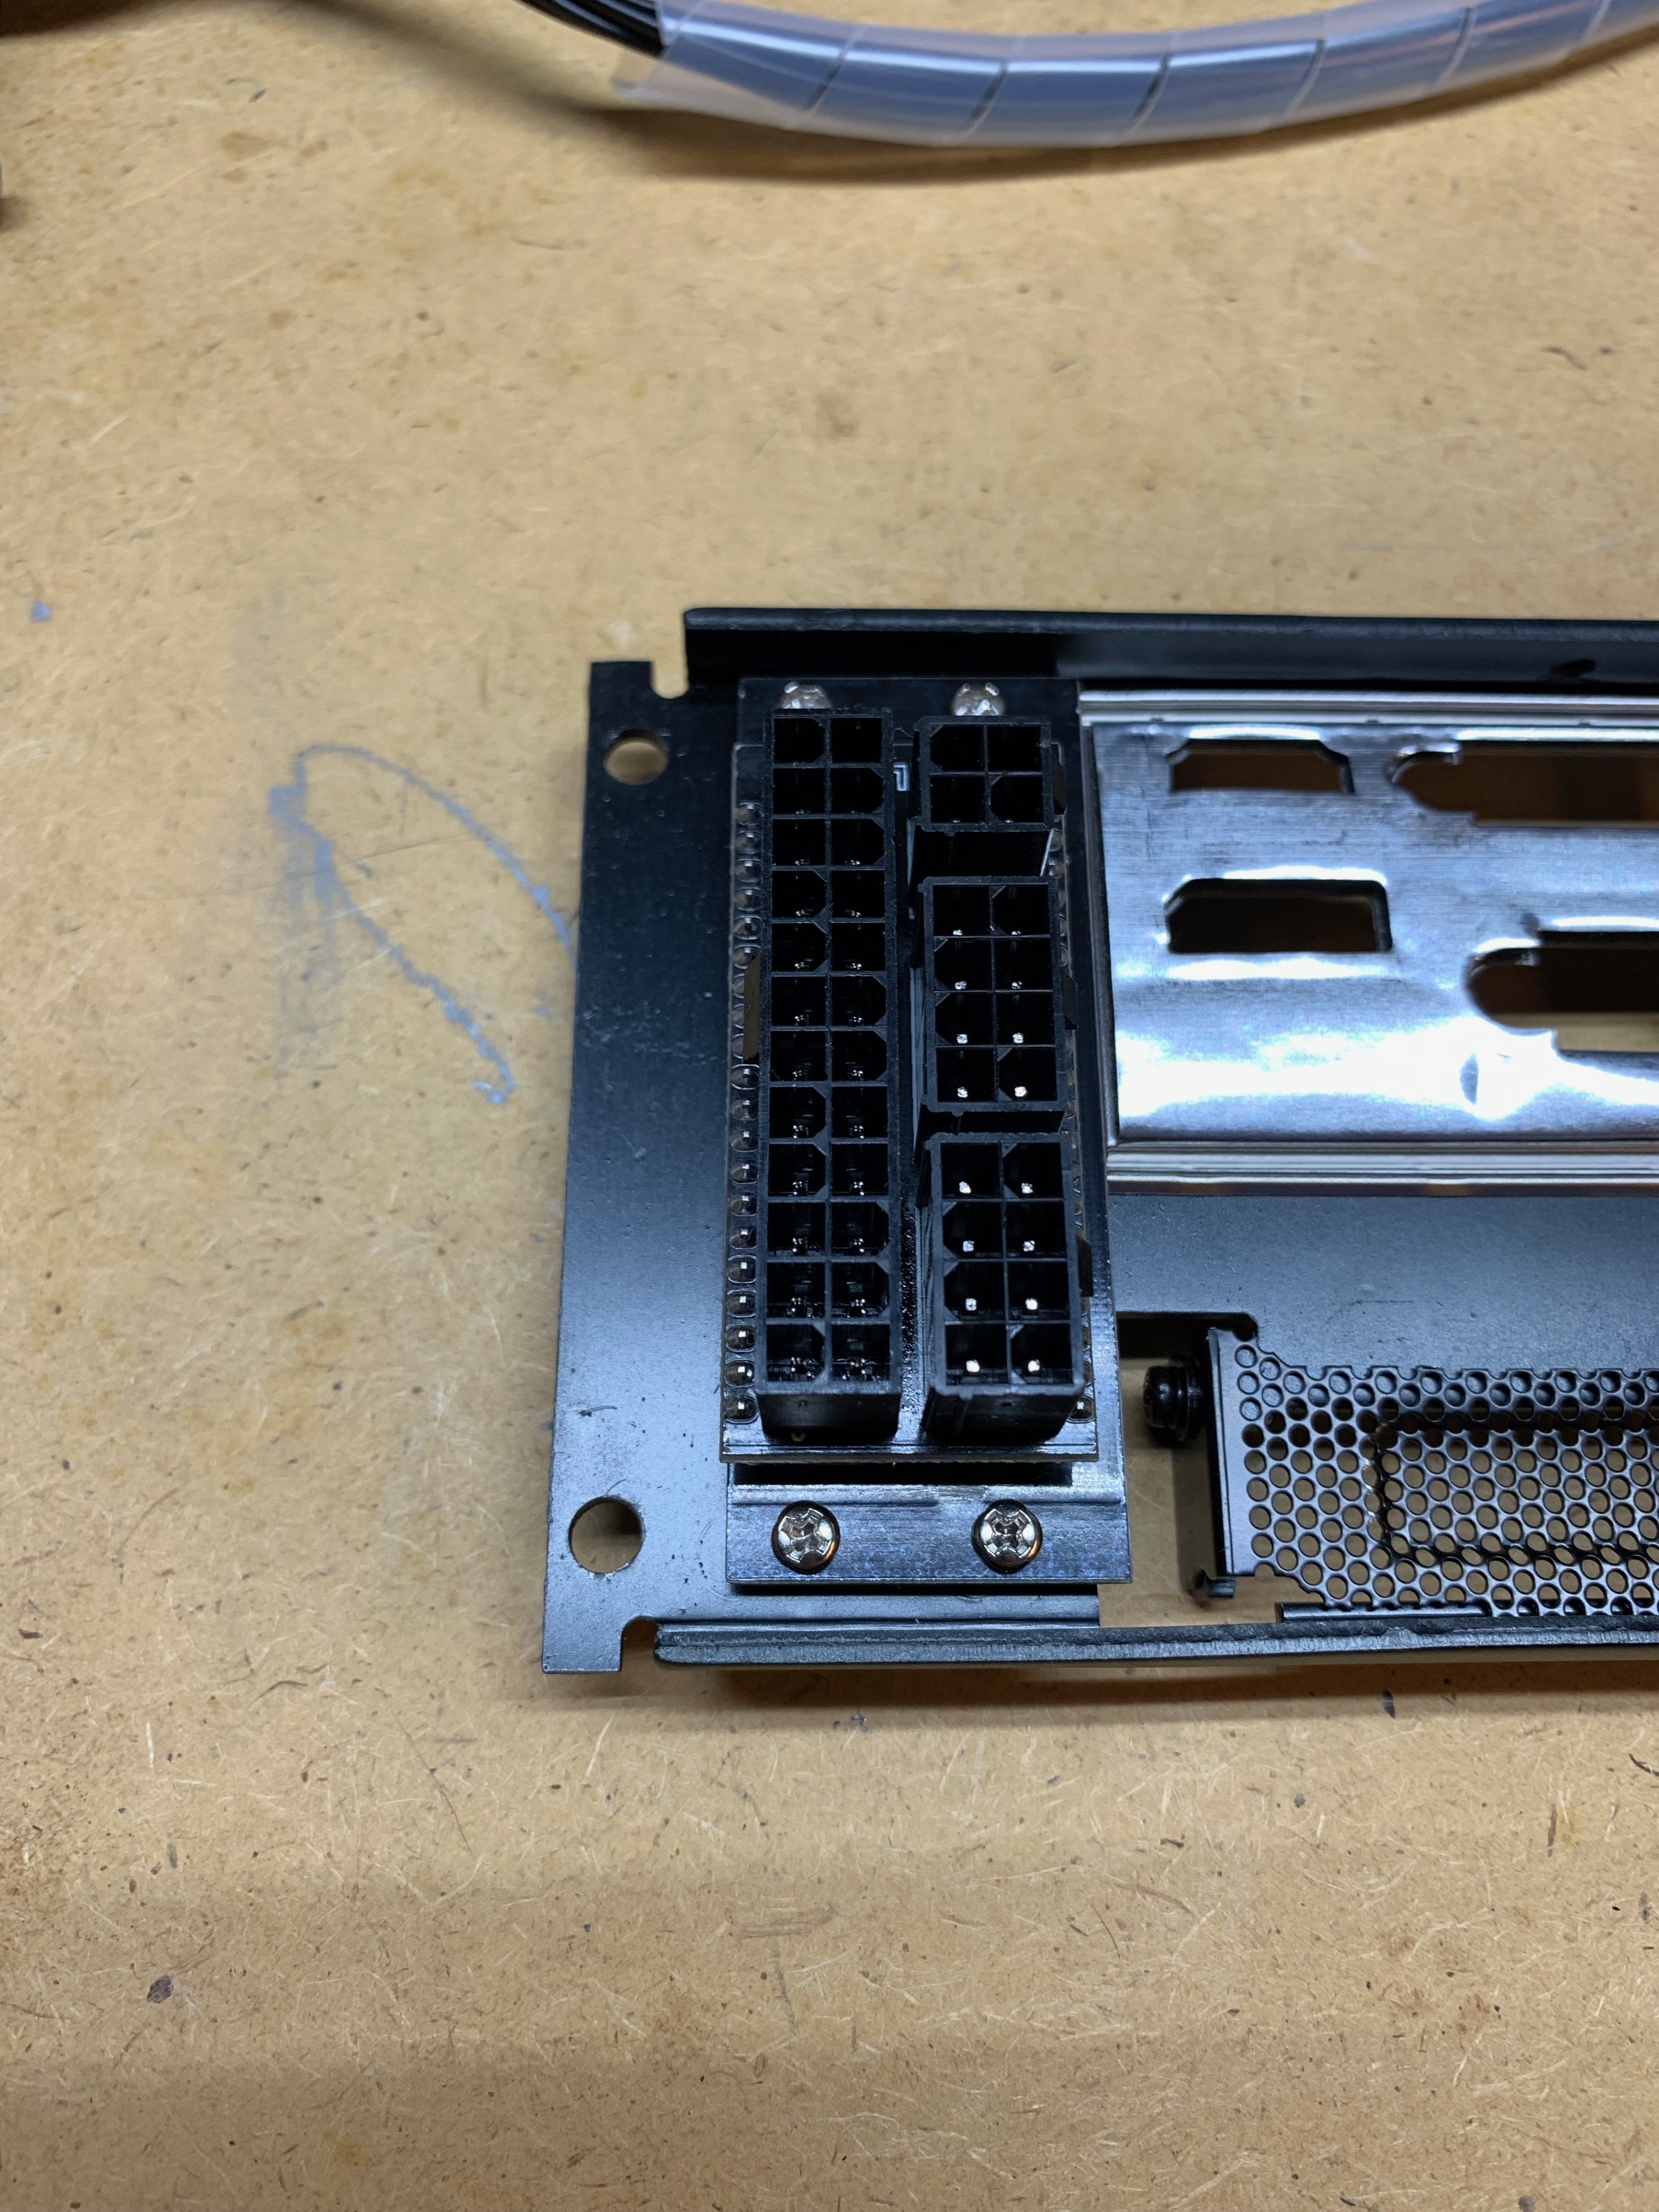
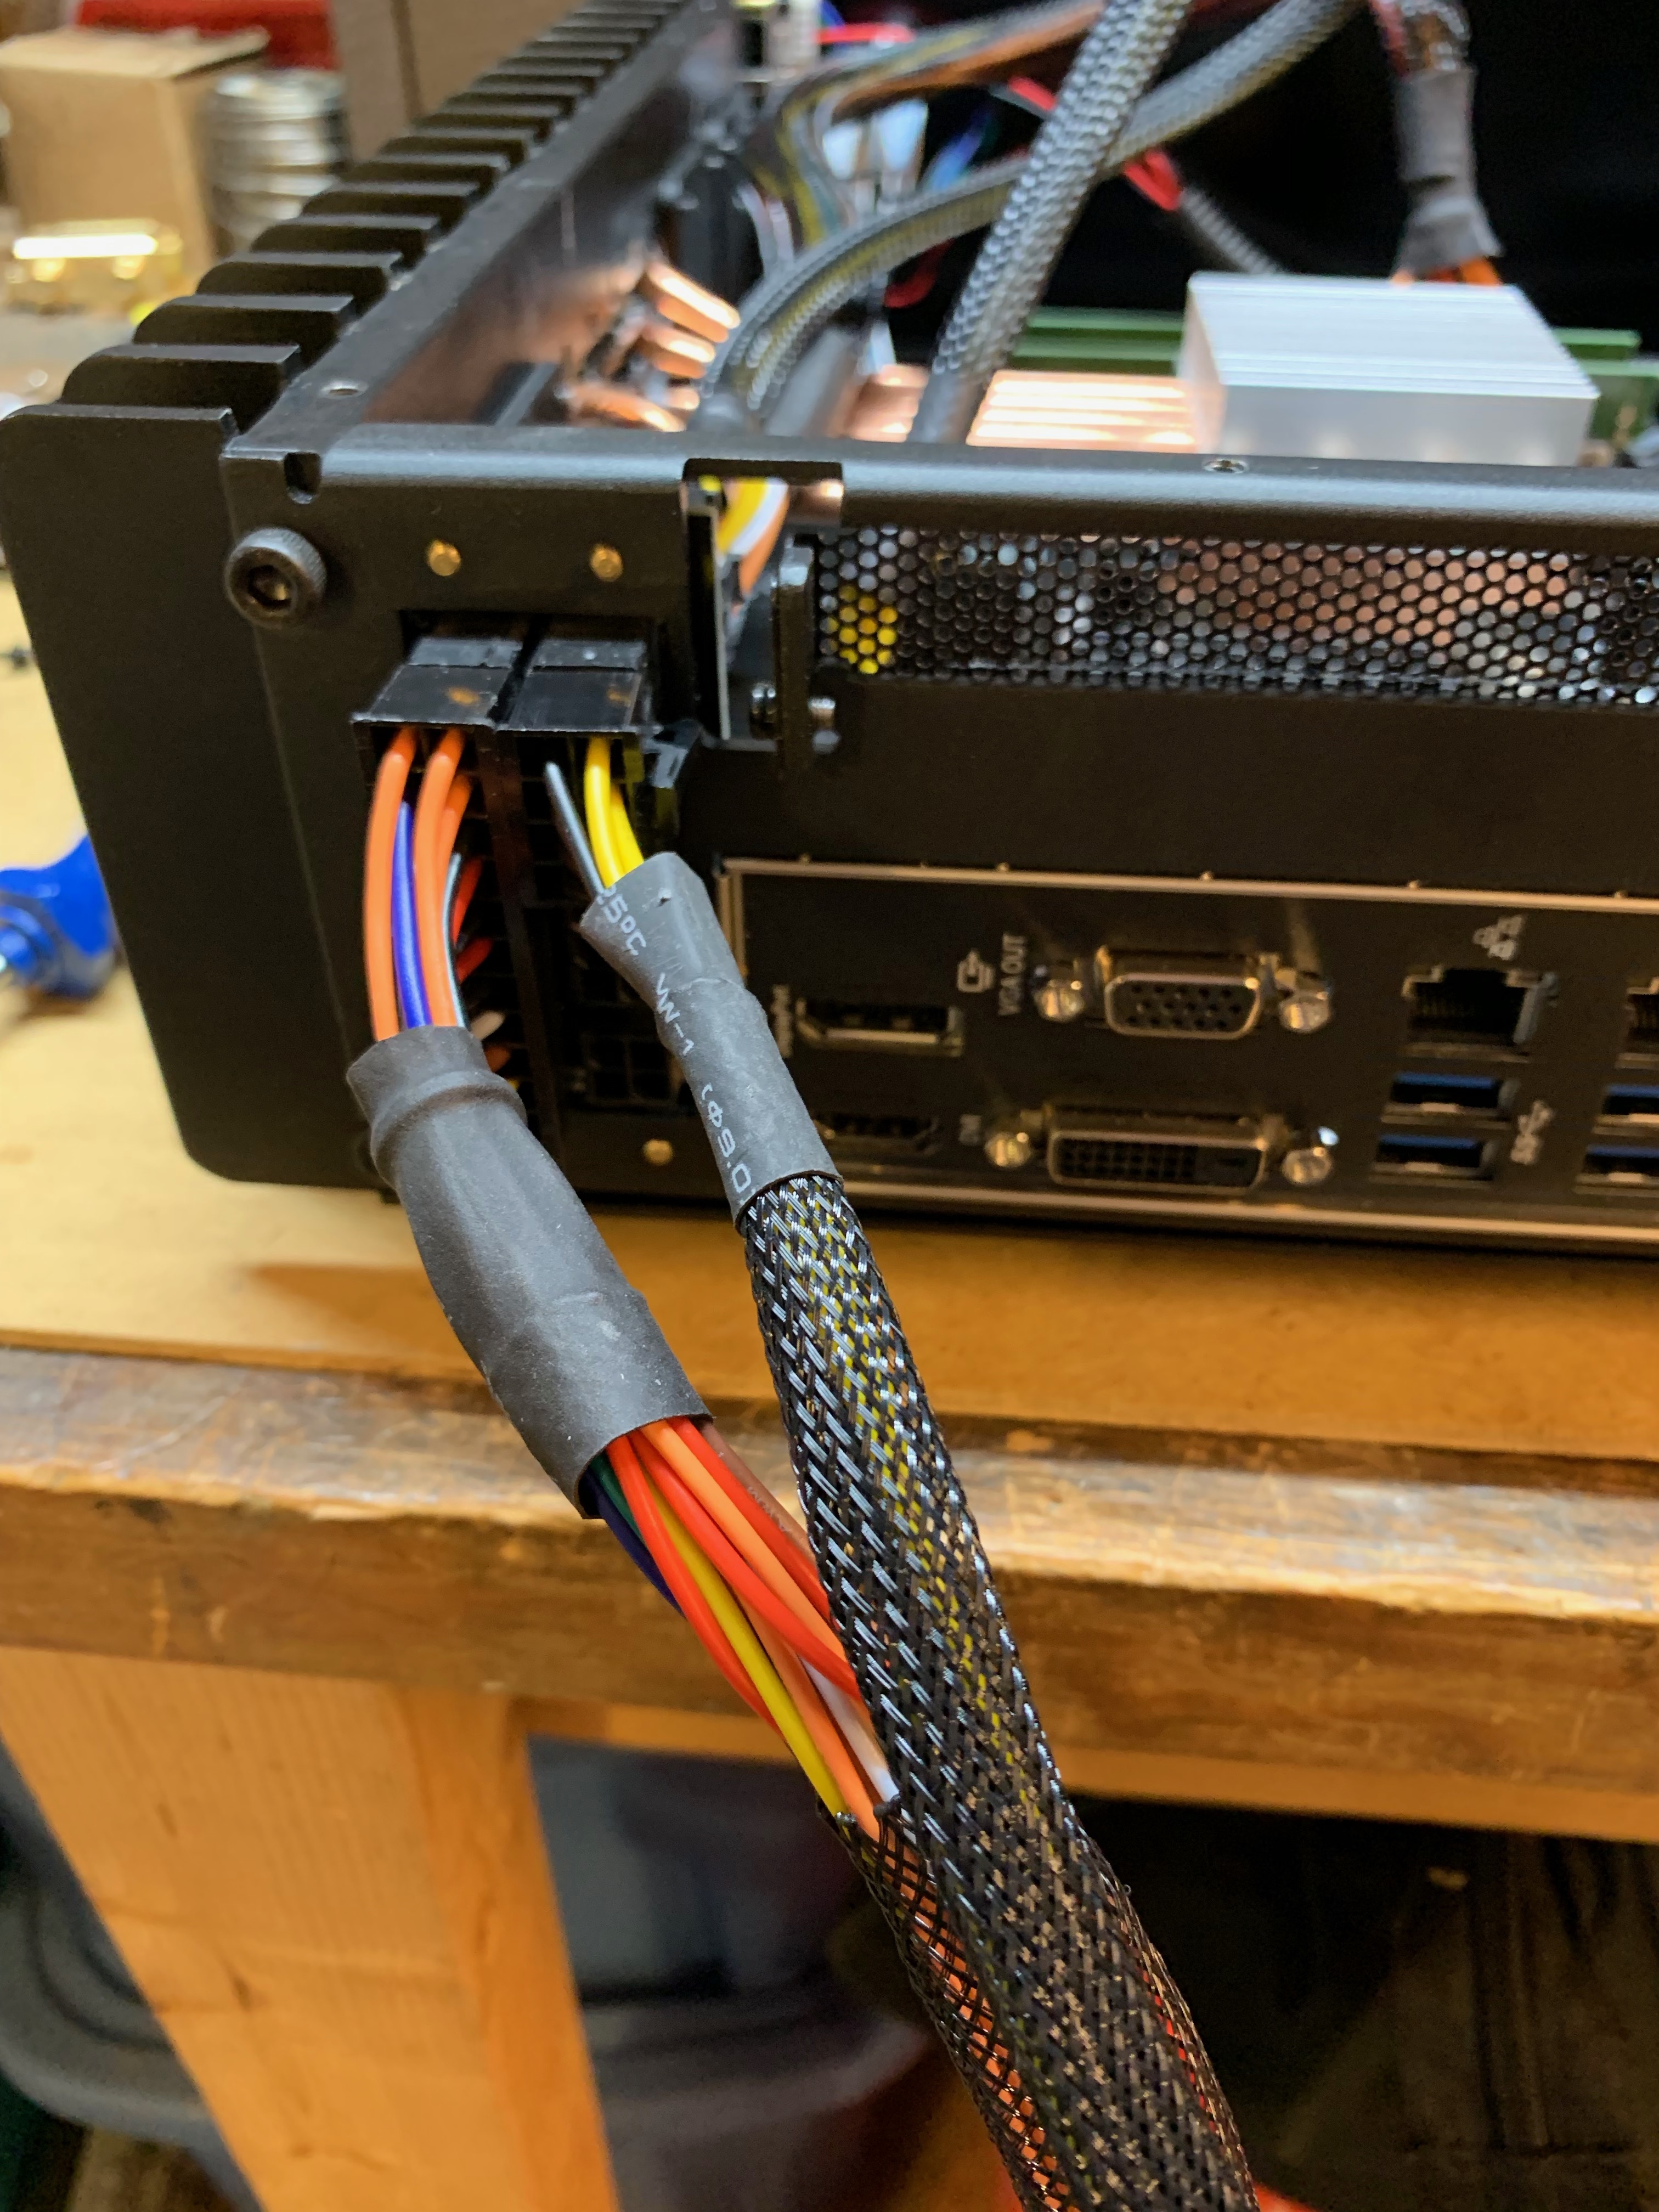
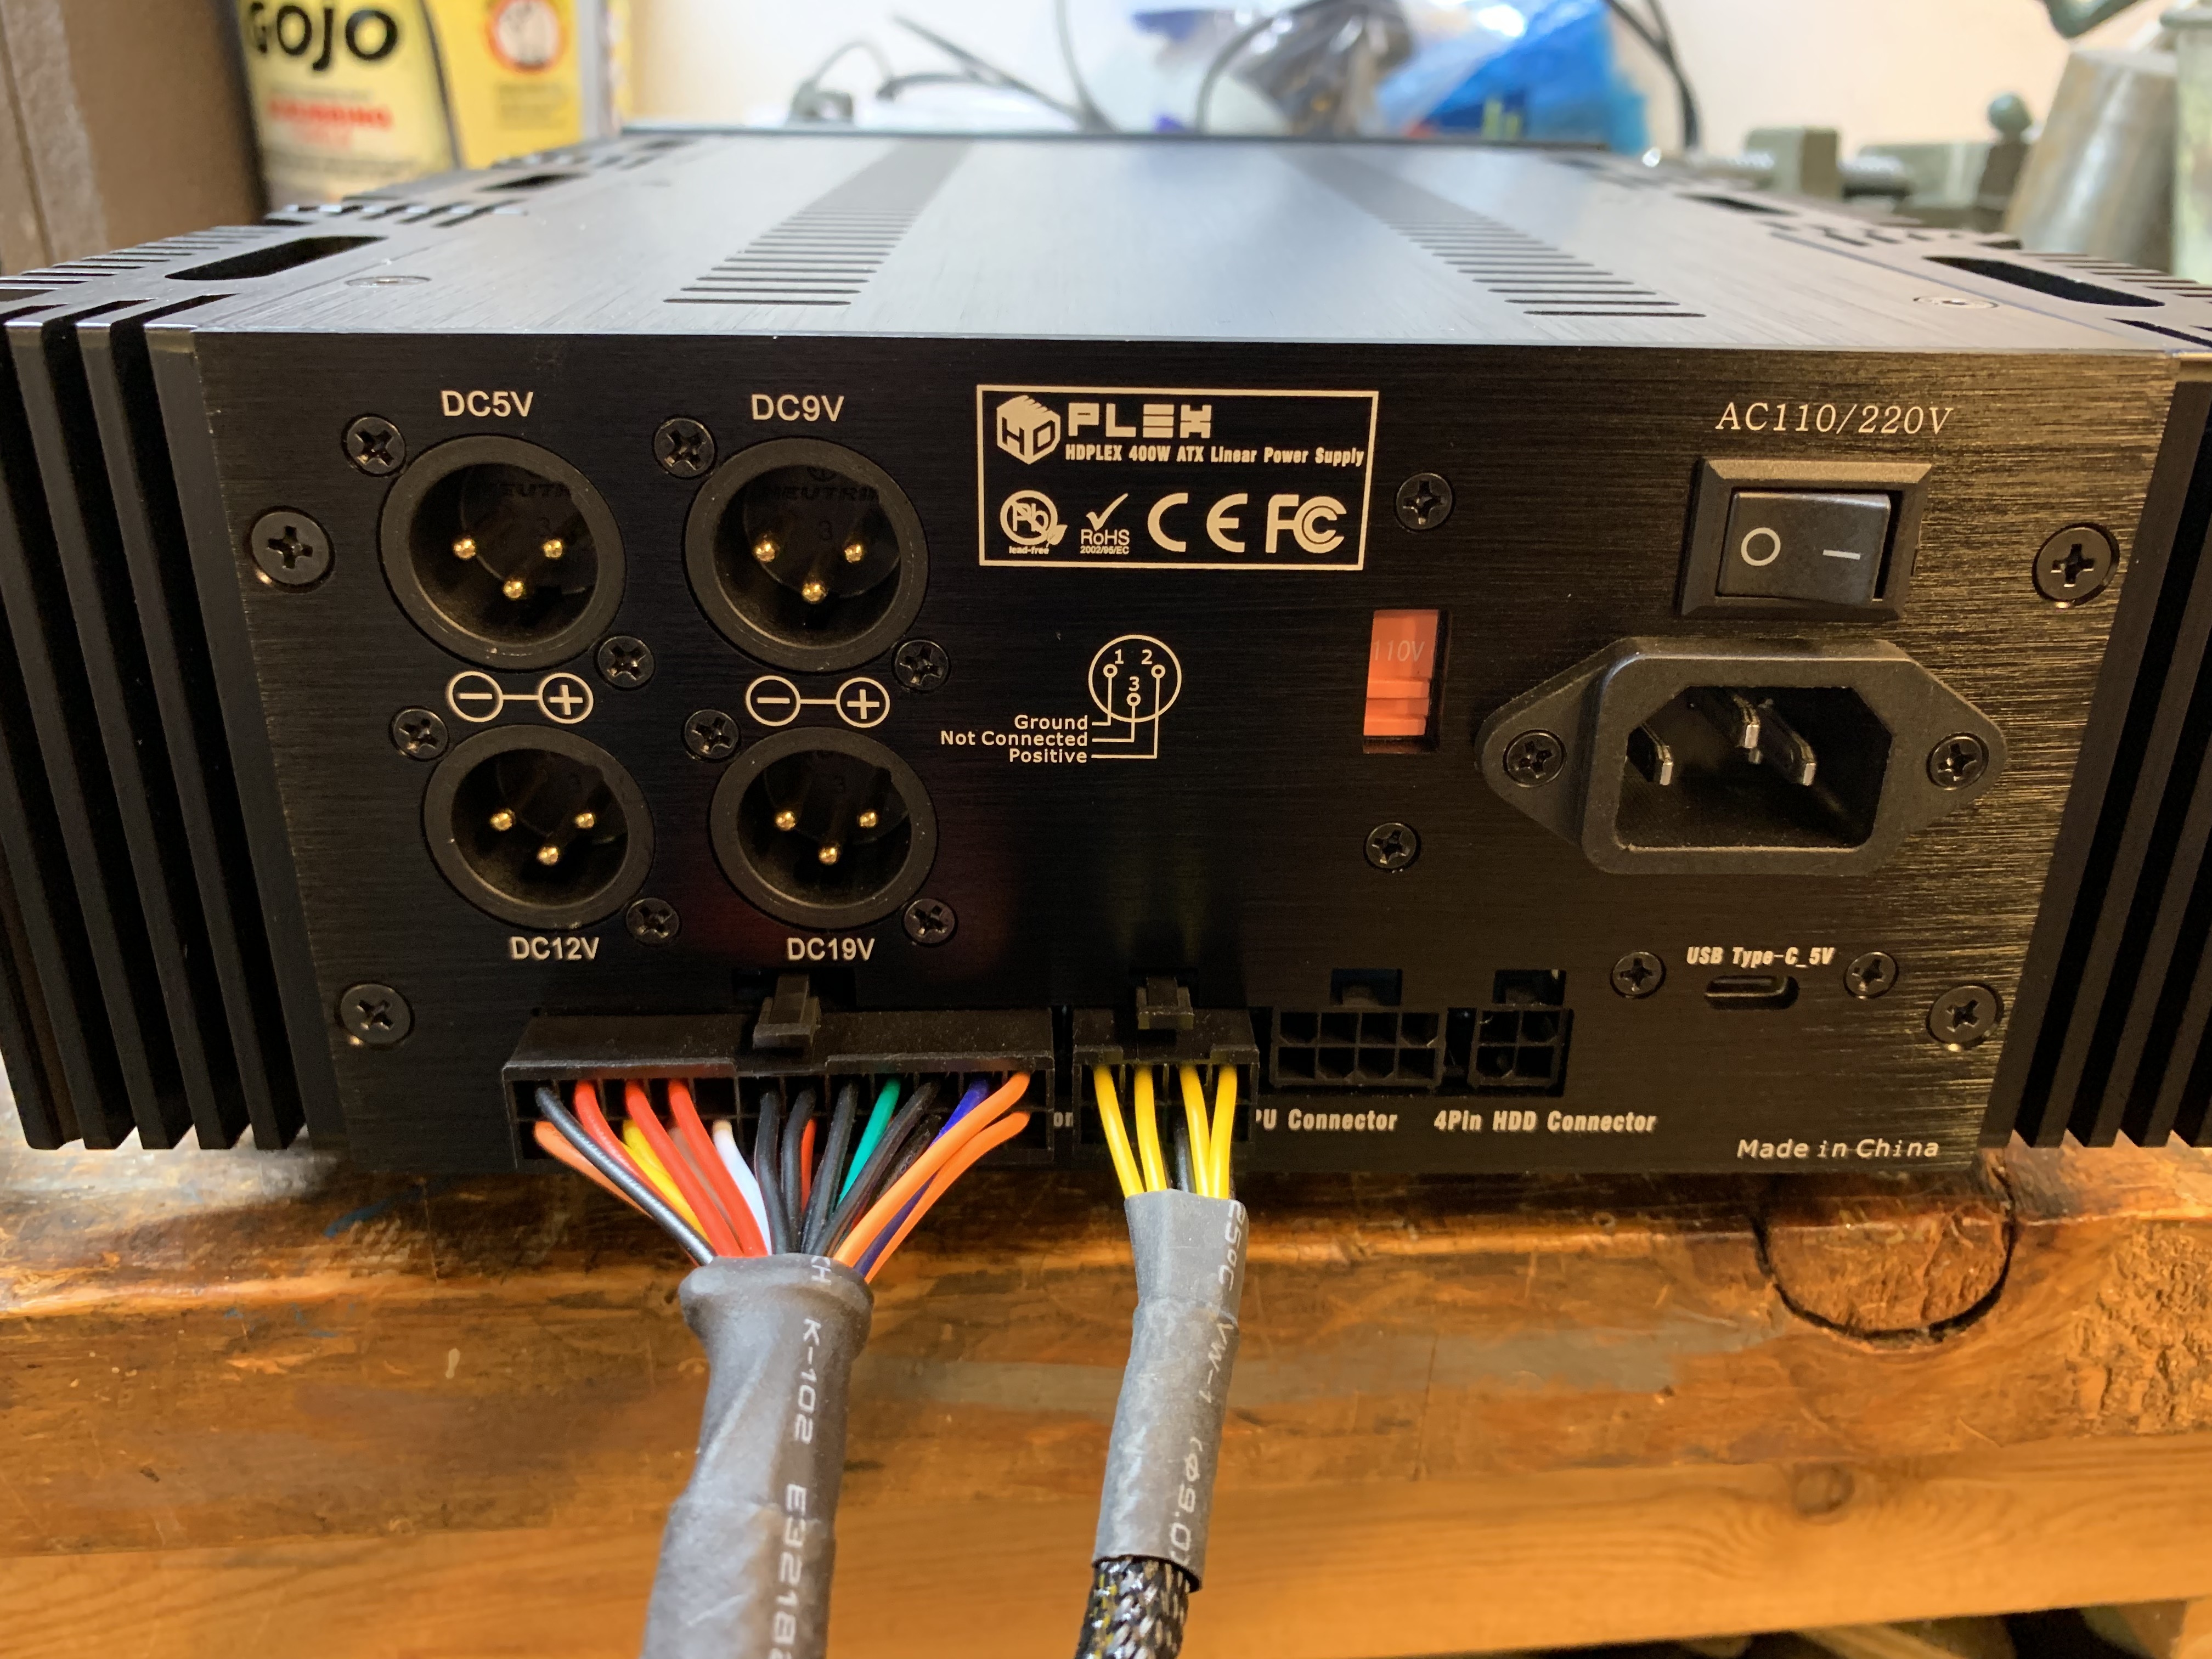
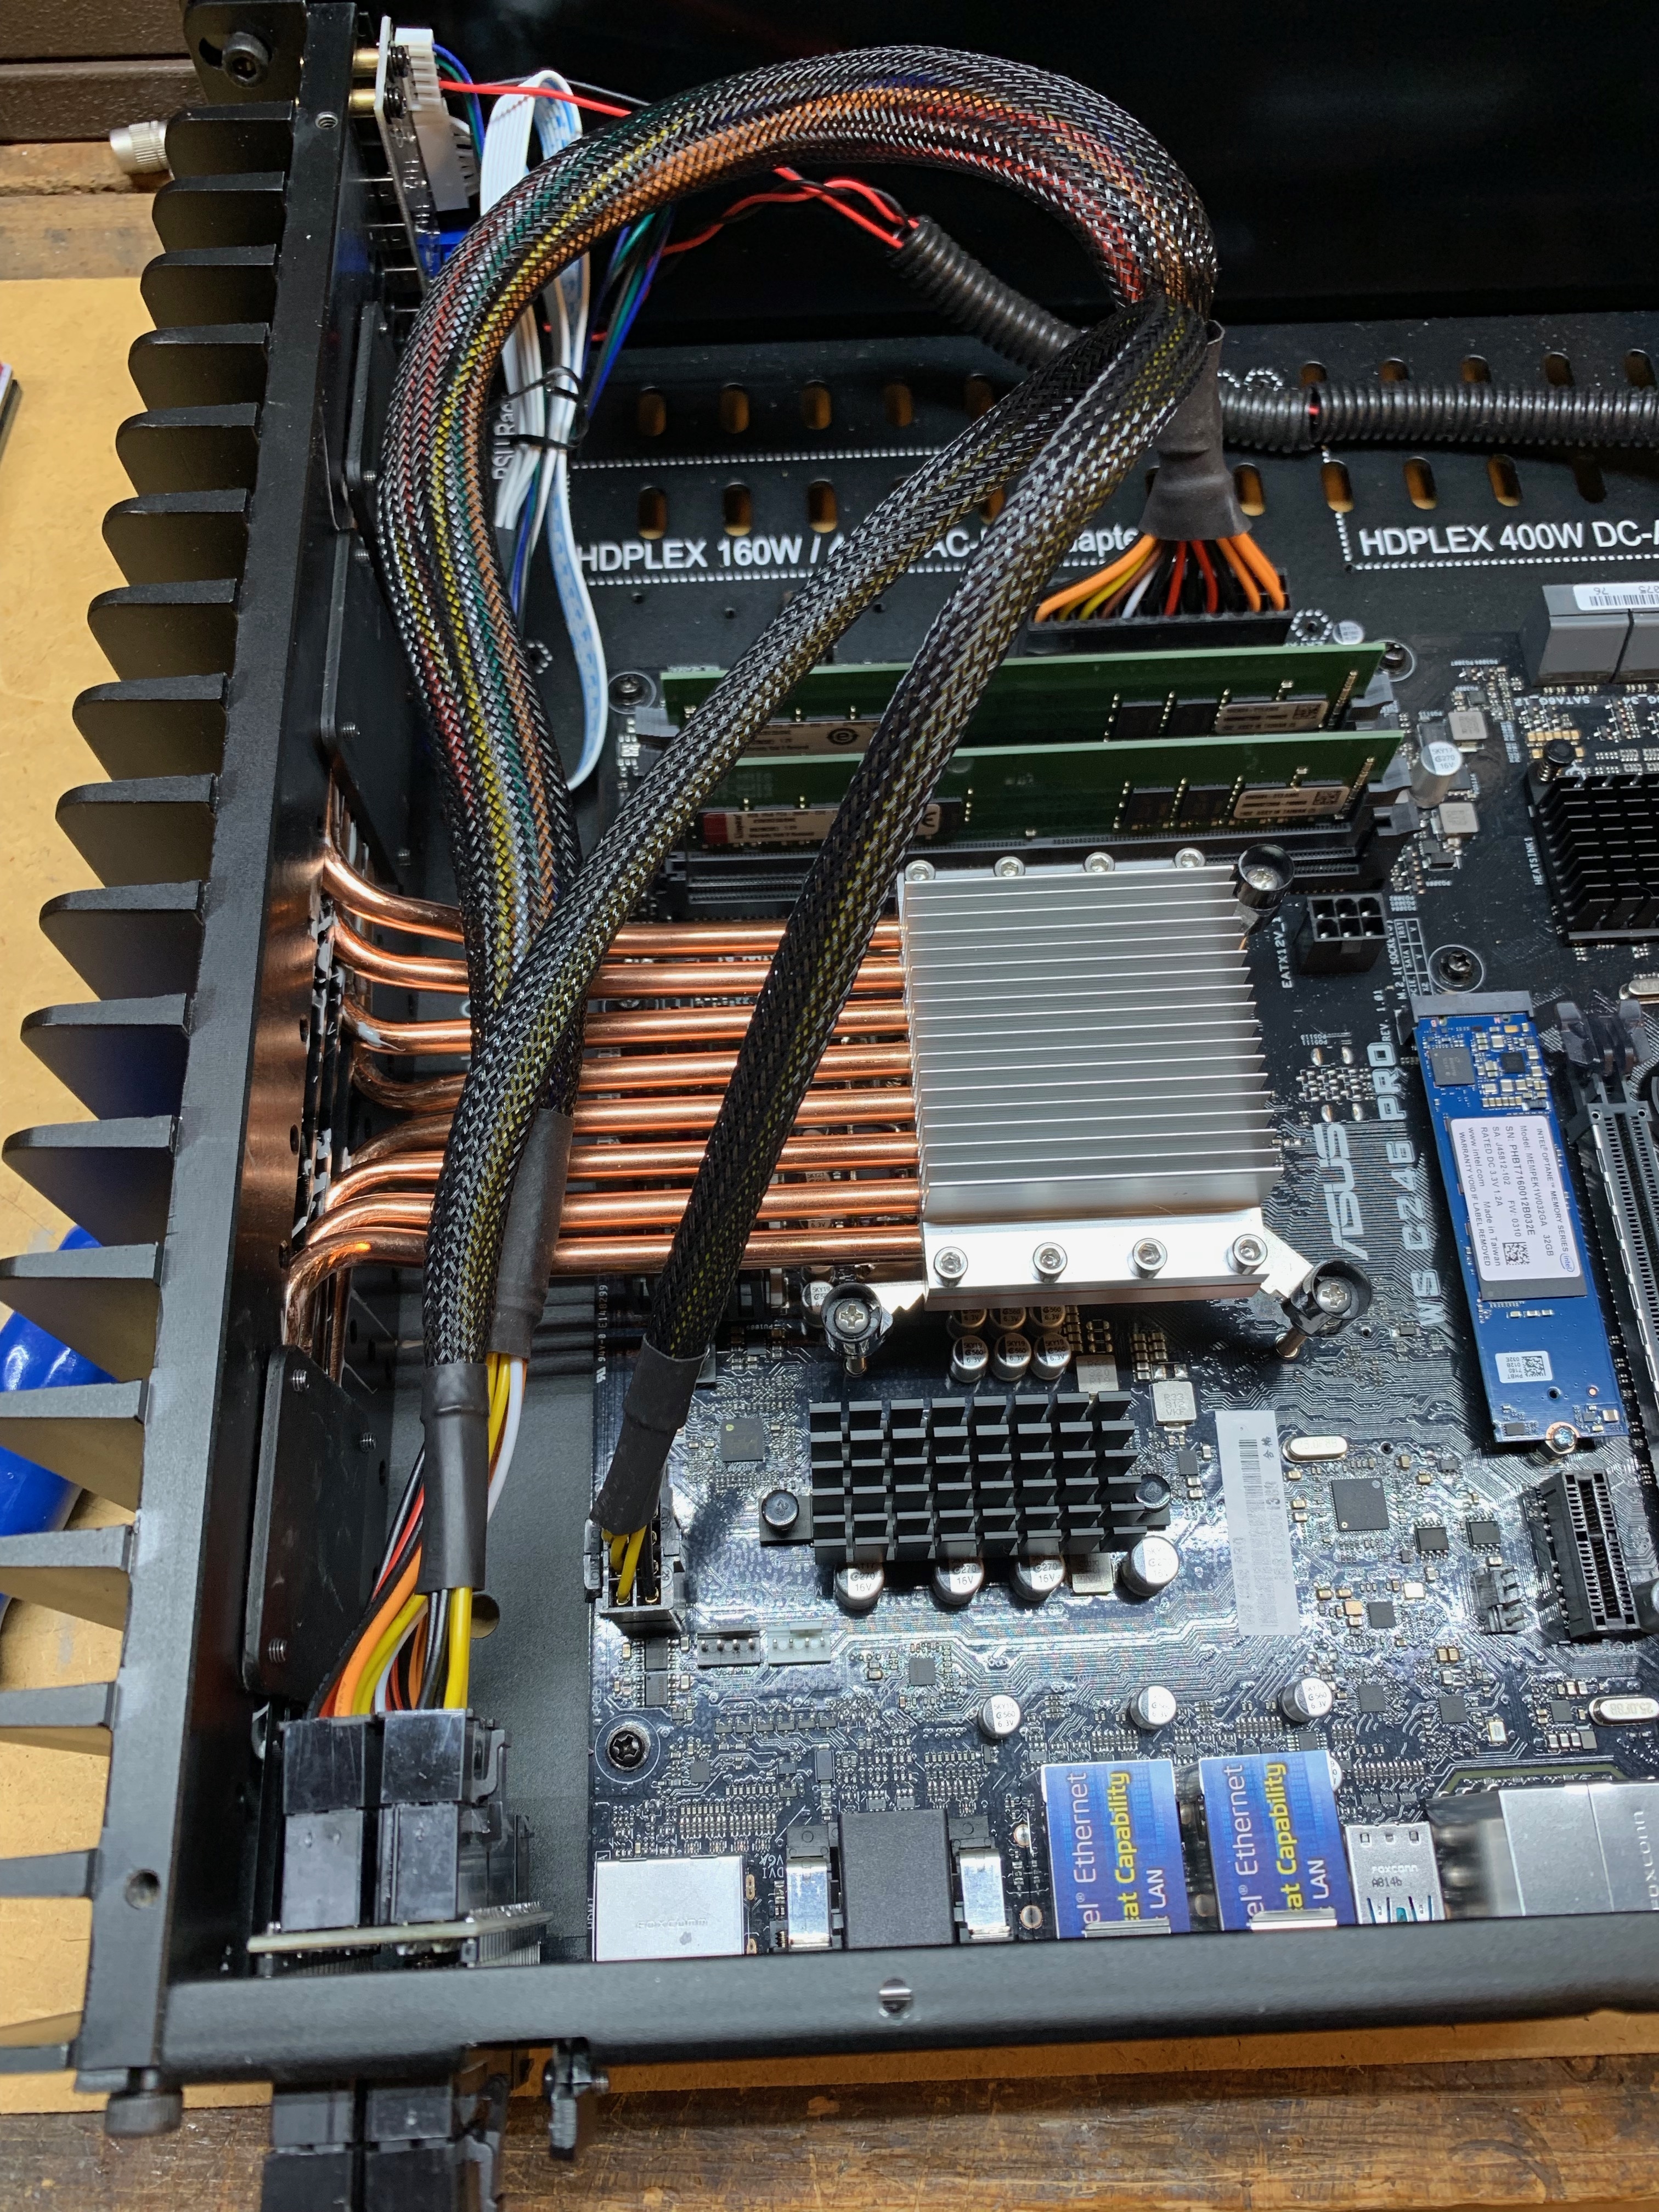
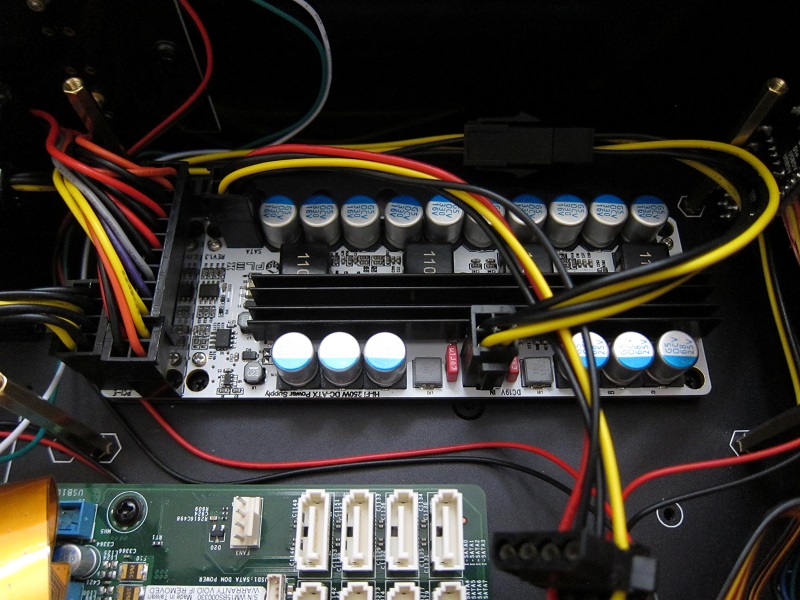
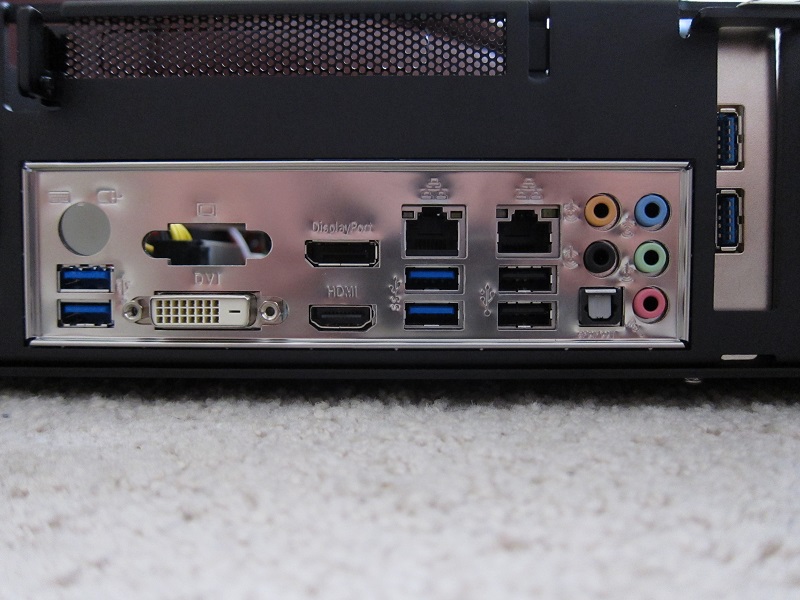
Update February 2020 I recently has the opportunity to test the JCAT USB and Net cards in my server. These cards are a worthy upgrade and I would highly suggest that you consider them in your systems design. My testing was done using the Xeon machine as a single box solution and the two cards made a lot of difference. Update October 2019 Over the summer I have been testing a lot of things around my server and the current place I have landed is the server is now connected to the Kii Control in my main system via a txUSBultra. I am running Euphony Stylus software as the player. I am editing this post to reflect where I have arrived. Update April 2019 There are a few changes in the server that are important. First, I have moved to Euphony OS to run the Roon server software. Next I removed the USB storage drive and am pulling from a NAS for the music. The third change was to change the power supply. I removed the DC-ATX converter and replaced the HDPLEX200 with the HDPLEX400. February 2019 I have built a custom music server to run Roon Core. BECAUSE! I have a perfectly good server or rather a GREAT one from Small Green Computer. Andrew makes excellent hardware, and the OS in the machine is stable and supports a lot of music player software. It is "Plug and Play” and very well supported. It does not lend itself to tinkering! I want to listen and tinker with some different ideas with, setup, power, networking, and connectivity. Thus my build. Just like my build of the NUC endpoint, I am doing this build in public so that others can duplicate it or follow along. A Side Note: John Darko put up a very timely video. It is ostensibly a review of sparkling water and the Innuos ZEN MK3. John speaks the way I think. This is not hard if you have “The Knack.” And No Soldering iron required! General Goals: Roon Core Server Euphony OS $389 "Swap-able" components, MB, CPU, Power I want this build to sound GREAT Key design features: Multiple network interfaces for bridging and more No WiFi High TDP capable Xeon, ECC RAM, Optane Storage Option for mass storage Fan-less Powered by an outboard LPS PCIe expansion card with SFP for network testing System Description A dedicated silent workstation / small business class server. The case is fan-less, with an external power supply. There is 16GB of ECC RAM and a 32GB Optane SSD for boot, and database storage. There are two onboard network interfaces which are different Intel generations. I have a PCIe network interface card with a single SFP slot to be the optical network bridge to the "best" endpoint that I will be testing with later. The motherboard supports either Xeon or 8th Generation core Intel processors in the LGA1151 socket. The chipset is VPRO and thus supports Optane storage. The board also supports both ECC and non-ECC RAM with four slots. I am using the entry-level E-Series Xeon E-2124G processor to start with as the price and availability are good. The E-2124G has a TDP of 71 which is well within the case specs. I am using ECC RAM that has been validated to work with the motherboard. Music storage is an interesting problem. I read through the threads on AS about data storage and to be honest, without some summary there is too much data to compile into a “best practice.” In my testing with a different NAS and a different server than I am running now, the NAS did not sound “as good.” I do not want the drive inside the server, as indications are that internal storage degrades sound quality. The Case for the Case! I have been researching this for several months, and I picked the HDPLEX case due to the flexibility of their design. The H5 case fits up to a full ATX motherboard like I am using. The H5 case can also support adding a graphics card to your build which I am not using. There is room for both 2.5in and 3.5in storage devices. The H5 case is designed to support alternative power supply configurations which is one of the bigger keys to performance. After a lot of testing I am now using the HDPLEX 400 direct into the machine. I have not yet changed to the Ghent cables that others are using.: Buying "stuff." Picking suppliers is a problem today. Many online stores are marketplaces with other vendors inside of them, and that adds risk to the purchase process. I purchased most of the server computer components from Newegg.com. The Power supplies and case came directly from HDPLEX. I want to thank Larry at HDPLEX for helping me validate the fit of my motherboard selection during the pre-purchase process. Great customer service there! I purchased these from Newegg $248 ASUS WS C246 Pro Motherboard $250 Intel Xeon E-2124G $214 Two Kensington 8GB ECC RAM (check MB validated models) I purchased this from Amazon. $62 Intel 32GB Optane M.2 SSD From HDPLEX I purchased the following items: $485 HDPLEX200 LPS $388 2nd Gen H5 Case with 400W DC to ATX internal supply I have added an Element H USB card $250 I am now using an HDPLEX 400 power supply For Music Storage I am now using my QNAP NAS I will not count research time as that is endless. Actual construction and setup were completed over two days. I estimate about 10 hours of review, assembly, software configuration, and BIOS learning. As a reminder, I do this stuff for FUN. If this sounds like work, please buy a commercial server you will be happier! ———— BIOS Setup I have turned off all the fan controls and monitoring. The fancy signed secure boot had to be turned off. I have NOT changed any of the default CPU settings. I have not turned off all of the “other” hardware that I will not be using. I had some issues with the boot order. I have not found the way to boot off of USB first every time. (I will try to do BIOS screenshots later) ———— Euphony Stylus Setup As of about April 2019 I have fully moved off of AudioLinux to Euphony OS and I switch between Roon and Euphony Stylus as my playback software. Follow the instructions on the website for trial download and setup. This custom port of linux and player software cost $289 USD and I was very happy to pay that. https://euphony-audio.com ————— Build Process I am an experienced PC builder, and they usually go together pretty quickly. This build took a bit longer than I expected. Taking great care with the heatsink, the heat-pipes, as well as the first time is this kind of case slowed me down. If I built a second one I could do it in half a day. Please remember to use proper anti-static protection. Do not over-use heat-sink compound! And have fun! Let's get started! Here are the "goodies" to start building the case This is the heatsink system A little out of context! This is a single Motherboard stud. You have to place them properly for your board. Next we put the posts and the power switch button on the side panel and mount the PCB for the USB ports, etc. Here is the side panel mounted to the base and you can see the motherboard standoffs already inserted. Now it is time to start on the CPU heatsink On the LGA11551 socket, the pins for the CPU are on the motherboard. CAREFULLY place the CPU on the socket and close the locking cover and bar. I did not take a picture of the underside of the motherboard where the bottom part of the headsink system attaches. The casemanul covers this pretty well Add the heatsink compound to the base of the copper heatsink Here is the base of the heatsink attached to the motherboard Another view of the case with the side panel, MB and heatsink ready for the heat pipes. The manual covers the intall of the heatpipes well. Again donot over use heatsink compound and proceed slowly. Here are some shots of the system installed and hooked up You can see the RAM and the Optane drive installed here. I have since removed the DC to ATX supply! This is the other side of the case. I hate how black things collect dust and stuff. I purchased the HDPLEX 400 power supply and here are the changes to the server to remove the DC-ATX converter and connect the new supply. I disconnected the DC-ATX converter and removed it from the case. (sorry no picture) First the old 19V socket and mount have to be removed to place the back to back ATX boards. This really requires you to remove the back panel first. There are four studs installed and the board pair is screwed into the back plate. Then the two internal cables are run from the connector board to the Motherboard. The two longer cables are connected to the outside of the case and run to the back of the HDPLEX supply. NOTE DO NOT FORGET TO SET THE AC INPUT VOLTAGE SELECTOR PROPERLY! Not hard at all.

- 99 replies
-
- 18
-

-

-

-
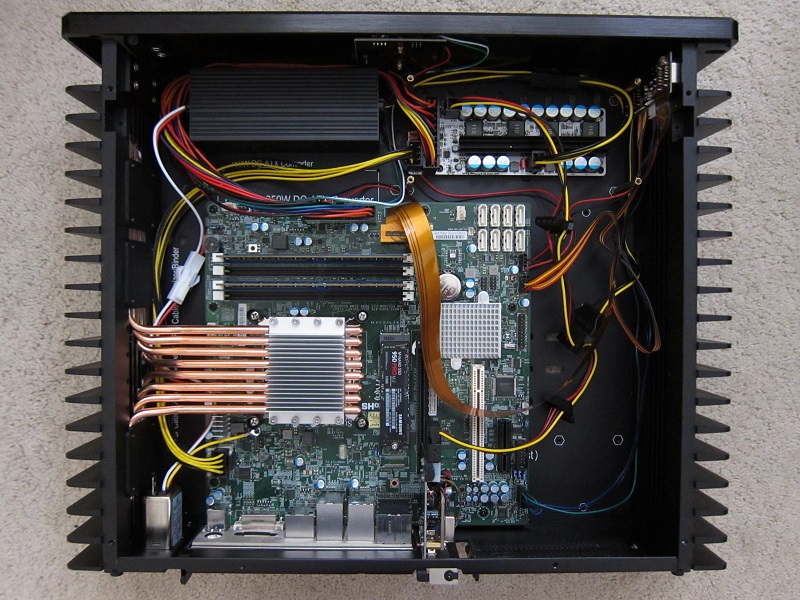
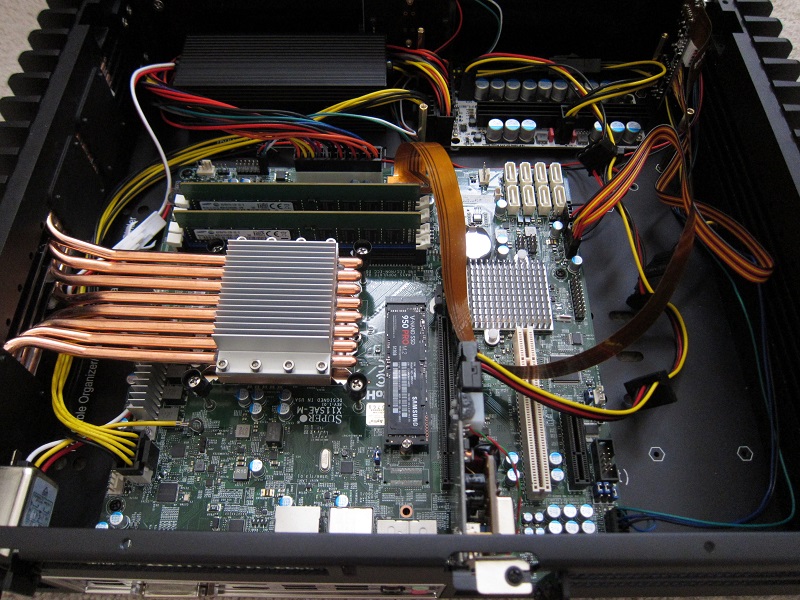
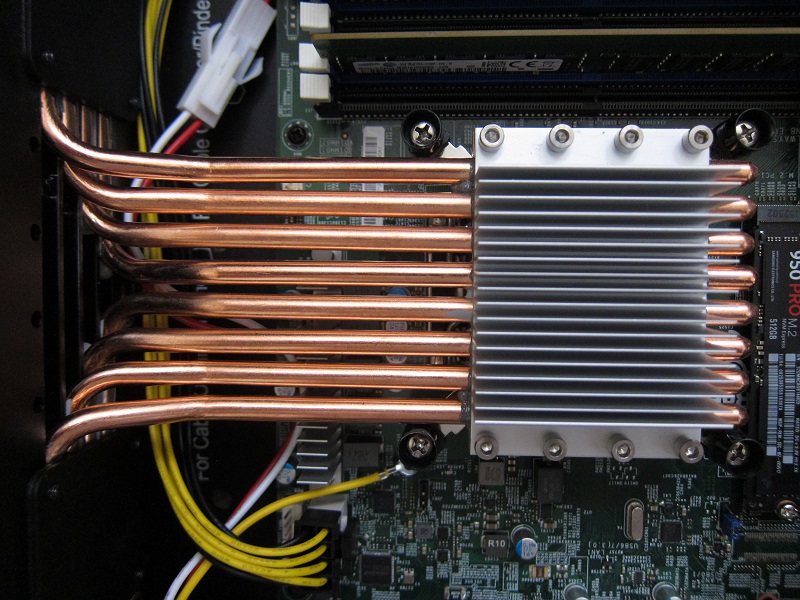
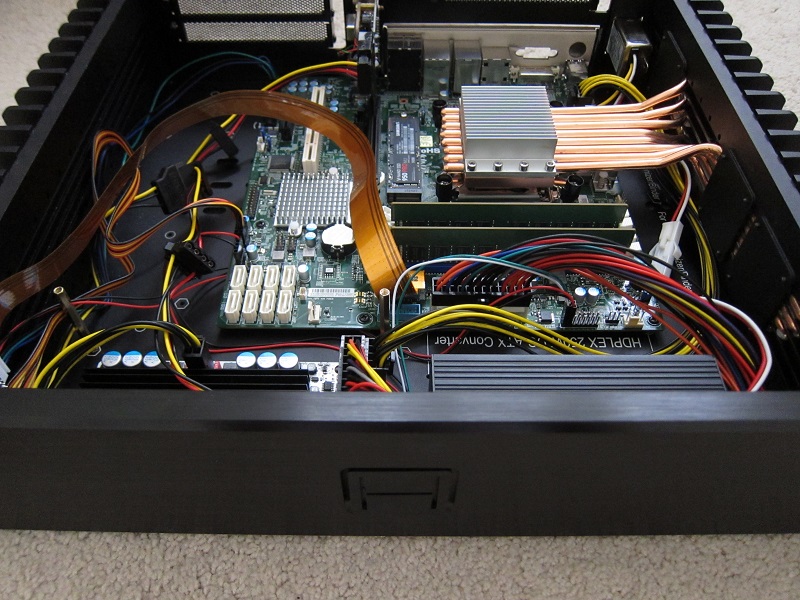
Here is my just-completed build of a fanless silent music player. Components: - HDPLEX 2nd Gen H5 fanless chassis - HDPLEX HiFi 250W DC-ATX (nanoATX series) power converter - HDPLEX 160W AC-DC w/PFC (nanoATX series) PSU - Supermicro X11SAE-M uATX motherboard - Intel Xeon E3-1275 v5 CPU - 16GB DDR4-2133 memory - Samsung 950 Pro 512GB M.2 NVMe PCIe SSD - PPA v2 USB card This box will be used to run HQPlayer. Target OS is Windows 10. The M.2 SSD is a placeholder which will eventually be removed to make the box diskless, booting from a mounted iSCSI drive served by a silent NUC box acting as NAS and containing my music library. I'm also waiting for an HDPLEX 300W ATX linear PSU to arrive, and will be able to compare the sound between the above PSU setup and the 300W linear PSU.