


 The only constant in computer audio is change. Let me qualify that statement so as not to create discomfort among hesitant consumers. The only constant in computer audio, for early adopters and those seeking better solutions, is change. It's entirely possible to purchase a Mac, PC, or canned music server today and use it for the next five to ten years. But just because it's possible doesn't mean it's probable. As new servers, operating systems, and playback applications are released with better features and functionality consumer interest in changing solutions increases. Unfortunately switching servers isn't as simple as copying files or moving an external hard drive from one server to another. There are major incompatibilities between music server solutions. Some solutions like Olive Media servers don't allow users to export their music collections in a format usable by anything other than another Olive Media server. Other solutions like JRiver on a PC or the Aurender S10 Linux server support open standards such as FLAC that enable easy transitions to different platforms. The most problematic server switches involve Apple's iTunes, the most popular playback application in the world, and OS X operating system.
[PRBREAK][/PRBREAK]
Executive Summary
This article covers in detail how to convert a music library from iTunes on Mac OS X to almost any Linux based server. The server used as an example is the Aurender S10, but this guide should work for servers such as the SOtM sMS-100, Auraliti PK series, etc… The first of two steps is preparing the iTunes library before file format conversion. The second step is converting the files to FLAC and embedding appropriate metadata. This entire process will prepare the music library for use with the Aurender S10 and for the possibility of using another music server in the future. Working with a large collection of music can cause anxiety and stress as unlearned computer audiophiles worry about deleting files or changing data forever. Following this guide should simplify the process and set users up for success now and in the future.
Introduction
The popularity of new Linux based servers has increased the number of users moving away from Macintosh servers running OS X and iTunes toward solutions such as the Aurender S10 and SOtM sMS-1000. Reasons for switching servers are all over the board. Some users want an appliance-like server with an excellent iPad user interface while others are looking for a possible sound quality improvement that can come with dedicated hardware and software. No matter the reason for switching servers the goal remains the same, to move all music from Mac to Linux without losing metadata, album art, and the integrity of the music files.
Goal: To move all music from Mac to Linux without losing metadata, album art, and the integrity of the music files.
Quick Primer
Understanding how CD ripping and metadata work isn't necessary but the knowledge will help computer audiophiles in many other settings as well as the music server conversion process. The vast majority of people place CDs into their computers and click Yes when a box pops up asking if they want iTunes to import the disc. These users have unknowingly accepted the default ripping configuration. Most likely the disc will be ripped to 256Kbps AAC files that remove much of the information contained on the disc in an effort to save hard drive space. That's perfect for most people. Computer audiophiles on the other hand have likely changed the CD ripping settings to store the files in WAV, AIFF, or M4A / ALAC (Apple Lossless Audio Codec). Each of these three codecs / file formats is lossless in the same way a ZIP file is lossless for an MS Word document. Selecting a lossless codec is the easy part that most readers understand or will understand with a little education.
Metadata is a completely different animal and one that doesn't rear its ugly head until a users switches server platforms. The key concept to understand is embedded metadata versus associated metadata.
From the Computer Audiophile FAQ - What is metadata? ![]()
Metadata In general metadata is data about data. In the context of audio metadata is information describing an album, artist, track, etc… and cover art that goes with each album.
Associated Metadata (Stays with the application)
This metadata is frequently stored in a proprietary database or file used by playback applications. When looking at an album within the application users will see all the information available such as album art, artists, track title etc... The problem with associated metadata is its lack of transportability. This metadata will only be available when using the specific application that associated the metadata with the files. If a file with associated metadata is moved to another application all the metadata is gone for good.
Embedded Metadata (Stays with the file)
This metadata is stored as chunks inside the the audio file's container such as AIFF or FLAC. Containers / file formats such as FLAC, AIFF, M4A (ALAC) support embedded metadata that is readable and writable by many audio playback applications. These containers/file formats have guidelines or standards for embedding metadata and they allocate space within the container for this data. Once this metadata has been embedded into a container/file like AIFF the metadata is there until removed. Moving a file to another application has no effect on the metadata.
One additional note about metadata: Different applications embed this information differently. For example one program may embed a Comment in the Comment field while another may use the Description field. Furthermore, when converting a file the Comments field may be converted into the Description field. Life would be too simple if there was one standard that everyone agreed upon. Fortunately life can be made simpler using FLAC files when applications and platforms support the format. iTunes is not one of those application (without using the convoluted Fluke method, or a playlist in Amarra or Pure Music).
How iTunes Stores Metadata. AKA - How We Got Into This Mess.
As this article is about switching from the Mac / iTunes platform to a Linux platform it will be helpful for readers to understand how the above metadata information is pertinent to Mac / iTunes. Depending on the file format used iTunes can both embed metadata and associate metadata. However, iTunes never embeds album art without manual intervention.
M4A (Apple Lossless) & AIFF - By default iTunes embeds a limited number of metadata fields into each file such as Name, Artist, Album Artist, Album, Composer, Comments, Genre, Year, Track Number, and Disc Number. iTunes does not embed album art into either file format. Rather the album art images are stored in a convoluted maze of folders that prevents all but the most dedicated users from retrieving manually. When albums in wither format are moved to a different computer or platform the text based information such as Name, Artist, Track, etc… stays with the file and should be readable by the new platform. The album art does not move with the file and stays with the application on the source computer. Note: Doug Adams from Doug's Scripts has created a script that embeds album art into iTunes albums (Embed Artwork v2.0 ![]() ). For the most part this script works very well. I have had a few problems with error messages that aren't descriptive (Example
). For the most part this script works very well. I have had a few problems with error messages that aren't descriptive (Example  ). This is annoying when selecting 10,000 tracks to embed album art and the script has an issue with a couple tracks yet doesn't identify the tracks.
WAV - iTunes does not embed any metadata into WAV files. When using iTunes all track information and album art automatically downloaded from Apple is visible but only associated with the album. Moving WAV files results in tracks without identifying information other than the actual file name such as Light My Fire.wav. I don't recommend using any scripts in an attempt to improve the metadata embedded into WAV file if moving to another platform. User sticking with iTunes and WAV files can user this guide to embedding metadata into WAV files (Link ![]() ). I didn't say it would be easy.
). I didn't say it would be easy.
Now What? AKA - How We Get Out Of This Mess.
It's important to keep the goal of moving all music from Mac to Linux without losing metadata, album art, and the integrity of the music files in mind. Accomplishing these three elements of the goal isn't rocket science but can be impossible for computer audio newcomers. The above explanations detailed the source data handled by iTunes. This data is a mixed bag of embedded and associated metadata and album art. Just as important as the source data are the requirements of the target music server and a little vision for where this wonderful hobby of ours is headed.
First, thinking about where computer audio is headed helps focus the target and appropriate options for conversion. In the future computer audio will be filled with even more options. There isn't a single technology that rises above all others so much so that 300,000,000 iTunes users and all computer audiophiles will accept it as the gold standard and be able to afford this mythical technology. When CD players first came out only a select few companies offered the players in their product lines. Years later nearly every brand offered its own CD player. This pattern will likely play out with computer audio transports. Every year more manufacturers will put their own spin on a music server and offer it to their faithful customers. There will be a plethora of options using Ethernet, USB, Thunderbolt, Linux, Mac OS X, Windows, and proprietary operating systems in the near future. Promoting the concept of getting a computer out of the listening room is disingenuous and only fools unknowing consumers. All of the current and near future devices are really computers as is an iPhone, Aurender S10, PS Audio PWD Mk. II, etc… All these options will drive consumers to jump around making changes from one platform to another. The ability to switch platforms without reinventing the wheel or hiring an off-shore team of workers is crucial. At the AES Convention in 2010 I talked to a representative of the Smithsonian Institute in Washington DC about long term data storage media and file formats. He said the major focus of the Smithsonian with respect to long term data storage was the ability to transfer and convert files from one platform to another as technology changes. This philosophy of adapting to inevitable change is also relevant to computer audio. Setting oneself up for current and future successful server transitions can be accomplished by taking advantage of everything the FLAC file format has to offer.
The remaining examples and requirements are based on the Aurender S10 music server. This server uses the Linux operating system and has very similar file format requirements as other Linux servers like the SOtM sMS-1000 and Auraliti PK90-USB or PK100. The Aurender S10 supports several Lossless formats including AIFF, WAV, FLAC, and M4A Apple Lossless. Any one of these codecs would satisfy the file integrity part of the stated goal. Despite what others in the high end audio industry have said, namely Charles Zellig and Jay Clawson in The Absolute Sound's computer audio quality series, I believe there is no conceivable way lossless audio file conversion can change the sound of a music file and I have never heard a different between two identical files. For example when a file is converted from one lossless codec to another and back to the original codec this file is identifiable by what's called an MD5 or SHA-2 checksum. Contrary to what Charles Zellig and Jay Clawson suggest there is no plausible way, all things being equal, for files with identical checksums to sound different. Identical is identical is identical… That statement is of course my opinion based on my education and my research. Given the fact that losses audio codecs preserve the integrity of music / data files there is no need to re-rip one's music collection or worry about degrading sound quality when switching music servers.
Every Linux based server I've used supports Free Lossless Audio Codec (FLAC). I believe FLAC is more robust and its metadata is supported better than all other audio codecs. Moving from application to application and music server platform to platform FLAC files and embedded metadata appear identical to the end user. I've never had an issue where I embedded metadata into a FLAC file on my Windows server only to find another server unable to read the embedded data. Contrarily I've run into numerous issue with other file formats and lack of support for metadata across several platforms. Embedded AIFF metadata may appear in iTunes but not appear identically in Linux servers or Windows applications. This is caused by a lack of standards for embedding metadata into AIFF files. It should also be noted that FLAC supports varying levels of file compression and an option for no compression. The uncompressed FLAC files are similar to WAV and AIFF in that they contain identical PCM music data but differ in that FLAC supports much better metadata. Uncompressed FLAC is like having one's cake and eating it too for many compression-concerned audiophiles.
Note: Recently Apple released its Apple Lossless Audio codec as open source giving it a much greater potential to flourish and compete with FLAC. However, to date I'm unaware of any advancement of ALAC by the open source community.
Getting out of the iTunes metadata mess and into an Aurender S10 music server can be done in such a way that enables successful use of the Aurender S10 and prepares one's music collection for a possible music server migration in the future. The first of two steps in this music server switch is to prepare the iTunes music library for conversion into the FLAC format. The second step is converting the music while embedding album art and adjusting metadata (if necessary). This conversion places the entire music collection on the Aurender S10 music server as a finished product. There will be no cleanup necessary once the files are on the target server.
Step By Step Guide To Converting From iTunes To Aurender S10 Linux Music Server
There are several ways to move music from iTunes to an Aurender S10 music server. Each method has pros and cons. The method shown here is the most versatile, robust, and easiest way to get from here to there. I attempted to do this entire conversion using Mac OS X applications only because it's a given that users have a Mac computer as this is the platform they are leaving for Linux. I ran into a couple problems with XLD and Max during my research. I was unable to configure XLD to either copy a folder.jpg file or extract a folder.jpg file and place it on the target Aurender S10 server. This was a showstopper. Max was able to extract a folder.jpg file and place it directly on the Aurender S10, but this required using the script to embed album art within iTunes while preparing the music for conversion. As I mentioned earlier this script produced error messages that were unpredictable and not repeatable. Also, Max is unable to output uncompressed FLAC files. I'm unsure how both applications handle libraries of considerable size such as 50,000 tracks and up. I've had issues with Max in the past when converting a large library. If the application has issues it can be impossible to pick up where the conversion left off. Thus, I recommend using the Windows only application dBpoweramp to convert files from an iTunes music library to an Aurender S10 music server.
Requirements:
- Mac running iTunes containing music library
- Save Album Art as folder.jpg v2.2 script
- Windows computer or Windows virtual machine running on Mac OS X.
- dBpoweramp
- Aurender S10 or other Linux based music server
- Wired Ethernet connection (optional but highly recommended)
Here is a real world example of iTunes ripping and metadata embedding & association. These albums will be used throughout this guide. I created a small iTunes library containing five albums. Each album is different in either file format or metadata storage. These albums are representative of most computer audiophile's libraries in one way or another. Most listeners select one or two of these configurations when using iTunes.
Artist: Norah Jones
Album: Little Broken Hearts
Method: I ripped this album with iTunes set to import files using the Apple Lossless Encoder and error correction. Album art was automatically downloaded from Apple and associated, not embedded, with the album by iTunes. I manually added the following text into the Comment field of each track, "Manually added comment in iTunes for Norah Jones in ALAC."
Artist: Jack White
Album: Blunderbuss
Method: I ripped this album with iTunes set to import files using the AIFF Encoder and error correction. Album art was automatically downloaded from Apple and associated, not embedded, with the album by iTunes. I manually added the following text into the Comment field of each track, "Manually added comment in iTunes for Jack White in AIFF."
Artist: Lionel Richie
Album: Tuskegee
Method: I ripped this album with iTunes set to import files using the AIFF Encoder and error correction. Album art was added manually by selecting all album tracks > Get Info > and dragging the image file into the Artwork window. This album art is embedded, not associated, into each track of this album. I manually added the following text into the Comment field of each track, "Manually added comment in iTunes for Lionel Richie in AIFF."
Artist: The Little Willies
Album: For The Good Times
Method: I ripped this album with iTunes set to import files using the WAV Encoder and error correction. Album art was automatically downloaded from Apple and associated, not embedded, with the album by iTunes. I manually added the following text into the Comment field of each track, "Manually added comment in iTunes for The Little Willies in WAV."
Artist: The Doors
Album: The Doors (24 bit / 96 kHz)
Method: I downloaded this album from HDtracks in FLAC format and edited the metadata with dBpoweramp on a Windows PC. I then converted the album to M4A Apple Lossless using dBpoweramp and imported the tracks into iTunes using the Automatically Add to iTunes folder. iTunes surprised me by importing the PDF liner notes into the Books section of the program. I manually added the following text into the Comment field of each track, "Manually added comment in iTunes for The Doors 24/96 in ALAC."
Prior to this conversion I copied my five album test music library from a Mac to the Aurender without any file format conversion or metadata adjustments.
This is an image of the original library with some embedded and some associated metadata as viewed in iTunes.

This is an image of the original library with some embedded and some associated metadata as viewed on the Aurender S10. Notice there are only four albums listed, two of which are missing album art. In this image The Doors and Lionel Richie albums display album art because it was embedded into the tracks manually within iTunes. The missing album is from The Little Willies. This album was ripped into WAV files. iTunes doesn't support any metadata embedding into WAVs and without metadata the Aurender can only arrange the album by folder. Thus navigating the folder menu allows one to view The Little Willies album.

Step One: Prepare iTunes Music Library
A. Convert all WAV files to M4A Apple Lossless within iTunes.
B. Use Doug Adams' script to place album art in each album folder.
Step Two: Convert Files and Adjust Metadata
A. Configure dBpoweramp
B. Convert entire library
Step One: A. Convert all WAV files to M4A Apple Lossless within iTunes. If users don't have any WAV files this step can be skipped.
Configure iTunes Import Settings to Import Using: Apple Lossless Encoder. Menu location is iTunes > Preferences > General > Import Settings...

Sort the iTunes Music by Kind thus grouping all WAV files together. If Kind is not visible click the View menu > View Options > Check Kind. Select all WAV files by clicking the first WAV file, holding down the shift key, then clicking the last WAV file. All WAVs should be highlighted. Right-click or hold the Control key and click to view the popup options menu. From this menu select Create Apple Lossless Version. If the option says any other file format you've missed the previous instruction to configure the import settings. When this conversion is complete there's no need to delete the original WAV files unless disk space is running low.

Step One: B. Use Doug Adam's script to place album art in each album folder.
This is the belt and suspenders approach that enables both embedding album art into each track and including the embedded picture file in the same folder a the album. Some music servers prefer to read the album art picture file over reading the embedded album art tag. Having the picture file may provided better options for metadata manipulation should another server require this and the file doesn't consumer much disk space. Again, the belt (embedded art) and suspenders (picture file) approach.
Visit Doug Adams' website (Doug's AppleScripts for iTunes ![]() ) to download the free script and make a monetary donation to Doug for creating such a great tool. Once the ZIP file is downloaded unpack it and double click the enclosed dmg file. The two files visible when launching the dmg file should be placed in the user's Scripts folder.
) to download the free script and make a monetary donation to Doug for creating such a great tool. Once the ZIP file is downloaded unpack it and double click the enclosed dmg file. The two files visible when launching the dmg file should be placed in the user's Scripts folder.
Users with OS X version 10.6.x and earlier can simply browse Finder to Macintosh HD/ Users/(your-username)/Library/iTunes/Scripts and drag the two files into the Scripts folder. If the Scripts folder doesn't exist simple create the folder by selecting File > Create New Folder from the menu at the top of the window. Then drag and drop the two files into the Scripts folder.
Users of OS X 10.7.x and newer must unhide the Library folder to move Doug's script into the right location. To unhide the Library folder click the menu option Go at the top of the Finder window. If the Go option is unavailable click anywhere on the desktop to make it appear. After clicking Go, hold down the Option key to unhide the link to the Library folder. Select Library the browse to iTunes. If a Scripts folder exists place the two files into that folder other wise create the Scripts folder by selecting File > Create New Folder from the menu at the top of the window. Then drag and drop the two files into the Scripts folder.
If iTunes was open, close the application and relaunch. Otherwise simply open iTunes once the script files have been copied to the Scripts folder. Users should now see the Script icon at the top menu. Selecting this icon reveals Doug's Save Album Art as folder.jpg script as pictured below.

Using Doug's Save Album Art as folder.jpg script is simple. Select all albums within iTunes. I use the Album view for this task. Then select the Script menu at the top and click Save Album Art as folder.jpg. This selection will bring up the configuration options window. I change JPEG Compression to Low because JPEG compression is lossy and reduces image quality. Then click the OK button and watch the progress via the horizontal popup window. When the Script is complete click the Quit button. Users should check a couple album folders to make sure the new file titled folder.jpg is located among the individual tracks. Each album folder should contain one folder.jpg file. Once this step is complete the iTunes music library is prepared for work with dBpoweramp.


Important Note: Before proceeding to the next step it's imperative that a Windows computer has access to the iTunes music files. Mac OS X uses the HFS+ format for hard drives. Unfortunately Windows is unable to read an HFS+ (Mac OS X Extended) formatted drive without special software. Users with music stored on a Network Attached Storage (NAS) drive won't have any problems and can skip directly to step two below. All other users are likely storing their iTunes music files on either the internal Mac hard drive or an external FireWire or USB hard drive in HFS+ (Mac OS X Extended) format. The solution to allow Windows access to the iTunes music contain on HFS+ (Mac OS X Extended) drives is different depending on one's computer and where the music is stored. One of the following methods should resolve the issue for nearly all users.
Computer: Mac running OS X 10.6 or newer and running Windows XP, Vista, or 7 via Boot Camp.
iTunes Music Stored: Internal or external FireWire or USB drive.
Solution: Apple currently includes HFS+ read only drivers with Boot Camp. Windows should be able to read the HFS+ drive as of May 2012. An update to the Boot Camp drivers may be necessary.
Computer: Mac
iTunes Music Stored: Internal hard drive
Solution: 1. Purchase an external USB drive. Format the drive as MS-DOS (FAT) using the built-in OS X Disk utility. Copy all iTunes music to this new external USB drive, then connect the drive to a Windows PC. I recommend USB drives in this scenario because they can be used with an Aurender or many other Linux servers.
Solution: 2. Use Mac OS X built-in File Sharing to share the iTunes music folder over a network. This is typically more difficult for new users. To share a folder open System Preference click on Sharing and check File Sharing. The iTunes music folder must be added as a Shared Folder and at least Read Only access given to appropriate users. Once this is done a Windows PC can connect to the Mac with access to the music files.
Computer: Mac
iTunes Music Stored: External FireWire or USB drive formatted as HFS+ (Mac OS X Extended).
Solution: 1. Purchase an additional external USB drive. Format the drive as MS-DOS (FAT) using the built-in OS X Disk utility. Copy all iTunes music to this new external USB drive, then connect the drive to a Windows PC. I recommend USB drives in this scenario because they can be used with an Aurender or many other Linux servers.
Solution: 2. Users with enough internal hard drive space available can copy the iTunes music folder to the internal drive, then proceed to use the external drive as if it was new -> Format the external drive as MS-DOS (FAT) using the built-in OS X Disk utility. Copy all iTunes music to this new external USB drive, then connect the drive to a Windows PC.
Solution: 3. Use Mac OS X built-in File Sharing to share the iTunes music folder over a network. This is typically more difficult for new users. To share a folder open System Preference click on Sharing and check File Sharing. The iTunes music folder must be added as a Shared Folder and at least Read Only access given to appropriate users. Once this is done a Windows PC can connect to the Mac with access to the music files.
Note about virtualization software such as Parallels and VM Ware Fusion. I was able to read an HFS+ drive using Parallels which doesn't require rebooting into Windows. However, my Windows virtual machine is my Boot Camp partition which uses the Apple HFS+ drivers. Parallels says reading and writing to a USB HFS+ drive is supported with use of SmartMount in the Parallels VM configuration. According to the user manual, "When you connect a storage device or volume, it is mounted as a network drive. For example, a USB flash drive plugged in to your Mac will be accessible from both the /Volumes folder in Mac OS X and My Computer in Windows."
Step Two: A. Configure dBpoweramp
The remaining steps must be done using a Windows operating system. Users without dBpoweramp can purchase and download the product from the dBpoweramp Reference R14 page (Link ![]() ). In addition to the main dBpoweramp product users must also download a free codec utility from dBpoweramp called ID Tag Update (Link
). In addition to the main dBpoweramp product users must also download a free codec utility from dBpoweramp called ID Tag Update (Link ![]() ). Once downloaded simply open the exe file and click next > finish for the utility to automatically install into dBpoweramp.
). Once downloaded simply open the exe file and click next > finish for the utility to automatically install into dBpoweramp.
Once installed open the dBpoweramp Batch Converter Start > All Programs > dBpoweramp Music Converter > dBpoweramp Batch Converter. The following window should appear. At the top of this window click the Filter button. Scroll down to the bottom and un-check WAVE (.wav). This instructs dBpoweramp to skip the WAV files in the iTunes music library that were previously converted to M4A Apple Lossless files.

In the left window pane browse to the folder containing the iTunes music files and check the box next to the folder. In the image below I selected the Music folder as everything underneath that top folder contains music. The image also show all tracks automatically selected when the folder Music was selected. Once the correct folder is selected click the Convert button. This will not begin the conversion rather it only leads to additional configuration.

The conversion configuration window pictured below is very important to the success of the entire process. Select FLAC in the Converting To: drop-down box. I use Lossless Uncompressed as my Encoding selection and enable the After Encoding Verify Written Audio option. The Output Location is where to set the target drive for the converted iTunes music files' final resting place. There is no need to convert to an intermediate location when converting directly to the Aurender accomplished the same thing and is much quicker. Select the Dynamic radio button. Enter the location of the Aurender in the Folder box. The network location of the Aurender S10 music folder is \\Aurenders10-us\hdd1\. This will likely be different on a different network using a different Aurender. Clicking the Browse button will enable users to select their Aurender server and its hard drive (Example 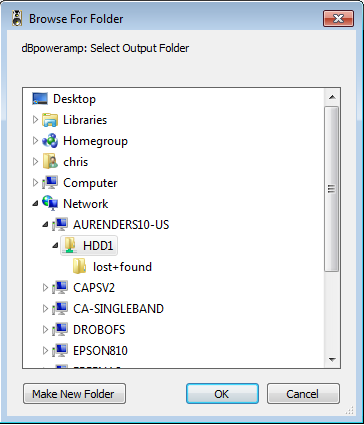 ). In the final box I recommend copying this text and pasting it directly into dBpoweramp -> [iFVALUE]album artist,[album artist],[iFCOMP]Various Artists[][iF!COMP][artist][][]\[album]\[track] - [title] This string determines how the music is stored in folders on the Aurender S10. For example a regular album will be stored as Artist\Album\Track Number - Track Name. A compilation album will be stored as Various Artists\Album\Track Number - Track Name. Users can change this to whatever suits their needs.
Earlier in this guide Doug's script was used to place album art into each album folder. The Options: DSP Effects / Actions window is where to configure dBpoweramp to use this folder.jpg file to embed album art and to copy the file to the Aurender. Click Add > Add DSP Effect > Folder.jpg Preserve. Make sure the top box is checked. I also add the .pdf extension in the Files With Extension box. This preserves all liner notes that are PDF files by copying them to the Album folders on the Aurender S10. The Aurender doesn't support these PDF files, but the SOTm sMS-1000 does and future Aurender servers may also support PDFs. In addition to copying the album art dBpoweramp must be instructed to embed the art into each file. To configure this click Add > Add DSP Effect > ID Tag Processing. Select the Manipulation tab and enter folder.jpg in the box to the right of Import Album Art From.
Optional: On the ID Tag Processing window it's possible to map metadata fields. For example it's possible to map the iTunes Comments field to the FLAC Description field if needed. A reason for mapping such a field is for consistency across a music collection. Some of my files contain comment type information in the Description field while others contain this in the Comment field.
Preserve jpg options

ID Tag Processing options

Final conversion configuration settings

Step Two: B. Convert entire library
All the dBpoweramp conversion options have been set during the previous steps. It's time to click the Convert button and follow the progress. The progress window displays the percentage of files converted and the number of converted files. Near the bottom right of this window is a little down arrow. Select this arrow, click Priority, then click Above Normal. This option gives dBpoweramp greater priority than other programs and some services running on Windows.

When the conversion is complete dBpoweramp may display a window with numerous error messages similar to the following two messages. These messages can be ignored based on the file dBpoweramp attempted to convert. Looking closely at the files one can see the names start with ._Track Name Here. These files are only used in OS X and remain invisible to end users unless they've configured the operating system to show hidden files. Windows has no problem seeing these files and dBpoweramp mistakenly attempts to convert them with the rest of the files. The bottom line is files or error messages about files that start with a "._" prefix can be ignored. I'm sure there is a way to exclude these files from conversion but Ii am unable to find the option. The image below is a screenshot from the Aurender iPad application. All five albums have album art and metadata visible to the user as opposed to the missing art and information found when simply copying files from the Mac to the Aurender S10.
Error converting to FLAC, 'M:\music\temp\Music\Jack White\Blunderbuss\._01 Missing Pieces.aif' to '\\Aurenders10-us\hdd1\ - ._01 Missing Pieces.flac'
Error first chunk unknown: [clAIFFHandler::ScanFile]
Error converting to FLAC, 'M:\music\temp\Music\Norah Jones\Little Broken Hearts\._07 4 Broken Hearts.m4a' to '\\Aurenders10-us\hdd1\ - ._07 4 Broken Hearts.flac'
Unable to decode m4a file (is corrupt or not supported audio type).

Looking at this guide as a whole may be overwhelming to many readers. Much of the information is extremely detailed and adds to the length of the guide. I'm trying to avoid leading tech un-savvy readers down the road of conversion only leave them high and dry with a poor explanation of a simple step. We've all been there following a how-to guide when all progress stops because the author forgot to add a minor detail. Hopefully that won't happen with this guide. To prove this type of conversion is easier than it may appear I created a video of me going through the steps from downloading the script to clicking the convert button. The entire process is done in less than 2 minutes 30 seconds.
<iframe width="750" height="411" src="http://www.youtube.com/embed/InBNMvUrIy0" frameborder="0" allowfullscreen></iframe>
![]()
![]()
![]()


Recommended Comments