


Patience is a virtue, especially when installing a high end twelve channel immersive audio system. From the moment crates of speakers arrive to the final placement before the play button is pushed, one has to operate like everything is an irreplaceable antiquity. Installing this stuff with the mindset of just getting it done so one can start listening, is a recipe for disaster. Even the middle ground between those two, leads to disappointment, with scratched paint and incorrectly placed speakers. Fortunately, I've learned through the mistakes of others, and some very wise mentors. That's why I spent months planning, and three full days and nights carefully installing the entire system. What follows is my journey preparing my listening room, running cables, and installing speakers and components.
Slow and Steady Wins the Race
Twelve channels, two digital interfaces, and cabling to absolutely everything. Here are the specific components I added to my existing two channel system.
- Wilson Audio Alida x 8 surrounds
- Wilson Audio WATCH Convergent Synergy center channel
- Wilson Audio Lōkē subwoofer
- Merging Technologies Anubis
- Merging technologies HAPI MKII
- Transparent Ultra speaker and interconnect cabling
- Transparent custom 8 channel DB25 to XLR x 2
- Transparent High Performance 10-2 in-wall cable
- Transparent PowerWave
- Transparent Performance power cables
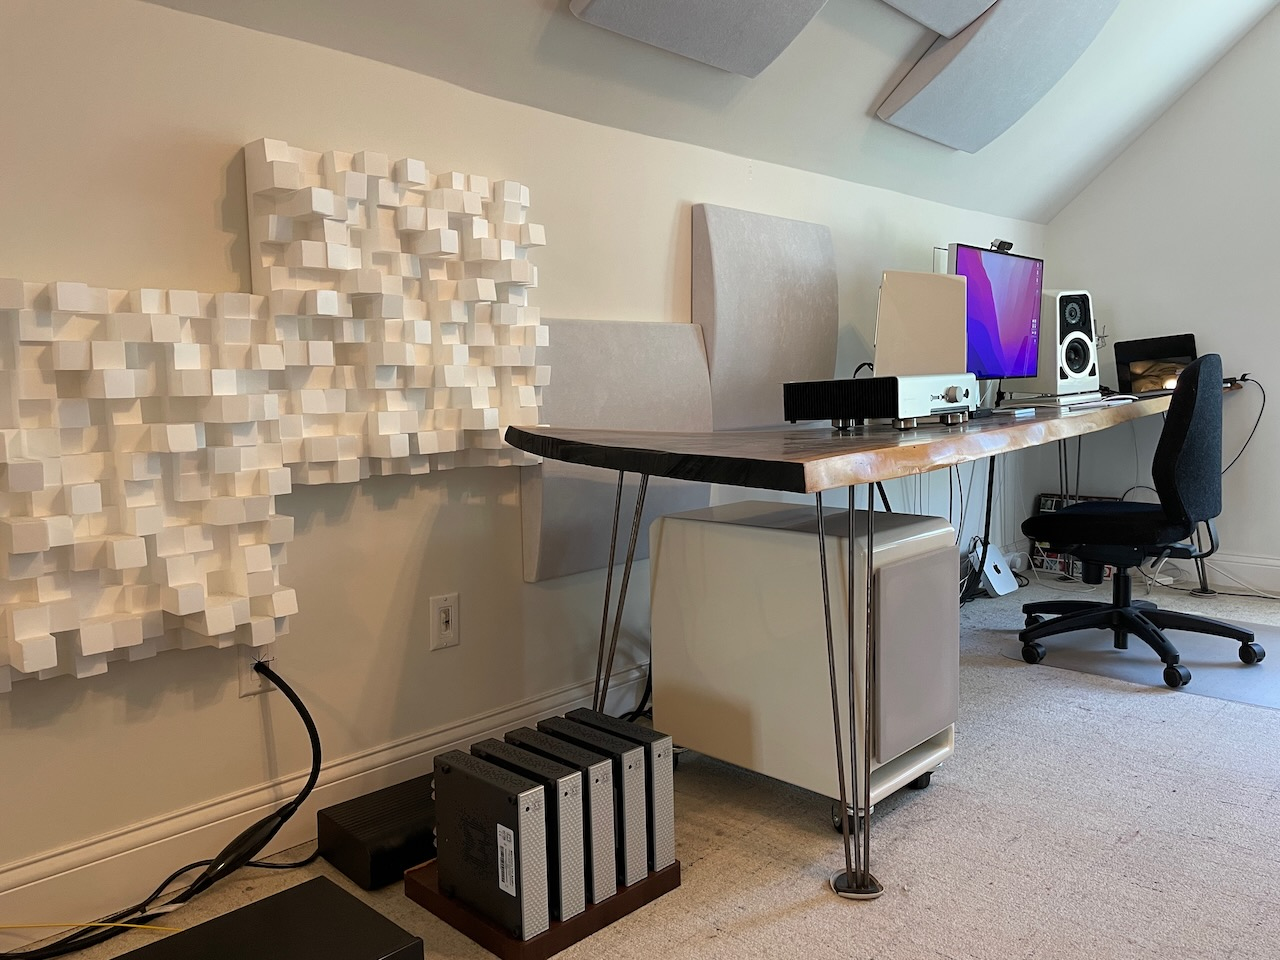
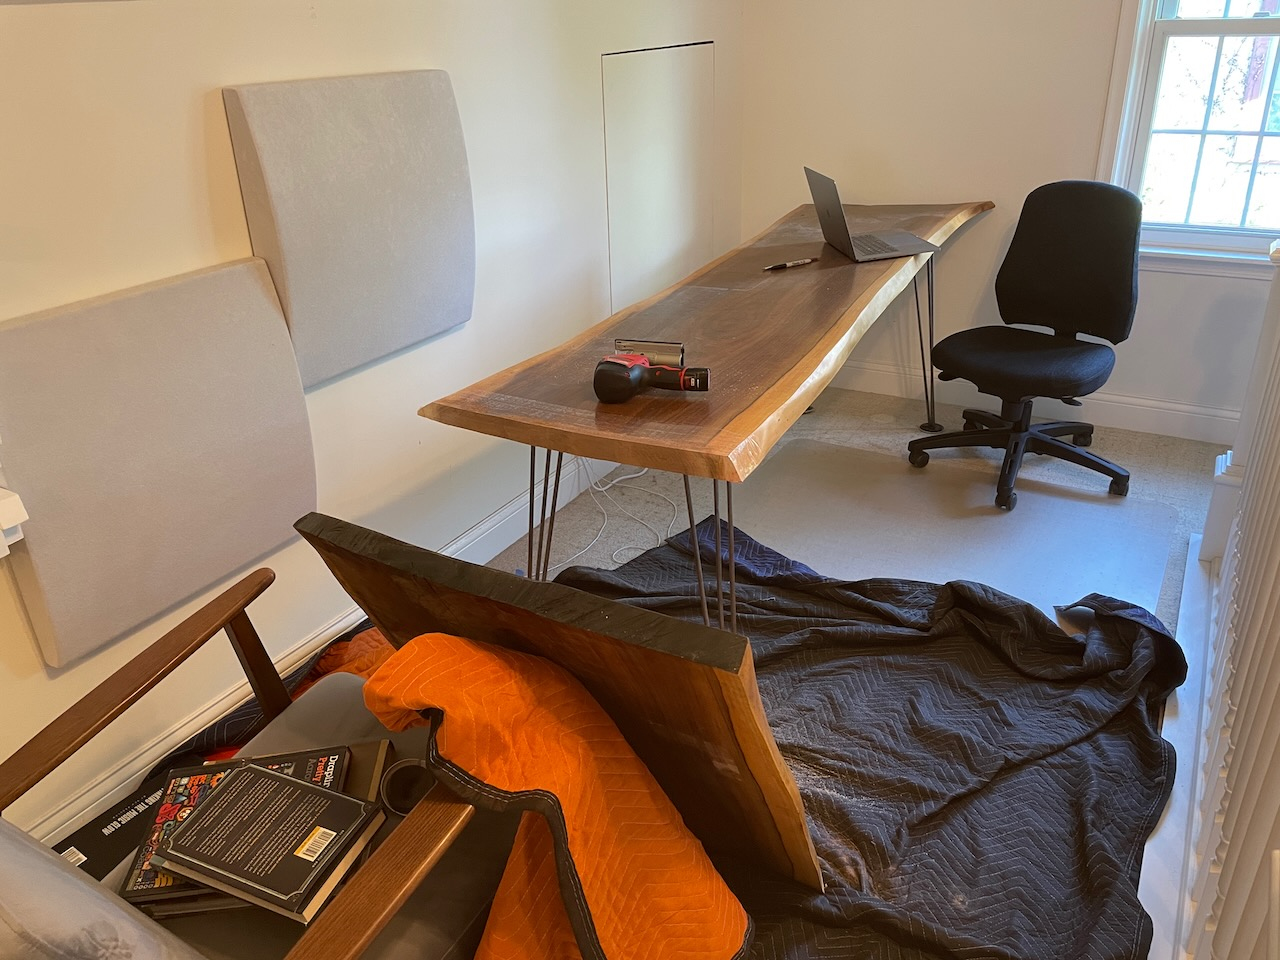
It all started with sawing off roughly three feet of my desk. This twelve foot slab of live-edge wood worked perfect when I had a two channel stereo. However, Dolby Atmos side surround speakers should be placed at 100 degrees from the listening position. In order to install the right surround speaker in this location, I sacrificed three feet of my desk.
Before and after.
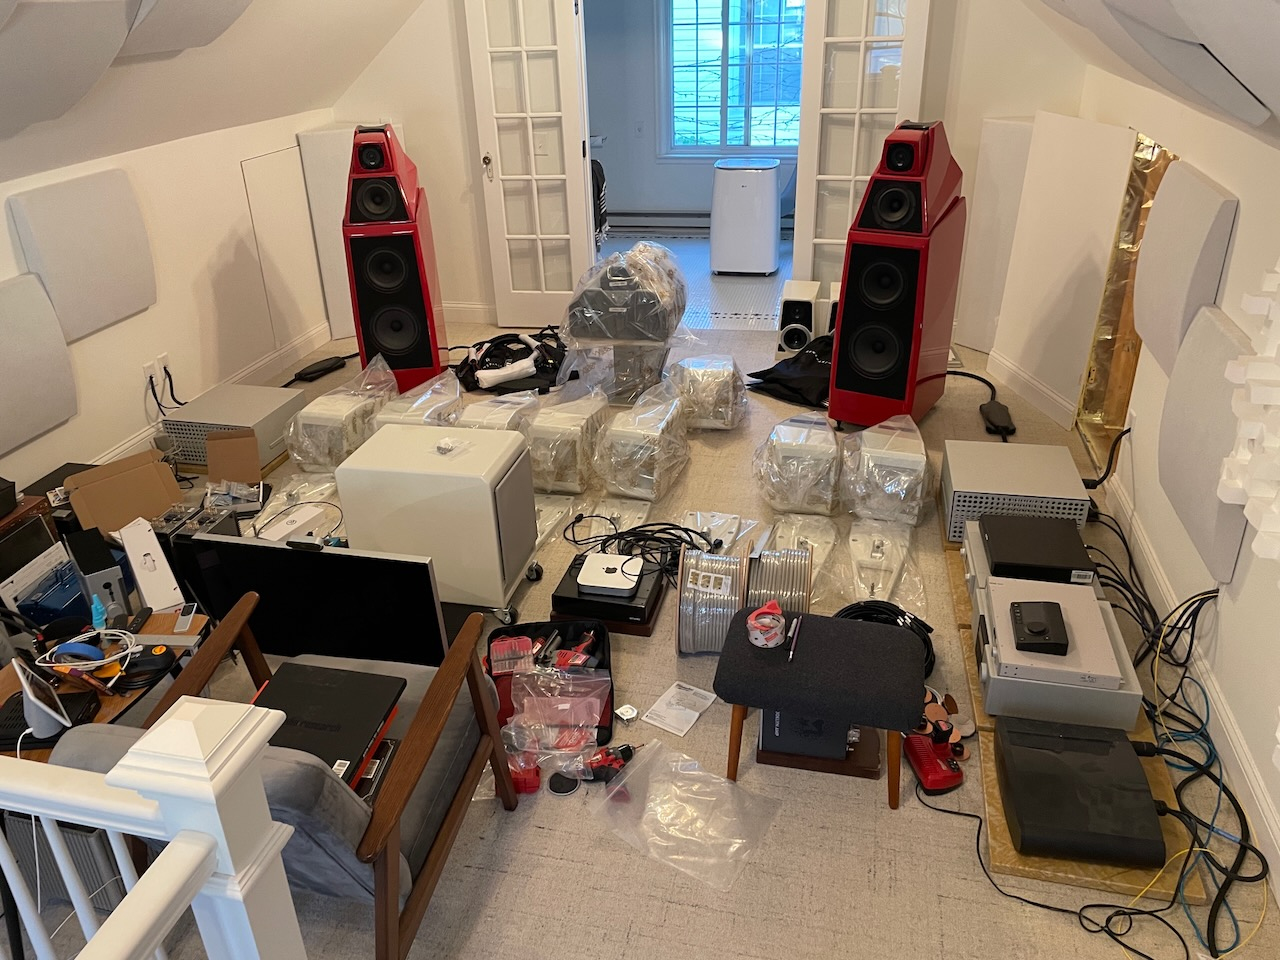
Here are all of the items to be installed, and some of the tools I used.
The Wilson Alida speakers weigh 58 lbs, including the heavy duty mount. Wilson highly recommends the mount be screwed into a stud or concrete, and offers very detailed instructions in the Alida manual. These instructions were incredibly helpful, but are only for reference for Wilson Audio owners. A skilled Wilson dealer installs everything, under normal circumstances. My circumstances aren't normal :~)
Given the weight of the speakers, the location of studs behind my walls, and Dolby's specific speaker placement guidelines, this install could've involved some serious creativity. Let's just say I had several contingency plans for placing the speakers on the walls without a stud or concrete, but fortunately none of them were needed. In 1941, the builders of my house must've foreseen the installation of a twelve channel immersive audio system at some point in the future, because there are studs in every speaker location. Only kidding about the builders, but dead serious about having studs in perfect locations for all eight Alida speakers.
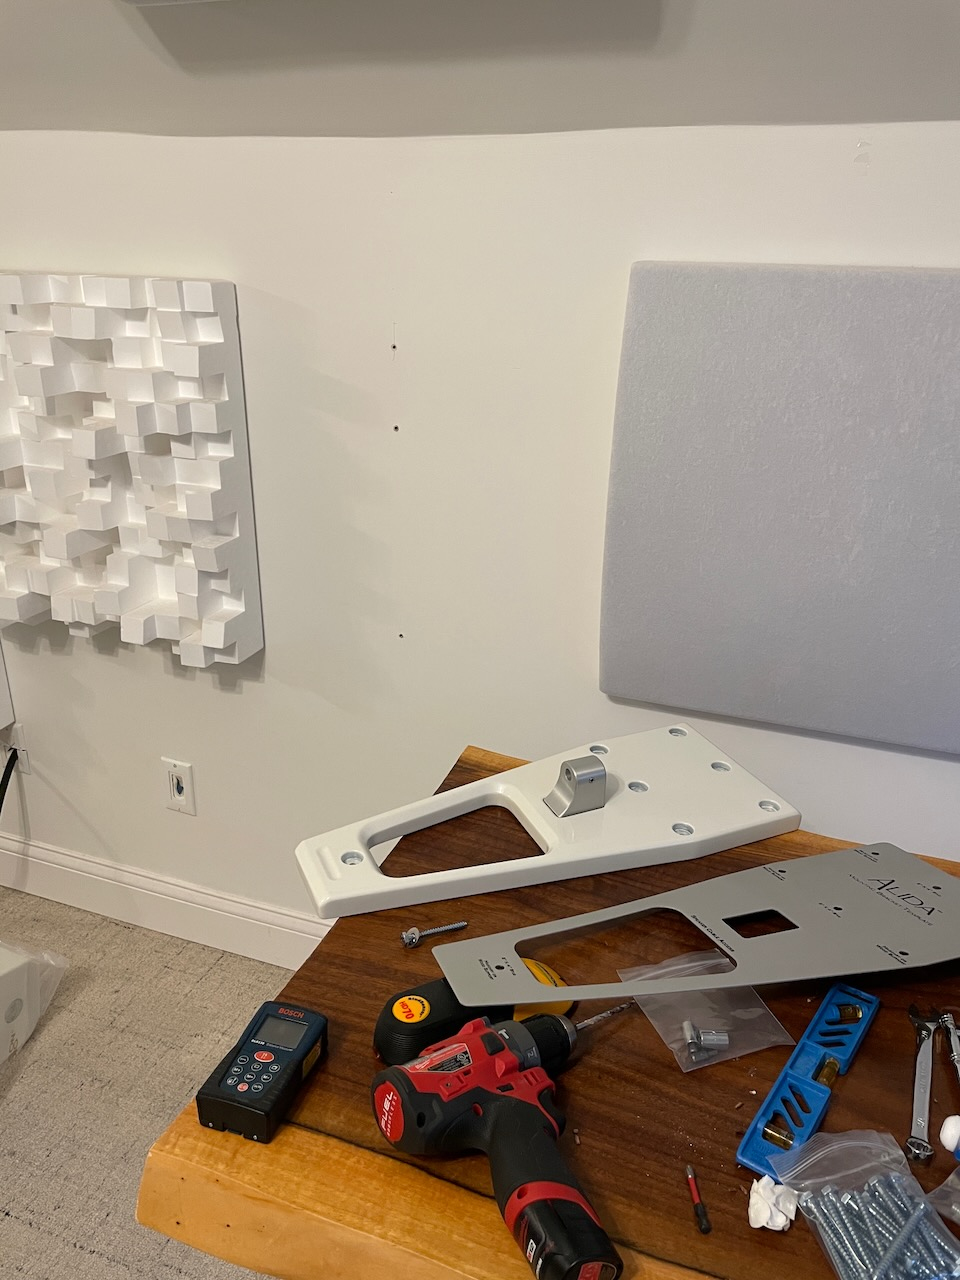 The first speaker I installed was the right surround. This was the easiest speaker because of its height and a lack of "stuff" in the way. Wilson provides a nice Alida mounting bracket template that was possibly the most valuable item I used for the entire project. The metal template, a stud finder, a level, and a pencil, made quick work of preparing the wall for the speaker mount. I penciled-in the hole locations and pre-drilled holes with the provided 3/16 drill bit. Within a minute I had the mount securely screwed into a stud, at 100 degrees from the listening position, and ready for the first Alida.
Note: Wilson Audio includes drill bits with the speakers, but I purchased this 3/16 in. x 4 in. x 6 in. Milwaukee Shockwave carbide multi-material drill bit because the studs in my house are often referred to as "iron wood" by any tradesman who drills into them. The upgraded drill bit came in handy for all 24 holes.
Before placing the speaker on the mount, I used a one inch hole saw to drill the hole for the speaker cable to route through the wall. I could've used a much smaller hole, but decided on one inch because the selection of grommets for a one inch hole is much better and the one inch hole gave me a little breathing room when pulling cable through the wall. The specific grommets I used are here.


After mounting the first speaker, I had a feel for the process. I removed the speaker from the mount because I still had work to do in the area, then drilled the other mounts into the side walls. The right surround, left surround, right rear surround, and left rear surround were all pretty straight forward to mount on the walls.

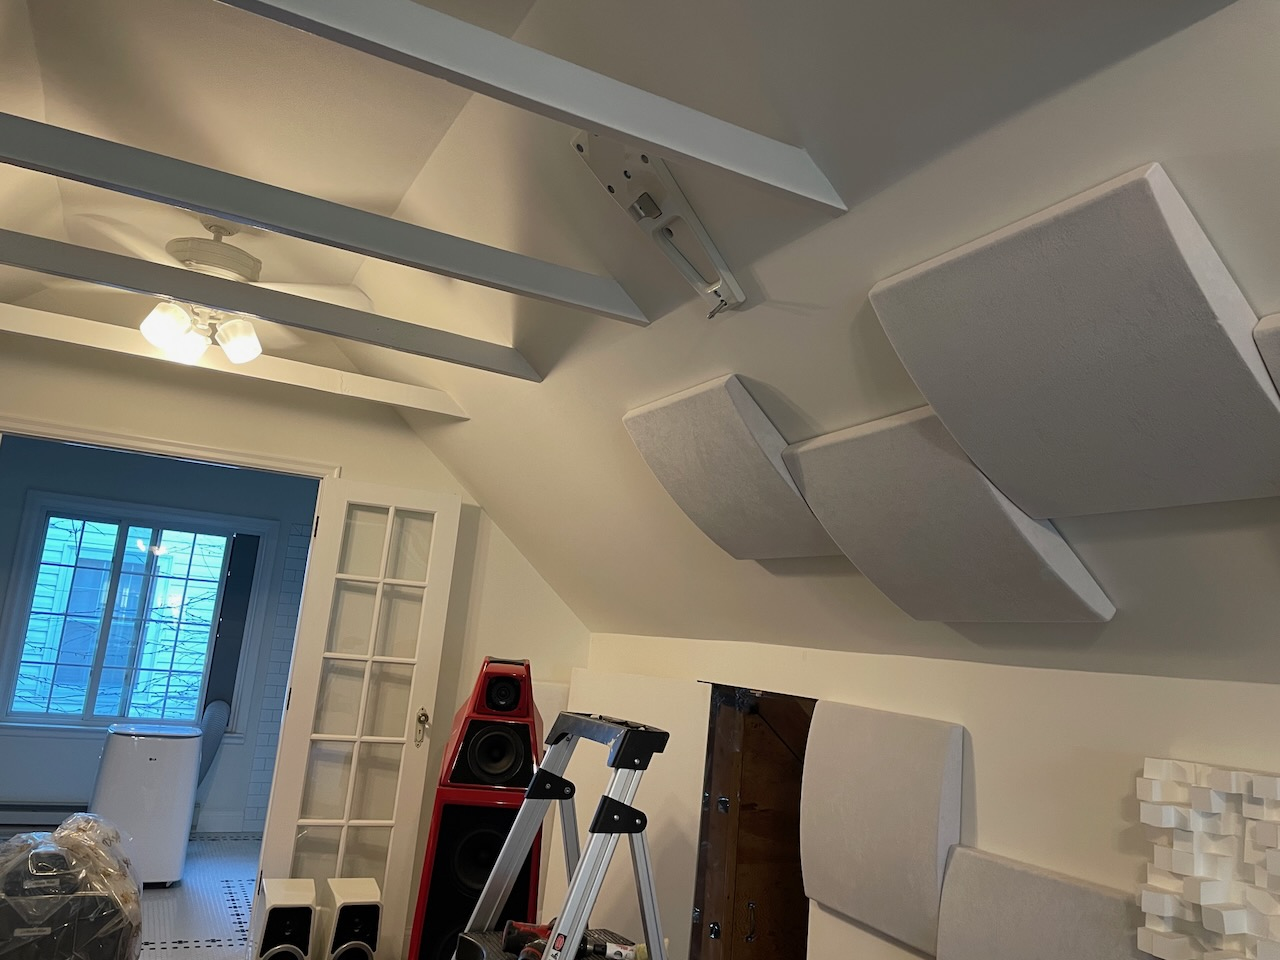
Then it was time to install the mounts on the angled ceiling. For the most part, Dolby's guidelines helped me position them, but within the acceptable installation window, I had some decisions to make. One of them was the vertical placement on the ceiling. Too high would put the speakers too close together and even move them out of spec. The main item that concerned me was placement of the drivers with respect to the beams that go across my ceiling. I didn't want either driver the be completely behind a beam, when viewed from the listening position. This dictated that I place the speaker mount ten inches from the top of the angled ceiling.
As fate would have it, this location placed a mounting screw right on top of a drywall screw for the top right front speaker. I adjusted the mounting position by a quarter inch, and proceeded.

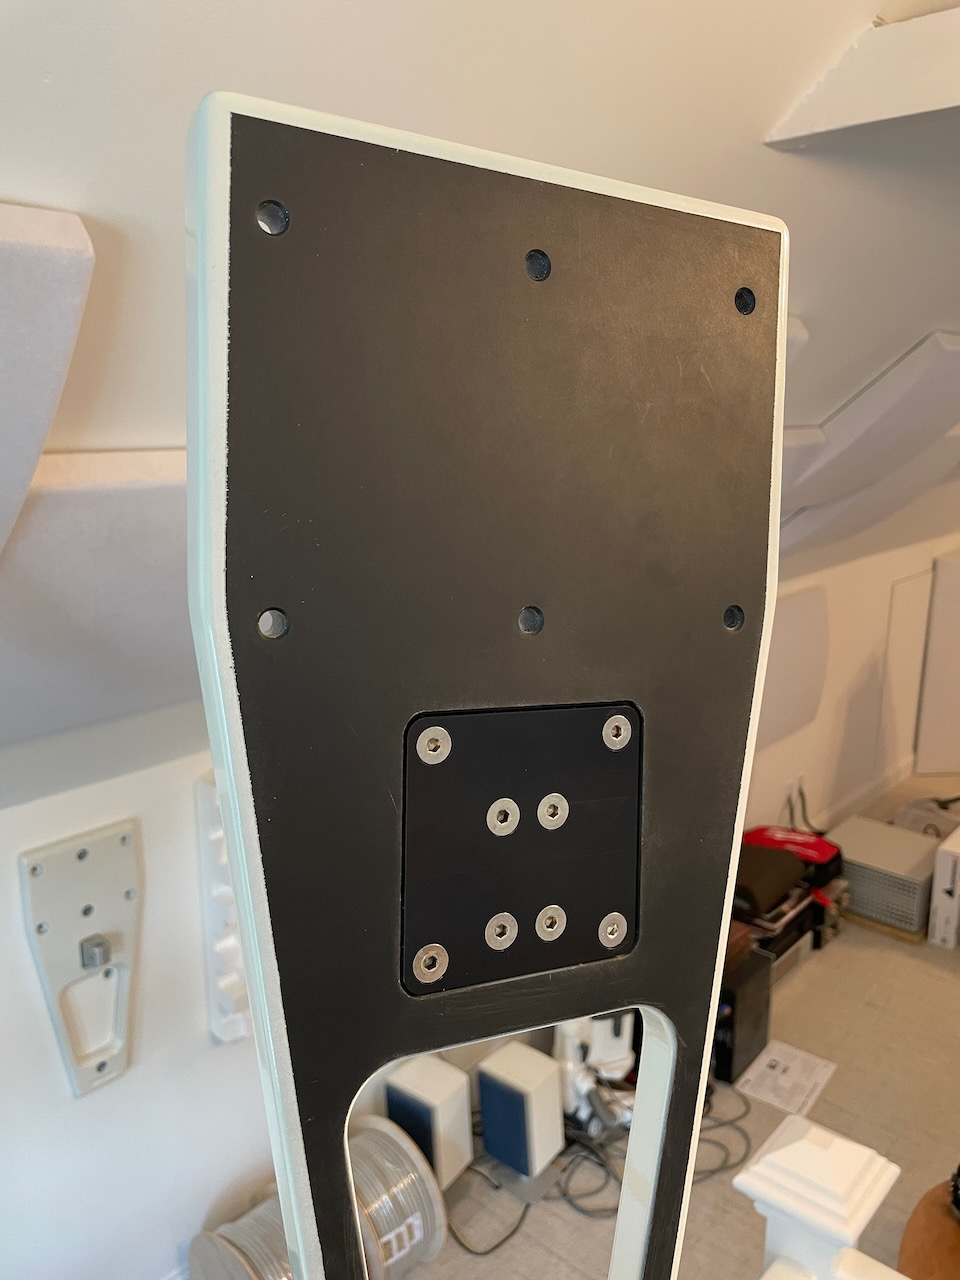
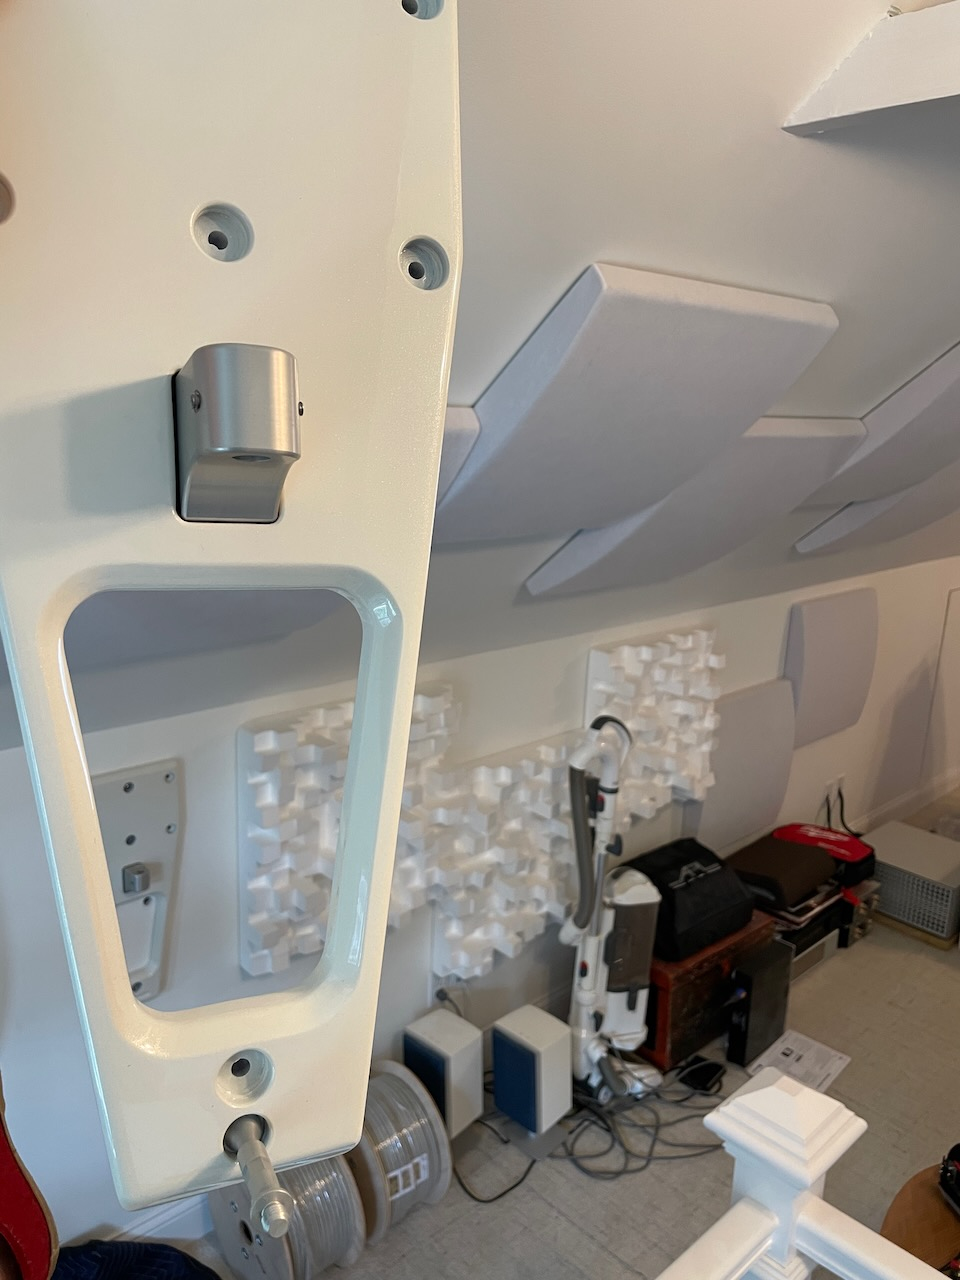
A closer look at the Alida mounts. This specific mount is for a ceiling speaker. It has the fixed "tensioning spike" that screws into the speaker, rather than the standard tensioning spike that's adjustable.
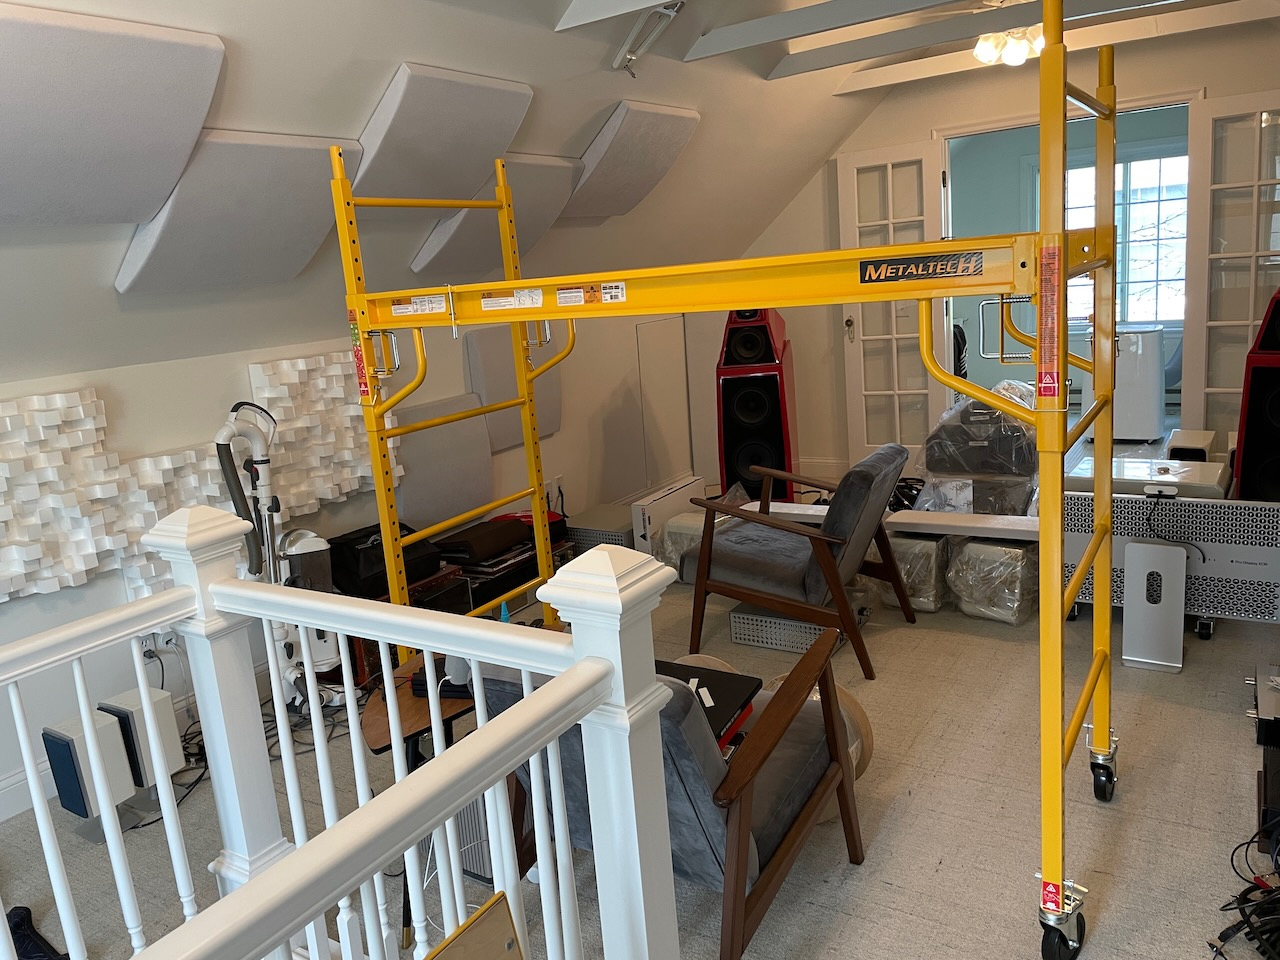
The ceiling mounts went up just fine, until I attempted the top rear left mount. Due to the design of my room, I couldn't place the ladder anywhere near the location I needed. Things got dicey when I placed one foot on the railing and one on the ladder. I quickly realized I needed to bring in the right tool for the job.
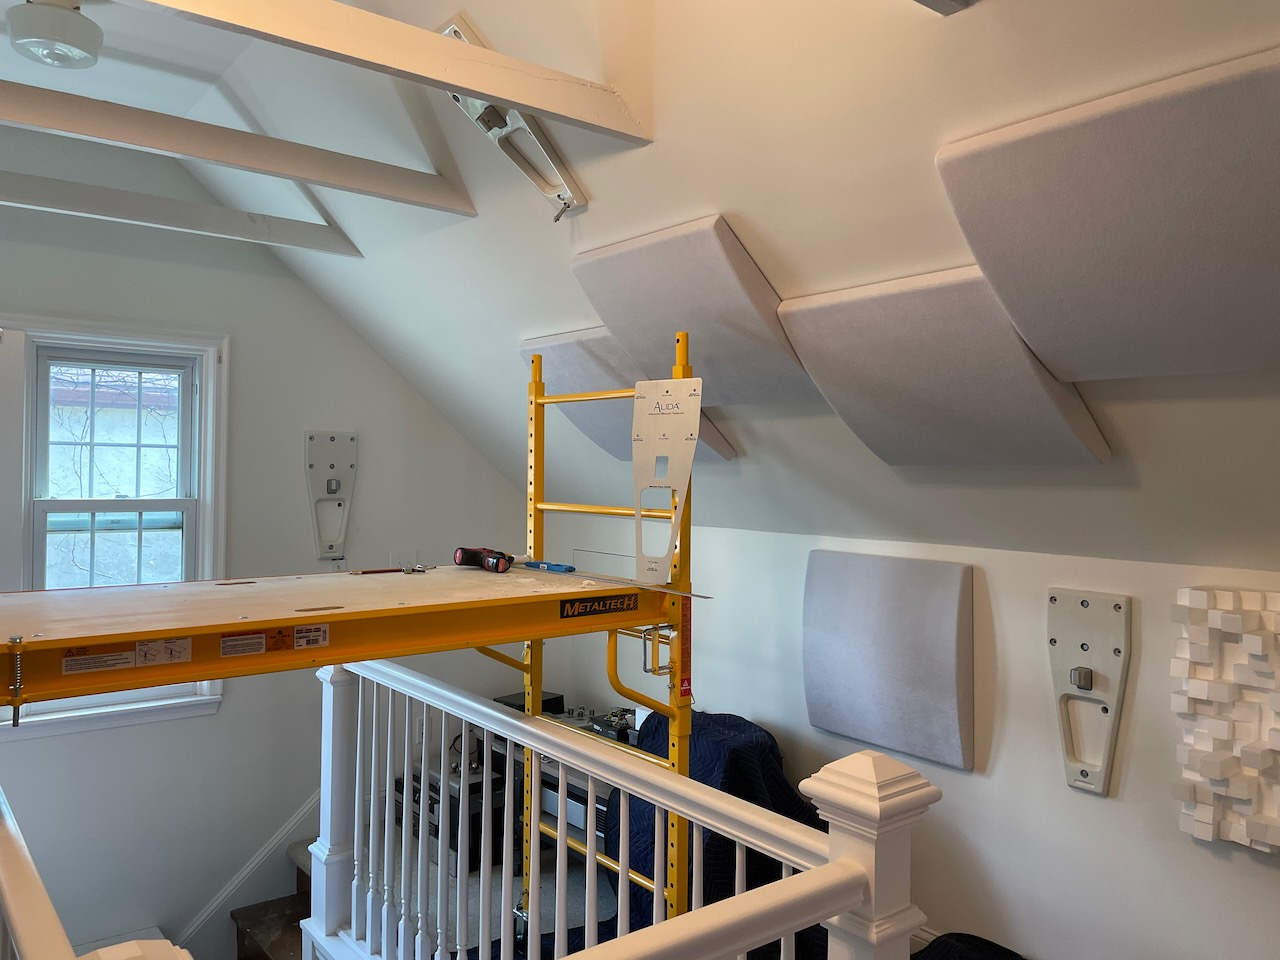
I drove down to Northern Tool + Equipment to purchase a Metaltech Multi-Purpose 6ft. Baker-Style Scaffold. This was unexpectedly one of the best things I'v purchased in a long time. The scaffold made not only the top rear left mount simple to install, but it was extremely handy when hoisting the fairly heavy Alida speakers into position.
Cabling
Once the mounts were in place, I ran wires to each speaker location, before setting the Alidas into their final positions. Running the wires was the most time consuming part of the entire installation. Sure, there is a quick way to do this by running them along the front of the walls and attempting to hide them, but the look of that would've driven me nuts. I'm in this office / listening room for ten hours per day, it was to look nice to me.
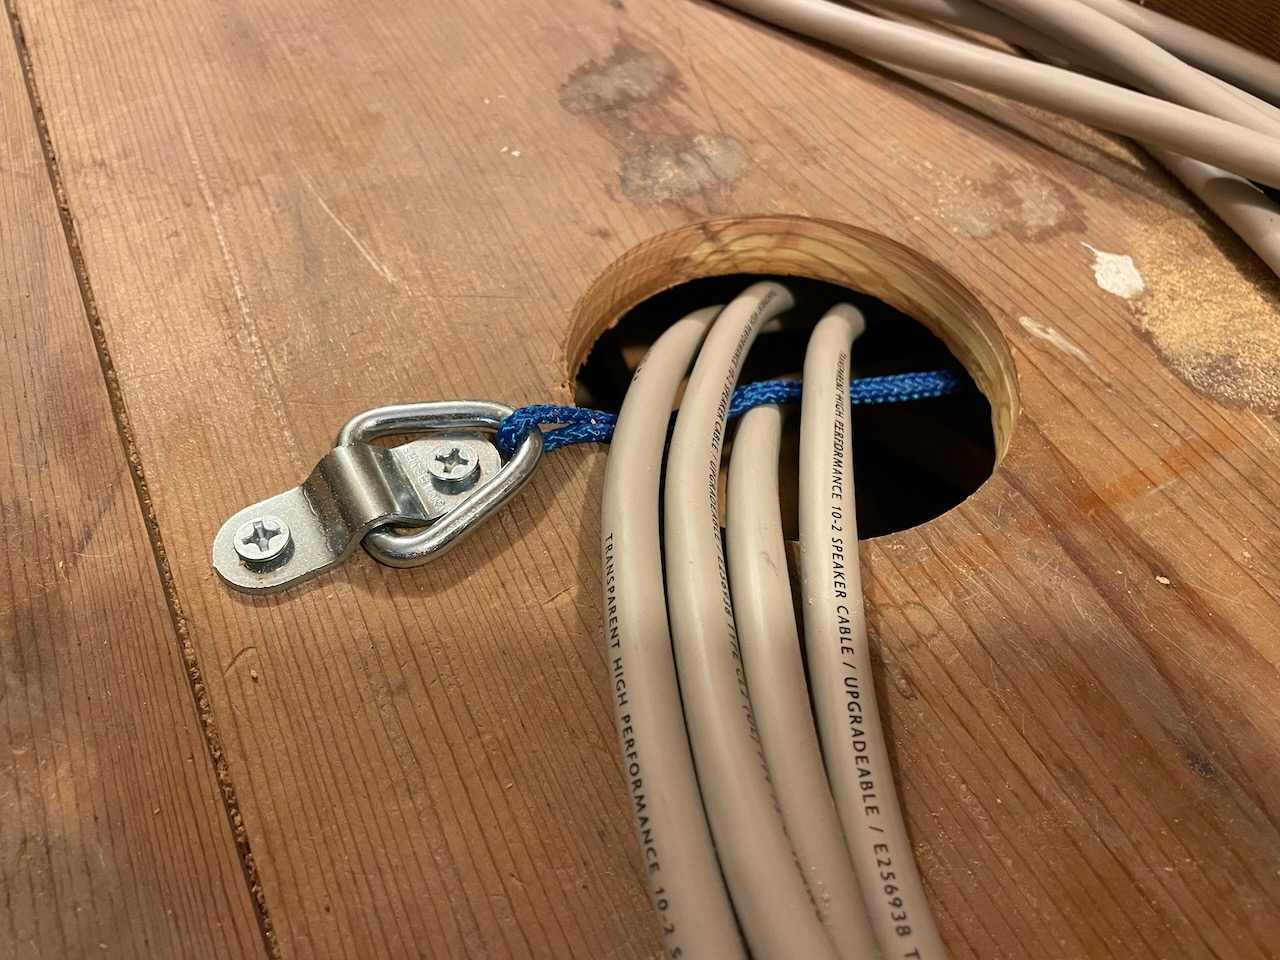
All my electronics are on the right side of the room. Getting speaker wires from the amps to the speakers on the left side of the room required routing them under the floor boards. I've done this previously with power, network, and interconnect cabling. I drilled new holes in the floor on both sides of the room, in the hidden crawl space, for the four surround speaker cables. I screwed D-Rings into the wood near each hole and ran a string loop between the rings. This enabled me to attach the four speaker wires to the string, and pull it from one side to the other with ease.
I had some concerns due to the size of the Transparent High Performance 10-2 speaker cables, but working with this cable was a dream. It's very flexible and came off the roll, ready to be run. I didn't have to lay it out to straighten it or unwind it at all. My concerns were unwarranted, and I actually enjoyed working with this cable. It's both substantial and easy to work with, unlike many garden hose variety high end cables. Bravo Transparent!
Getting the cable to the rear speakers involved some creativity. I removed baseboard along the floor, carved out a channel for the cable, then drilled a larger hole (still behind the baseboard) directly beneath the speaker, to run the cable upward. Going around the light switch box was not easy.
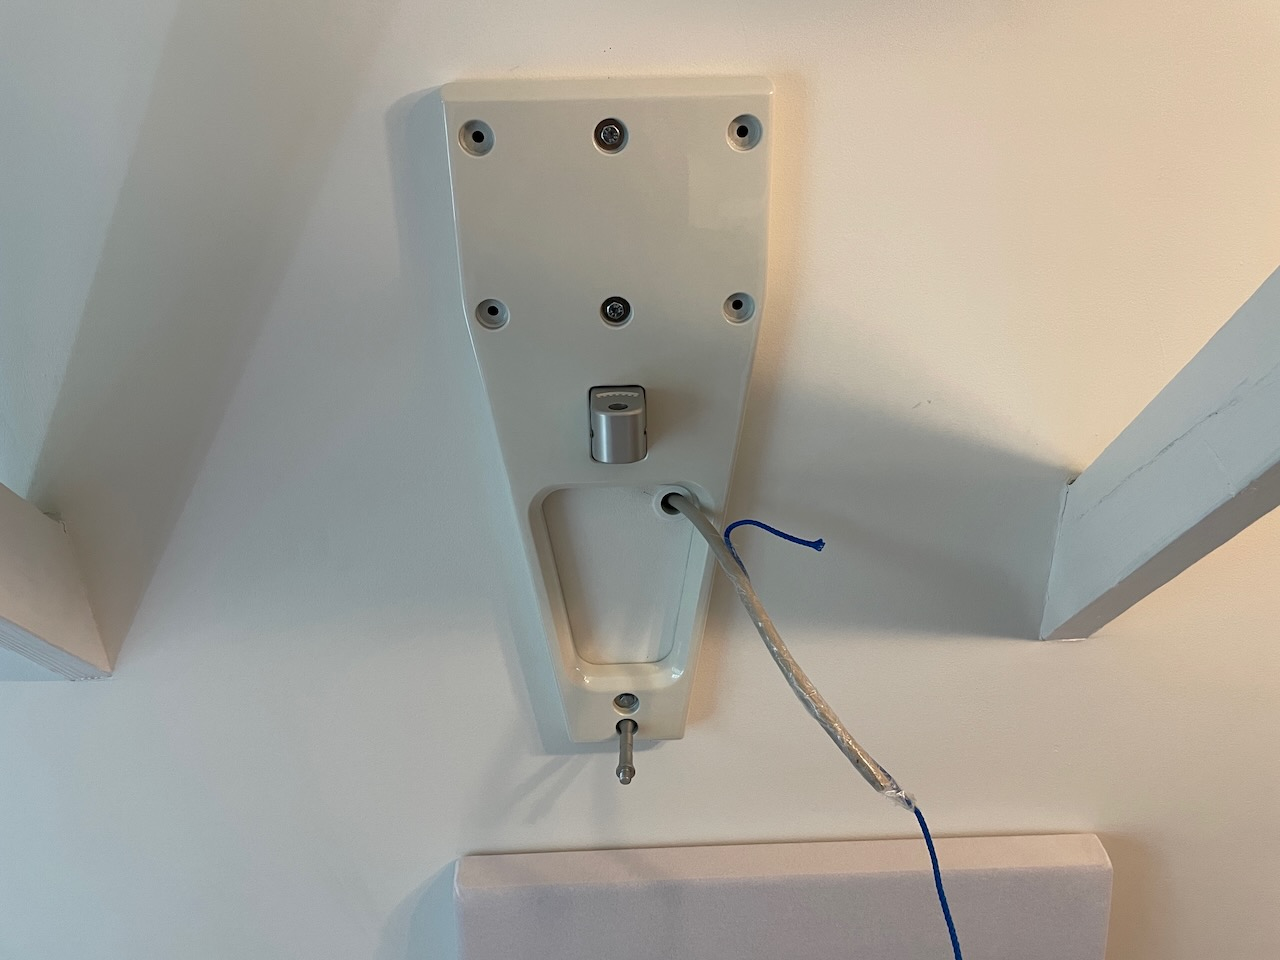
Behind the access panel below, I drilled a hole directly behind the baseboard, to snake the speaker cable through. When I removed the baseboard, I could assess the speaker cable once I cut a channel to run the cable. On the lower right edge of the mounted speaker you can see the light switch, which caused me about 45 minutes and three broken fiberglass rods, trying to maneuver the cable into position.
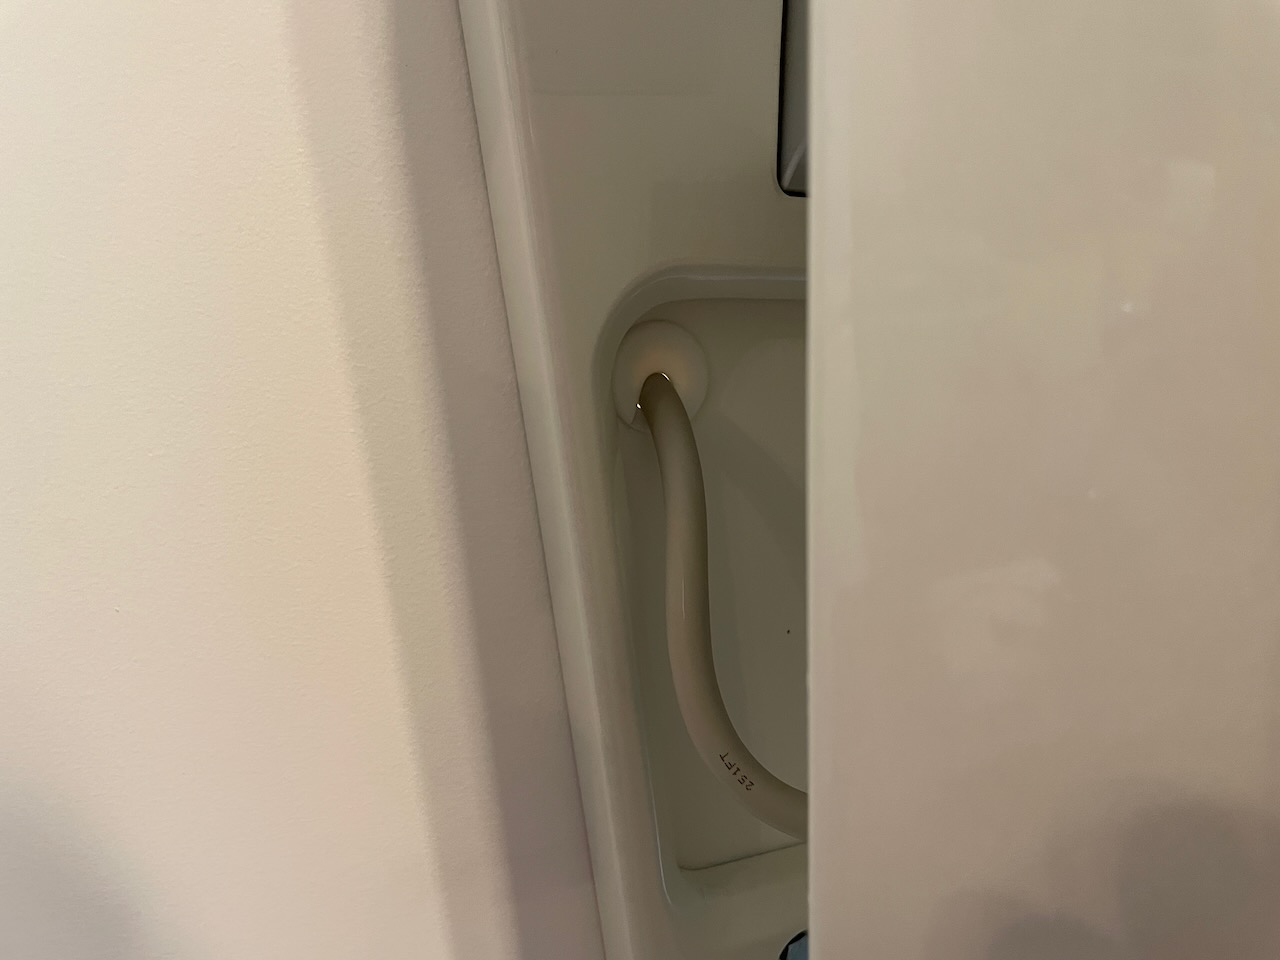
To get cabling to the ceiling speakers, I have access to the base of the angled ceiling drywall, in the crawl space behind the side walls of the room. Behind the walls of the angled ceiling is a thick layer of insulation inside clear plastic. The best way to get the this speaker wire from the base of the ceiling to the one inch hole behind the speaker, was to run it form the bottom to the top, not top down. Because the wire hole was only one inch, I didn't have enough space to get my hand in their and push the cable downward, between the layer of insulation and the drywall. Gravity wasn't enough to take the cable down the back of the wall by itself.
I taped a three foot long string to a thin fiberglass push/pull rod, then taped the speaker cable to the string. I pushed the rod up the back of the wall, attaching additional extension rods as needed. Once the rod, string, and wire were close to the hole behind the speaker, I used a lighted steel claw mechanical pickup tool with a Depstech endoscope camera attached, to grab the string and pull it through the wire hole. This endoscope camera saved me a ton of time because the fiberglass rod never went straight up the back of the wall and stopped right next to the speaker wire hole. The camera sent live video to my iPhone as I fished for the string.
My tools of the trade. Fiberglass rods, mechanical claw, and camera.


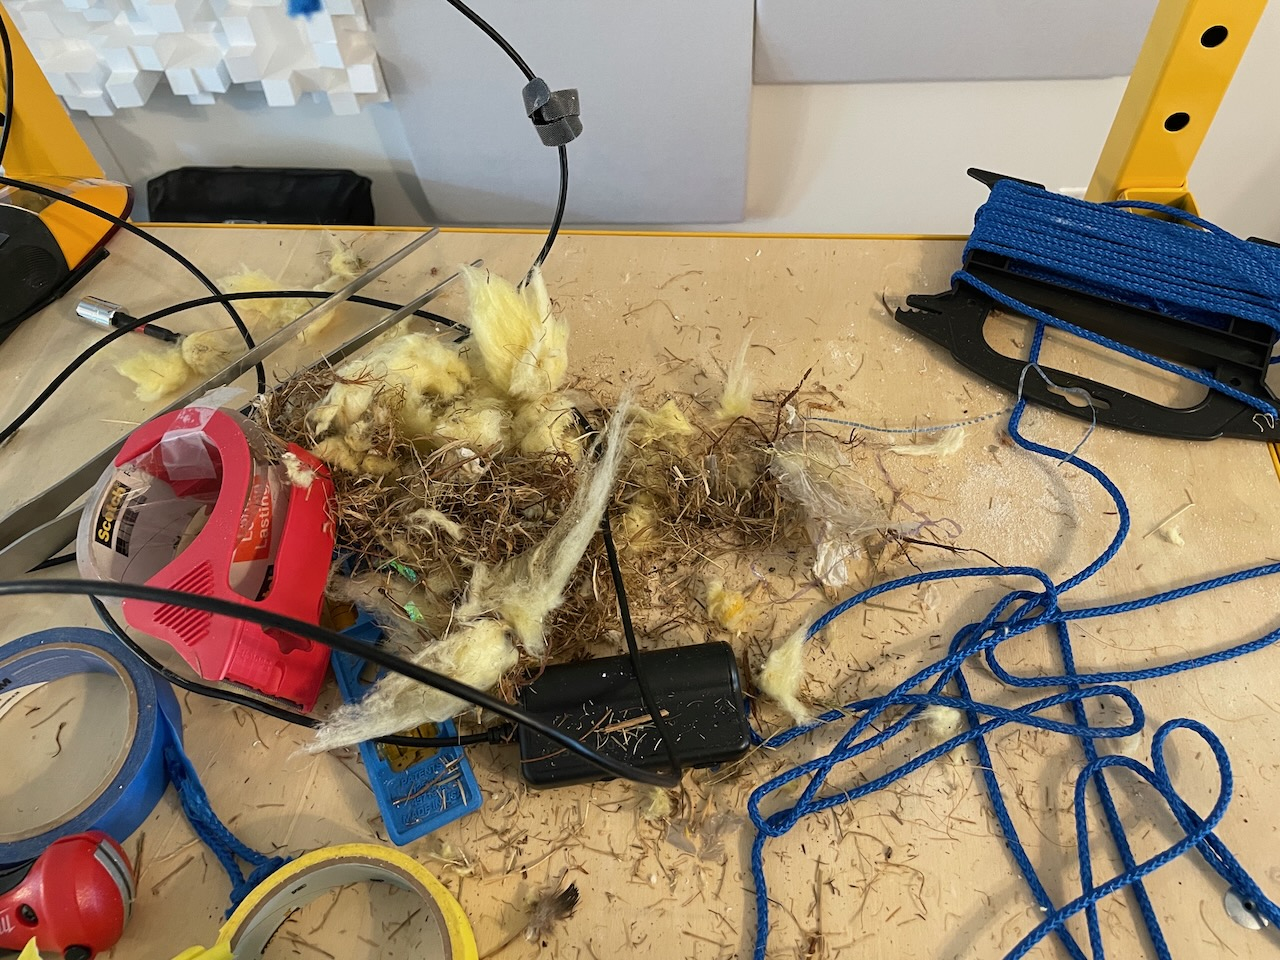
This method worked great because I could easily see the blue string against the yellow insulation. Once I grabbed the string with the claw, I pulled it through the hole and pulled the 10-2 cable through the one inch hole without any problems. That is, until I ran into an old squirrel nest in the wall. The nest was there before we replaced our roof a decade ago, and it made fishing out the wire a real challenge. The squirrels had used mostly organic matter from trees and grasses to build this nest, but there were a few colorful items that appeared to be multicolored fake grass from an Easter basket. I thought I saw my blue string more than once, only to be fooled by a piece of fake grass.
Cable pulled through the one inch hole, and the remains of the squirrel nest.
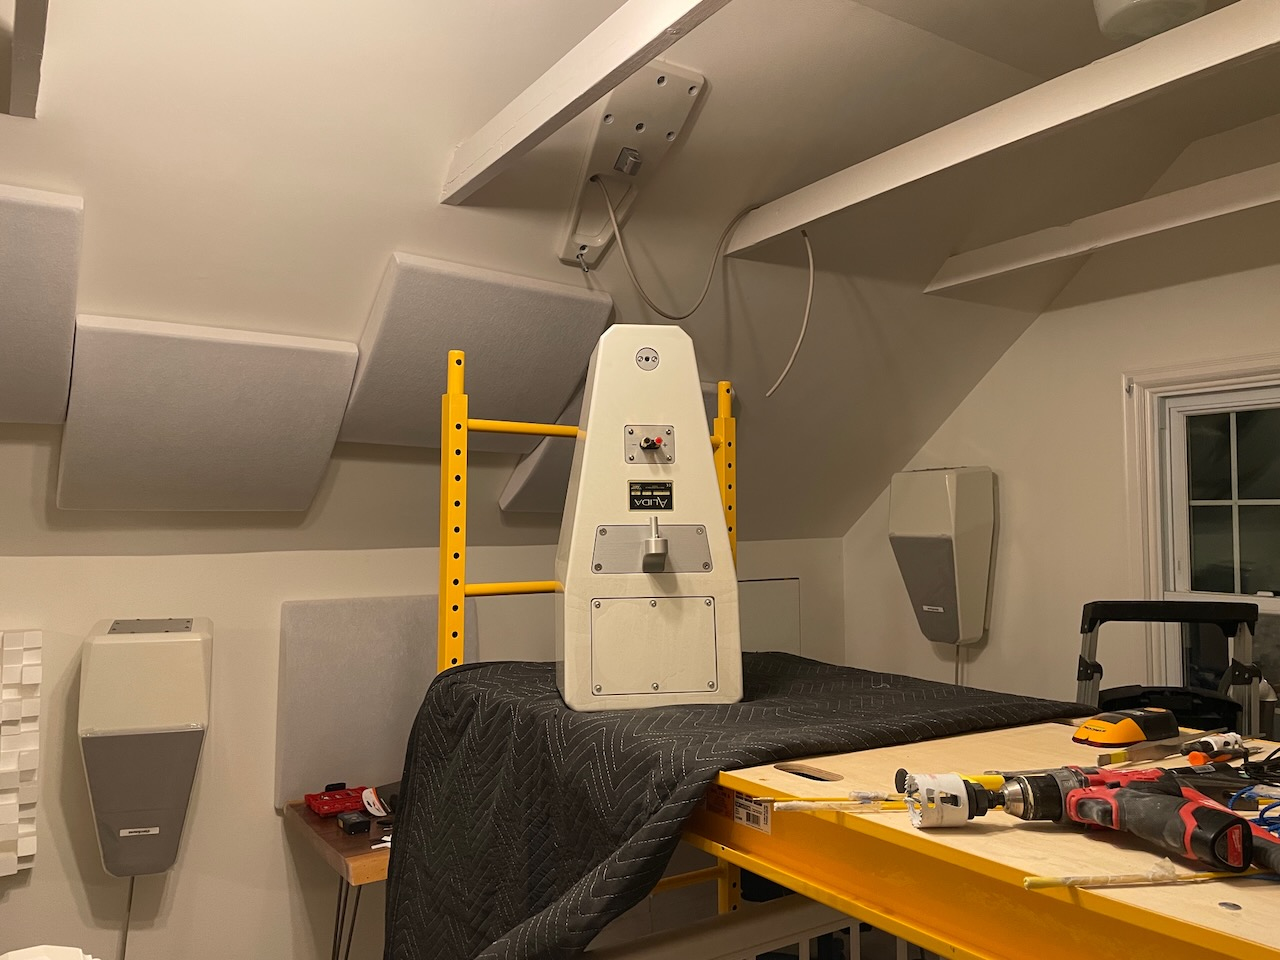
After I ran all the speaker cables, it was time to hoist the speakers into the mounts. The side channels were pretty simple, although heavier than most surround speakers. The ceiling speakers were nearly as easy because of the scaffold.
Once the speakers were in place and wired, I straightened up the electronics and connected everything. Before making the cables look a bit better, I wanted to make sure I had sound to every channel.
Here you can see the immersive system components mixed with the stereo system components. The Constellation Audio amps work with both systems, as they each have two XLR inputs and a switch on the back for flipping between inputs.
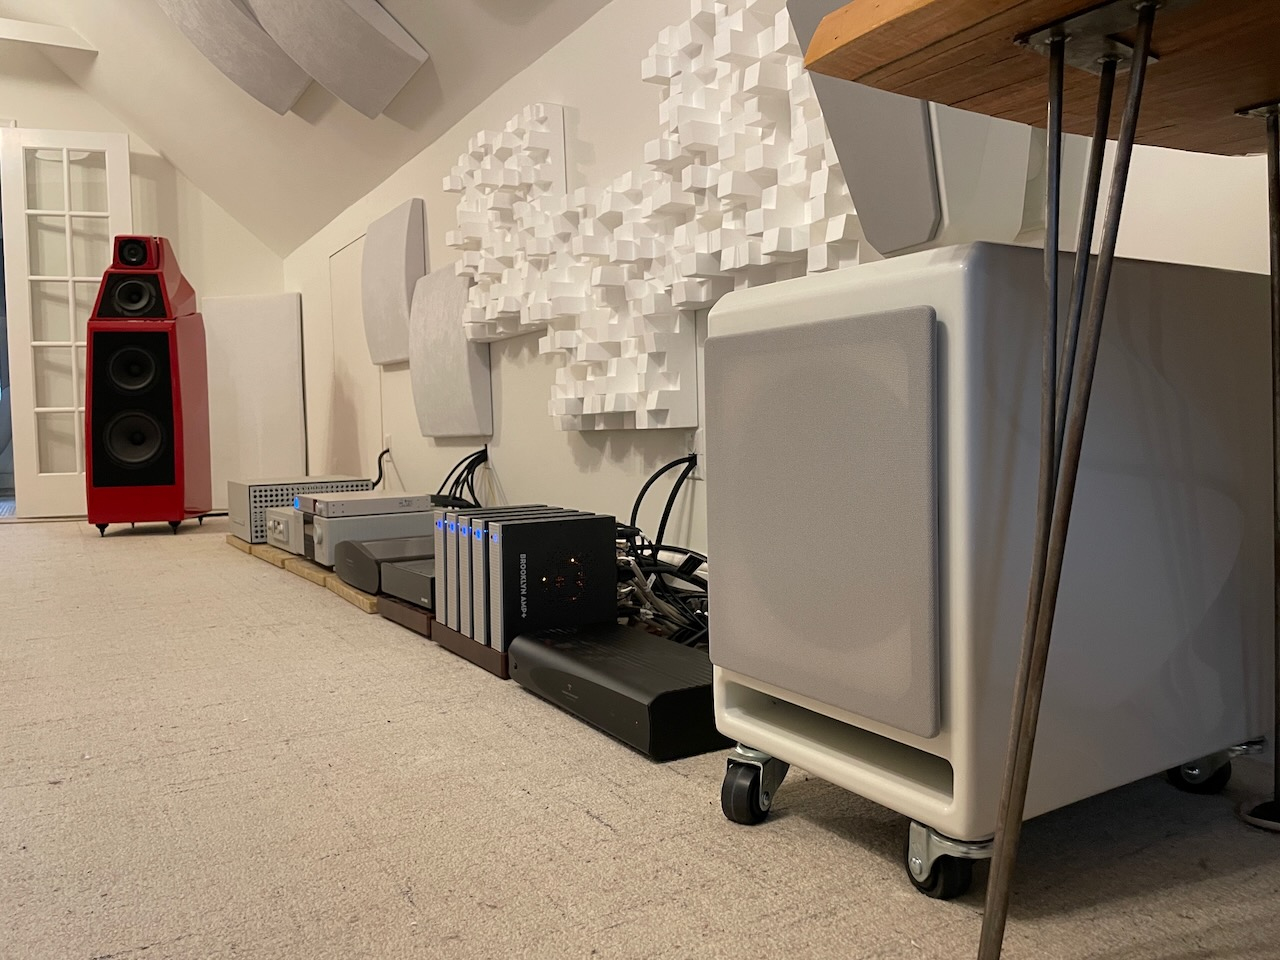
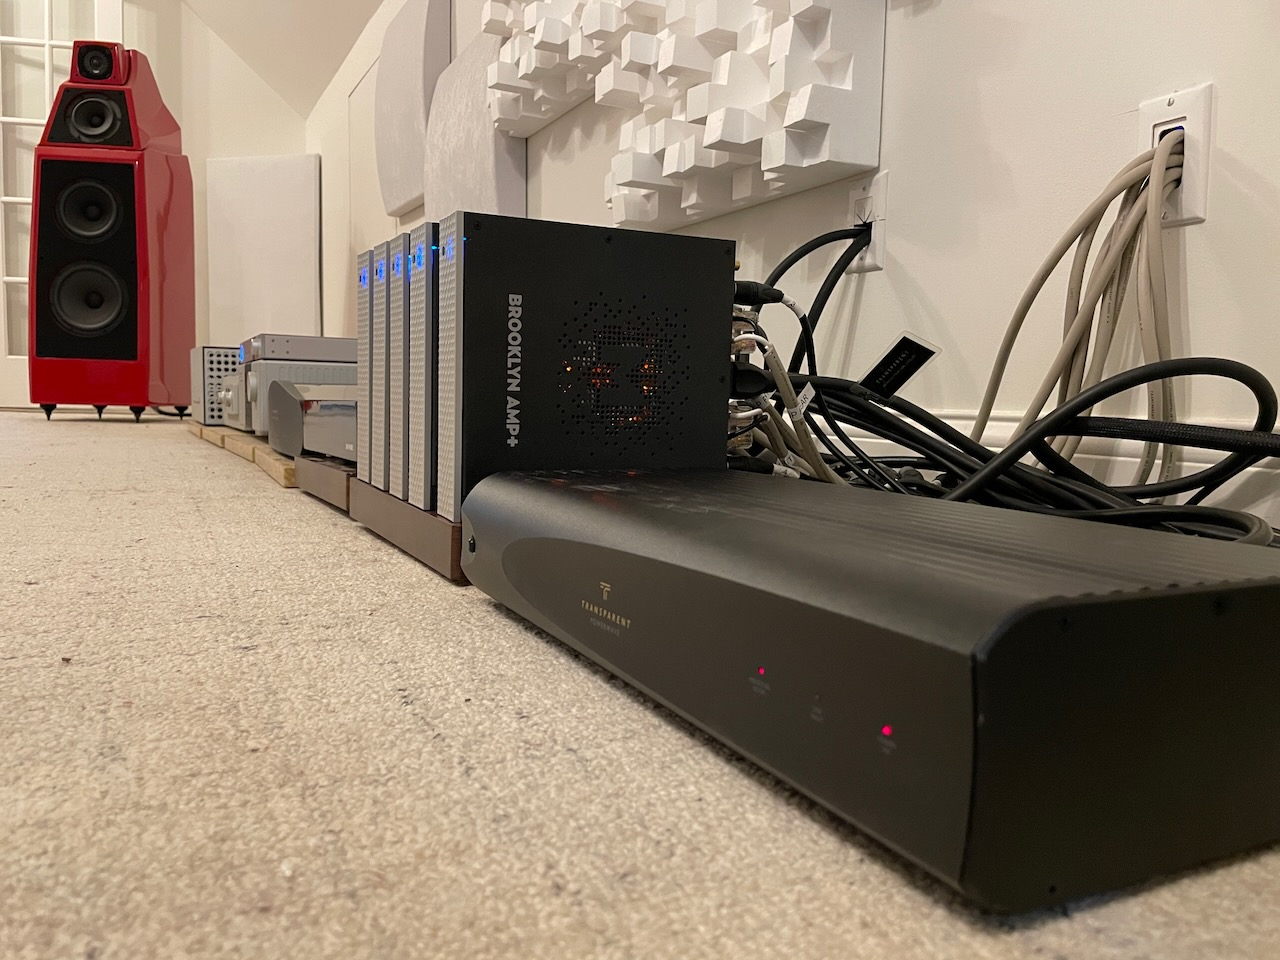
This is a closer view of the PowerWave and Mytek Brooklyn AMP+ units. The amps are sitting on a Taiko Audio Daiza isolation platform, made from CNC machined German Panzerholz.
This is the Merging Technologies HAPI MKII, and a top view showing the Transparent custom DB25 to XLR cables. Each cable has eight channels of analog output.


Wrap Up
Everything is installed and I have audio output to each channel. I'm preparing for a visit from Peter McGrath and Tyler Hall of Wilson Audio and Wilson dealer Maier Shadi of The Audio Salon. Before they arrive in the middle of July, I need to tidy up all the cabling and do some fine tuning of the entire system. I can't wait to share the follow up articles with everyone to show how the tuning is done and above all, to share how the system sounds.
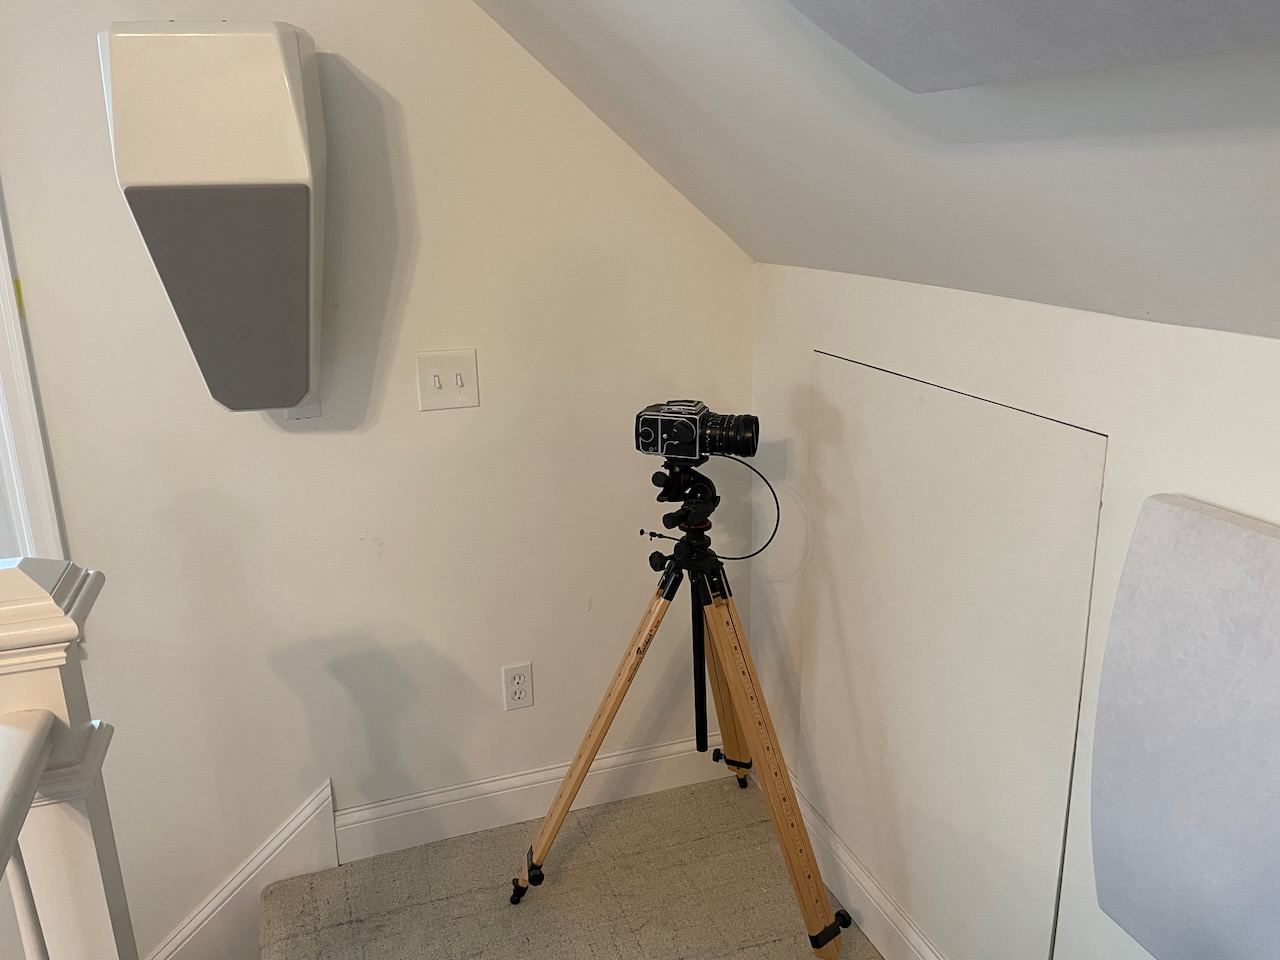
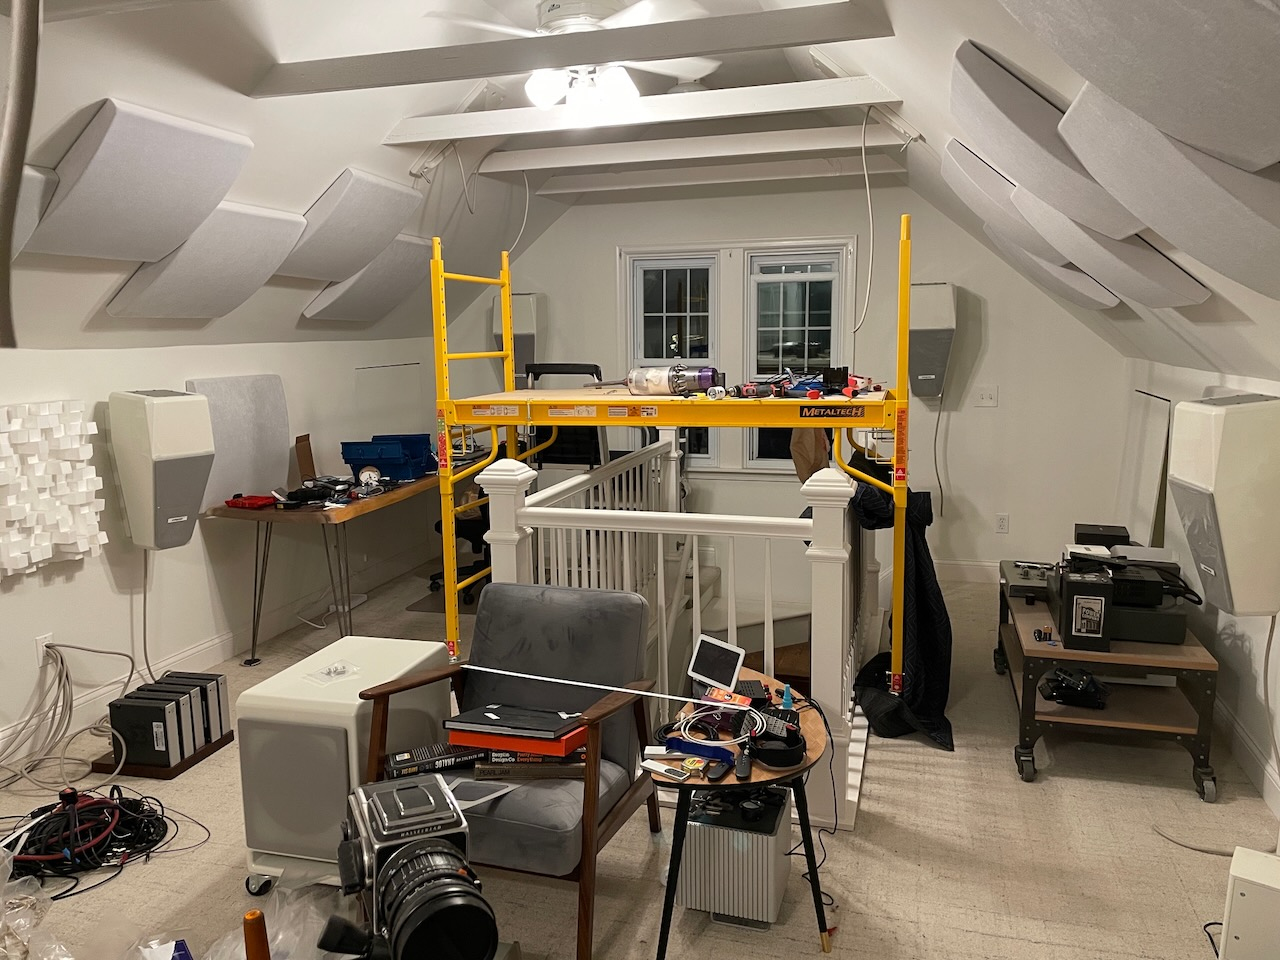
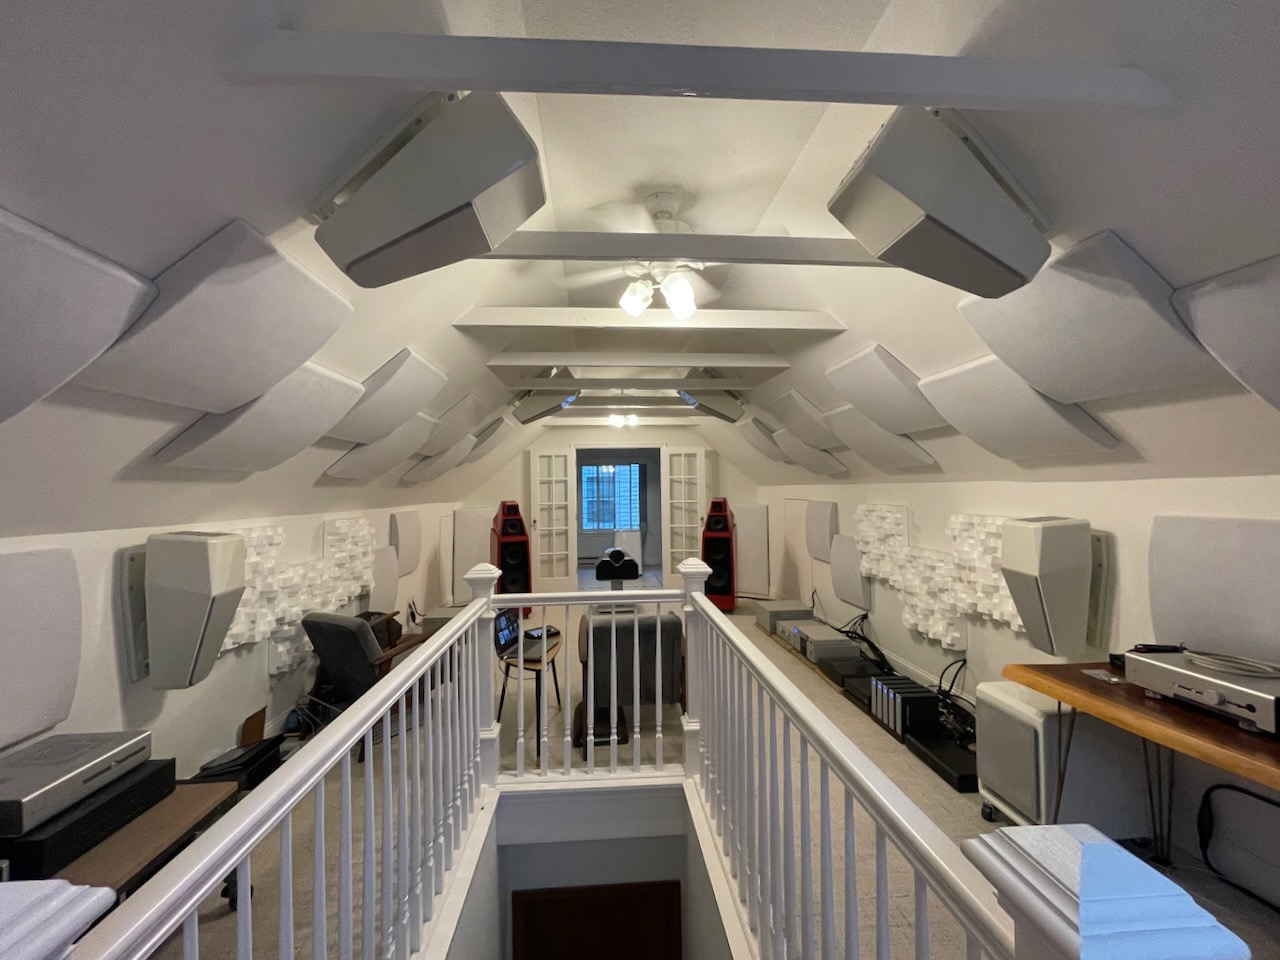
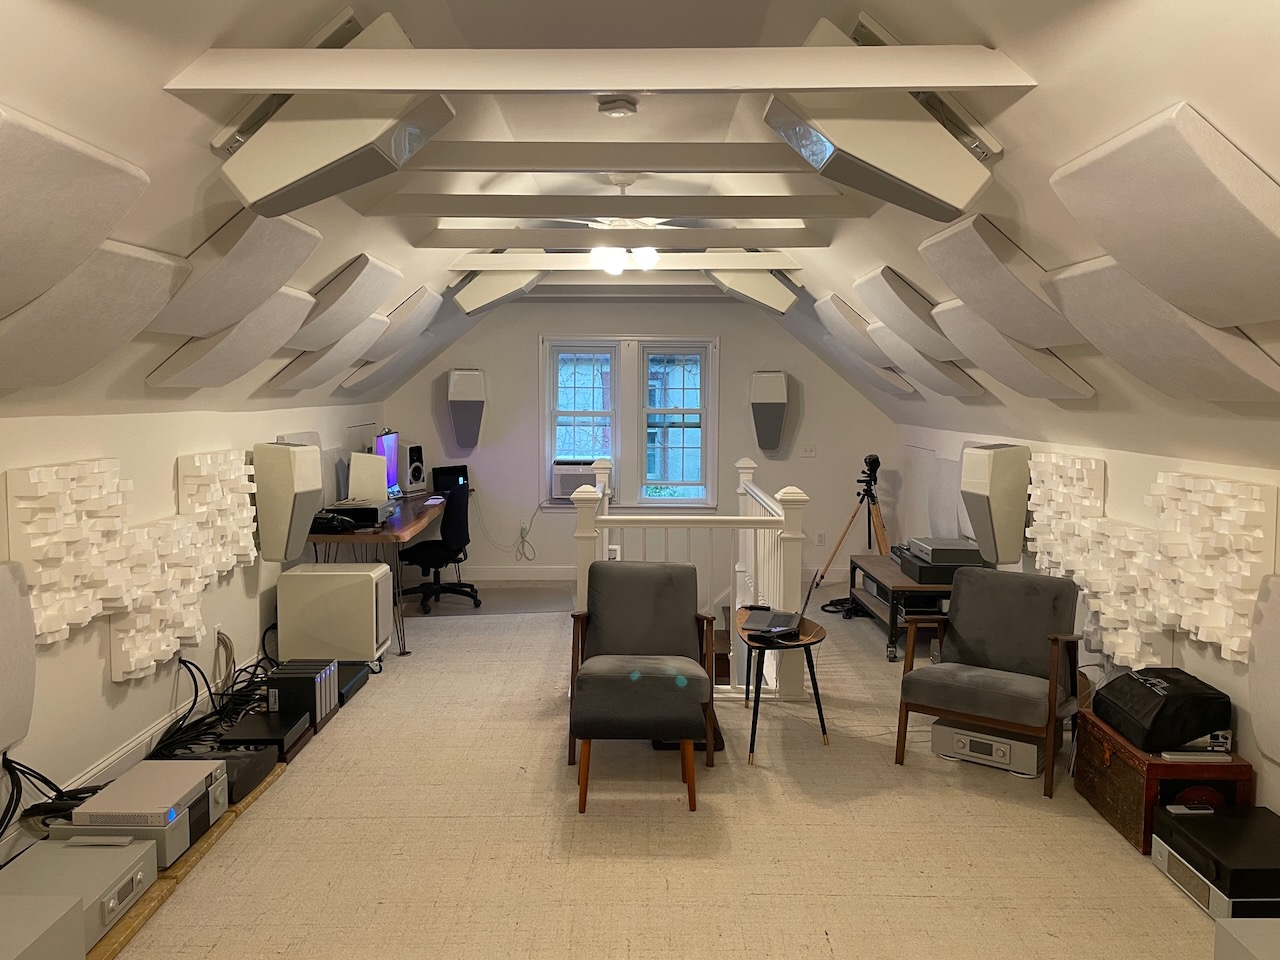
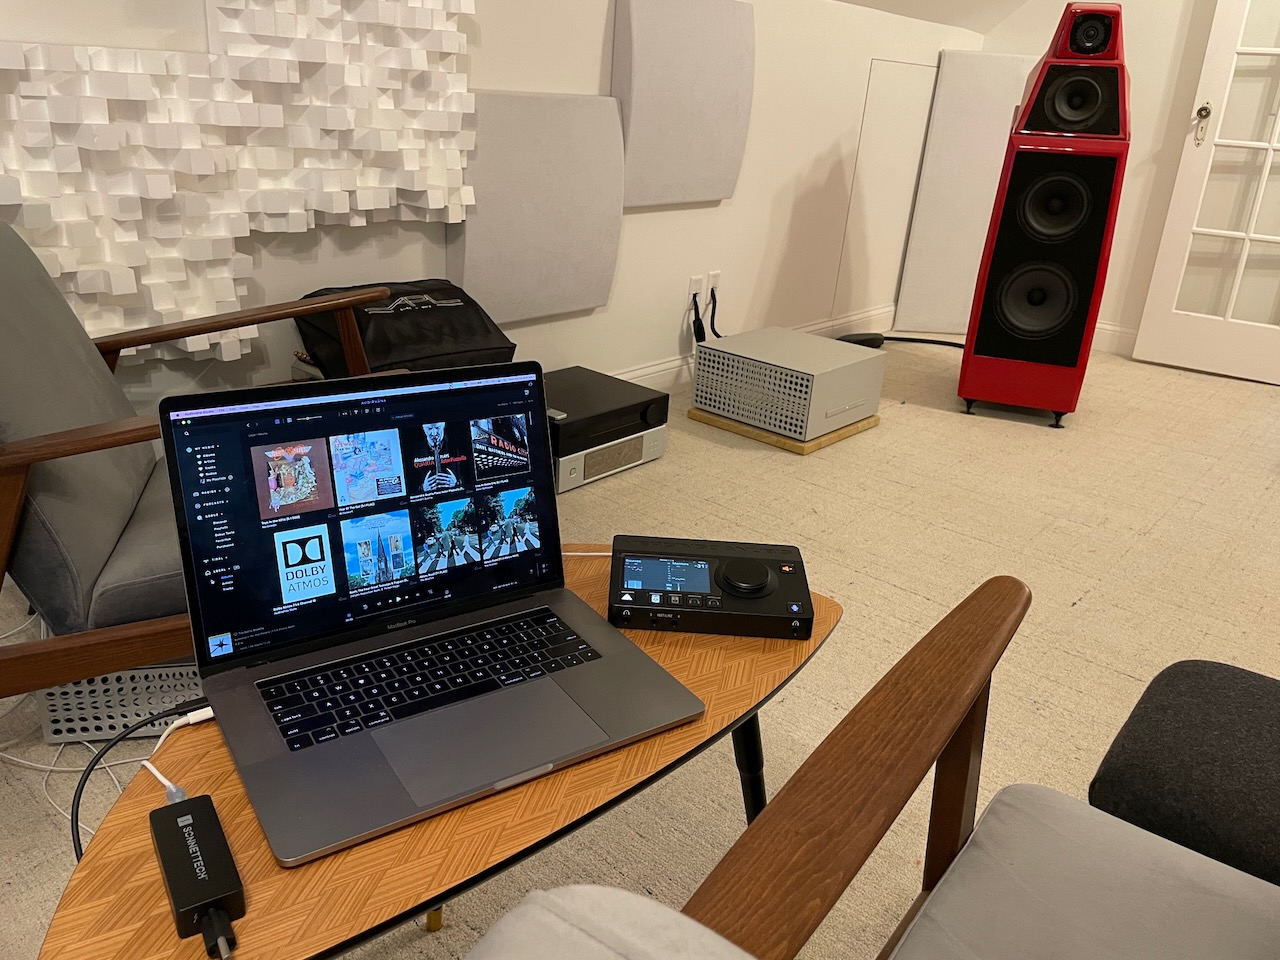
Here are some images of the room, looking at the front, rear, and listening position. The MacBook Pro is next to the listening position for now, because it makes testing easier. Once I have everything dialed-in, I will likely place it elsewhere. The Merging Anubis will remain next to the listening position becuase it controls the playback volume, among other things I'll discuss in later articles.


Recommended Comments
Create an account or sign in to comment
You need to be a member in order to leave a comment
Create an account
Sign up for a new account in our community. It's easy!
Register a new accountSign in
Already have an account? Sign in here.
Sign In Now