


This afternoon I decided I needed a small project. This happens once in a while. For some reason I'll think of a project that I've had on my mind for literally years, and finally decide to get it done. Today's project was to setup a Raspberry Pi 4 B as a Roon Bridge and HQPlayer NAA. But, that's not what excited me about the project. I've done the aforementioned setup a trillion times. The exciting part that I've wanted to try for years is to power the Raspberry Pi with the PoE HAT. Using power over Ethernet enables one to not use the standard, or upgraded, power supply. Just connect an Ethernet cable and a USB cable to the DAC and that's it.
I know, I can hear the card carrying, knuckle-dragging, old school yet new school audiophiles cringing because I'm not using a $4,000 linear PSU to power my $89.23 (including MN state tax) project. Get over it. I'm a member of that infamous audiophile group too and sometimes I just want to create an audio endpoint that's dead simple and enables me to get rid of one extra piece of the puzzle. And no, I'm not moving away from my Sonore Signature Rendu SE optical, APL HiFi DNP-SR streamer, or the new unannounced CAPS Twenty. Yes, I just said that. Thanks for reading. You never know what nuggets you'll find in our articles here at Audiophile Style.
Anyway, here are the pieces to the puzzle and a a couple tips.
Hardware
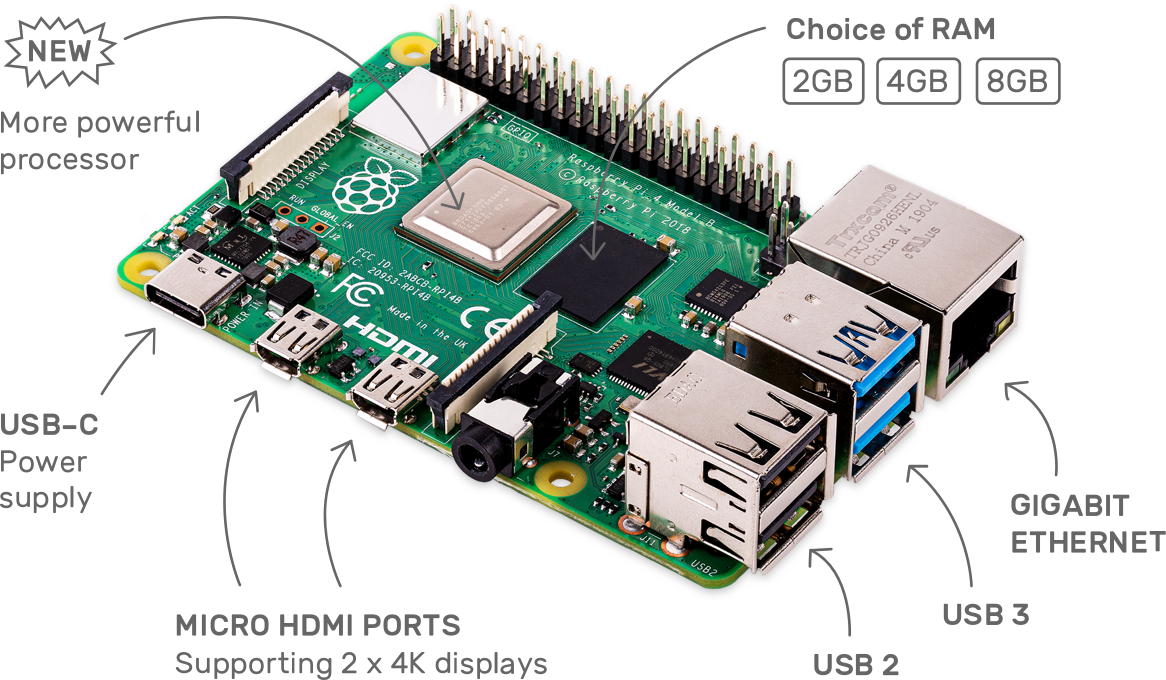
Raspberry Pi 4 B (4GB) https://amzn.to/3gpcAFw
The 4GB version isn't necessary, but I purchased this one because I tend to repurpose tiny computers like this down the road and I don't want to run into some unforeseen roadblock. Plus, the price isn't prohibitive.
Based on the system stats, I have 3.5GB of free memory when it's receiving audio.
Official Raspberry Pi PoE HAT https://amzn.to/2XsJVGS
Note, you will need a network switch that supplies power over Ethernet. I used this one for my Powerless-Pi (link).
Samsung Evo MicroSD card (64GB) https://amzn.to/2LWP0C2
The 64GB version isn't required, but I also like to repurpose these cards for years to come. 64Gb is way larger than needed for this audio endpoint project, but it's large enough to give me room for other projects I may want to do down the road. Again, the price isn't prohibitive.
Optional: HiFiBerry HighPi Raspberry Pi Case https://amzn.to/3ejxzHV
See notes about the case in the Tips area of this article.
* Using our links gives us a tiny kickback and doesn't cost you anything. We're experimenting with this, so please no phone calls or letters just yet.

Software
Operating System
I elected to use the official Raspberry Pi operating system Rasbian Buster Lite. This is a project aiming for simplicity and there's nothing simpler for me than skipping all the homework and downloading the official image. I used the operating system without a desktop as it isn't needed for this project.
Raspbian Buster Lite - https://downloads.raspberrypi.org/raspbian_lite_latest
Note: After finishing this project, I downloaded the 64 bit version of Ubuntu 20.04 and also installed Roon Bridge as a test. It works identically to the Raspbian Buster Lite install.
Roon
I installed Roon Bridge the simple way, by following the instructions here - https://kb.roonlabs.com/LinuxInstall
Readers should note that the Raspbian Buster Lite operating system is only 32 bit and the hardware appears as ARMv7 the OS. Thus, installation of the ARMv7 version of Roon Bridge is required even though the Raspberry Pi 4 B hardware is an ARMv8 / 64 bit SOC.
HQPlayer NAA
Installing HQPlayer's NAA is pretty simple given that Jussi Laako provides the packages pre-compiled for easy installation. Here are the commands I used to get it installed. If one is reading this after a new version is released, just make sure to browse the NAA images to get the correct link (https://www.signalyst.eu/bins/naa/images/).
HQPlayer NAA doesn't require a fit processor at all. While receiving very high sample rate DSD audio, NAA is only using 10% of the CPU.
curl -O https://www.signalyst.eu/bins/naa/linux/buster/networkaudiod_4.1.1-46_armhf.deb
chmod +x networkaudiod_4.1.1-46_armhf.deb
sudo dpkg -i networkaudiod_4.1.1-46_armhf.deb
sudo reboot
Tips
The official Raspberry Pi PoE HAT contains a fan that's fairly noisy. It's a tiny fan that spins up often and runs loud. To resolve this issue, add the following two lines to the config.txt file on the Pi. Here are the commands.
sudo nano /boot/config.txt
dtparam=poe_fan_temp0=80000,poe_fan_temp0_hyst=5000
dtparam=poe_fan_temp1=82000,poe_fan_temp1_hyst=2000
crtl+o
ctrl+x
sudo reboot
Note: If you want to get the fan under control and you're using Ubuntu 20.04 on the Pi, download this file (link) and place it in the /etc/udev/rules.d/ directory.
One other note about the fan. It is taller than most Raspberry Pi cases. This requires one to cut a hole in the top of the case for the fan to both breathe and the case to fit. I currently don't have a case on my Powerless Pi, but I found a case from the guys at HiFiBerry will work. The HiFiBerry HighPi Raspberry Pi Case works and according to these guys the temperature shouldn't be an issue.
Conclusion
Seriously, this is all I had to do to complete a project I'd thought about for several years. I just wanted an audio endpoint that was powered via Ethernet. Partly just because I could but also because it's nice to get rid of an extra PSU. Plus, there are many use cases where simplicity is required. I'm now listening to DSD512 streamed to this new PoE Pi and enjoying my afternoon. Ah, the simple life.
P.S. I'm not giving up my Sonore Signature Rendu SE Optical anytime soon.


Recommended Comments
Create an account or sign in to comment
You need to be a member in order to leave a comment
Create an account
Sign up for a new account in our community. It's easy!
Register a new accountSign in
Already have an account? Sign in here.
Sign In Now