


I've used various Aurender servers for roughly ten years, going back the the original S10 in 2011. In that time Aurender has continued to offer larger hard drives to accommodate expanding libraries. One item that remains outside the scope of music storage and playback at the highest levels is backing up these libraries. At first blush it seems like one's ripped and downloaded music is the valuable asset that drives this need for backup. However, there's nothing more valuable than one's time. The time it would take one to re-rip and re-download an entire music collection, followed by properly tagging and gathering the album art, is what really drives this need for backup. If readers are like me, they have hundreds of Mobile Fidelity, AudioWave, XRCD, XRCD24, Three Blind Mice, Ampex, DSD rips, etc... that all require oodles attention during the ripping process and none of them are available for download purchase or streaming. These items alone should be reason enough for readers to consider and implement a proper backup of their music servers.
During my decade of Aurender music server use, I've received many emails, texts, and phone calls about backing up Aurender servers. My answer has been the same since day one for every model Aurender has ever made, use a NAS.
My goal with this backup method is to leave the Aurender 100% unaffected by the process. In other words, make it so the Aurender has no idea it's being backed up, don't mess with anything on the actual music server or the Aurender Conductor app configuration, and above all, don't change the sound quality.
Here are my detailed instructions for backing up any Aurender server to either a QNAP or Synology NAS.
Hardware
Nearly any QNAP or Synology NAS will work perfect for backing up an Aurender, as long as it has enough storage for the backup. CPU and RAM performance isn't an issue on either platform. Spinning hard drives are fine and 1 gigabit network interfaces are just fine. If money isn't an issue, filling a NAS with SSDs would be nice, but again, it isn't necessary.
In this article I'm using a QNAP TVS-872XT with four Seagate 6TB IronWolf NAS drives (ST6000VN0033), and an old Synology DS1812+ (current model is DS1821+), also with Seagate 6TB IronWolf NAS drives (ST6000VN0033).*
*Using our links gives us a tiny kickback and doesn't cost you anything. We're experimenting with this, so please no phone calls, facsimiles, or telegrams just yet.
Click either logo to go directly to that system's configuration.
1. Create shared folder called ABackup from the QNAP Control Panel
2. Install or open HBS 3 Hybrid Backup Sync
3. Go to Sync on the left side, click the down arrow on the Sync Now button, and select Active Sync Job.

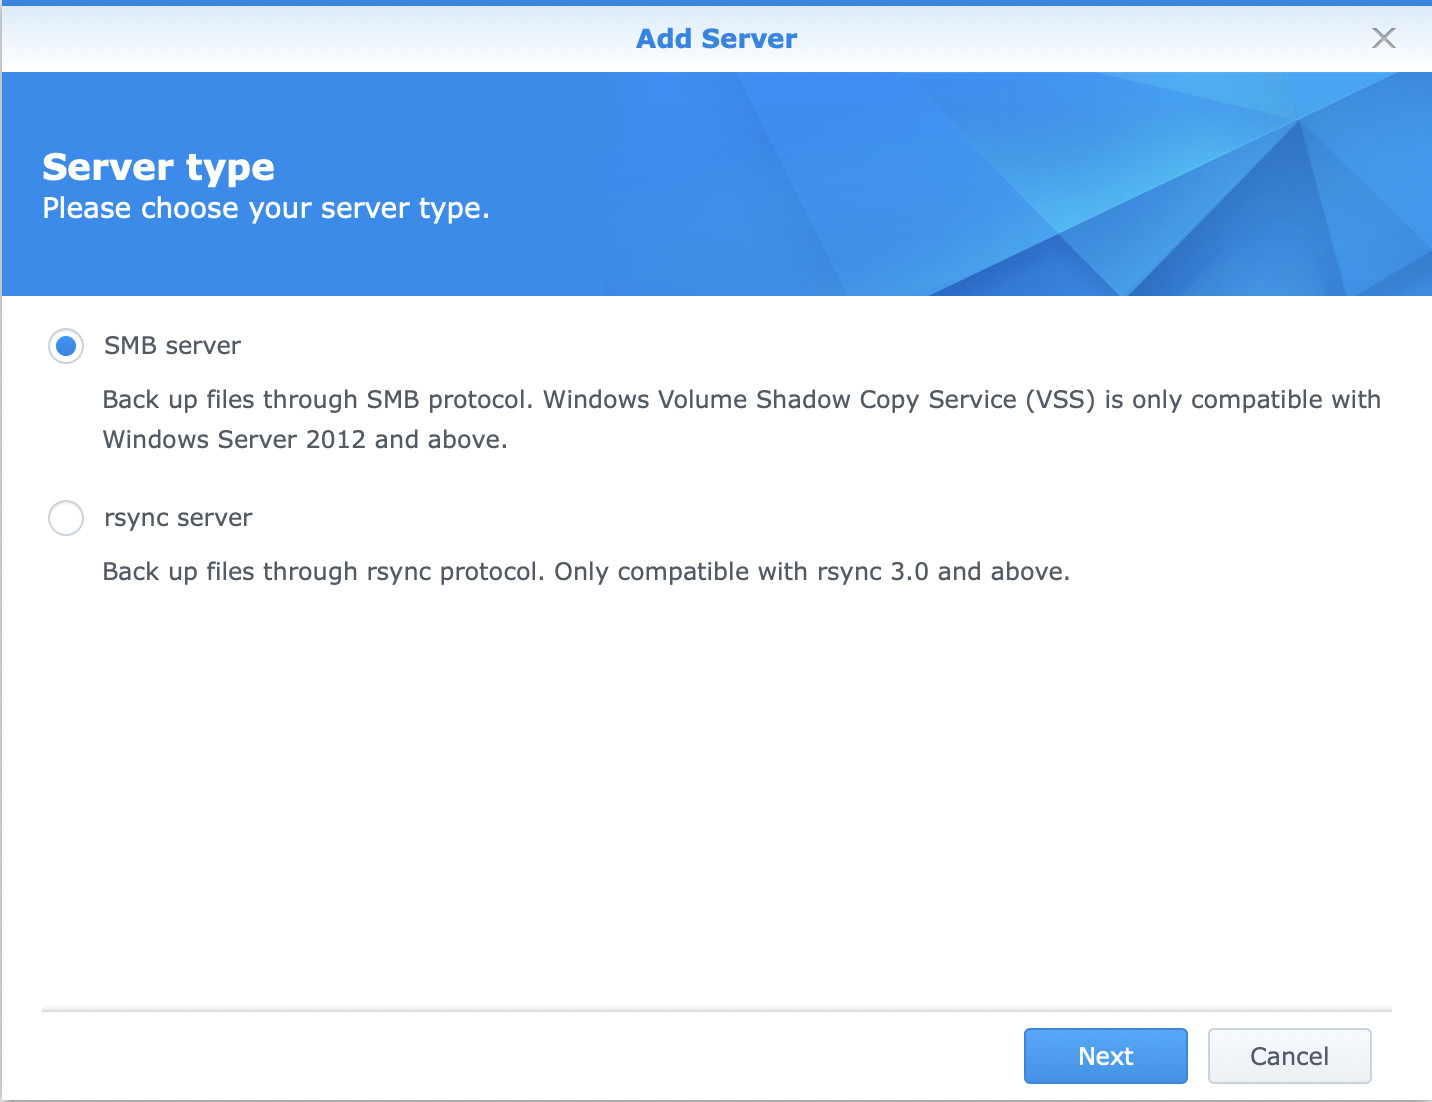
4. Select Remote CIFS/SMB Server in the Create Sync Job window.
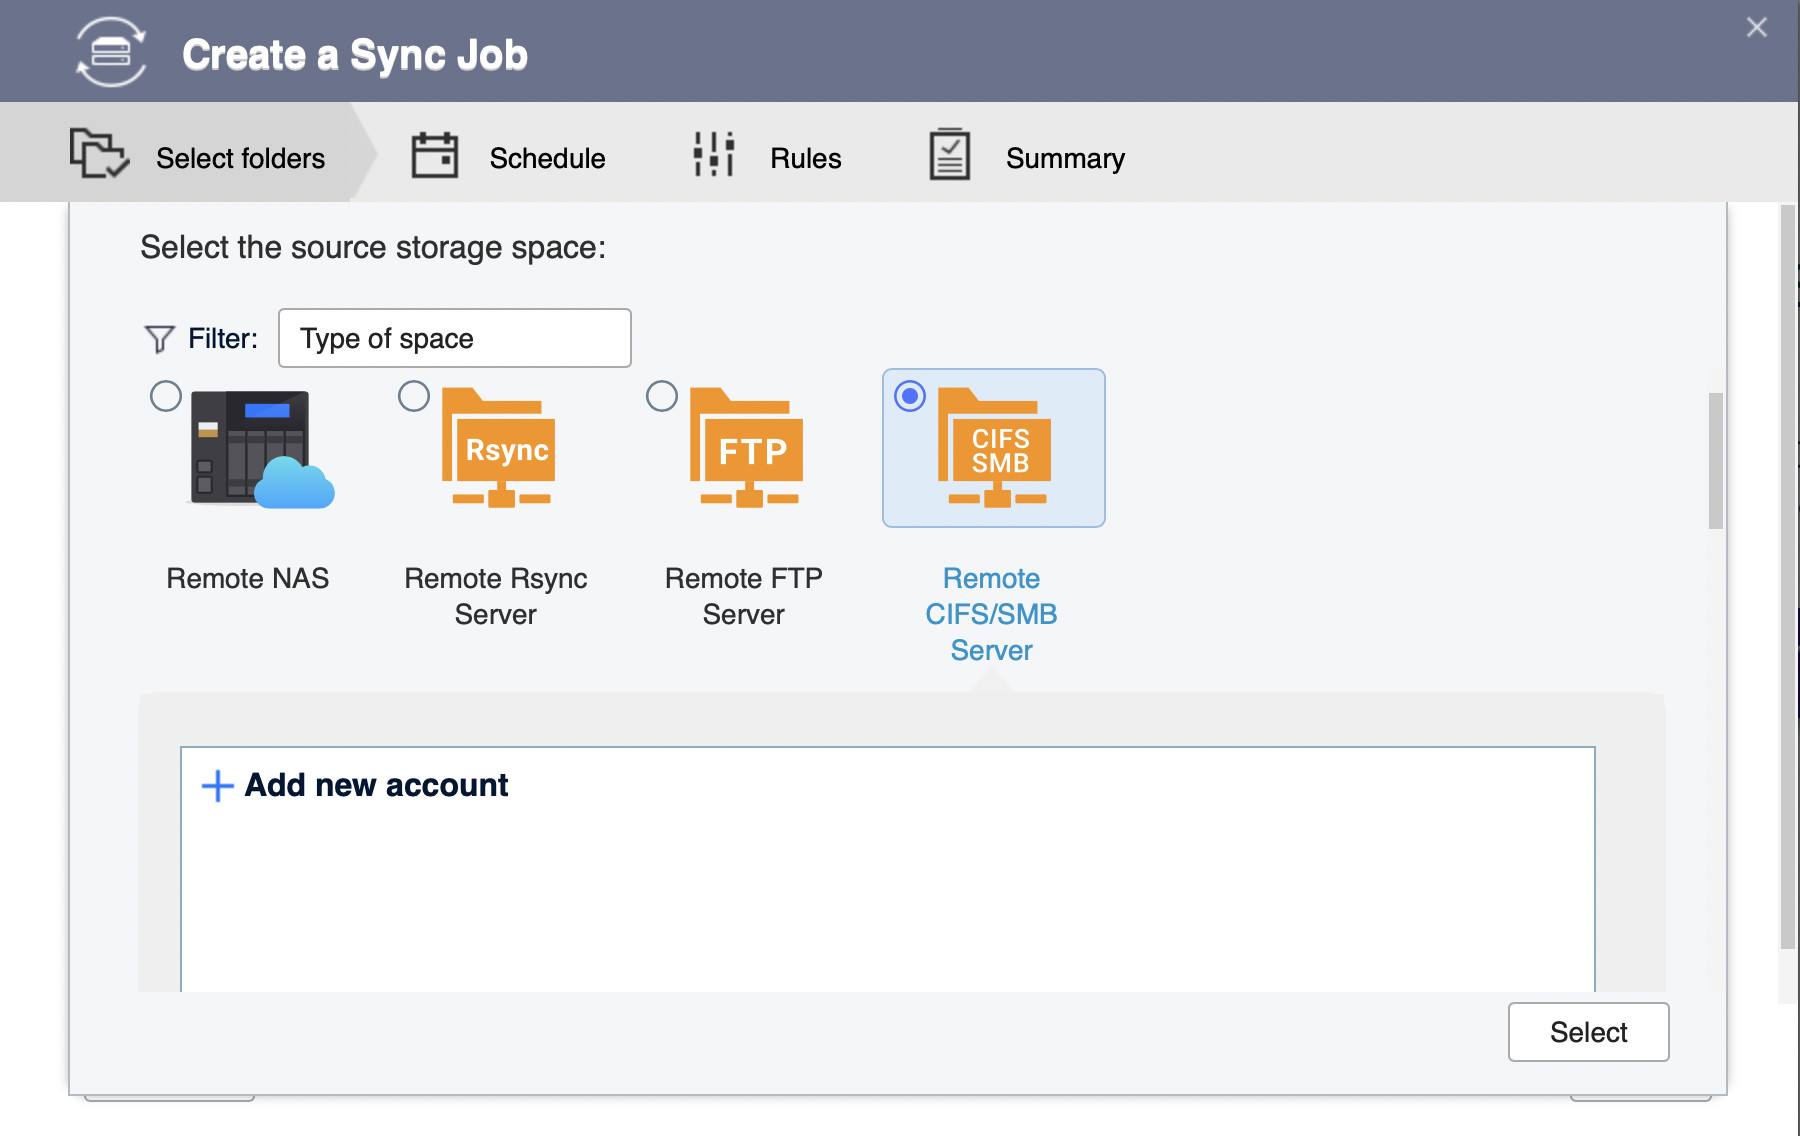
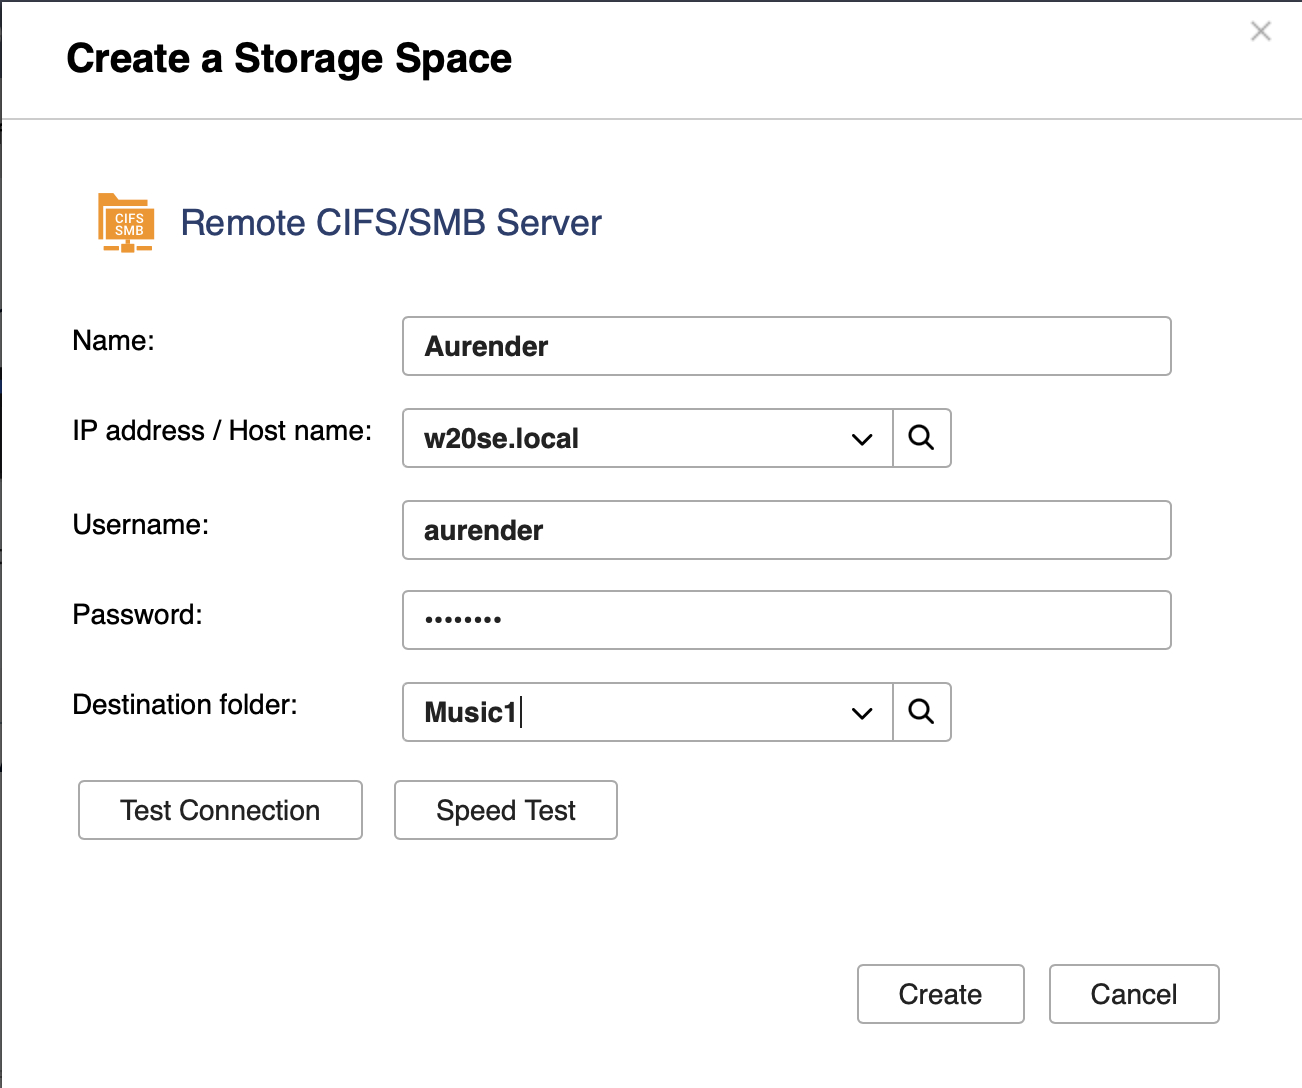
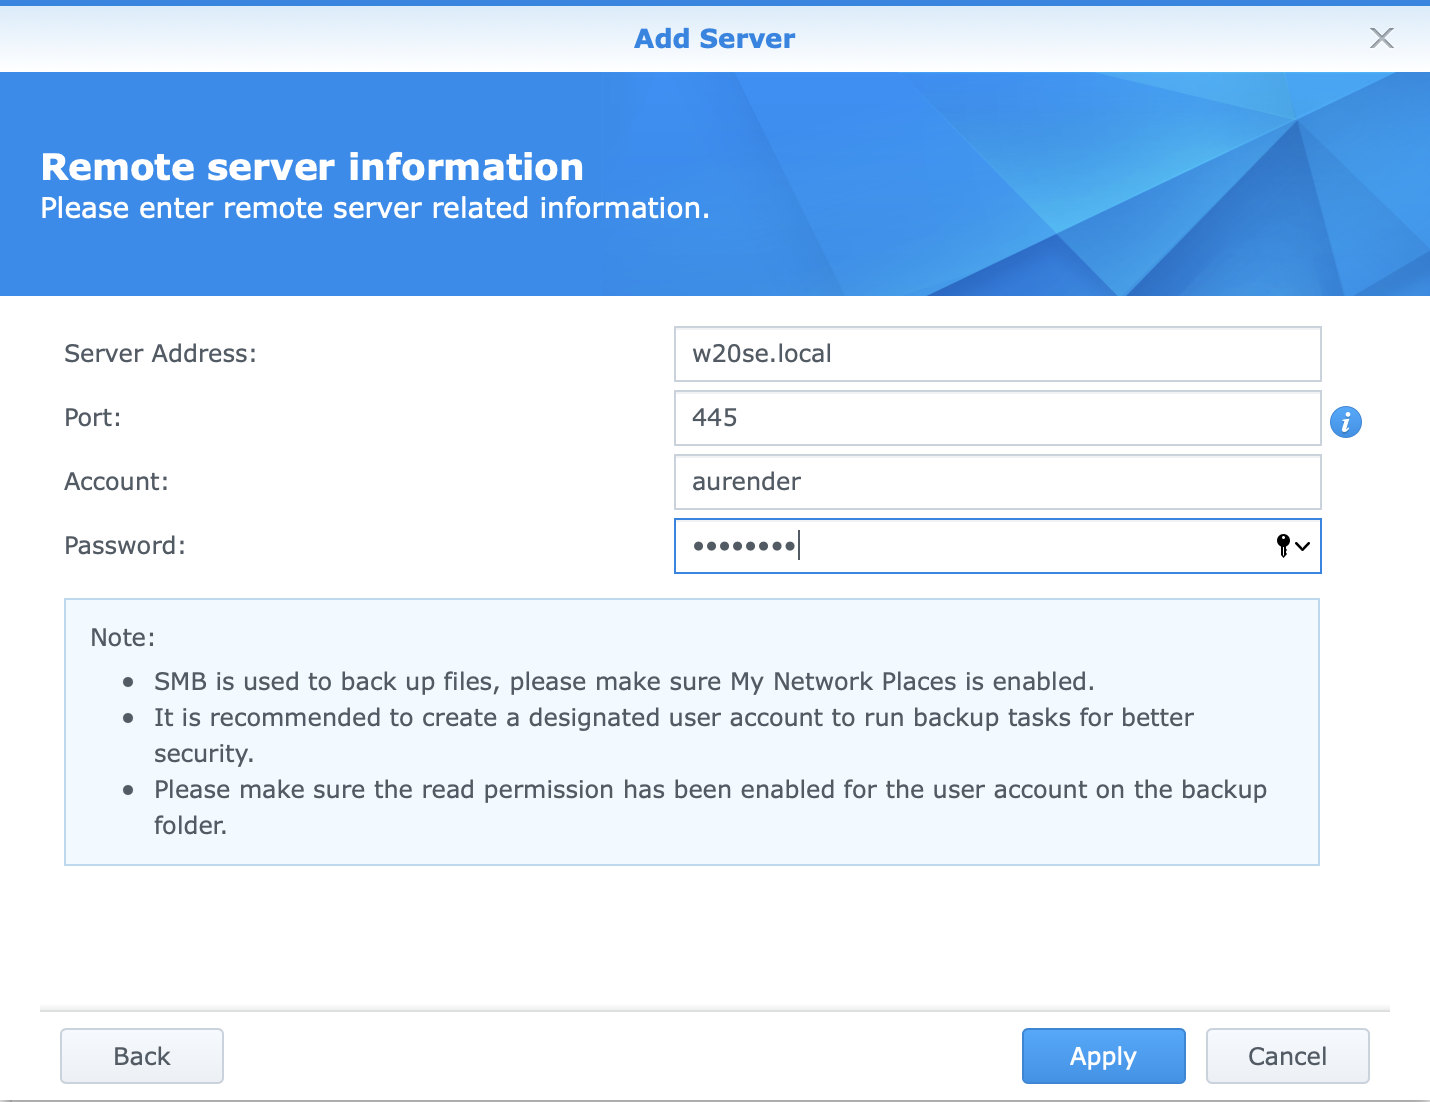
5. Name the server Aurender, enter the IP address or name of your Aurender (Note: the IP address may change, so I use the name of the Aurender on my network. This usually is something like w20.local.).
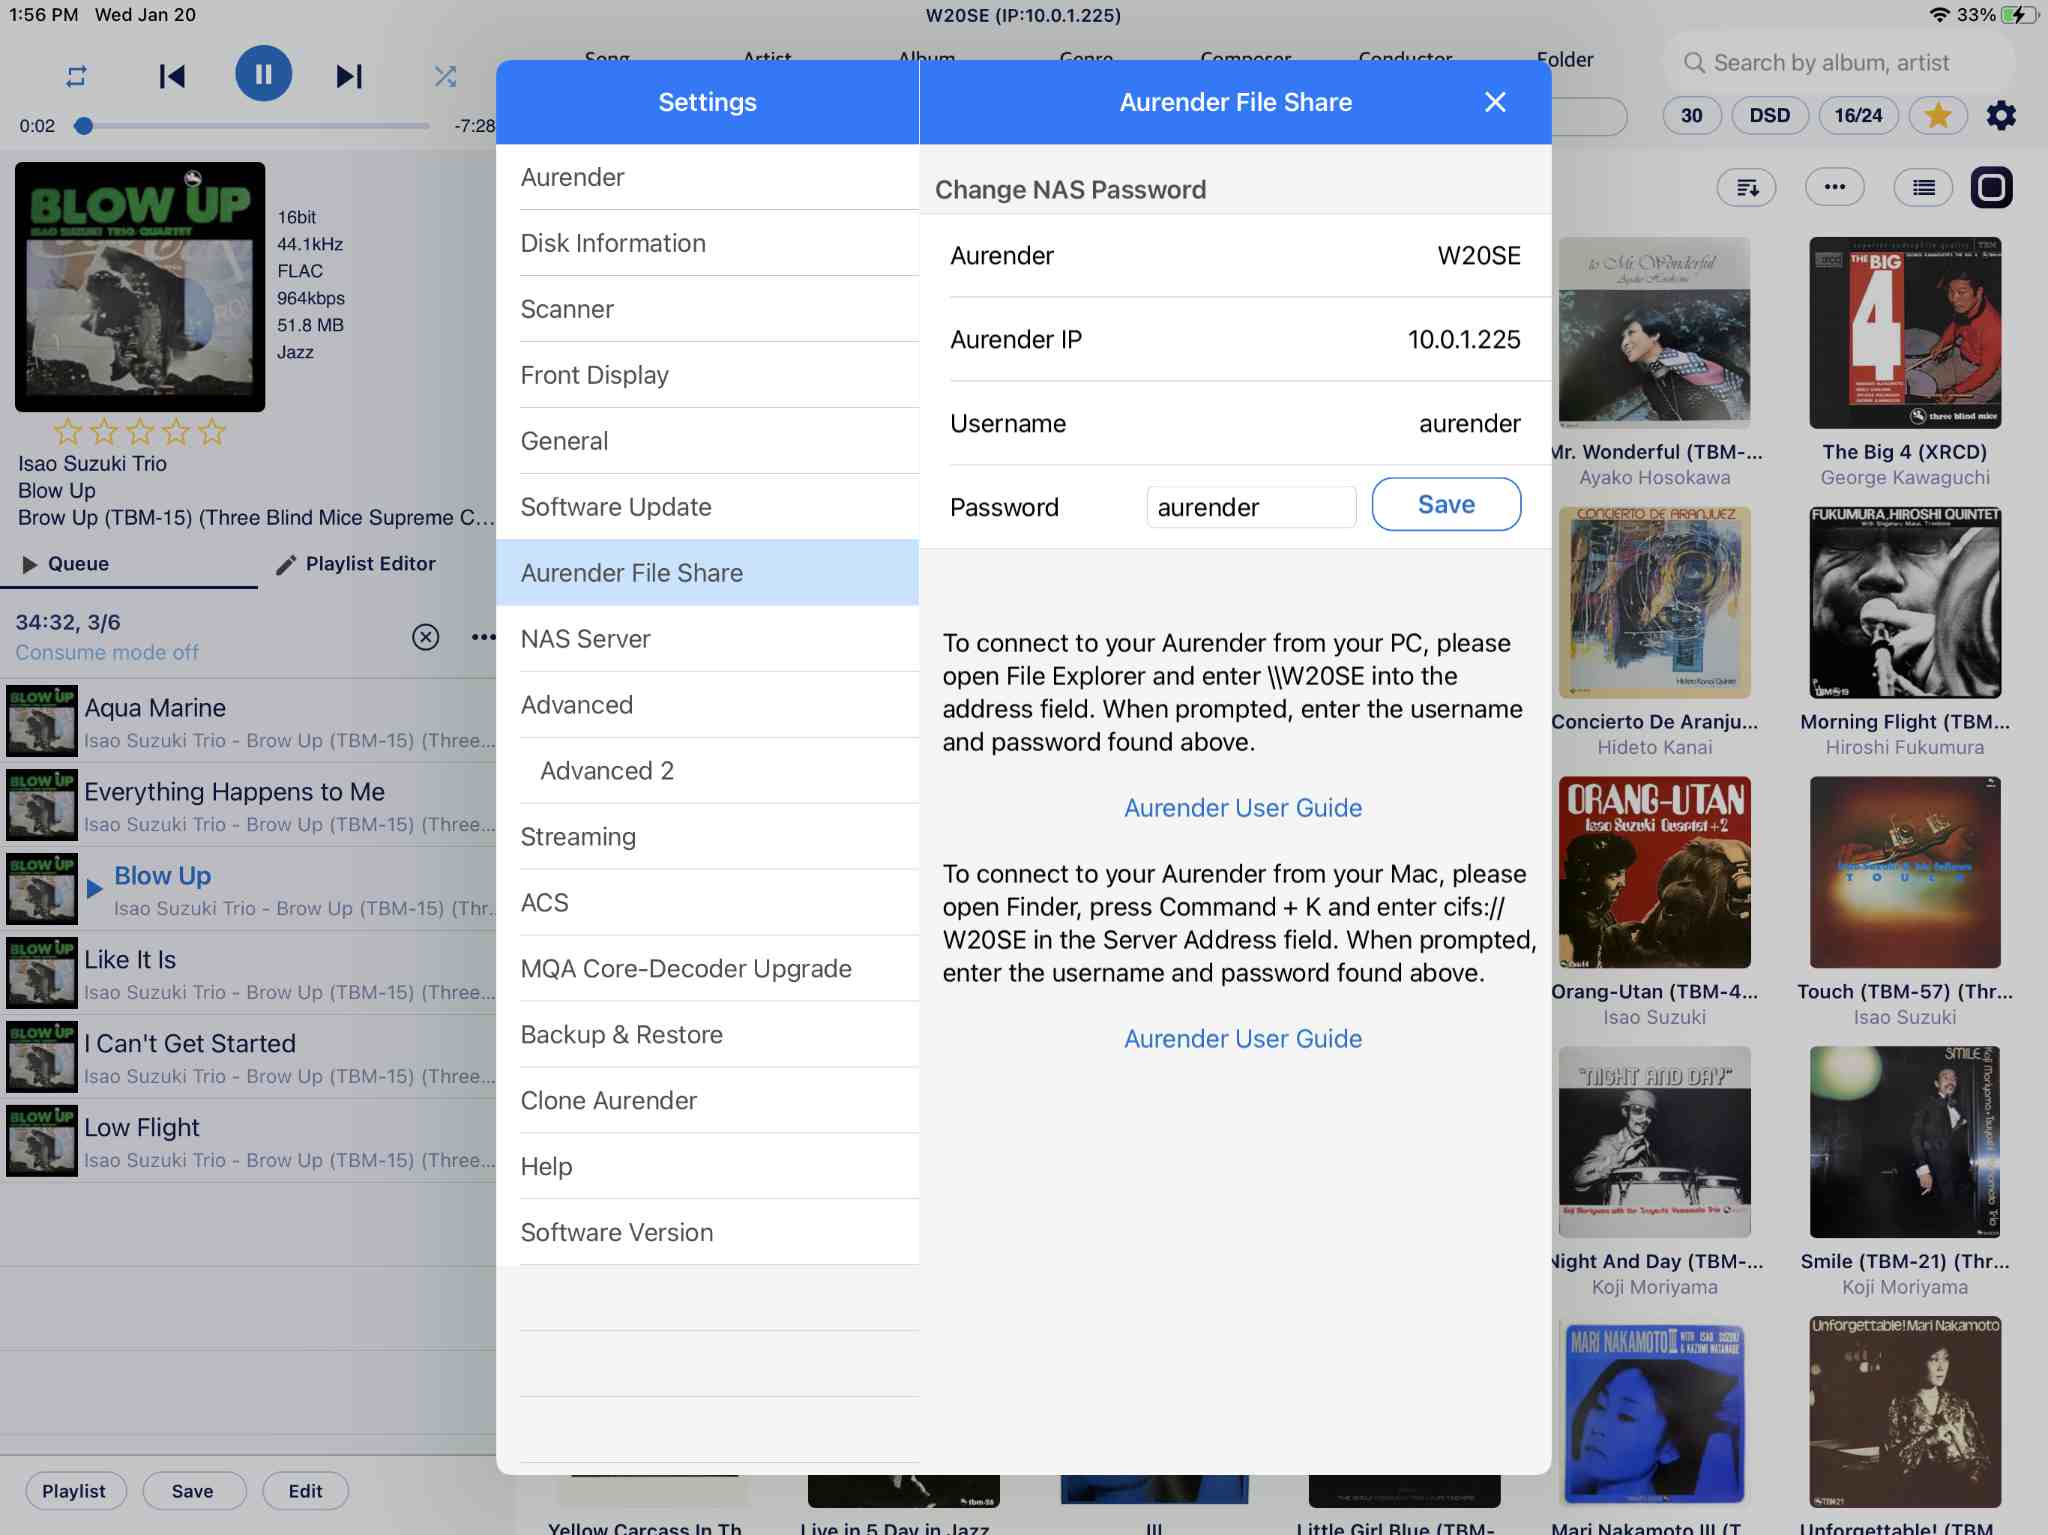
Enter the username and password that's listed on the Aurender File Share tab in the Aurender Conductor application for iOS.
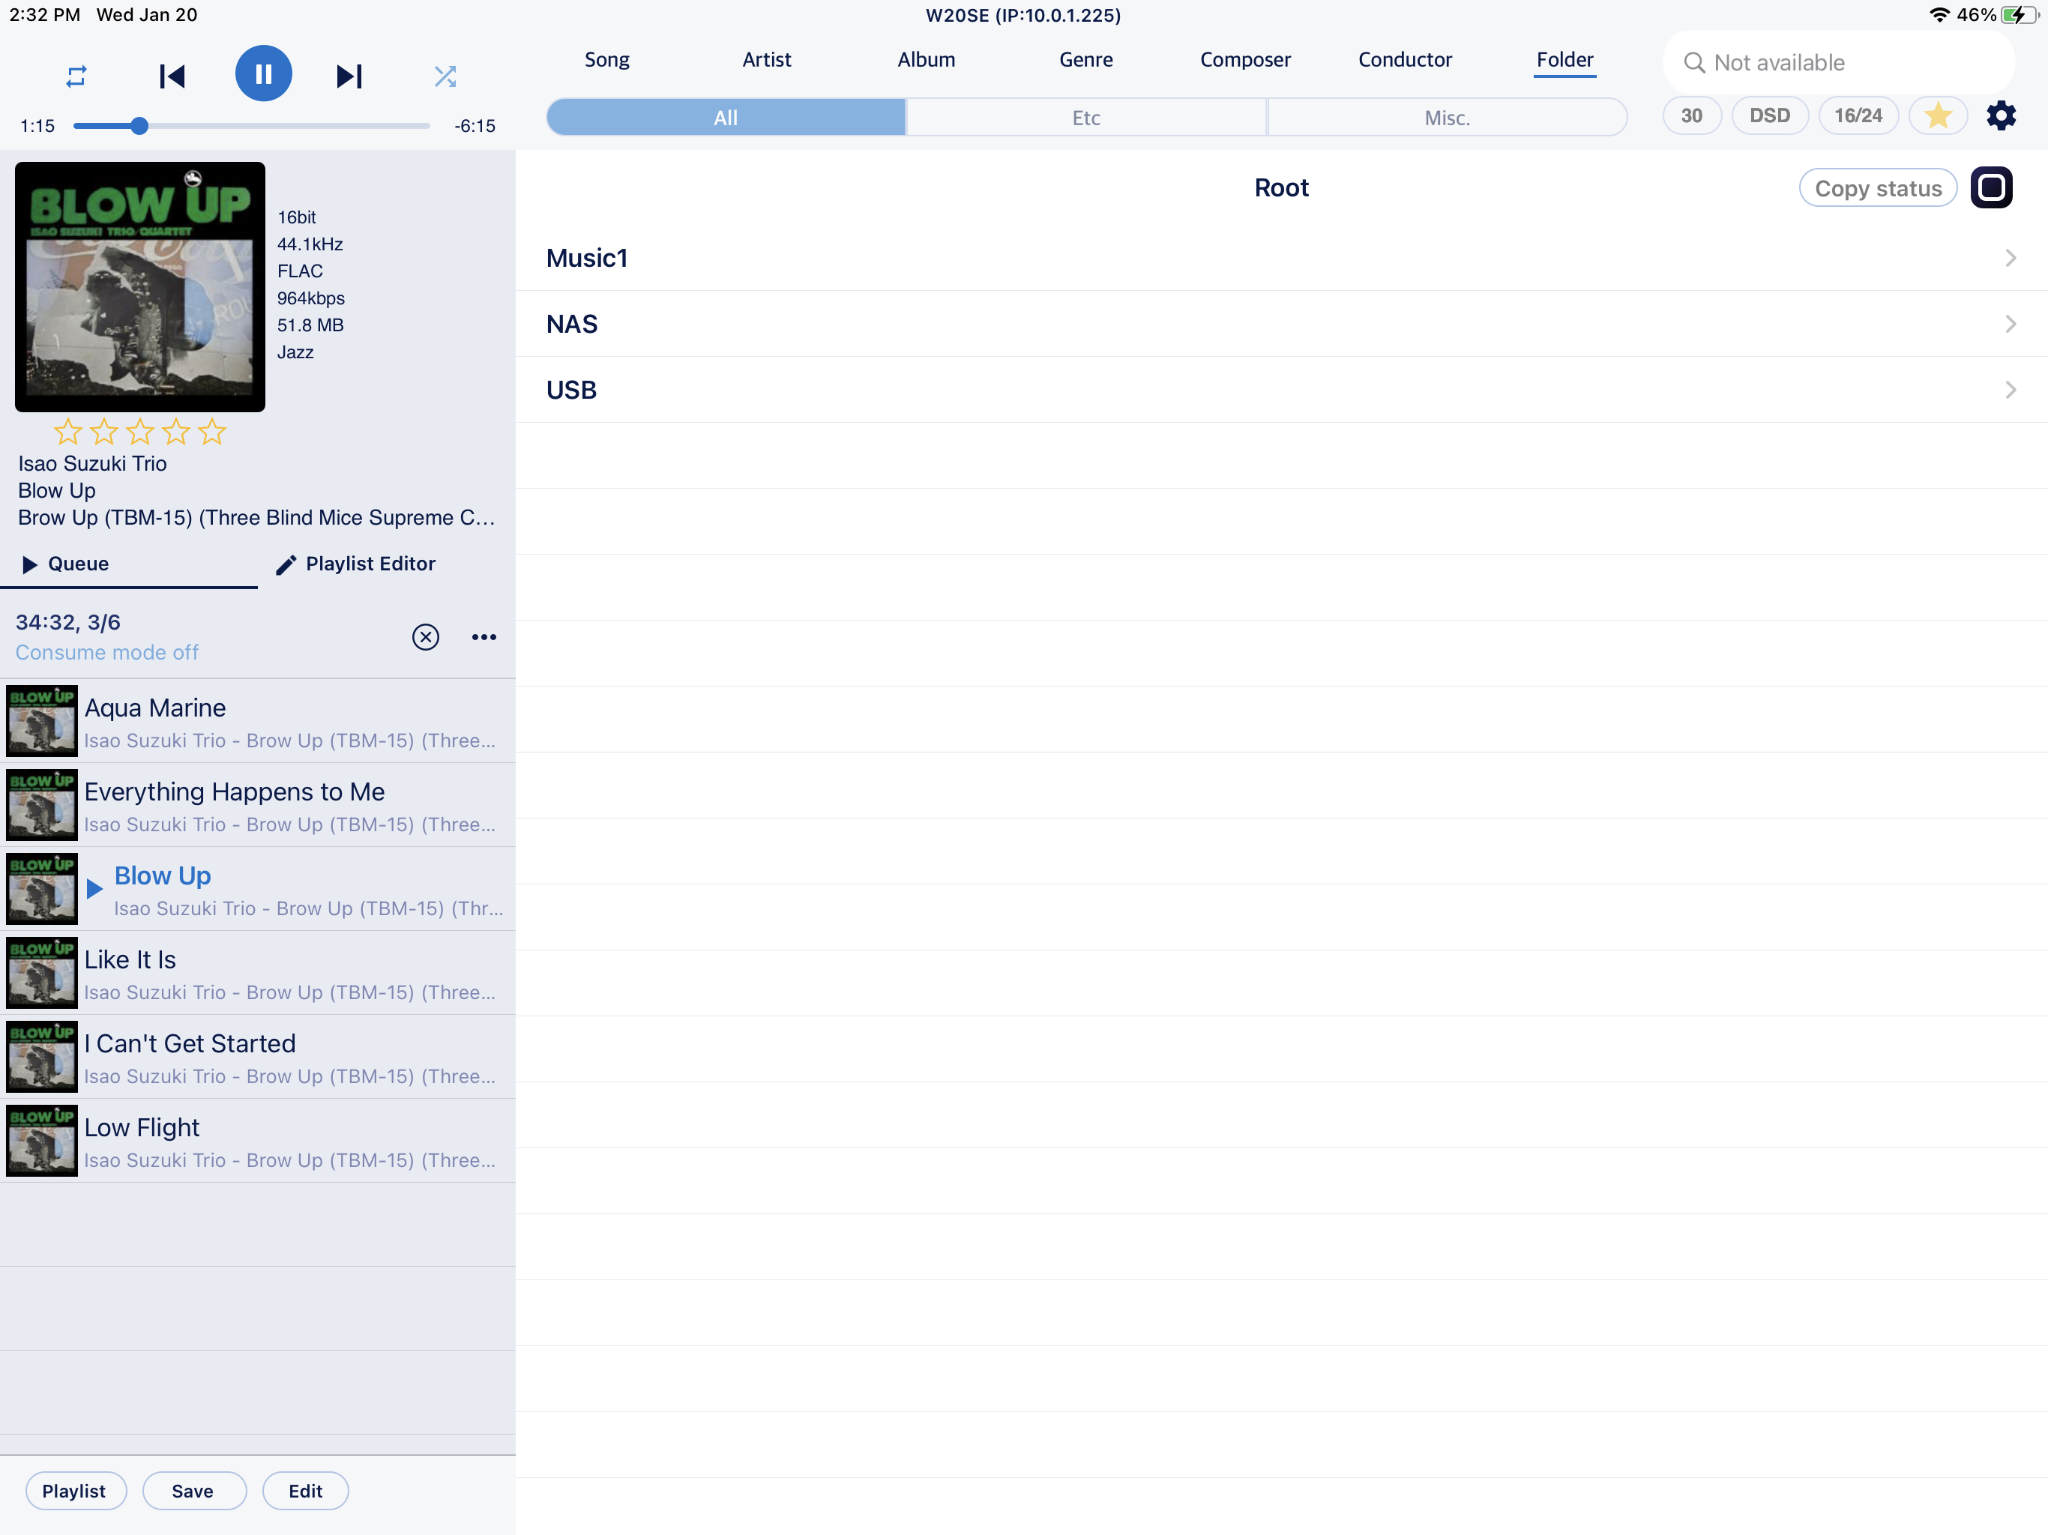
For Destination folder, enter the name of the main folder on the Aurender. Mine is Music1, as can be seen by browsing to the Folder tab at the top of the Aurender Conductor tab in iOS, and looking at the listed folders.
Click Create
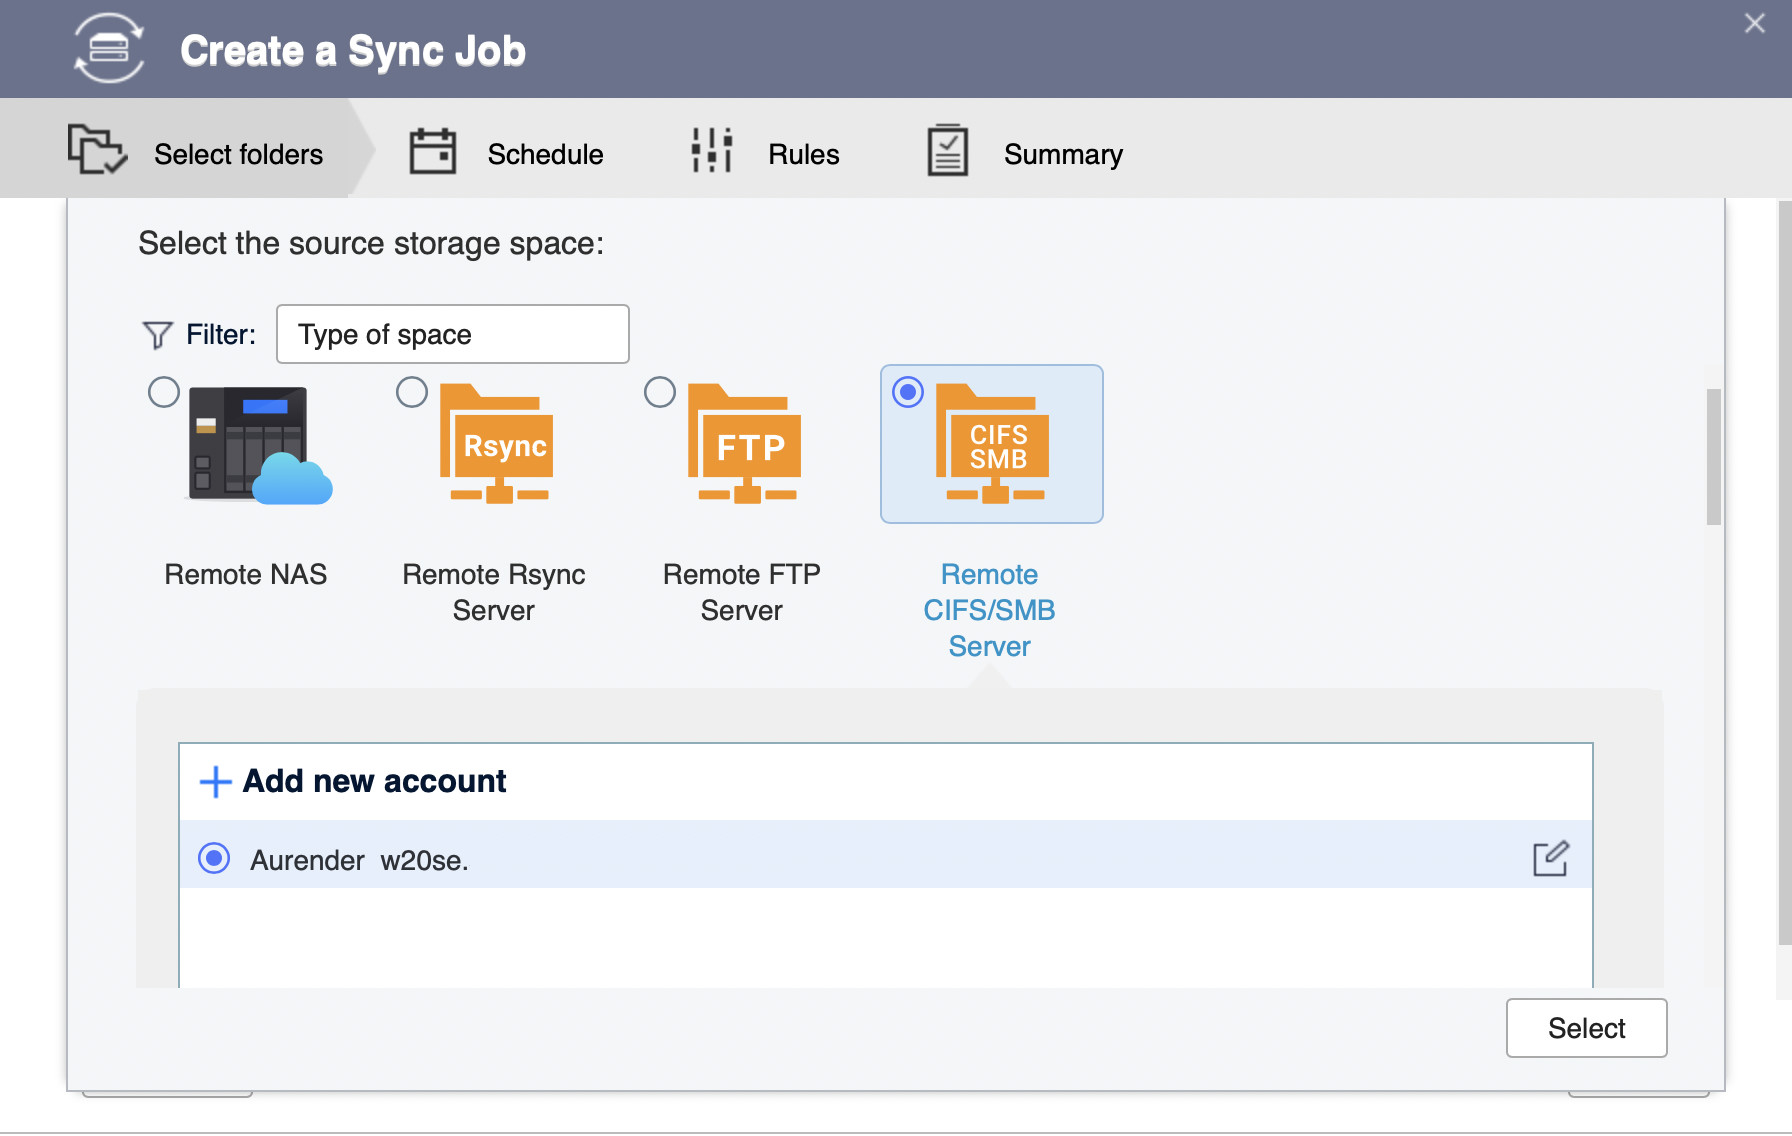
6. This should add the Aurender in the bottom of the following window. Make sure it's selected and click the Select button.
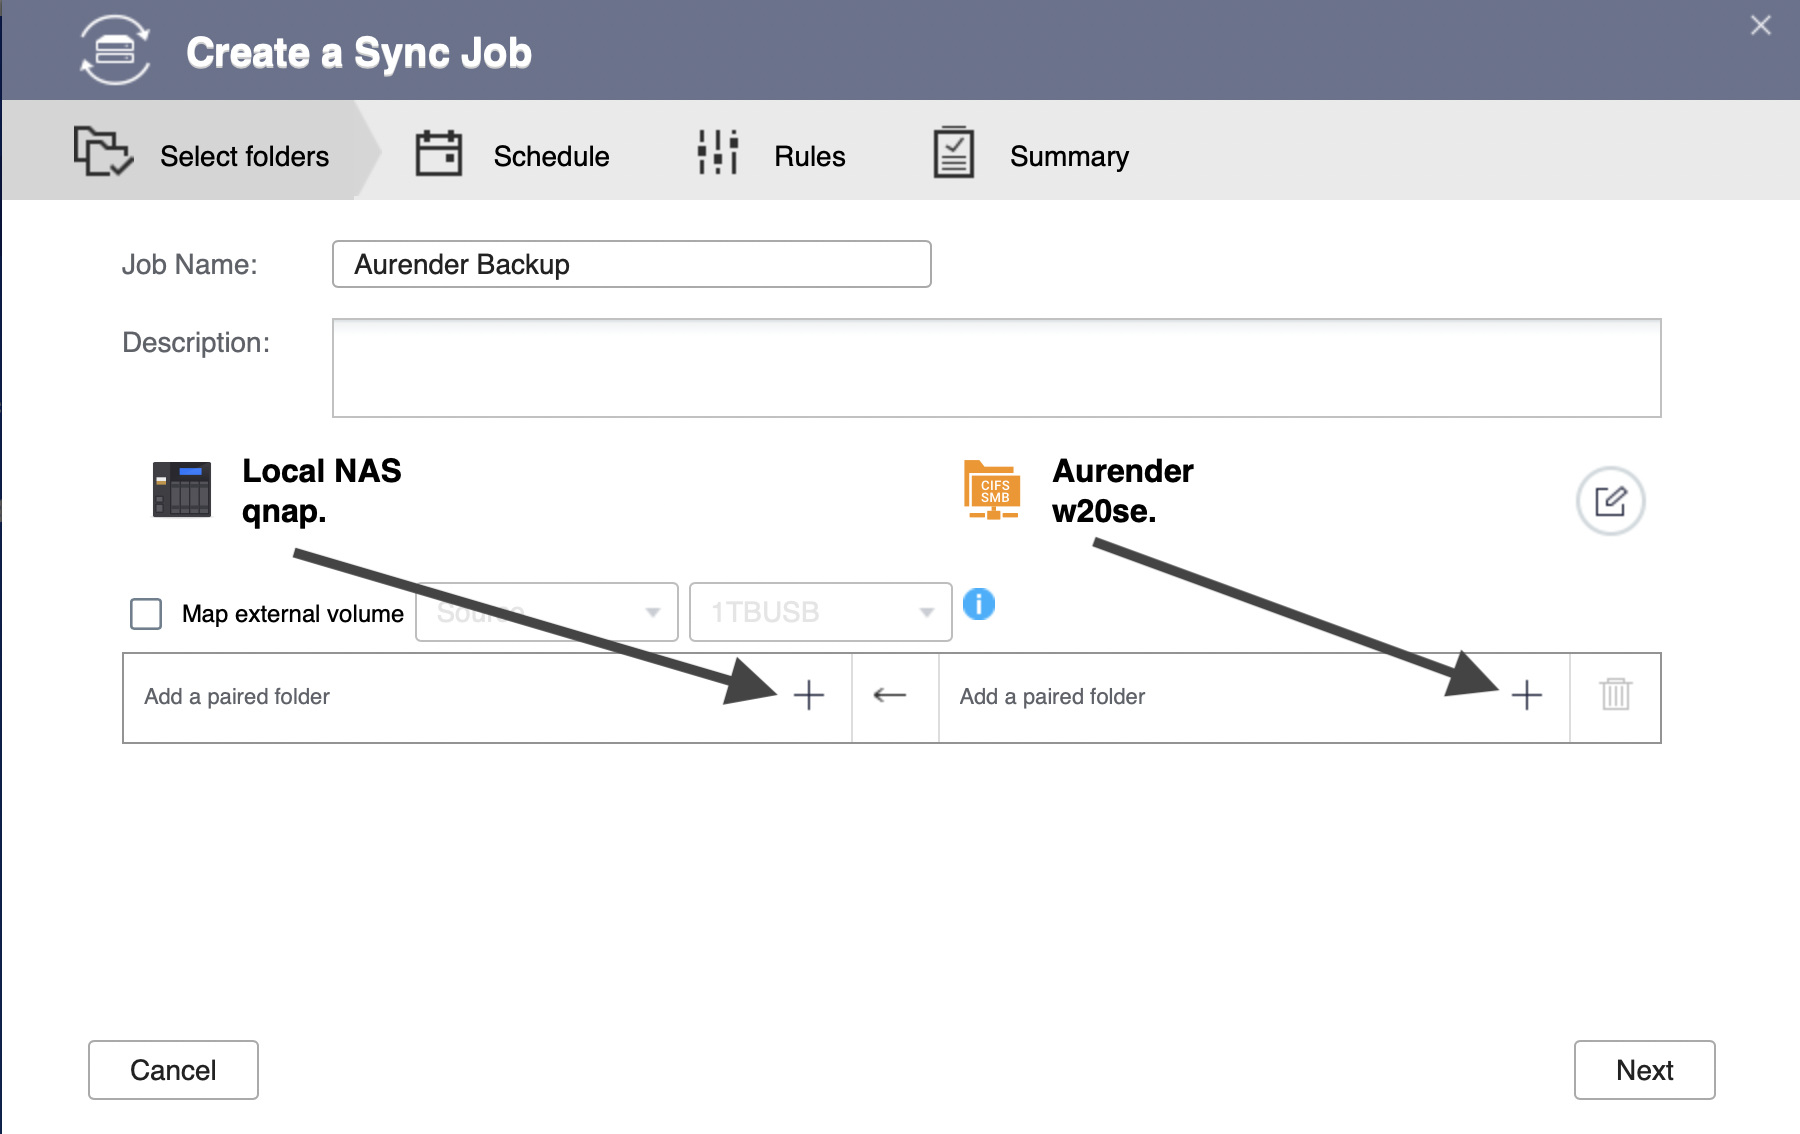
7. Name the sync job Aurender Backup.
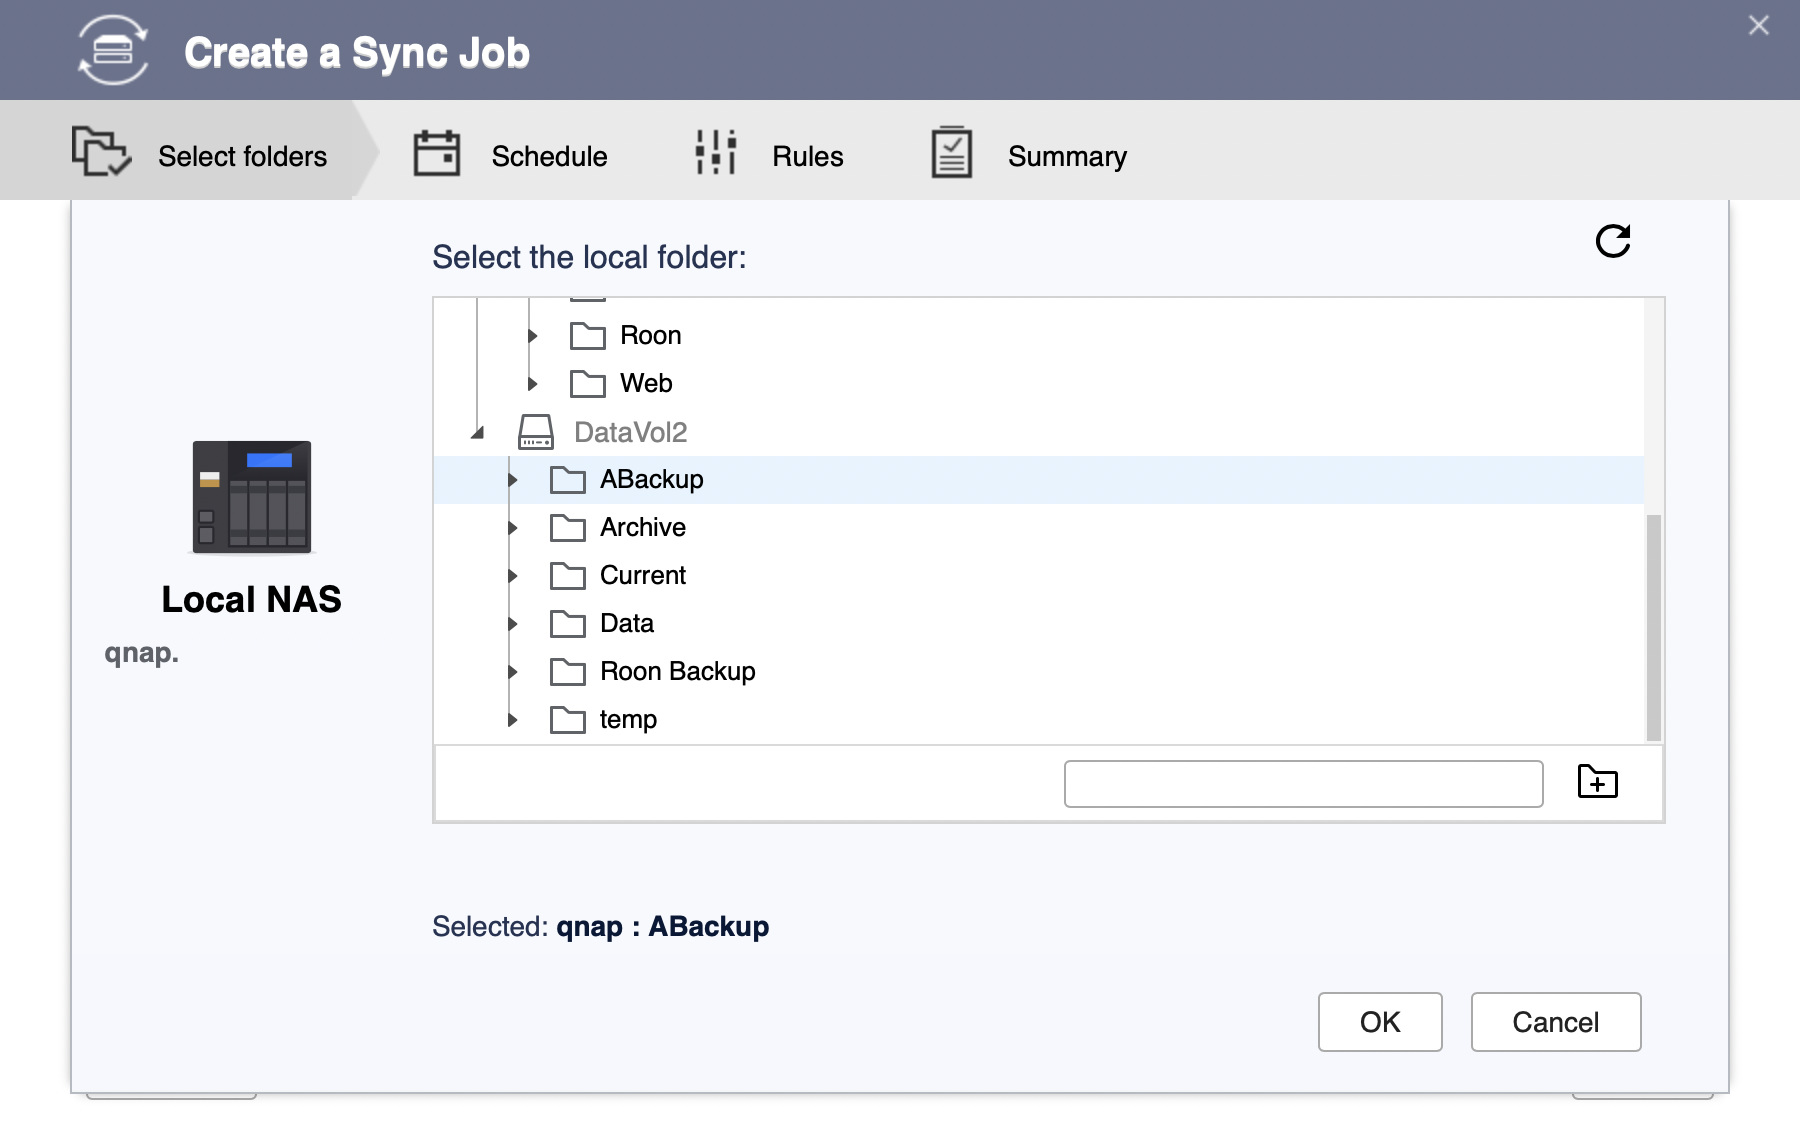
Select the folder on your QNAP NAS that will contain the backed up data, but clicking the plus sign under the name of the NAS, then select the ABackup folder created in the first step. See second image below.
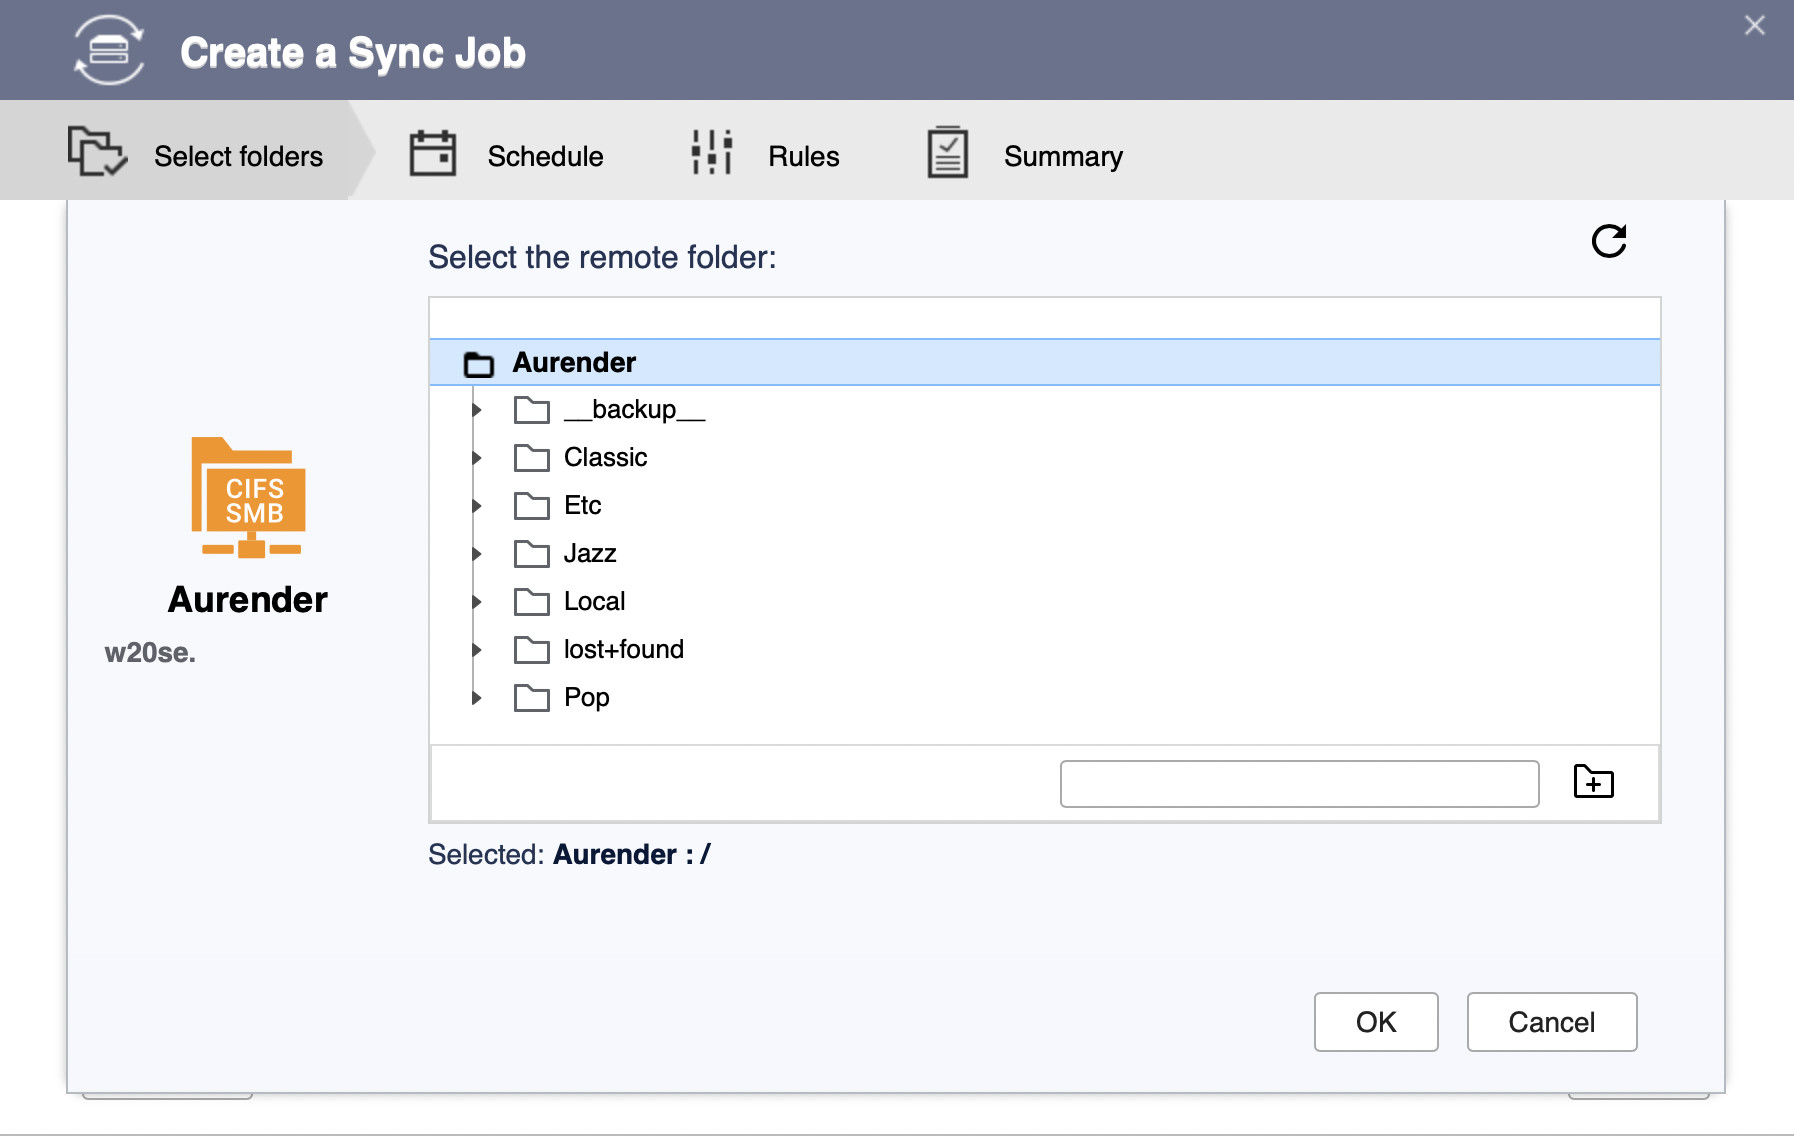
Select the folder on the Aurender to be backed up to the QNAP by clicking the plus sign on the right. If you want to backup the entire Aurender, I suggest you do, just select Aurender at the top of the next window, as seen in the third image below.
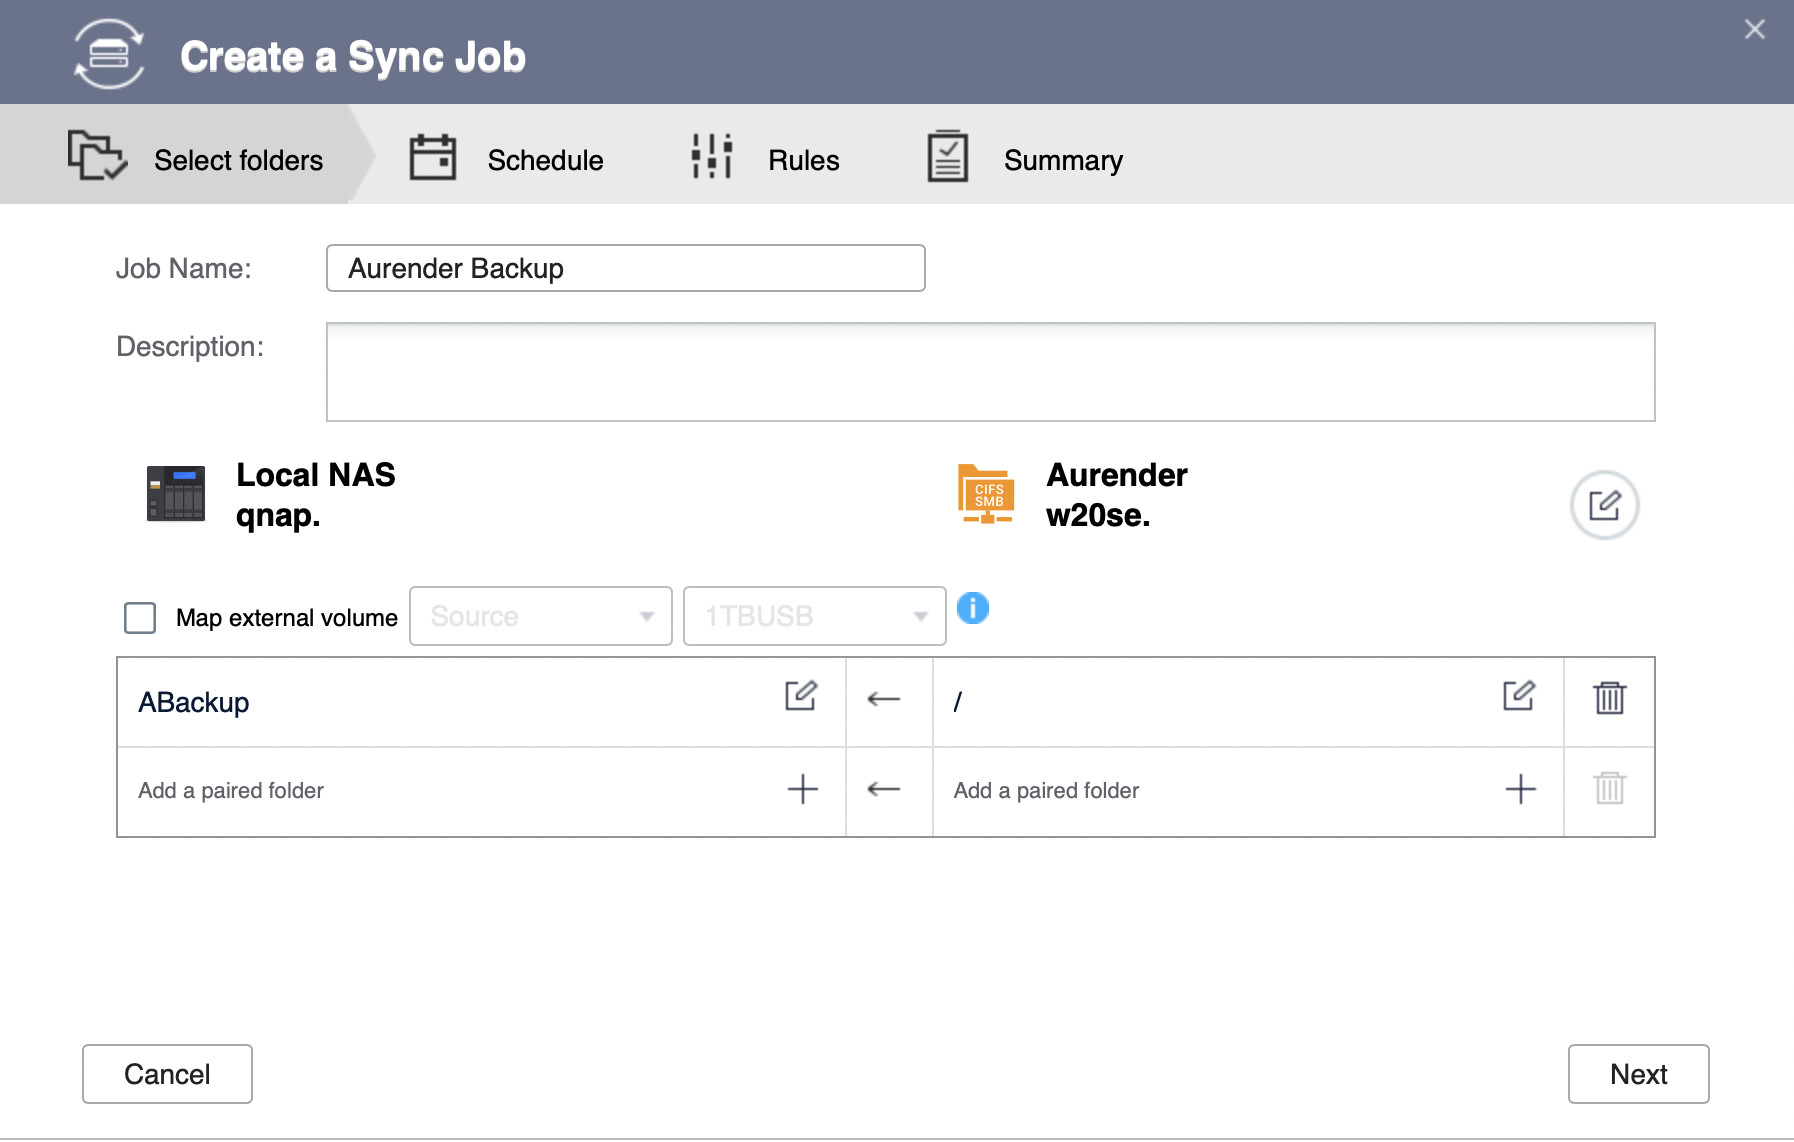
With both the source and destination listed (see fourth image below), select Next.
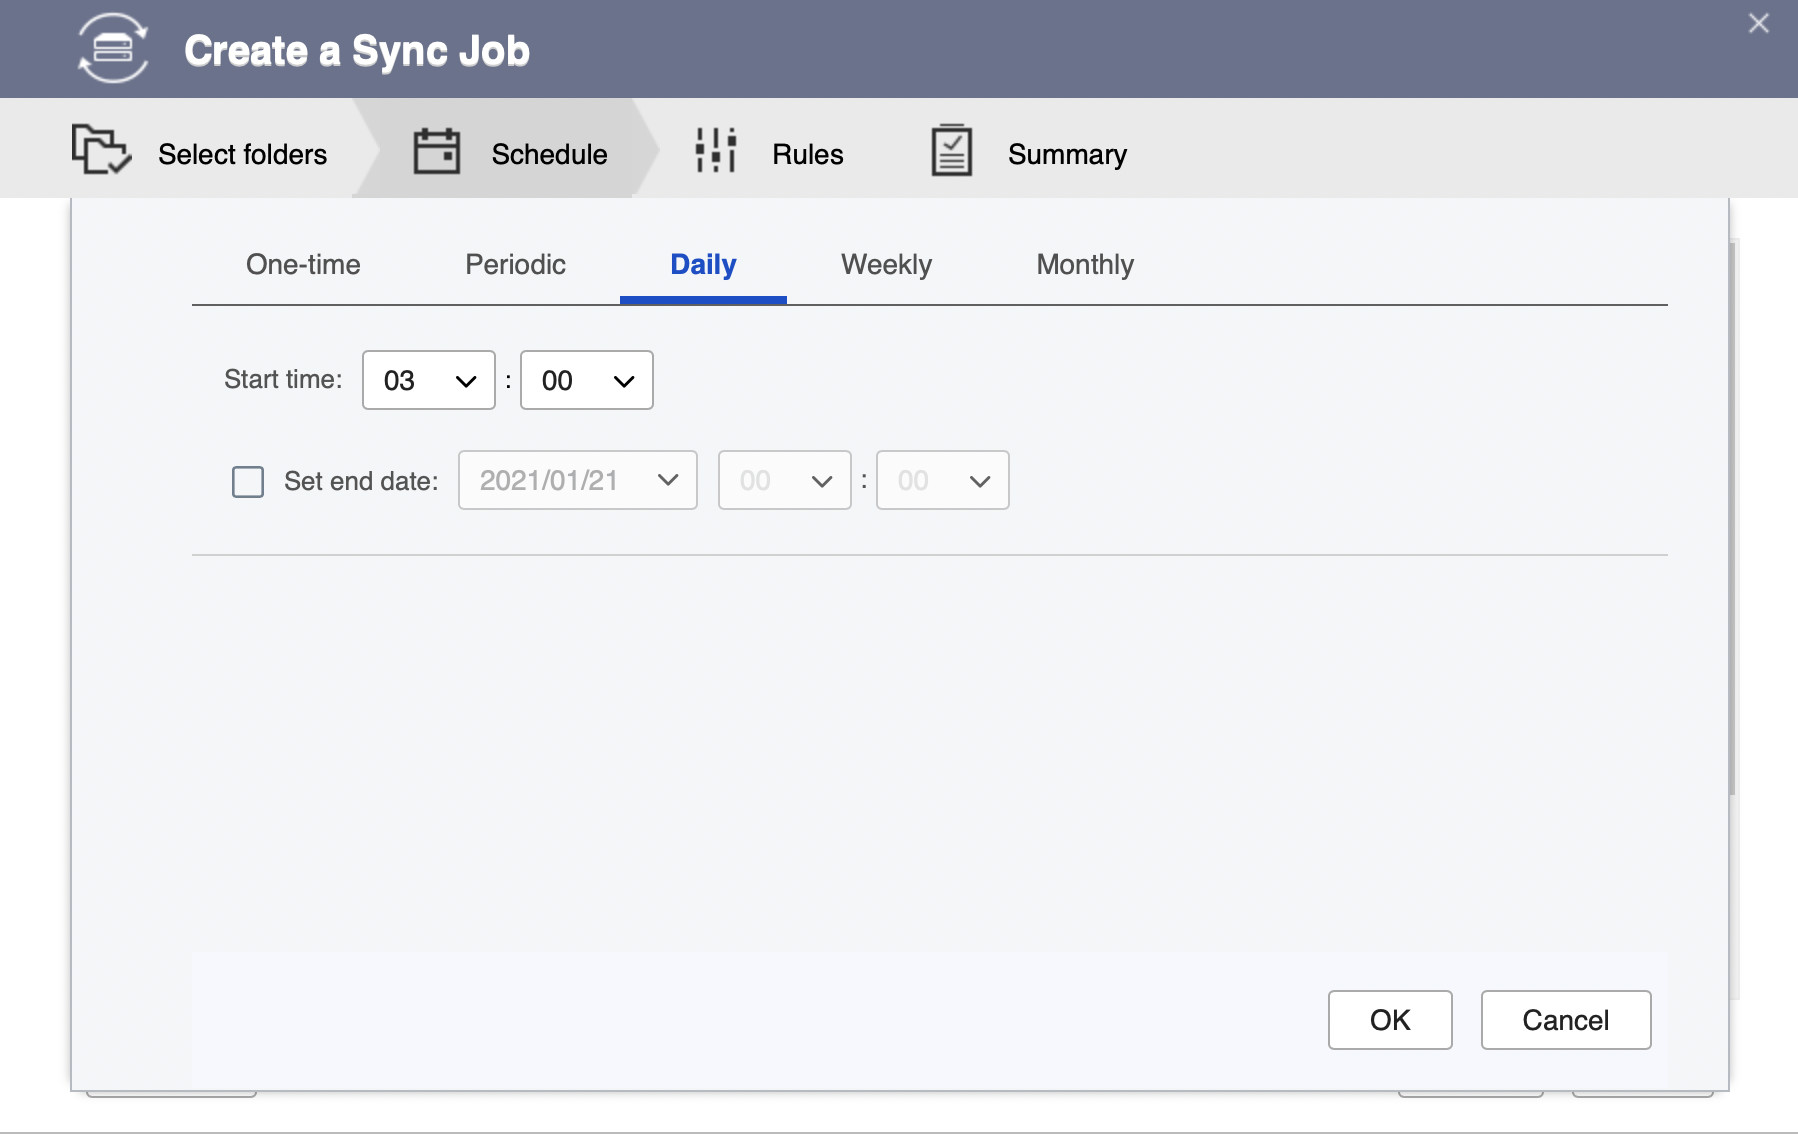
8. This is where I schedule the sync to run once per day, by clicking scheduler and clicking the plus sign to setup the schedule. On the next window I select the Daily tab, and use 3:00AM as my sync time. Then click OK, and Next.

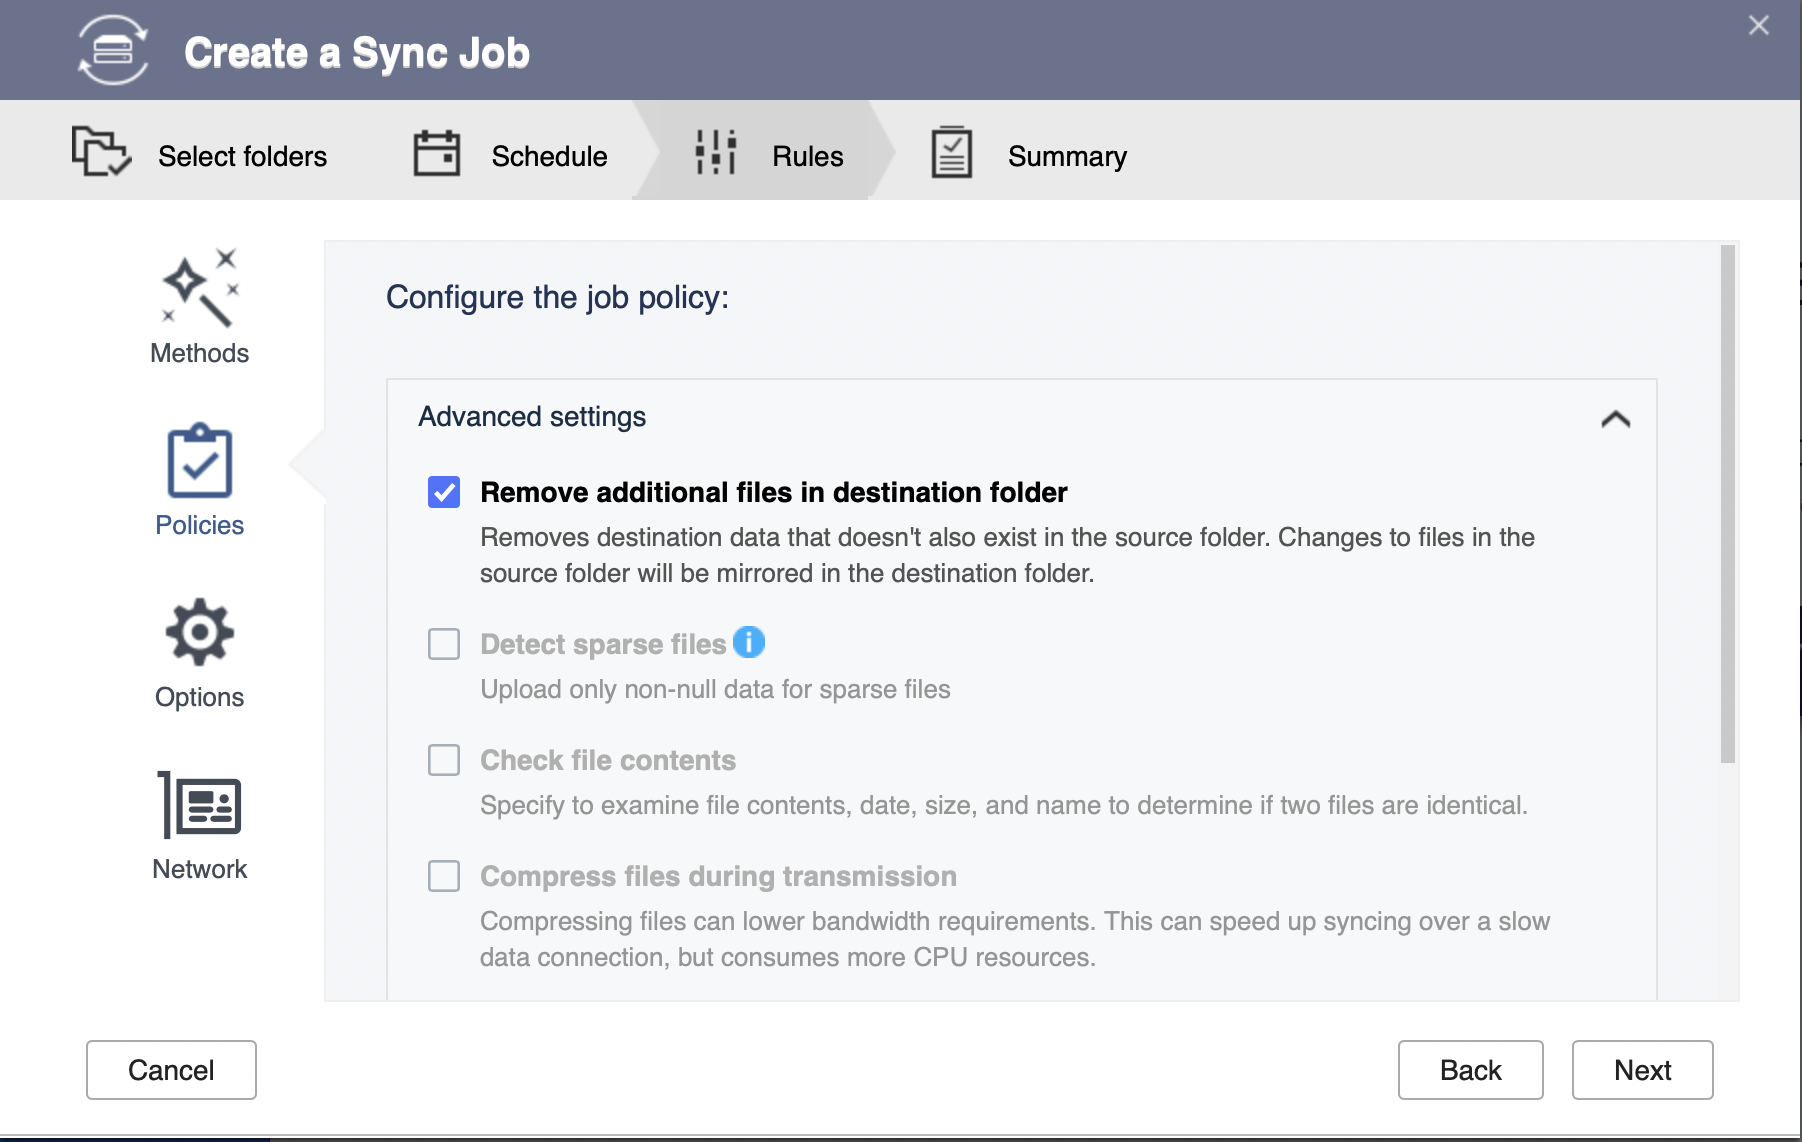
9. ON the Rules page, click o Policies on the left and check the box to Remove additional files in destination folder. This will delete files that you've deleted from the Aurender. This option isn't required, but I use it so the sync copy is identical to the Aurender copy. Click Next.
10. On the last Summary page, click Create.

11. On the main Sync page of HBS 3, click Sync now to run the synchronization now, if you don't want to wait until the scheduled time. I do this just to make sure it's going to work without any unforeseen issues.
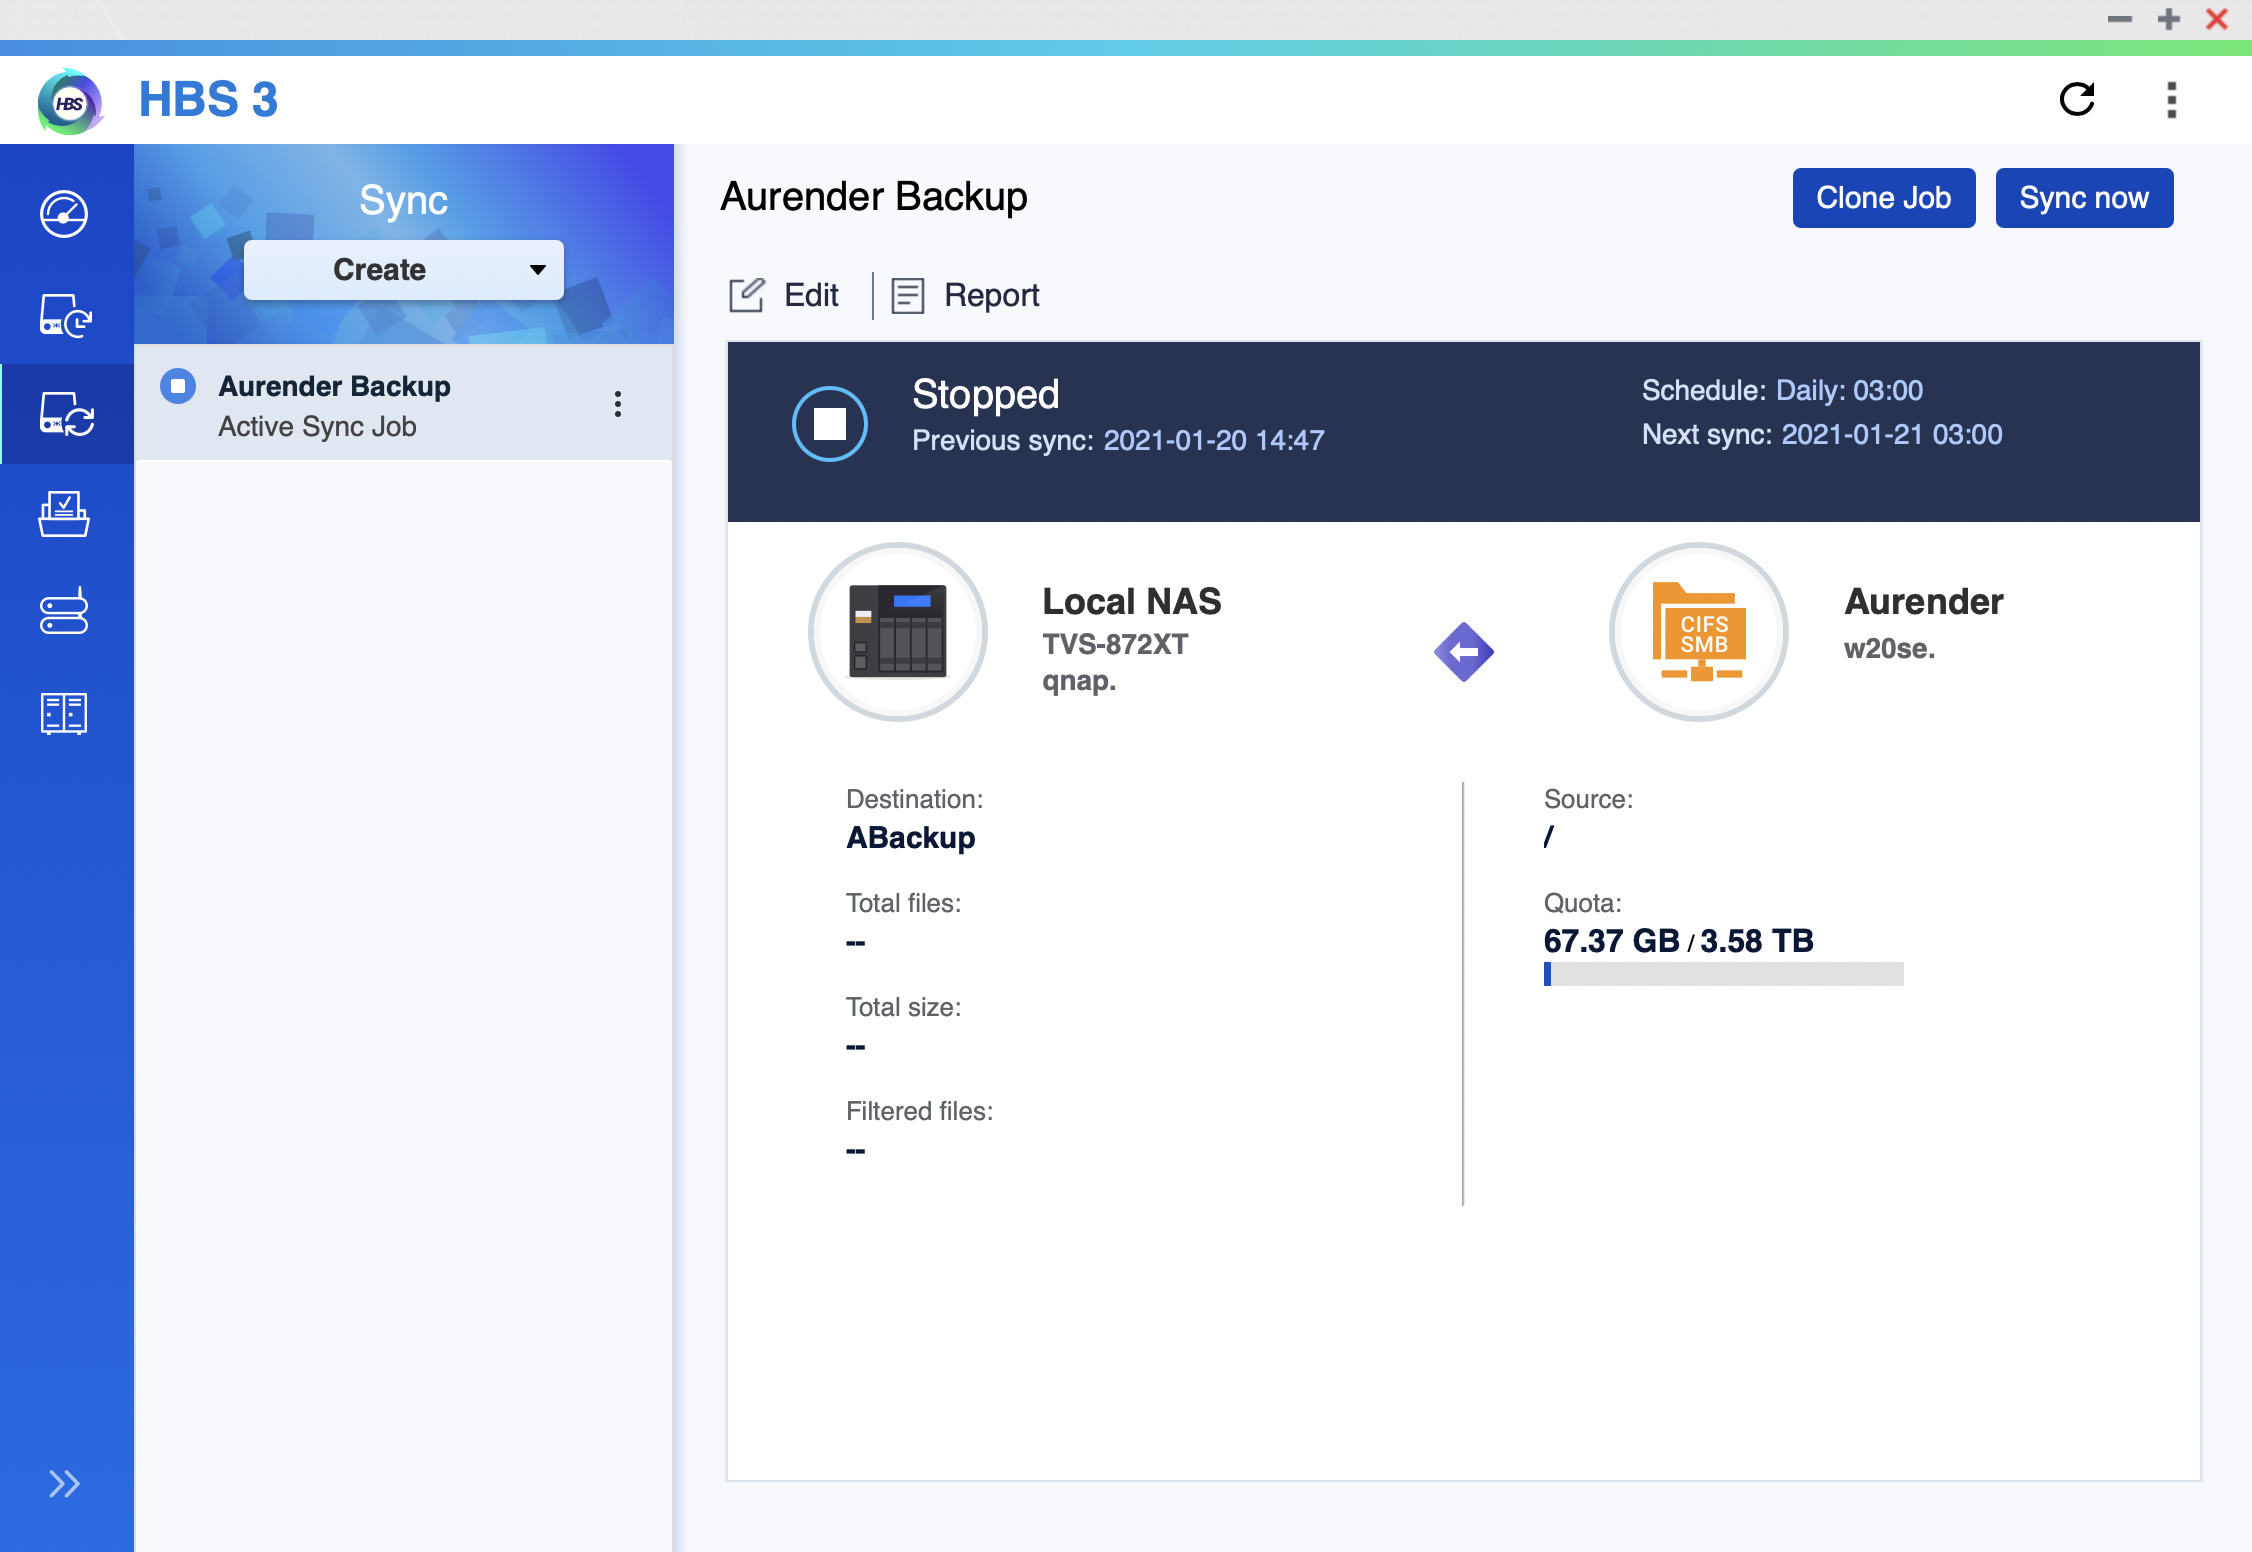
That's it. The Aurender will now be synchronized with a folder on the QNAP, without touching the Aurender configuration or having anything not audio related running on the Aurender.
1. Create a shared folder called ABackup from the Synology Control Panel.
2. Install Active Backup for Business in the Synology Package Center.
3. Open Active Backup and select File Server on the left side of the window, then select Select Add Server.

4. Make sure SMB Server is selected, then click Next.
5. Add ether the IP address of the Aurender or its name for Server Address. Leave the port at 445.
Enter the username and password that's listed on the Aurender File Share tab in the Aurender Conductor application for iOS.
Click Apply and Yes to the popup.
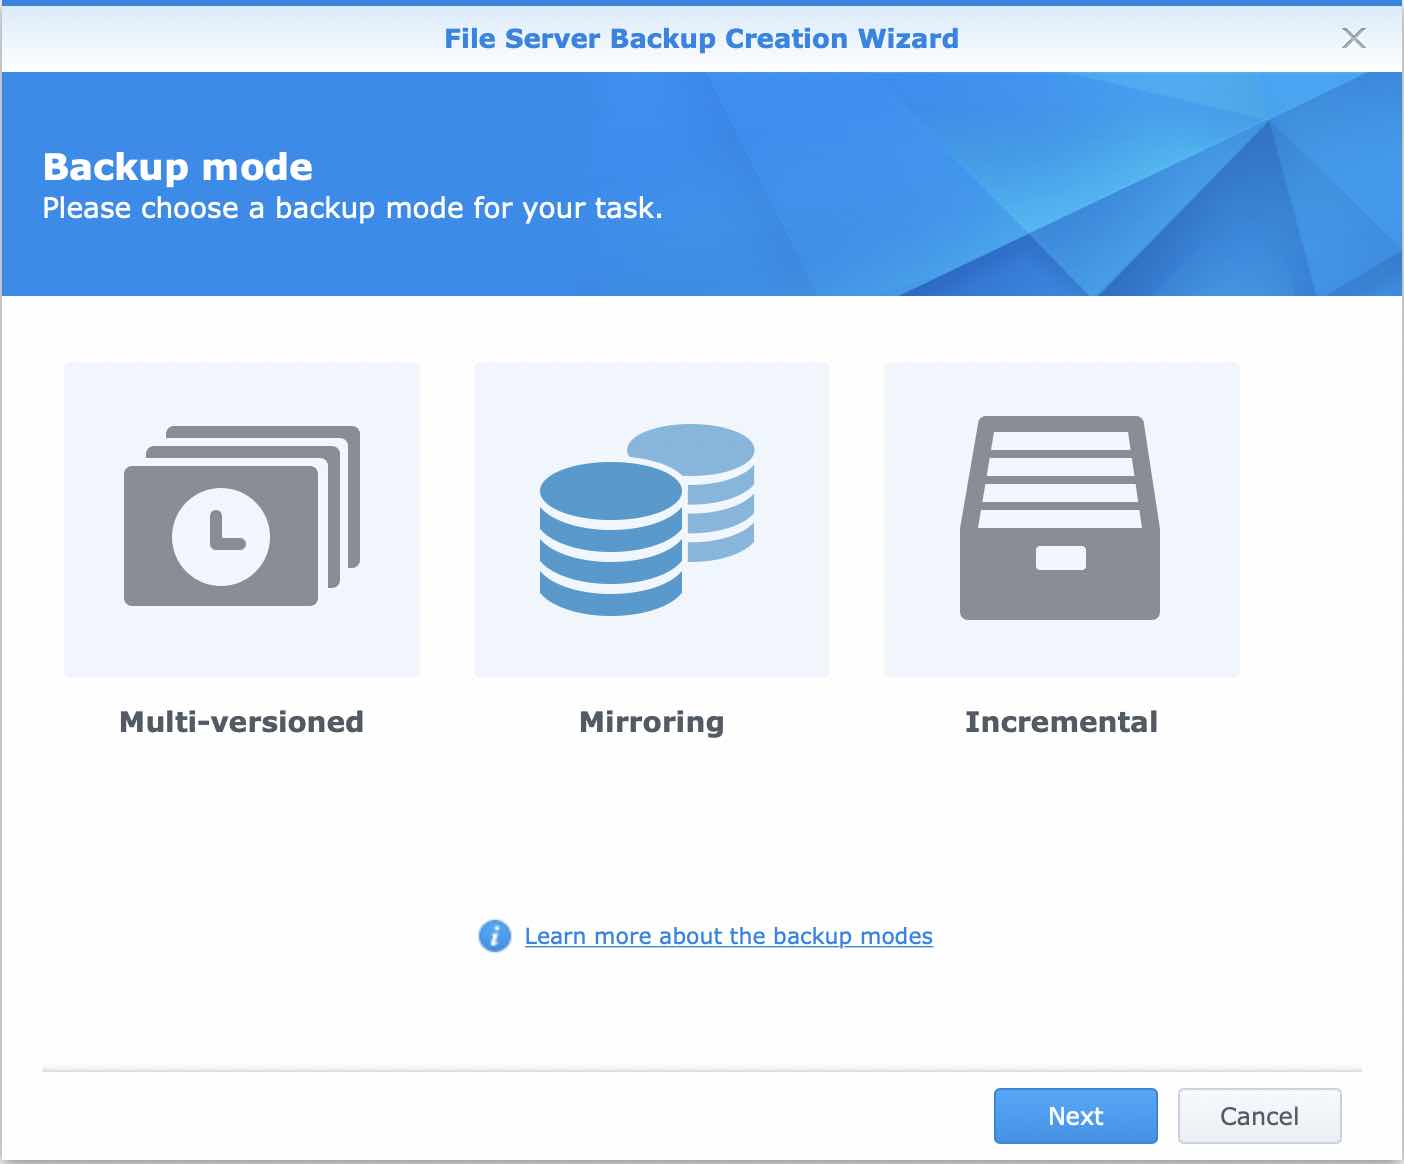
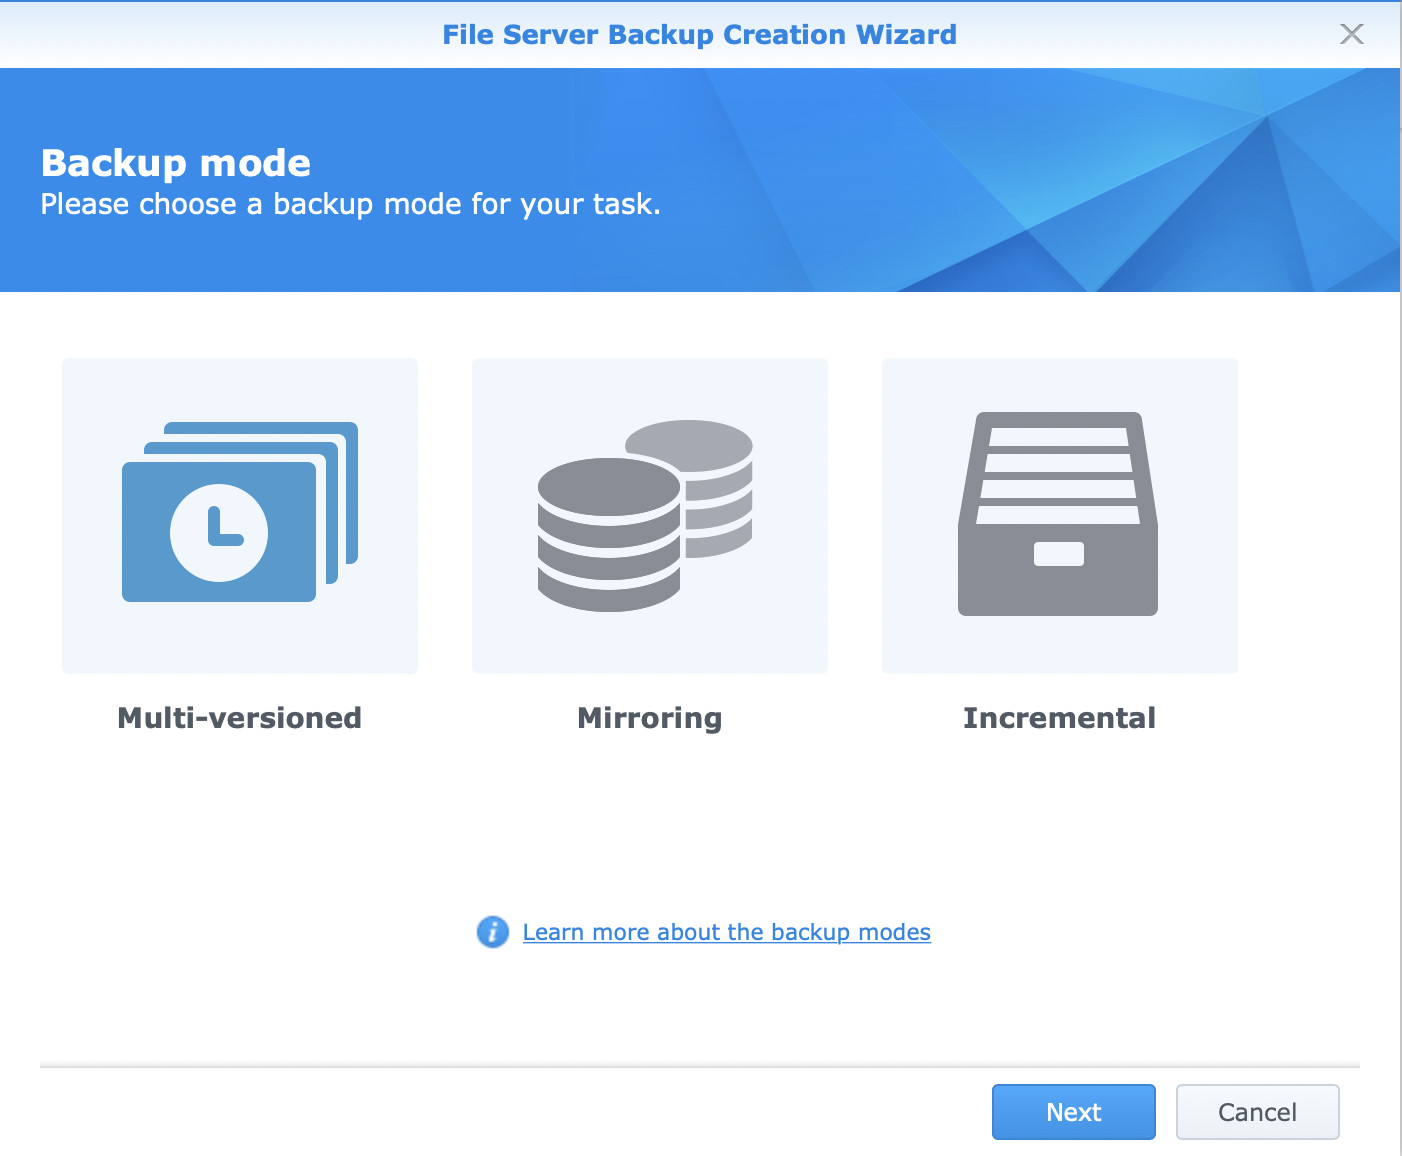
6. On the Backup mode page, select Mirroring then select Next.
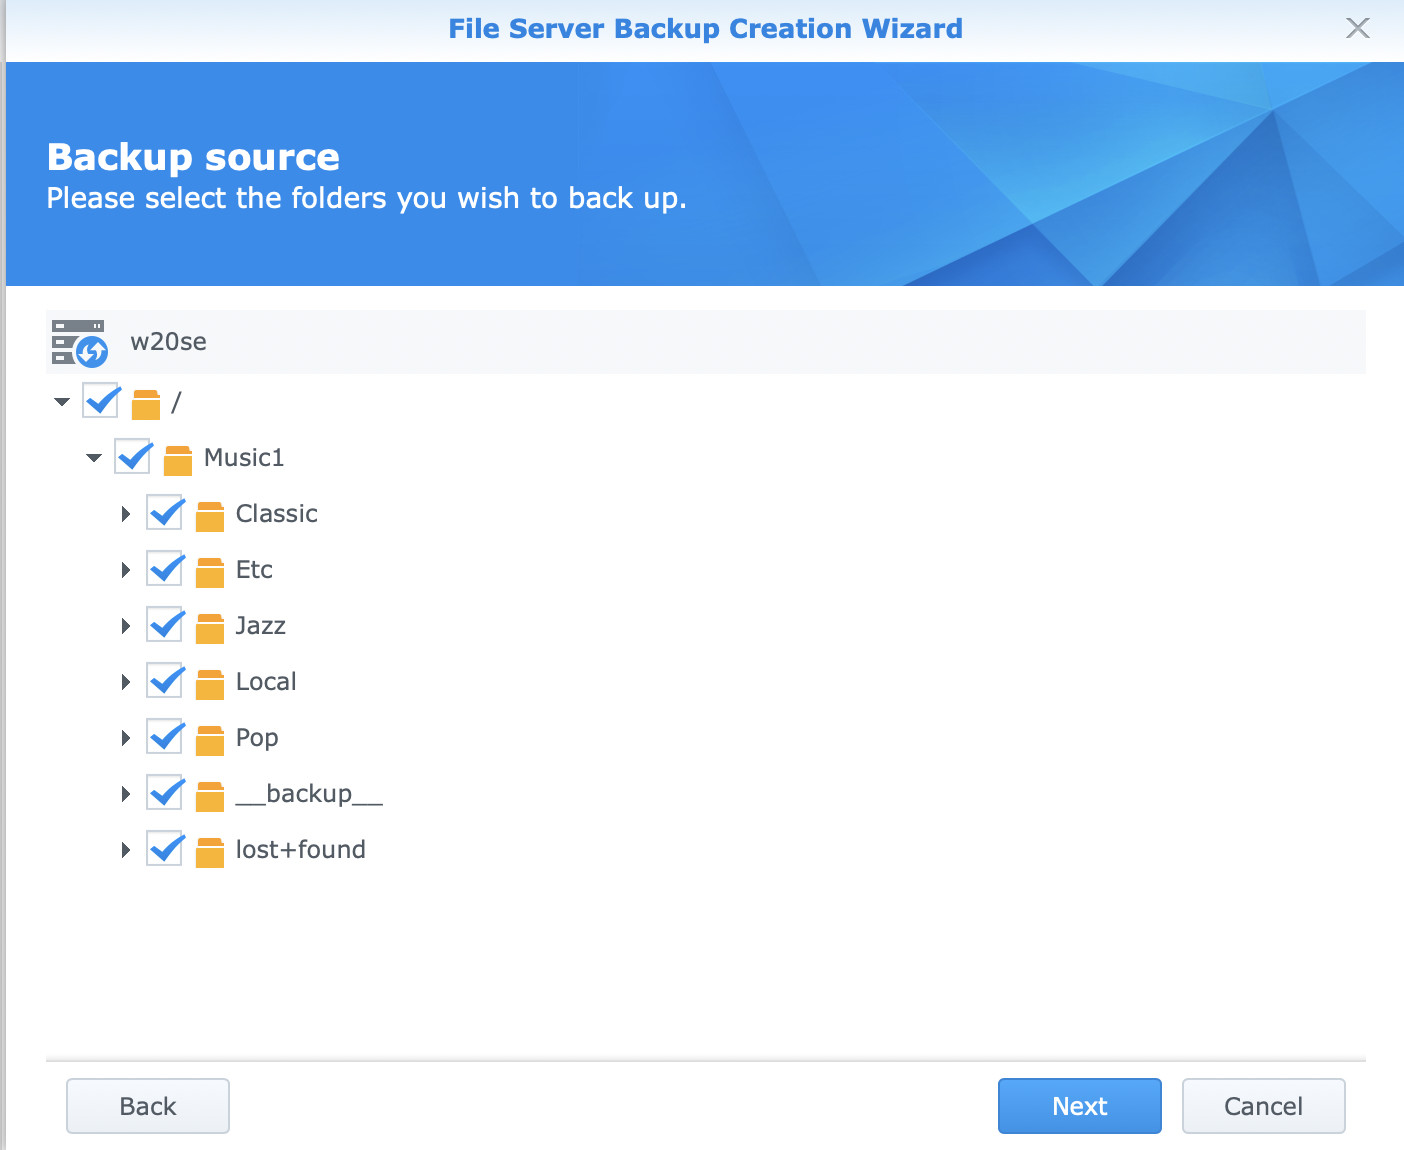
7. Select the Aurender folder(s) you wish to backup. I selected the top level folder, to backup everything. Click Next.
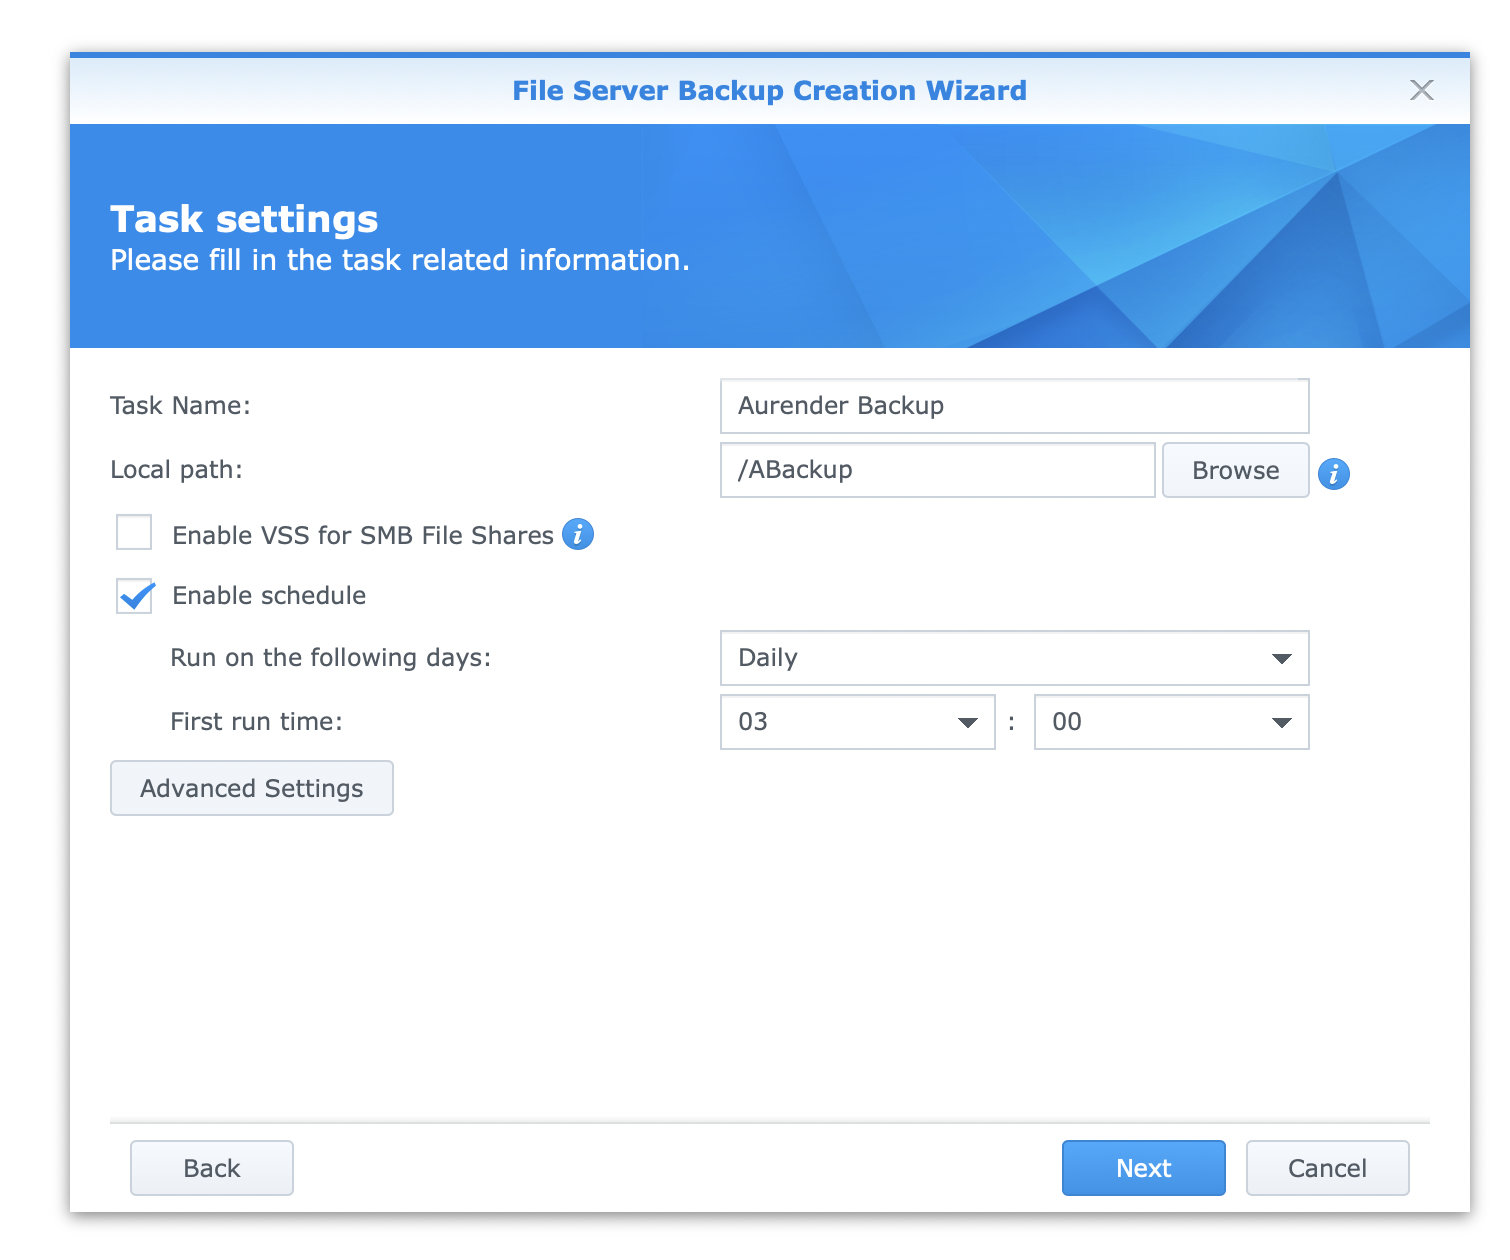
8. Name the task Aurender Backup, click browse to select the ABackup folder previously created, enable schedule, select the time you'd like it to backup, click Next, then Apply.
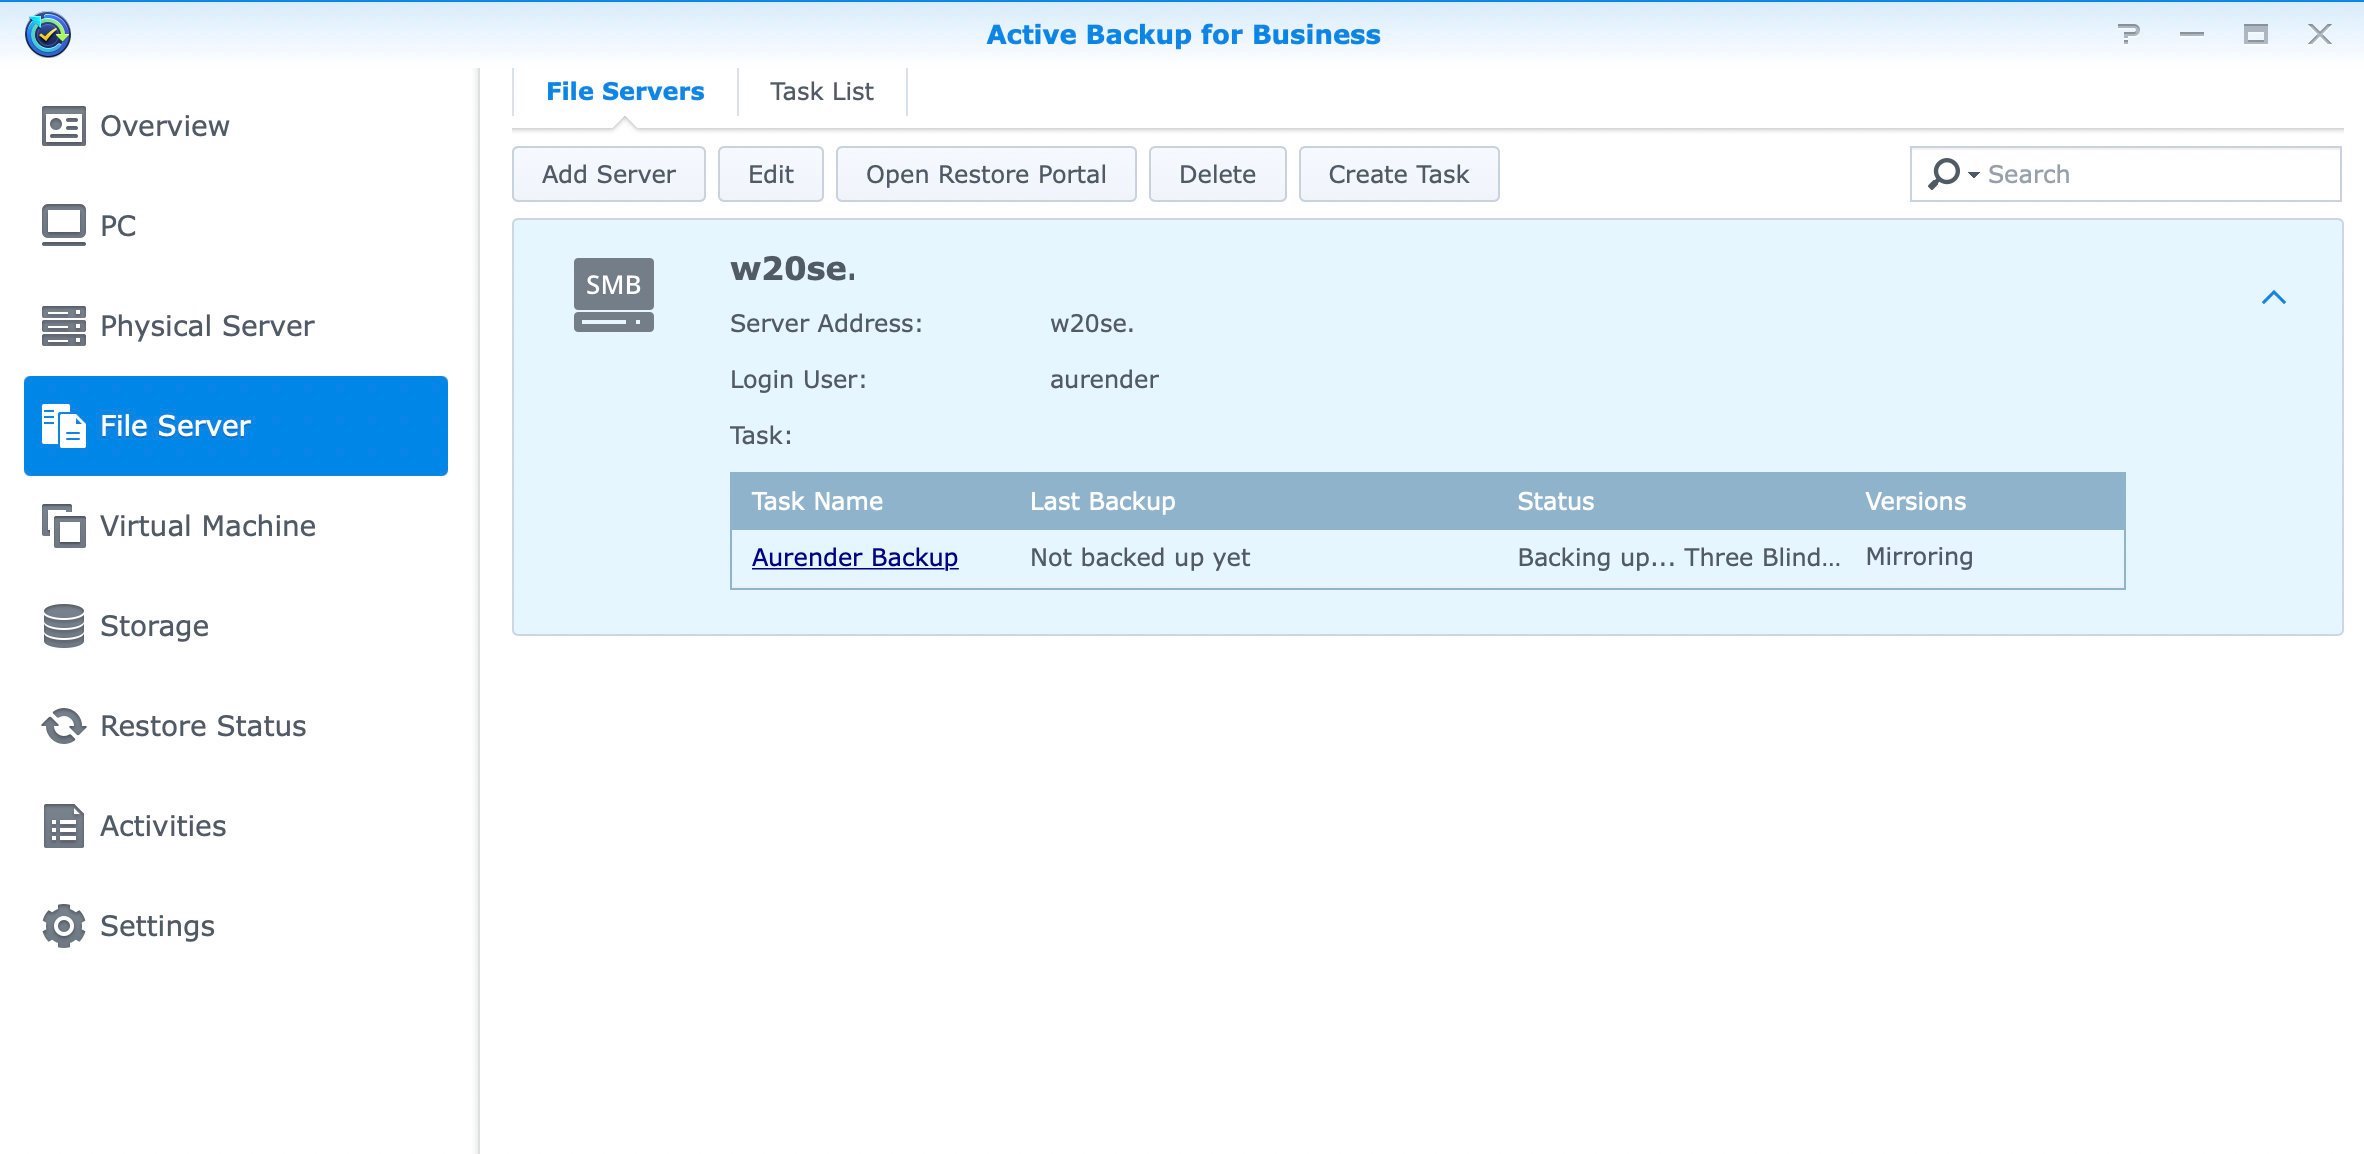
9. You can backup now, or on the schedule. To see the status of the backup, look at the following screen.
That's it for backing up Aurender Music Servers to either a QNAP or a Synology NAS. This same method can be used for other music servers. If you'd like to see instructions for other servers, let me know in the comments below.


Recommended Comments
Create an account or sign in to comment
You need to be a member in order to leave a comment
Create an account
Sign up for a new account in our community. It's easy!
Register a new accountSign in
Already have an account? Sign in here.
Sign In Now