


It's finally time to talk about CAPS twenty!
I've been working on this project for months with people from all over the world. Keeping it under wraps for so long has been nearly impossible because I'm so excited about a new CAPS design. CAPS is truly a passion project for me that's fun, educational because I learn so much along the way, and hopefully beneficial to the Audiophile Style community.
This time around CAPS information will be in both written and video form. The written articles will cover much more ground than the videos and will be open for discussions. There may be a tidbit or two from off the cuff comments in the videos that don't make the written text, but I will do my best to include it all right here.
Let's get going!

First A Note of Thanks
This CAPS project is like no previous CAPS project in that it has been a global effort. Individuals and companies from around the world have provided expertise, hardware, software, and monetary contributions to support the project. Without this global support CAPS Twenty wouldn't exist.
When I contacted each of these companies, they completely got it. What I mean is that they understood the CAPS project, saw how they could help, realized that this project is something quite different from the norm, and jumped at the chance. I'm immensely grateful for their support.
Please consider each of these supporters / sponsors as you think about your next audio purchase.


CAPS Twenty Part One Video
What's in a Name - CAPS
In late 2009 / early 2010 I developed a "tiny" music server. I showed the original design to an industry friend and he responded by saying it was so small it could fit in one's pocket. "It's a pocket server." He said. Thus, the name Computer Audiophile Pocket Server (CAPS) was born. We are no longer Computer Audiophile and the sever isn't pocket sized, but the name isn't going anywhere.
Why Build It?
Understanding why I came up with a new CAPS design may help some members of this community either avoid the project or jump in with both feet. It all started with me dipping my toes back into the world of Jussi Laako's HQPlayer. I was evaluating a couple DACs that could handle very high rates of native DSD content, but I couldn't get any of my existing audio endpoints to work perfectly with the DACs. I often heard loud noises, pops, and much of the time the DACs were just not recognized by the audio devices. I needed a solution to this issue, so I decided it was time for a new CAPS design.
This is the crux of CAPS designs. Filling a void in the marketplace. The original CAPS servers were built because we had very few options from HiFi manufacturers at the time. I'm 100% uninterested in producing a CAPS design that competes with existing products from HiFi manufacturers. Those guys do this day-in/day-out and build amazing products that we could've only dreamt of back in the day.
As you will see in this CAPS design, buying an off the shelf product from a HiFi manufacturer will be much easier and may sound much better to your ears. I make no claims that CAPS Twenty is the best sounding system. In fact, if there was more Linux support for native DSD playback with HiFi DACs, I would've never gone down this path. I would use my Sonore Signature Rendu SE optical for one half of this CAPS design. Unfortunately manufacturers like Sonore can only do so much in their efforts to support native DSD. Because of these efforts there is support for many DACs, but if hardware manufacturers are unwilling to work with the Sonore team, there is little they can do.
The other factor that pushed me to do another CAPS design was the thriving community of people who like to put music servers together from scratch. This group of people knows more than I ever will about chipsets, processors, PCIe lanes, and much more. There are also less savvy members of the community who want a little more direction and help selecting which parts to use in such a server. Both of these groups will enjoy the CAPS Twenty project.
A couple last notes.
One - Over the years I've discovered that CAPS designs push people in two directions. One group of people reads about it and enjoys putting the server together. The other group reads about it and solidifies their belief that this is the farthest thing from having fun or enjoying music. Either way, I completely understand the points of view and enjoy seeing both groups of people around here daily. Heck, I fall into both camps from time to time. I use everything from ground up PC builds to turnkey music servers. It's all good and there are many roads leading to Rome.
Two - The CAPS Twenty system will work exactly as described as long as it's built exactly as described. One of the things I want to do with CAPS is show a proven design that can guarantee a specific outcome. There are tons of options that could be used and I'm sure most are wonderful. I just can't give a thumbs up or down to design changes because I haven't tested them. Feel free to copy this design word for word or chart your own course. Just make sure to have fun doing it and share the outcome with everyone else who may learn from your experience.
CAPS Twenty, What is it?
CAPS Twenty is a two PC system. One PC is the server and the other is the endpoint. The official names are as follows.
CAPS Twenty - The high horsepower server.
CAPS Twenty.One - Pronounced twenty point one like a 5.1 multi-channel audio system, this is the audio endpoint.
This article will cover only CAPS Twenty.One. A full featured CAPS Twenty article and video are coming very soon. Obtaining parts for a high powered music server during a global health pandemic has proven to be very difficult. As I type this, the GPU is on its way and the final cooling pieces will be confirmed and ordered this afternoon.
Hardware
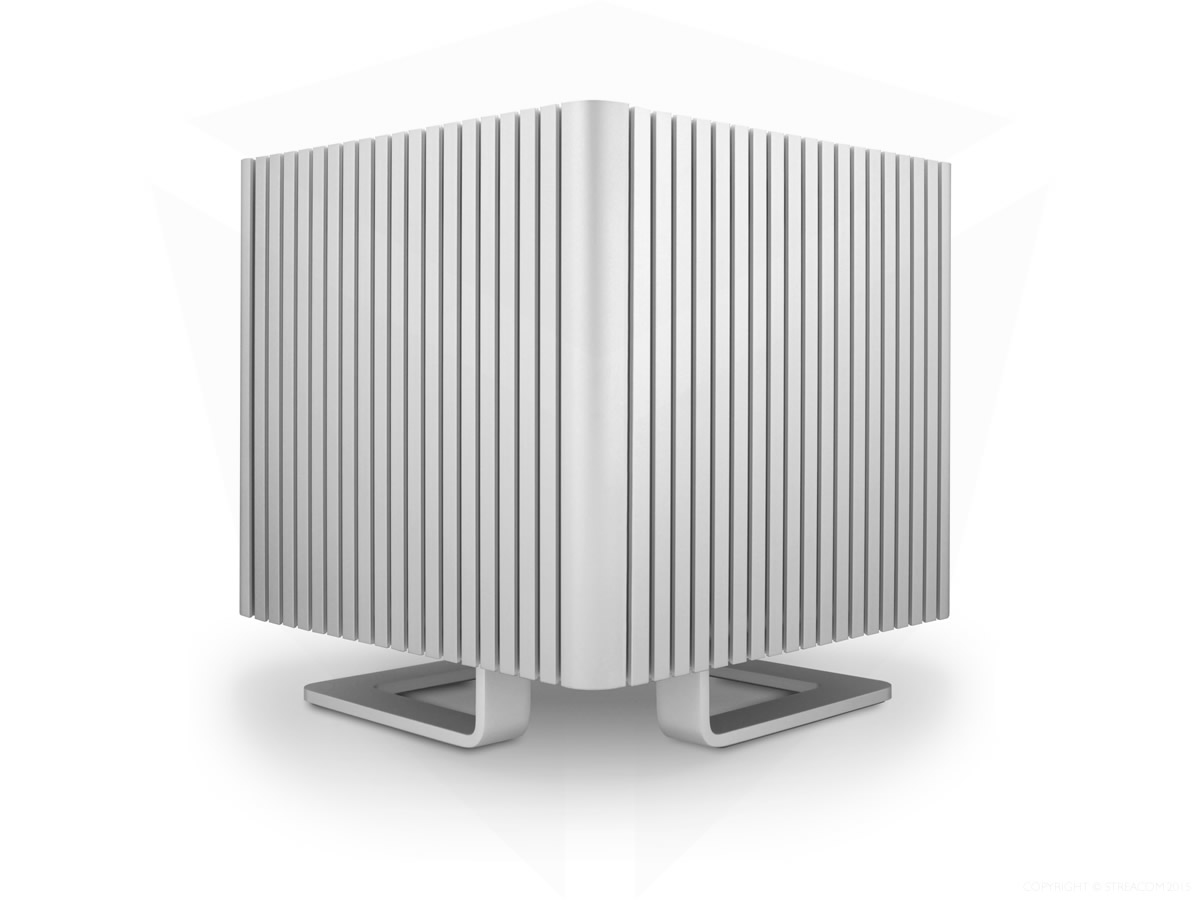 Chassis - CAPS Twenty.One is built on the Streacom DB4 chassis. I chose this chassis for several reasons, among them are its unique appearance, fanless design, very high quality, versatility, documentation, dual expansion slots, the fact that Streacom is a good company to work with, and the chassis features room to mount the one of a kind analog gauges for monitoring PC resources.
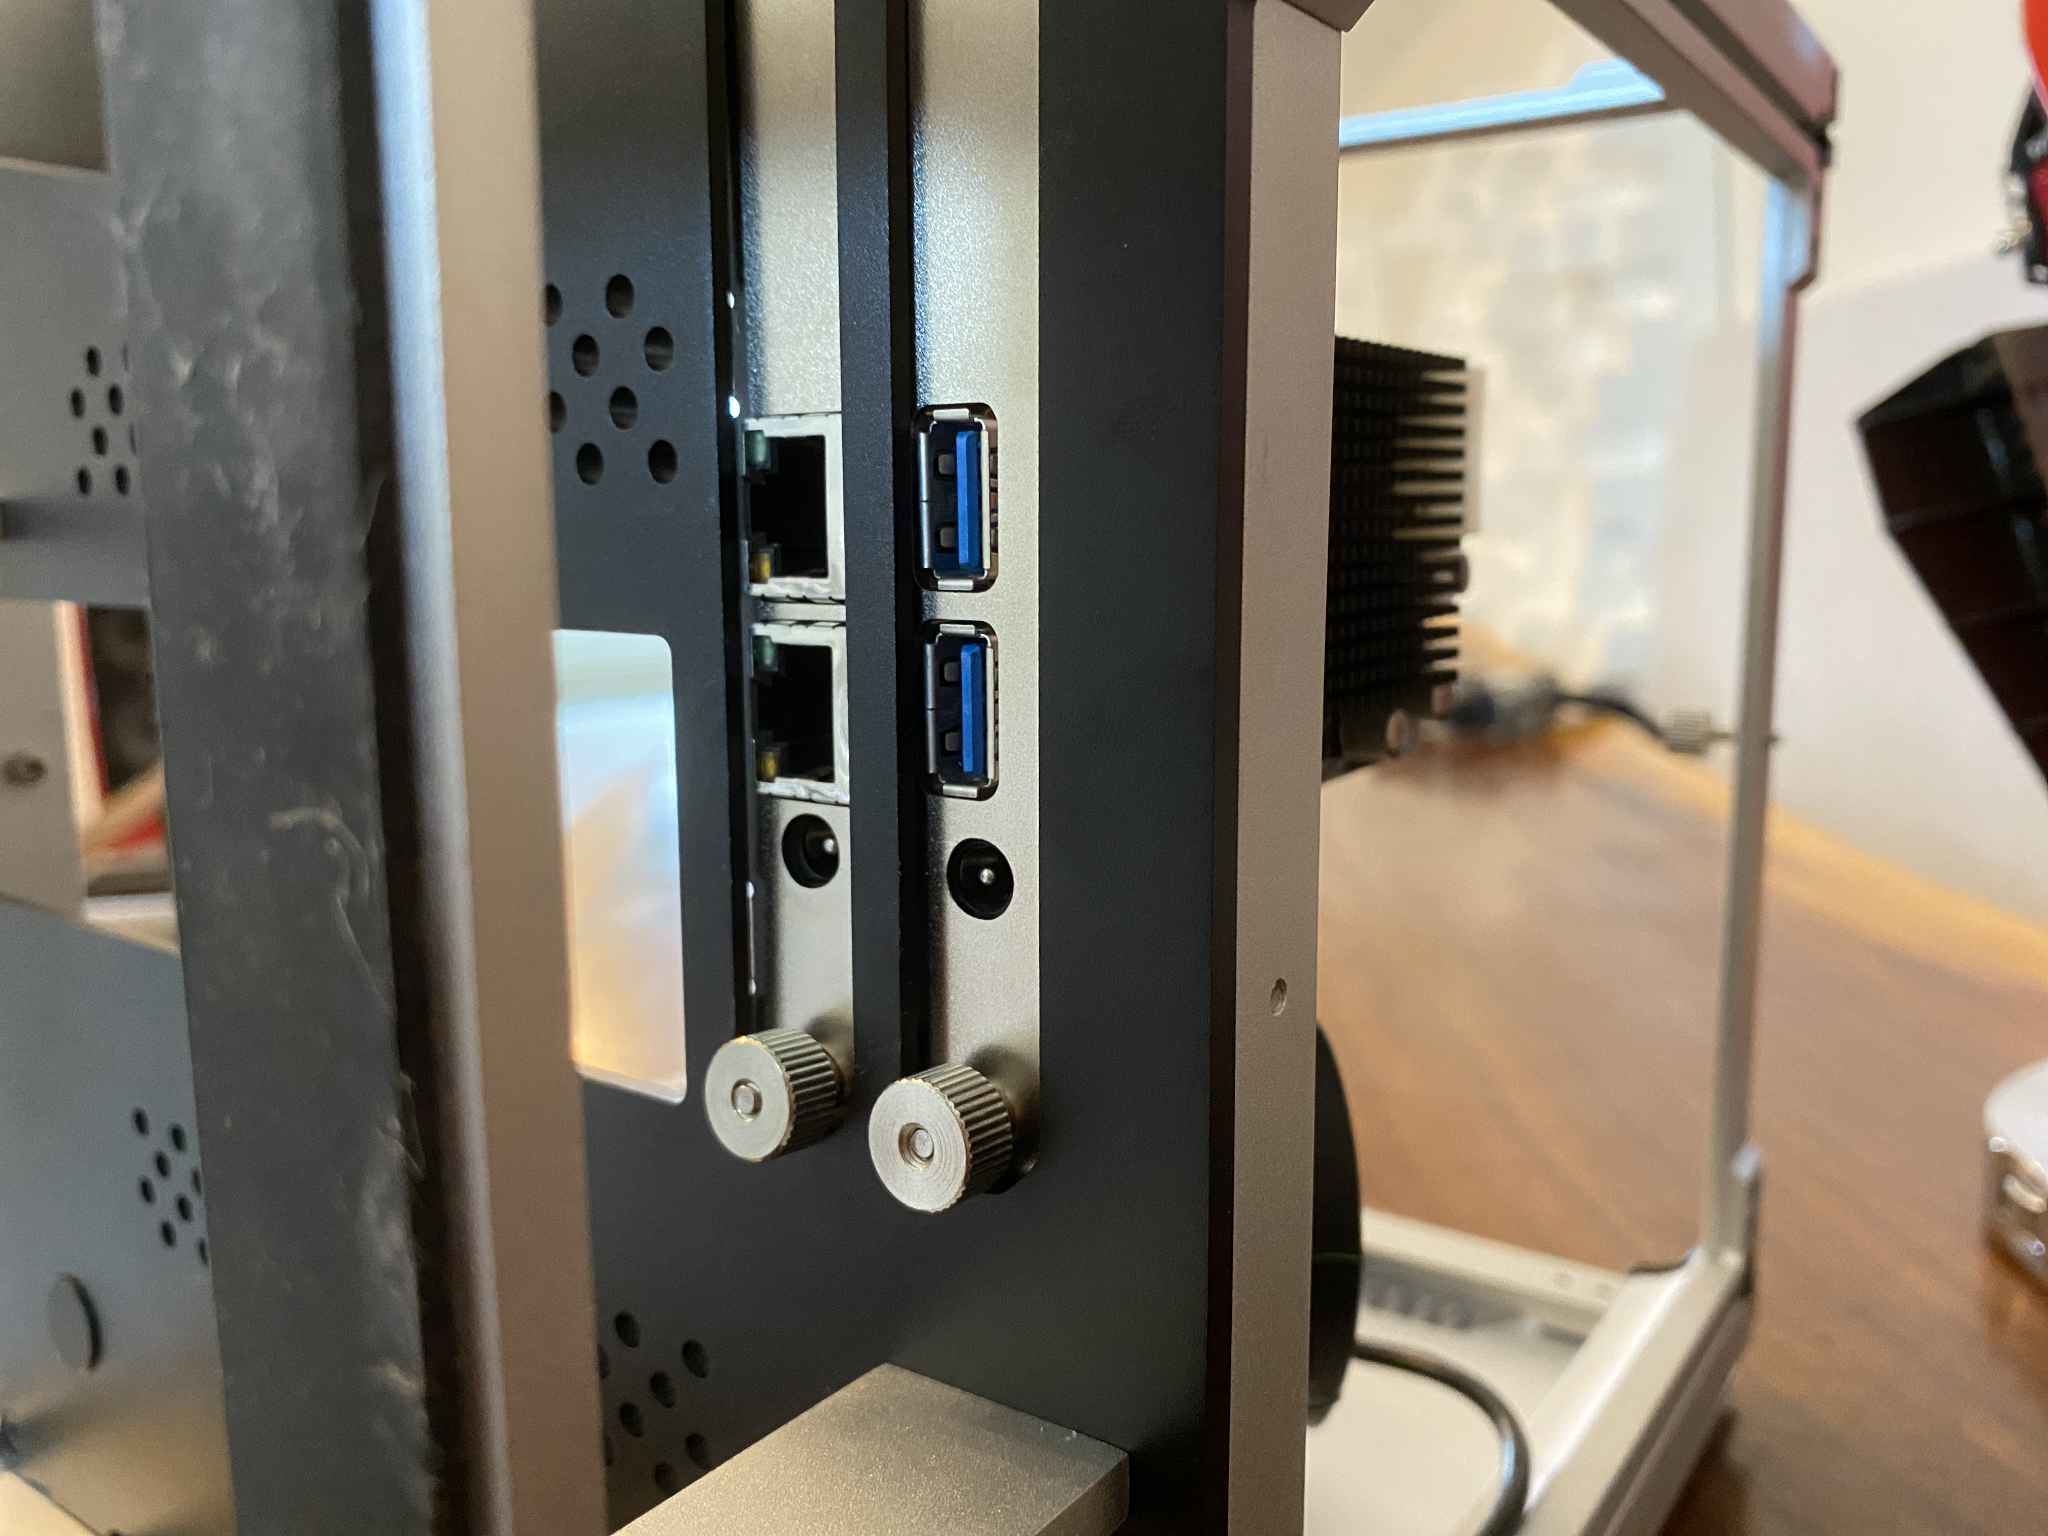
The DB4 is an absolute joy with which to work. All four identical sides are removable, enabling one to access the internal infrastructure with ease. The side panels are made of 1/2 inch thick aluminum (including fins) that's much more reminiscent of a high end audio product than a computer case. The top of the DB4 features a removable 1/8 inch thick plastic piece with vents on all four sides. All cabling for power, USB, Ethernet, and other peripherals is attached to the case or main board through the bottom of the chassis. The feet are designed in such a way that allows cable routing either though the openings or through two of the four corners where the feet don't reach the end of the chassis. It's a fantastic design all around.
The Streacom DB4 ships with passive heatsink cooling for processors up through 65W TDP and can be configured for CPUs up through 110W TDP with the additional LH6 heat pipe kit. An add-on DB4 GPU cooling kit is also available for graphics cards with a maximum TDP of 75W. I haven't used the LH6 kit or GPU kit and can't vouch for the efficacy of either piece.
Streacom kindly shipped me the ST-ZF240 ZeroFlex 240W Passive power supply that mounts inside the DB4 chassis, but as readers will see in a bit, I opted to use PSUs from other manufacturers because I waned to power PCIe cards with linear supplies.
The documentation for this chassis and optional accessories is fantastic. Almost anyone could build a PC using the detailed text and images provided.
Motherboard - This is a bit of a misnomer for CAPS Twenty.One because I opted to use a single board computer with built-in RAM, CPU, and storage. The DB4 case features a removable motherboard tray for Mini-ITX boards, so I removed it and kept it out of the chassis. Speaking of Mini-ITX, I opted to not use a traditional Mini-ITX or similar sized motherboard for a few reasons including the usual lack of multiple PCIe slots, the fact that I could get everything on a single board without using Mini-ITX, and the versatility provided by using the chosen "board."
 The main board of CAPS Twenty.One is a LattePanda Alpha 864s. The Alpha 864s is a complete computer on an iPhone sized single board (4.5" x 3" x 1/2"). One great thing about selecting this board is the fact that people can purchase the board and call it a day. There is no need to take things to the extreme like I will further down in this article.
The Alpha 864s features an 8th generation Intel Core M3-8100y CPU, identical to some MacBooks. The Alpha 864s has 8GB of RAM and 64Gb of eMMC storage built into the board. I opted for the version with Windows 10 Pro preinstalled and activated on the internal eMMC drive. This drive won't set any read/write speed records, but it's faster than an audio endpoint will ever need. I've reinstalled Windows on it and installed many applications for testing, and it's always been plenty fast.
The rest of the Alpha 864s is really top notch as well. It features support for Windows/Linux/macOS (unofficially), 1 Gb Ethernet, 802.11ac wireless, 3xUSB 3.0 ports, USB type C for power (optional), GPIOs for I2S, RS232, etc..., exposed 4 pin power connector, 10 pin LiPo battery, eDP touch display connector, and two M.2 slots that CAPS Twenty.One depends on for use with USB and Ethernet add-on cards.
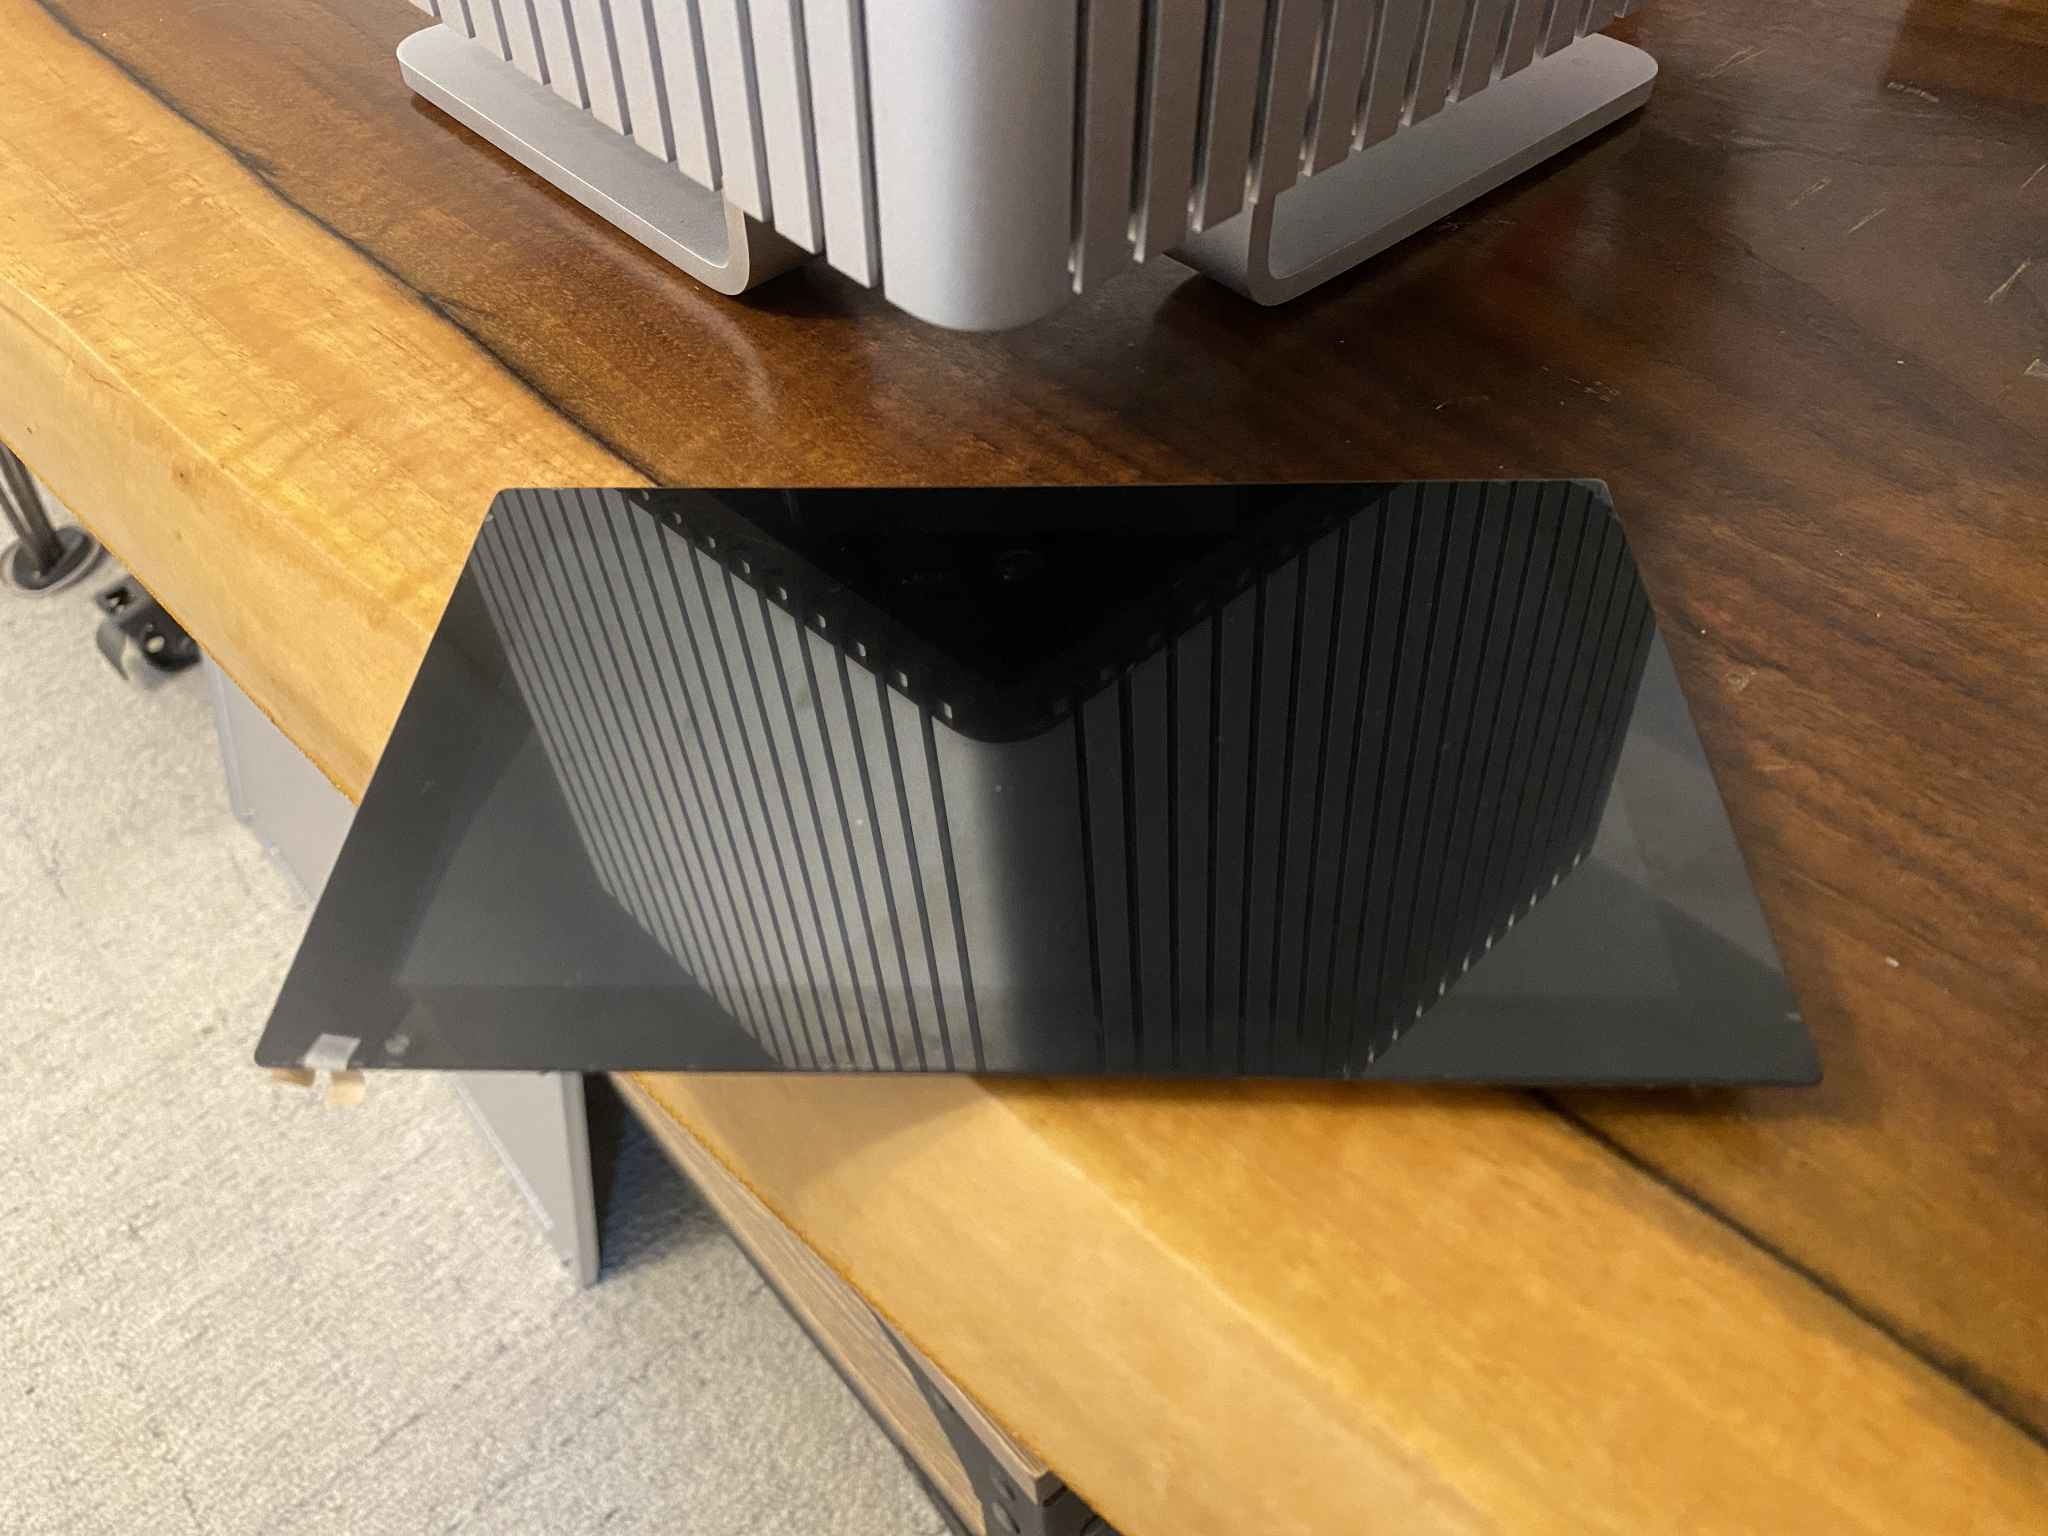
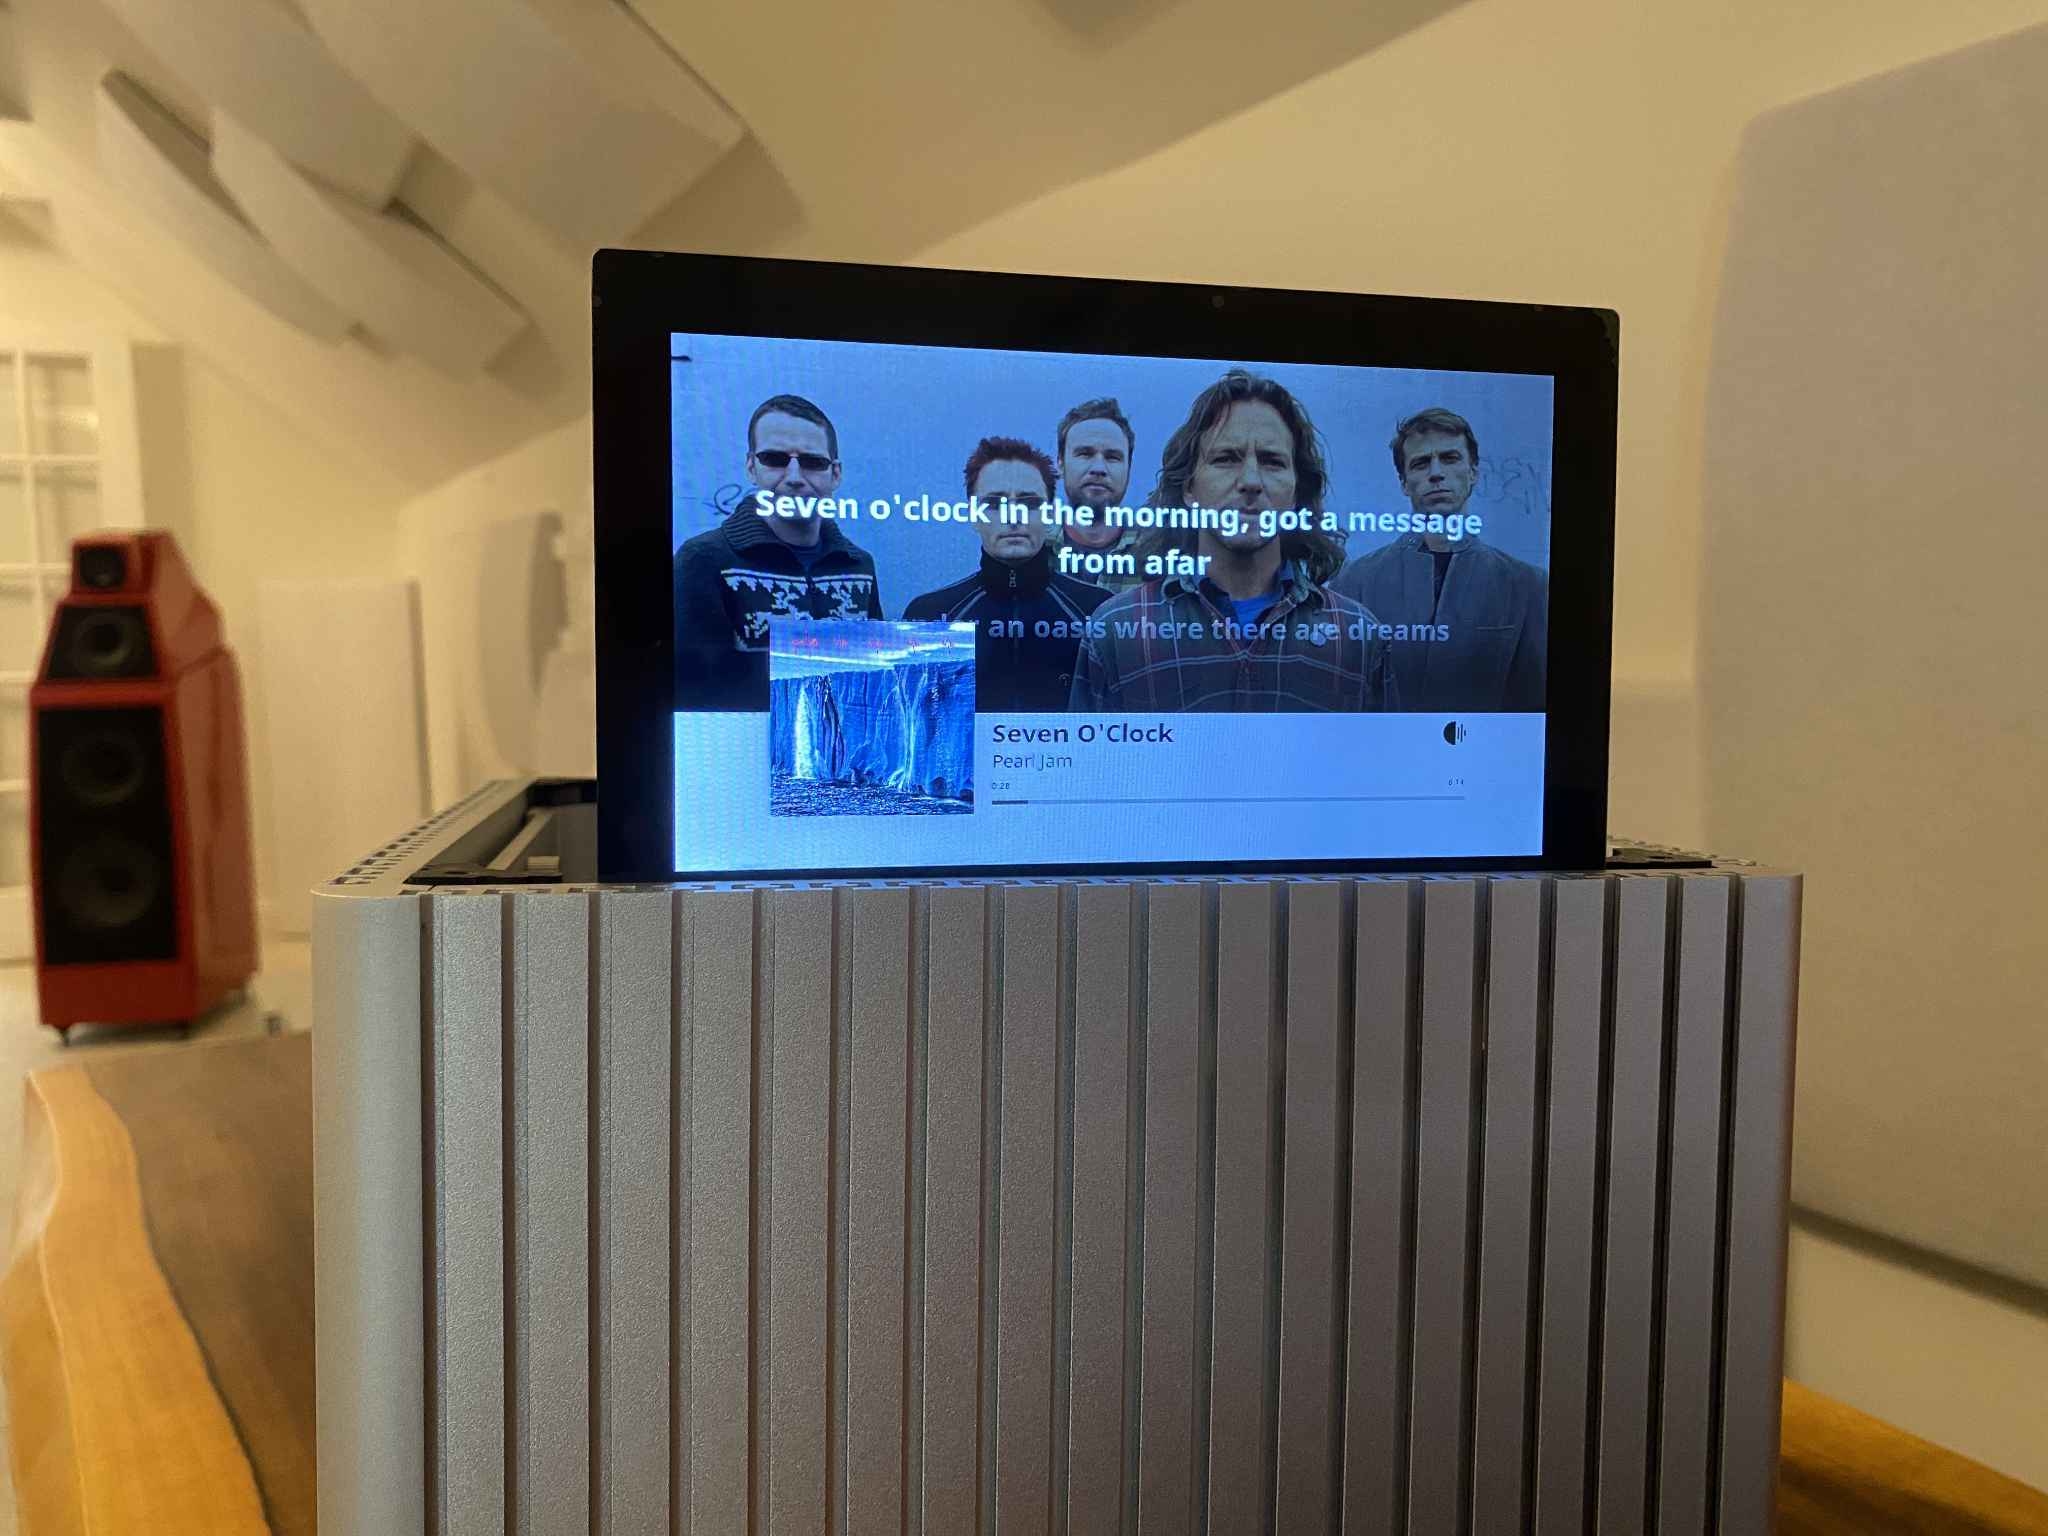
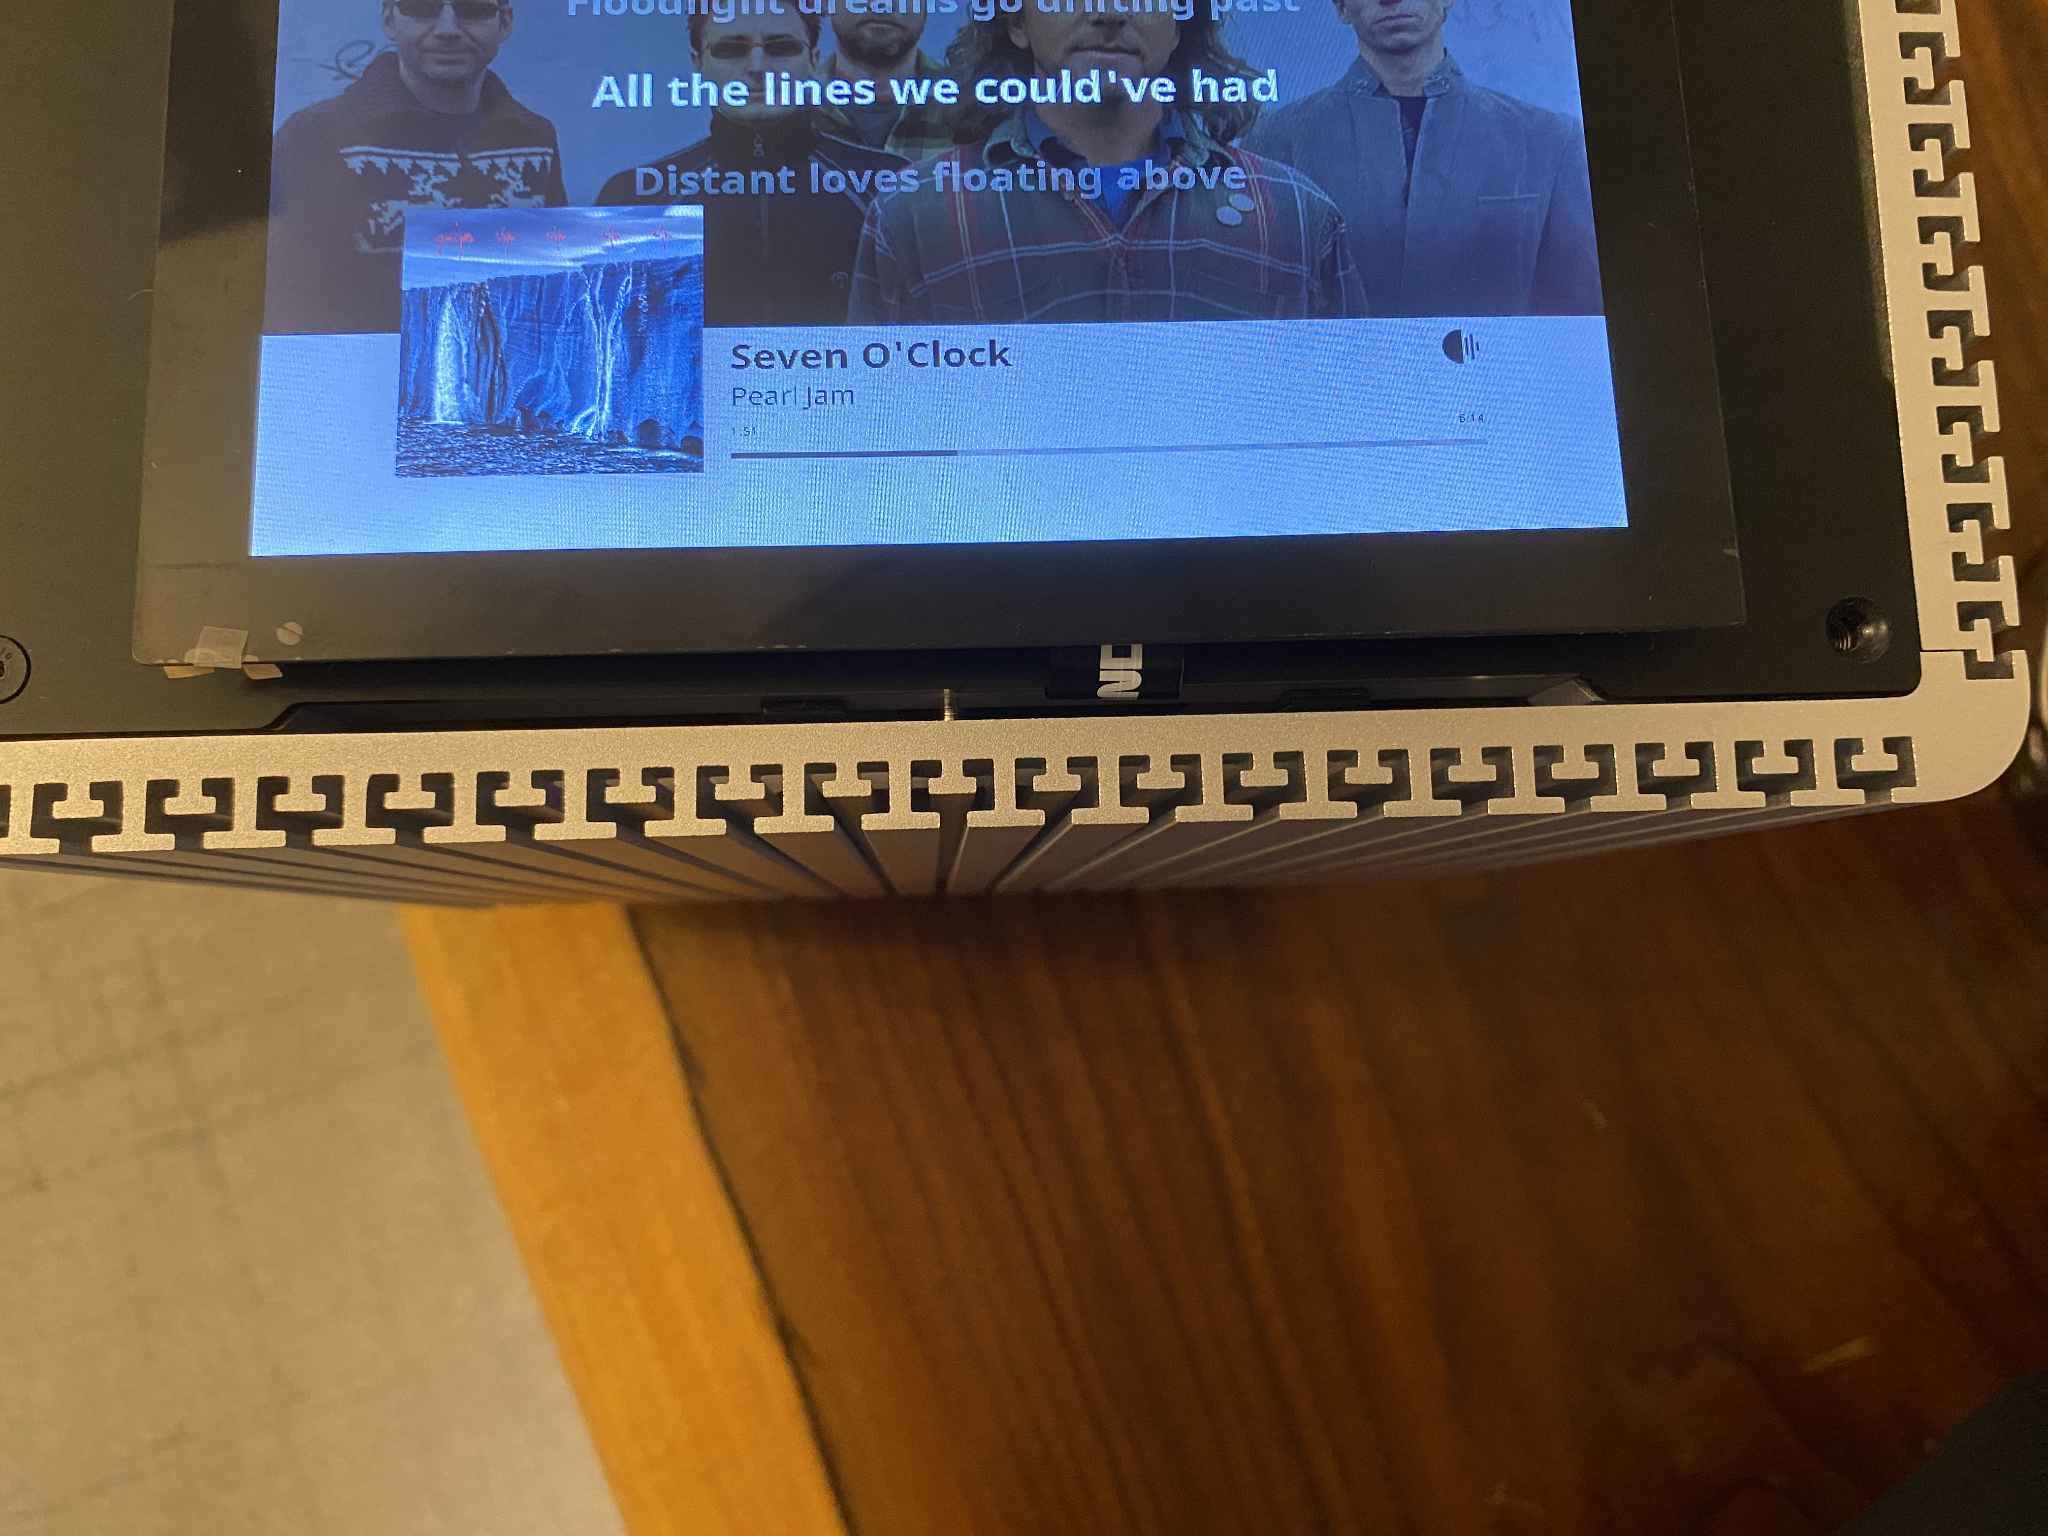
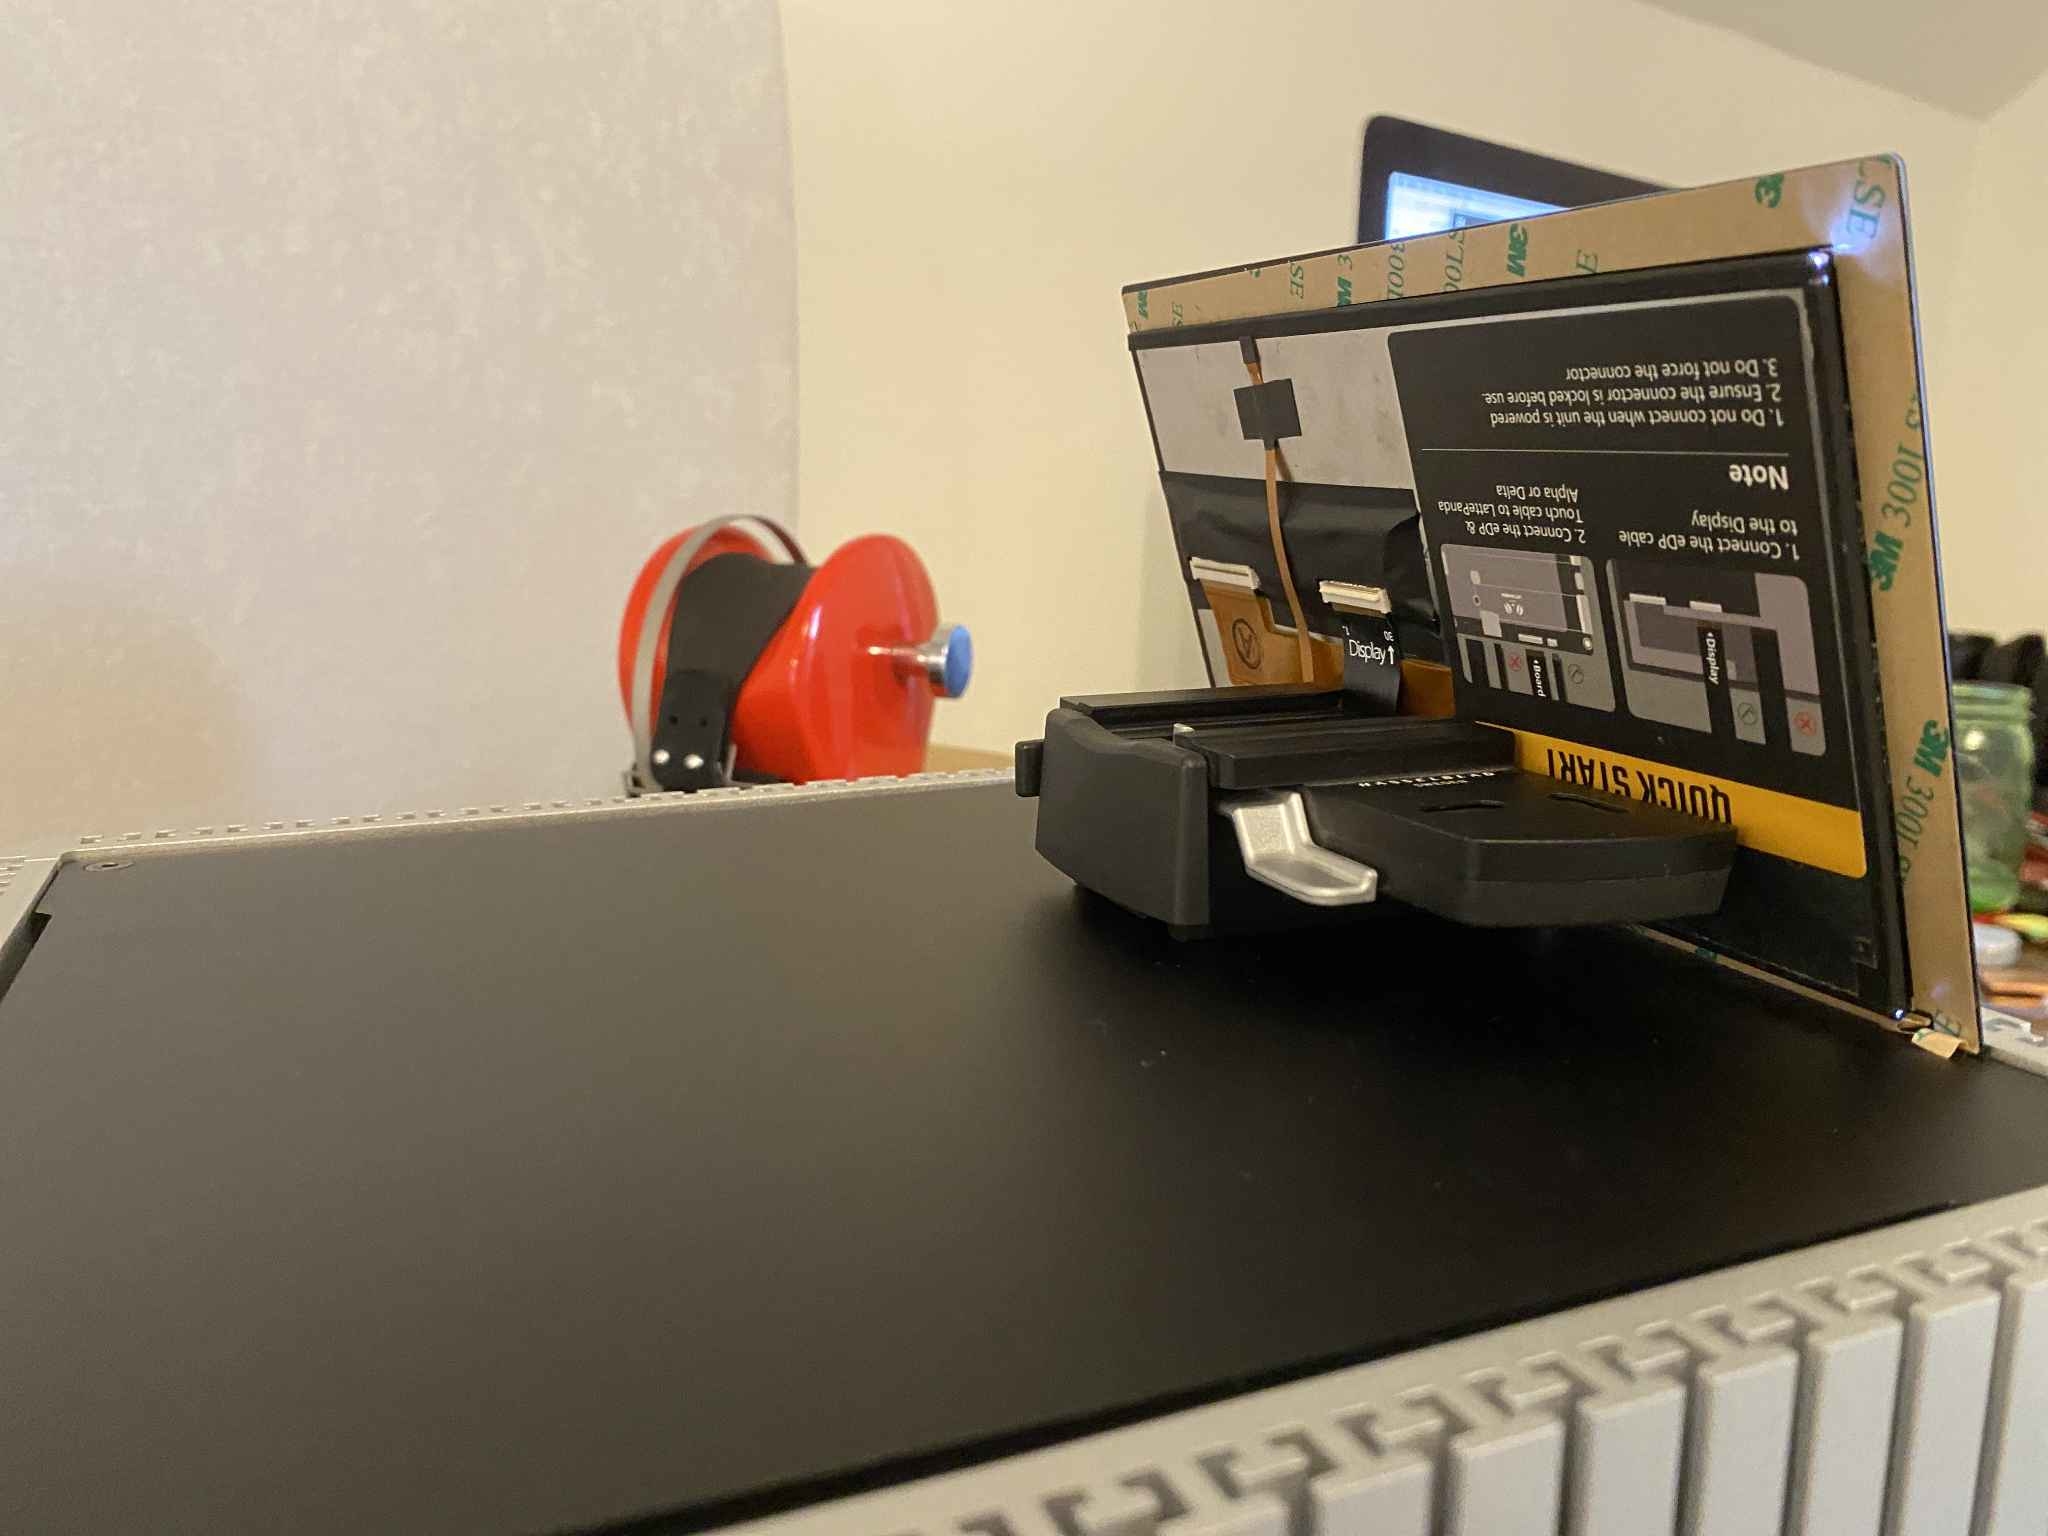
 I used the eDisplay port, 30PIN 15CM FPC Cable, and the LattePanda 7" touch panel off and on throughout my testing of the Alpha 864s. It's a double edged sword. The display works great and enables the user to control the PC with the tap of a finger. It's also a great remote display for Roon. This is done by launching the Chrome web browser at startup and opening the URL of one's Roon core like this, using the IP address of the Roon core - http://10.0.1.241:9100/display/. The touch panel then displayed album art and lyrics for every track I played in Roon, no matter what endpoint I sent the audio to.
The bad part of this display is the cabling. The display cable is 15cm and it's livable. However, the touch panel cable's port on the Alpha 864s is the worst design I'v ever used. This cable will not stay in the port if there is any movement whatsoever. By movement, I mean adjusting the eDisplay by 1/2 inch or trying to prop up the display so it's visible. This cable is a nightmare and I don't recommend anyone purchase it for anything other than playing around. The display cable works and is fine, just not the touch cable that's captive on the back of the eDisplay.
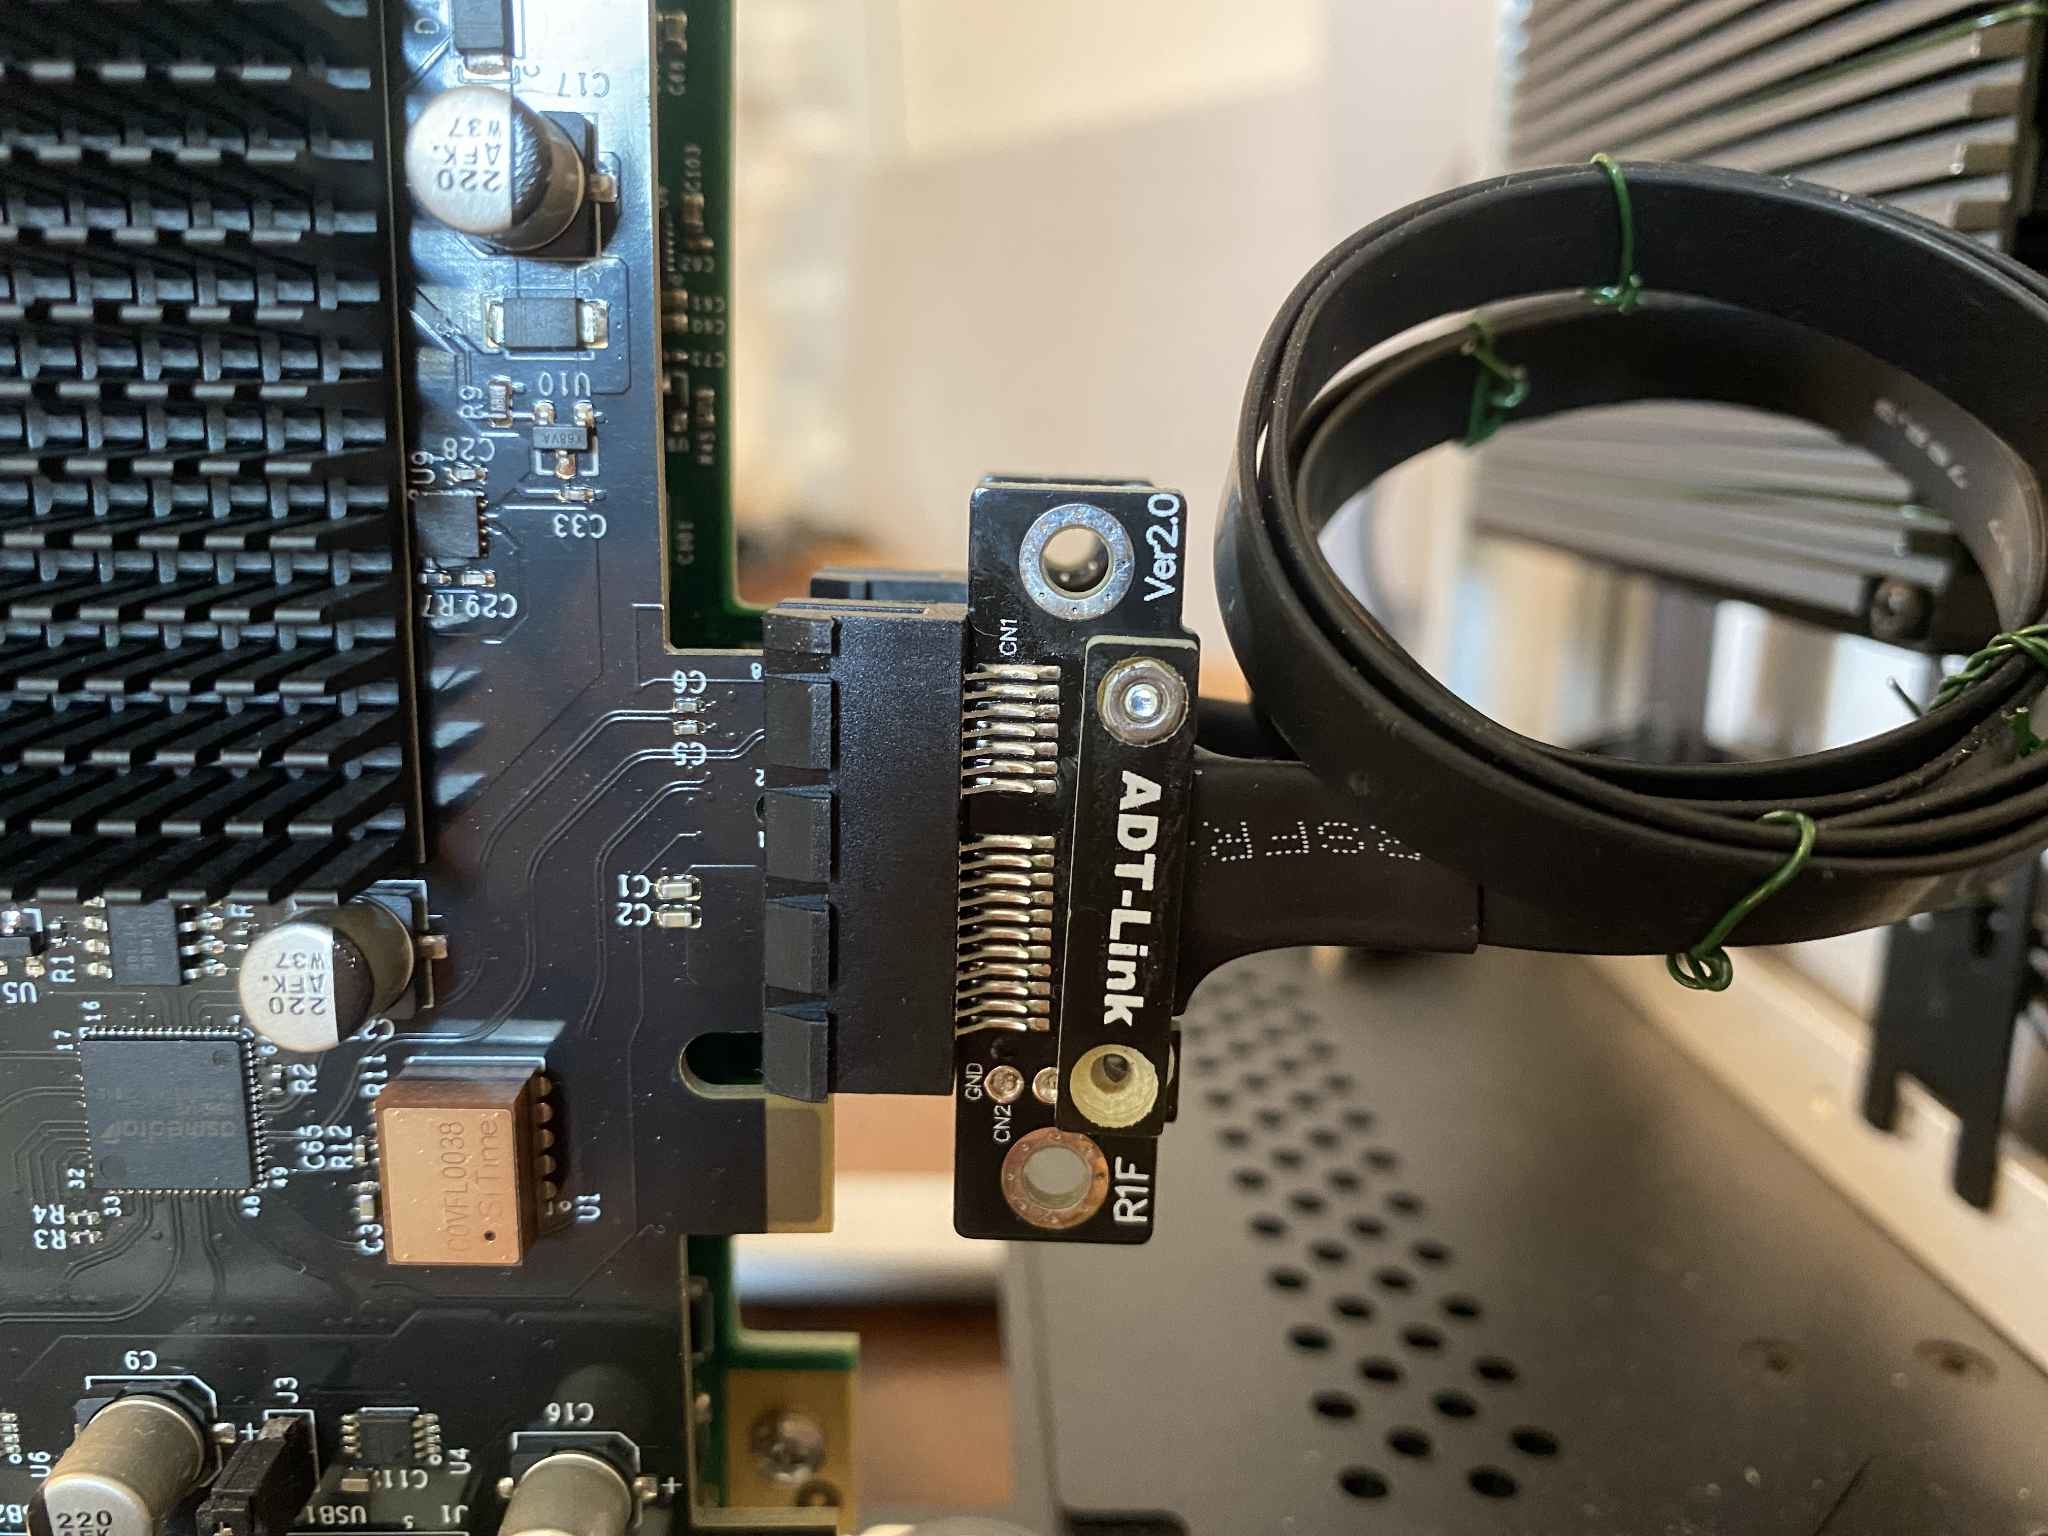
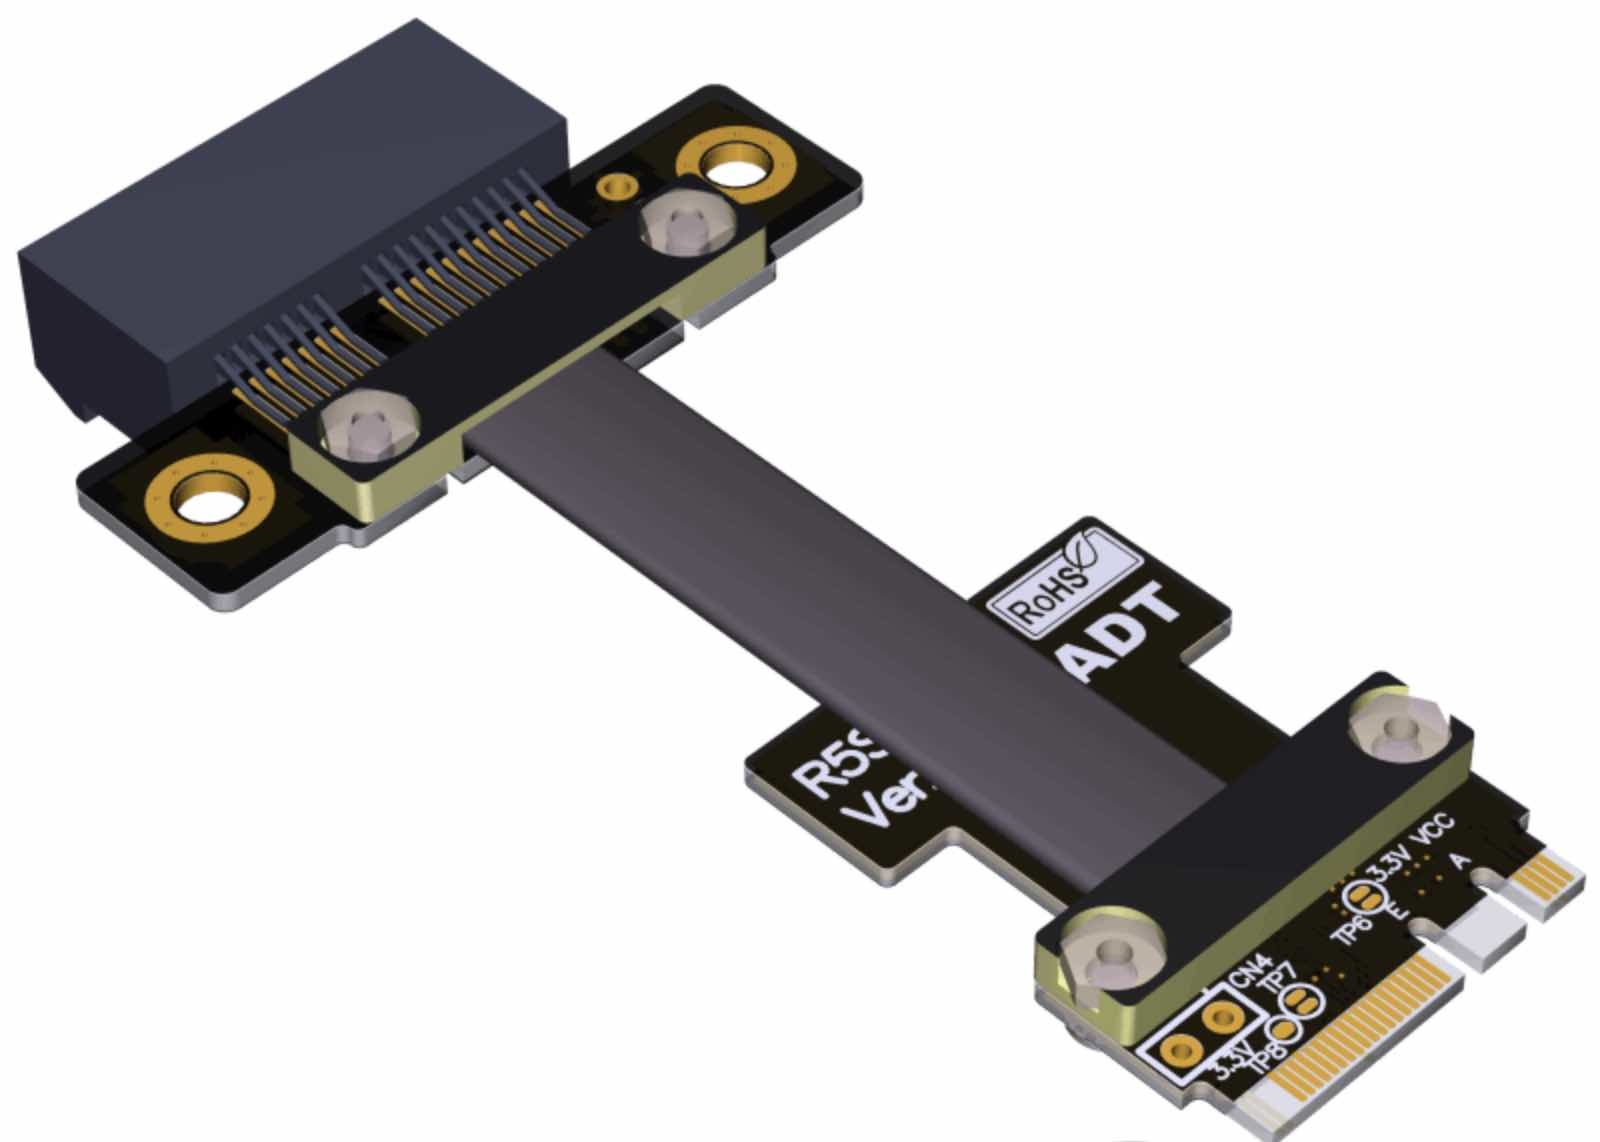 One critical feature of the LattePanda Alpha 864s is its M.2 slots. These slots enable us to connect the two (optional) PCIe cards, one for USB and one for Ethernet. Typically these slots are used for M.2 NVME SSDs and M.2 WiFi cards, but there is a way to make them work with audiophile grade PCIe cards. JCAT founder Marcin Ostapowicz told me about adapter cables from a company called ADT-Link. This company makes the best M.2 adapter cables available. I highly recommend ordering ADT-Link cables and avoiding all the adapters available for much less money on Amazon.
CAPS Twenty.One uses the ADT-Link R41SF cable, 50cm in length, to connect the onboard M.2 M Key slot of the Alpha 864s to the JCAT USB CARD XE. The M Key slot is the one typically used for NVME SSD drives.
CAPS Twenty.One uses the ADT-Link R51SF cable, 50cm in length, to connect the onboard M.3 E Key slot of the Alpha 864s to the JCAT Net CARD XE. This E Key slot is typically used for WiFi cards.
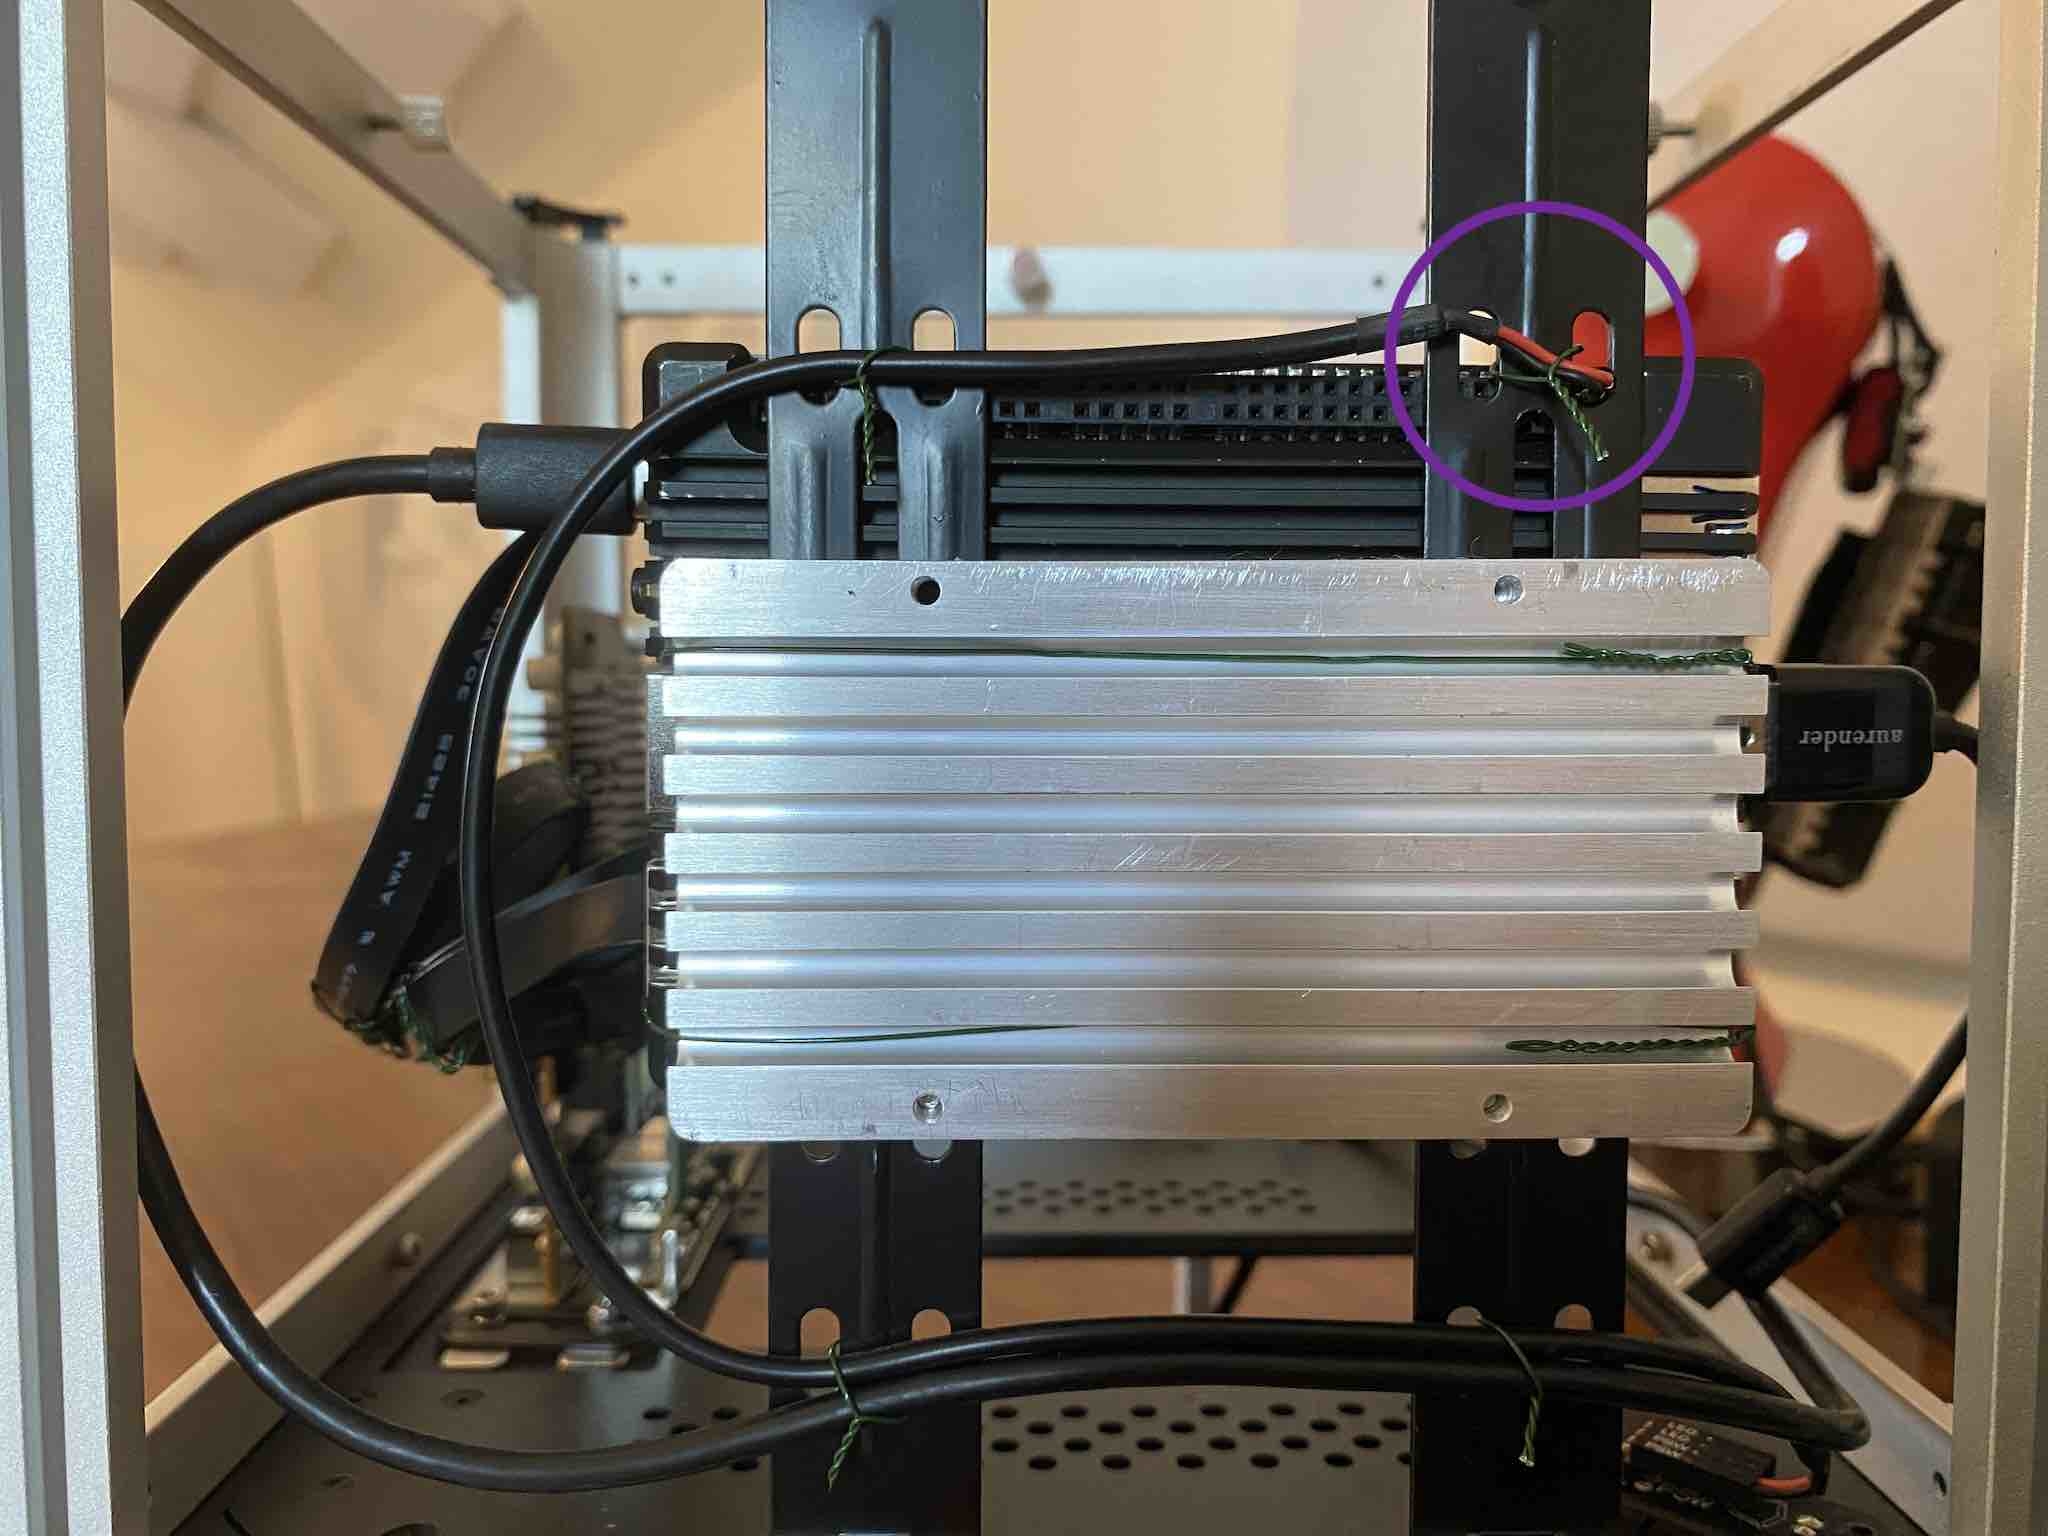
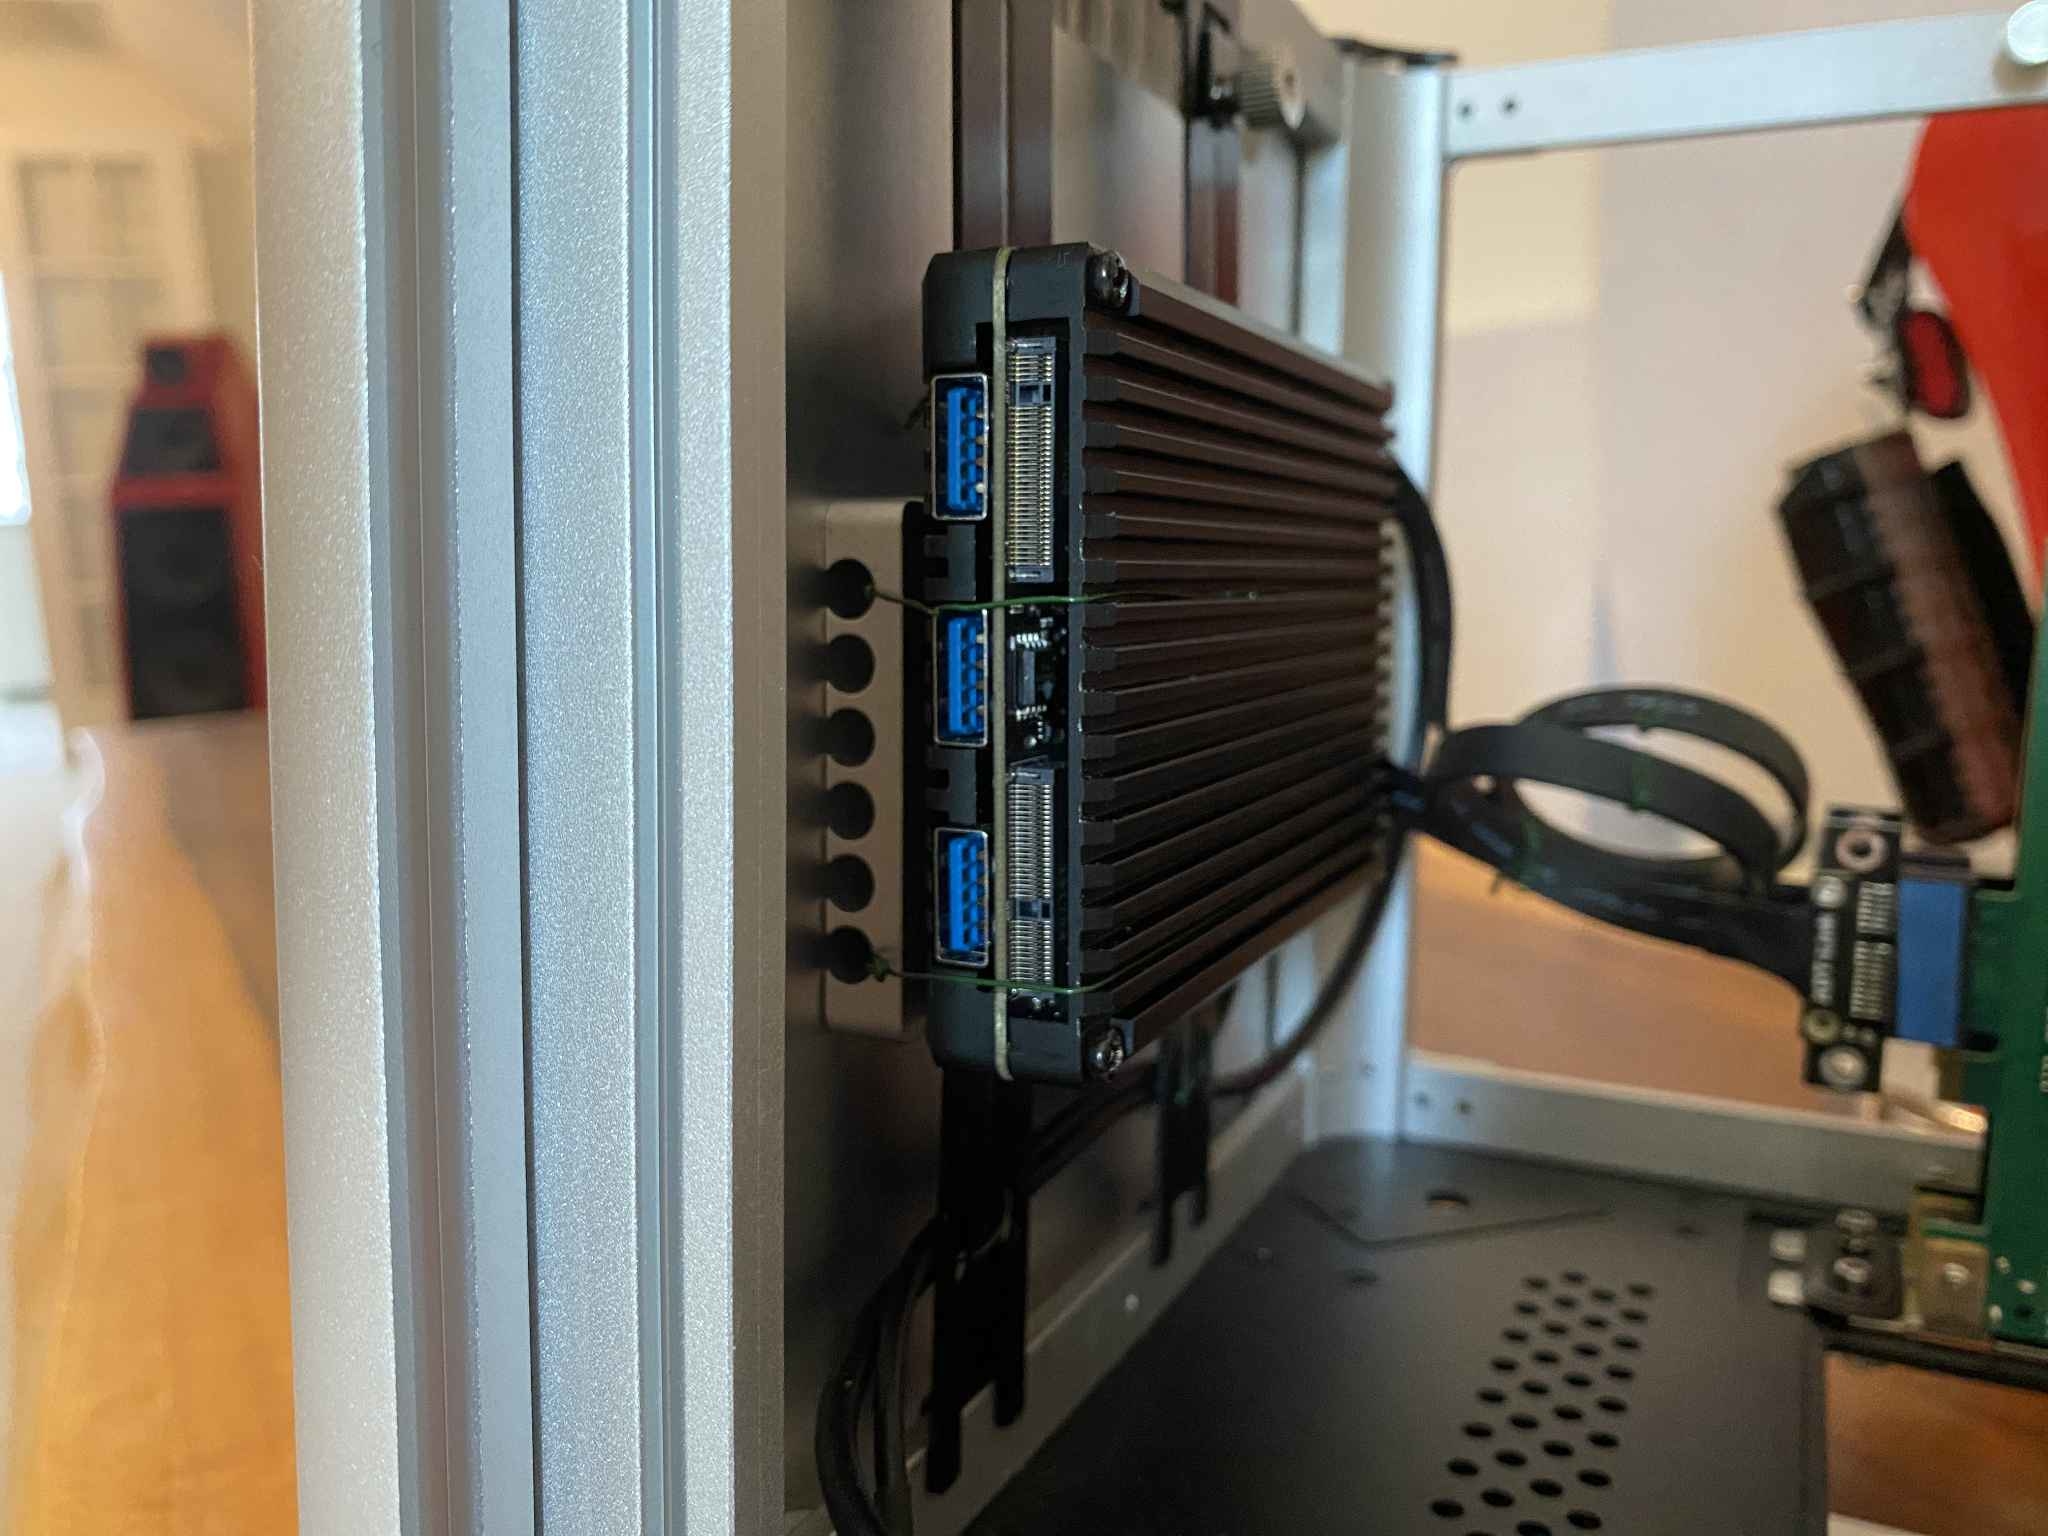
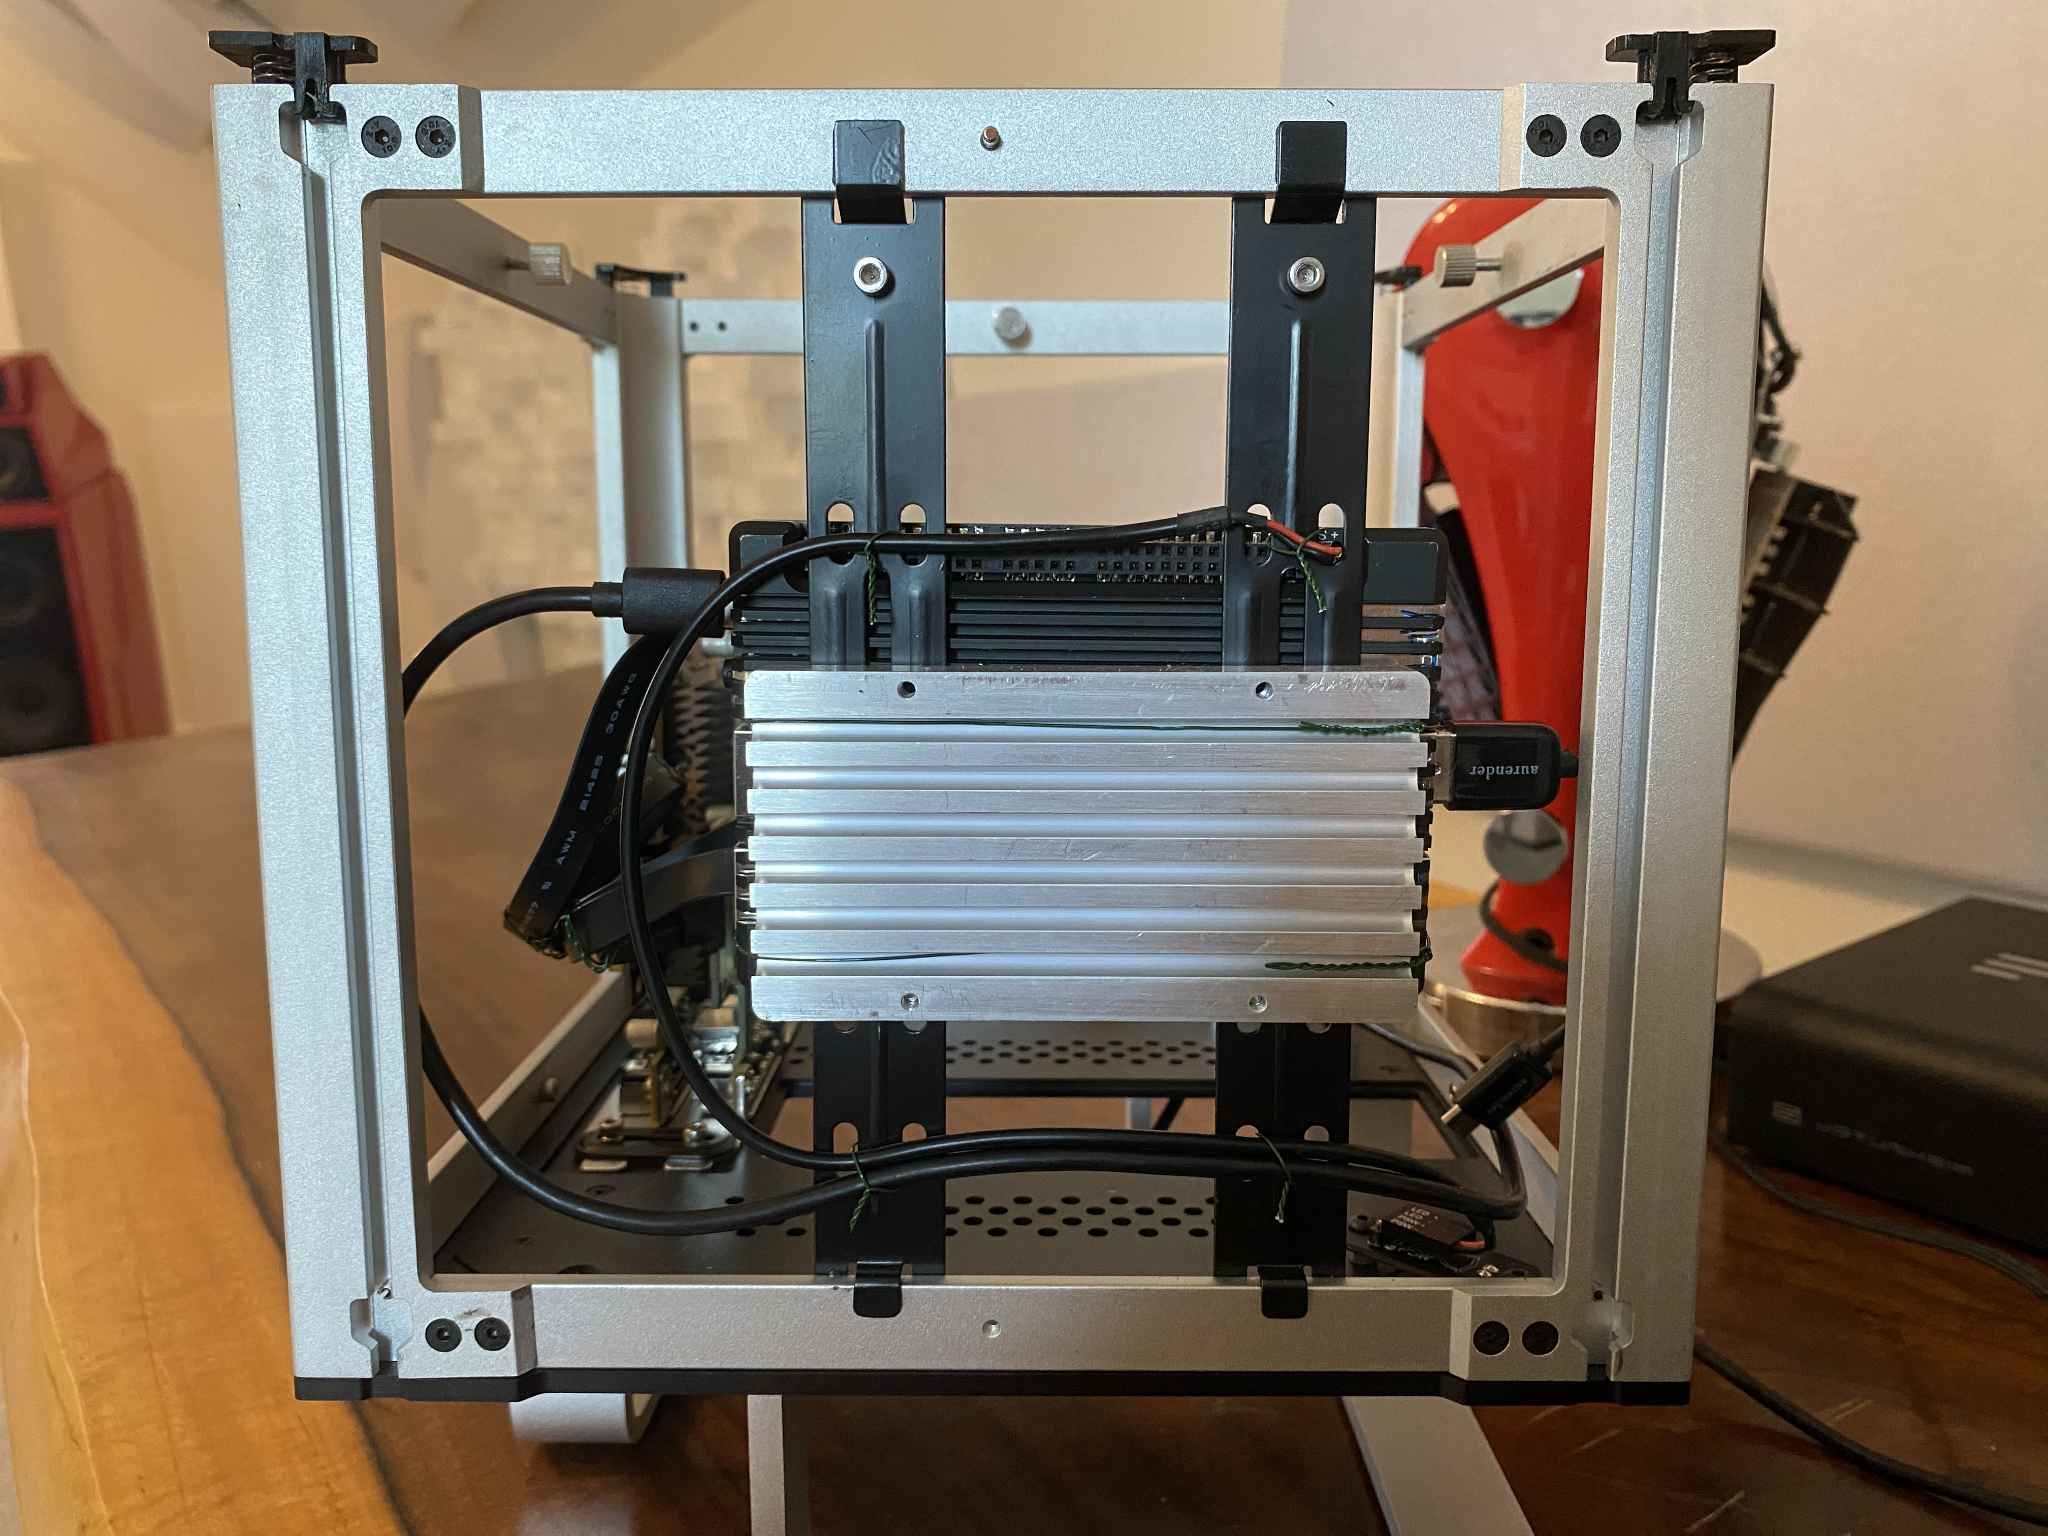
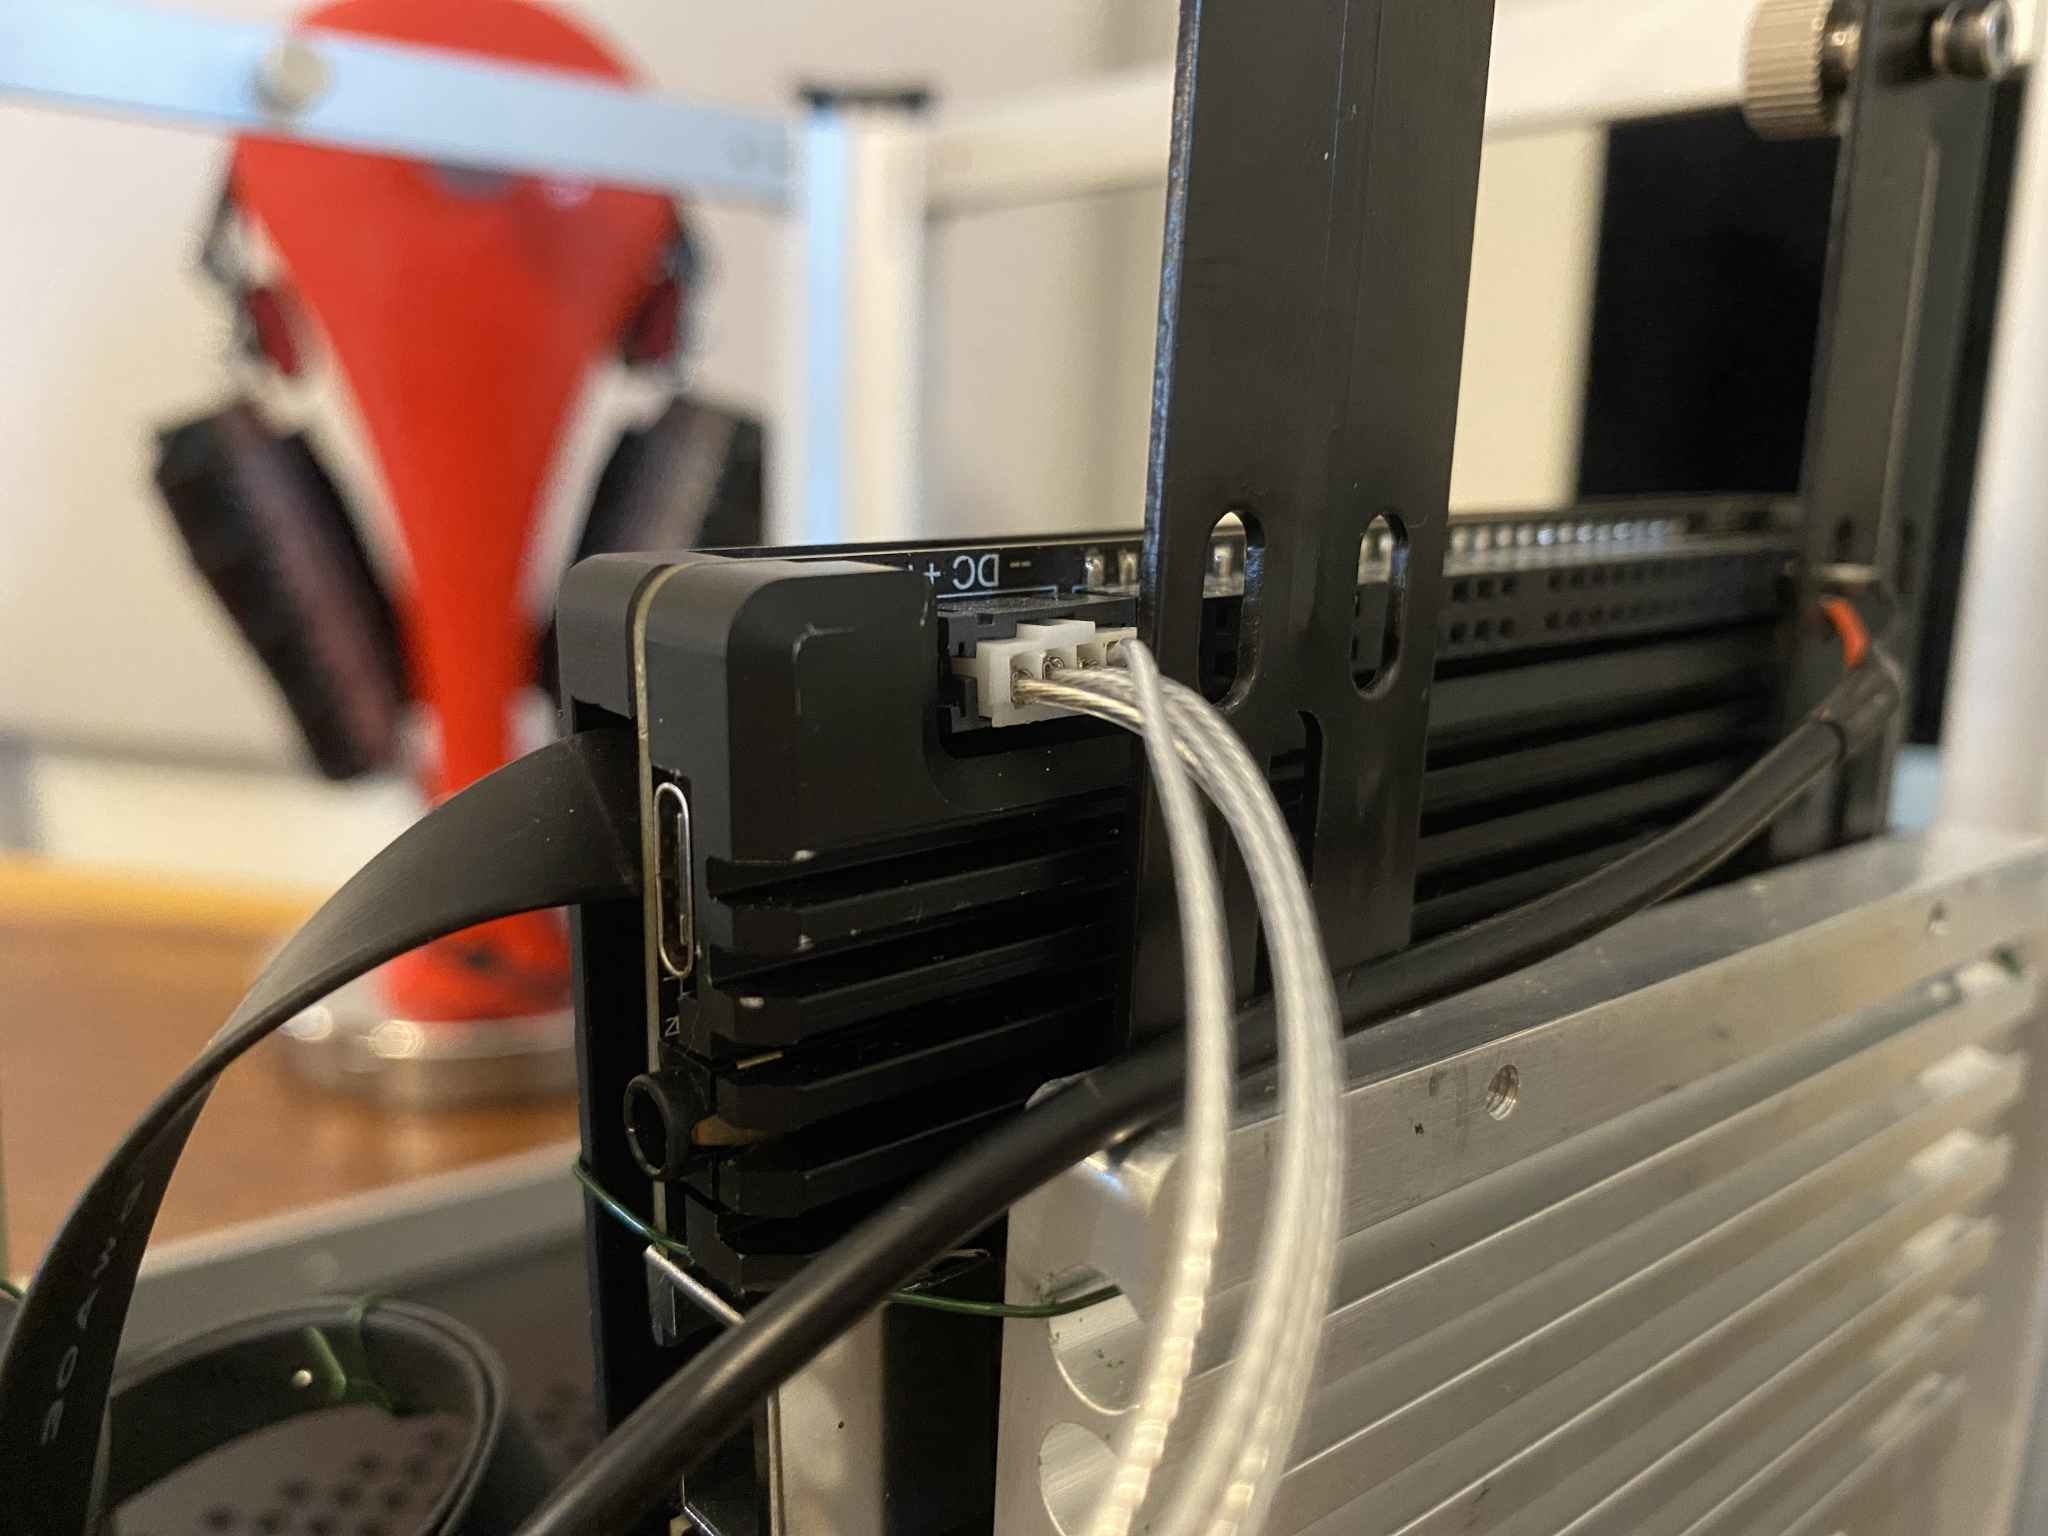
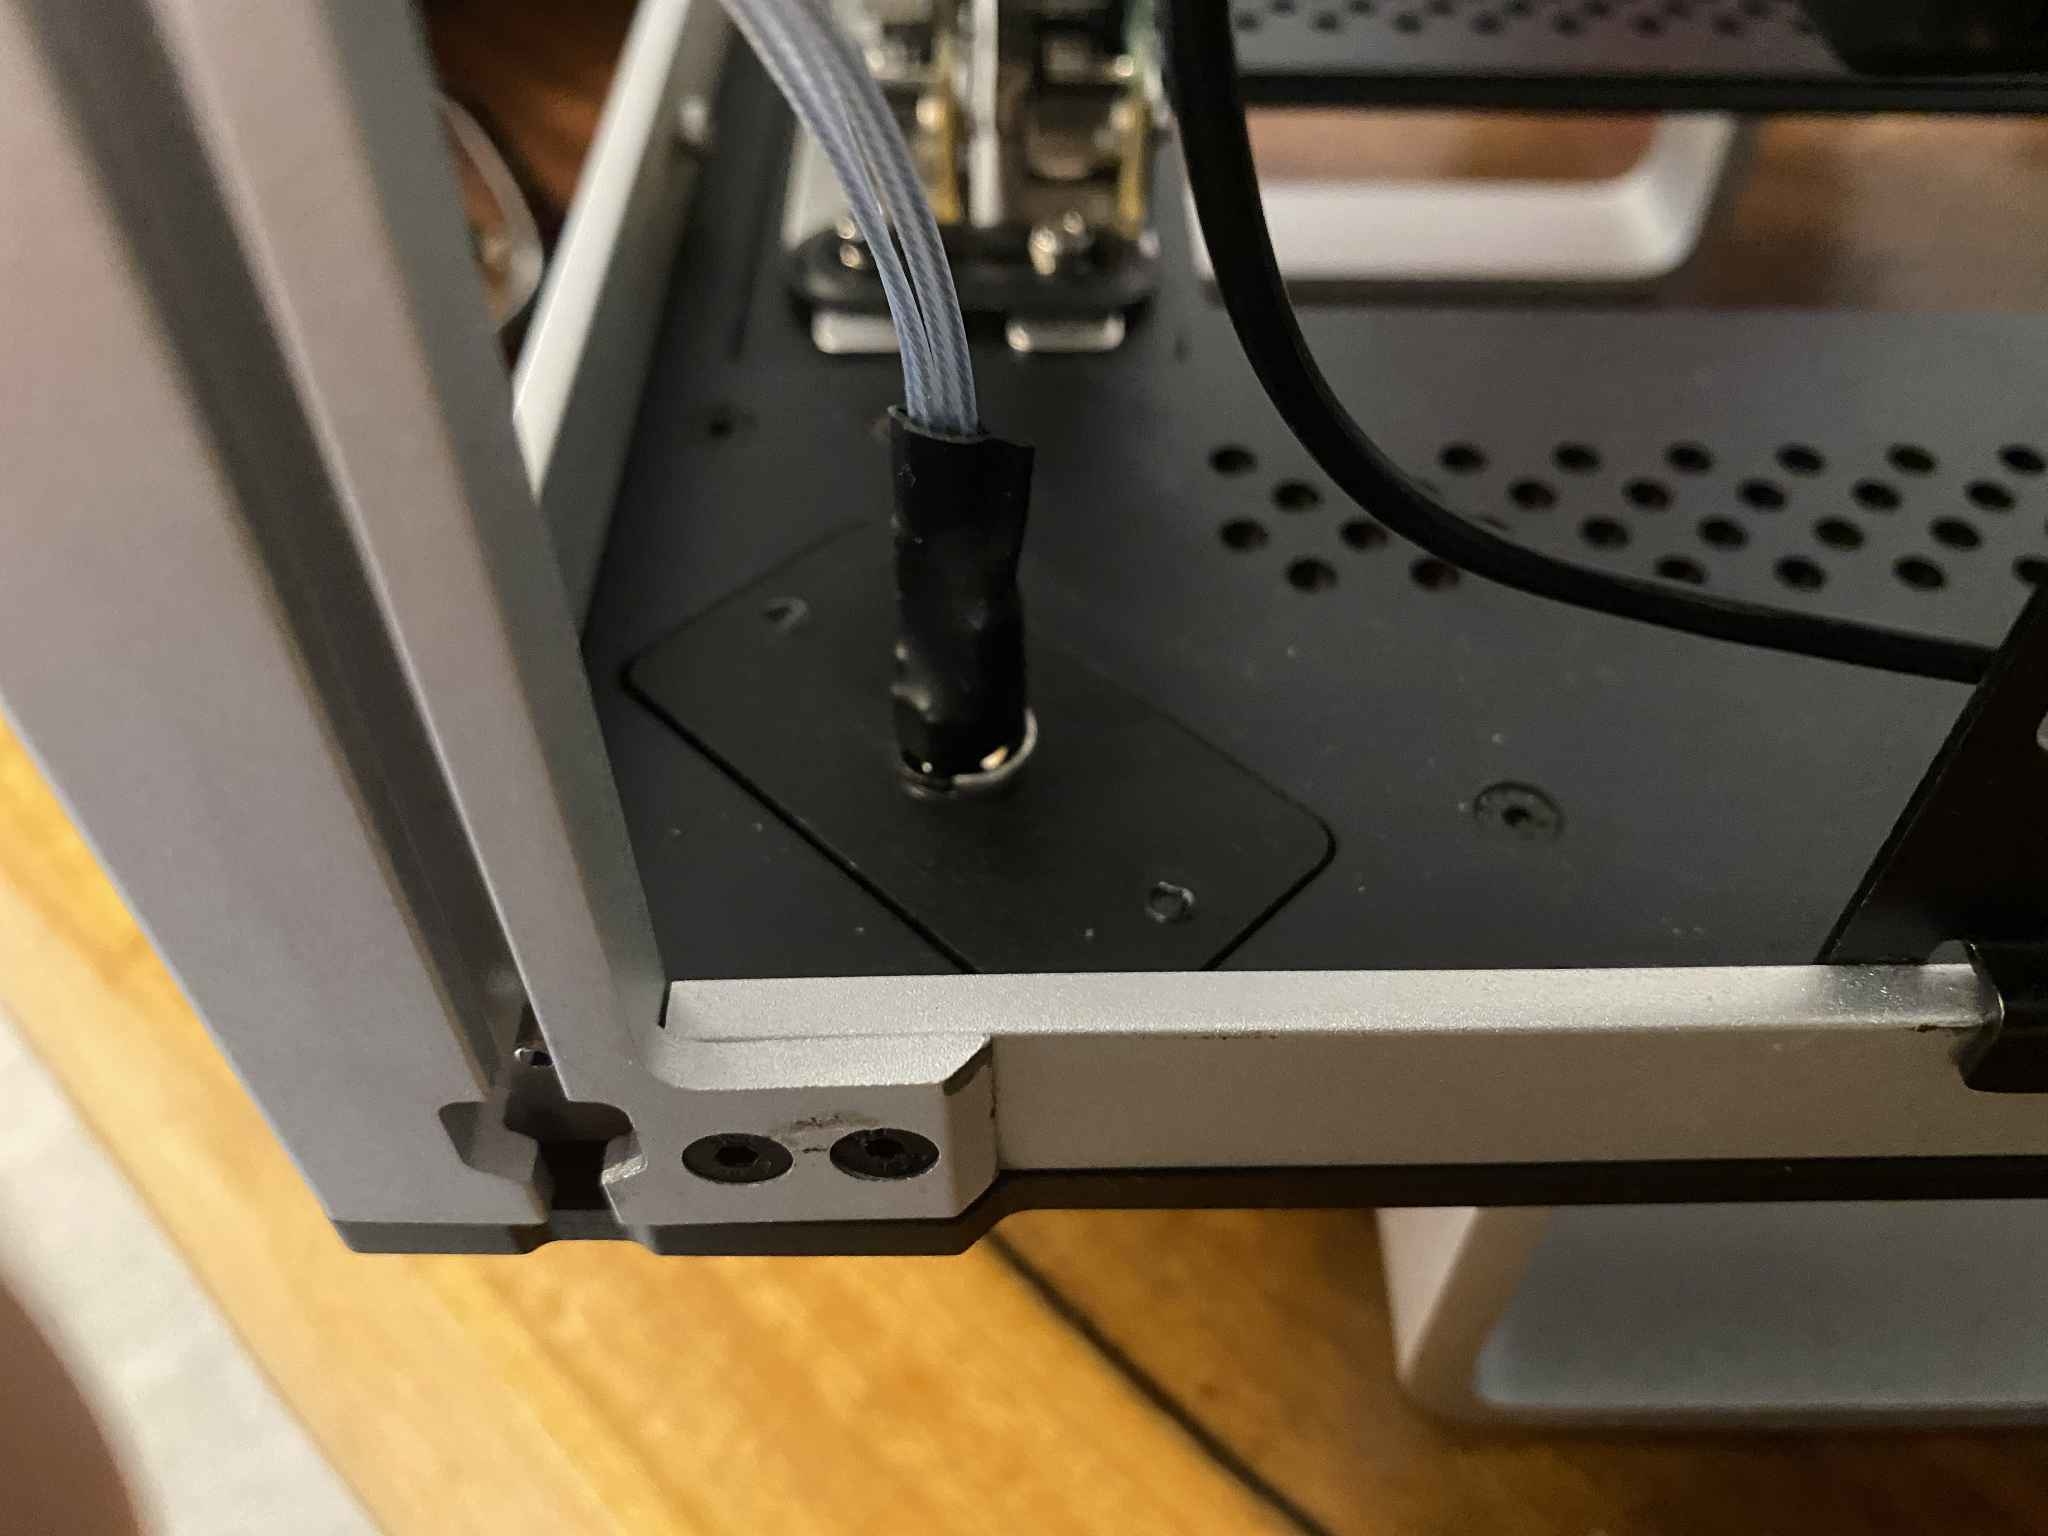
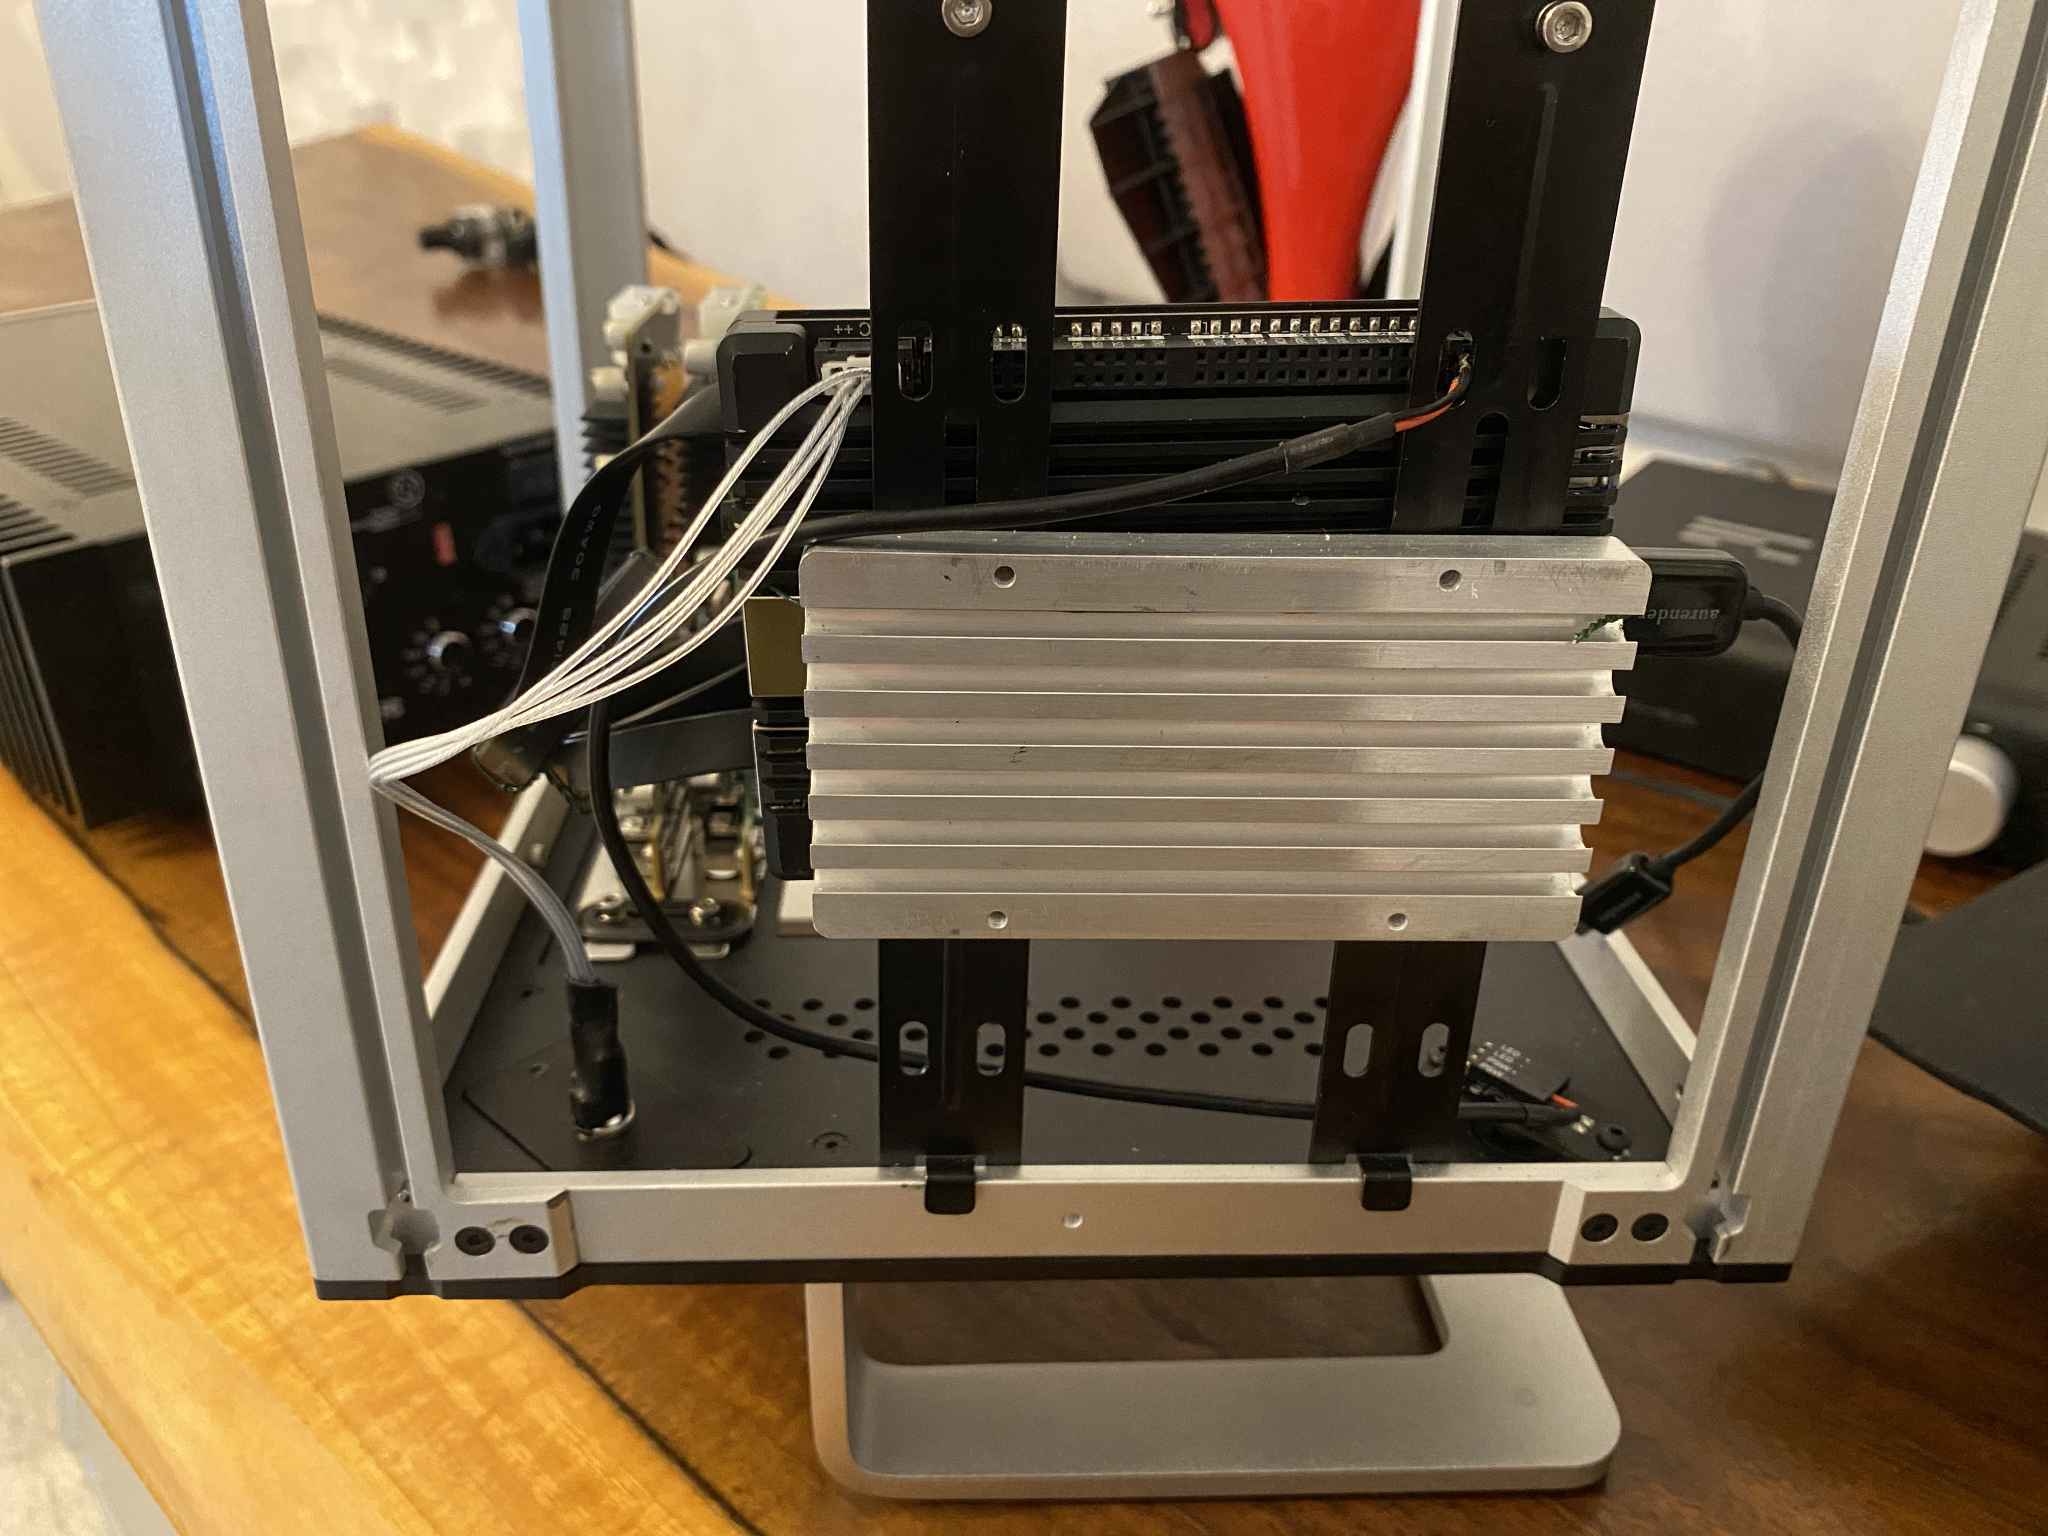
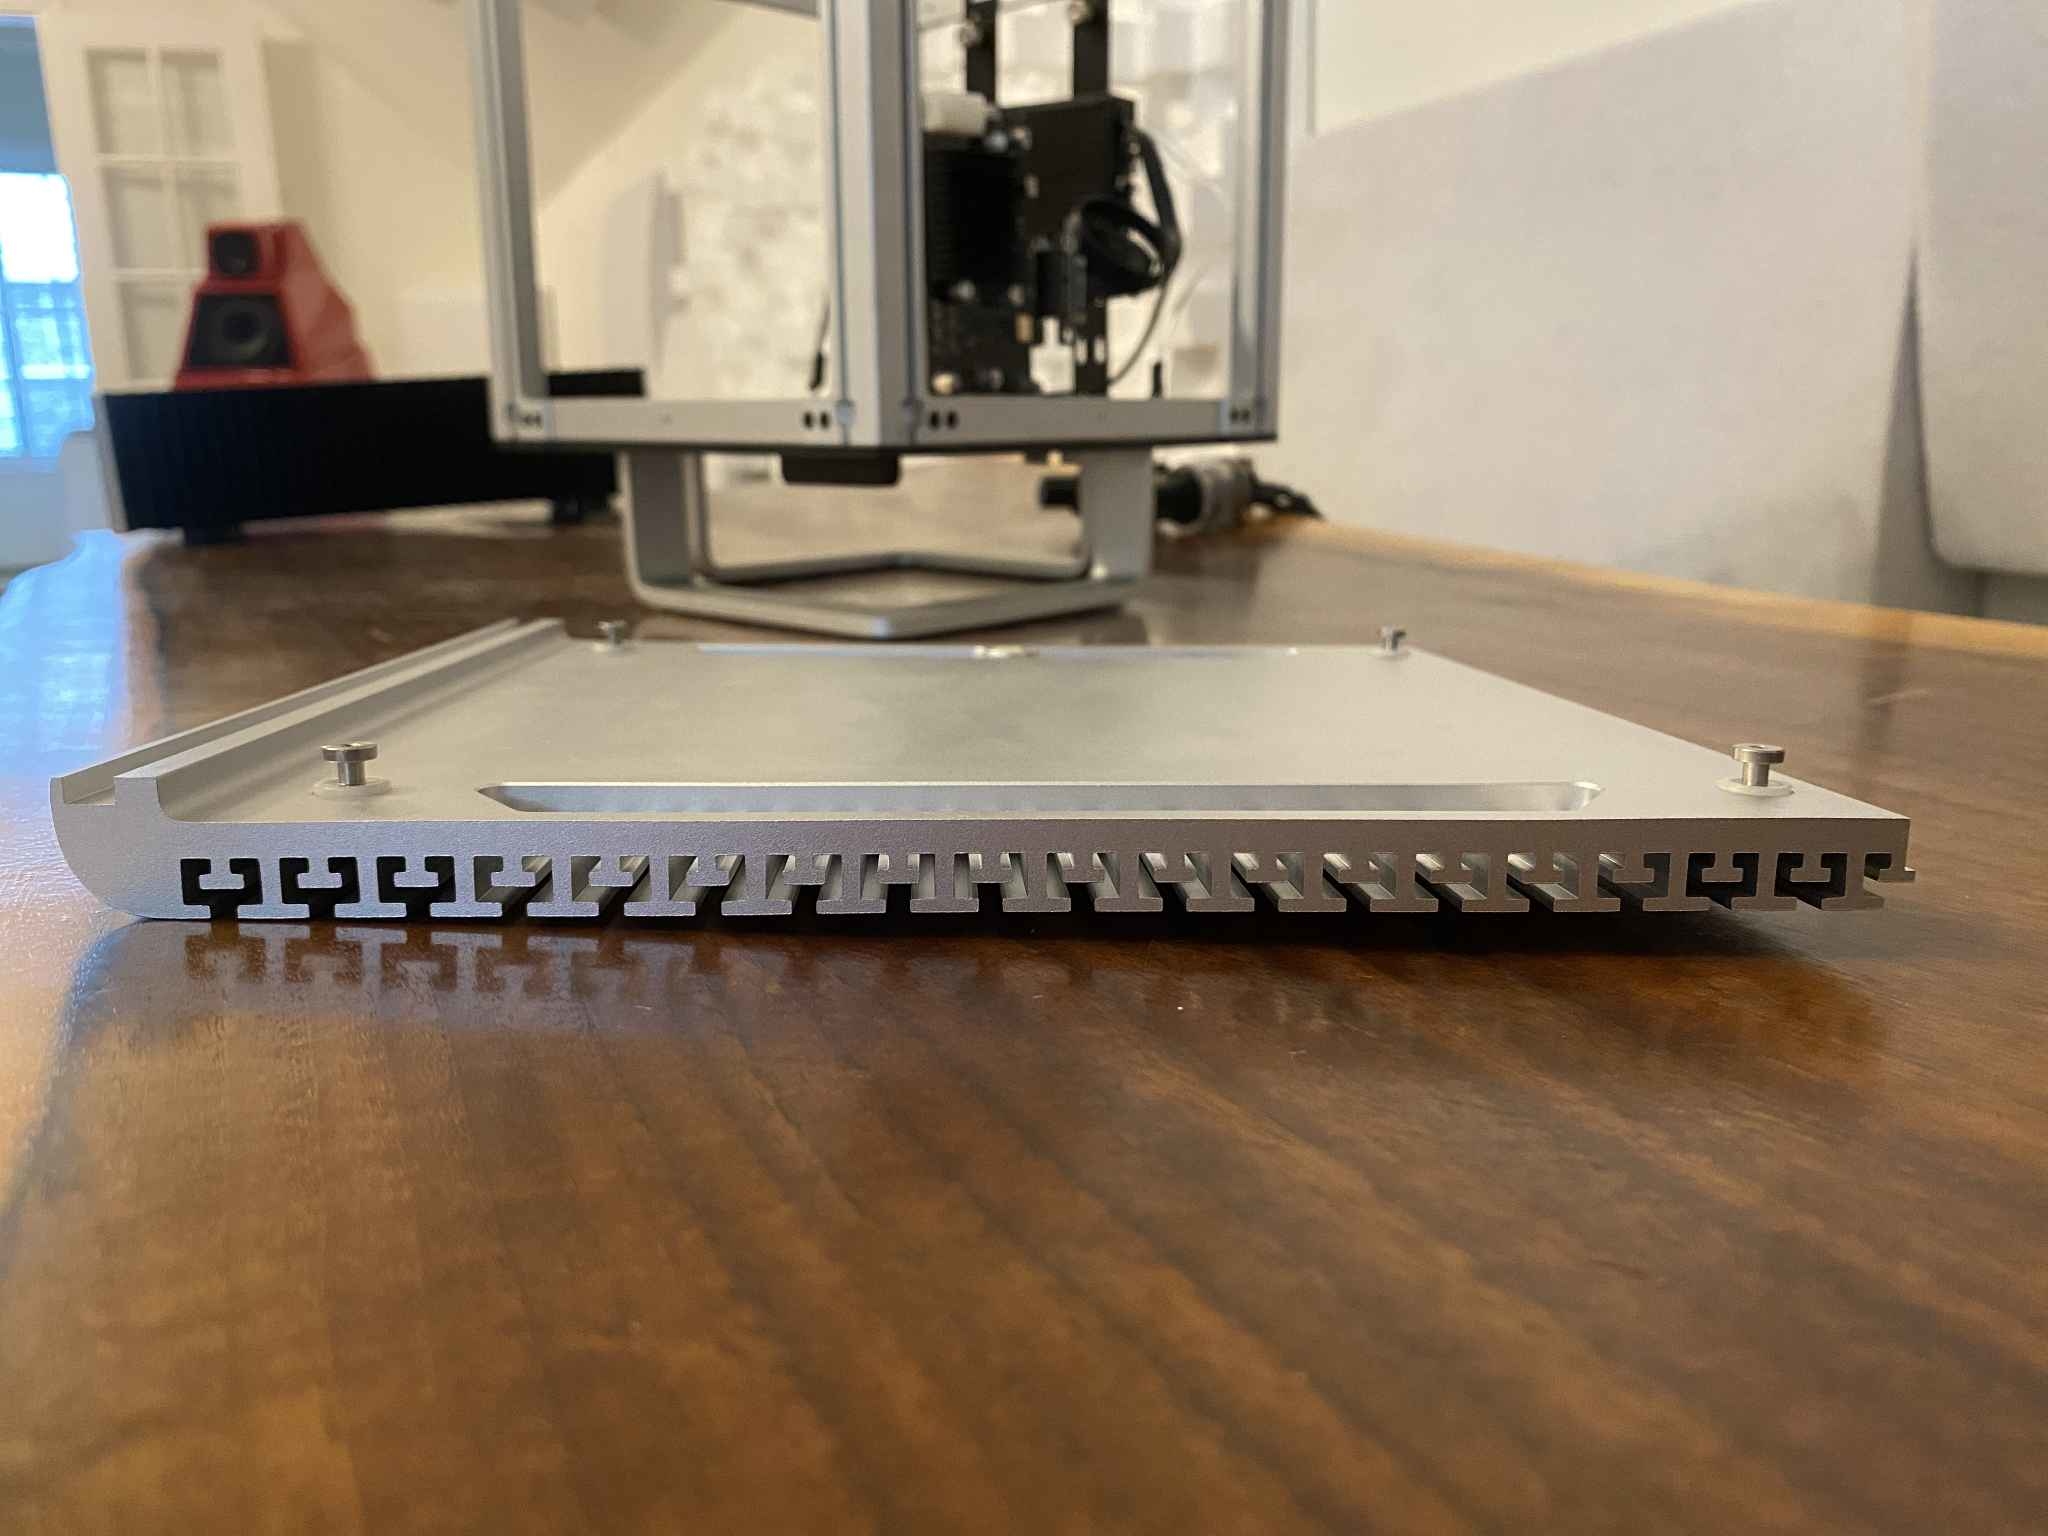
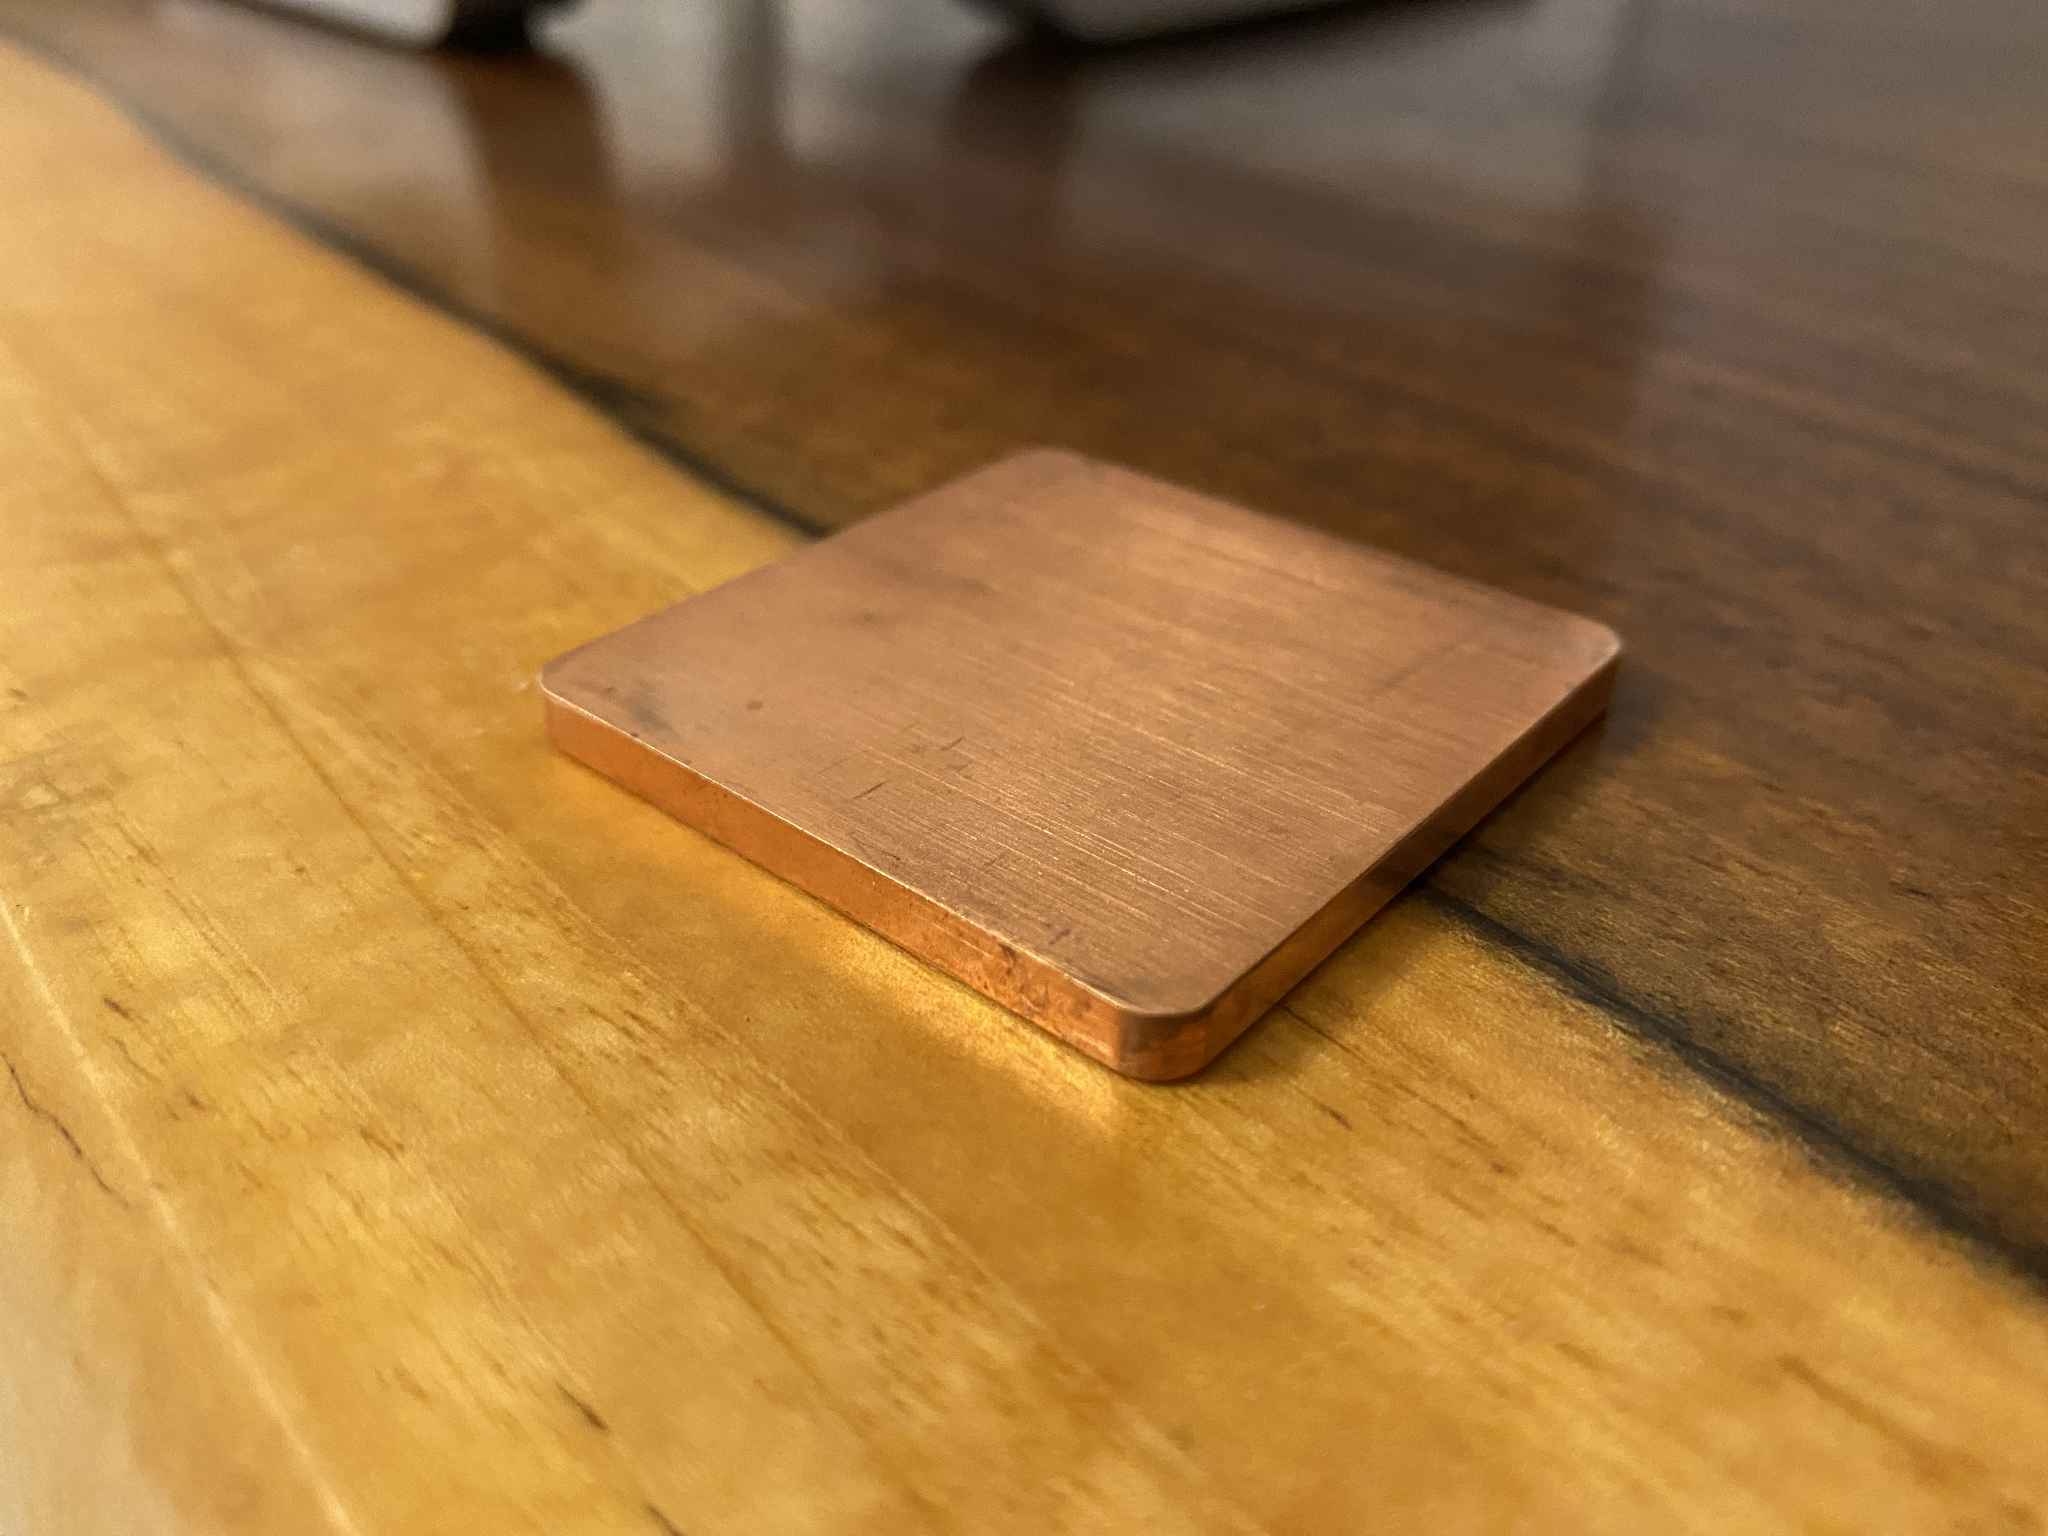
I know this may sound strange, but I put the LattePanda board in its own case, inside the Streacom DB4 case. I used the LattePanda Aluminum Alloy Passive Cooling Case for this situation because it enabled me to remove the stock Alpha 864s fan and to dissipate the Alpha 864s heat by placing the case next a DB4 included heatsink that was next the DB4 chassis. In this case a picture is worth a thousands words. You can see in my photos that the included DB4 heatsink mount is sandwiched between the aluminum ally case of the Alpha 864s and the side panel of the DB4 chassis. What is hard to see is the copper shim, also included with the DB4 case, that's sandwiched between the aluminum ally case and the heat sink mount.
You can see the copper shim and heatsink mount in this diagram from the DB4 manual, and in the photos of CAPS Twenty.One.

 The last accessory I tested with the LattePanda Alpha 864s is the Streaming Cable. It's billed as a way to give the user a picture in picture view of the Alpha 864s computer, from a Mac, Linux or Windows machine. I originally thought it would be a really nice and simple way of working on the Alpha 864s, but soon found out it's pretty overrated.
In my forum post on October 31, 2019 I said, "Right now I have Windows 10 Pro installed on the 64GB eMMC. I can use the streaming cable to connect directly from my laptop to the Alpha, and pull up an RDP remote desktop session. This cable has 5GB of bandwidth. But, the cable just acts as another network interface on both host and remote devices. Once connected, I just launch remote desktop and connect to the IP of the streaming cable. I can also just use an Ethernet cable connected to my laptop and the Alpha's Ethernet port and do the same thing. The streaming cable is much more handy for other operating systems in that one can connect it and use software to run remote sessions. It's essentially another network card with direct connection and possibly some other benefits that I've yet to discover."
That's the deal with the Streaming Cable. It's unneeded for CAPS Twenty.One because users can just connect the Alpha 864s to their networks and use Microsoft Remote Desktop to connect.
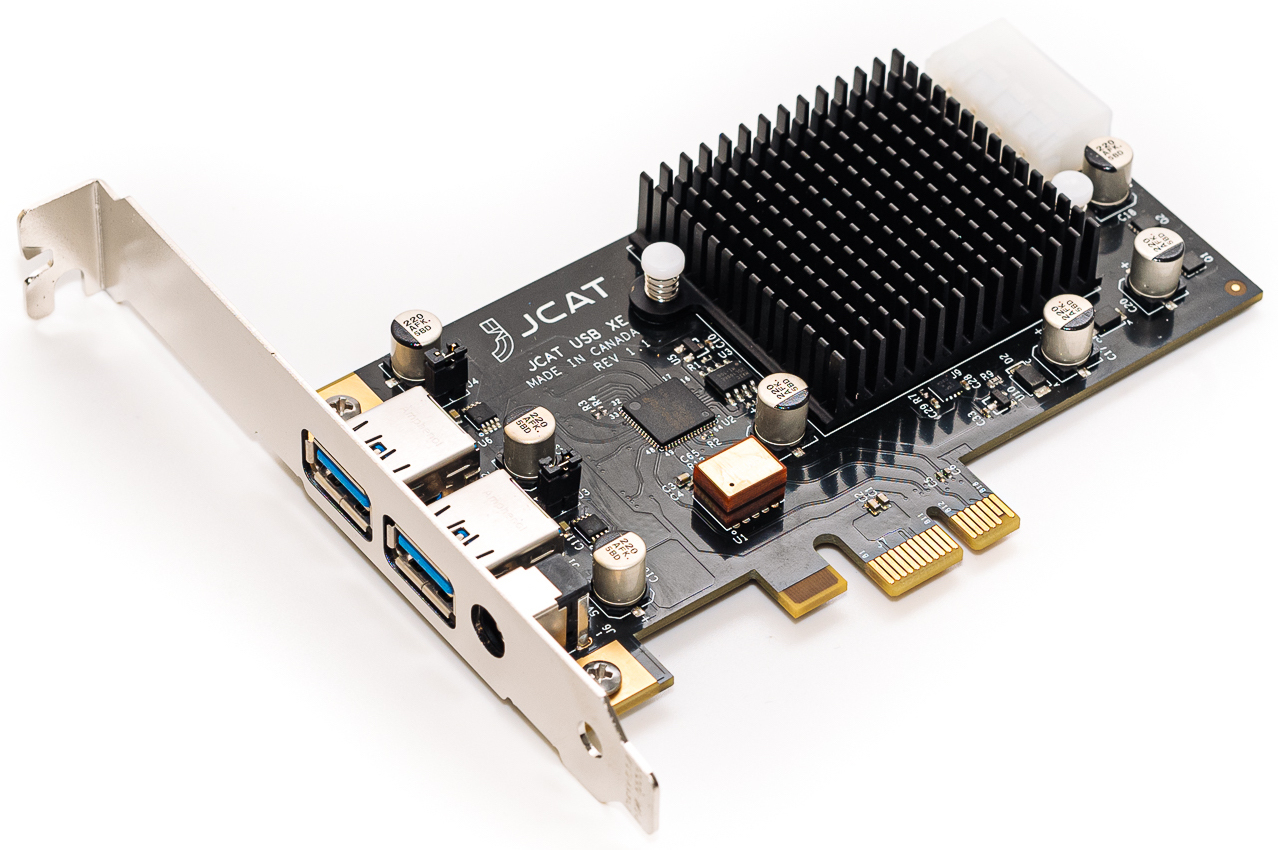
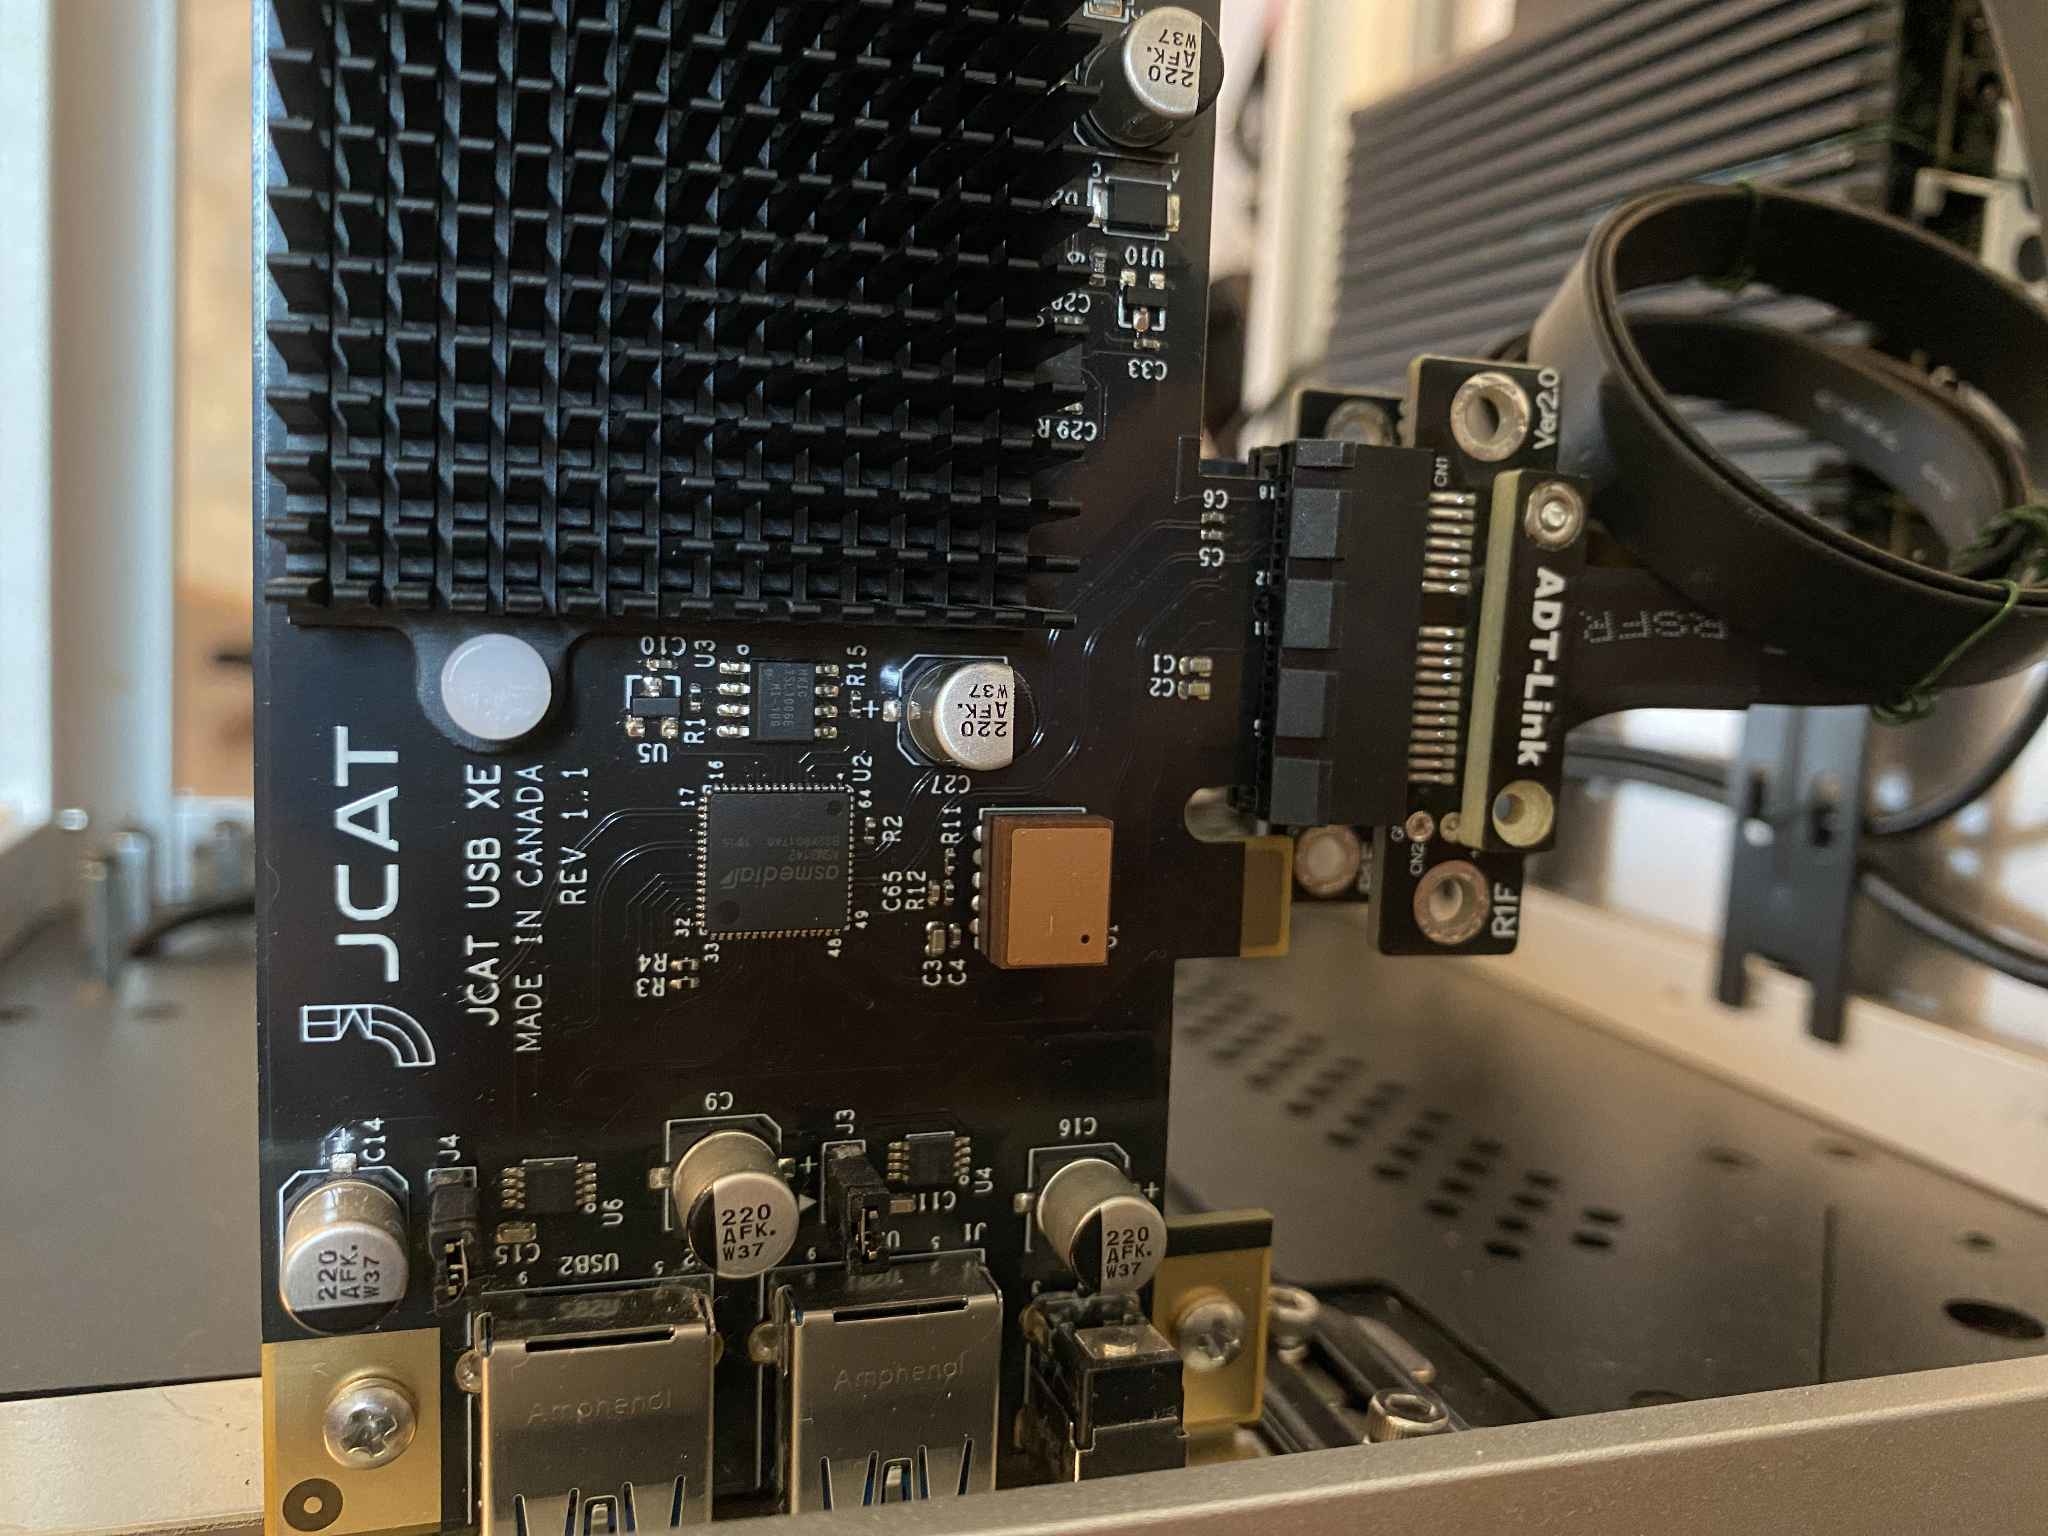
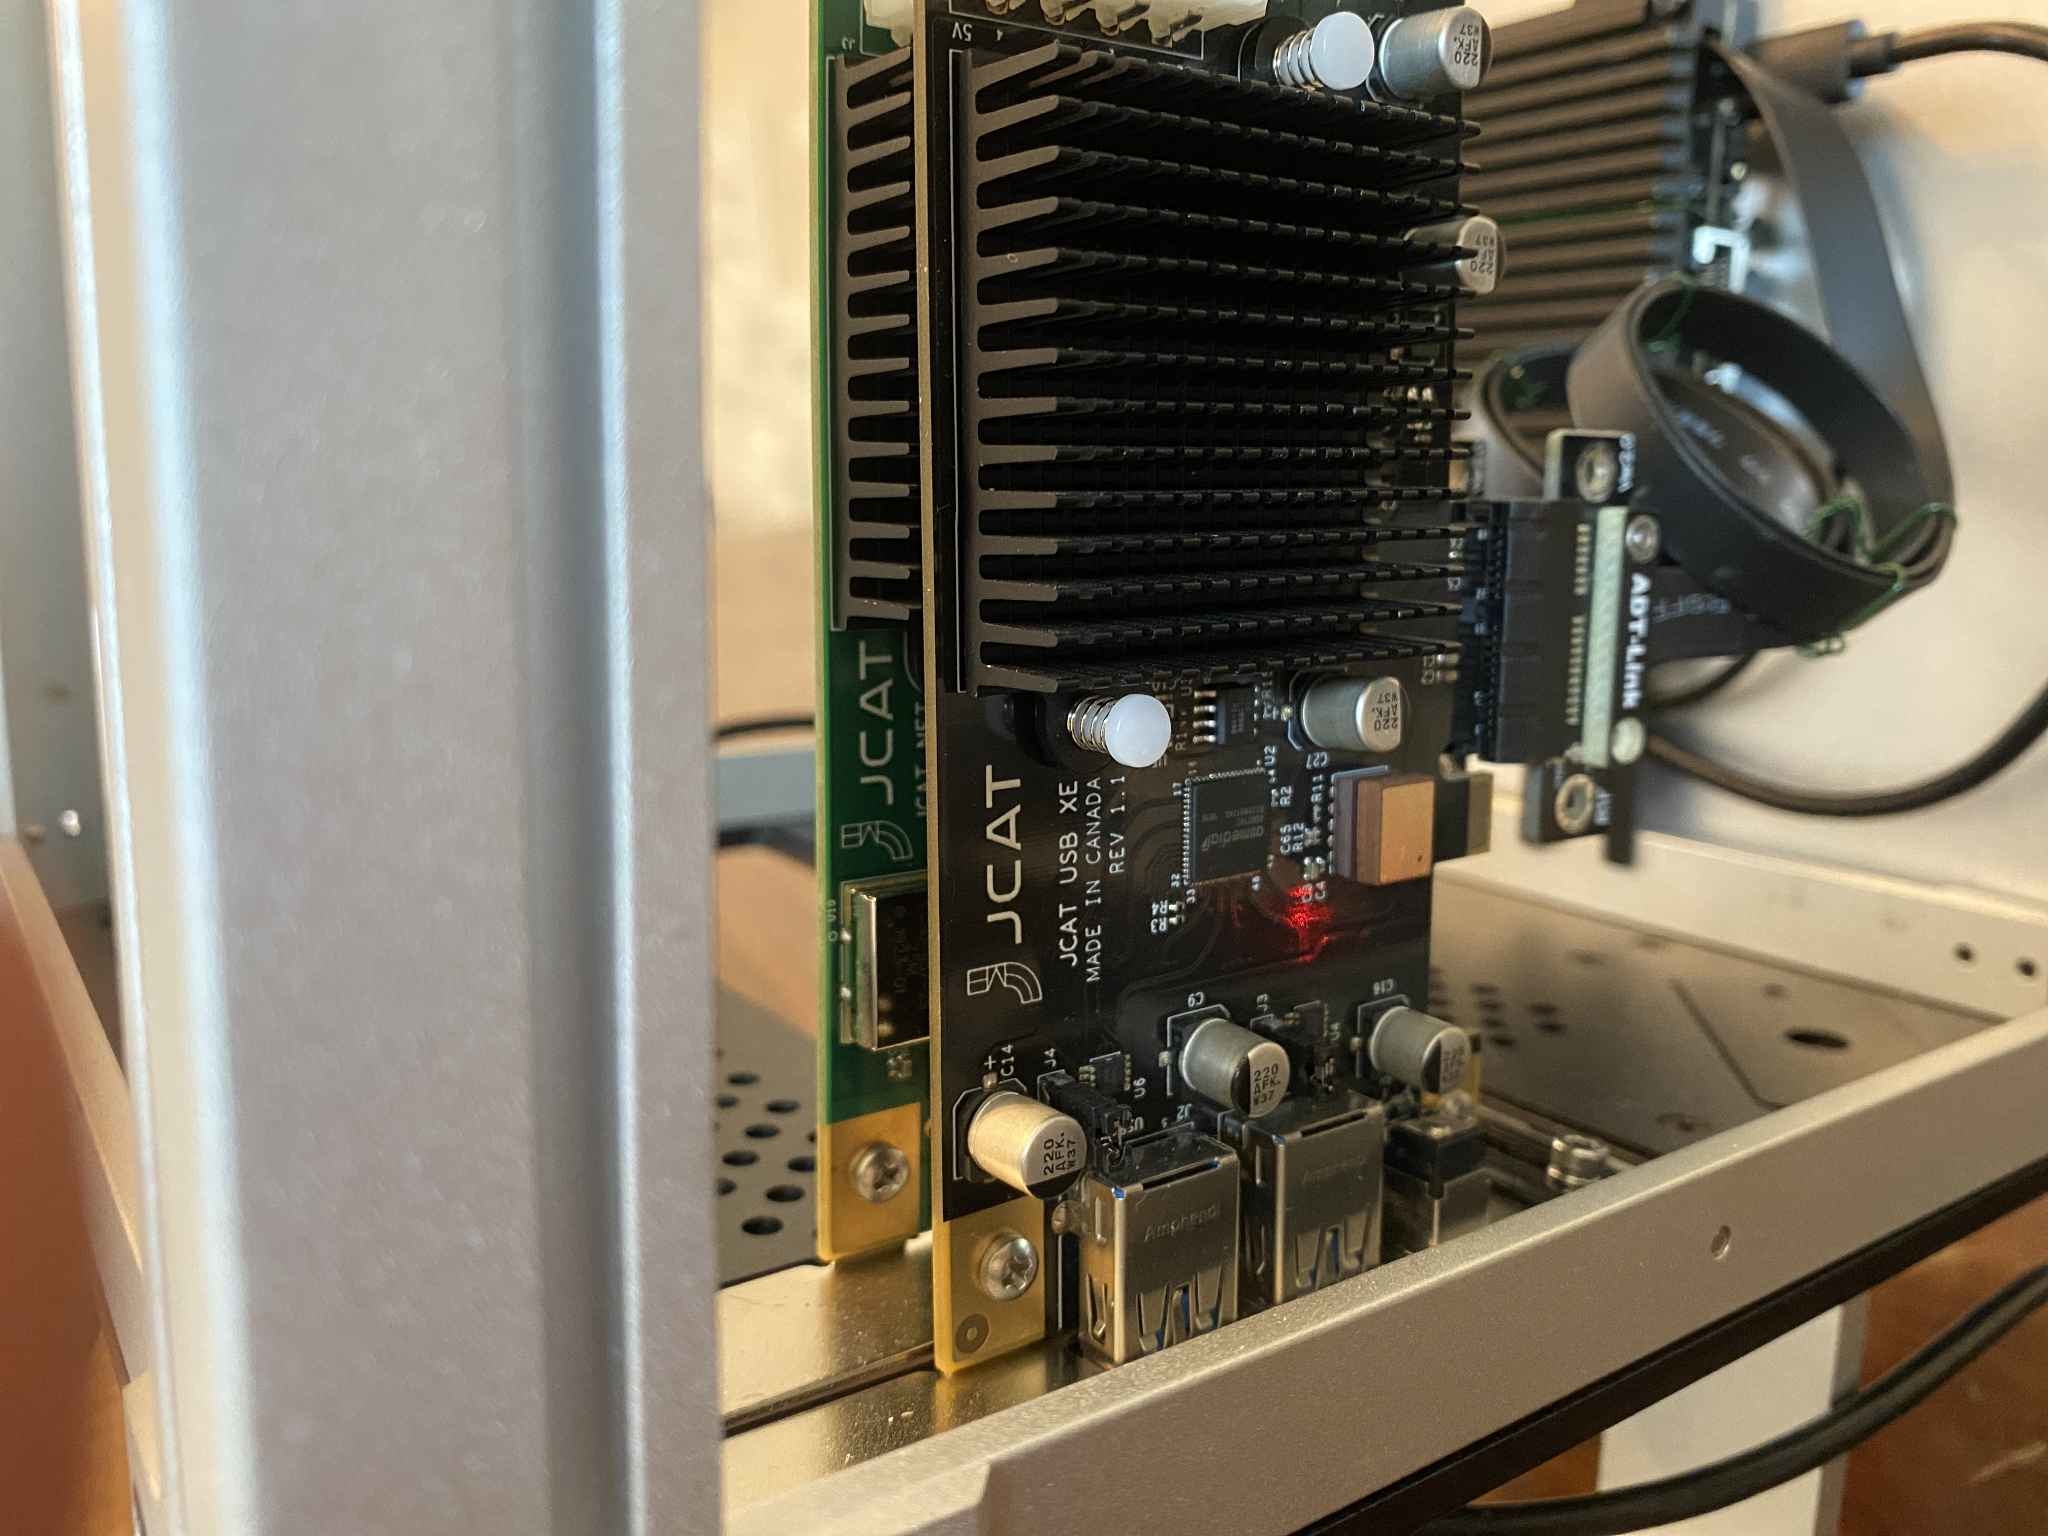
PCIe USB and Network Cards - I'm a firm believer in using the best quality parts possible, and the design of CAPS Twenty.One is no exception. To take the Alpha 864s to the next level I added the JCAT USB CARD XE and the JCAT NET CARD XE.
The JCAT USB CARD XE is the newest PCIe card offering from Marcin Ostapowicz's JCAT. It features a state of the art Emerald OCXO (oven controlled oscillator), a truly linear power design with LT3045 linear regulators and filters, the ASM3142 USB 3.1 USB host controller, and a port for powering the card with an external power supply.
The JCAT NET CARD XE is billed as the first audiophile network interface ever. This card is similar to the USB card in that it has no switching power supplies on board, only ultra low noise linear regulators and filters. It also uses a Crystek CCHD-957 low jitter crystal oscillator. This clock was designed "specifically for High Definition Audio" according to the manufacturer and it's the same clock used in many high end audio components.
NOTE: As of August 2020, I upgraded from the JCAT NET CARD FEMTO to the JCAT NET CARD XE, the newest version of JCAT's network interface. So far the results are terrific.
I'm a big fan of JCAT hardware and believe these cards are a perfect match for CAPS Twenty.One.

Power - The LattePanda Alpha 864s is ultra flexible when it comes to power, with an input voltage range of 11-15 volts but its standard being 3 amps at 12 volts. The stock power supply that ships with the Alpha 864s is a LattePanda 45W PD power adapter with a USB type C connector. This connects to the USB-C port on the Alpha 864s to fully power the unit, but that leaves the USB and network cards powerless. The only logical thing to do about this powerlessness is to add an external supply of course. This is where the options come into play and where readers can select which one suits their needs best. I used a few different configurations that I will cover here in no specific order.
When I first received the LattePanda Alpha 864s I powered it with the included 45W PD adapter and called it a day. This is certainly possible for people who wish to try this PC without the JCAT USB and network cards. Once CAPS design started I opted for two of the four options below, with the third being more of a proof of concept and the fourth being an untested but support possibility.
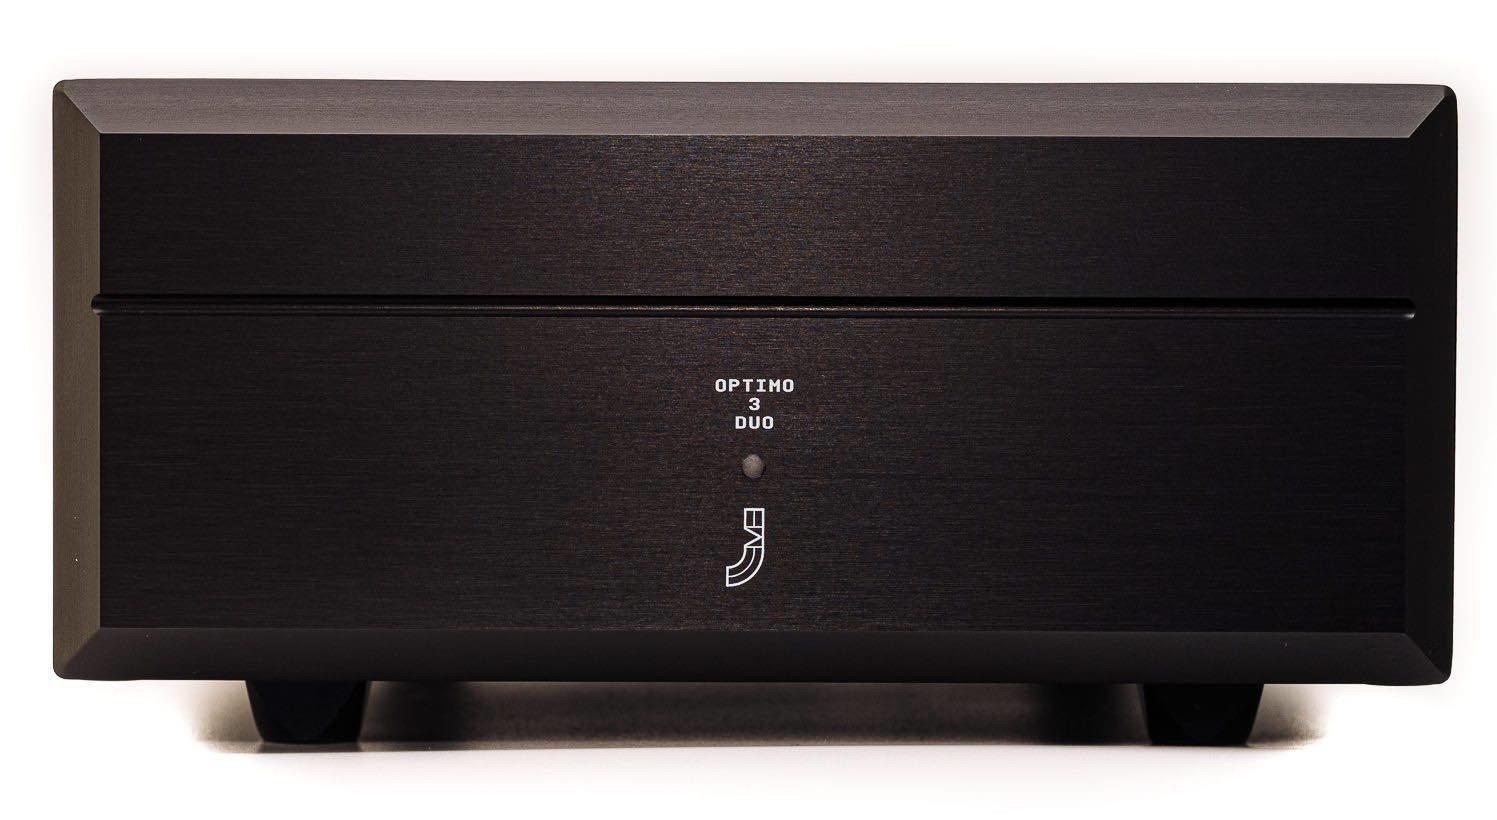
Option One - The first option that I recommend is the JCAT OPTIMO 3 DUO linear power supply. This PSU has two power outputs, so it must be used in conjunction with either the stock LattePanda PSU or different supply. I used the stock PSU to power the Alpha 864s via USB-C and the OPTIMO 3 DUO to power the two JCAT PCIe cards. The OPTIMO 3 DUO was designed with these cards in mind as its default voltage is set perfectly for them at 5V/1A. Other voltages are available upon request, which brings me to another configuration that I didn't try, but I know would work well. This PSU can be configure to supply either a USB card or network card, and the Alpha 864s computer (12V/3A), just not all three devices simultaneously.
The OPTIMO 3 DUO is similar in design to the JCAT PCIe cards in that it's of the highest quality. It features two independent galvanically isolated DC outputs, zero internal switching supplies, twelve LT3045 ultra low noise linear voltage regulators (helping the noise level measure below 2 microvolts), a bespoke low induction 100VA transformer with magnetic and electrical shielding, OCC copper internal wiring, Furutech IEC and Neutrik Speakon sockets, and two very high quality double shielded DC cables that connect to the PCIe cards. The entire design from input to output at the ends of the cables is exquisite.

 Option Two - I tried this option as a proof of concept more than anything and I found it worked pretty well. Using the JCAT OPTIMO 3 DUO linear PSU to power the PCIe cards, I replaced the stock 45W LatePanda Alpha 864s PSU with a 30W Anker PowerCore+ 26800 PD battery / high capacity charger. The Anker device connected to the standard USB-C port on the Alpha 864s, just like the stock PSU. At just 30W it doesn't meet the requirements specified by LattePanda, but I had absolutely no problems running the CAPS Twenty.One from this battery for several hours. I researched other similar options and found a whole host of battery "chargers" with more output wattage and storage capacity than this device from Anker. I can't vouch for them, but I can say the Anker PowerCore+ 26800 PD was surprisingly good and enabled me to keep the JCAT OPTIMO 3 DUO in the system.
Another cool possibility for this battery supply is when using the Alpha 864s without any PCIe cards, it's possible to have a completely wireless audio endpoint when combined with the built-in WiFi of the 864s.
Option Three - Seeking a power supply that could handle all three devices (USB, NET, and Alpha 864s), I contacted Larry at HDPlex. I had a feeling he could not only deliver such a device but also create a custom cable for me that could power the Alpha 864s via its exposed power header. A big thanks to Larry for coming through on this request and supplying the perfect solution.
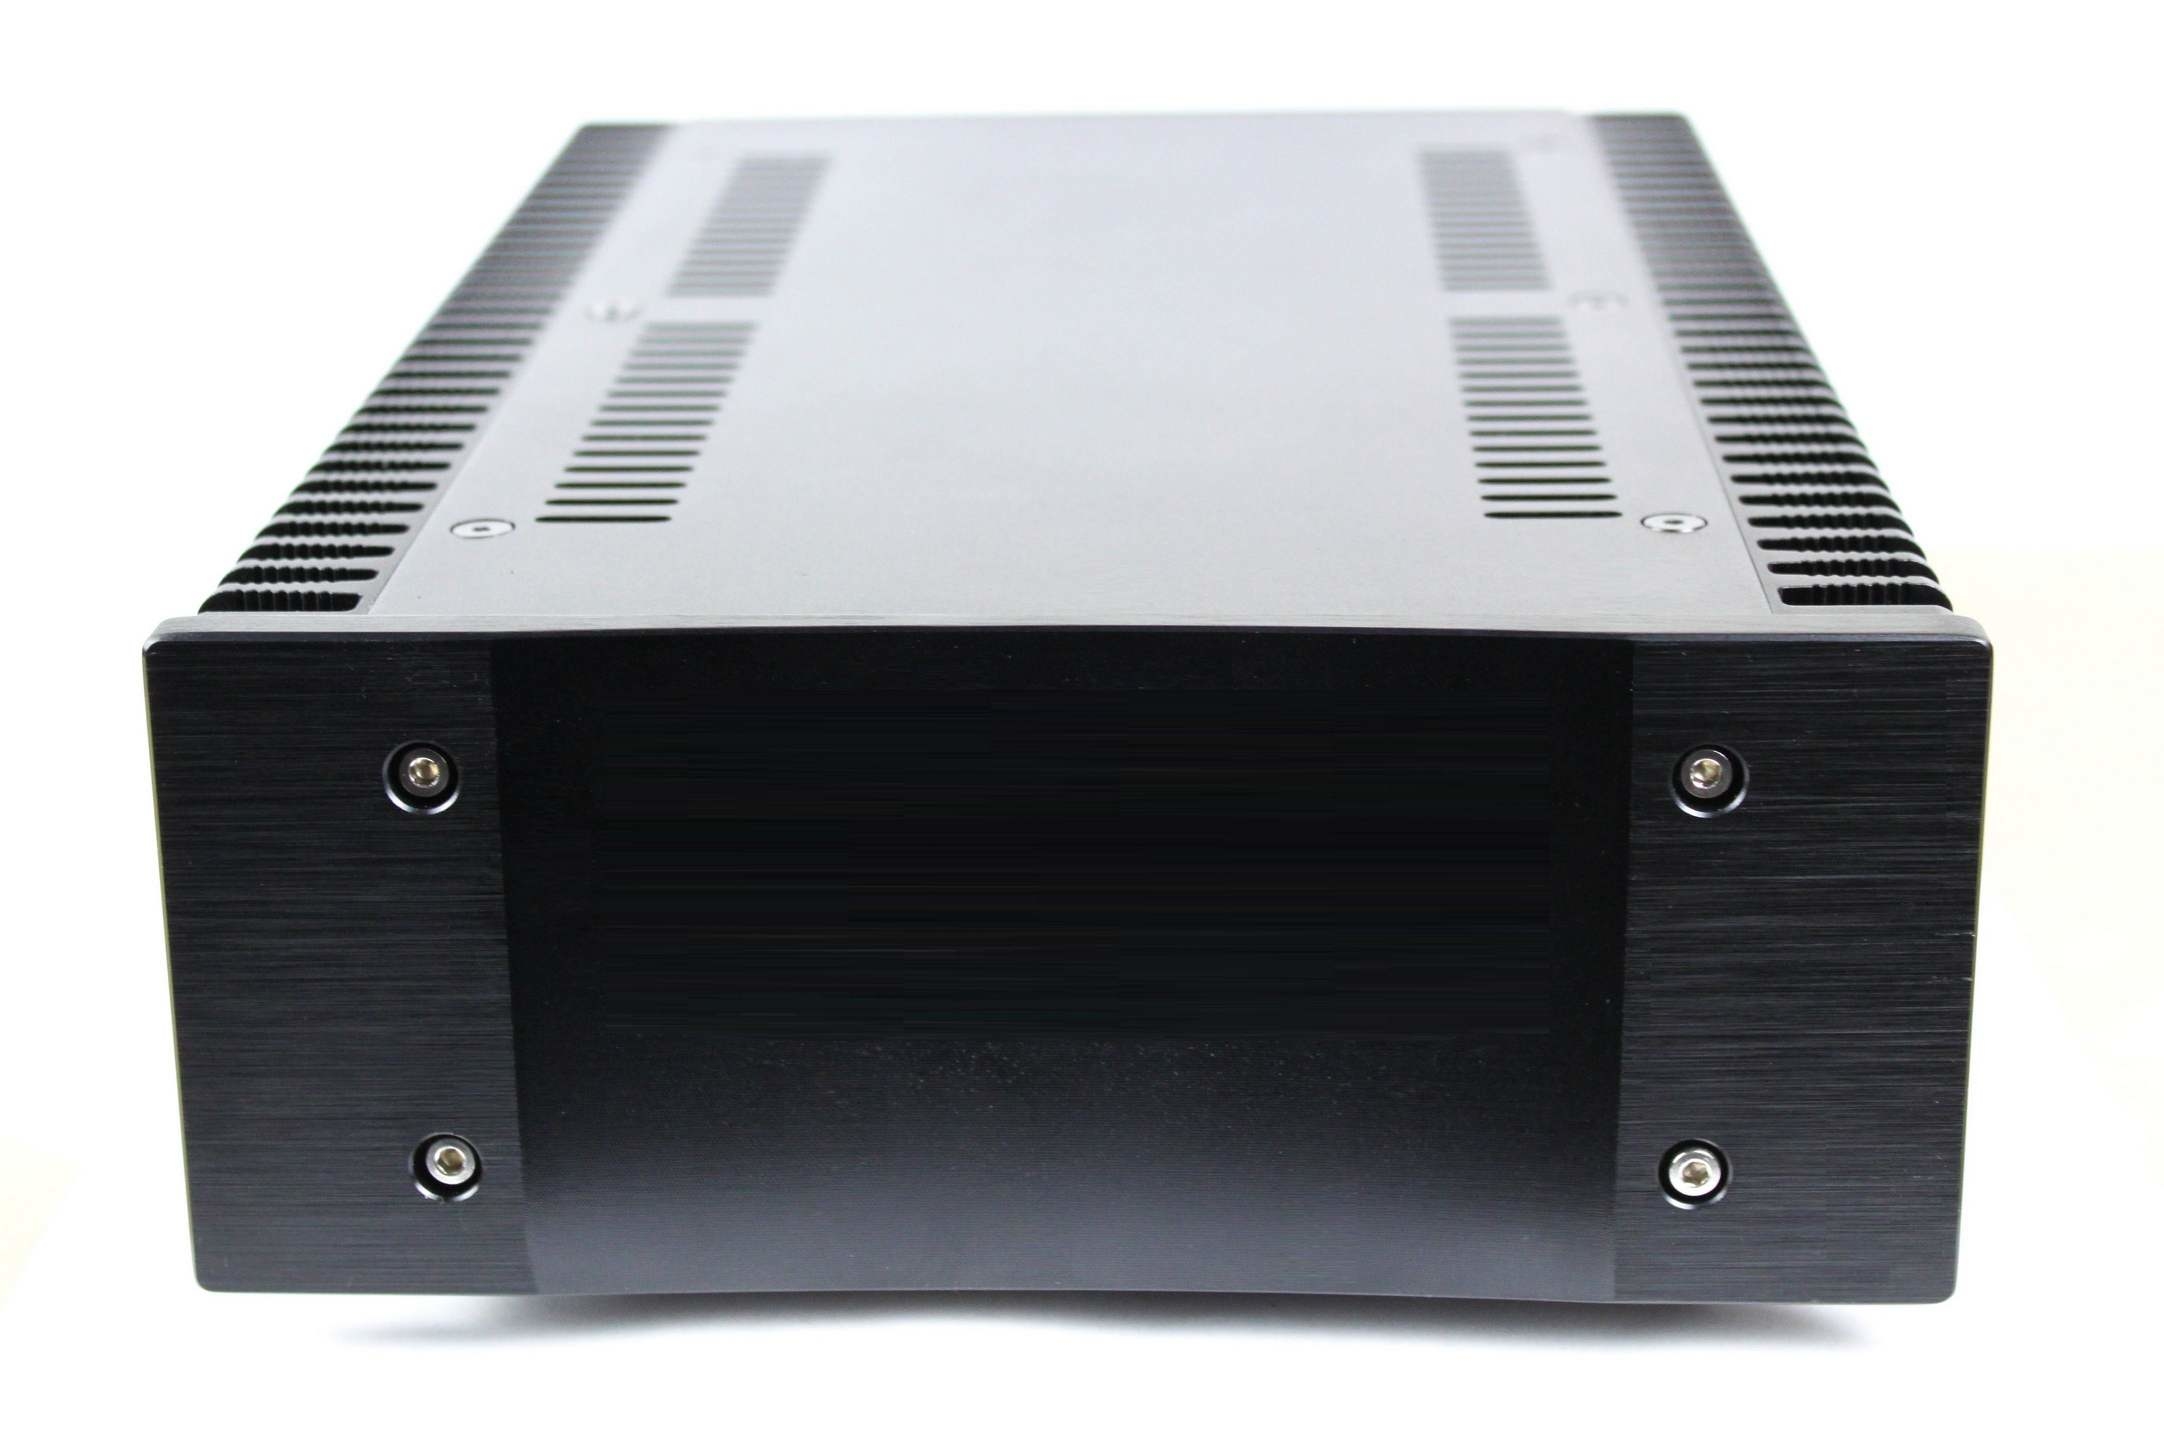
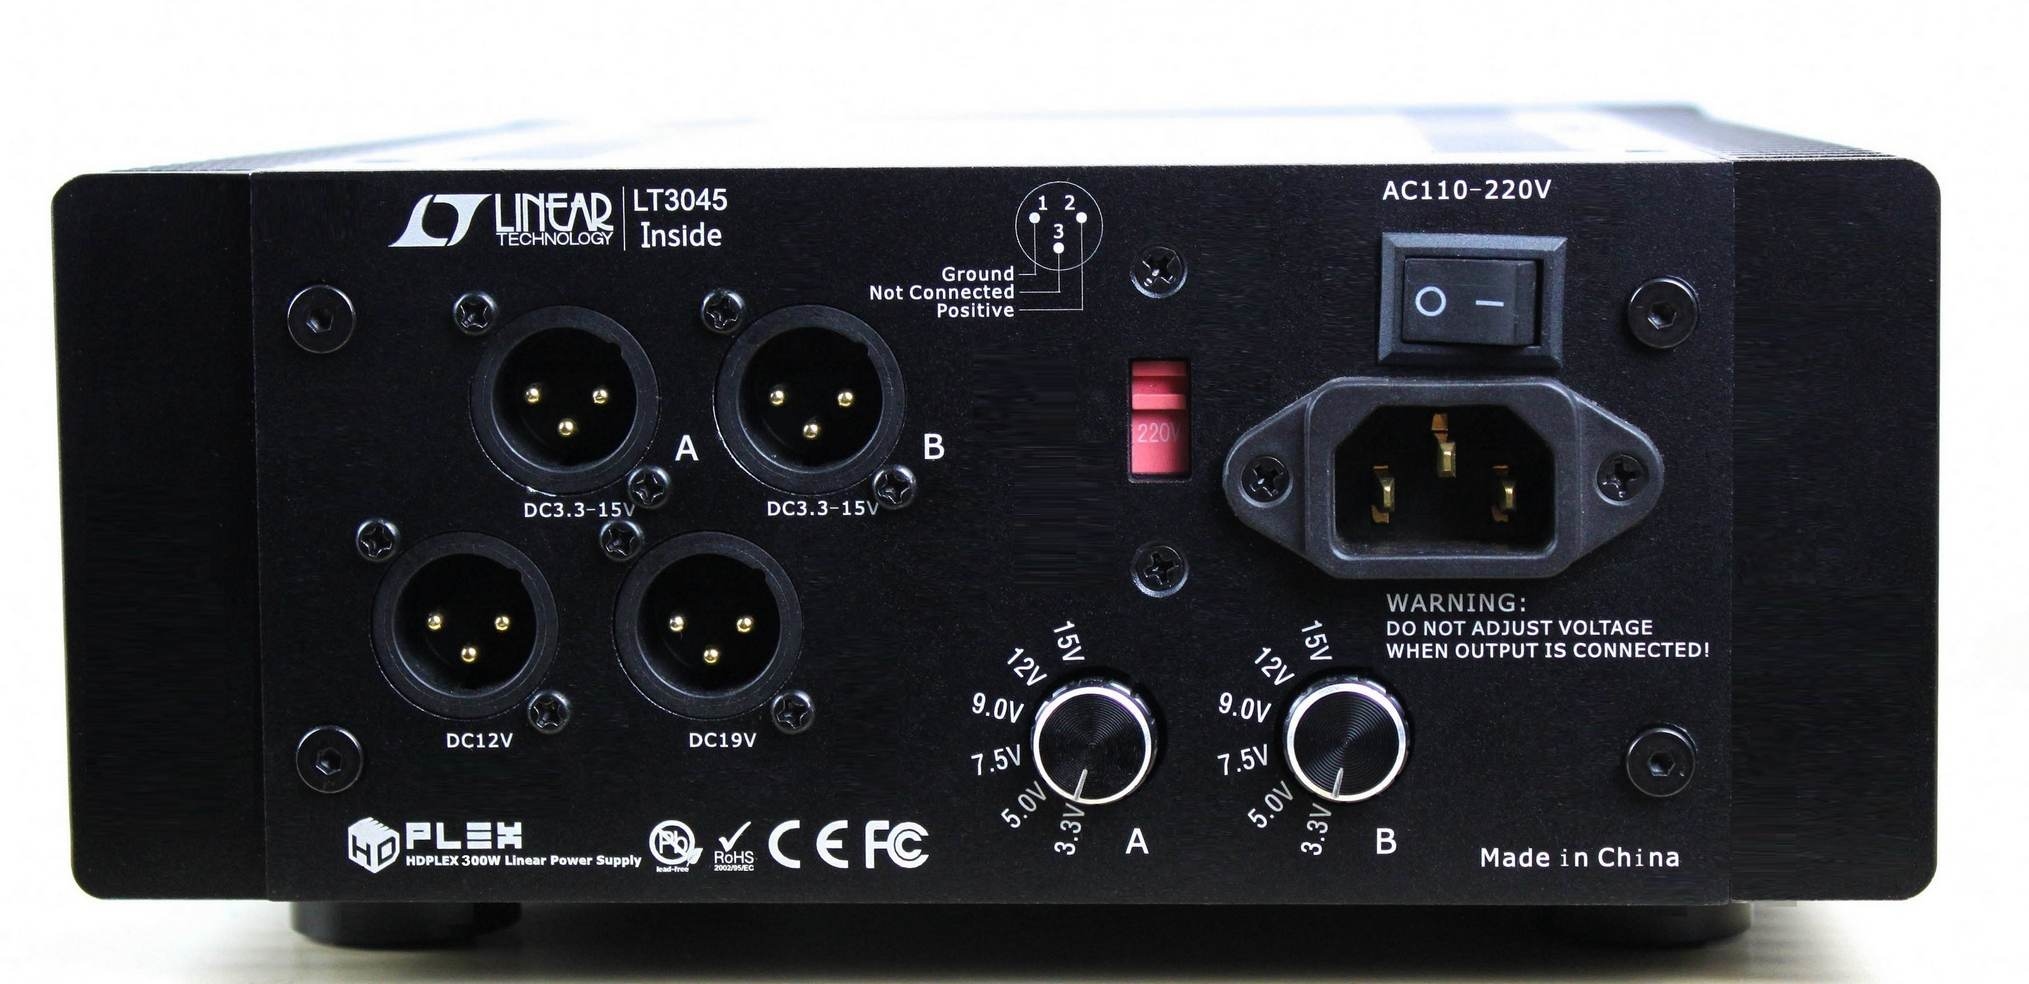
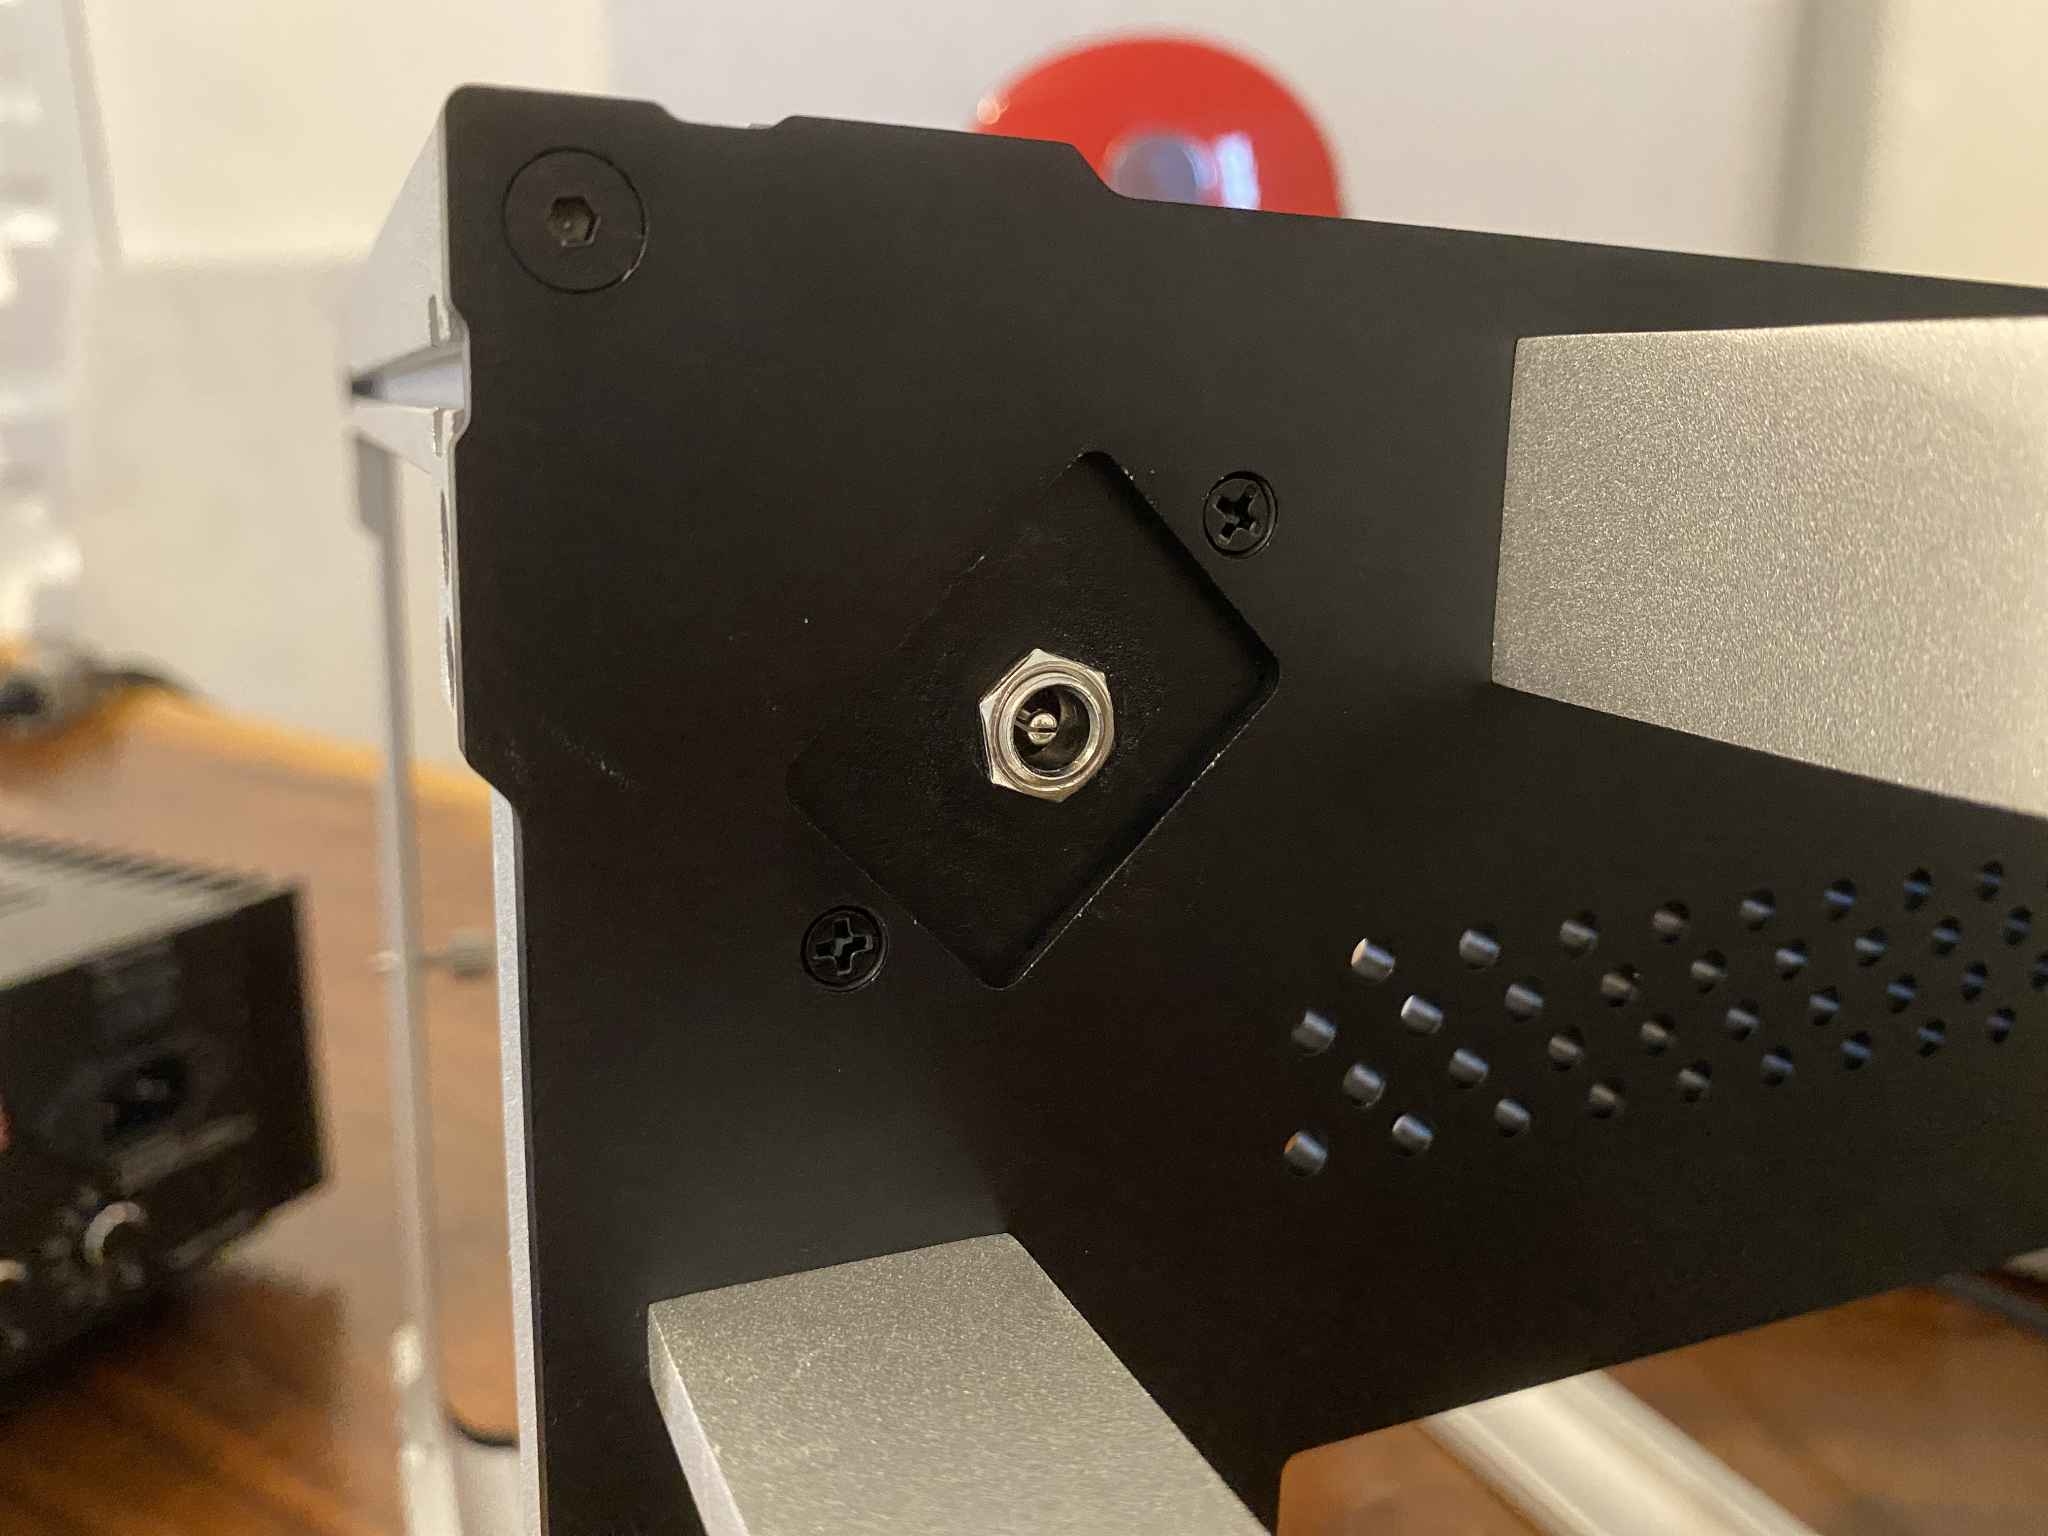
The LattePanda Alpha 864s exposed power header requires a JST 4 pin, 2.0mm pitch female connector. These are pretty cheap to purchase in lots of 50 on Amazon or even 10 at DFRobot, but that would be only the beginning for a layman like me. I sent the specifications to Larry, along with the power requirements for the JCAT cards. A few weeks later I received the HDPLEX 300W Linear Power Supply with cables for the JCAT cards and Alpha 864s, and a custom cable with the JST connector and female barrel connector to attach from the Alpha 864s to the Streacom DB4 chassis. Readers looking for a single PSU to power CAPS Twenty.One will be very pleased with this configuration.
The HDPLEX 300W Linear Power Supply features a 300W R-Core transformer, Super 10000µf ELNA Audio Capacitors, a single capacitor per rail to eliminate phase distortion, several Linear Technology LT3045 Ultralow Noise, Ultrahigh PSRR Linear Regulators, Neutrik XLR connectors, and the ultimate in flexibility with four different voltage outputs (two are user adjustable).
Connected to CAPS Twenty.One I used the DC12V output, connected to the custom cable, to power the LattePanda Alpha 864s, and set the A and B outputs of the HDPlex to 5V to power the JCAT USB and network cards. This is a terrific single box solution for devices such as CAPS Twenty.One that require multiple power inputs with different voltage requirements. I also love the flexibility of this PSU because it can be repurposed in the future with another PC even if the power requirements are different.
Option Four - The last option for powering CAPS Twenty.One is with a LiPo (lithium-ion polymer) battery. This batter solution is similar to the first two options above in that it requires an additional PSU for the JCAT cards. Readers who just want to use the LattePanda Alpha 864s on its own without PCIe cards, can use this LiPo option as the sole PSU.
The Alpha 864s features a 10 pin connector specifically for LiPo batteries. Powering the Alpha 864s this way requires much more effort because there isn't an off the shelf battery one can purchase just for this task. I didn't test any of these, but will link to the specifications on the LattePanda documentation site here.
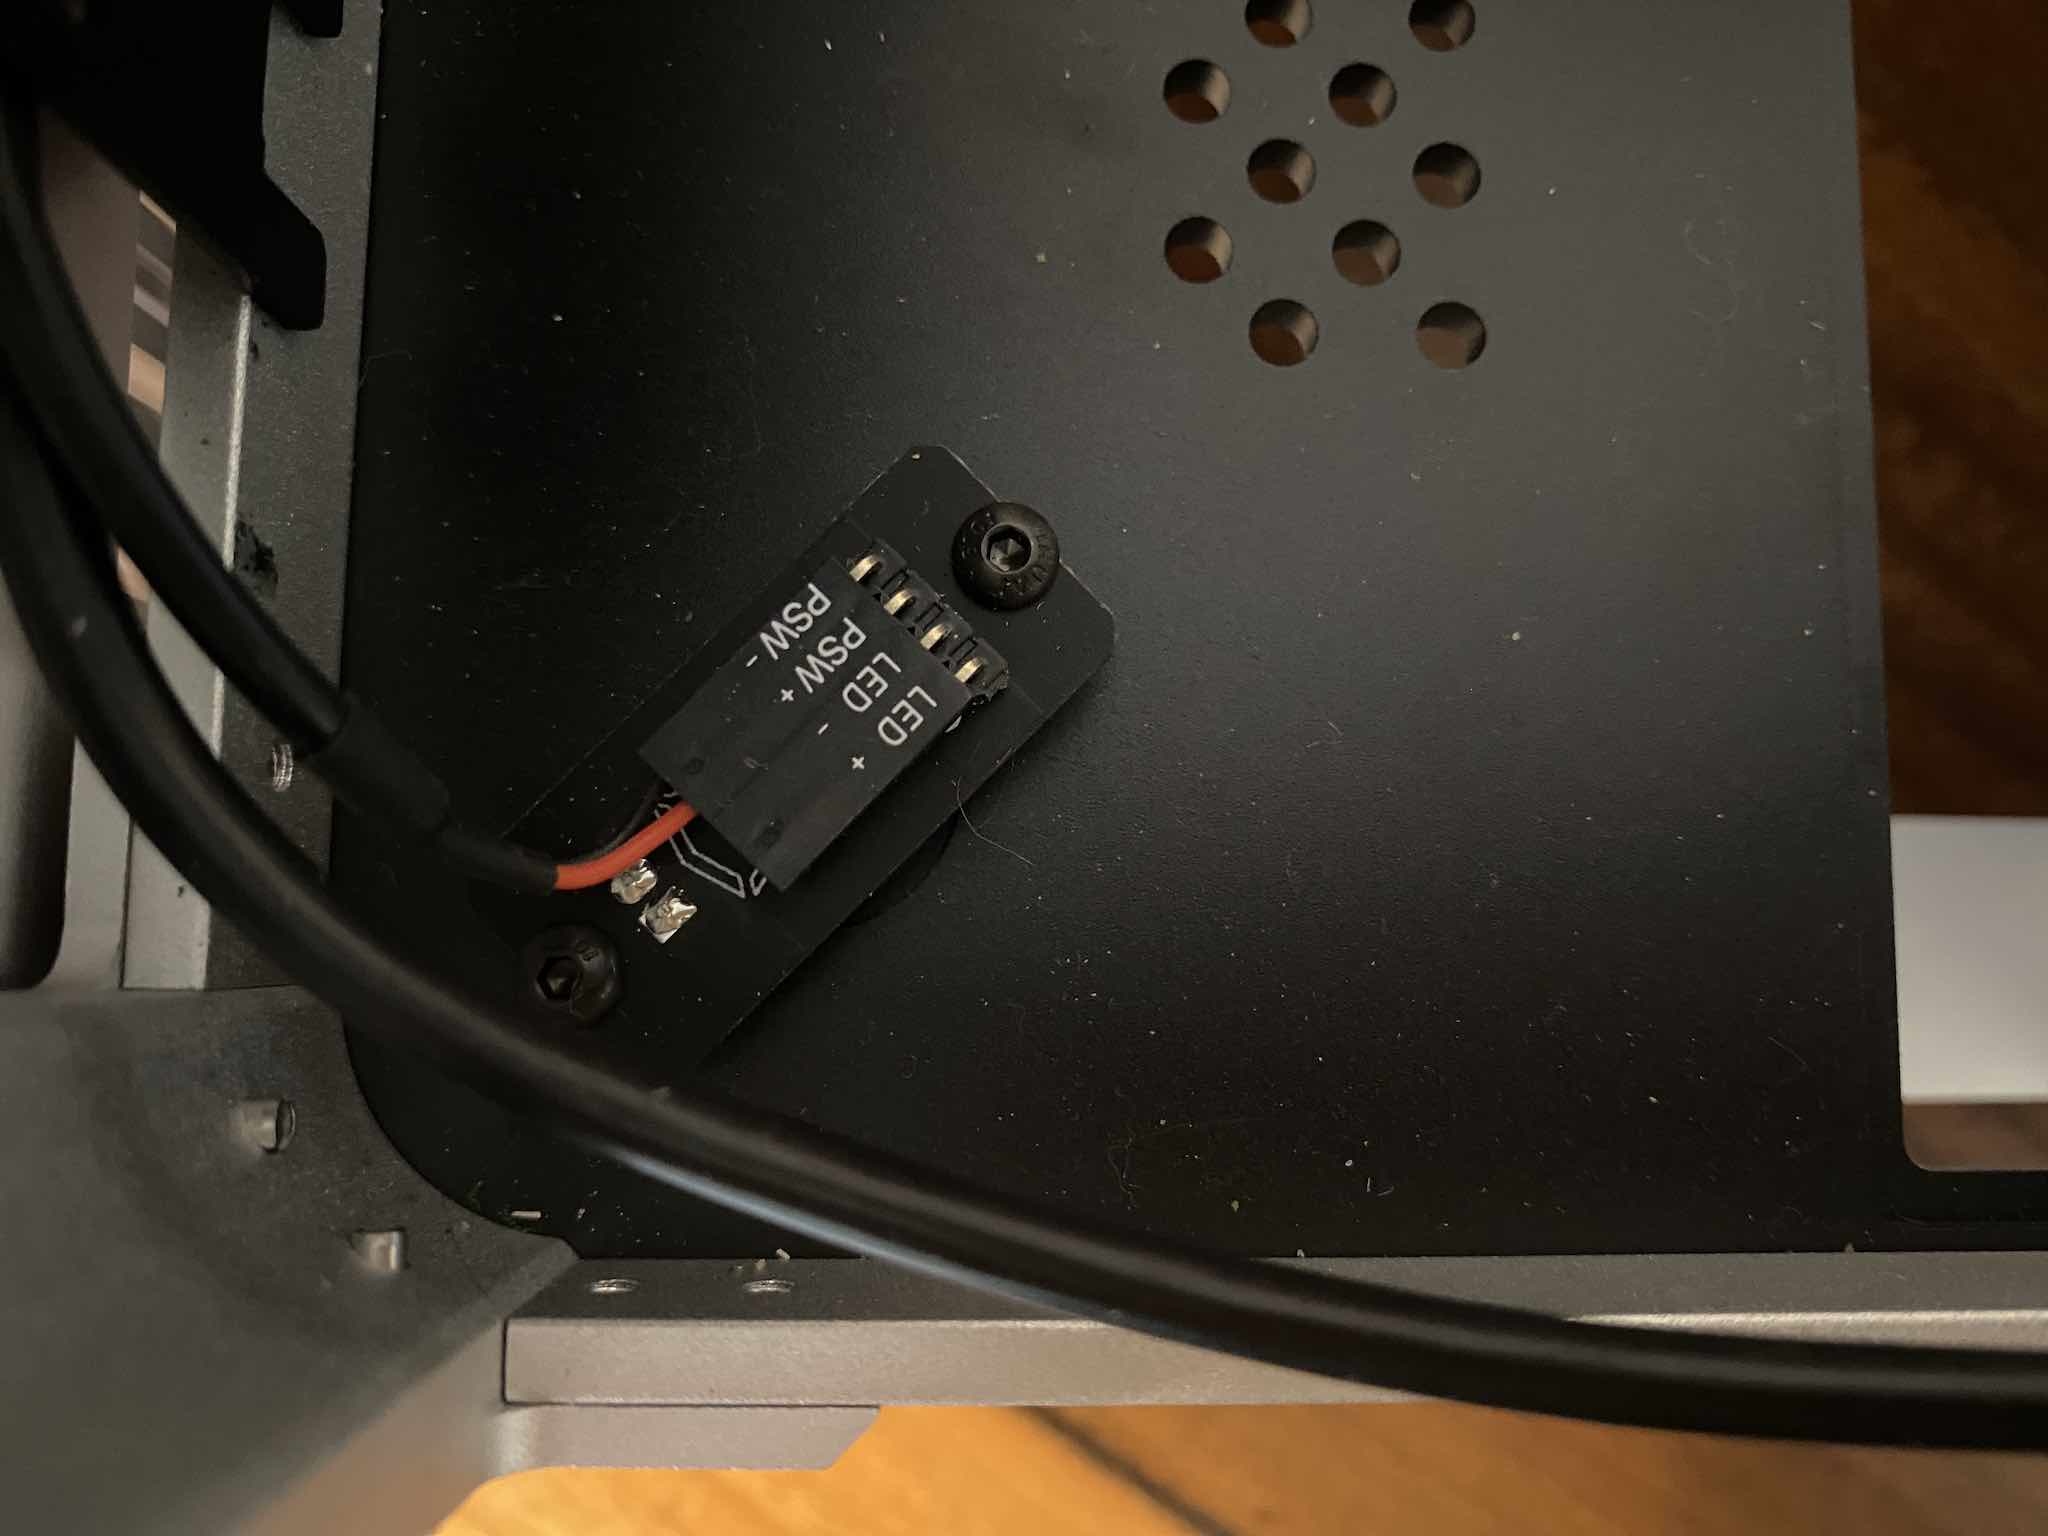
Turning The Power On - The Alpha 864s features thee options for powering the unit on, a small power button on the board, a power switch header, and a limited release BIOS that powers the unit on when power is connected. I used the first two options during CAPS Twenty.One testing and settles on the power switch header as the perfect long term solution.
The power switch header is really easy to use because the Streacom DB4 case ships with a power switch cable. The only issue is this cable must be customized a bit to fit the Alpha 864s. The stock power switch cable has female four pin connectors at each end. To work with the Alpha 864s I removed the connector from one end and removed two of the four cables from both ends. This left me with a cable that had crimp pins on one end for positive and negative, and a four point connector on the other end with only two wired going into it. The female end connects easily to the dedicated pins on the DB4 case, just above the power button. The exposed crimp pins connect to the Alpha 864s power switch header. This is another case of a picture being worth a thousand words. You can see in my images below how this looks. It's pretty easy to do.
Software
Operating System - CAPS Twenty.One is based on Windows 10 Pro. It isn't my first choice for an operating system on audio endpoints, but it's the OS that's required under certain circumstances. As I said many paragraphs earlier, if one's DAC works with native DSD on Linux, then by all means use something like a Sonore Rendu, HQPlayer NAA image, or Raspberry Pi and call it a day. In addition, if one's DAC is a Schiit Yggdrasil, or the like, that only accepts PCM, then CAPS Twenty.One may only apply if one like to build things and experiment with power supplies and PCIe cards etc... No worries either way, just some details that should be said and read.
On CAPS Twenty.One I'm using the stock install of Windows 10 Pro and removing the unneeded apps that are automatically installed. There's not many of them and I doubt having them lay dormant on the hard drive will do anything, but I just don't like them. I considered using one of the Windows apps like Audiophile Optimizer, Fidelizer, or Process Lasso but decided against it for now. While the apps have thousands of fans around the globe and they definitely tame a beast of an operating system, I didn't want to add another layer of possible complication to this design. I'm not saying apps such as Audiophile Optimizer are complicated, but I am saying they can cause issues that I can't address in an article like this due to the diversity of connected devices and drivers. I encourage people to try these apps on their own and report back to the Audiophile Style community. Perhaps there's a standard setting or install that can be used.
Audio Apps - CAPS Twenty.One is mainly an endpoint for HQPlayer, running NAA (Network Audio Adapter) software from Jussi Laako at Signalyst. Technically called the Network Audio Daemon by Jussi, it's a tiny download from his website that runs Windows, macOS, and Linux. There is nothing for the end user to do with this software other than install it.
Running the Network Audio Daemon on CAPS twenty.One enables it to receive audio at ultra high same rates without breaking a sweat. So far I've sent DSD512 to the LattePanda Alpha 864s, connected to an APL HiFi DSD-MR MK2 DAC via USB, without an issue. I have a DAC on hand that accepts DSD1024 and will test this as soon as the high powered CAPS Twenty PC is completed.
 On CAPS Twenty.One I configured the Network Audio Daemon software to launch automatically when the computer boots, so I don't have to connect to it just to launch the app. An easy way to do this is to go to the Windows Run box and type shell:startup. This brings up a folder containing items you's like to start when Windows boots. In this folder, add a shortcut to the Network Audio Daemon,most likely located here "C:\Program Files\Signalyst\HQPlayer NAA\x64\networkaudiod.exe".
Adding this shortcut is as easy as right-clicking in the folder's window, selecting NEW > SHORTCUT and following the wizard.
The other audio app I installed on CAPS Twenty.One is Roon Bridge. This is completely separate from anything related to HQPlayer and NAA, as the two offer similar functionality. I said similar, not identical. If one wants to just make CAPS Twenty.One a Roon endpoint, then Roon Bridge is al that's required. Conversely, if one wants to make CAPS Twenty.one an HQPlayer Network Audio Adapter / endpoint, then the Network Audio Daemon is all that's required.
Installing Roon Bridge is just a download and double-click from the Roon Labs website. There is nothing to configure other than making sure it launches at startup if so desired. This is done by right-clicking the Roon icon in the Windows systray and click the line that says "Launch at startup?"
Connecting to CAPS Twenty.One - Because I don't want a monitor connected to CAPS Twenty.one, I use the Microsoft Remote Desktop app to do everything from the iMac on my desk. There is no need for a mouse of keyboard attached CAPS Twenty.One either. Remote Desktop works well to accomplish things such as installing USB DAC drivers, updating the Network Audio Daemon or installing Roon Bridge etc... The only time a keyboard, mouse and monitor may be required is if one wants to update the BIOS on the Alpha 864s.
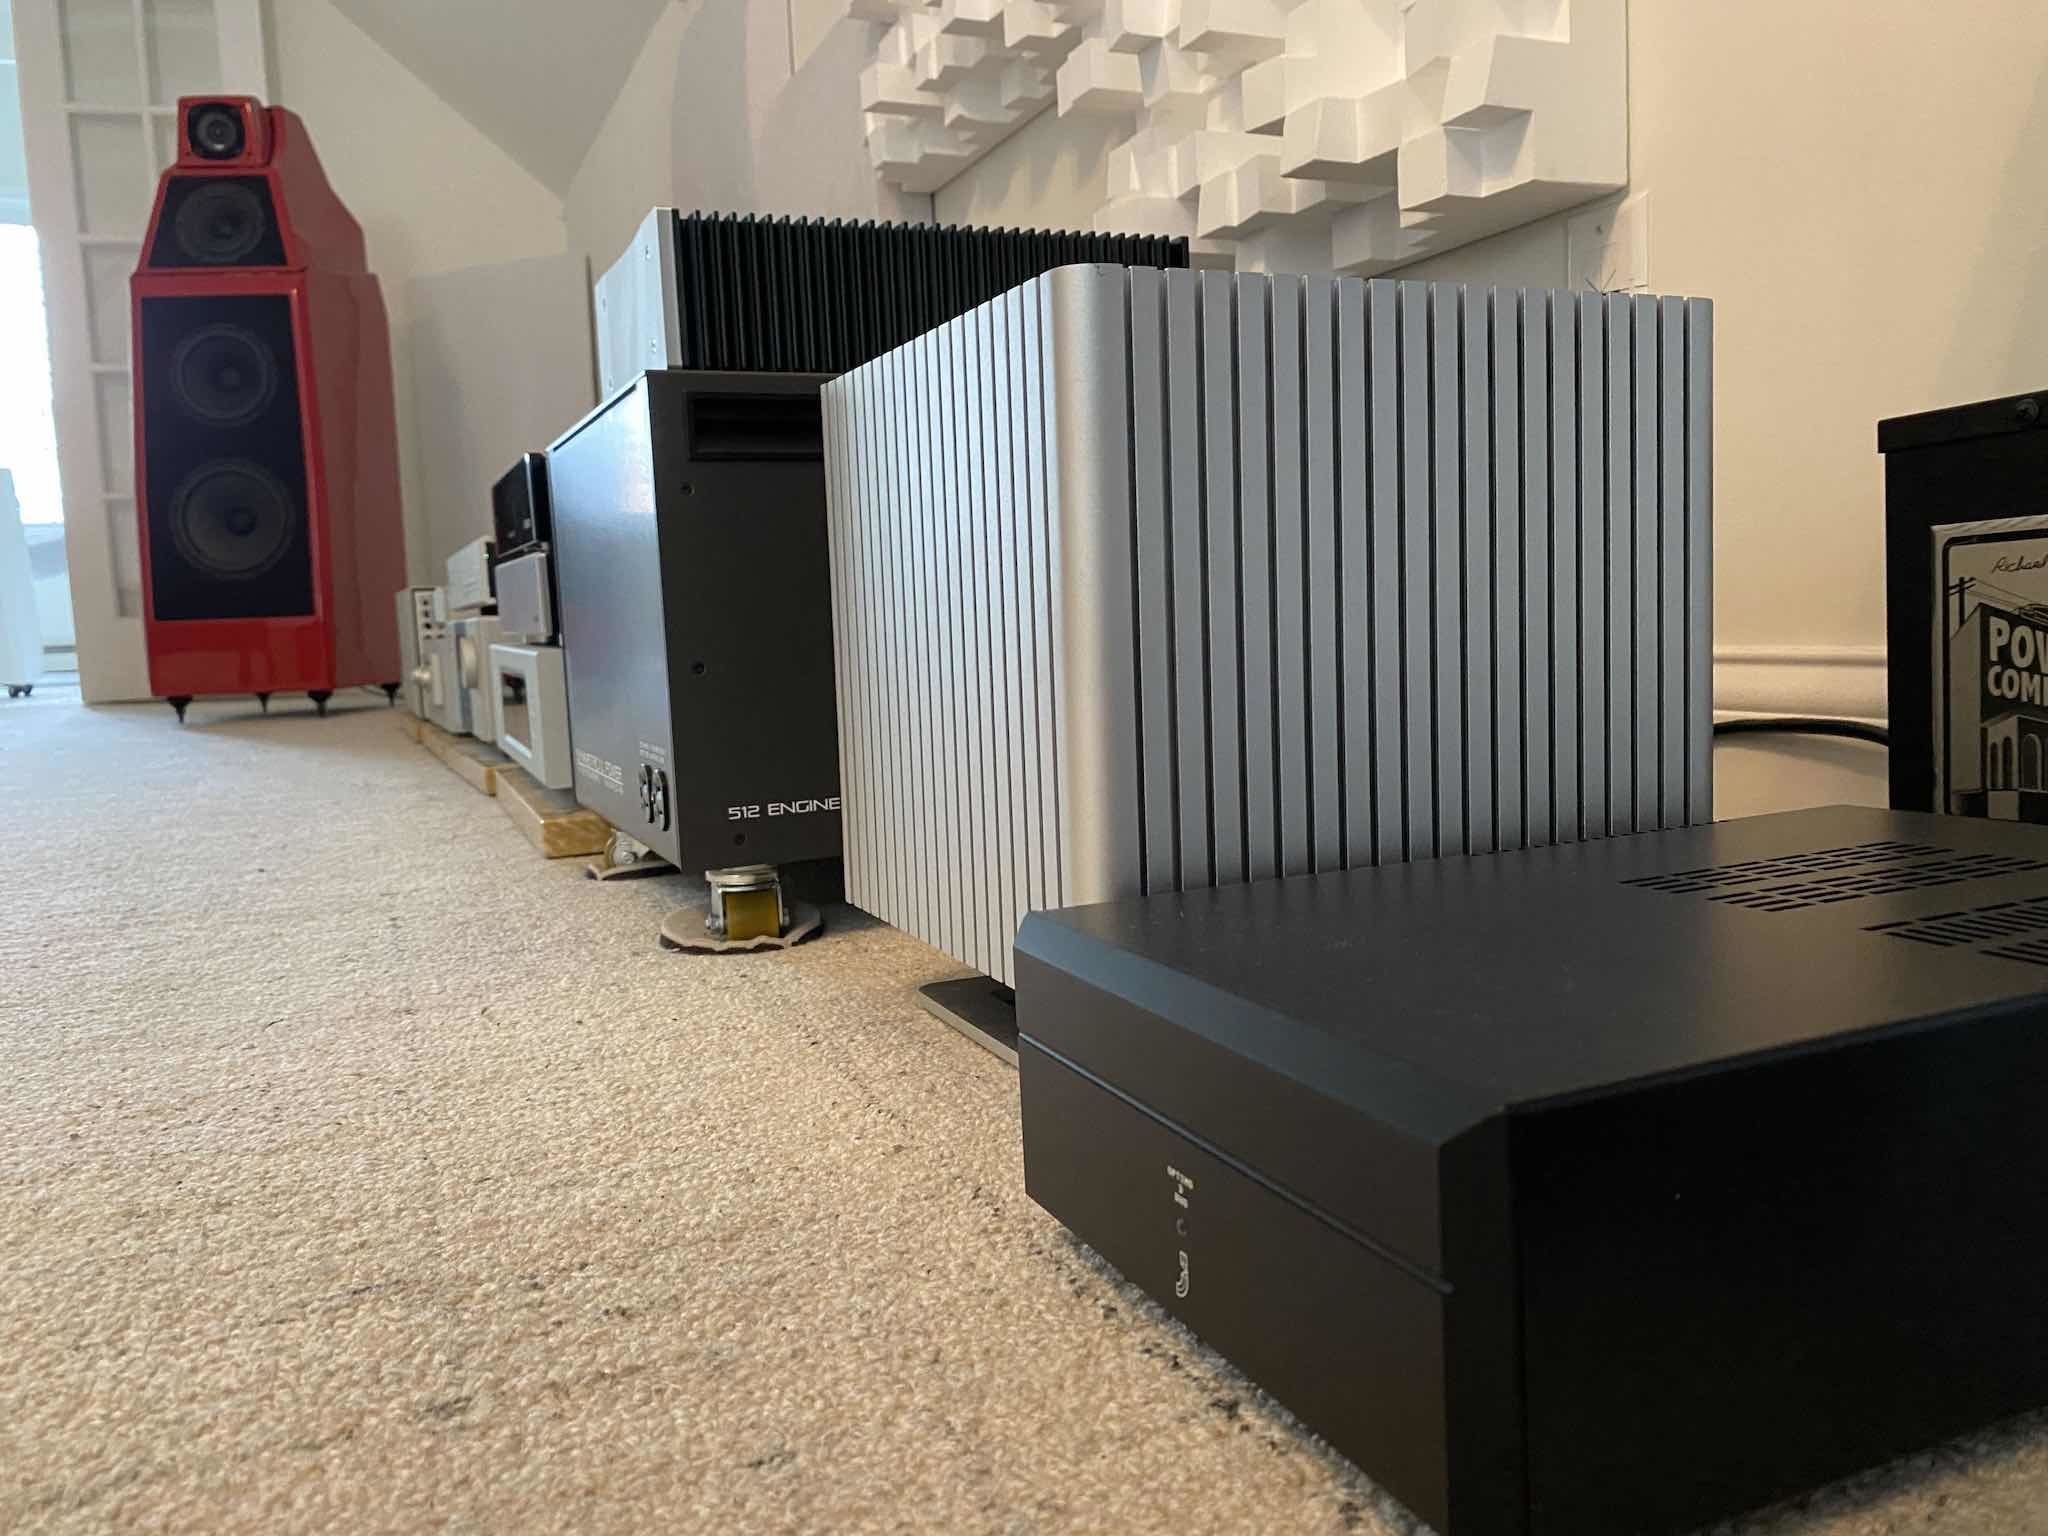
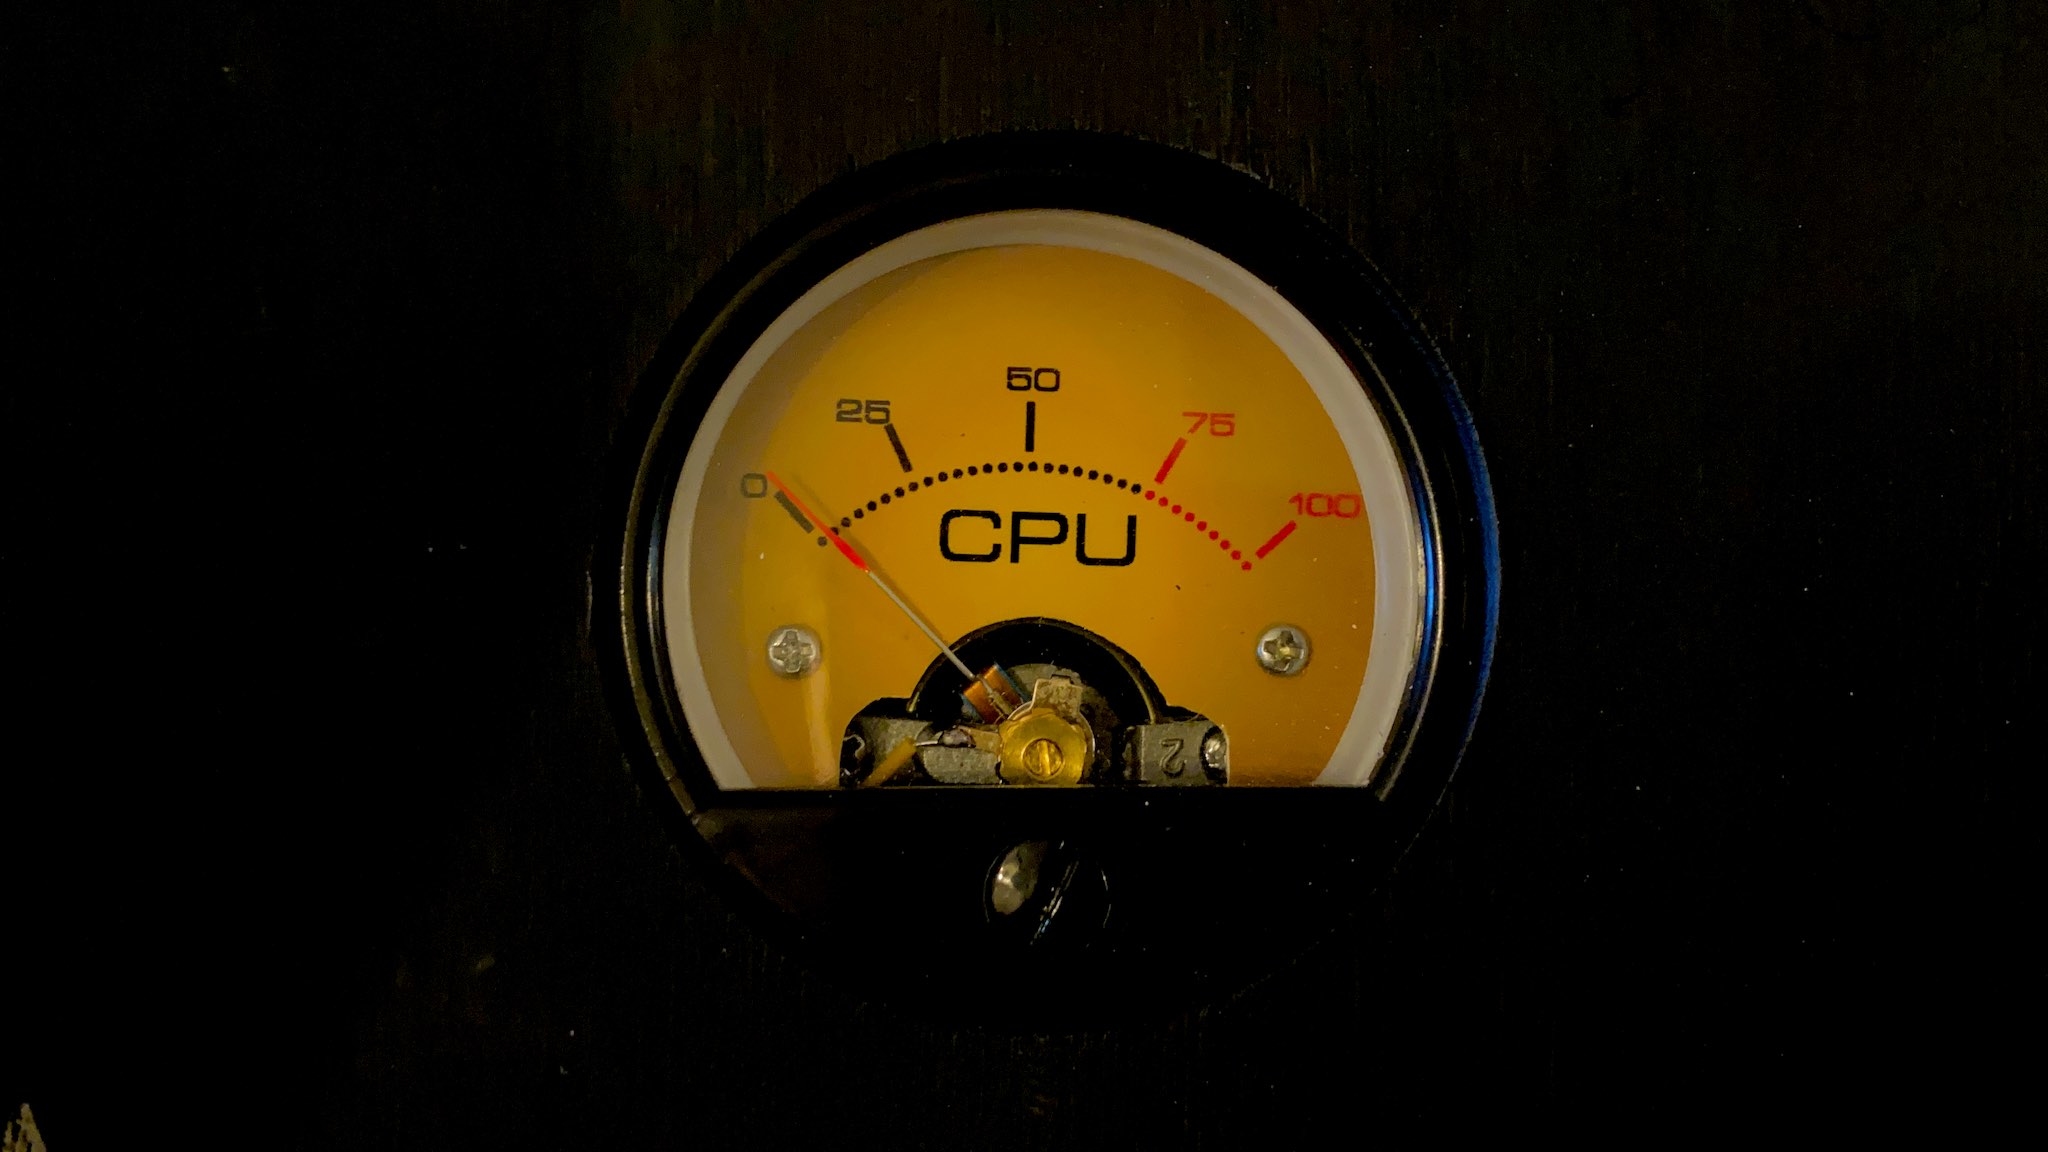 The pièce de résistance of CAPS Twenty - The Analog gauges for monitoring PC resources. As I was putting together CAPS Twenty I had an idea that was inspired by Dan D'Agostino. I thought, what if I could use analog gauges to display items such as CPU and network utilization and make it look cool? I looked into attempting to do it myself, then quickly realized it was way beyond my skill set.
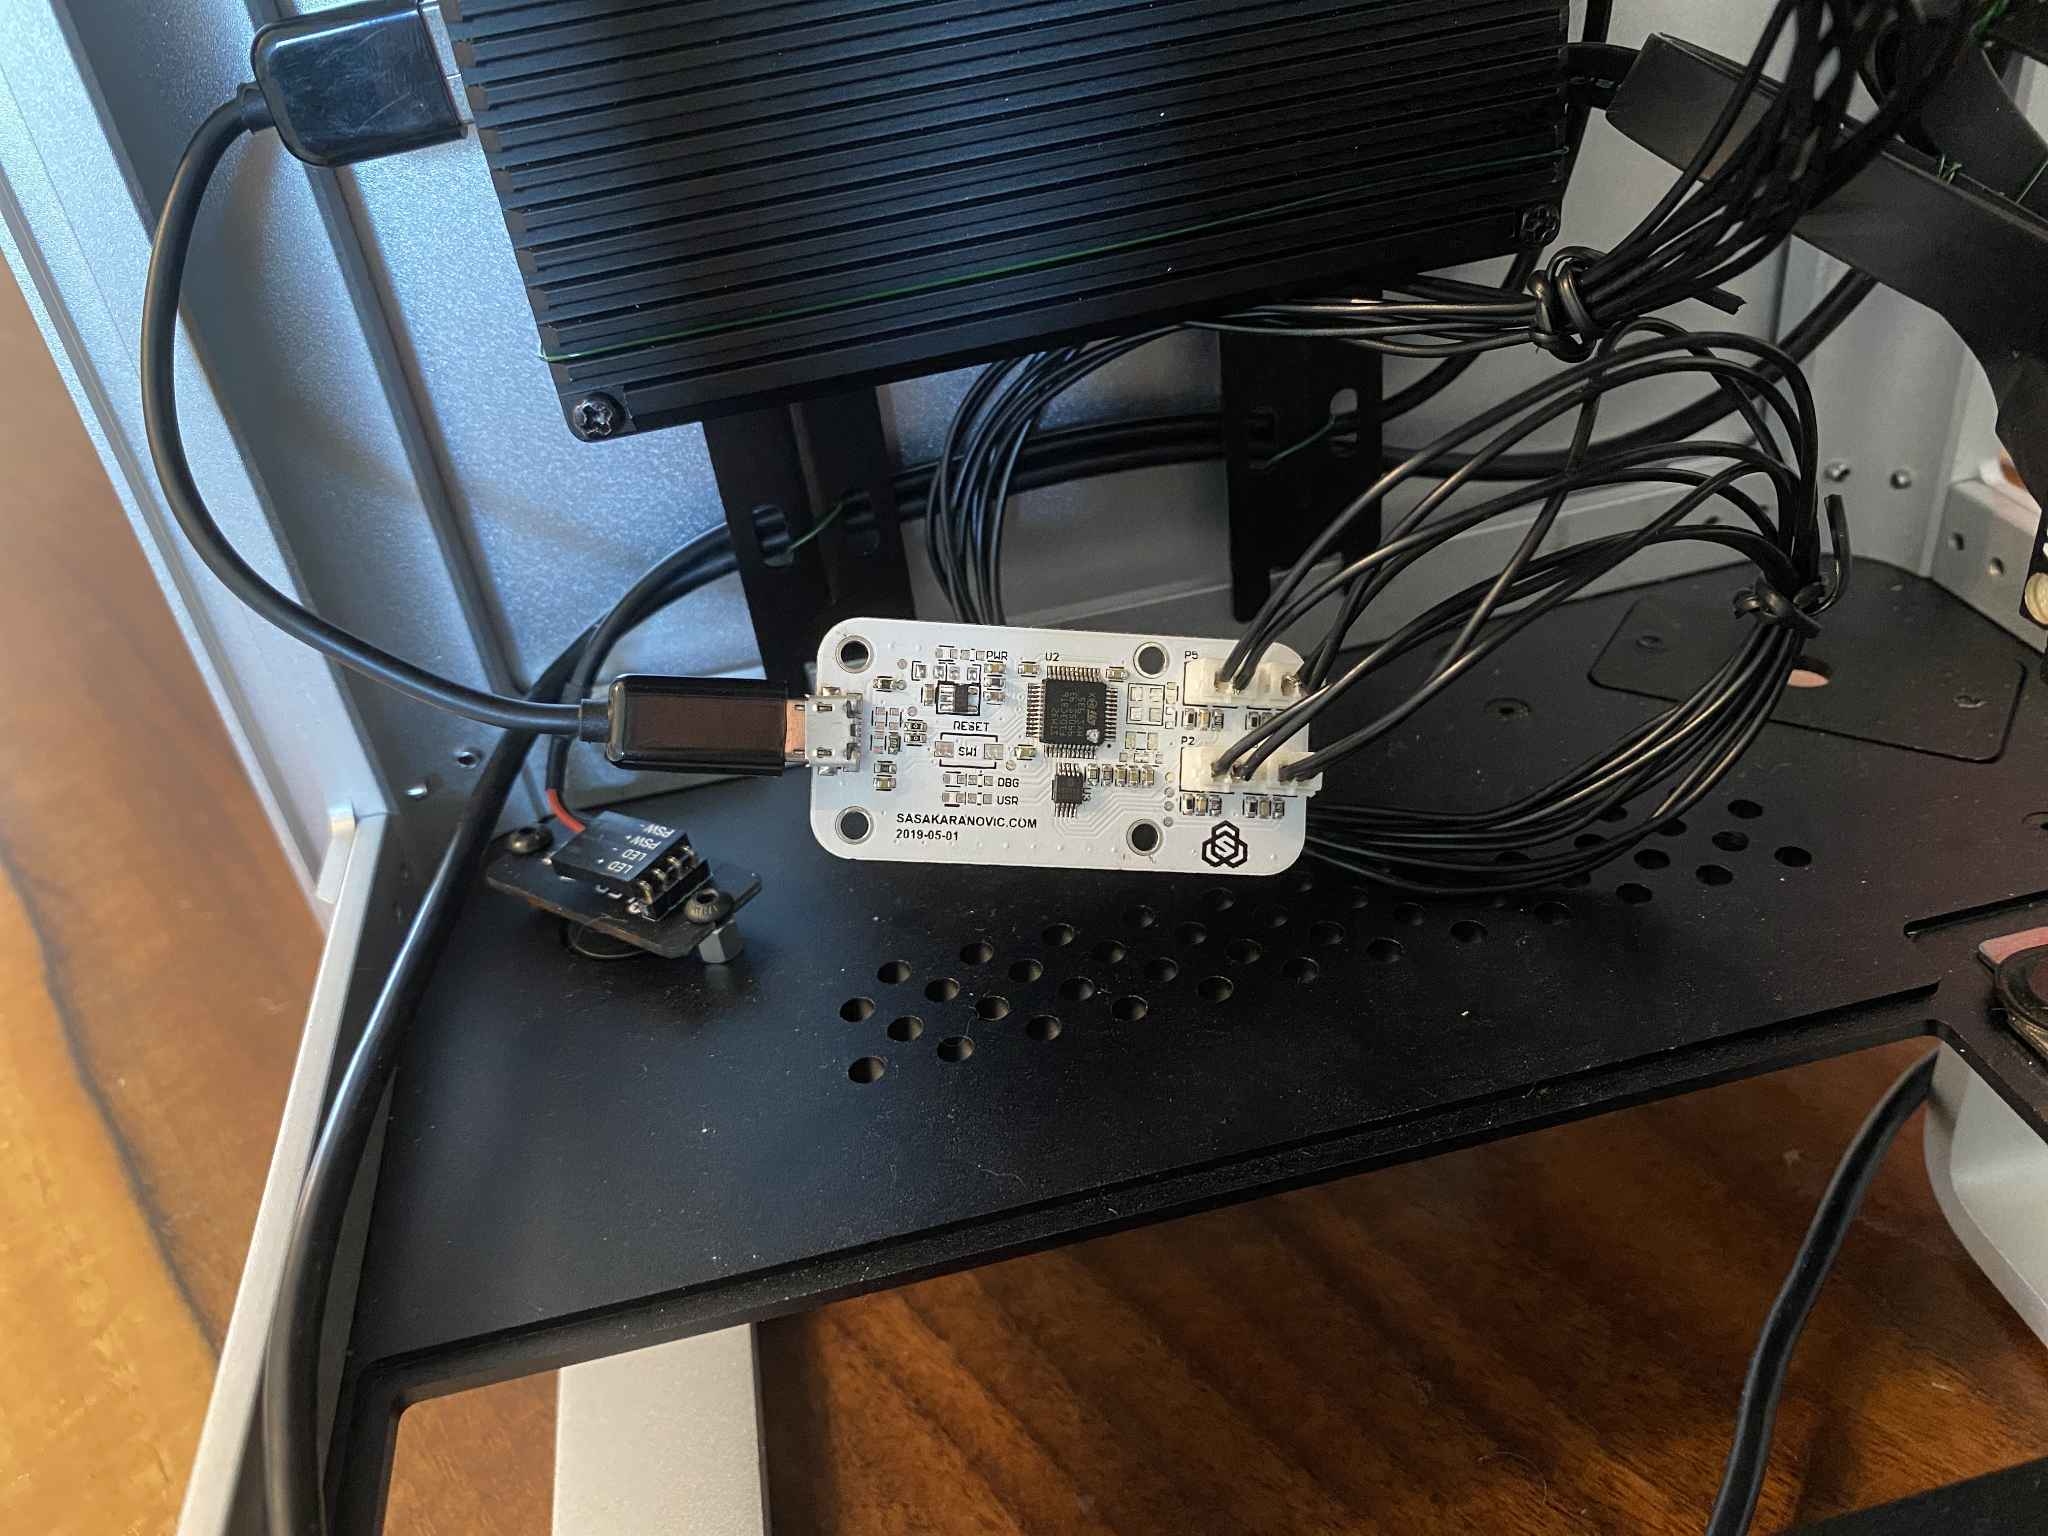
Fortunately I found Toronto based engineer Sasa Karanovic who had done this exact thing in late 2019. Sasa created analog gauges for CPU, RAM, network, and GPU utilization. The exact four resources I wanted to monitor in CAPS Twenty. He even provided all the information needed for someone with the requisite skills to recreate on his/her own. I spent about 30 minutes looking at Sasa's design and soon realized it was over my head, even with all the instructions.
I sent an email to Sasa asking if I could hire him to create the gauges for me, so I could use in CAPS twenty. The response I received was over the top terrific. Sasa said that he would use two sets of gauges he already had on hand, build two PCB boards, wire and test the gauges, and help me get the small bit of software running on my computer. All for the price of .... FREE. Sasa was so helpful during this process. I couldn't have done it without him.
For all the details about how he turned galvanometers into analog PC resources gauges, have a look at his website and videos. Much of it is over my head, but I'm sure many readers will enjoy seeing the details even without an understanding of what's going on.
Note: The GPU gauge on the CAPS Twenty.One PC is not functioning due to the Intel integrated graphics processor. On CAPS Twenty, this gauge will work just fine.
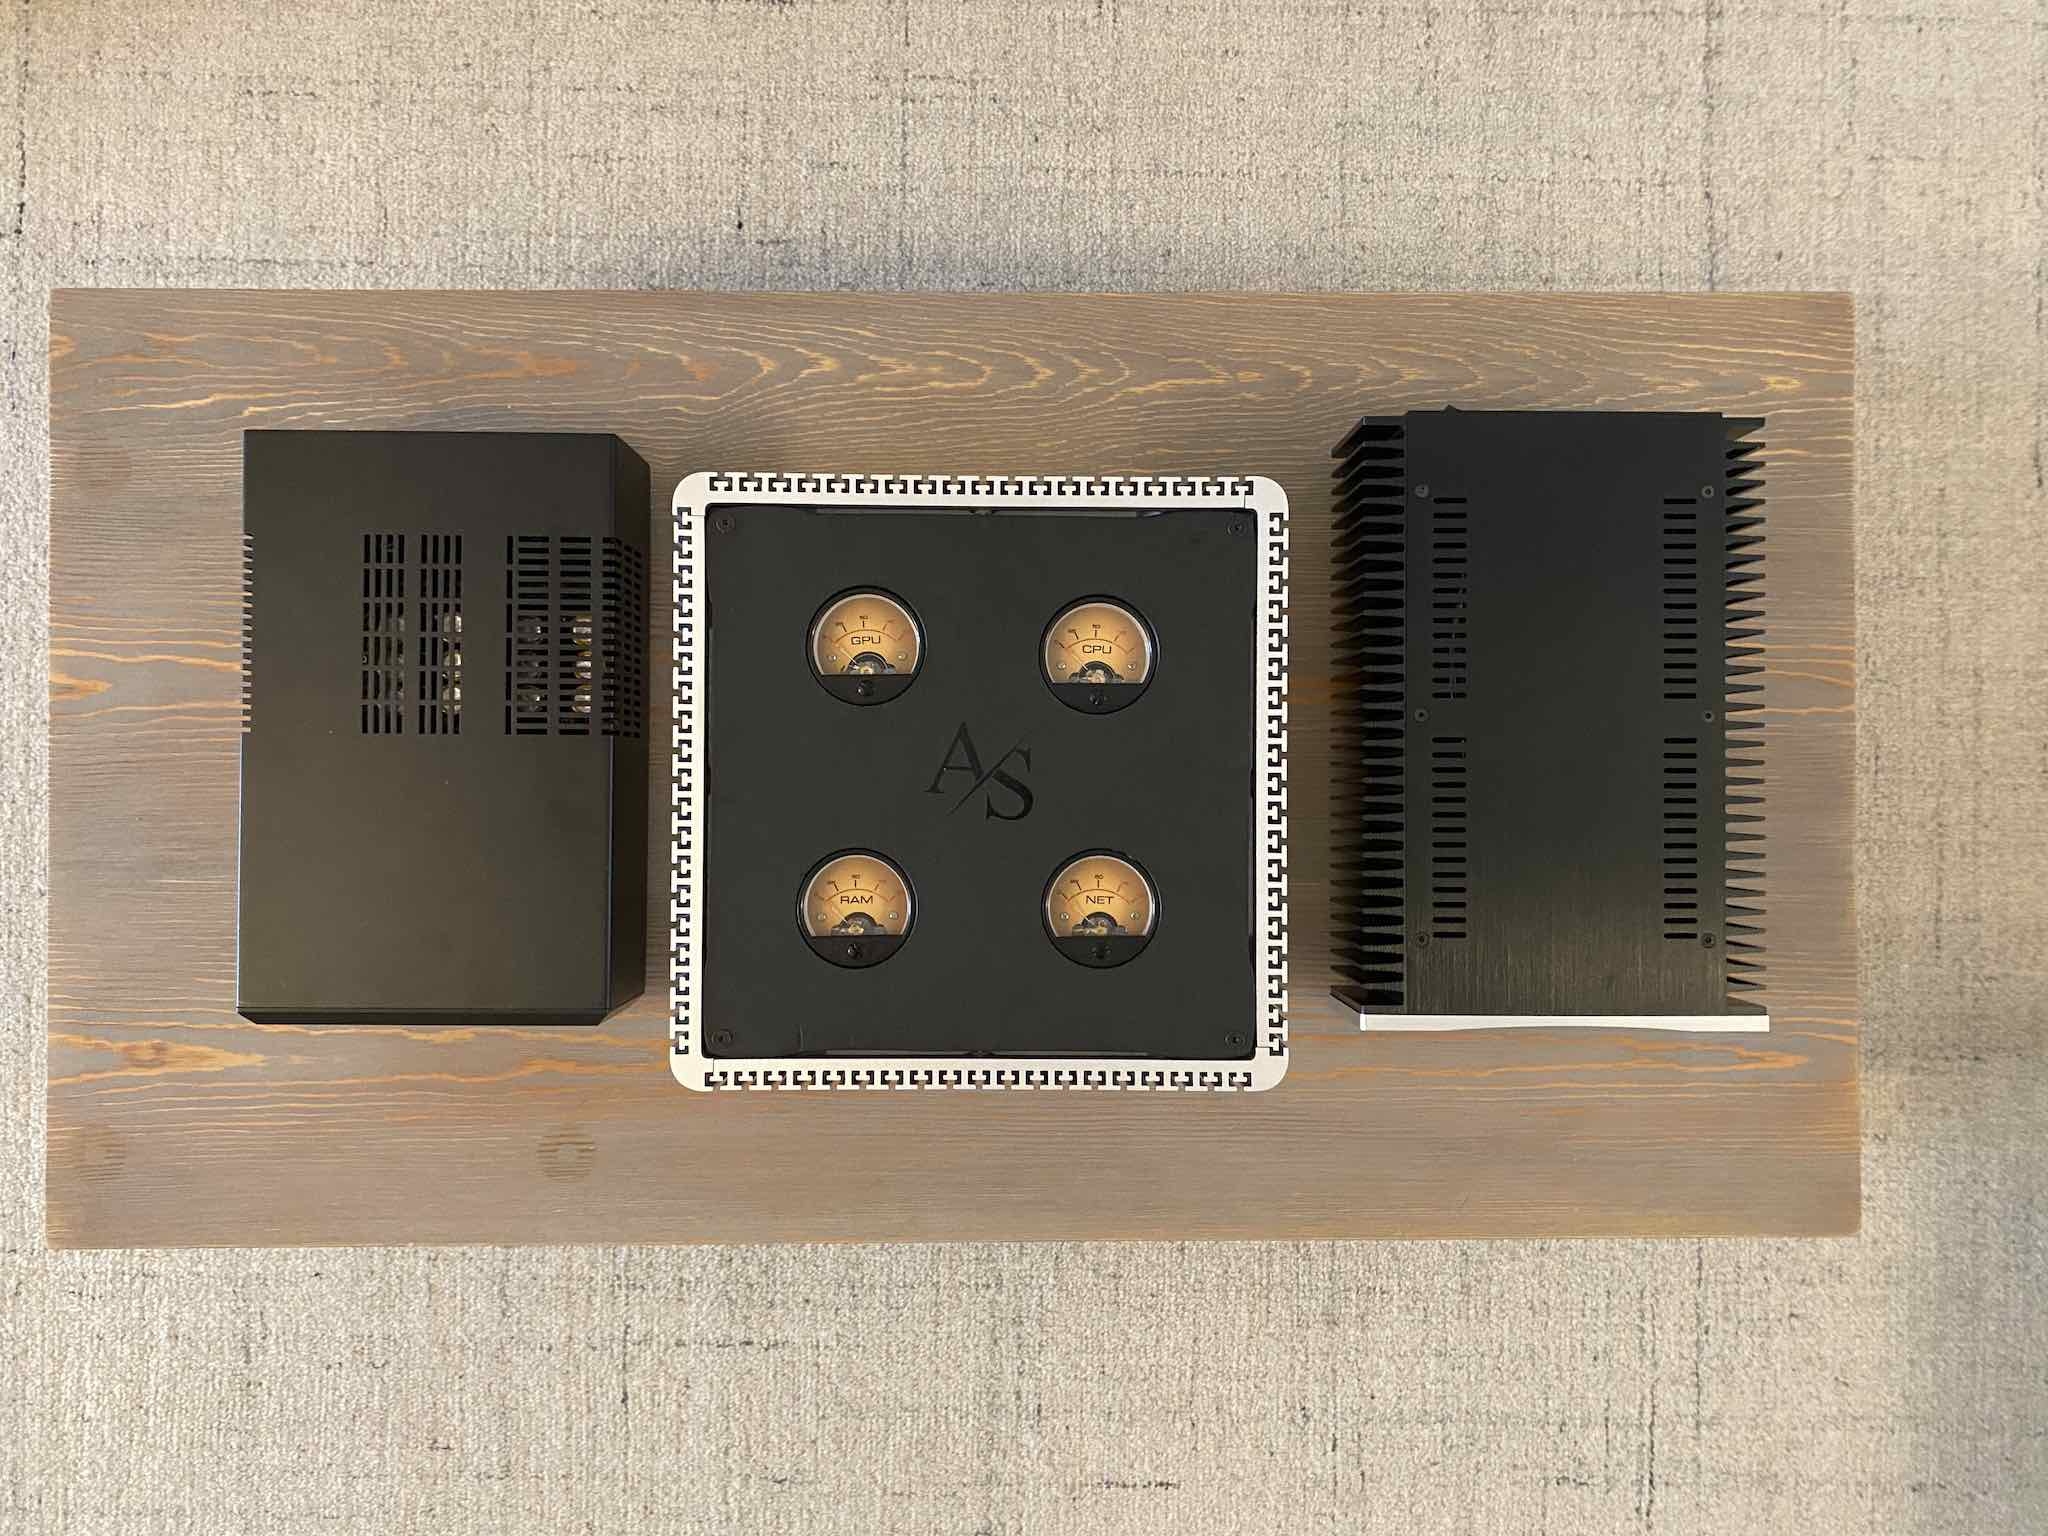
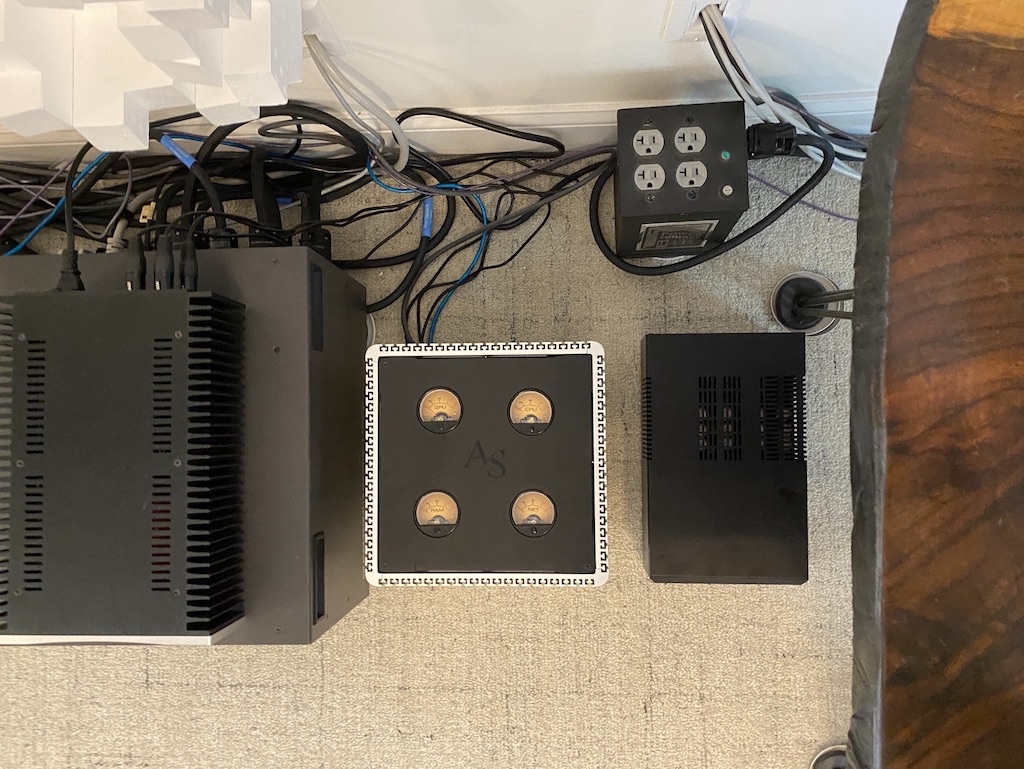 I received two sets of gauges, one for CAPS Twenty.One and one for the high performance CAPS Twenty build that's coming very soon. I enlisted two local friends here in Minneapolis to help me customize the faces of the gauges and the top piece of the Streacom DB4 chassis.
Mike Minick at Minick Design understood the look I was shooting for with the gauges and created the custom face design reminiscent of old school VU meters.
Pat Finn of Finn Woodworks created a custom wood top with the exact same dimensions as the stock 1/8 plastic top of the DB4 chassis. Pat also drilled the holes for the gauges and the four corner screws to keep the top in place. Pat didn't have much to work with because I gave him a very cheap piece of 3 mm x 12" x 12" Craft Plywood. He did his best with what he was given, but I think he would've preferred to create this top with a real solid piece of wood.
Analog gauges in action
CAPS Twenty.One, How it's Done
We've covered the who, what, when, where, and why. Now it's time for the how. How is CAPS Twenty.One put together? Let's take a look.
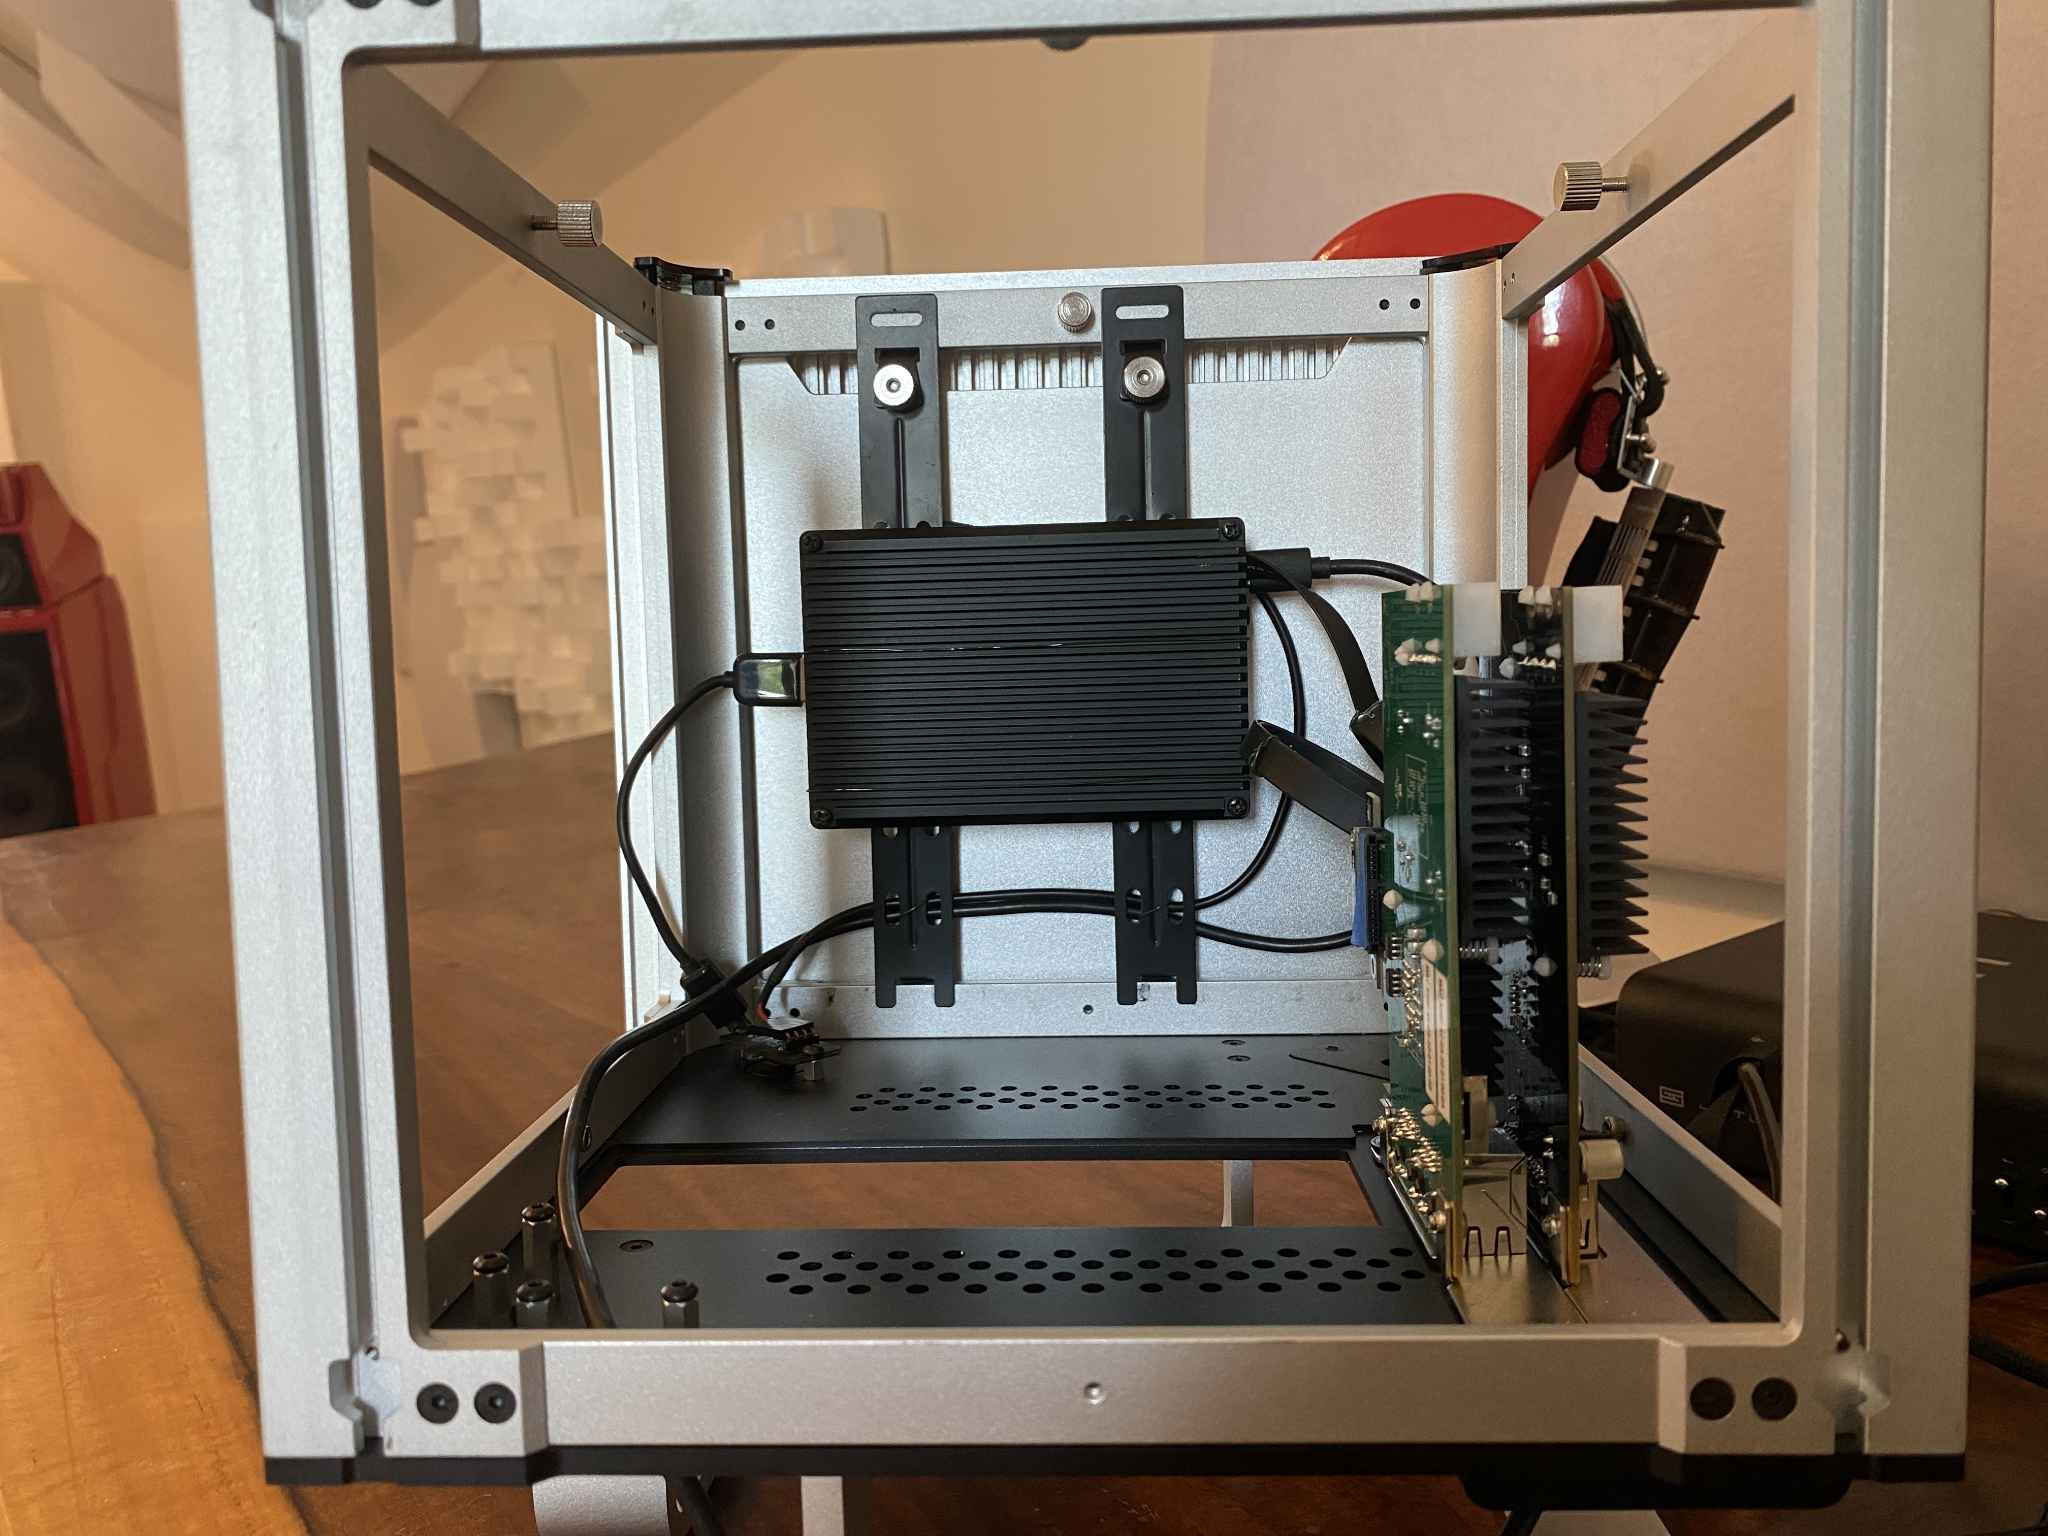
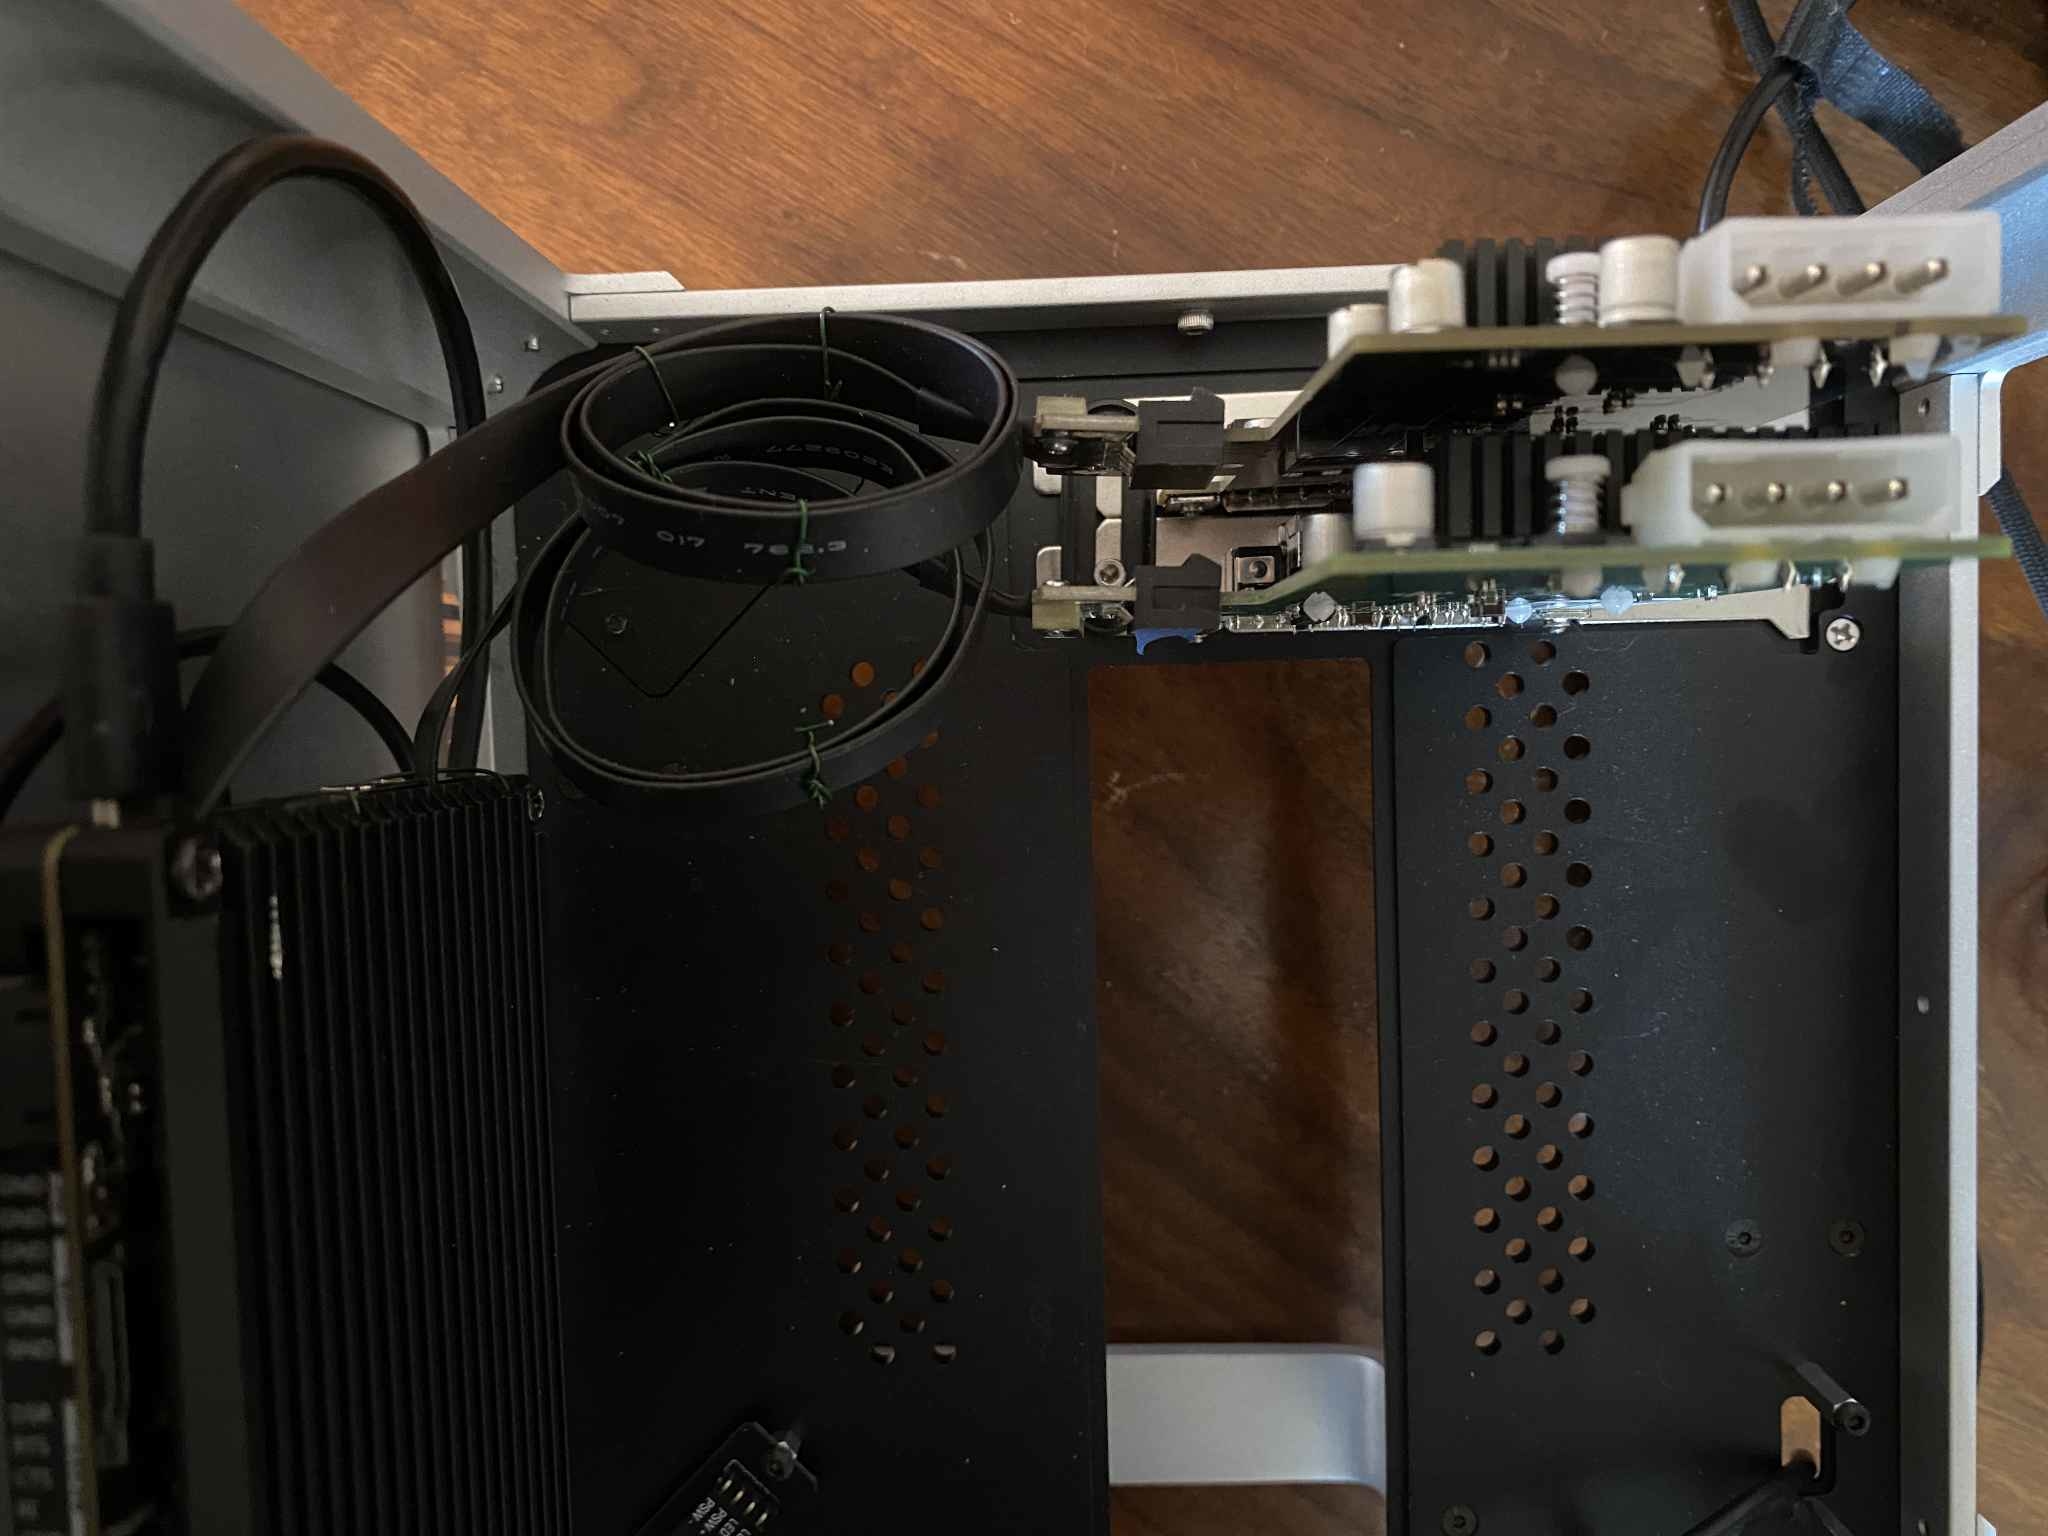
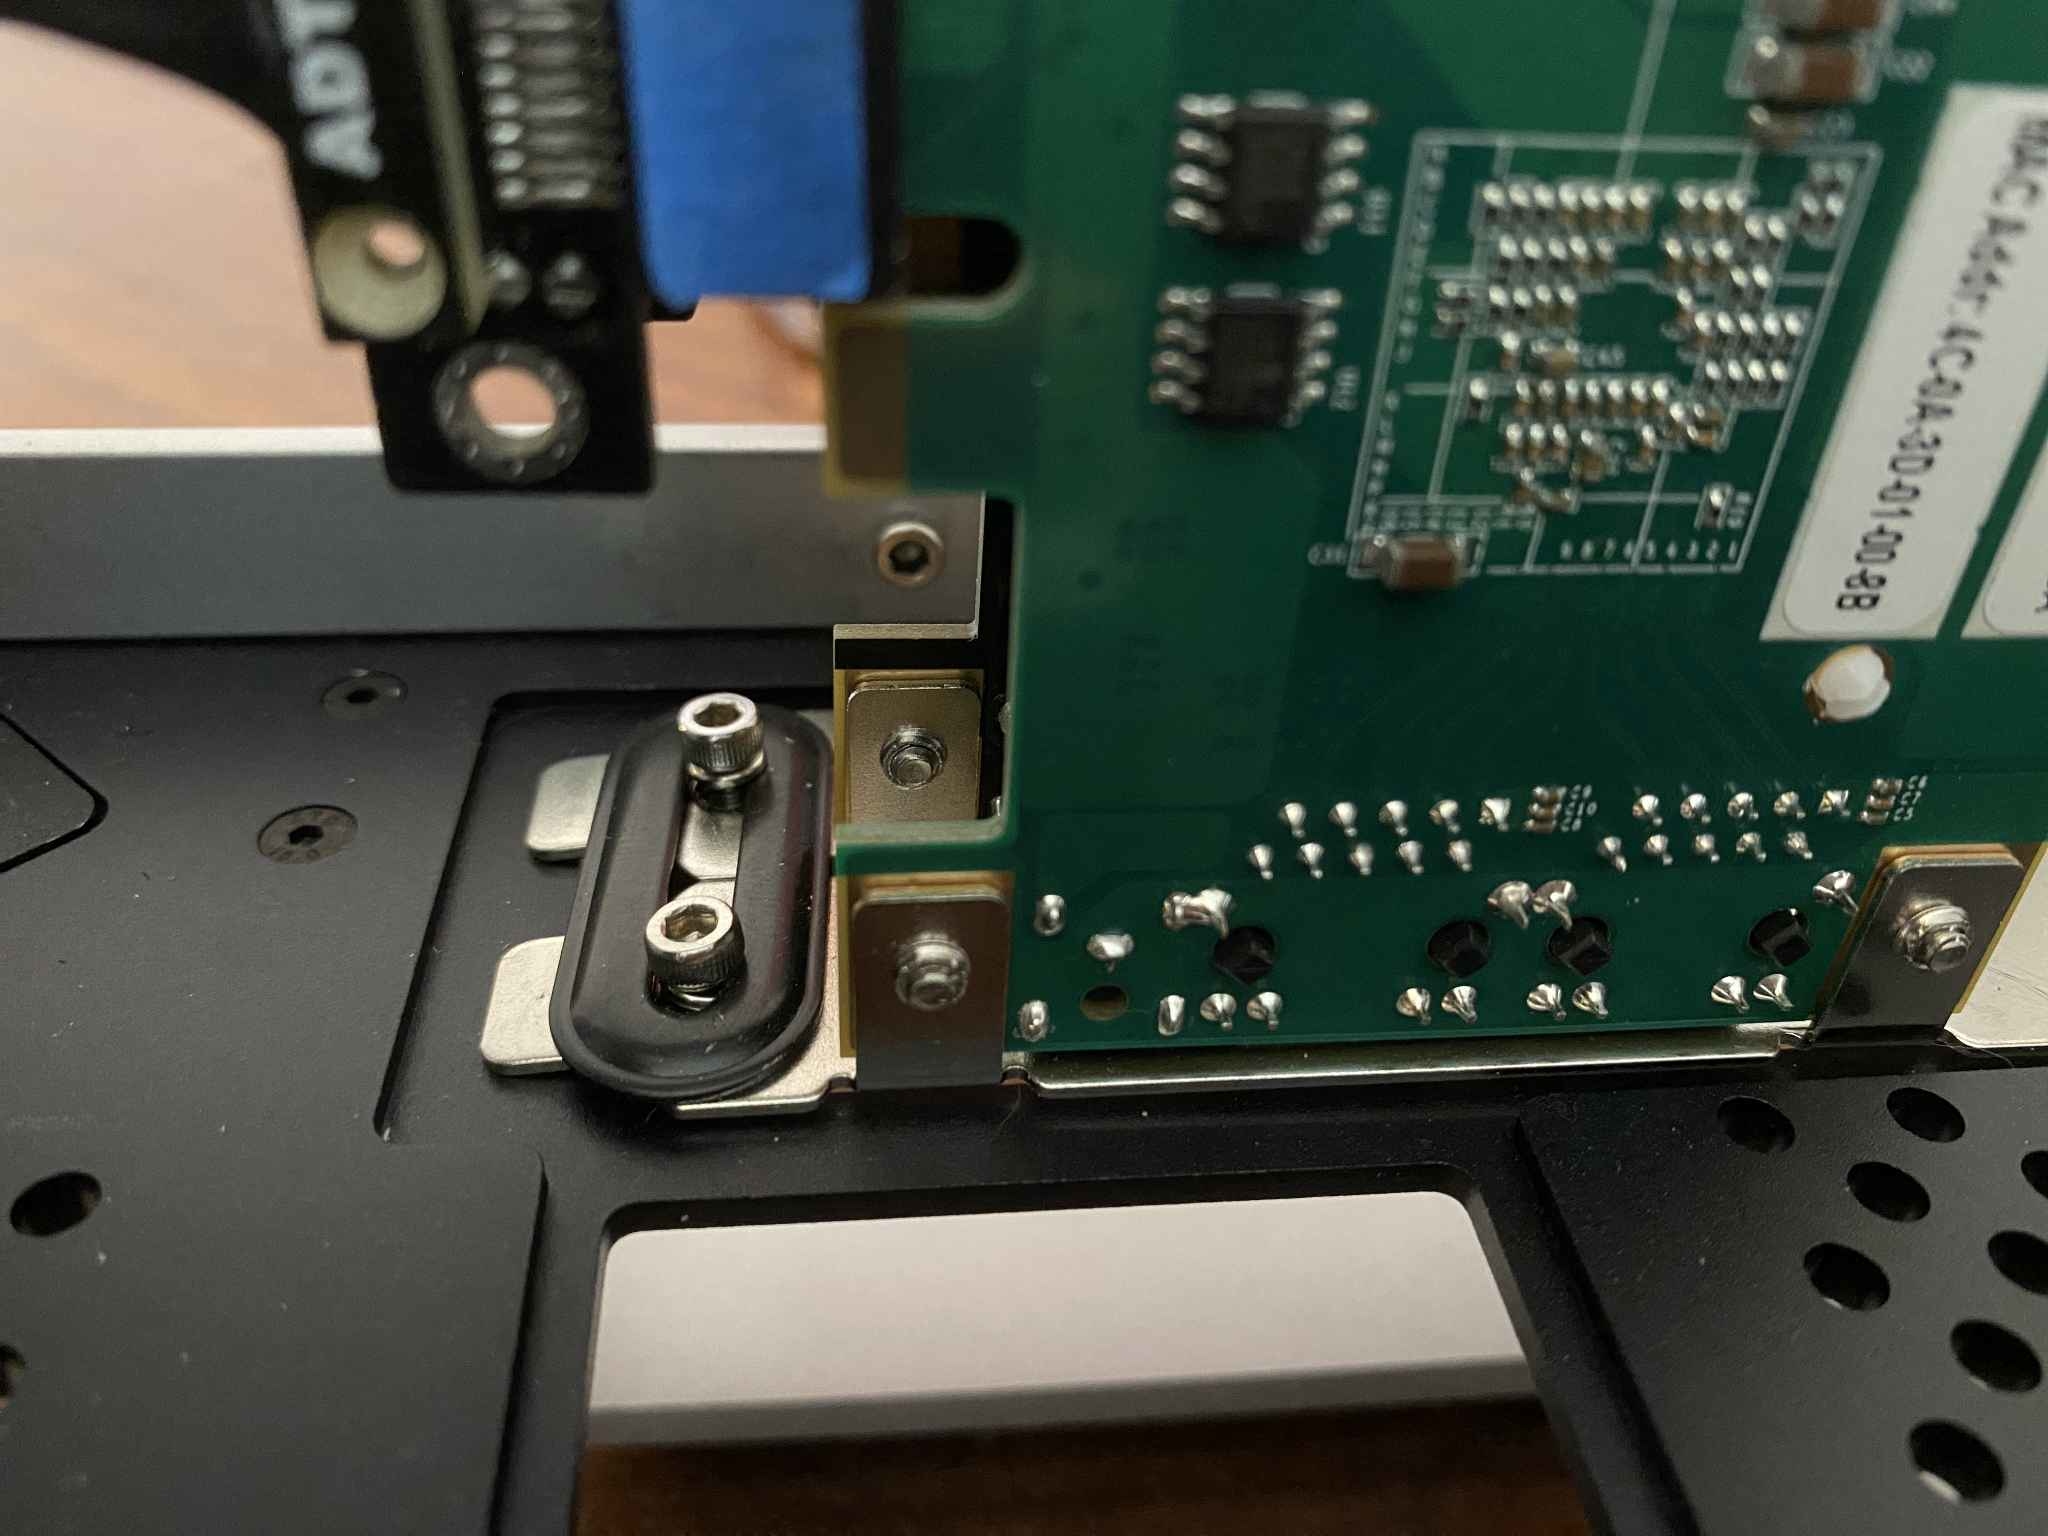
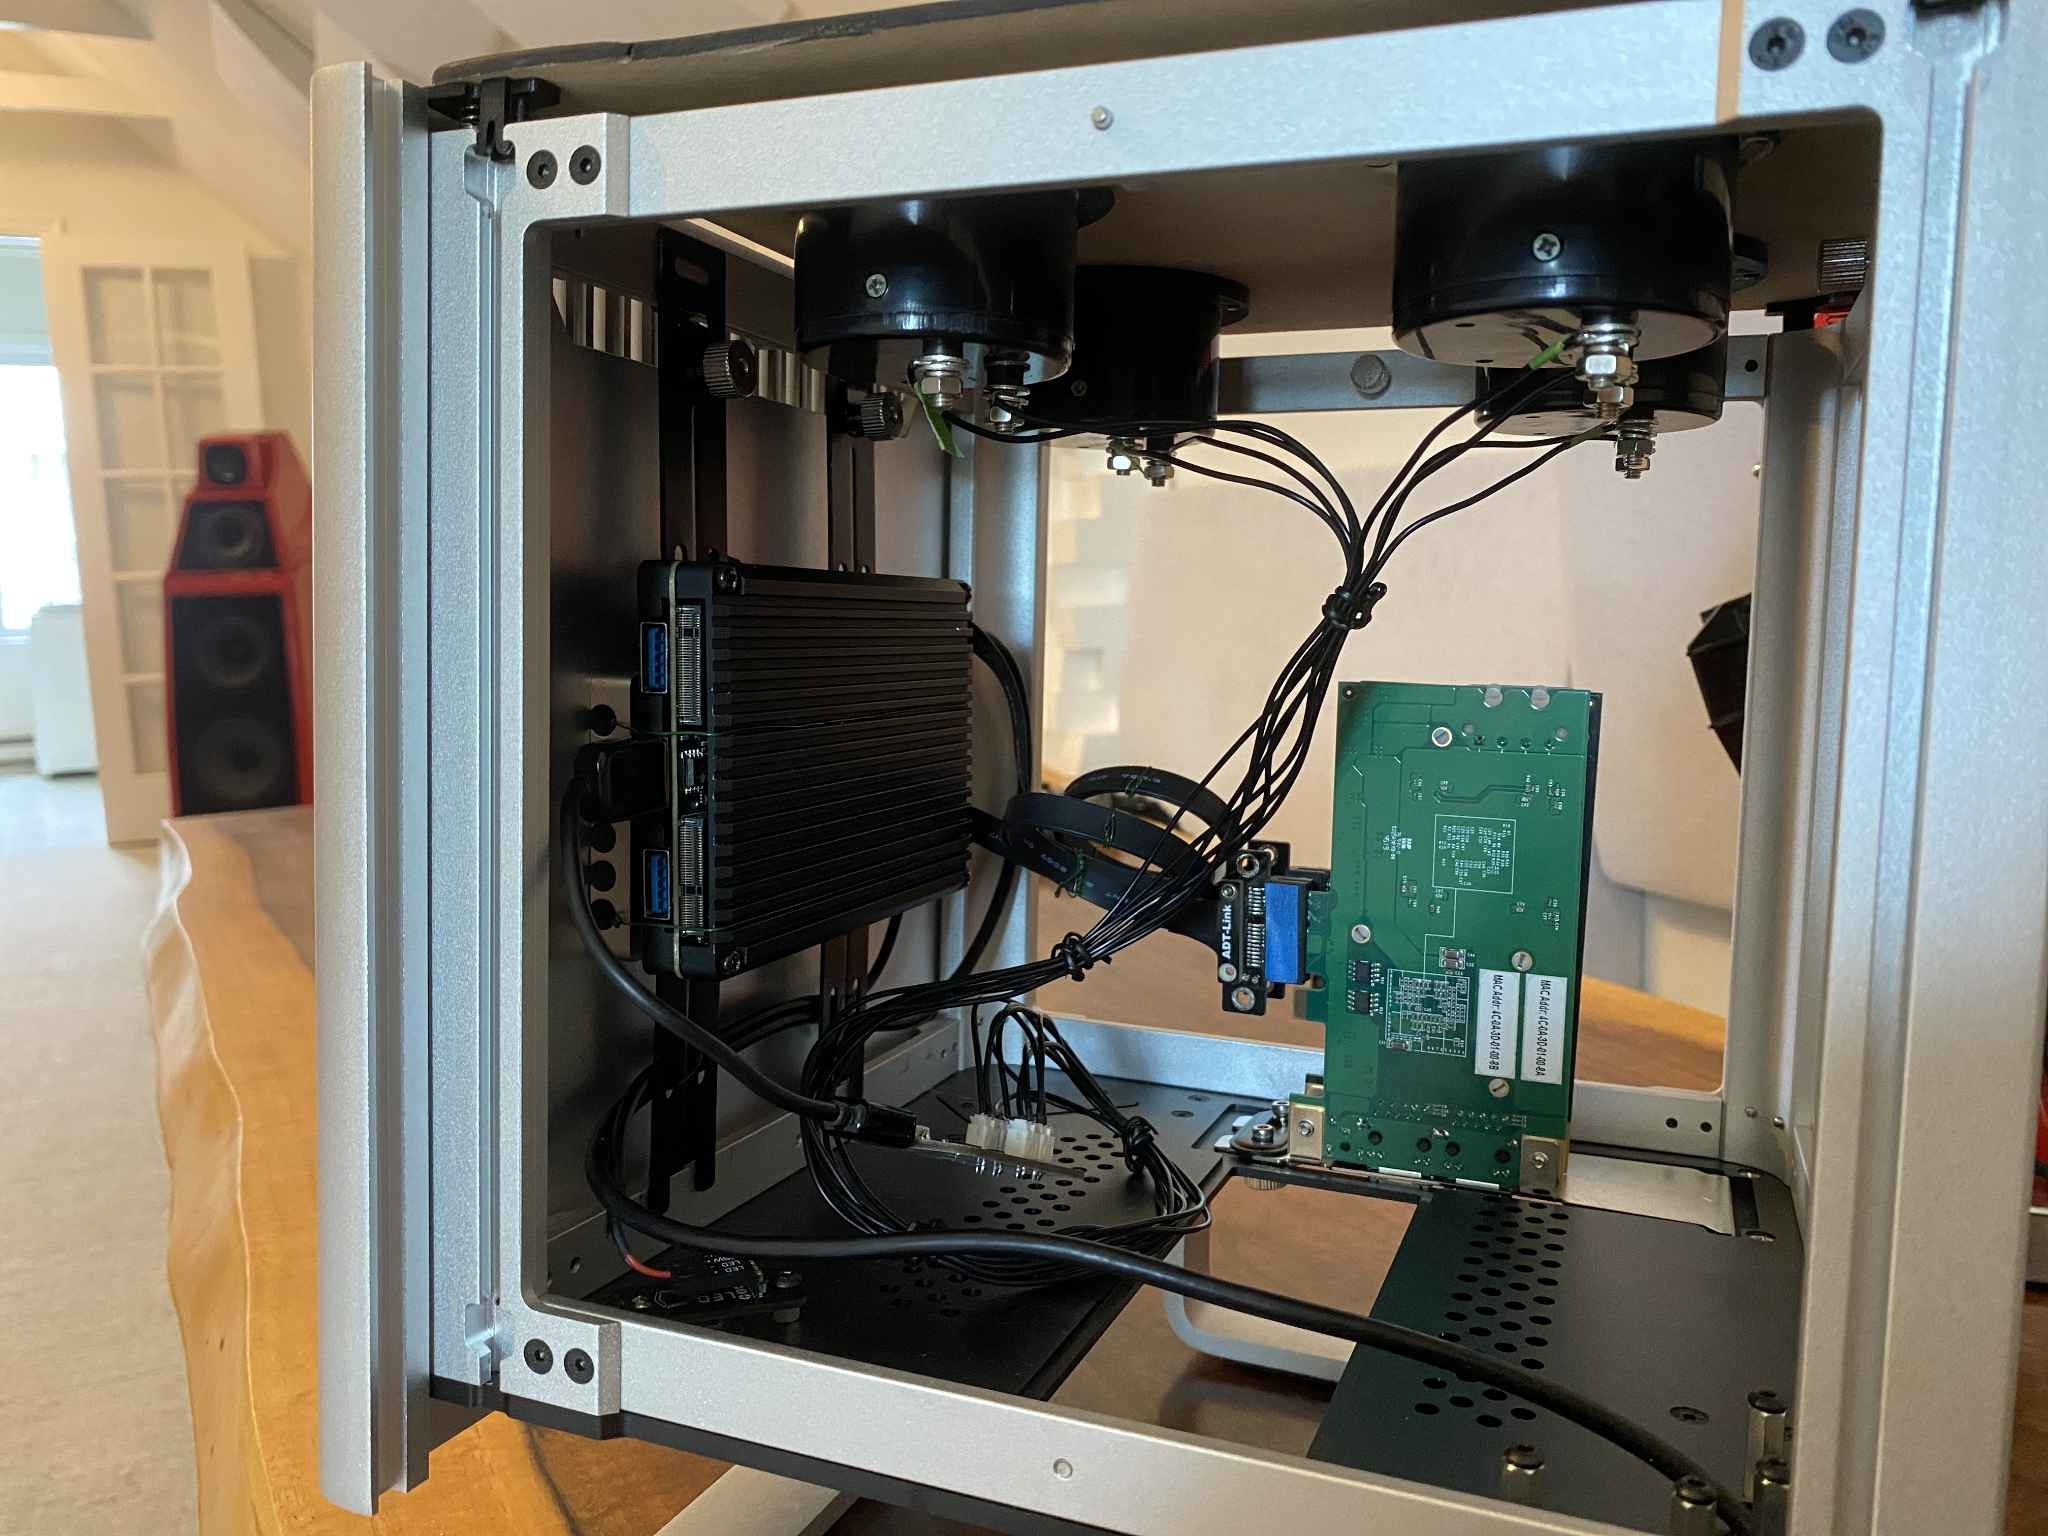
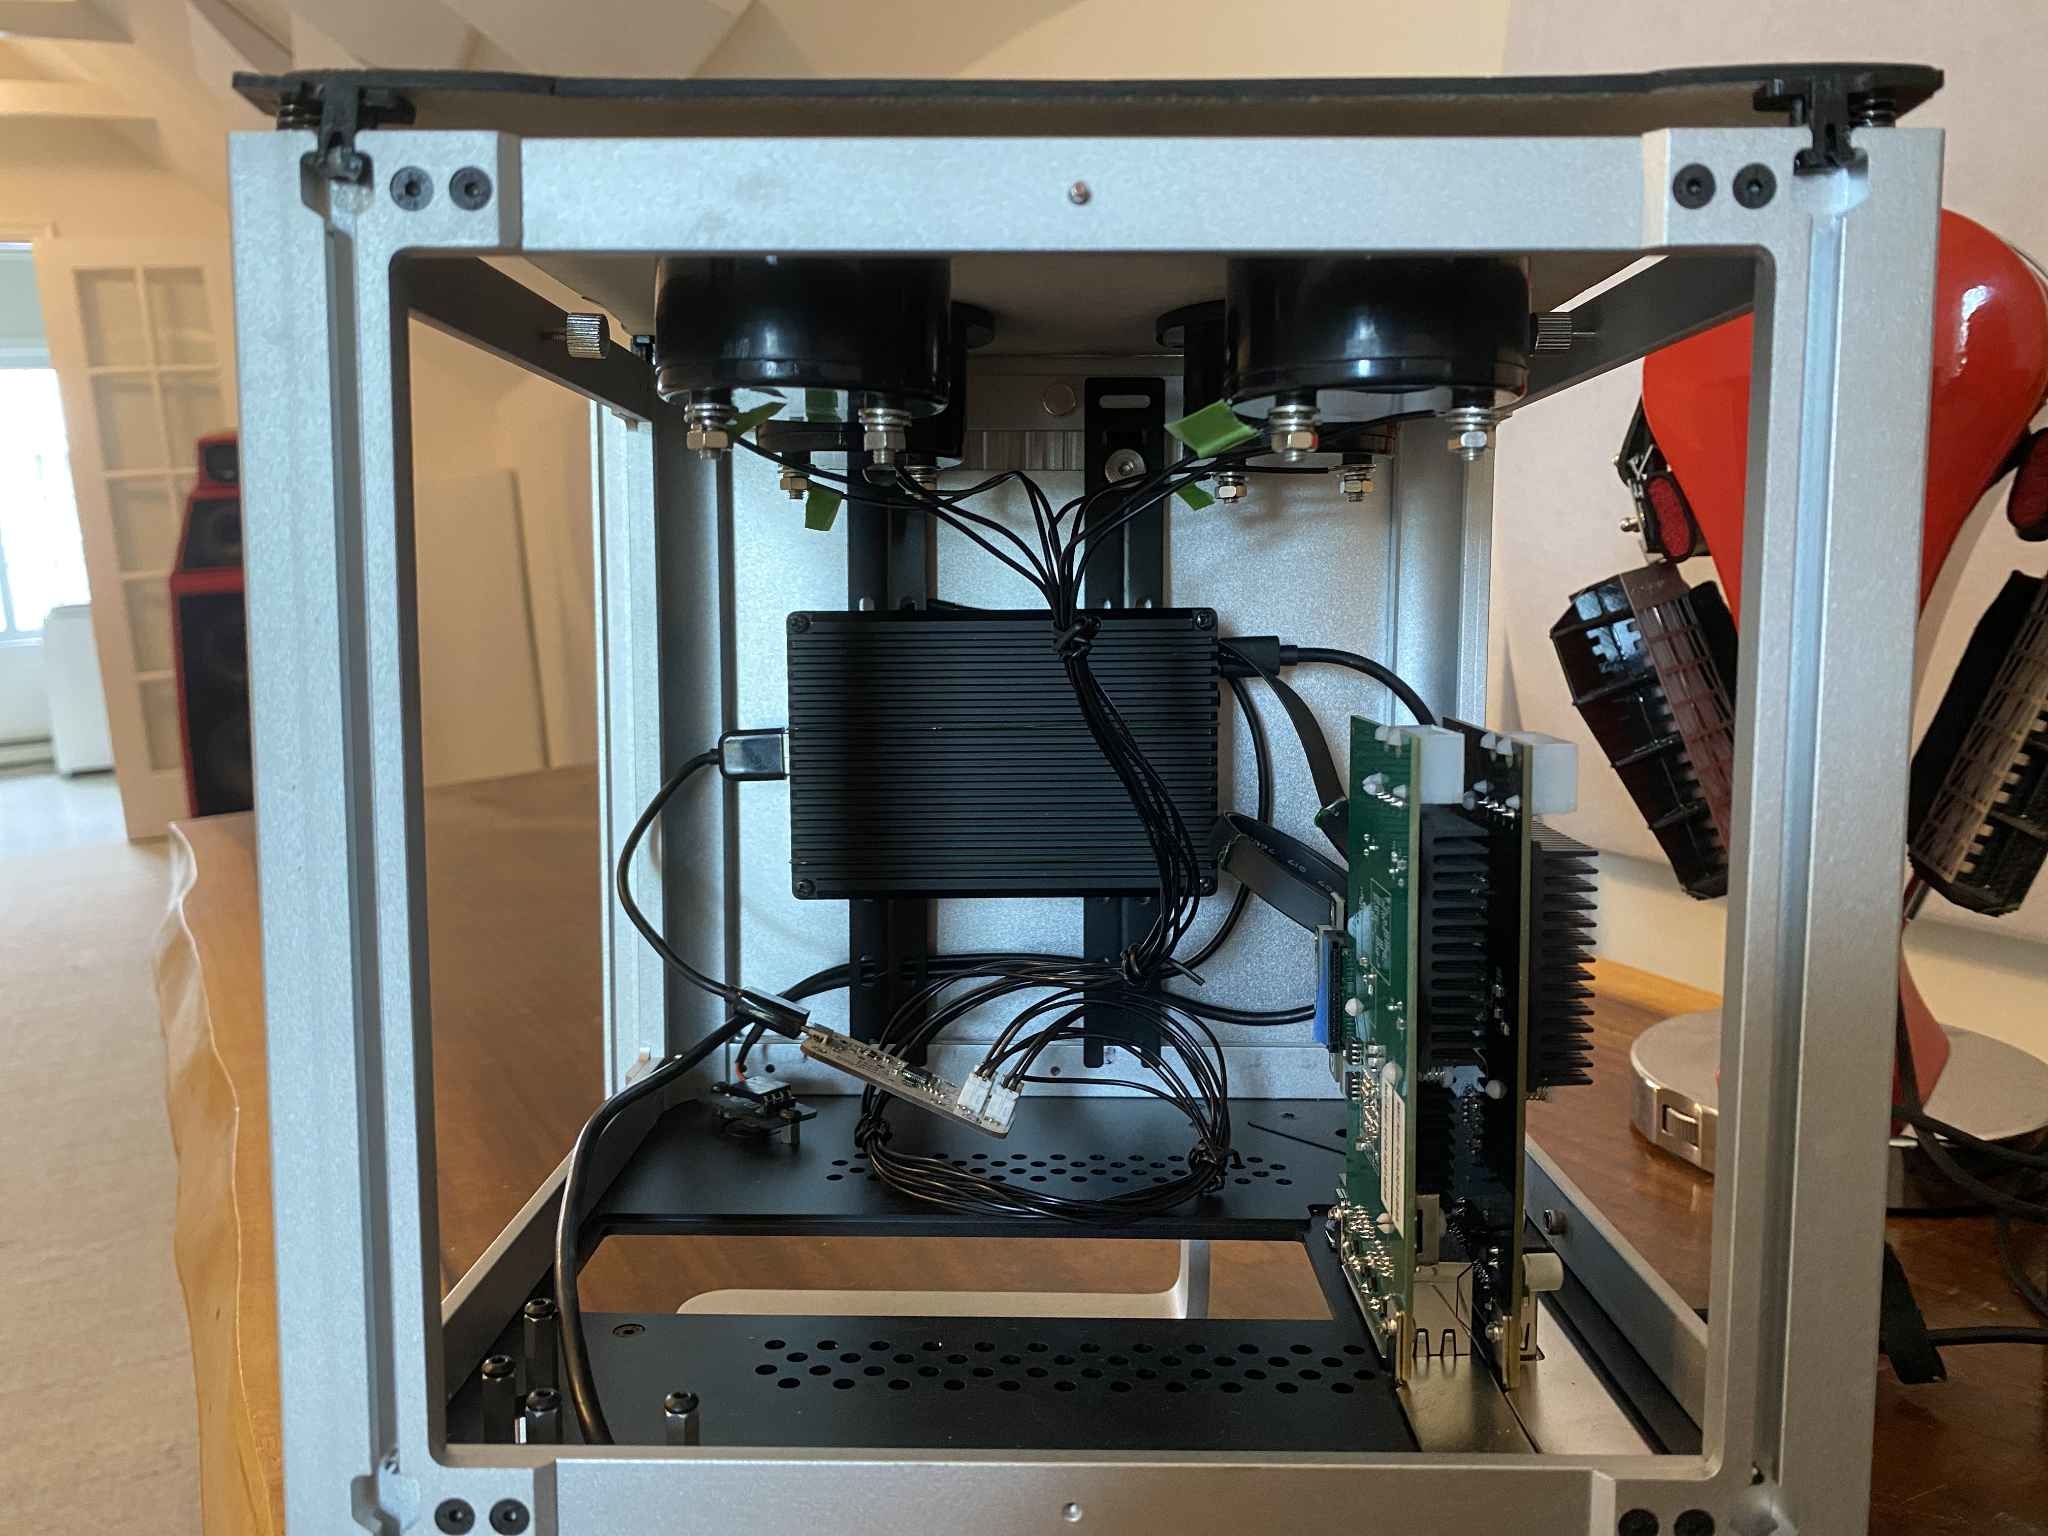
Here are photos depicting everything inside CAPS Twenty.One. You can see the repurposed CPU mount arm (black thing holding the PCIe cards in place) and the repurposed heatsink mount.
Also, here are images of how the power and power switch cables connect. You can see the power switch cable is pretty easy to create and where it connects.
Please let me know if there is something missing or if there are questions about how to put this together. I will shoot more photos and provide an explanation.


Conclusion
That's CAPS Twenty.One, a network audio adapter for HQPlayer or a Roon endpoint running Roon Bridge. I had a blast putting this together and welcome any and all comments, concerns, and questions about the design.
Below I've included links to purchase all the items discussed in this article. I've split the items into a few different categories, so people can move forward in small steps or go all-in if they wish.
I also want to thank all the sponsors and contributors who helped make CAPS Twenty happen. Without them, this wold still be a bunch of ideas jotted down on a virtual piece of paper. As you will see in Part Two, the CAPS Twenty high power server includes more components from some of these sponsors, a limited edition chassis, and will be unlike anything I've previously done. Stay tuned :~)
Components and Where To Purchase
These components are foundational. Readers who want to start small and get a working system, that's short of the full CAPS Twenty.One, can start with these items only.
- Main board - LattePanda Alpha 864s (with Windows 10 Pro installed and activated $459 *) (without a Windows product key $419 *)
- Fanless case - LattePanda Aluminum Alloy Passive Cooling Case $43 *
These items complete the CAPS Twenty.One design, taking it to a level far above just the foundational pieces listed above. Don't forget to order the foundational pieces because they're always required (even the finless case).
- Fanless Chassis - Streacom DB4 Chassis $325 (USA, World)
- USB card - JCAT USB CARD XE € 800
- Network card - JCAT NET CARD FEMTO € 435
- M.2 adapter for USB card - ADT-Link R41SF (50cm) (M Key) $26
- M.2 adapter for network card - ADT-Link R51SF (50cm) (E Key) $33
- Power supply - JCAT OPTIMO 3 DUO € 1,500 Or HDPlex 300W Power Supply $585.00
These items are completely optional
LattePanda 7" touch eDisplay and 30 pin cable $60 *
LattePanda Streaming Cable $29 *
* Using some of our links gives us a tiny kickback and doesn't cost you anything. We're experimenting with this, so please no phone calls, letters, or telegrams just yet.


Recommended Comments
Create an account or sign in to comment
You need to be a member in order to leave a comment
Create an account
Sign up for a new account in our community. It's easy!
Register a new accountSign in
Already have an account? Sign in here.
Sign In Now