Jump to content
  • The Computer Audiophile
    The Computer Audiophile

    A New Listening Room Part One

    A dedicated listening room is not a luxury for me, it's a necessity. I realize this is a luxurious necessity, but nonetheless it's a requirement for my job. Fortunately I have an understanding wife who has always encouraged me to improve my listening room given that I spend so much time in this room.


    We moved into our house in April 2008, about six months after Computer Audiophile launched. My original listening room in the basement of this house evolved over the years through several cosmetic upgrades such as fresh paint and new carpet. I didn't make any major changes to the space in ten years. In August 2018 I started thinking about changing this 14.5' x 17.5' x 6.5' (LxWxH) room to get better sound. After  many days of research I admitted defeat because my ceiling height was always going to be 6.5'. I just wasn't willing to dig out the existing basement floor and underpin the foundation to increase this height. 


    The other option was to move my listening room into the attic space above the main level of the house. This space was previously finished but needed some structural changes and a technology upgrade. Given the dimensions of the attic are 33' 9" x 13' 9" x 9', I was willing to go for it and move my listening room.  This move started as a small project but quickly turned into a complete refinishing of the space with new paint, new carpet, walls removed, railings put up, fiber optic cable installed, and a new bathroom. Doesn't everyone have a bathroom in their listening rooms? :~)


    What follows is part one of my listening room transformation with pictures and measurements. In part two I will install the acoustic absorption and diffusion panels and conduct further measurements of the room. I will also do some fine tuning to eke out all the sound quality I can get.


    Requirements


    Before moving to the new listening room I needed to have all the demolition and reconstruction done by a local contractor. I took on the task of running two fiber optic cables, one cat 7 cable, and moving my electrical sub panel from the old room to the new room. 


    Wiring


    I couldn't get the contractor to the house right away, so I did the wiring first. 


    All my computer network components are housed in the basement near my old listening room. This is because the fiber optic cable from CenturyLink goes into the basement for its 1 Gbps up/down internet service and this is a good space for noisy NAS units and computers to reside without disturbing anyone. The challenge was to get a wired network, and wireless access point, into the new listening room without tearing up the house or running cables through the brick walls outside.


    My house was built with plaster and lathe walls in 1941. It's a modest middle class abode with neat coved ceilings, original wood floors, and most of its original features. I just couldn't tear it apart, to run wires, in good conscience (more on this later). Thus, I invited my wife's electrician cousin over to help me fish wires from the south east corner of the basement to the north west corner of the attic. 


    I opted to run two fiber optic cables and a single category 7 copper cable from the main network switch in the basement to the attic. Why fiber? Why two? Why copper? Why one? 


    I selected fiber cable as the main conduit between the switches because it's very future resistant (nothing is future proof). If I want to run a 10 Gbps network in the future, I can do it over this fiber cable without an issue. Fiber can also travel longer distances than copper. The single mode fiber I selected can run over kilometers rather than the 300 meter copper limit. I certainly don't need a fiber cable to run kilometers, but I wanted a long enough cable to be able to move the switches on either end without length restrictions. In other words, I gave myself plenty of slack on each end of the cable to move the switches to any corner of the house.


    I purchased two 300 feet fiber optic cables from Ubiquiti (model FC-SM-300). Each of these cables has six strands of single mode G.657.A2 optical cable wrapped in kevlar yarn and an outdoor jacket (image). The reason I purchased two cables is because my attic has empty space behind the walls, where I placed switches, on each side of the livable space. This enabled me to access a fiber-connected switch from either side of the listening room without running a visible Ethernet cable across the floor.


    storage-space-v2.jpg

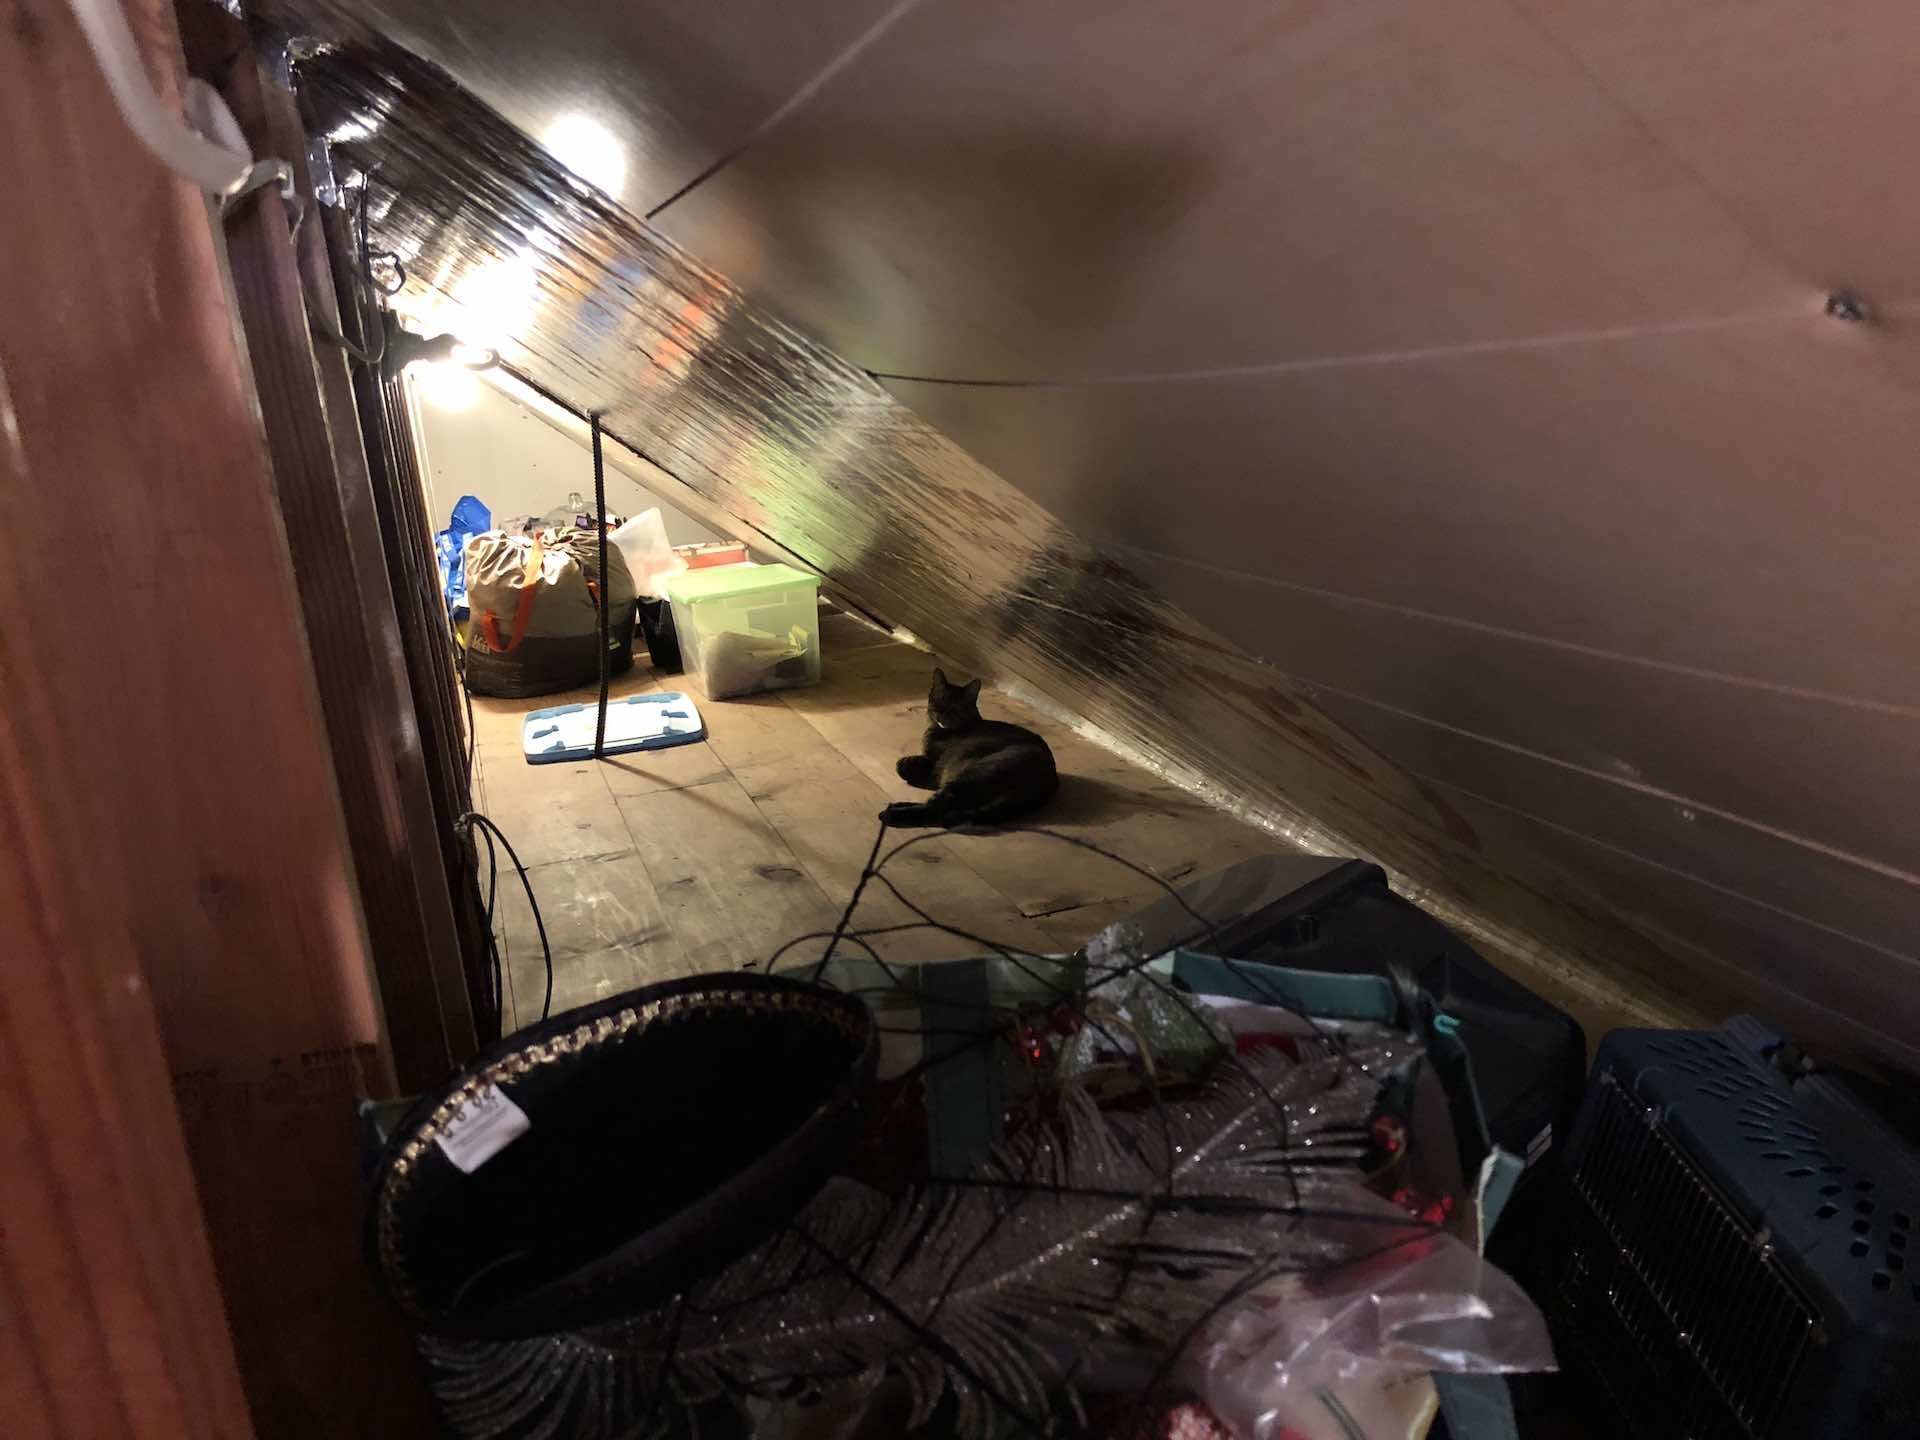
    Storage space behind listening room walls on each side.


    On each side of the listening room, behind the walls, I installed an 8 port Ubiquiti UniFi managed PoE+ gigabit switch (model US‑8‑150W). I didn't need PoE, but this is the only 8 port UniFi switch with SFP ports for fiber optic modules. I purchased four Ubiquiti UF-SM-1G-S fiber optic modules for the switches. Two placed in my 24 port UniFi switch (model US-24) in the basement and one in each of the 8 port switches behind the listening room walls. Attached to one of the 8 port switches I connected a Ubiquiti UniFi HD wireless access point (model UAP-AC-HD).


    ubnt-8.jpg

    US-8-150W switch, UAP-AC-HD access point, FC-SM-300 fiber optic cable.


    I ran the category 7 copper cable just because I could and I wanted to see how it compares to the fiber cables. The copper cable I purchased was a 100 meter 600MHz Duronic Black Network Cable (link). As this is only for testing I see no need to purchase one of these for each switch. It should be noted that this cable is specified to work with 10 Gbps Ethernet, but at this distance I highly doubt it could support the maximum speed. 


    Directly outside my original listening room I had a dedicated electrical sub panel. For the new room I opted to move the sub panel up to the space behind the listening room wall in the attic. Rather than run a completely new electrical wire, I purchased 75 feet of 6 gauge (6/3 NM-B W/G) copper electrical wire and a junction box to connect to the original sub panel wiring and run it up to the attic from that point rather than run it all the way back to the main electrical panel. There is nothing between the sub panel and the main electrical panel other than the junction box tying both electrical wires together. 


    In this sub panel I have six dedicated circuits to use any way I need. Currently I have three 20 amp circuits going to a single duplex outlet. Two of the outlets are from Transparent Audio. They are the same outlets used in the company's Reference Power Isolator. I originally planned to place the audio components either along the west wall or between the loudspeakers. Thus, I had the power outlets placed near the aforementioned locations. However, I've since moved the components to the east wall and need to run power from the sub panel, under the floor (between the joists), to an outlet close to the components along the east wall of the listening room. 


    Fishing Wire


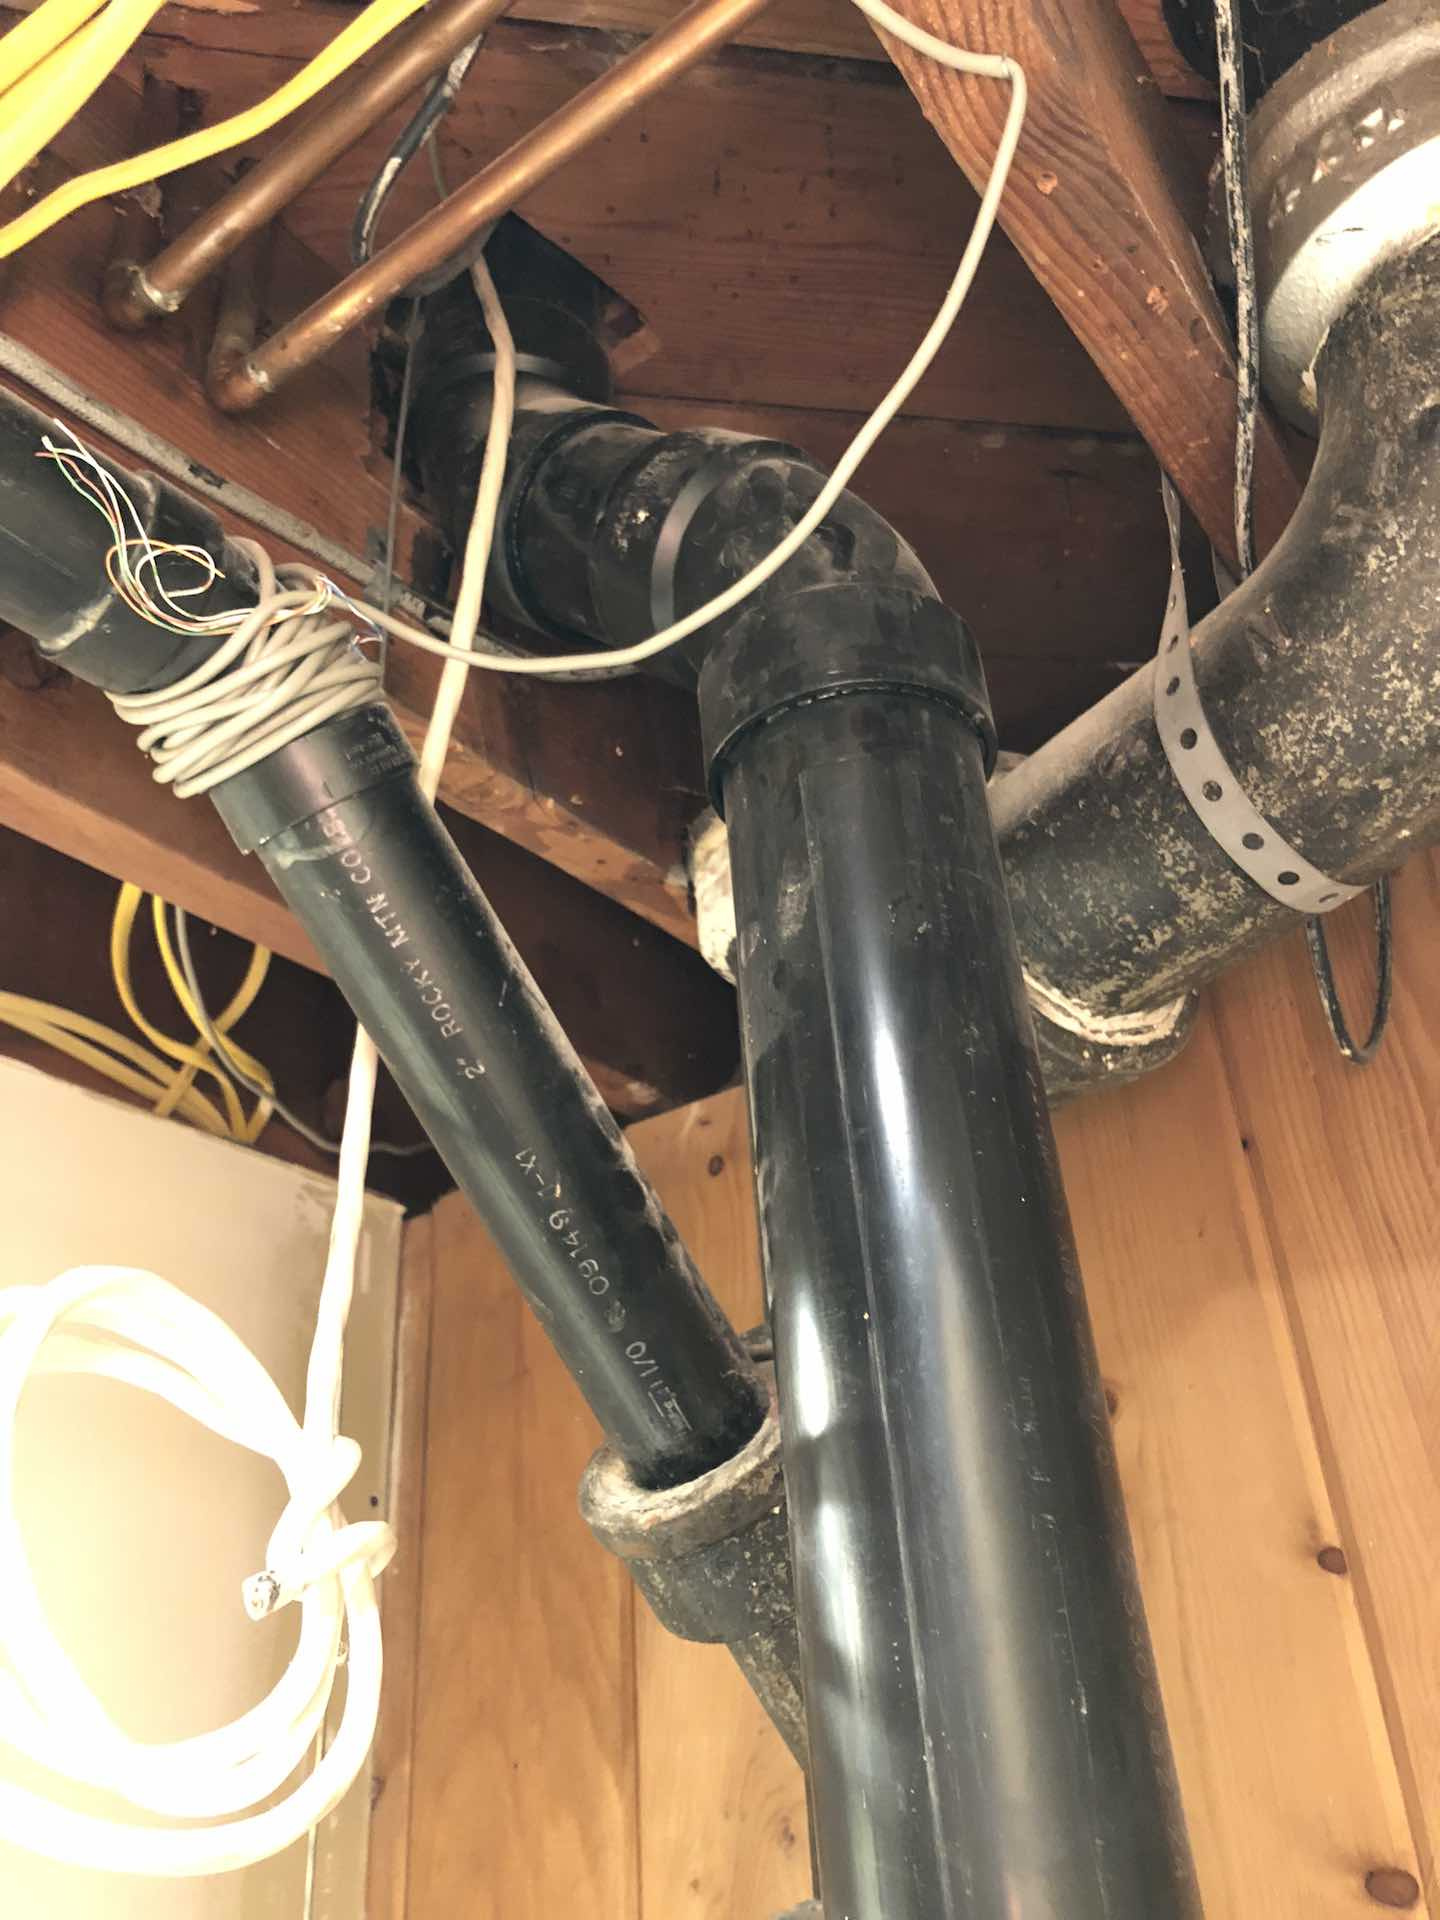
    Running the fiber optic, copper data, and copper electrical wires from the basement to the attic was a serious challenge. My electrician Kevin found a path for these wires that only required cutting a small hole in one wall on the main level of the house. Fortunately this hole was in placed in a sheetrock "box" constructed in the mid-nineties to cover the pipes for the bathroom that was later installed in the attic. I'm going to put a heat register / duct cover over this hole which will allow future access should it be required. 


    The circuitous path of the data wires was from the south east corner of the basement horizontally along the unfinished ceiling, over HVAC ducts between the old listening room and main basement living room, into a utility closet, vertical through the ceiling and between the bathroom wall and my daughter's bedroom wall on the main level, horizontally between the ceiling of her room and the floor of the attic, then diagonally out through the floor of the attic behind the new listening room wall.


    closet-downstairs.jpg closet-2.jpg

    Closet in the basement where the cables started routing vertical through the floor.


    We ran the cables from the attic down to the basement, taking advantage of gravity to help pull them through the tight openings. My main concern with the fiber optic cables was breaking the glass inside. Anyone who has ever snaked cabled through walls like this knows that it isn't always smooth sailing. We had to pull fairly hard on the cables a couple times because they got hung up on obstructions we couldn't see in the walls. I could feel the rubbery plastic jacket of the Ubiquiti fiber cable stretching as I pulled it through. To my surprise the fiber cables came through in perfect condition. I guess they don't make them like they used to, but in a good way. Old school fiber cables are prone to braking easily. 


    attic-opening.jpg

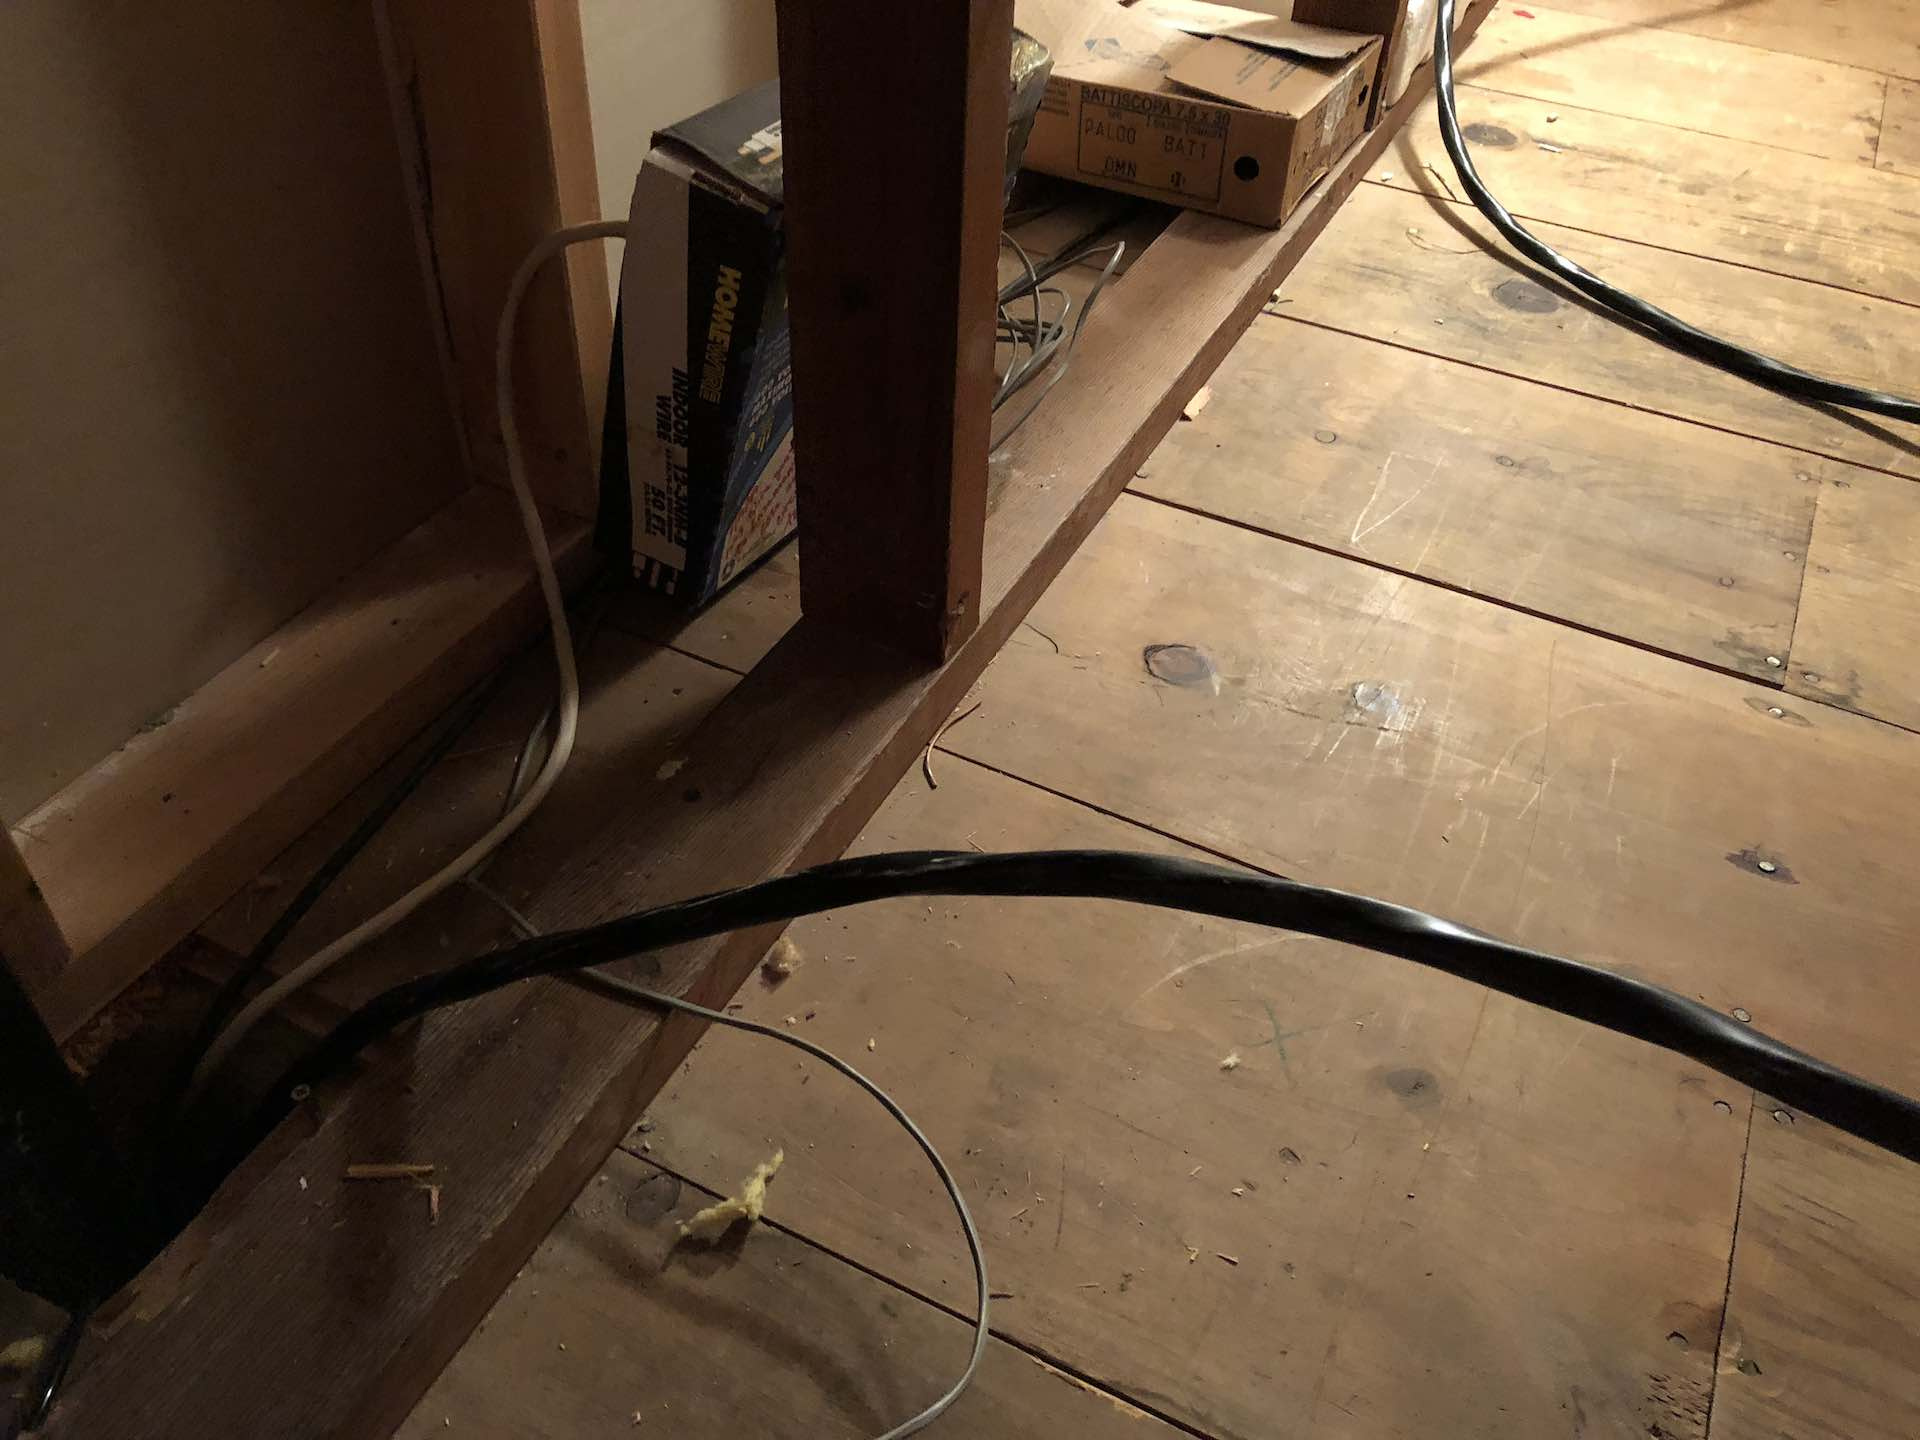
    Opening in the attic floor behind listening room wall where cables routed.


    Note: The Ubiquiti fiber SFP modules only require one of the six strands of fiber in the Ubiquiti fiber cables. This leaves five "extra" strands of fiber to be used in other switches. Should the cable have been pulled too hard during installation I at least had six internal fiber cables to try to get working. In other words, inside the single cable there is six redundant cables in case one gets broken (because I only needed a single fiber cable from within each FC-SM-300 cable).


    Running the 6 gauge electrical wire through the walls was an exercise that I hope to never do again. That stuff is stiff, thick, and doesn't slide through tiny openings without "grabbing" on because the coating on the cable isn't slippery. Needless to say, it took both me and Kevin the electrician quite a while to get the job done.


    6awg.jpg

    6AWG electrical wire going through the floor heading to main level and on to basement.


    Demolition / Construction


    By no means is my room in the same class as many high end dedicated listening rooms we've all seen online. My goal was to do this entire project for a reasonable amount of money. In other words, the sky wasn't the limit and cost was an object. 


    The attic space has a total length of 33 feet 9 inches. The existing bathroom consumes 8 feet 1 inch on the north end of the space. That leaves the listening room with a length of 25 feet 8 inches. The width of the room originally varied because of a coset in the south east corner. That closet was marked for demolition to widen the room and provide space for my desk and even out the width to 13 feet nine inches from front to back. Another obstacle in the room was 2 feet high wall with 1 foot high railing around the staircase entrance/exit on the south end. This wall was also marked for removal and in its place a new three feet high bannister. 


    My options for this listening room were a bit limited by of course cost but also because I wasn't willing to change anything about the rest of the house below this room. For example, I ask in the forum about using a rubber sound barrier under the carpet and before I knew it the recommendations were to rip up the ceiling below the room and put in a sand barrier etc... That was a bit too over the top for my situation although I'm totally on board with going all out in the right circumstances. I'd love a cost no object / no construction constraints type of room as much as the next guy. 


    Given that the attic space was finished decades after the house was built, I was totally fine with demoing every piece of the room. I thought long and hard about making the sheetrock side walls more solid with additional layers glued and screwed to the original walls, but this would've reduced the width of the room by several inches. I opted to leave the existing side walls for now because I can always address them down the road if necessary.


    I'll save everyone the cosmetic details about paint, light fixtures (although I purchased three from the 1940s through Etsy for this room), and door knobs (also from the 1940s and from Etsy). During my research I was advised that wool carpet was the best flooring choice for listening rooms. I was happy to hear that because I love everything about wool carpet (research it if you're so inclined). I had 100% New Zealand wool carpet installed once the demolition and construction was complete. 


    south.jpg north.jpg

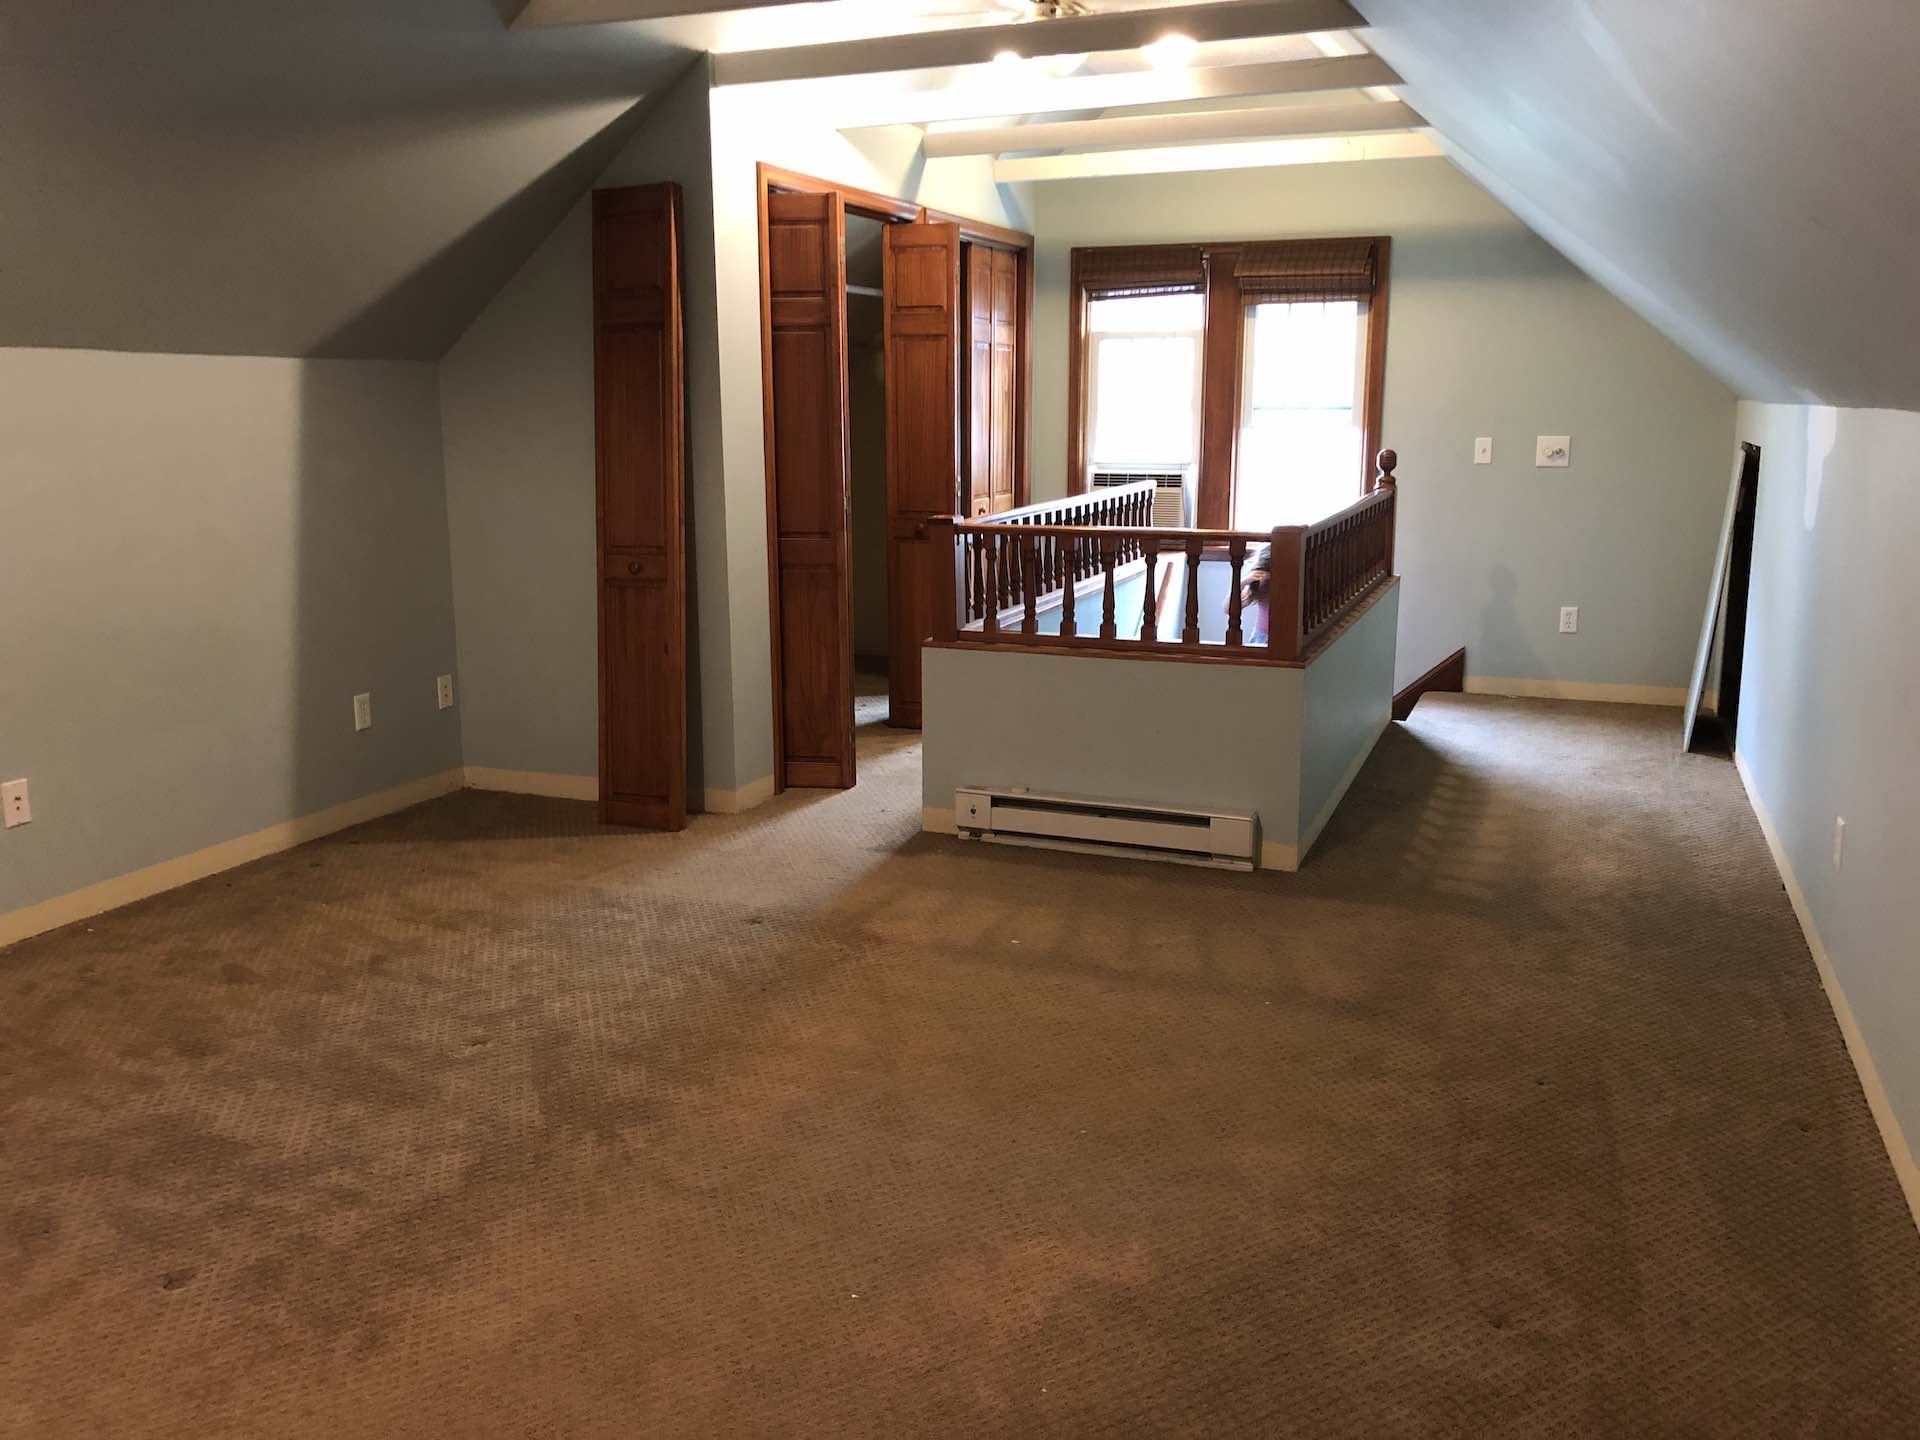
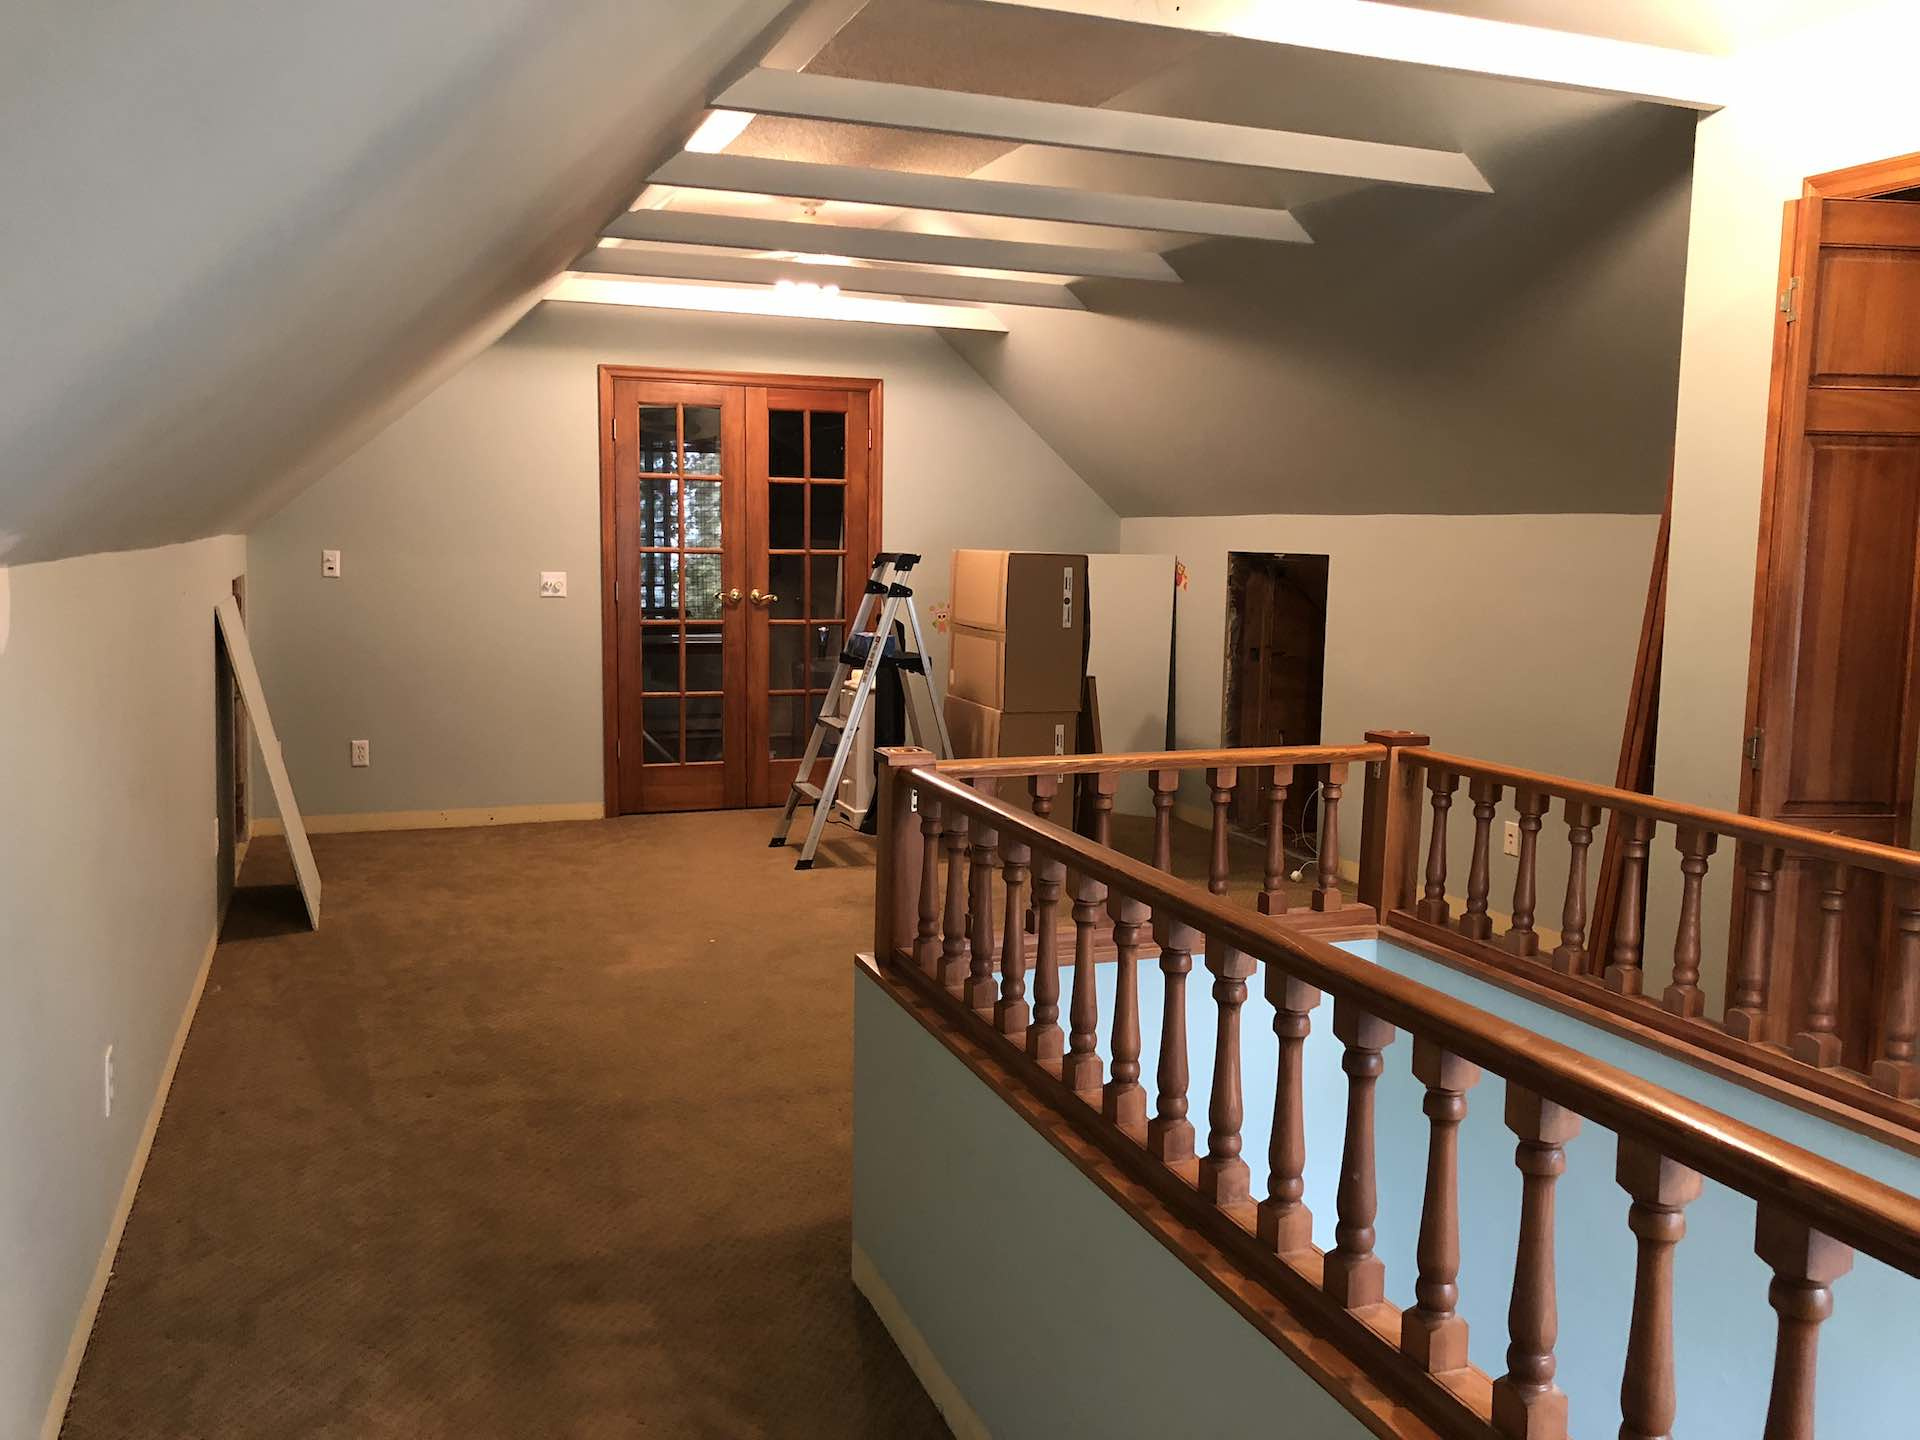
    The new listening room before demolition started.


    demo-1.jpg demo-2.jpg

    demo-3.jpg demo-4.jpg

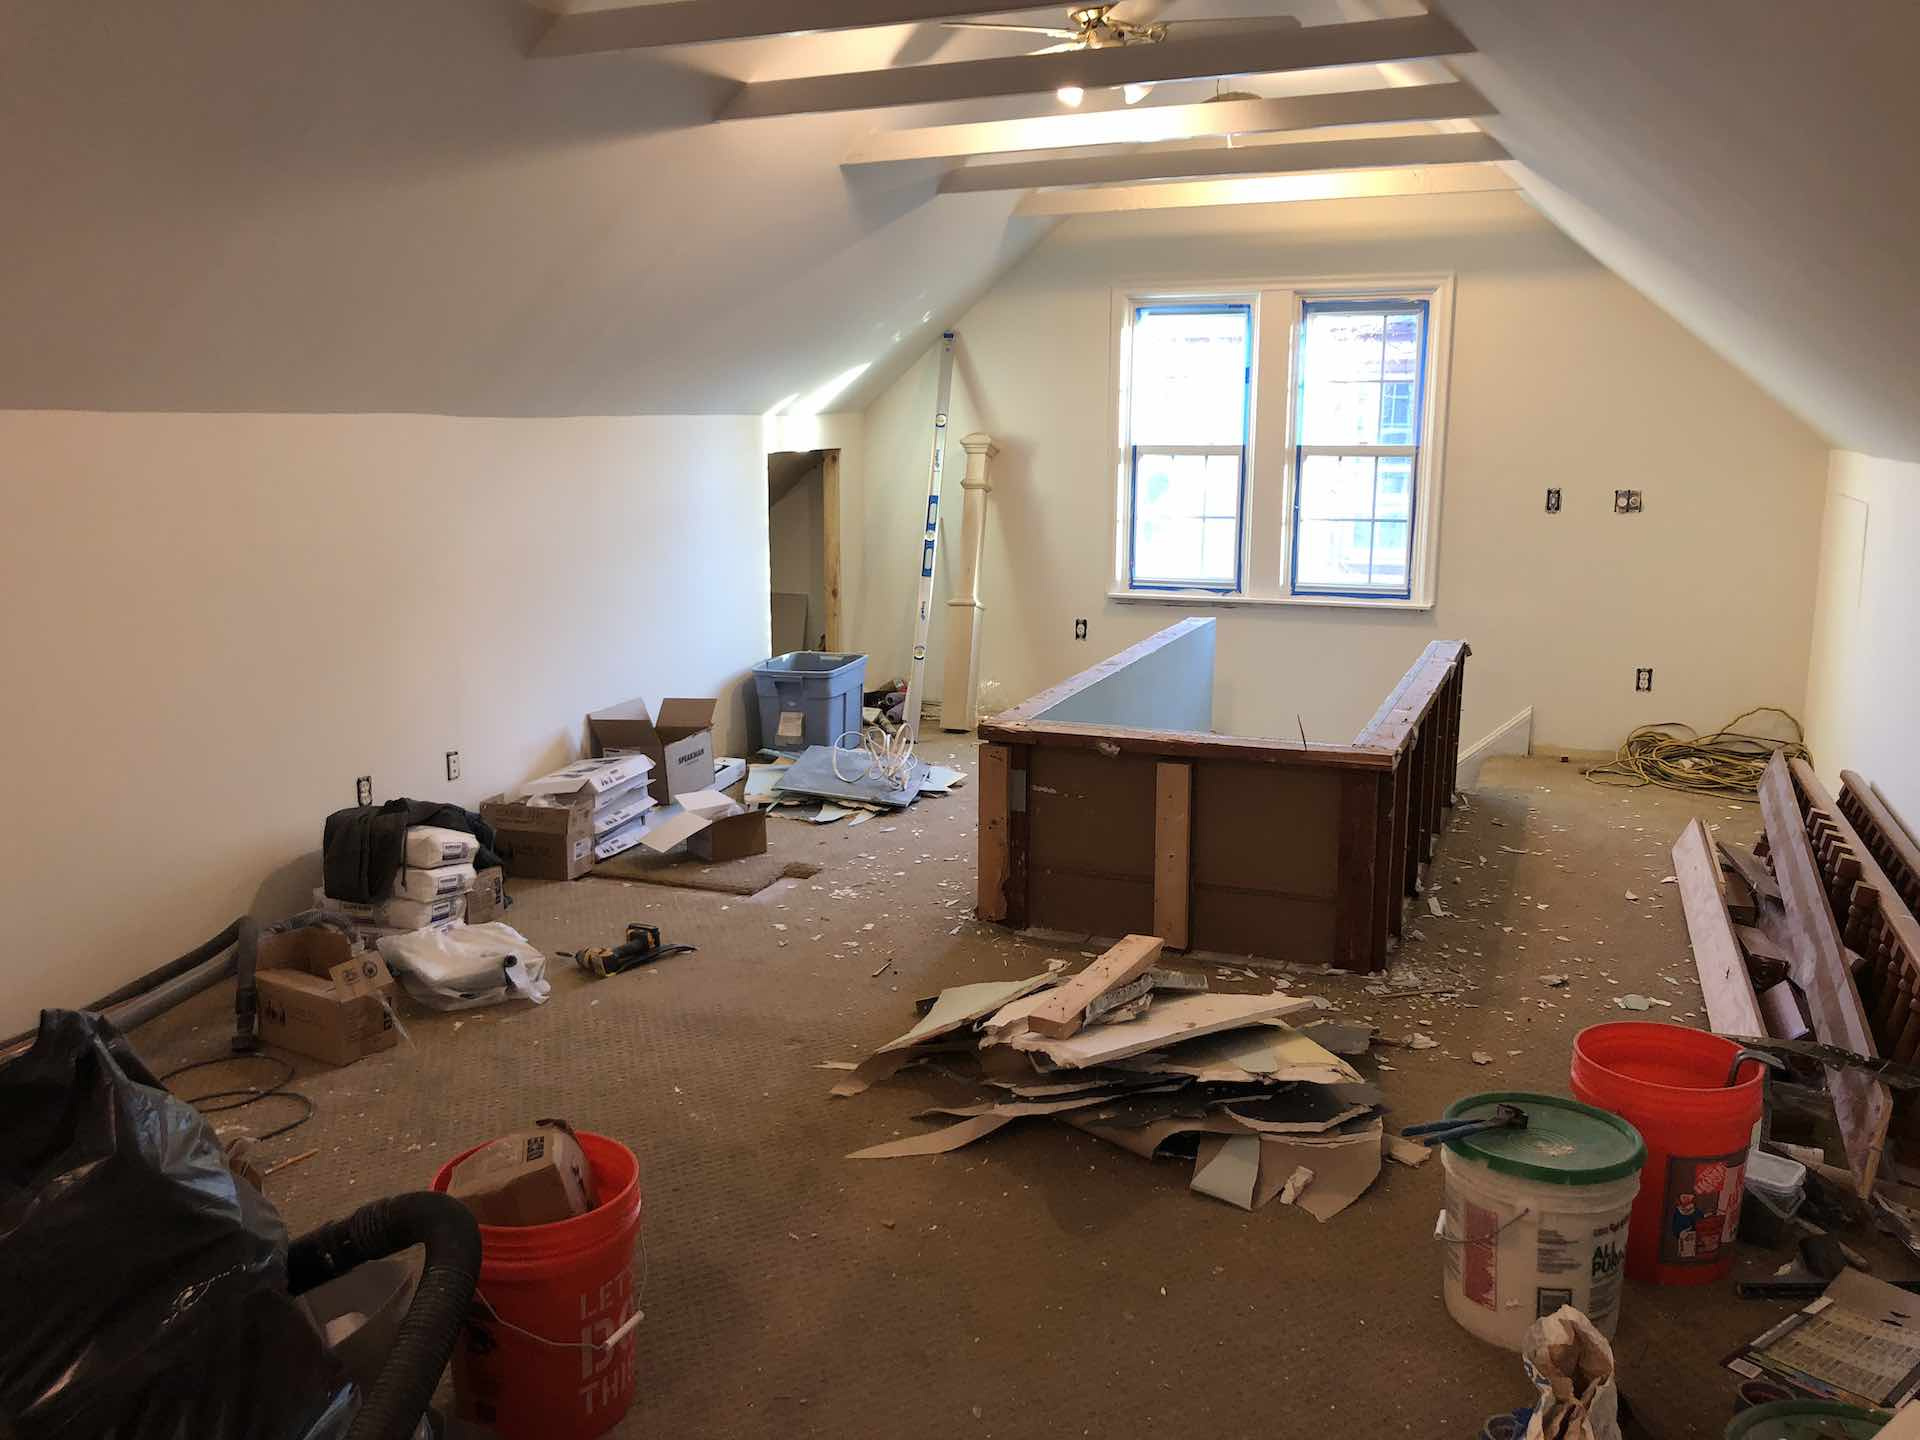
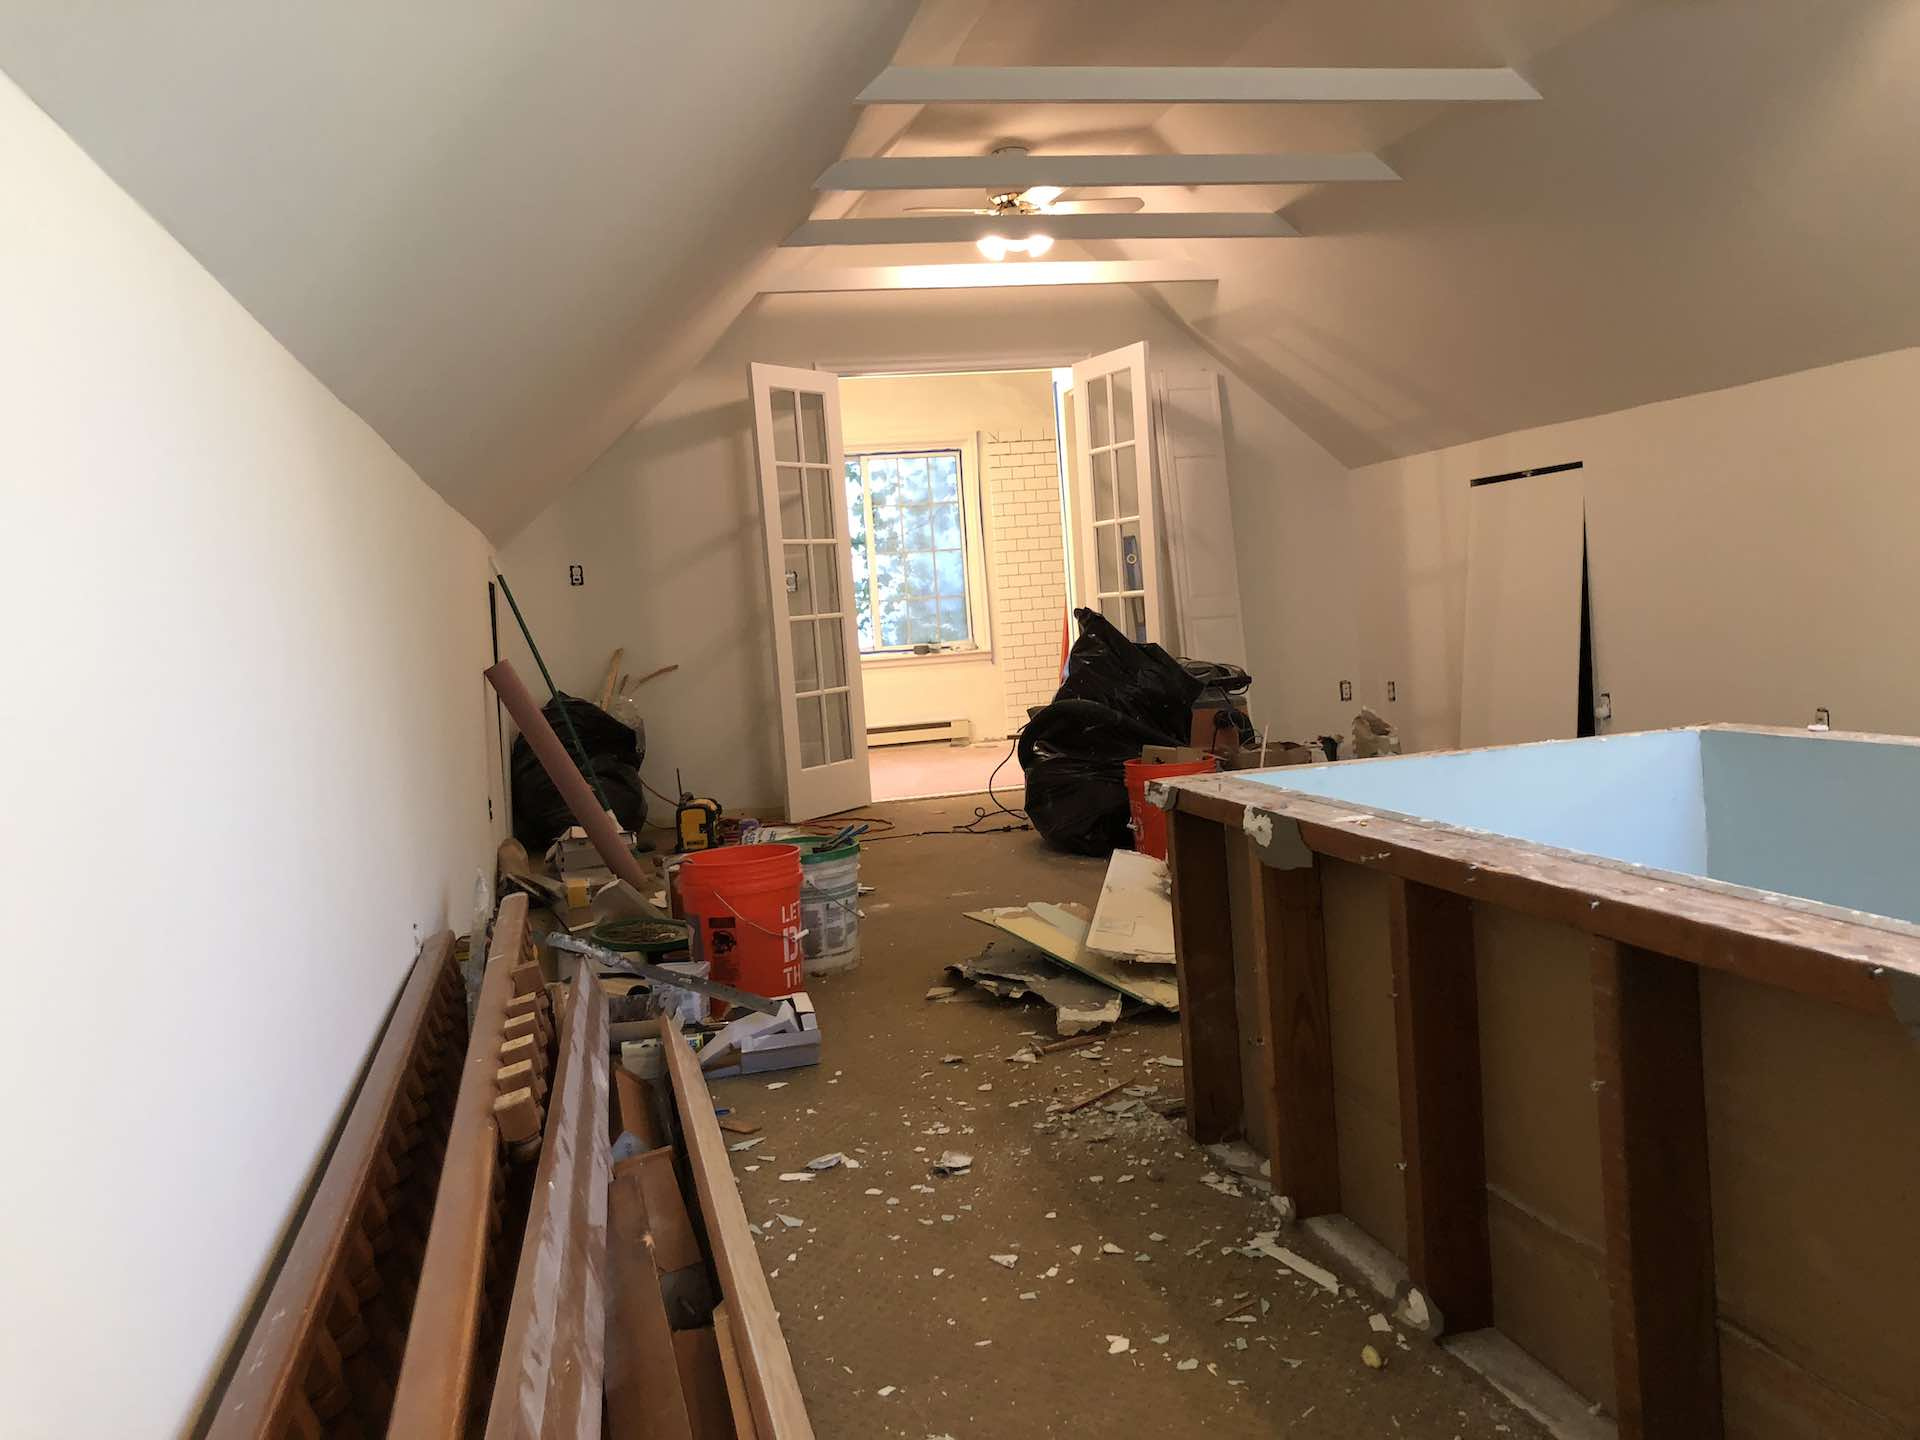
    The new listening room during demolition.


    Current Situation


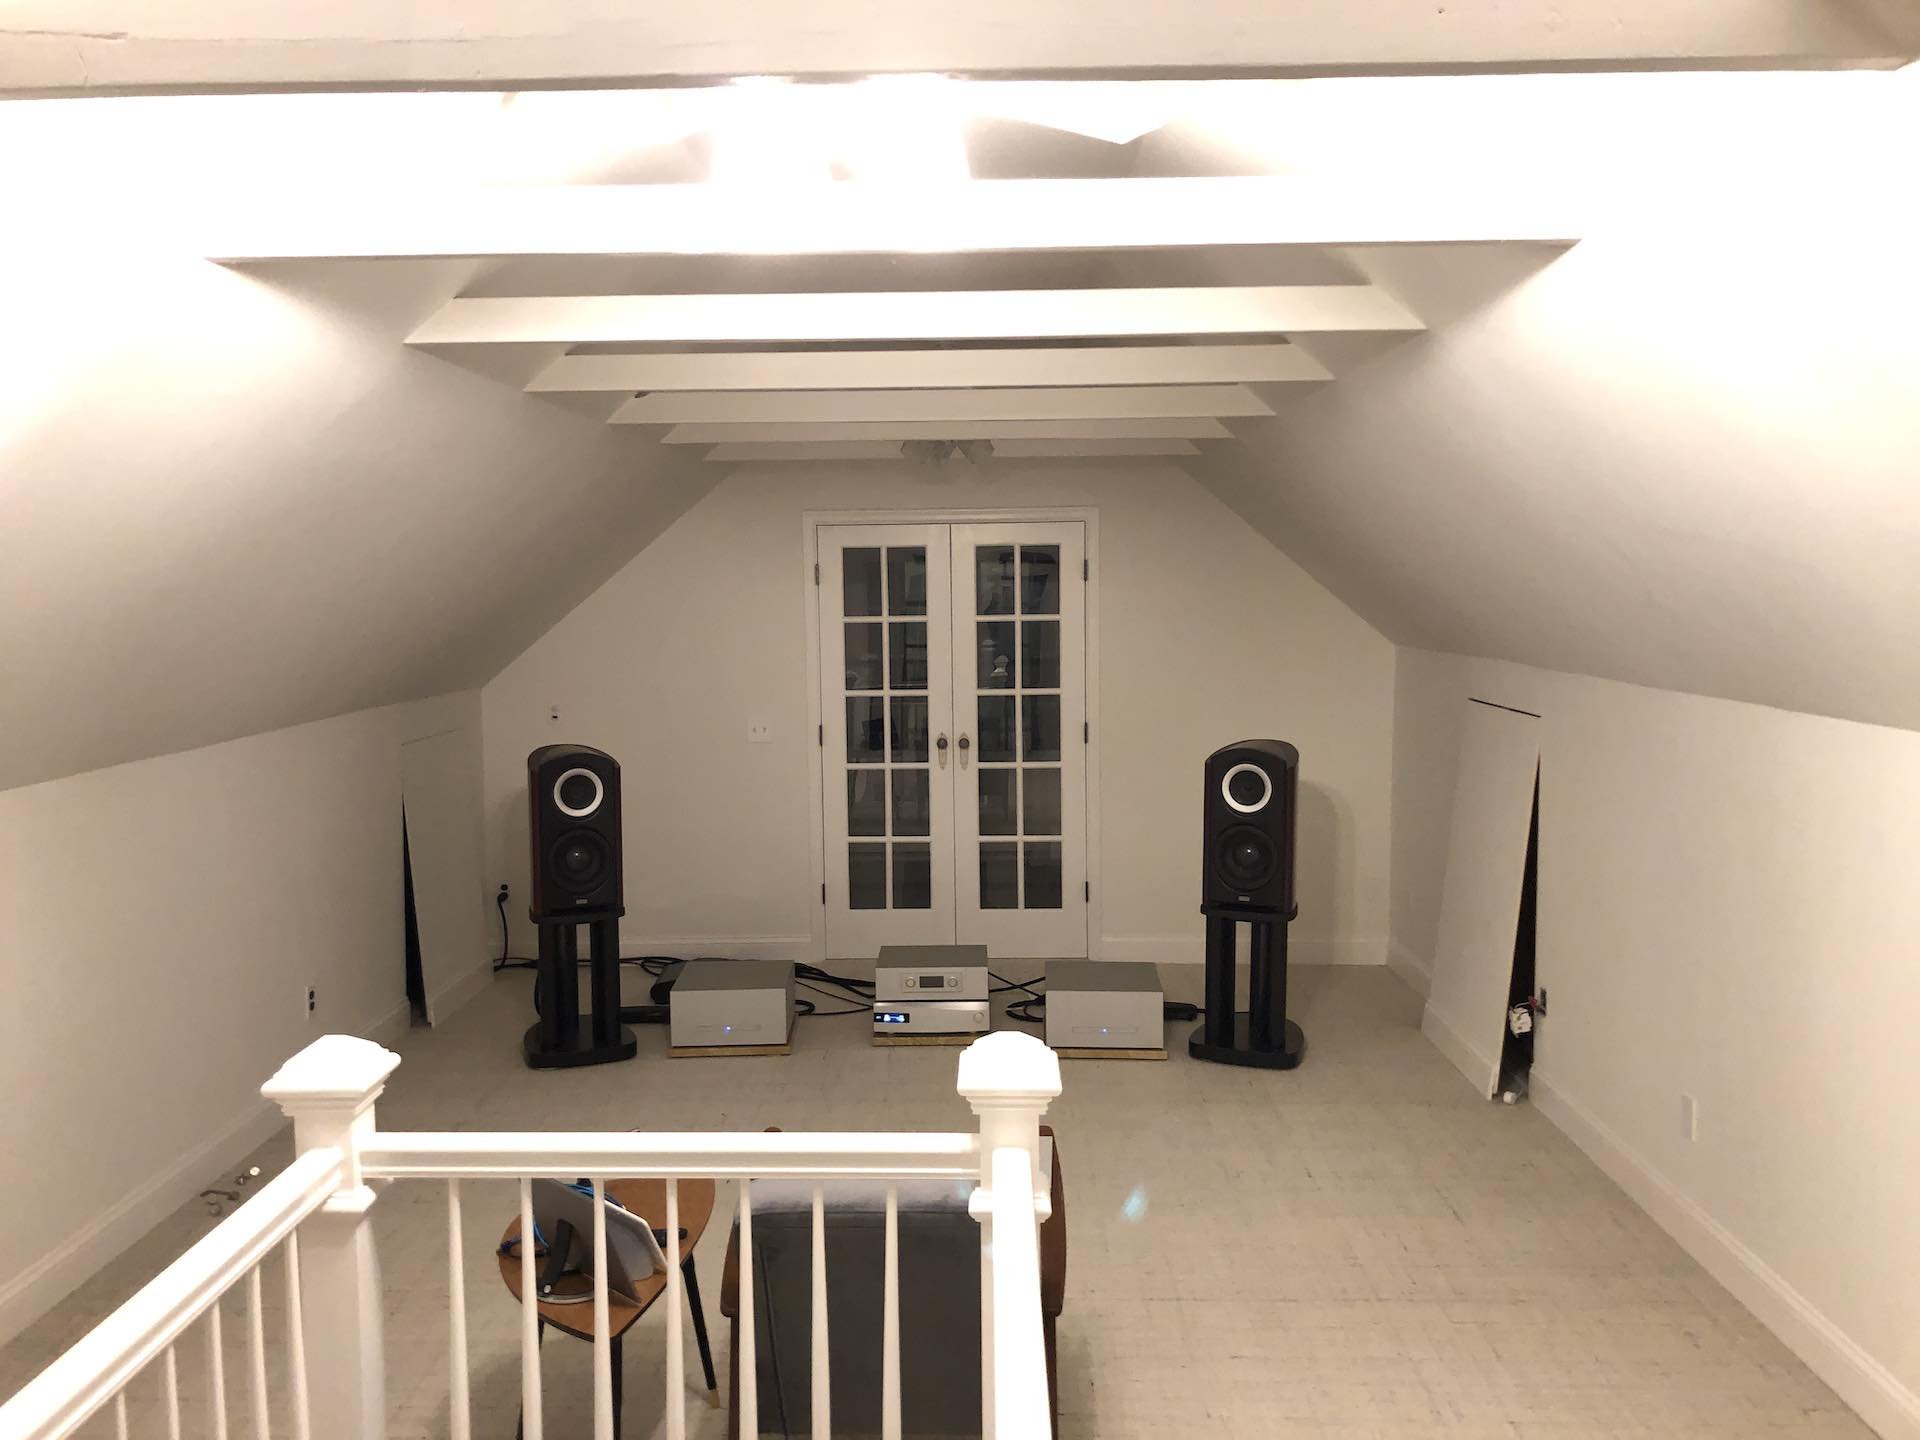
    Currently I have the audio system installed where I want it, with speakers on the north end of the room and components along the east wall. I originally tried the components placed between the speakers but that lasted about 48 hours before I grew tired of looking at the mess of cables and walking over everything to enter the bathroom. I'm using some no name speaker cables until I can replace my 8 feet long Transparent Audio Reference speaker cable with a longer pair. 


    How Does It Sound


    The big question for me is how does the new listening room sound? This is such a frustrating piece of building a new room. The first thing I did once construction was complete was to bring up my audio system and click play. After all, that's why this room was built. I caution everyone to NOT follow in my footsteps by playing audio without anything else in the room. The sound bouncing off the bare walls with zero furniture obstructions to diffuse or absorb the audio was horrendous. I took a few measurements and almost cried as I sent them to friends and our own DSP expert Mitch Barnett @mitchco. Fortunately the unanimous response I received from everyone was to relax, this was only the starting point. 


    Shortly before moving the audio system to the new room, I purchased a miniDSP measurement microphone (model UMIK-1). I took measurements of my original room so I could at least have a baseline to compare the new sound to the old via objective data. I'll do the subjective analysis for the rest of my life no doubt. 


    Here is a measurement of my original listening room in the basement. The room in which I reviewed components for 10+ years. 


    original-room.png

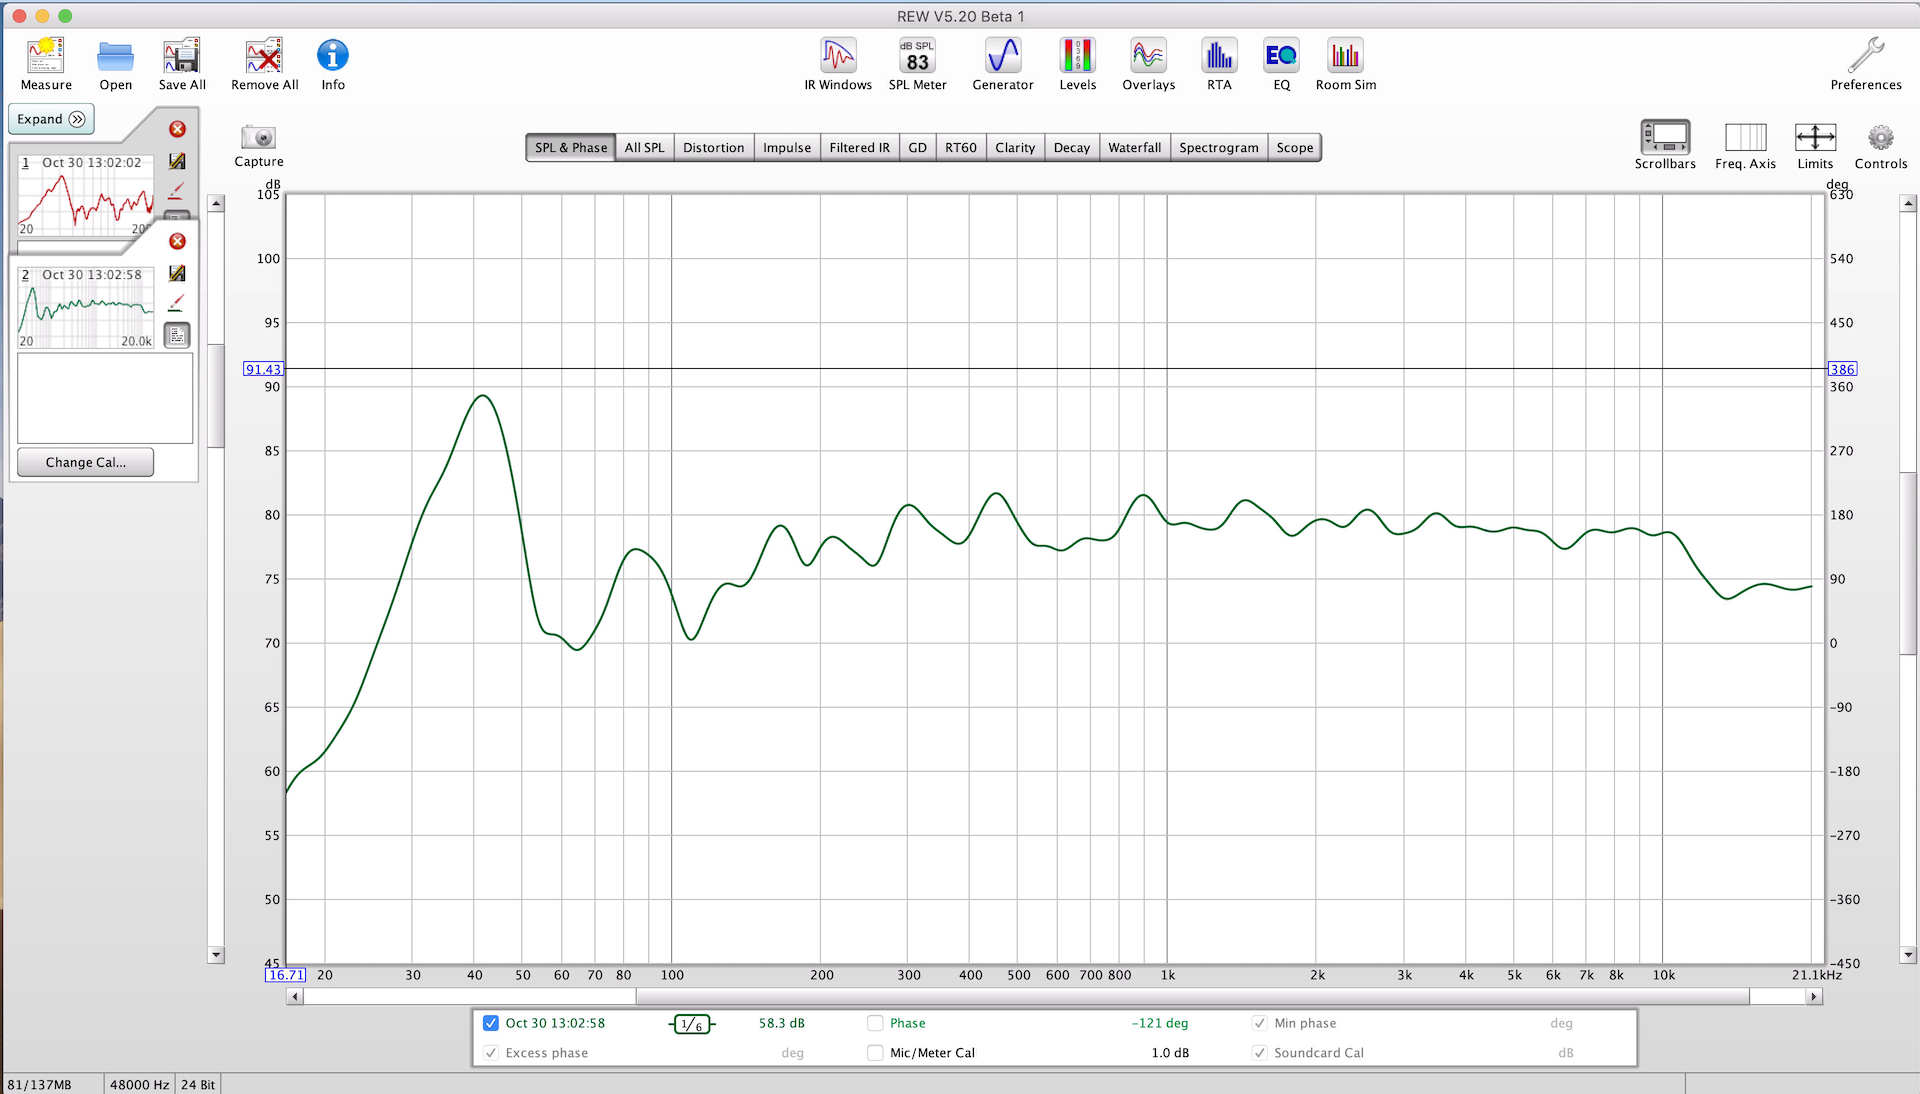
    Original basement sound room measurements.


    In the days after my initial listening sessions I brought up my 12 feet long desk, an additional chair, a trunk to be placed in a corner, and a few items to place on my desk. I also had the general contractor fix the sheetrock access panels that lead from the listening room into the attic space behind the walls. These panels were too big to fit tightly after the carpet was installed. During the initial listening and measurements these panels were placed close to the openings but there was a several inch gap enabling sound to leak out behind the walls in three of the four corners of the room. 


    The sound right now is definitely livable and will enable me to review components with a high degree of confidence in my conclusions. It helps to have the measurements to know where the peaks and dips in frequencies are when as I listen. 


    However, I am nowhere near satisfied with the sound and have opened a project with Vicoustic of Portugal. For those unfamiliar with the process, there is a page on Vicoustic's website to formally open a project (link). All that's required is to complete a small survey about the listening space and attach images and drawings (as crude or as sophisticated as one has available). In a couple weeks Vicoustic delivers a complete proposal with 3D drawings, expected sonic results, and proposed acoustic absorption / diffusion product recommendations. 


    I completed this process and received a full proposal from Vicoustic. In Part 2 of this series I'll upload the entire document. For now, here is a a 3D drawing of what the finished product will look like when I have the absorbers and diffusors installed.


    3D-Drawing.jpg

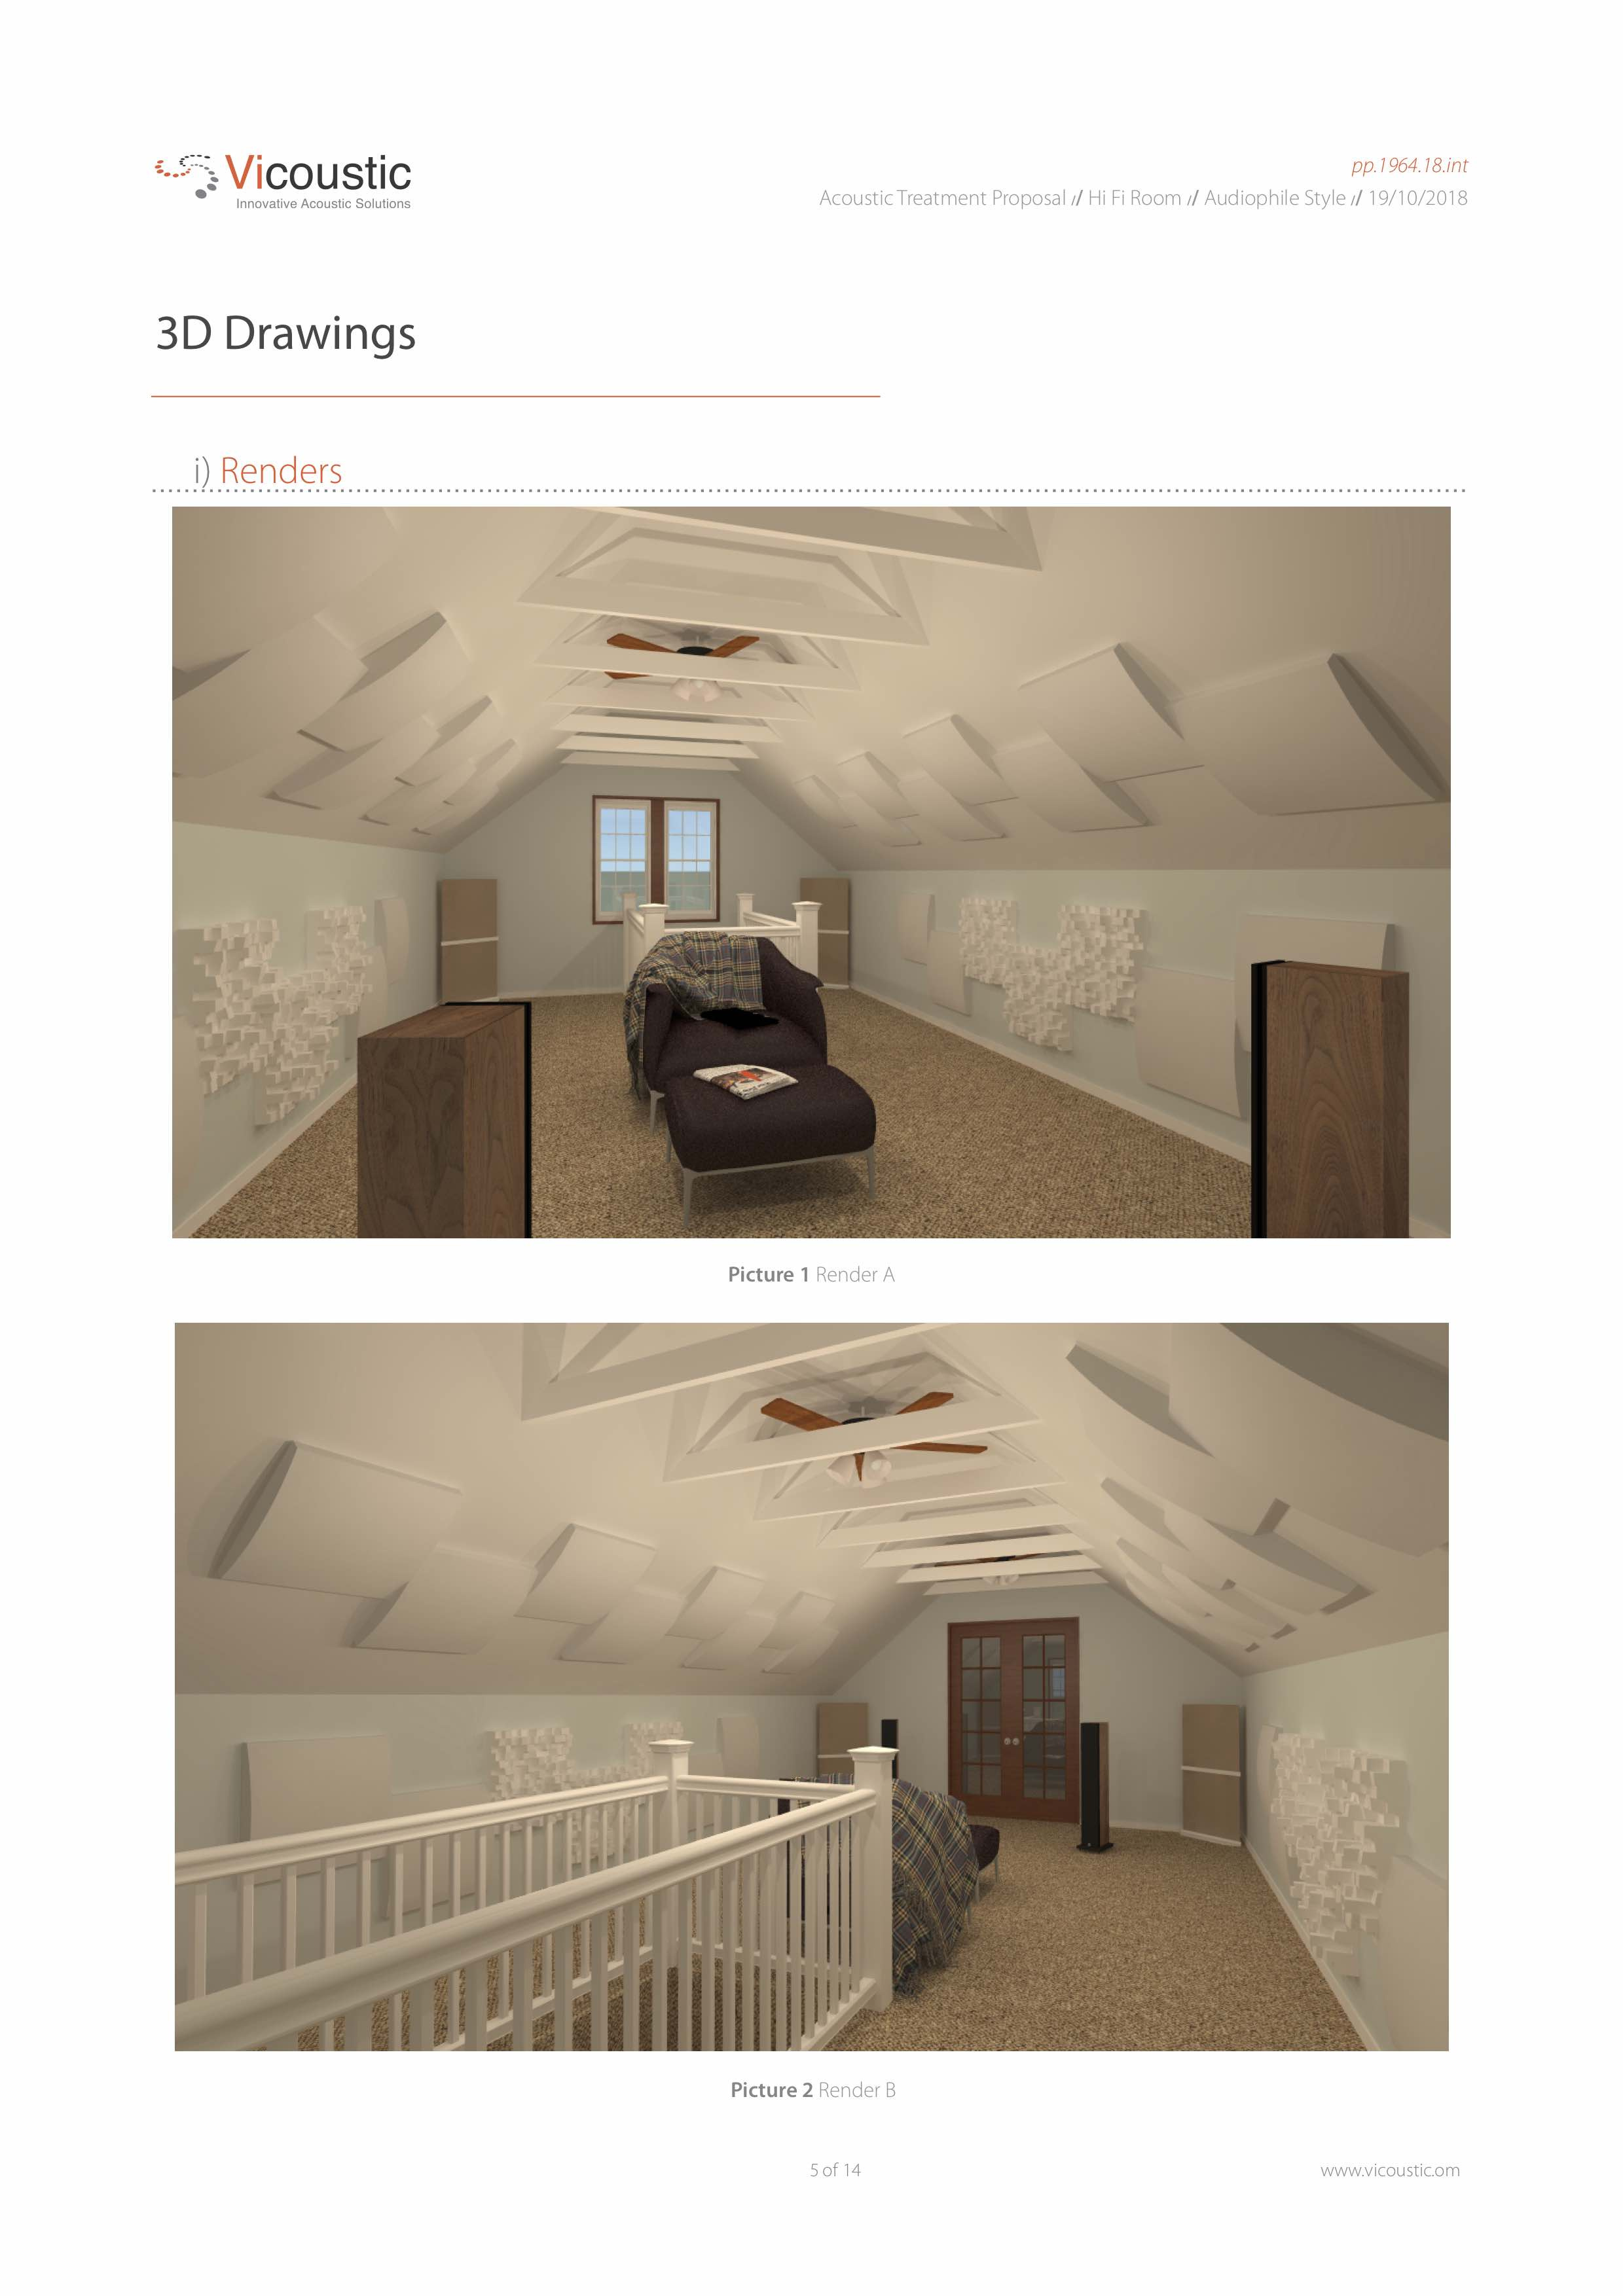
    Vicoustic 3D drawing.


    Wrap Up


    As it stand now, I really like the new listening room. I can't wait to get the acoustic panels installed to bring the sound quality up quite a bit. The room is a giant instrument and has the biggest affect on the sound quality of music. Forget about MQA, lossy, lossless, bit perfect, upsampling, music servers, or even speakers. If the room isn't good, the sound isn't good no matter what one does to the system.


    More to come in part two.


    Image Gallery


    bare-south.jpg bare-north.jpg

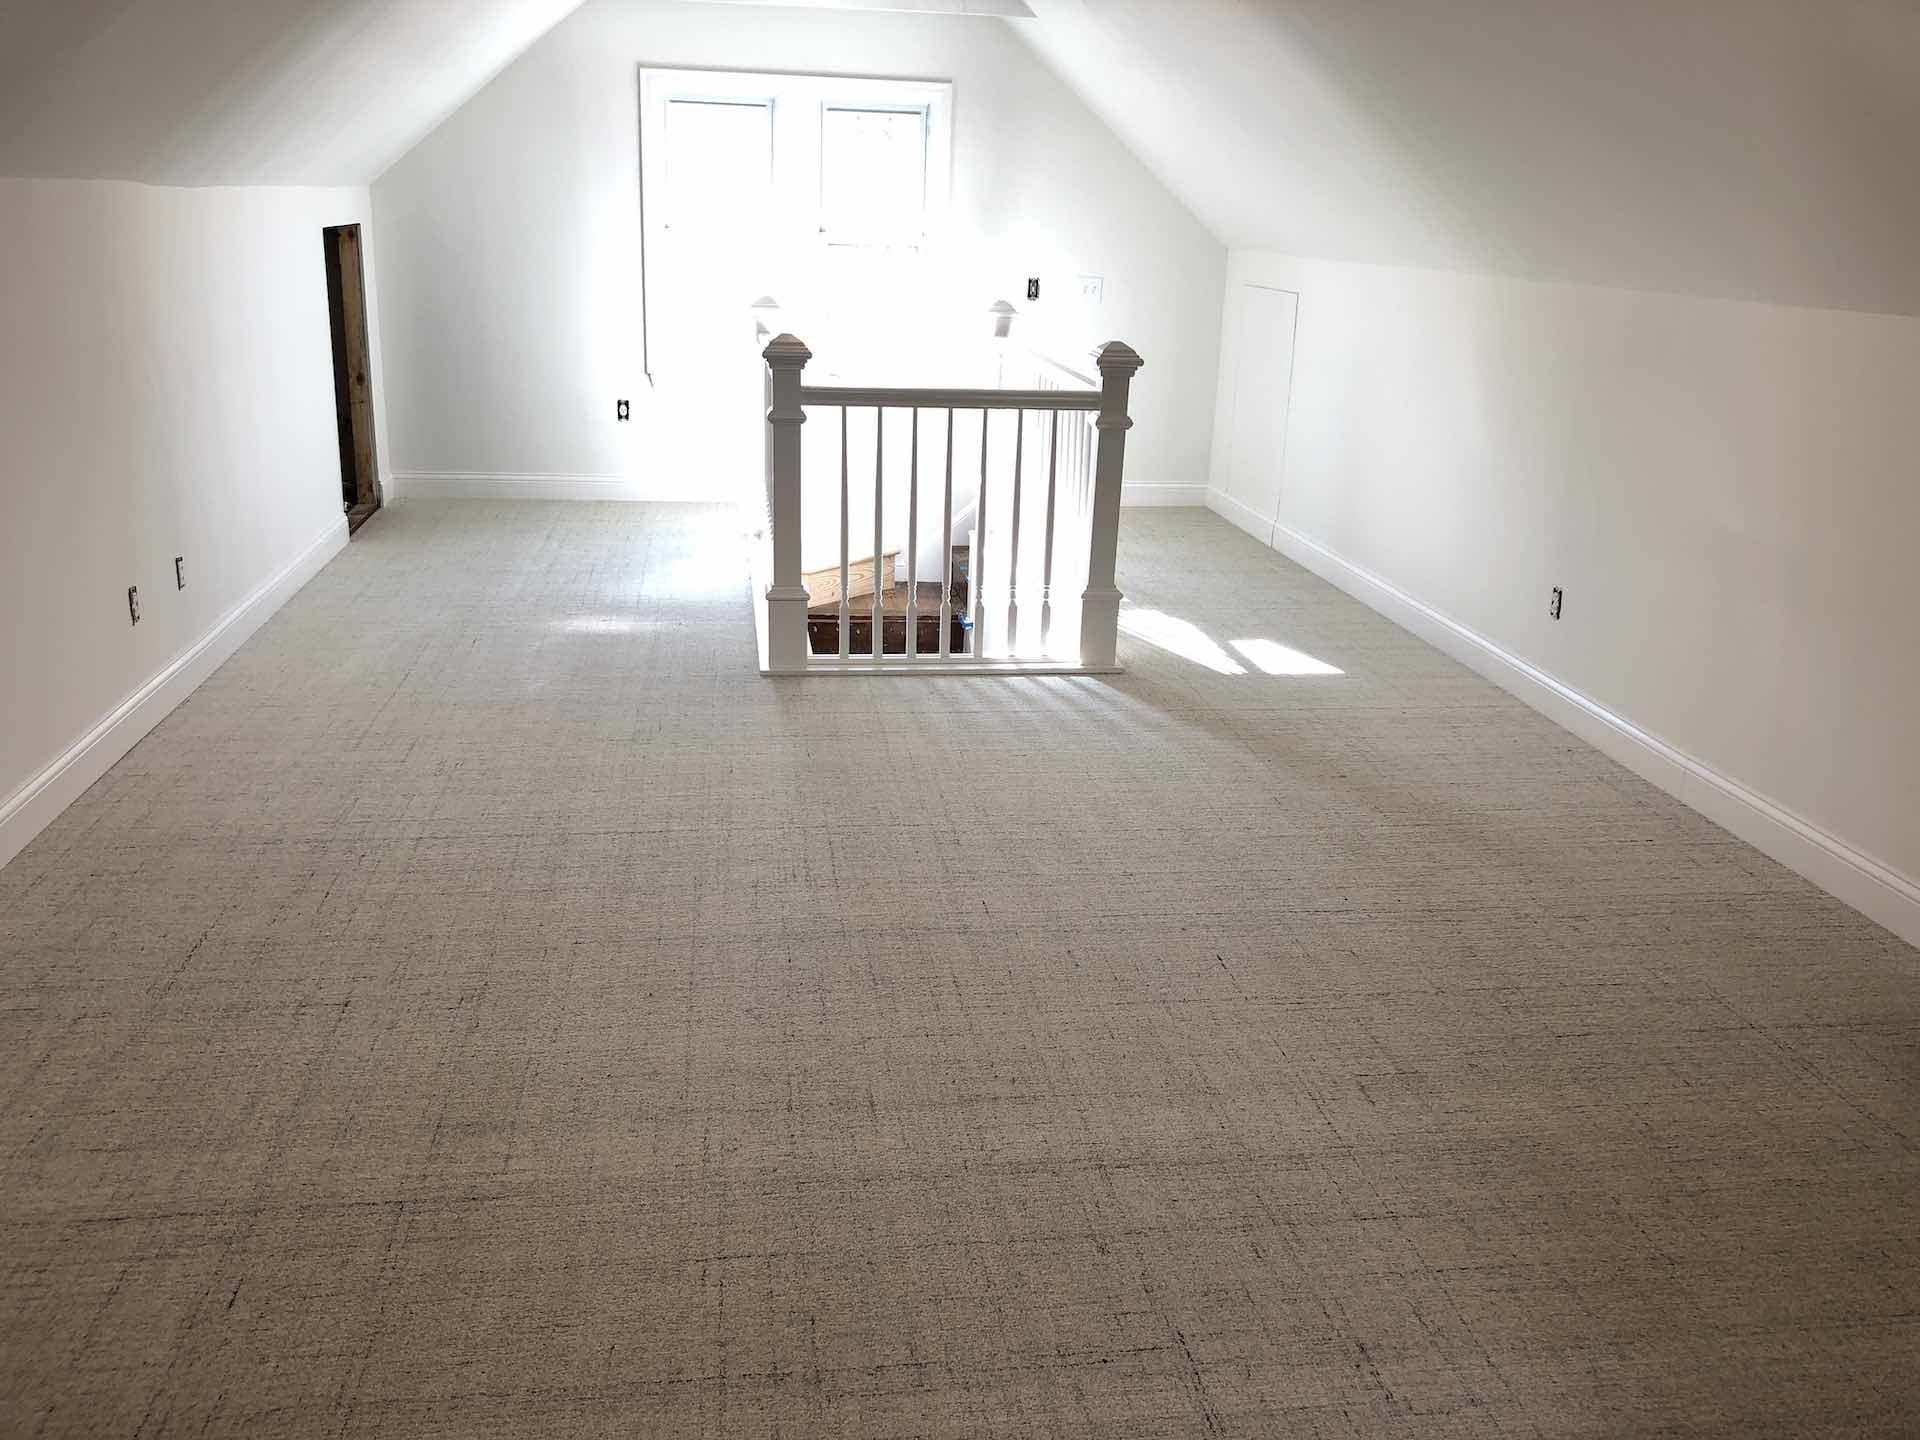
    When the sound was at its worst without anything in the room.


    room-4.jpg room-3.jpg

    room-1.jpg room-2.jpg

    room-5.jpg room-6.jpg

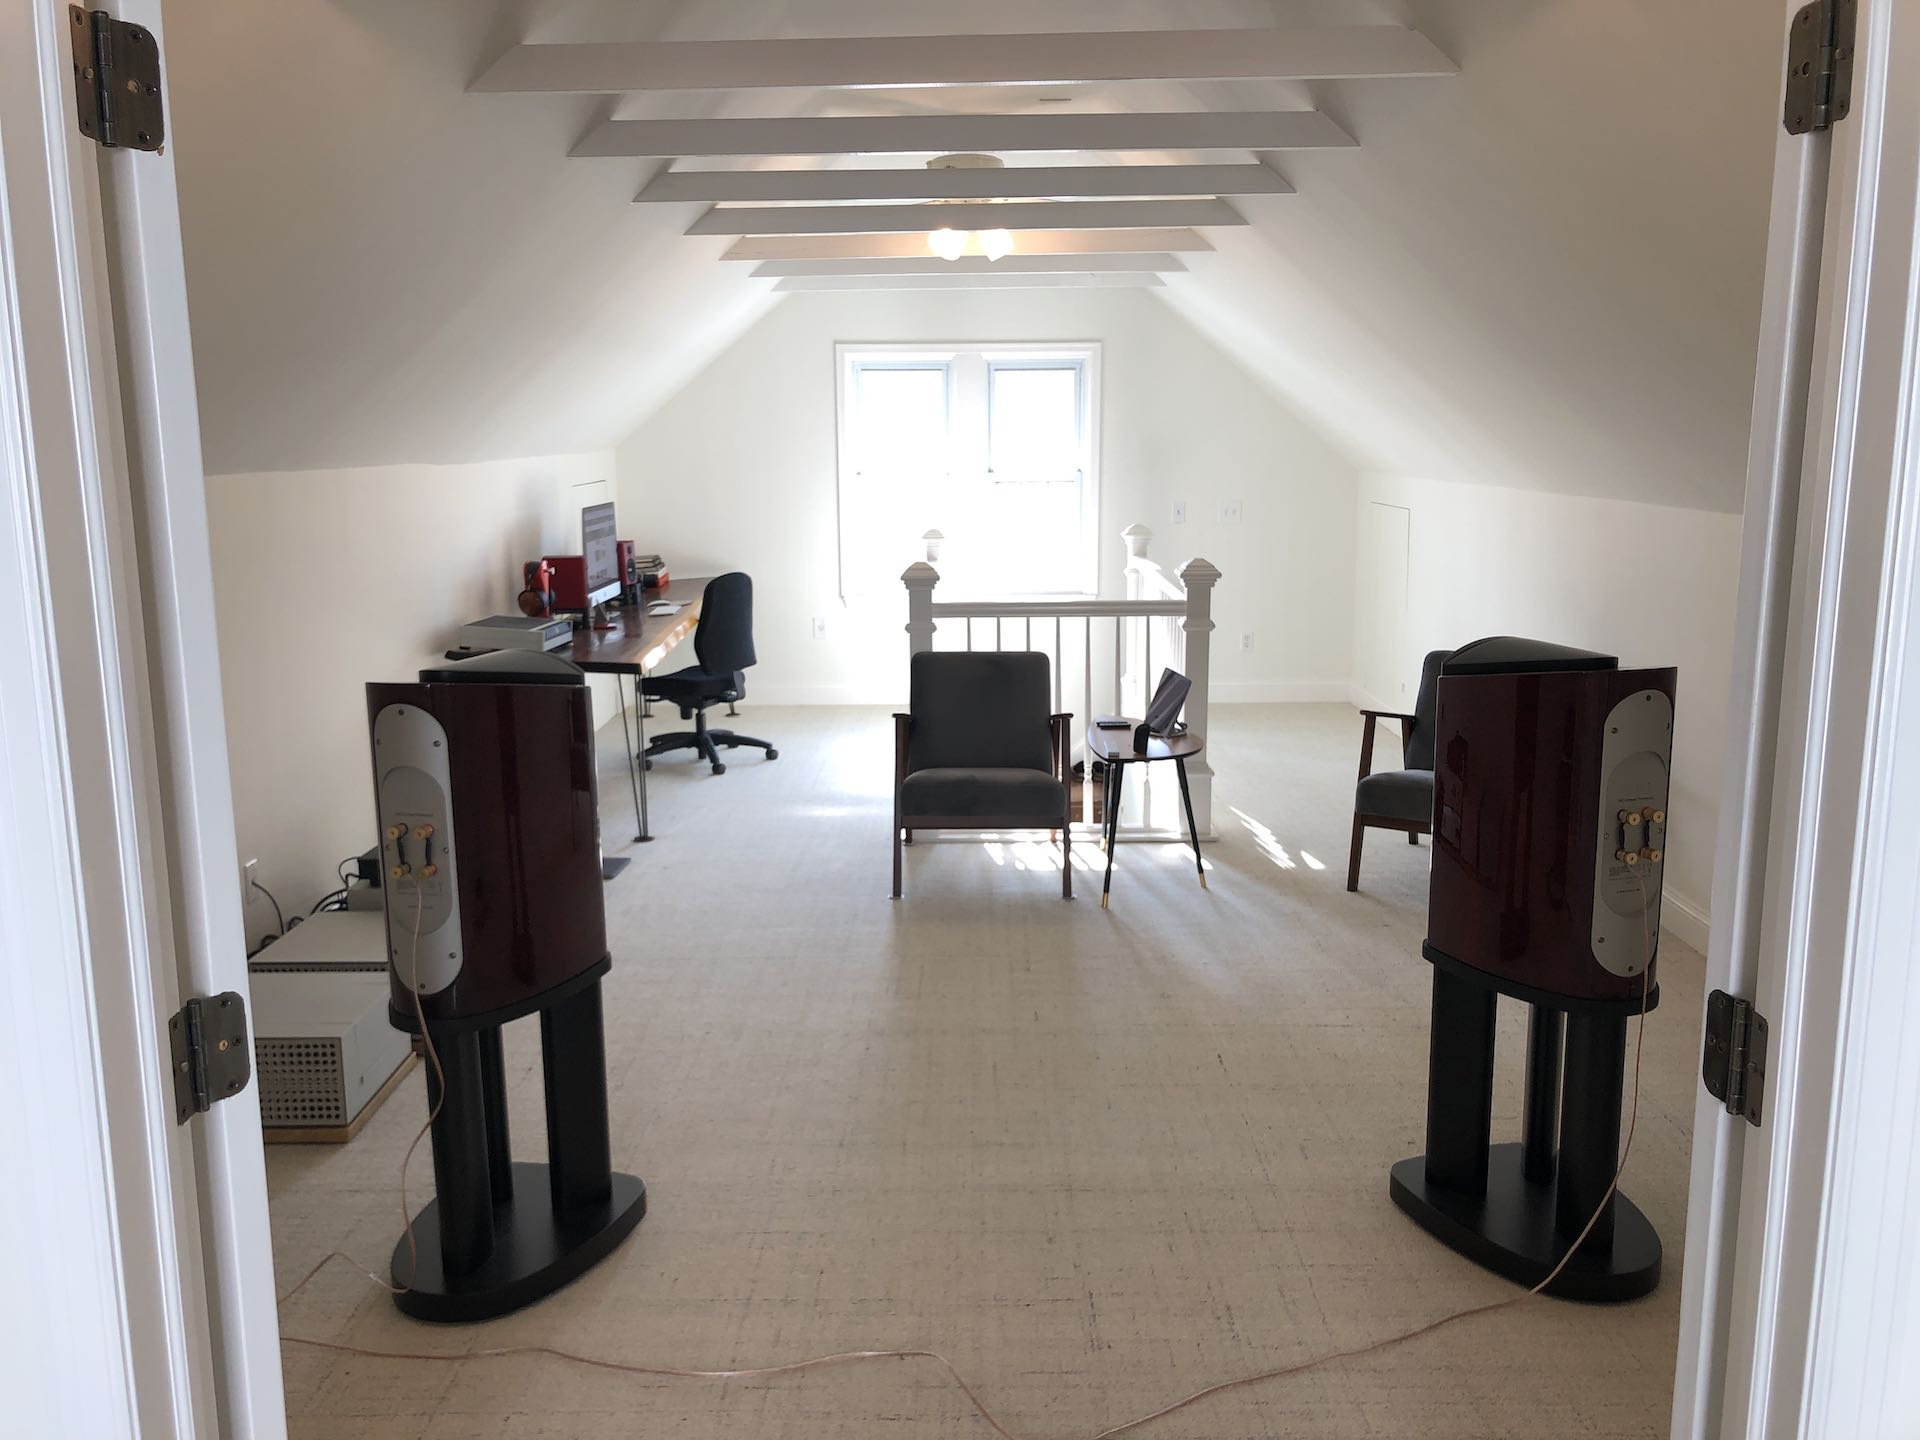
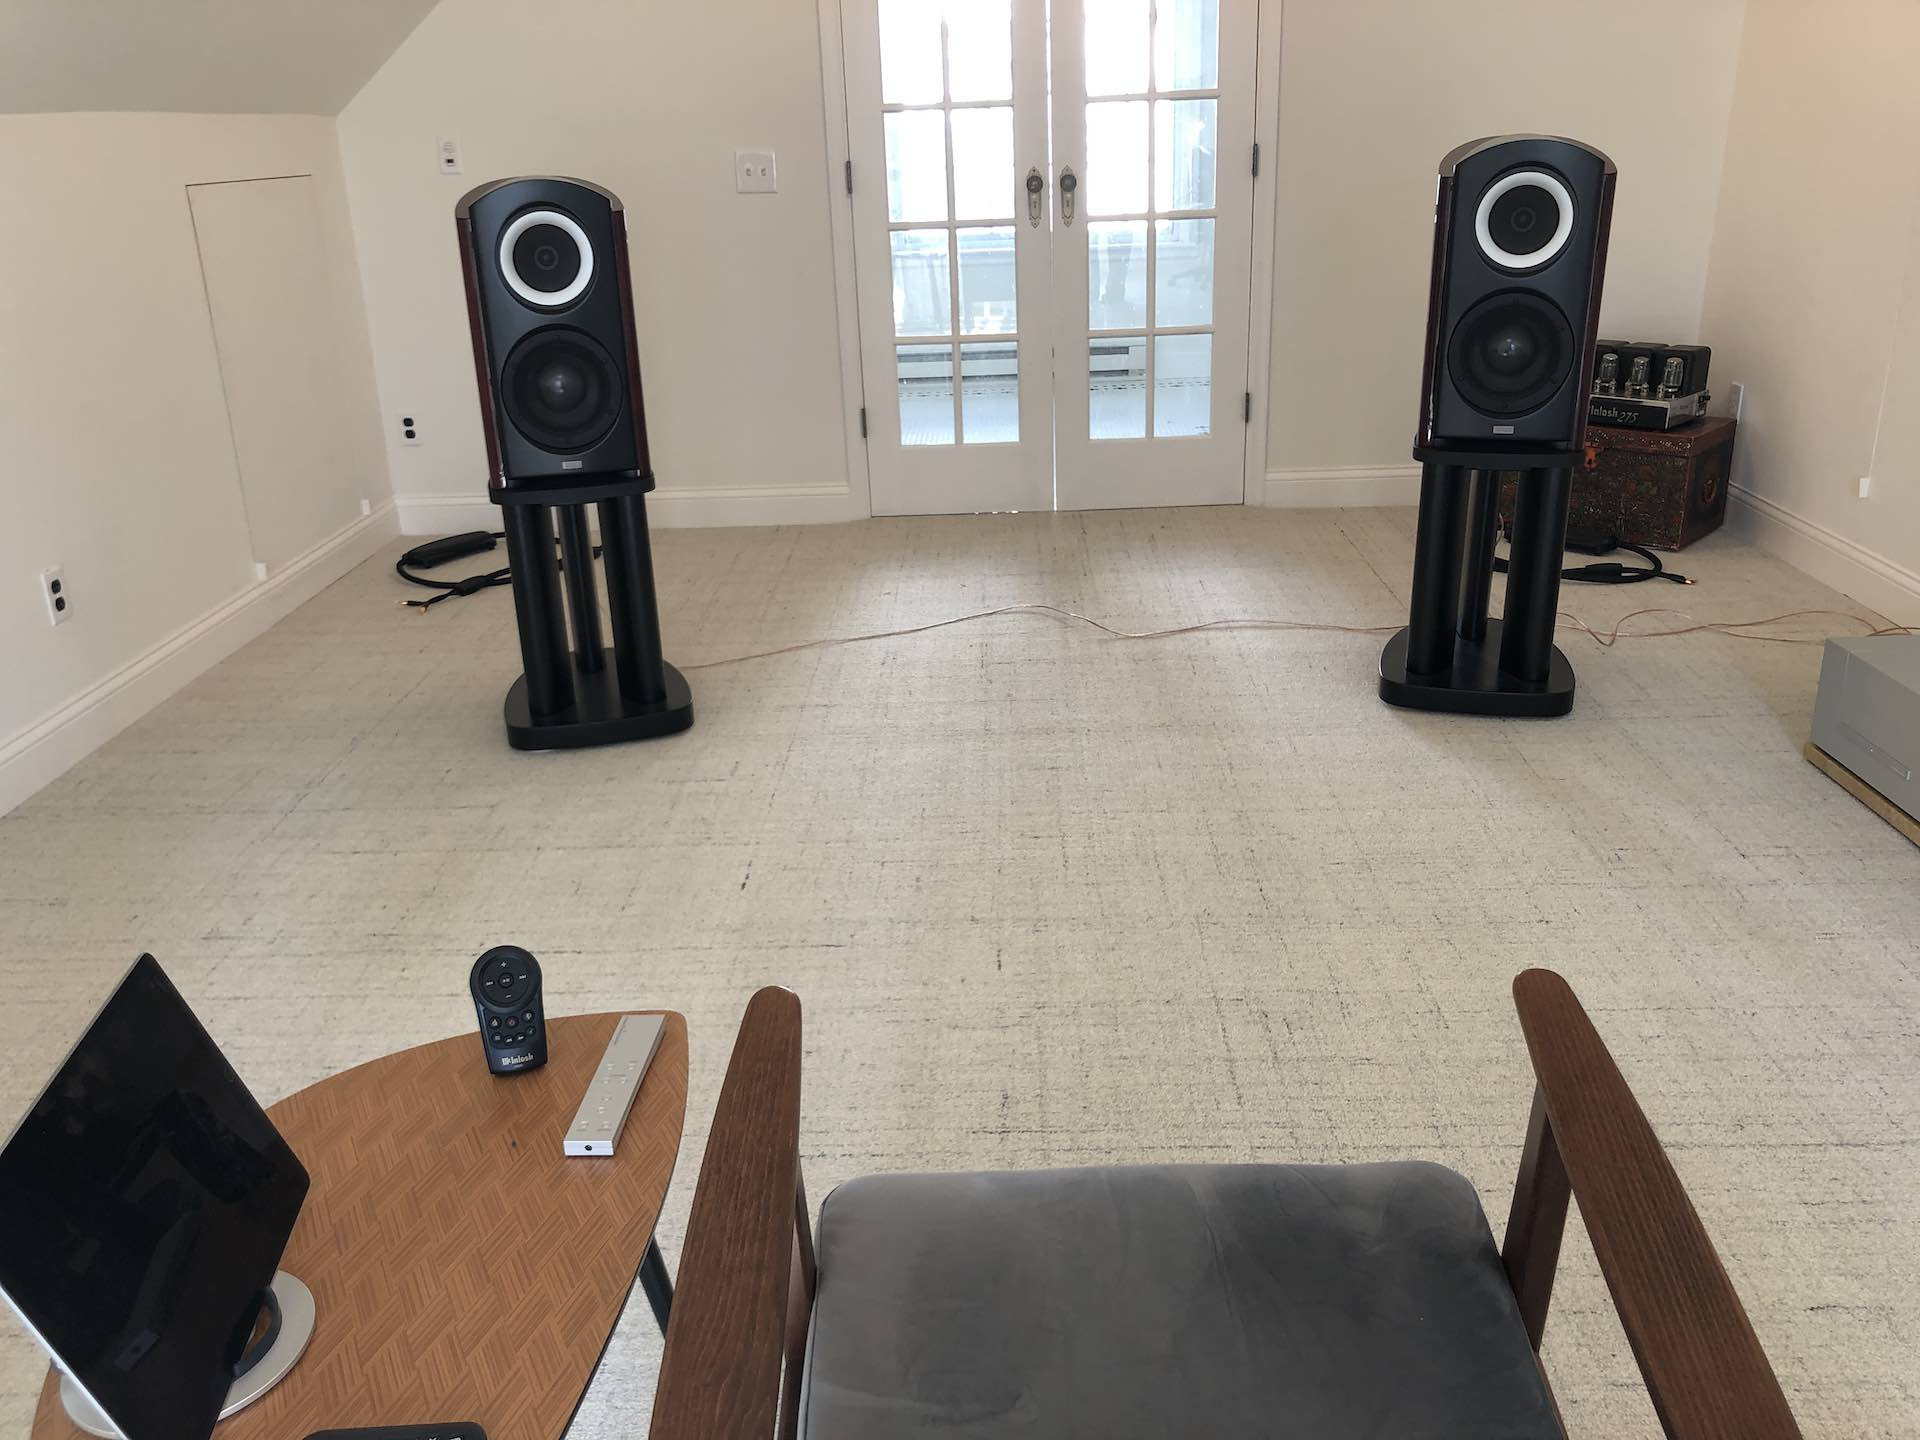
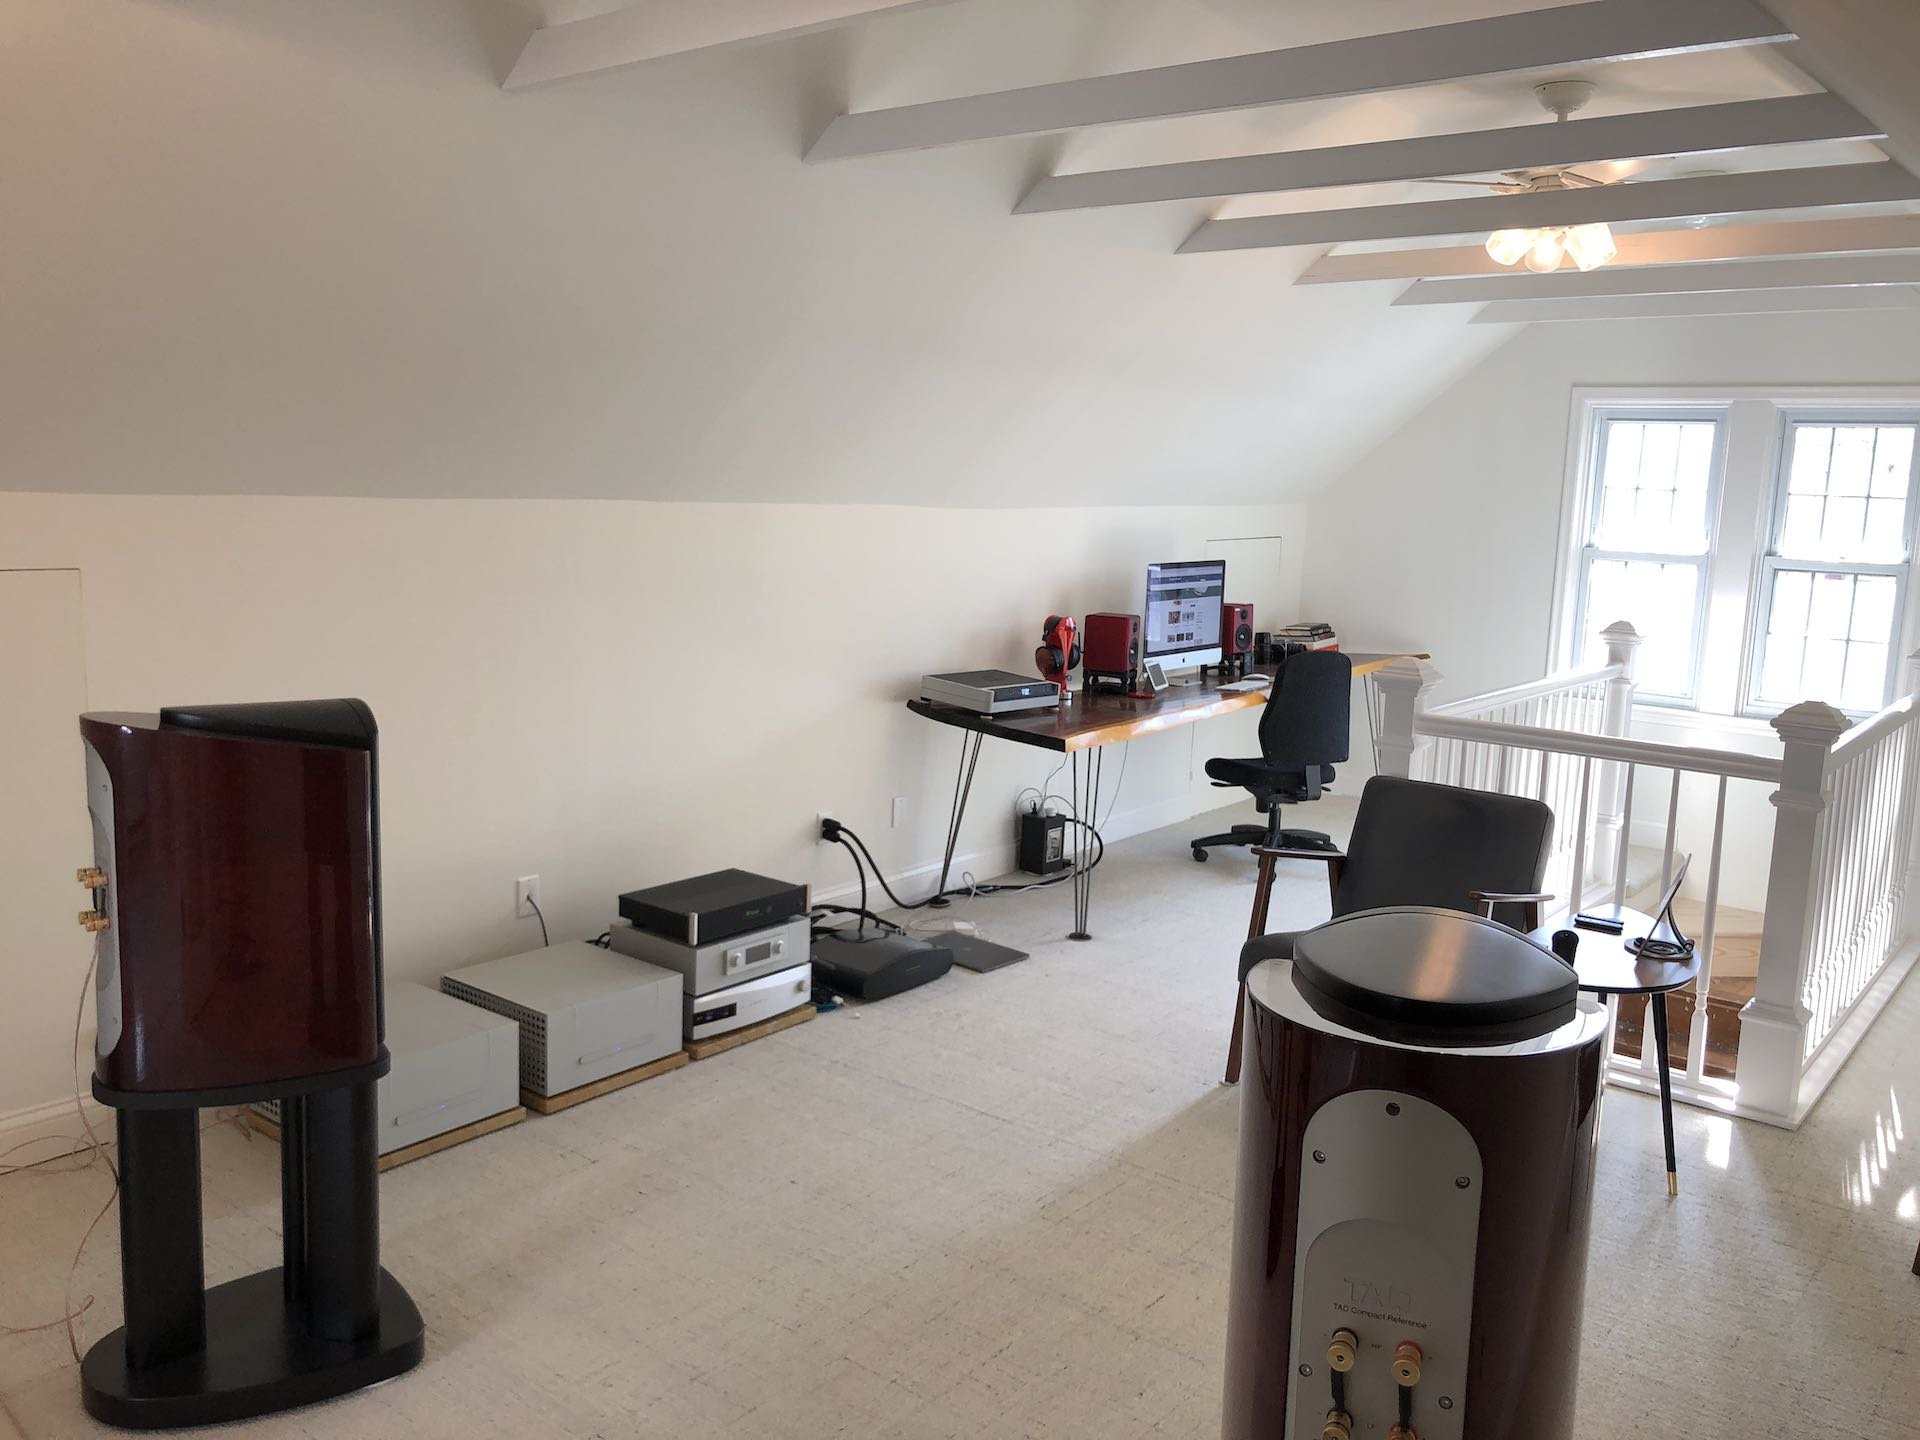
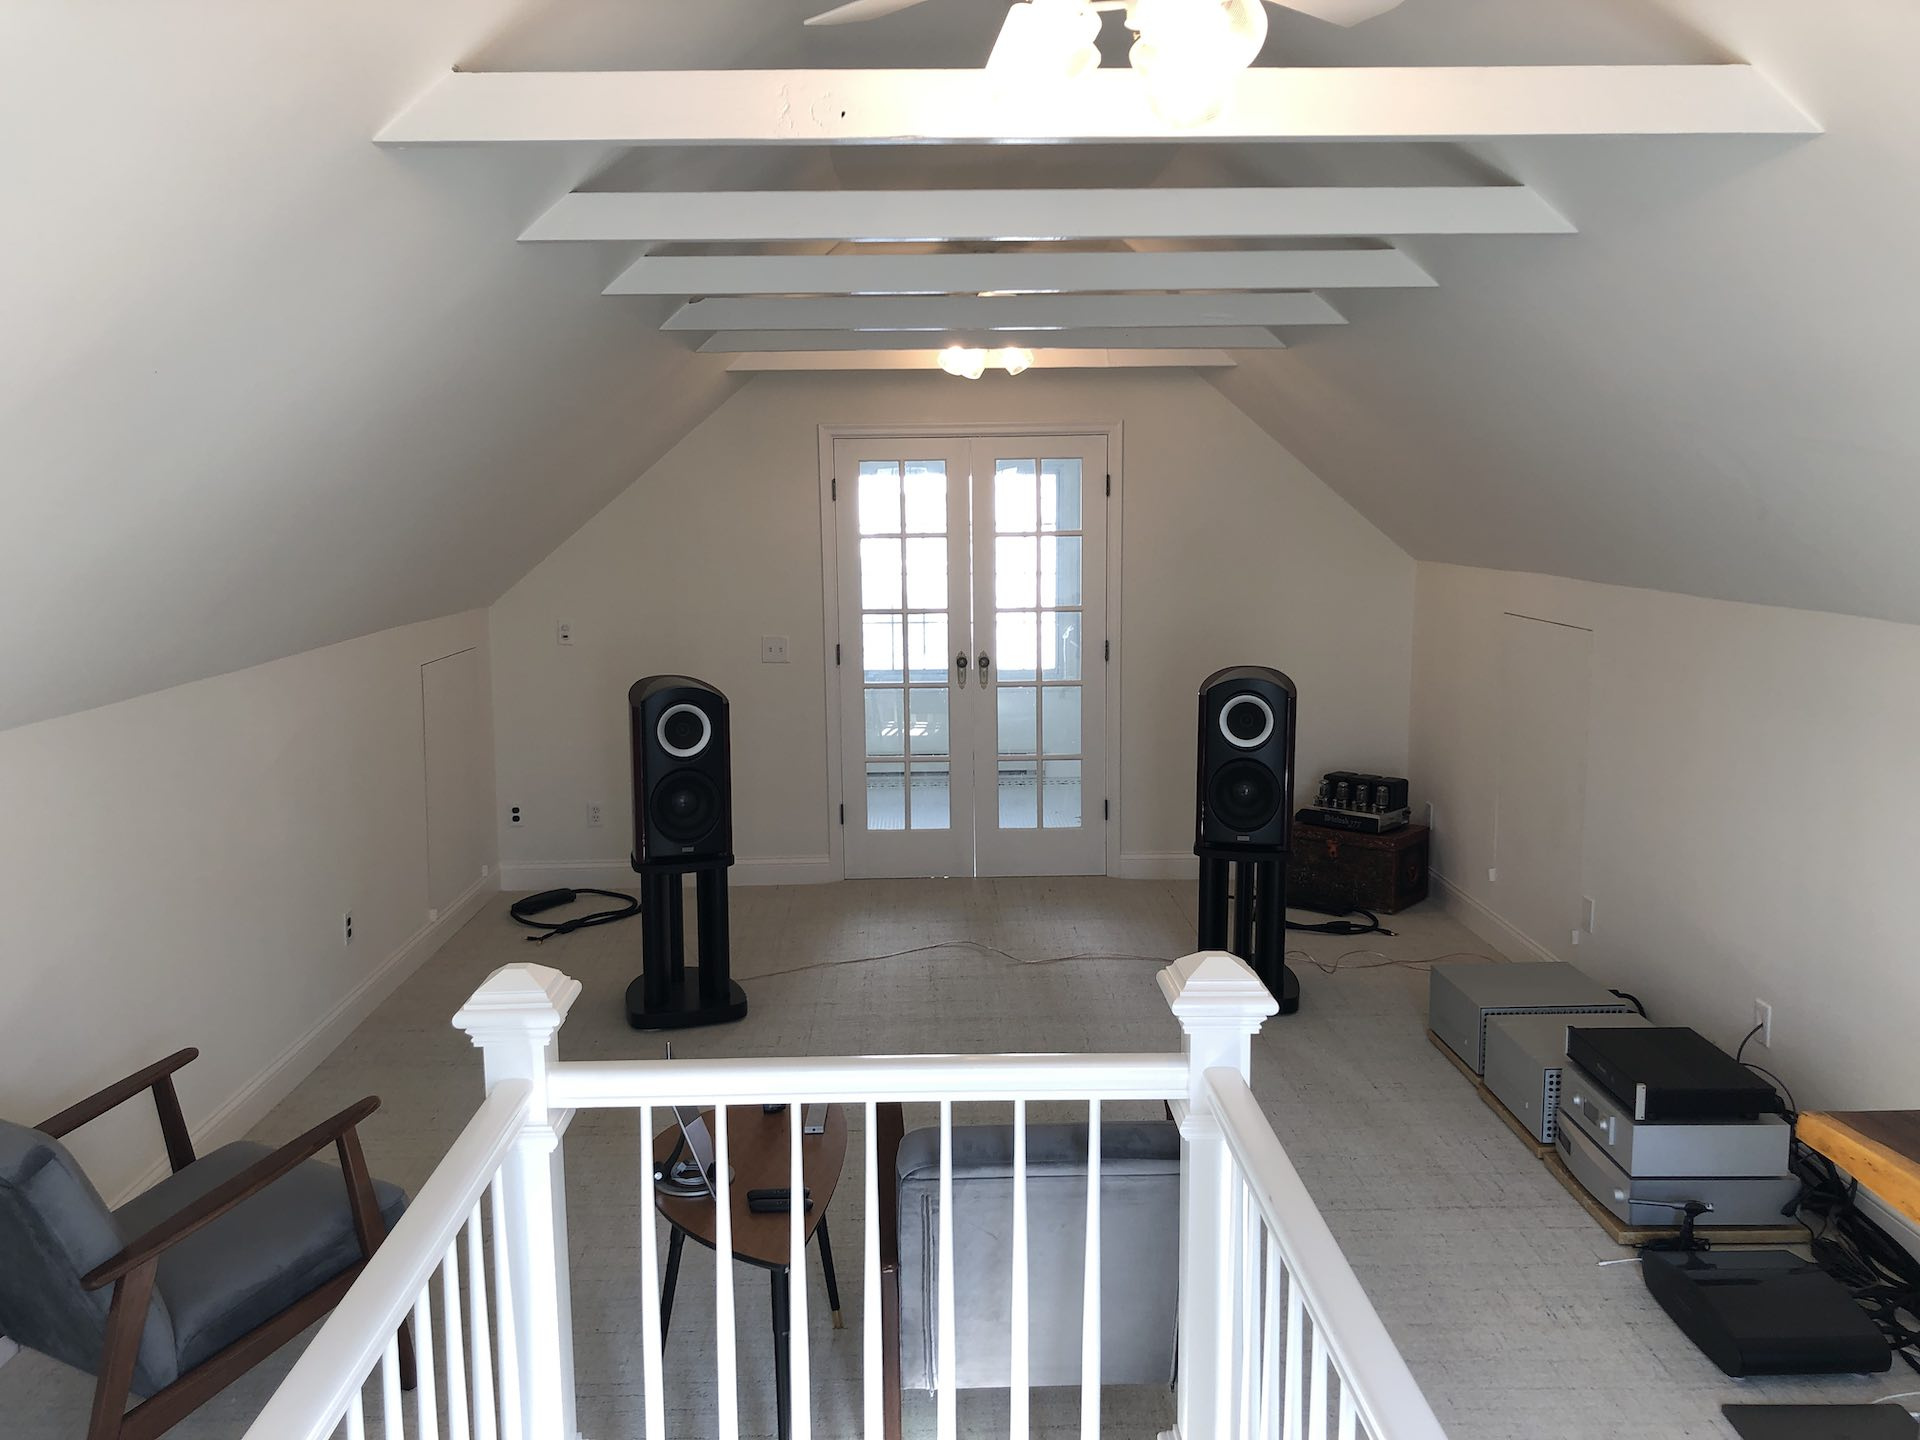
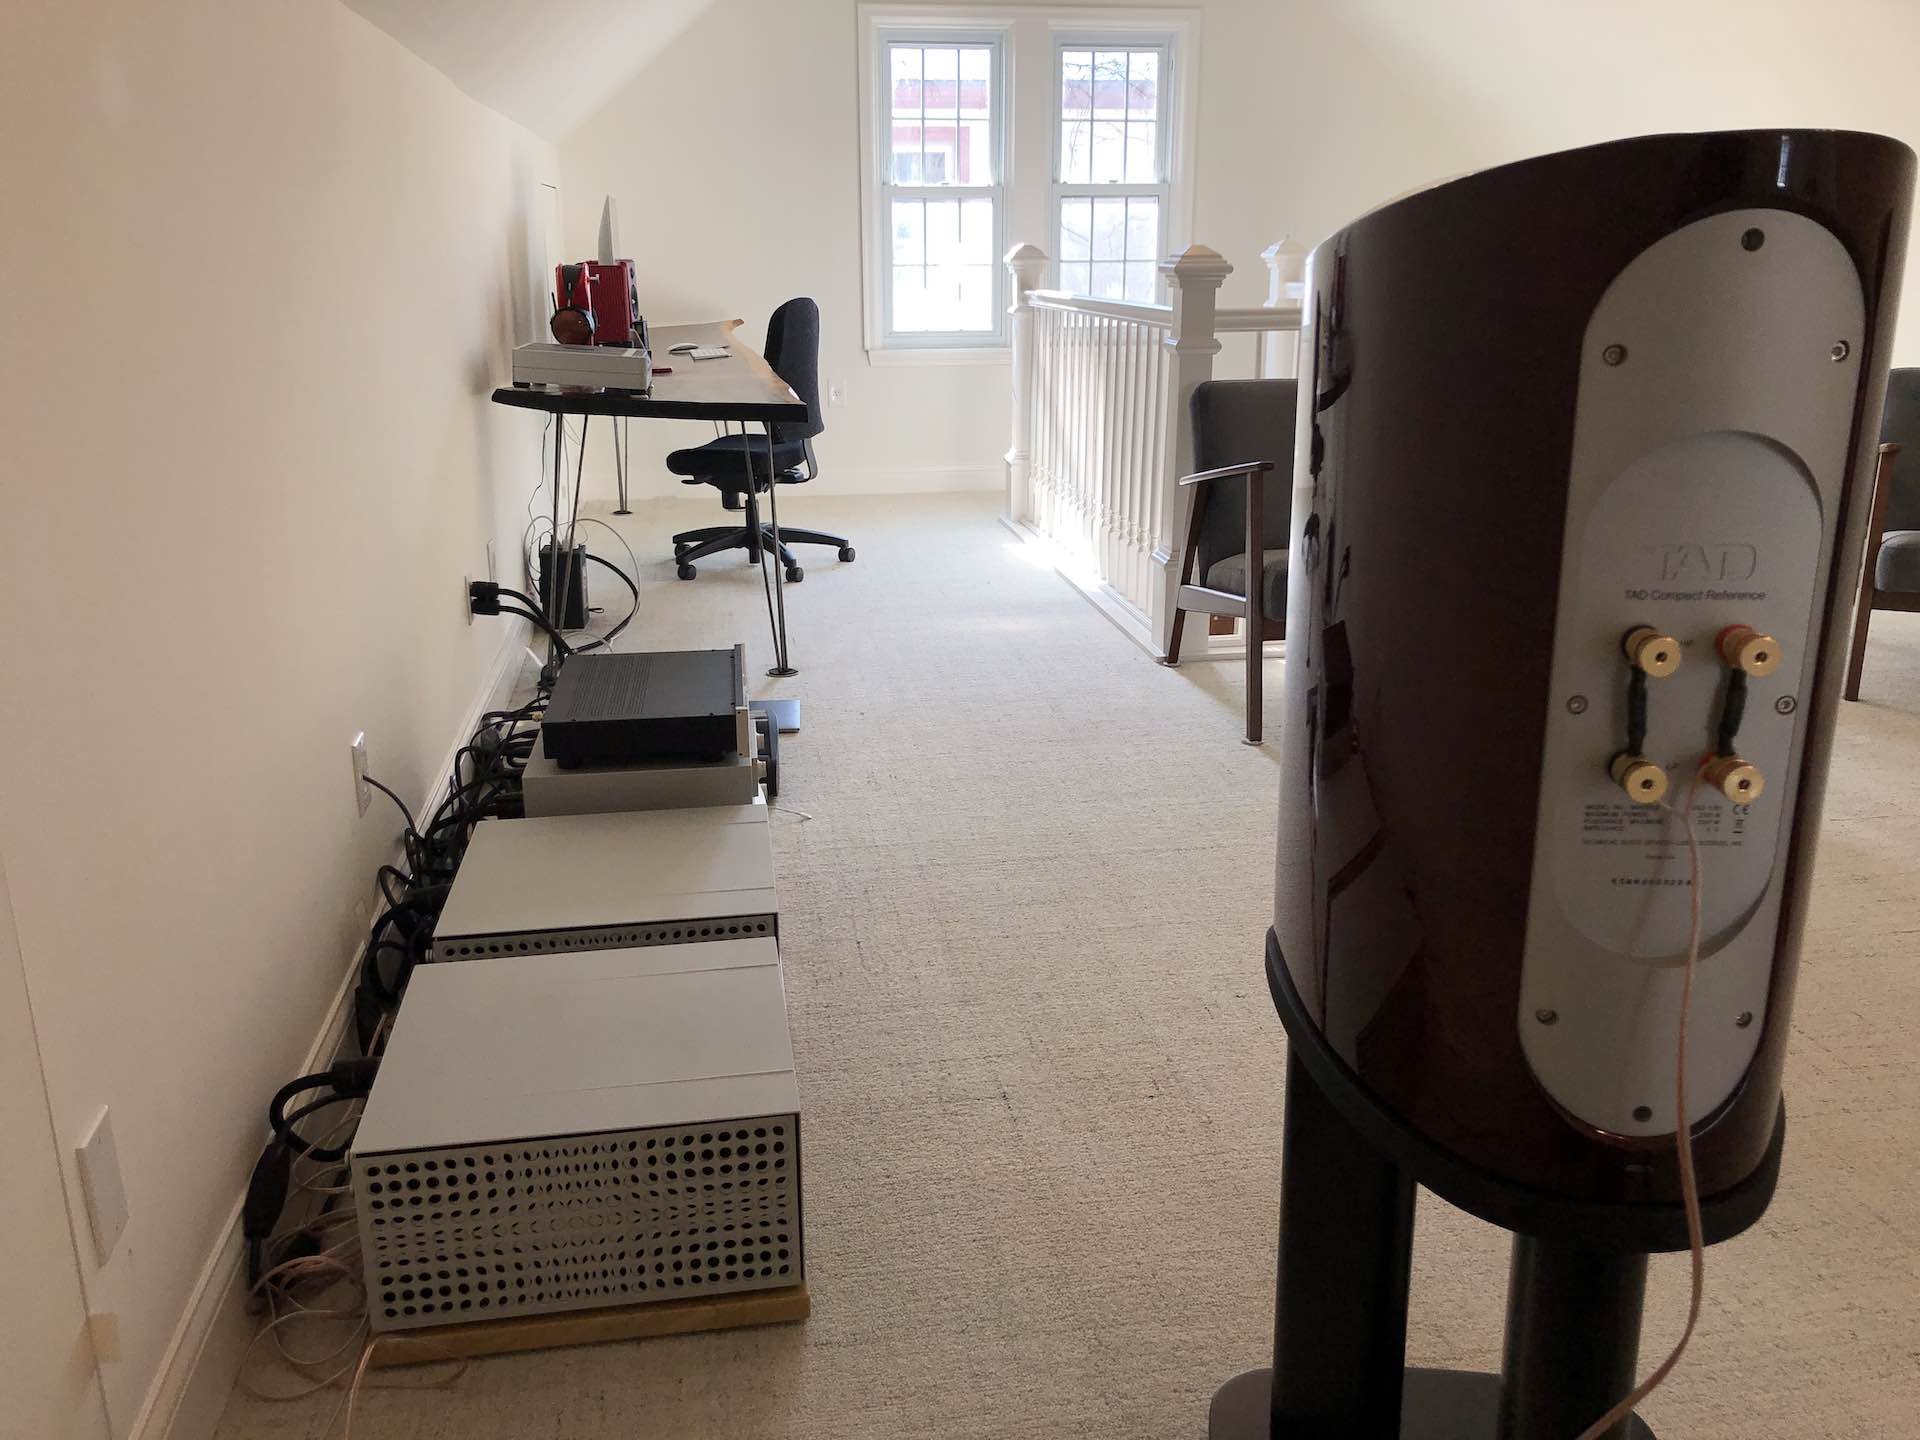
    Current images as of today November 09, 2018.


    Associated Equipment:


    User Feedback

    Recommended Comments


    37 minutes ago, miguelito said:

    If I had to guess, that would be the one place where I would be concerned. But I haven't seen it live obviously so maybe it is not an issue.


    In a previous apartment, I had a high ceiling with beams. Certainly bigger beams than the ones you have but nonetheless. The net effect was multiple reflections that made up for a ginormous RT60. It was very hard to fix given the size of the beams. Fortunately I ended up moving to a spaceship.


    I would consider horizontal drapes between beams. That would be fairly cheap to try I think.

    The other thing I would consider is something around the staircase railing. I would say more cloth down the railing for a try (now you'll probably be inches away from becoming an old lady int he attic). 


    Reason is: if you can make stuff behind you  more or less an infinite baffle, that would be a good thing, I think.

    Share this comment


    Link to comment
    Share on other sites

    5 hours ago, The Computer Audiophile said:


    Thanks for all the info. I'm with your Decorator in Chief :~)


    I'm not a big fan of making a listening room look like a place one would never want to spend time. I'm working with Vicoustic on colors etc... to make things look good for a reasonable price.


    Back to your original point about measuring differences between different options. I would love to do that and will plan to do that if it isn't too time consuming. But, it's such valuable information I think I have to do it and write about it. 


    Do take a look at the photo print on acoustic panels options. Looks better than I expected by far. If you're an ambitious DIYer, you can find info on printing and then building your own acoustic panel. I'm not that ambitious. The places I found that did print covers had a library of (decent) art options for those who don't have their own work.

    Share this comment


    Link to comment
    Share on other sites

    I see a mayor issue with room refections coming from the sides  and 45º ceiling focusing a lot of acoustic energy to the center of the room. I had a listening room with a vaulted roof with a radius equal to the apex of the room and focusing all sound to the centerline of the  floor and the acoustics were horrible. When I installed a suspended ceiling with a much greater radius the acoustics got pretty good. I guess one needs to disperse reflected sound and try to avoid focusing it to the listing area.

    Share this comment


    Link to comment
    Share on other sites

    Quote

    My options for this listening room were a bit limited by of course cost but also because I wasn't willing to change anything about the rest of the house below this room. For example, I ask in the forum about using a rubber sound barrier under the carpet and before I knew it the recommendations were to rip up the ceiling below the room and put in a sand [sic] barrier etc...


    @The Computer Audiophile  I applaud your efforts taking this project on with your own vision.  However, the proffering of solutions at an early stage would've been advanced by accurate depictions of the space on your part.   The purpose of your threads on new speakers and flooring was pooling ideas from the community.  Ideas brought forth were meant to not only be applicable to a high end listening room, but yours in particular. 


    Quite conservatively, carpet was the least obvious issue faced when taking in the full scope of this project.  Being as this is Computer Audiophile, the lengthy depiction of turning your attic into a listening room rightly comprised the majority of this article.  There were numerous twists and turns that could have put a halt on this project.  Less visible physical obstacles which quickly lost the element of high tension once successfully completed.  Yet no less daunting than the long slow process and infinite calculations required to locate objects in a room.  I have faith you will meet all further challenges with equal aplomb.  My only hope is that you will be open to the experiences of others kindly relating personal mistakes and triumphs.  

    Share this comment


    Link to comment
    Share on other sites

    22 minutes ago, rando said:


    @The Computer Audiophile  I applaud your efforts taking this project on with your own vision.  However, the proffering of solutions at an early stage would've been advanced by accurate depictions of the space on your part.   The purpose of your threads on new speakers and flooring was pooling ideas from the community.  Ideas brought forth were meant to not only be applicable to a high end listening room, but yours in particular. 


    Quite conservatively, carpet was the least obvious issue faced when taking in the full scope of this project.  Being as this is Computer Audiophile, the lengthy depiction of turning your attic into a listening room rightly comprised the majority of this article.  There were numerous twists and turns that could have put a halt on this project.  Less visible physical obstacles which quickly lost the element of high tension once successfully completed.  Yet no less daunting than the long slow process and infinite calculations required to locate objects in a room.  I have faith you will meet all further challenges with equal aplomb.  My only hope is that you will be open to the experiences of others kindly relating personal mistakes and triumphs.  

    Not following at all. 


    The reason I ask questions is because I’m open to input. Nobody in their right mind would accept and implement all input. Other than the competing philosophies, design by committee never works. 


    I asked a specific question about a specific product and received great answers about that product. 

    Share this comment


    Link to comment
    Share on other sites

    Great project Chris.  I'm curious, isn't Vicoustic much more expensive than say GIK acoustics?  Seems just the fact that it's a company from outside the US that would make Vicoustics cost prohibitive no?  What was your rationale?

    Share this comment


    Link to comment
    Share on other sites

    12 minutes ago, Forehaven said:

    Great project Chris.  I'm curious, isn't Vicoustic much more expensive than say GIK acoustics?  Seems just the fact that it's a company from outside the US that would make Vicoustics cost prohibitive no?  What was your rationale?

    I've bought products from both Vicoustic and GIK and I think they are both good value, and have products which can be used together and complement each other. In Europe there isn't that much difference in price or level of finish. The Vicoustic DC2 diffusers are actually cheaper per square metre than any of the GIK range of diffusers (eg the Gotham), and although they are expanded polystyrene I find them quite attractive.


    May only criticism of Vicoustic is that their products default fixing mechanism is glue, whereas with GIK it is usually done with sawtooth hangers.

    Share this comment


    Link to comment
    Share on other sites

    My only recommendation is to listen to how your audio system sound in the room you want to use before you start any renovation or invest in a lot of acoustic modification. The reason isn’t that I’m against acoustic treatments, it’s that some room are very, very difficult to get to sound good even if you spend a lot of money and time on re-building them. So best IMHO is to test its potential first and to hear if its wort re-building.  

    Share this comment


    Link to comment
    Share on other sites

    48 minutes ago, Forehaven said:

    Great project Chris.  I'm curious, isn't Vicoustic much more expensive than say GIK acoustics?  Seems just the fact that it's a company from outside the US that would make Vicoustics cost prohibitive no?  What was your rationale?

    Hi Chris - I have extensive experience  with Vicoustic products through friends of mine and I know the US Distributor very well. It's very nice to pick up the phone and talk to either friends of the distributor if needed, and have direct access to Vicoustic as needed. I'm sure GIK makes great stuff as well, but I don't have any experience with the products and don't know anyone there. 


    If they have an online project request similar to Vicoustic I should complete that as well to get two opinions.


    Share this comment


    Link to comment
    Share on other sites

    +1 For GIK


    Excellent products and performance along with superb support.


    Not a foam lover here....(my own opinion)

    Share this comment


    Link to comment
    Share on other sites

    Great project, detail and photos,...thank you very much! It would be great to see part 2 when you've tweaked the room with Vicoustic; please provide details on what Vicoustic panels, etc...you are going to apply and the 'why' in each case.  I had heard and read that Vicoustic was difficult to come by in the US; would you mind naming your source (dealer or distributor) and how you've found their order and fullfillment + delivery process as of late?  Thanks!  Mark

    Share this comment


    Link to comment
    Share on other sites

    @The Computer Audiophile Generally, it is not a good idea to have a void behind your listening area. The sound will be a little clinical. Perhaps, your acoustician could suggest something to reflect the sound at the spot I circled.


    Also, you may have a little issue with clarity as the rear wall ( window) can have a reflection of 10ms or more. It wont be an issue for full orchestra music but a typical audiophile album may feel like slightly lacking clarity. That also depends on the playback volume level. Try Stacy Kent and see if you are happy with the clarity. 


    Just my $0.02. :) 


    B2901691-0935-45E7-B604-548BF1231120.jpeg.83ec886d6cd8f5ff38aa1f8a616e07b2.jpeg


    Share this comment


    Link to comment
    Share on other sites

    Vicoustic proposal looks aesthetically good but not sure it makes complete sense. The trouble with the room is that it is roughly in the shape of a half tube. This room is going to sound like a subway tunnel unless you add a lot absorption and diffusers.


    I would suggest more corner bass traps and broadband absorbers at each end and around the listener (at least double what you have) and use only RPG diffusers on the slanted ceiling portions instead of the curved panels. The curved panels are great but work better for larger spaces. You actually don’t need curved panels and should not put anything on the vertical side walls except broadband absorbers by the listener.


    Acoustic physics is actually quite simple. To visualize what is going on simply imagine that each surface is a mirror. Your speakers will have a virtual mirrored speaker with the vertical side wall - this is a normal listening room situation and is not a problem as imaging will still work due to the symmetry with the listener (and correct drive alignment to the ear). The problem is the slanted low cathedral image speaker. Imagine again a mirror for these slanted walls - you have another set of virtual speakers sitting higher up. These virtual speakers are a problem. They will mess up imaging as well as the response at the listener from any multi-way speaker (other than coaxial) because the drivers of the virtual speaker are not time-aligned to the listener ear. This virtual speaker will be like listening to a real speaker in the nearfield but with ear level way off the proper listening height (which should normally be aligned with mid range or tweeter). So the big issue is those slanted cathedral walls - I would just place as much RPG diffusers as you can on those slanted walls in between the listener and the speakers.


    Of course, you might wonder why the horizontal ceiling or floor is less of an image problem and this virtual speaker can be ignored. This is fortunately taken care of by most speaker designs. The vertical dispersion is usually controlled by the speaker designer and not much energy other than low frequencies should be reflected off a 14 foot ceiling (10 feet above most speaker drivers). In addition a carpeted floor is not going to reflect much. Recall that wide speaker dispersion is desirable in the horizontal plane and unfortunately your slanted low cathedral ceiling walls are a bit too close to the speakers wider dispersion horizontal pattern. (Only perhaps 2 to 3 feet above the speaker)


    I think the room can be fantastic if treated properly. Of huge importance is the space around the listener. Too many domestic settings have the listener sitting close to a wall and this is a terrible place to sit. All studio control rooms have plenty of space BEHIND the listener and this is absolutely critical. You have a fantastic listening position.


    GOOD LUCK with this impressive project! Hopefully you don’t end up with a room like this!


    George Massenburg designed studio at Nashville Blackbird Studios


    Share this comment


    Link to comment
    Share on other sites

    Thanks for the continued input guys. 


    This project is getting more and more frustrating for me. I assumed this would be more of a science than an art, but given the wide range of feedback about what's right, what's wrong, and what I "should" do, it seems like much of this is an art. If this was as easy as swapping in a component to test it, I'd be enjoying the process. Unfortunately installing an acoustic package is much more difficult. 


    I've now brought in another consultant to look at the two proposals I received from Vicoustic and GIK. As you can probably guess, his opinion differs from both of these. I'm itching to get this done because I'm not happy with the current sound of the room.


    Thanks again for the feedback everyone.

    Share this comment


    Link to comment
    Share on other sites

    On 11/19/2018 at 7:10 AM, STC said:

    @The Computer Audiophile Generally, it is not a good idea to have a void behind your listening area. The sound will be a little clinical. Perhaps, your acoustician could suggest something to reflect the sound at the spot I circled.


    Also, you may have a little issue with clarity as the rear wall ( window) can have a reflection of 10ms or more. It wont be an issue for full orchestra music but a typical audiophile album may feel like slightly lacking clarity. That also depends on the playback volume level. Try Stacy Kent and see if you are happy with the clarity. 


    Just my $0.02. :) 


    B2901691-0935-45E7-B604-548BF1231120.jpeg.83ec886d6cd8f5ff38aa1f8a616e07b2.jpeg


    The worst thing you can do is to have clutter (or worse a wall) close to the listening position. Look at every multi million $ studio ever designed!

    Share this comment


    Link to comment
    Share on other sites

    18 minutes ago, The Computer Audiophile said:

    Thanks for the continued input guys. 


    This project is getting more and more frustrating for me. I assumed this would be more of a science than an art, but given the wide range of feedback about what's right, what's wrong, and what I "should" do, it seems like much of this is an art. If this was as easy as swapping in a component to test it, I'd be enjoying the process. Unfortunately installing an acoustic package is much more difficult. 


    I've now brought in another consultant to look at the two proposals I received from Vicoustic and GIK. As you can probably guess, his opinion differs from both of these. I'm itching to get this done because I'm not happy with the current sound of the room.


    Thanks again for the feedback everyone.


    GIK make great products at reasonable cost. Their corner tri-traps are excellent - you would probably need 8 of those. They work as broadband absorbers too - so you get more than just bass trapping.

    Share this comment


    Link to comment
    Share on other sites

    1 hour ago, The Computer Audiophile said:

    Thanks for the continued input guys. 


    This project is getting more and more frustrating for me. I assumed this would be more of a science than an art, but given the wide range of feedback about what's right, what's wrong, and what I "should" do, it seems like much of this is an art. If this was as easy as swapping in a component to test it, I'd be enjoying the process. Unfortunately installing an acoustic package is much more difficult. 


    I've now brought in another consultant to look at the two proposals I received from Vicoustic and GIK. As you can probably guess, his opinion differs from both of these. I'm itching to get this done because I'm not happy with the current sound of the room.


    Thanks again for the feedback everyone.

    I'd be curious - what's the essential difference between the proposals of the two companies? 

    No, it's not like swapping out components - but you can measure results and move panels/add panels/subtract panels till you get a measured response close to flat. So at least at the end, you'll know by measurement in addition to by ear. 

    Share this comment


    Link to comment
    Share on other sites

    imagining that each surface is a mirror works well for high freq.s - not at all for low freq.s - you can have someone hold a real mirror and slide it along the wall too


    acoustics IS a science, but in practice, it is a very complex science - there are lots and lots of things you should take account of - compare with the practice of medicine: also a science, but you have to first gather signs/symptoms, then work backwards along the chain of physiology to what could be causing them (it takes more than a few years to learn that)


    you need a way to parse your problem... that is really what expert #3 should be doing for you

    Share this comment


    Link to comment
    Share on other sites

    7 hours ago, Shadorne said:


    The worst thing you can do is to have clutter (or worse a wall) close to the listening position. Look at every multi million $ studio ever designed!


    Listening room meant to enjoy the music is not the same as the listening room where they master or record. Somehow, the distinction got blurred and some try to recreate the studio acoustics.  Maybe, i got confused with Chris’s intention. 


    Share this comment


    Link to comment
    Share on other sites

    8 hours ago, The Computer Audiophile said:

    This project is getting more and more frustrating for me. I assumed this would be more of a science than an art, but given the wide range of feedback about what's right, what's wrong, and what I "should" do, it seems like much of this is an art.


    Room acoustics is more of an art than science. I have given up on room measurement long ago when the results did not sound correct to my ears.


    Quote

    As you can probably guess, his opinion differs from both of these.


    Room acoustics for stereo music listening is different from HT. Listening to playback is different from studio acoustics.  Some specialize for one but not the other.

    Share this comment


    Link to comment
    Share on other sites


    Create an account or sign in to comment

    You need to be a member in order to leave a comment

    Create an account

    Sign up for a new account in our community. It's easy!

    Register a new account

    Sign in

    Already have an account? Sign in here.

    Sign In Now


×
×
  • Create New...